
Interested in learning why we chose LifeProof Vinyl Flooring for our home and want to know how to install it? This post is for you! This post is sponsored by the Home Depot and contains affiliate links. See policies for details.
.
If you’ve followed along for any length of time, you’ve heard me mention that we are currently living in a one room studio style garage apartment. It’s been an interesting year living here and we’ve learned a lot about life, love…and how much we hate these bare concrete floors–have you ever noticed them in my pictures?

They’ve got cracks, stains, chips and rough spots and they constantly look dirty no matter how much we clean them.

So we decided to finally cover it up and make our house feel more like a home than a garage with LifeProof vinyl plank flooring in Sterling Oak from The Home Depot.

Before deciding what to cover these concrete floors with, we did a little research. We choose this vinyl plank flooring by LifeProof for a few reasons.
.
First, it was a simple floating snap and lock design so we could install it over our concrete floors without any messy glues or fancy tools or hardware. All we needed was a rubber mallet and a piece of scrap plywood for a tapping block. The planks just snap together and float on top of the concrete. So easy install? Check.
.
Second, we didn’t have to buy and install a water proof barrier between the flooring and the concrete since it has a built in water proof underlayment. This allows you to install it directly onto wood, concrete and even some existing flooring types. So no additional underlayment required? Check.
.
Third, it’s perfect for our lifestyle—which is basically that we aren’t super careful with anything, so we need flooring that is tough (Danny says I’m a bull in a China shop…just like my dad haha). This LifeProof vinyl plank flooring should hold up well to Lucy’s dog nails, and the mud, gravel, sawdust, etc that we both track into the house all the time. It’s waterproof, scratch resistant, and looks like real wood. Check.

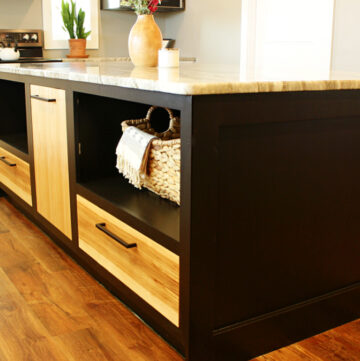
And, lastly, we chose this sterling oak color because we have so much wood furniture and wood colored kitchen cabinets that we thought the neutral grey color would keep it all from clashing. (However, if you aren’t a fan of the grey, LifeProof has several color options in this exact same flooring product to choose from.)

Installing the floor was pretty simple and straightforward and it didn’t require a lot of tools (Woot woot!). The worst part was having to move literally our entire house in sections since we live in one big room.
.
Luckily, once it was started, it went down really quick. I’ll share with you some tips and our process below.
.
But first, here’s a video if you’d like to watch rather than read.
What you’ll need:
LifeProof Vinyl Plank Flooring (order about 10% more floor than you should need to cover your area)
Rubber Mallet or Soft Faced Hammer
Utility knife and blades
Square
Knee Pads (optional, but trust me, you’ll wish you had them)
Oscillating saw (optional…may or may not need)
Trim to cover expansion gaps (quarter round–may remove and reuse if you already have)
Nail gun to attach/reattach trim
Jig saw & table saw (helpful in some cases, but not required)
Detailed instructions are included in every box of flooring. Refer to these before installing.
Step 1: Decide Layout and Clean the Floor
When installing plank flooring (whether wood or vinyl, etc), the first thing you need to do is decide your floor layout and which direction you want to install. Typically, you’d run your rows parallel to the longest wall in the room. But there are some exceptions.
.
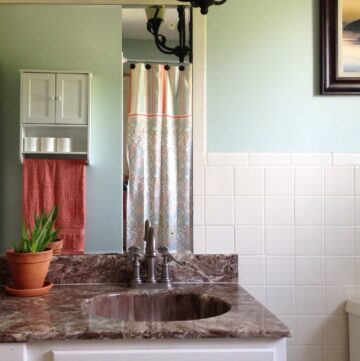
In our case, towards the back of the house, there was a bathroom and a laundry nook. If we ran parallel to the longest wall, we would end up having to go into our bathroom and laundry nook laying flooring in both the tongue and the groove…which would have been difficult. So in our case, we ran it parallel to the shorter wall to avoid having to work on both sides of the flooring once we got to the back of the room.
.
Once layout was decided, I moved the furniture in the section I planned to start. Then, I used my Ridgid battery powered vacuum to get all the dust bunnies, and debris off the floor before laying the planks. You can see more about this vacuum in my gift guide post here.

If you have existing quarter round or shoe molding, remove it as well. If you are careful, you can reuse it later in step 7. I didn’t have any, so I skipped this step and added it later when I was finished.
Step 2: Measure and Lay Out First Row
Then I grabbed this Bosch Blaze Laser Distance Measurer to figure out how long my first row was going to be. It was important not to have pieces too short on the ends of each run (pieces should be 8″ or longer), so I measured each run to make sure I wouldn’t end up with a piece on the end just a couple inches long after laying all my planks. (FYI each flooring piece is approx 48″ long.)

I used this little laser measurer throughout the project and was super blown away with how handy it was. I’ve got a post all about it here if you’re interested in its features.
.
Then I started working on the first row of floor. The first row went easy. I used a rubber mallet to hit the edges to simply snap them together. You can feel across the seam…when it’s snapped in good, it’s flush across the top.

Once I had a few snapped together, I used spacer blocks (small ¼″ plywood scraps) to keep the boards ¼″ from the walls. The instructions said to leave a ¼” gap along all the edges for expansion, so I kept that in mind throughout the project.
.
I continued along the first row until I got to the end. I measured the length for this last piece and subtracted ¼” for expansion gap, then cut a piece to fit. To cut, simply mark where to cut (make sure you measure the correct end of the board!) and use a square and a utility knife to score the top. Then the piece should snap along this line and you can cut the backing to separate it.

If you have a miter saw, you can cut this on a miter saw instead, but I didn’t want to get up and run to the shop every time I needed to cut, so I found the score and break method to be helpful.
Step 3: Install Second Row of Vinyl Plank Flooring
After the entire first row was together, the hardest part of the whole project began…laying down the second row. The second row was a little frustrating because it was hard to snap the pieces tight when the first row pieces kept moving. But eventually, I figured out that you have to angle the piece slightly and tap it into the groove of the first row, then snap the edge to the piece beside it (like from step 2), and tap it tight with a tapping block.

There are a lot of helpful tools you can purchase for this process, but I found that a scrap piece of plywood worked well as a tapping block…just be mindful of your block placement and be careful not to place it where it will damage the snapping lip. Or you can purchase this installation kit if you don’t want to make your own tapping block.
Step 4: Continue Snapping and Locking Floor Down
Once the second row was down, I slid the two rows tight up against the spacer blocks on the wall and began laying the next rows. It’s pretty repetitive. Lay a row, lay another row, keep going until you get to something you have to move, or an obstacle you need to cut around.
.
Keep in mind when laying flooring that you should stagger the pieces so that the ends do not line up in the same location on adjacent rows. When you cut end of the row pieces, be sure to cut the correct side of the piece and, unless the piece is too small, you can usually use the other end as a starter piece for the next row.

I found the key to snapping the rows together tight, was tapping first at a slight angle…

…then snapping the short end to the adjacent piece…

…then using the tapping block and a mallet to tap it in tight laying flat. You will be able to see the gap disappear between boards when you get it snapped in tight. That’s when you know it’s snapped in well and you can move to the next piece. If you have trouble getting a tight fit, check for debris in or damage to the snapping lip.

Step 5: Cut Around Obstacles as Needed
We didn’t have a ton of obstacles to cut around in our one big room, but when I got to a door or a protruding wall, I kept in mind that the flooring will go UNDER the door frame, but stay ¼” from the walls/baseboards. I would cover the gap with baseboard or quarter round later as needed.
.
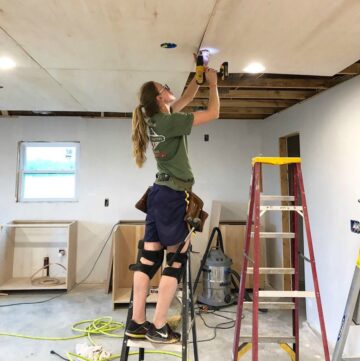
When a piece needed to go under the door jamb, I used an oscillating saw and a scrap piece of flooring to cut the door jamb and trim pieces so that a piece can slide under it.

I marked where the piece would need to be cut and trimmed this with a jig saw. (You can use a standard wood cutting blade.) Always pay attention to cut the correct side when trimming pieces and always buy a little extra flooring for accidents like this…oops 🙂

Besides a few mis cuts here and there, and having to move all the stuff in the entire house, the install was pretty smooth sailing. It took about a day and a half to install 800 sq. ft. and that included time to move all the stuff and put it all back, cut around obstacles, uninstall and reinstall the washer, dryer, refrigerator, etc. Not bad if you ask me.
Step 6: Cut Last Row
When we got to the last row, all the pieces needed to be trimmed to fit. So, I measured how wide each individual piece would need to be cut and trimmed this on the table saw. (You can use a utility knife or a jig saw if you don’t have a table saw. If you do have a table saw, they make special blades for this, but a general purpose blade like this works fine as well.)

Never take for granted, though that all these pieces will be the same width. Most walls aren’t perfectly square and each piece may need to be trimmed slightly differently, so measure for each piece.
.
Because I couldn’t tap these pieces in, I used a prybar to carefully snap them into place.

Step 7: Cover Flooring Gaps with Trim
Once the last piece was put in place, I needed to cover the expansion gaps along the edges with trim.
.
So I used my laser measurer again to figure up how much trim I needed, and to figure out what lengths to cut it. I cut to fit quarter round along all the walls where I left a gap, but since the gap was underneath the cabinet toe kicks in the kitchen, I didn’t bother covering those since you won’t see them.
.
Because the floor is a floating floor, it’s important that it’s not secured to anything stationary. So I was careful not to accidentally shoot a nail into the floor when installing the quarter round. Nail into the baseboard or wall…not down toward the flooring.

After a little putty in the nail holes and some caulk along the trim, that’s all there was to installing this LifeProof vinyl plank flooring from The Home Depot.
.
This was such a great improvement to our space and such a worthwhile investment.

I’m really glad we went with the sterling oak color, too. The grey looks really nice against all the warm wood in the house. And not it feels a little bit more like we live in a house now rather than a garage haha.
If you’re in the market for flooring that you don’t have to worry about with water or scratches, and is TOTALLY DIY-able, I’d definitely recommend checking out this LifeProof vinyl plank flooring. They’ve got plenty of color options, and of all the flooring I’ve ever laid (and I’ve laid a lot of flooring–engineered hardwood, hardwood, tile, laminate), this was by far the easiest to put down.

I hope this post has been helpful and I hope you’ve enjoyed watching us slowly transform our garage into a real home. If you liked this project, I’d love if you’d pin this for later or share it on your favorite social channel.

Until next time, happy home improvement 🙂
Janie says
Thank you so much for posting about this flooring. I’ve been undecided about replacing my carpet with some sort of hard floor. They tell me that laminate is on its way out Real hardwood is SO expensive. Vinyl is my other choice but some brands cost as much a wood. LifeProof just might be the solution. I do want something that looks good and is easy to clean. I hope you will post again and tell us how your beautiful new floor is holding up.
I love your blog and admire all your lovely projects.
MERRY CHRISTMAS and HAPPY NEW YEAR
Shara, Woodshop Diaries says
Good luck with your choice! So far, I am loving this vinyl. It’s been super easy to clean and I’m really happy with the look and feel of it!
Deb says
We put Lifeproof in a beach condo and the flooring survived with flying colors when we had tornado and water damage from hurricane Dorian this past September!
Shara, Woodshop Diaries says
I’ve been really impressed with how well it’s holding up with my crazy dog running around on it. Not a scratch yet and she tries her best haha.