
NOTE: This post contains affiliate links for your convenience. All opinions are my own. Please see my disclosure policy for more information.
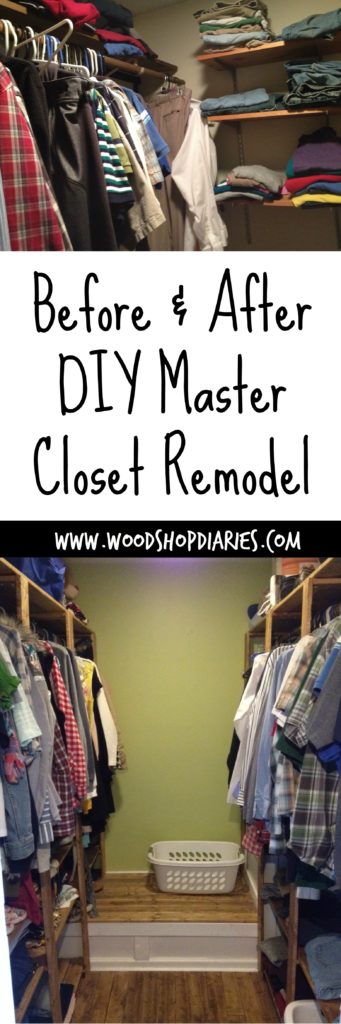
Okay, so….I never really planned on redoing our closet…at least not spur of the moment and not during the week of Christmas. We had talked about doing “something” with it this spring, but that was about as far as we had planned.
But, I had the week off from work this week (the week of Christmas) and I was itching to do a project. I had two ideas of projects I could reasonably complete in a week, BUT we needed to figure out a couple things to determine how big of a project they really were.
First idea: create a bar area between the kitchen and living room so I can put my cute barstools under it. We already have the space and countertop, we just have cabinets in the way so I can’t put barstools there.
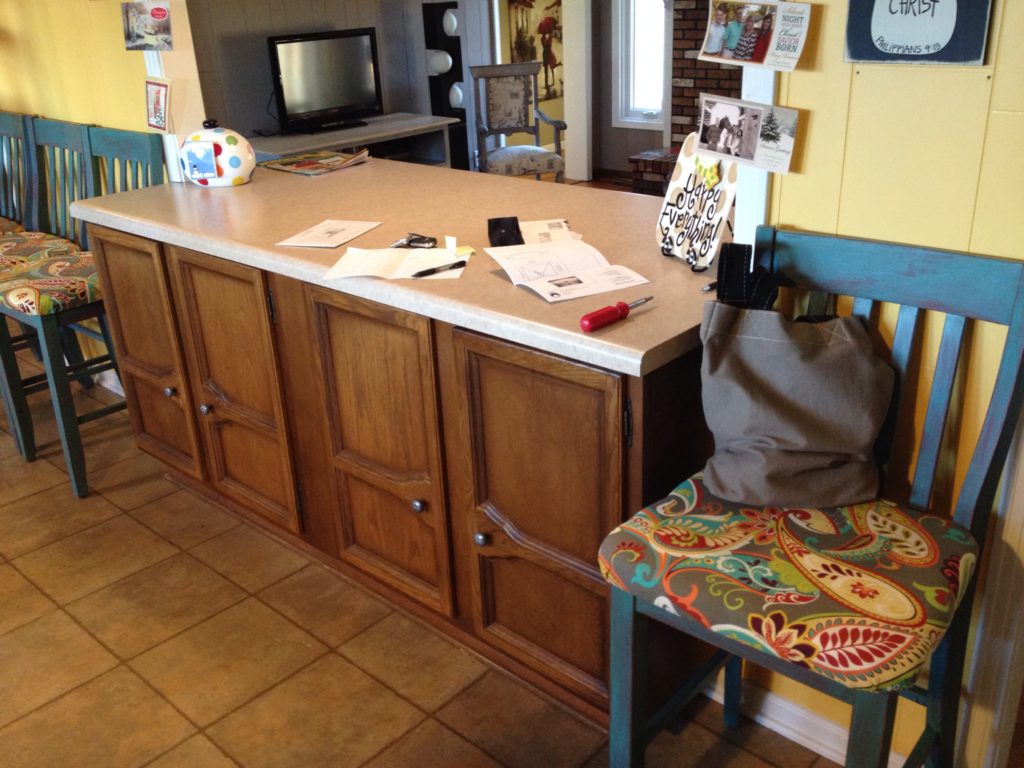
Long story short, after looking into it, this would require us to demolish the cabinets to remove them….so we decided to wait on that one until we have a better plan. Stay tuned though…..it will happen!
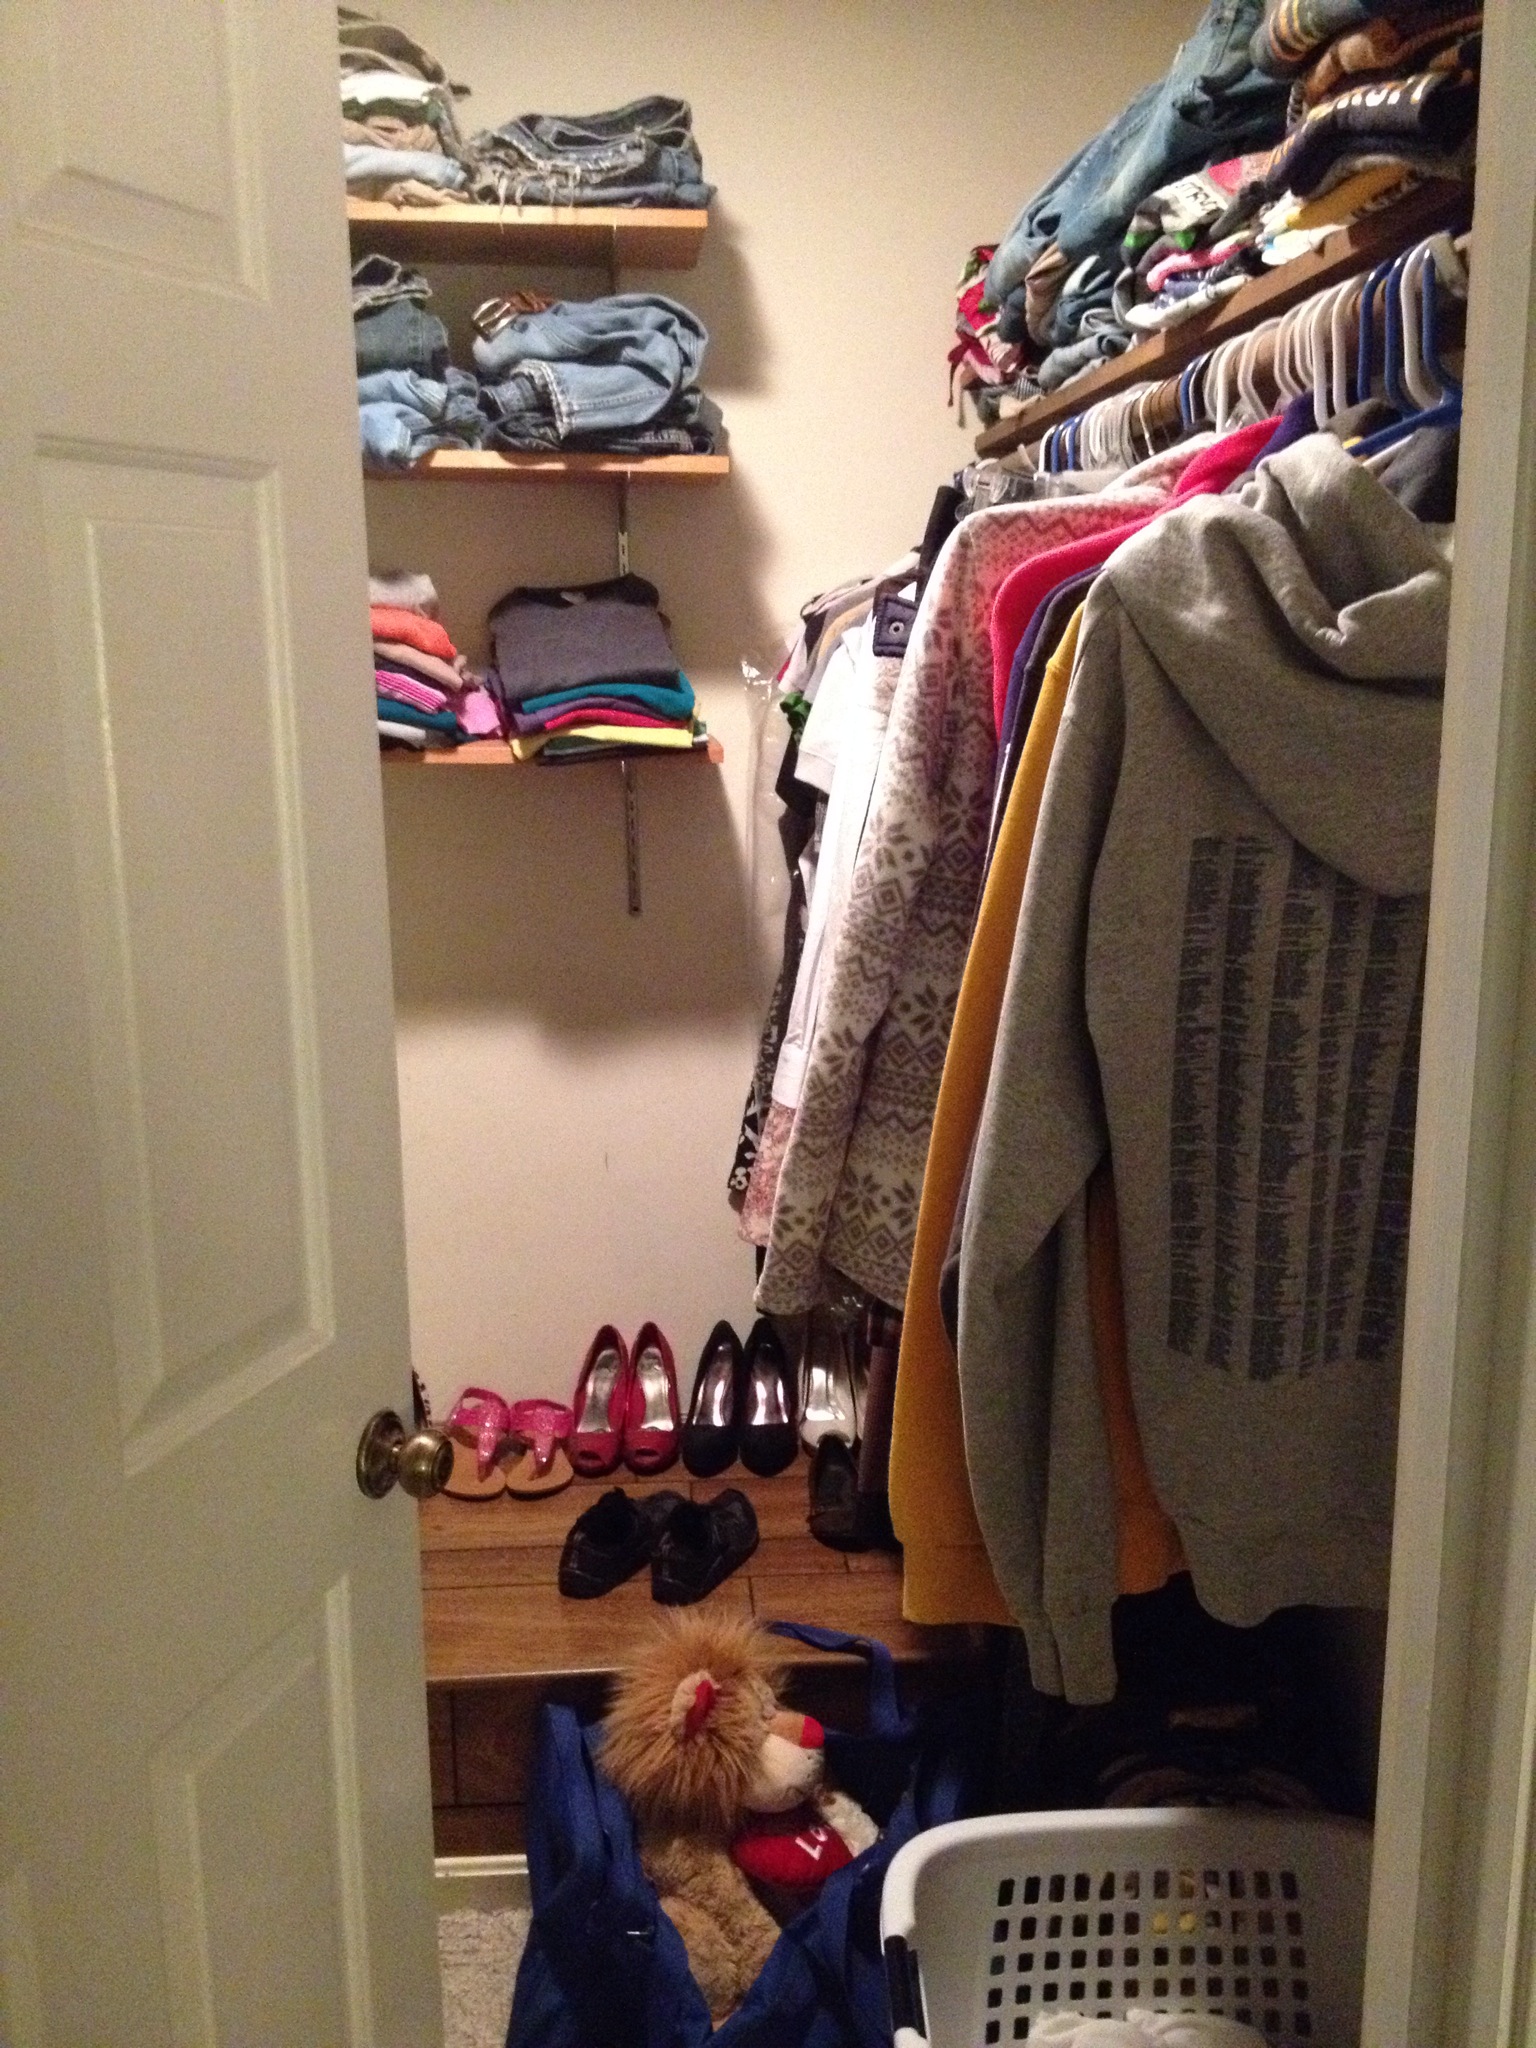
Second idea: remove the eyesore “thingy” in the closet. This did NOT include remodeling the closet, only removing this ugly paneled thing:

When we moved in, we wondered what in the world this thing was here for. It was ugly and took up a bunch of valuable closet space. So, first things first, this must go. However, if we removed it, and the carpet didn’t continue under it, we would need flooring for the whole closet.
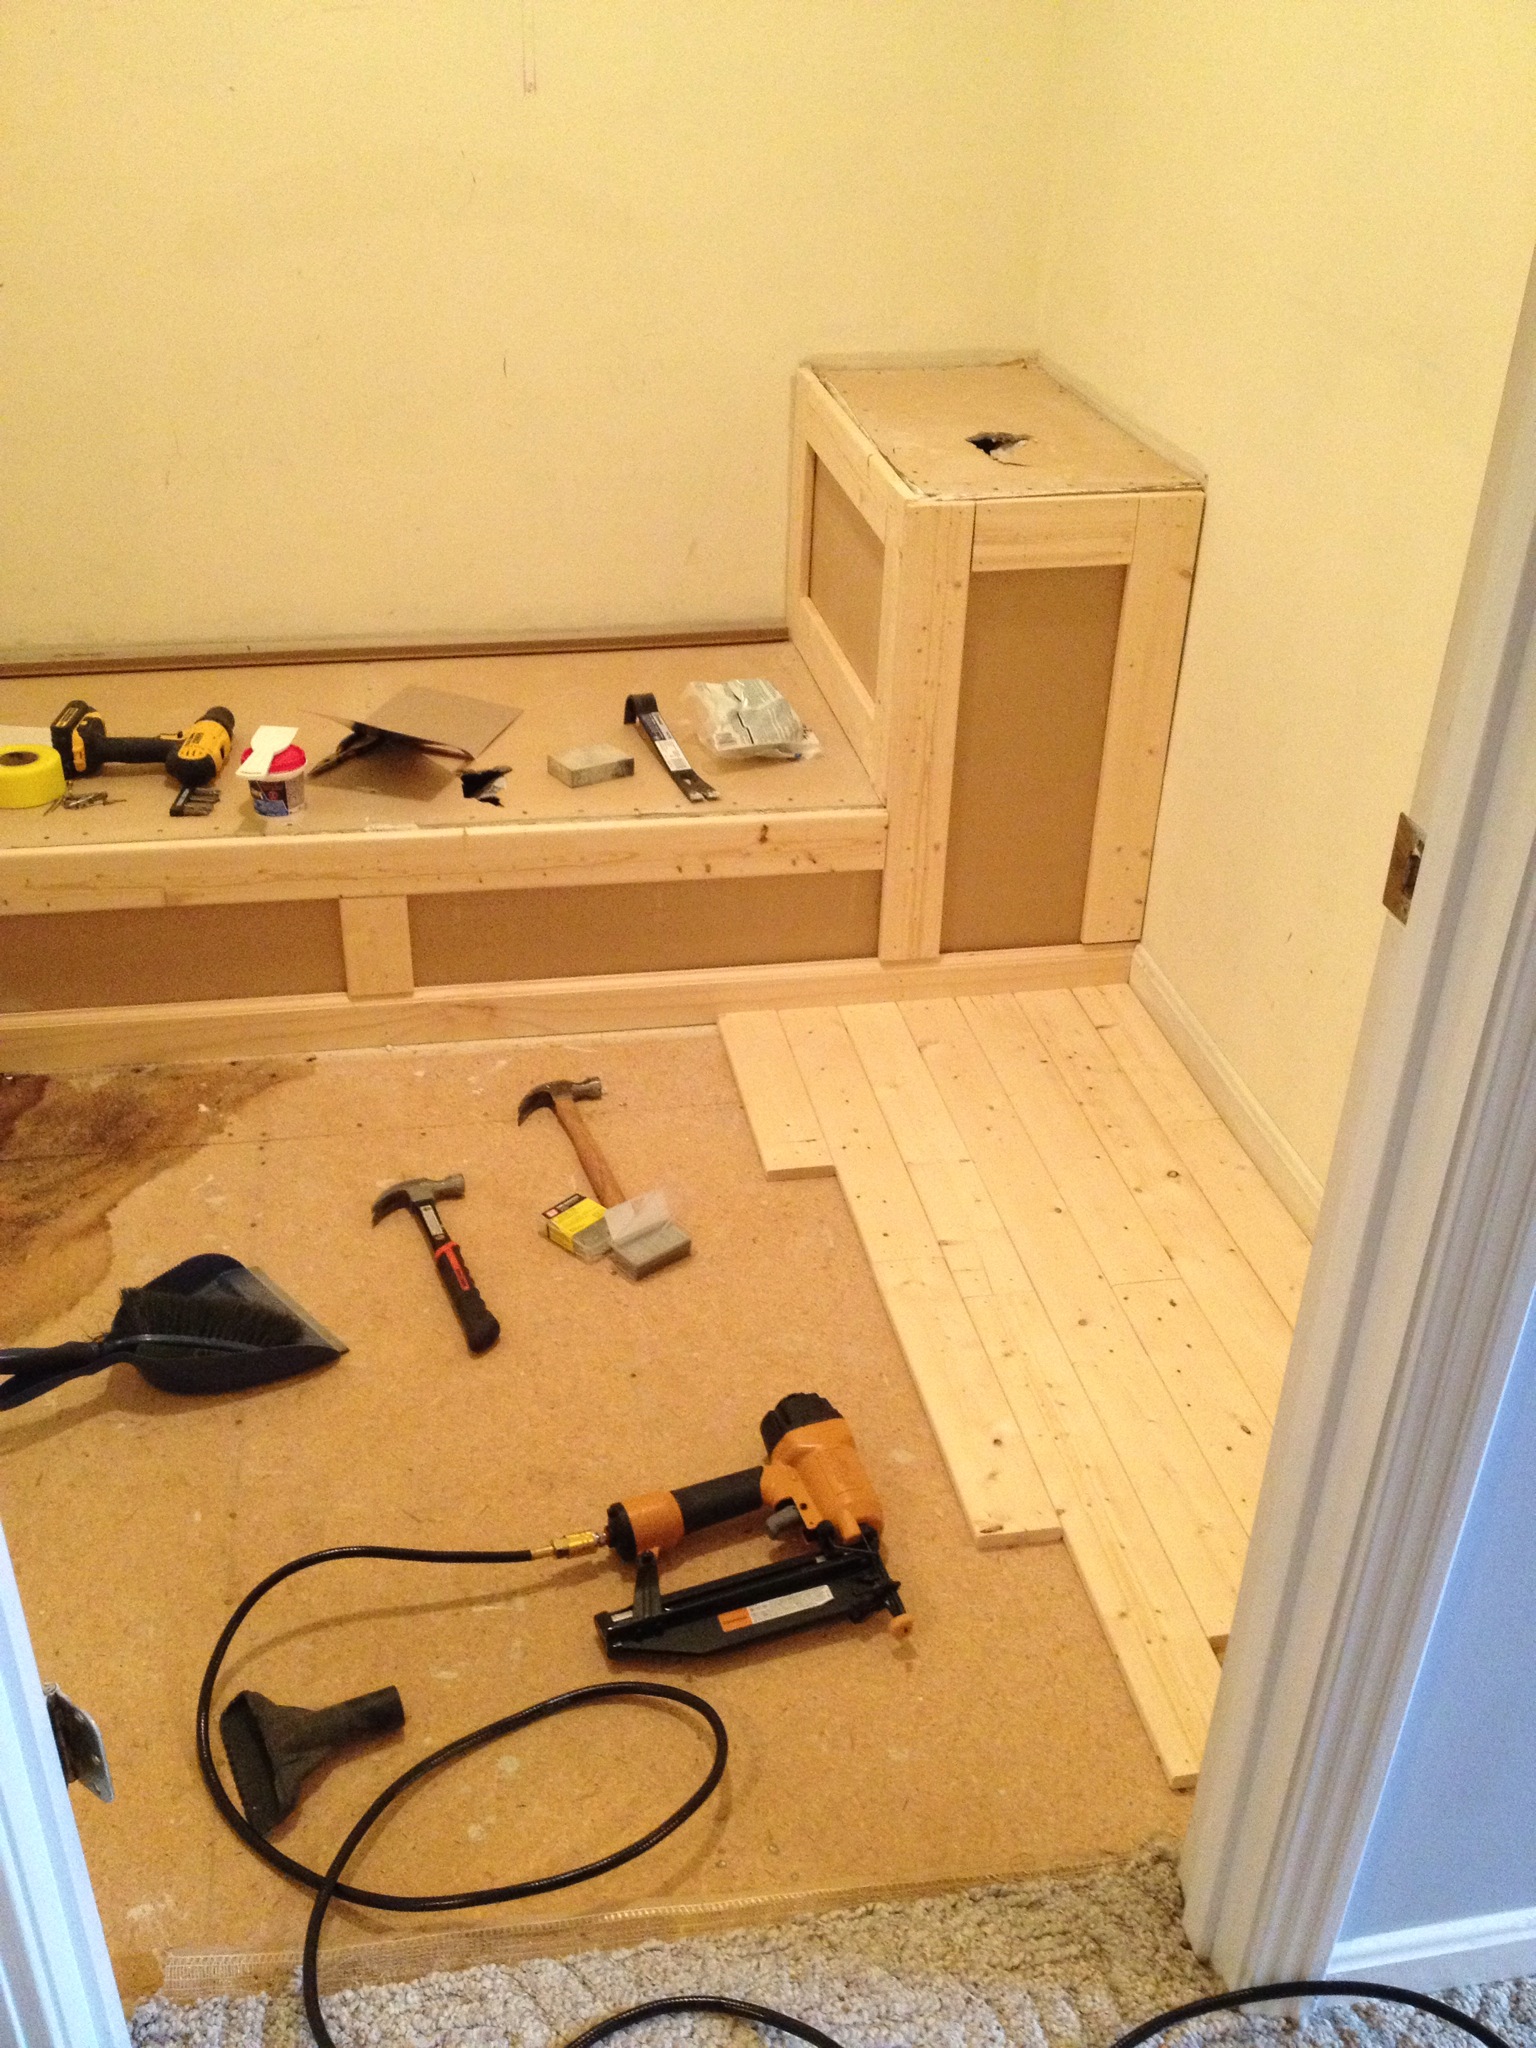
In order to figure out how big of a project this would be, I asked Danny to help me figure out what was under the thing. We peeled back the paneling on the top and busted a hole in the Sheetrock underneath to look inside. We found no carpet (go figure), and a large hole leading to the crawl space. Really? Who leaves a huge hole in the floor for who knows what to enter into the house?!
While we were at it, Danny wanted to fix this:

At some point, the copper pipes in the house were replaced with PVC. I guess it wasn’t high priority to properly patch the holes in the wall after this replacement. So whoever did it, just screwed some plywood over the holes. Nice….
While we were doing all this, we figured we might as well add some shelves. Our closet was annoying. The door opened inside so it took up half the closet when the door was open. There was hardly any storage space. The top shelves were hard to reach.


So we knew we would need plywood to patch the hole in the floor, drywall patches, and new flooring for the closet. Simple enough. Oh, and we needed stuff to build a whole new closet…not so simple. We went to Lowes (the service manager apparently recognizes us now since we are in there so often). We bought plywood, drywall patches and putty, and got a couple boxes of 99 cent laminate wood flooring.
Then, I remembered an idea I had (I have so many ideas, I forget most of them) for cool, cheap wood flooring. Danny disagreed to let me do it for the bedroom flooring because it wasn’t high quality (we want to replace the bedroom carpet with wood, but that’s expensive), so I talked him into letting me do it for the closet floor…it’s wood planks! Sooooo, we bought some 1x4s and put back the laminate flooring. I was SO EXCITED! Danny…well, he had his doubts.
I googled some cheap DIY closet storage/cabinet ideas that I could whip up quick. I found this as my inspiration:
So we bought a ton of 1x4s and some stain and headed home.
The next morning, I drew out a modified and customized plan for our closet based on Ana White’s version. I didn’t take a picture because I’m too embarrassed to show you how awful my “plan” looked on paper haha.
Danny patched the hole in the wall while I started building the frames for the closet storage. Then, we removed the paneling from the “eyesore thingy,” tore up the carpet and alllllll the staples that were left from it.


I was so excited to demolish the thingy so I busted a new hole in it. Then we realized it was the return air duct. Which means…it has to stay. I may or may not have shed a tear, had a tantrum, said “I quit” more times than I can count on one hand. But, I gained composure, and reminded myself that I am a problem solver and I will make this closet awesome.
After some thought, I decided to leave the Sheetrock on the front and add some trim and wood planks on top. Here is a pic of the trim and the beginning of the floor laying. For the floor, I just cut boards at random lengths and butted them together. For the last piece of every run, I’d measure and cut for an exact fit.
By the way, this was the first project I did with my nail gun and I promise my nail gun compressor combo kit![]() was the absolute best tool I have ever bought. My nail gun is still hands down my favorite tool. It makes things so much faster.
was the absolute best tool I have ever bought. My nail gun is still hands down my favorite tool. It makes things so much faster.
Then I stained the floor in Minwax Great American.

Then I painted the walls and the trim with leftover paint I had from previous projects.


I continued building frames and shelves for the closet and stained them. I brought them inside to make sure everything fit right.

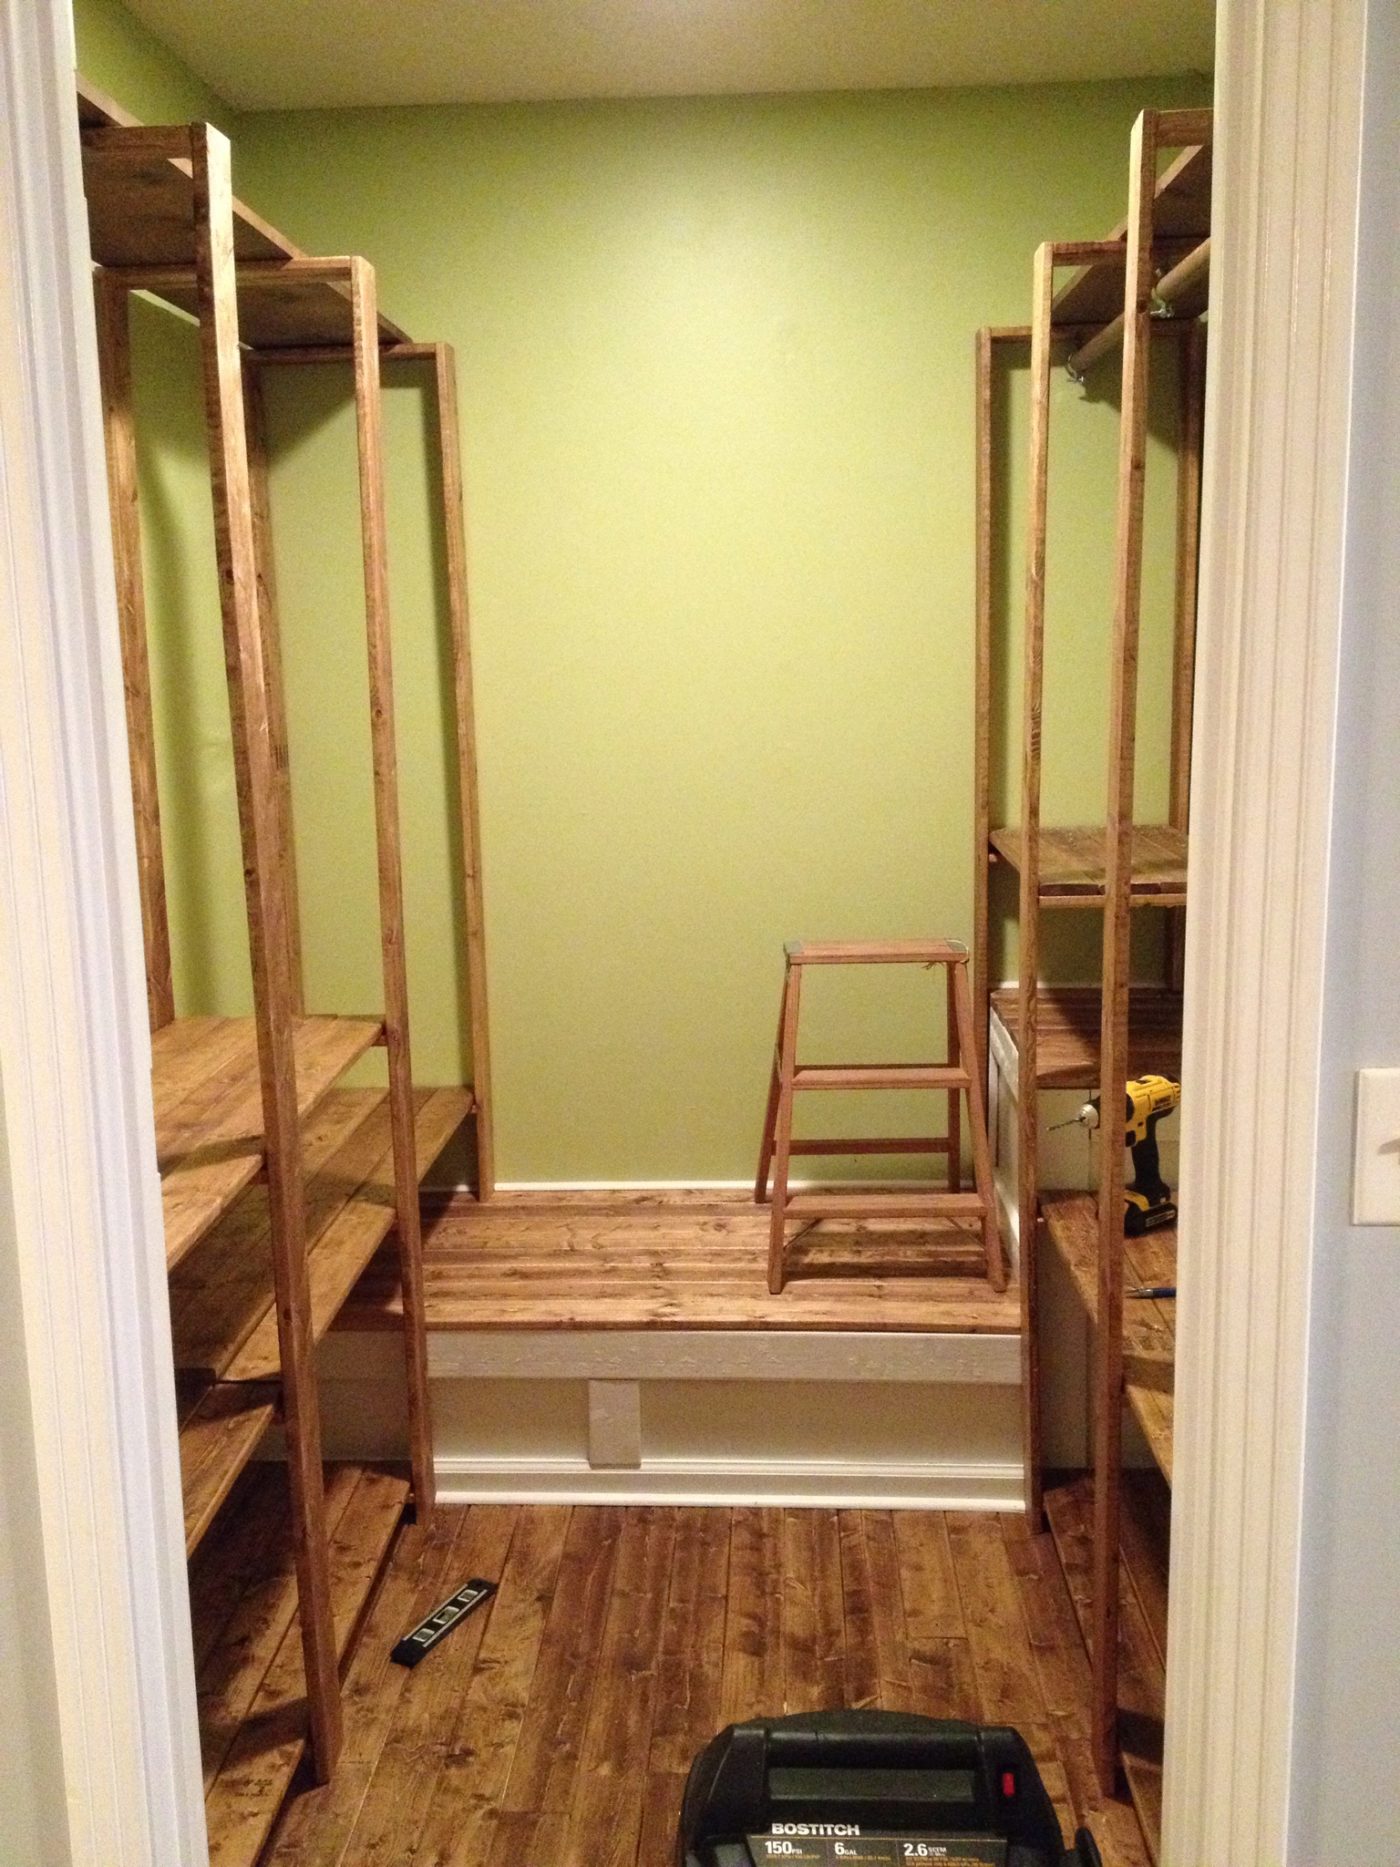
I had planned to copy Ana White’s idea of using galvanized pipes for hanging rods, but when we saw the price, we started thinking of cheaper ideas. Apparently galvanized pipes are expensive. We had two wooden dowels from the original closet, so we used those. Danny thought of using conduit hangers to hang the dowel rods from the top shelves. He’s so handy when he tries to be 🙂


I poly-ed the shelves (because Danny was afraid of stain making his clothes smell). And finally got our clothes off the bedroom floor and back in the closet!!!! I cannot stand clutter.


I LOVE it. Total cost: about $250. Totally worth it. By the way, the sign will be repainted…it doesn’t show up with those colors.
There is so much more storage now, and without the door, there is so much more room. I think Danny is impressed with my building skills, too.
Four days, well over 700 pneumatic gun nails, and 60 1x4s later, I’m so happy with our new closet. Added bonus: no more holes in the wall 🙂 I’m trying to talk Danny into putting in a pretty light fixture, too.
What do you think? I’d love to hear your feedback. Keep your eyes open for many upcoming projects!! 🙂

Jane says
You really do some very nice work.
Love the sliding doors. I have sliders on the inside of my boiler/hot water heater closet in my laundry room. Someone bent the sliding bar in a few places so the doors are constantly coming off the track. Your idea would work perfectly!
We have his n hers closets in our bedrm. With a good 6 to 8 inches of wasted space. Making 1 big closet is in the near future. Thanks for sharing your know how!
Shara, Chasing A Dream says
Thank you! That means so much! I’m so glad you enjoyed the sliding door post! I enjoy sharing what little “know how” that I have haha! Hopefully it helps and inspires someone out there 🙂 Good luck with your closet project!
Jane A says
i wish i could pay you and your husband to come fix up my place. i’m losing it over that faux fireplace you made with storage. do you live anywhere near michigan?
Shara, Chasing A Dream says
Thank you! That would be a dream job haha! Unfortunately I love quite a long way from Michigan!