
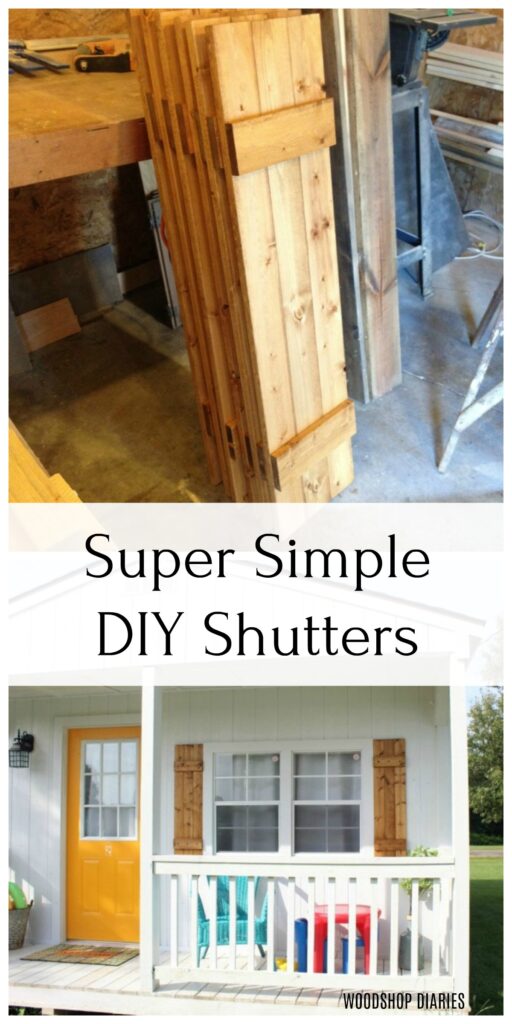
Looking to spruce up your home’s exterior without spending a ton of money?
Making your own DIY shutters is an excellent way to add some curb appeal!
I made these from simple 1x4s and it’s crazy how such a simple project can make such a huge impact!
A friend of mine recently bought a “she shed” for her new home office.
So she asked me to make her some shutters for it to give it a little–something extra.
So, I’m sharing a simple formula for making your own simple DIY shutters.
I promise, you will be done in no time 🙂 And all you need are some 1x4s, screws, glue, and an outdoor finish.
Easy peasy…let’s get started.
To Build These DIY Shutters, You Will Need:
This post contains affiliate links. See policies for details.
- Treated OR Cedar 1x4s (see step 1 for how many)
- 1 ¼″ exterior screws
- Wood Glue
- Outdoor finish
- Nail heads
- Hammer
- Drill
- Miter Saw
.
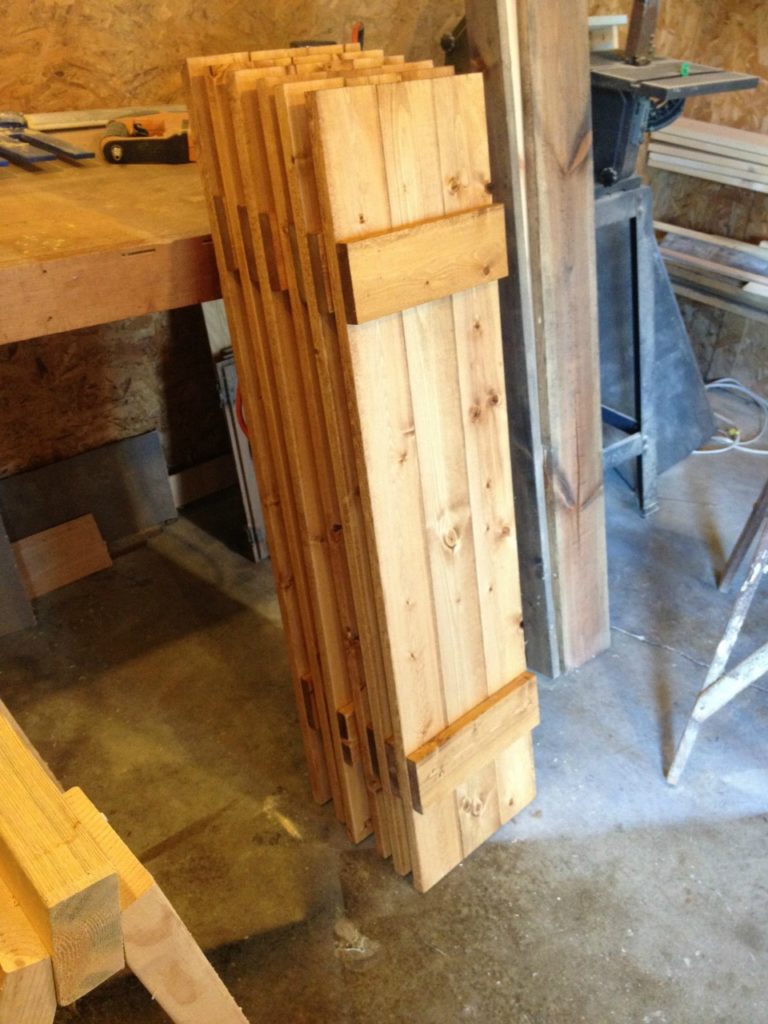
NOTE: In the photos below, you will see I used regular untreated 1x4s for this project.
That will work fine…for a while. Regular spruce or pine 1x4s will last a good while if they are regularly recoated in a good outdoor finish.
However, they will eventually rot.
So, I recommend using cedar boards for this as they are naturally rot resistant OR using treated lumber for outdoor use.
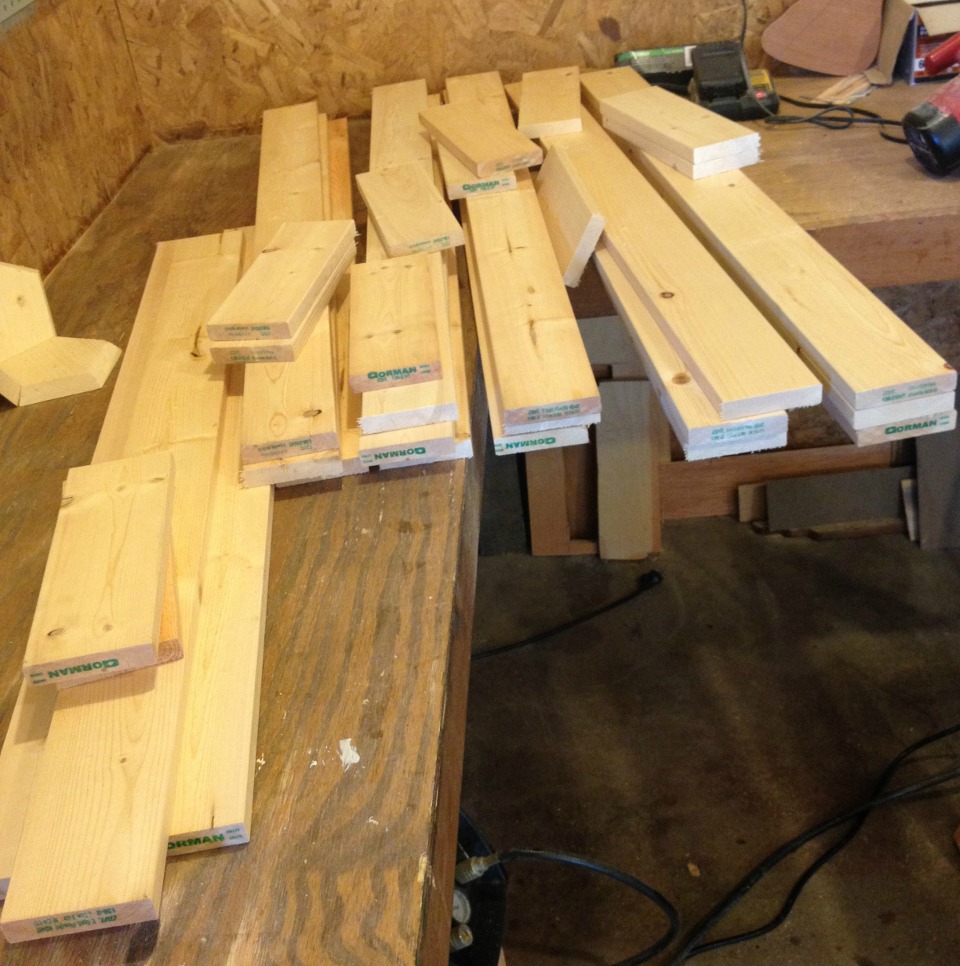
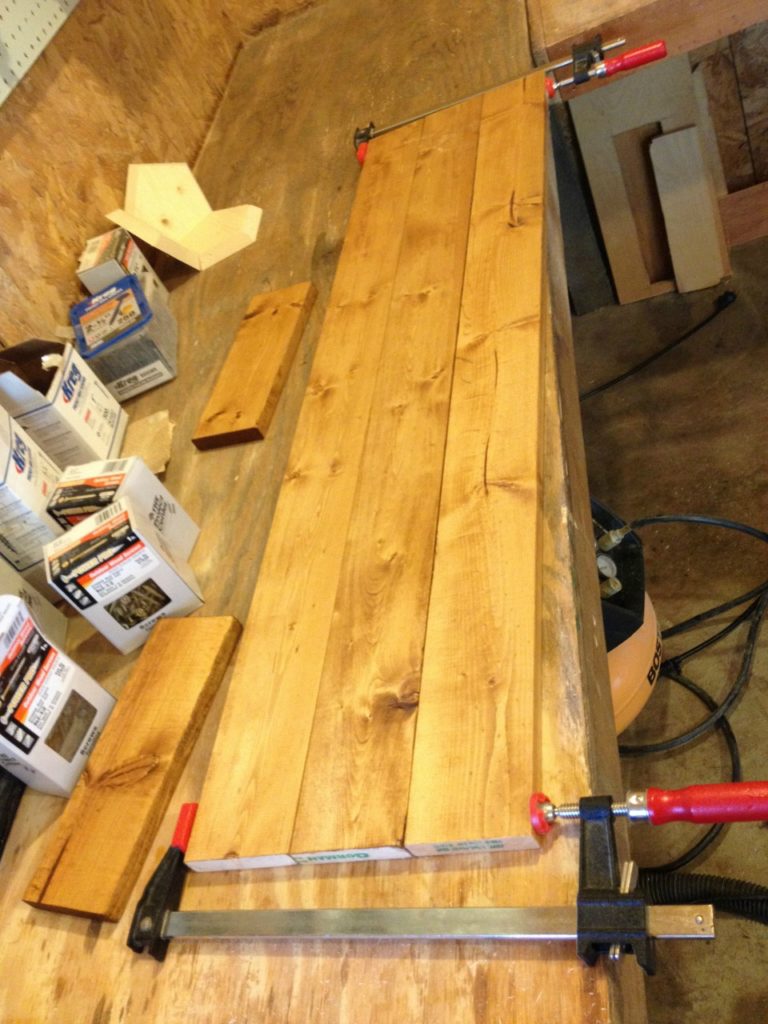
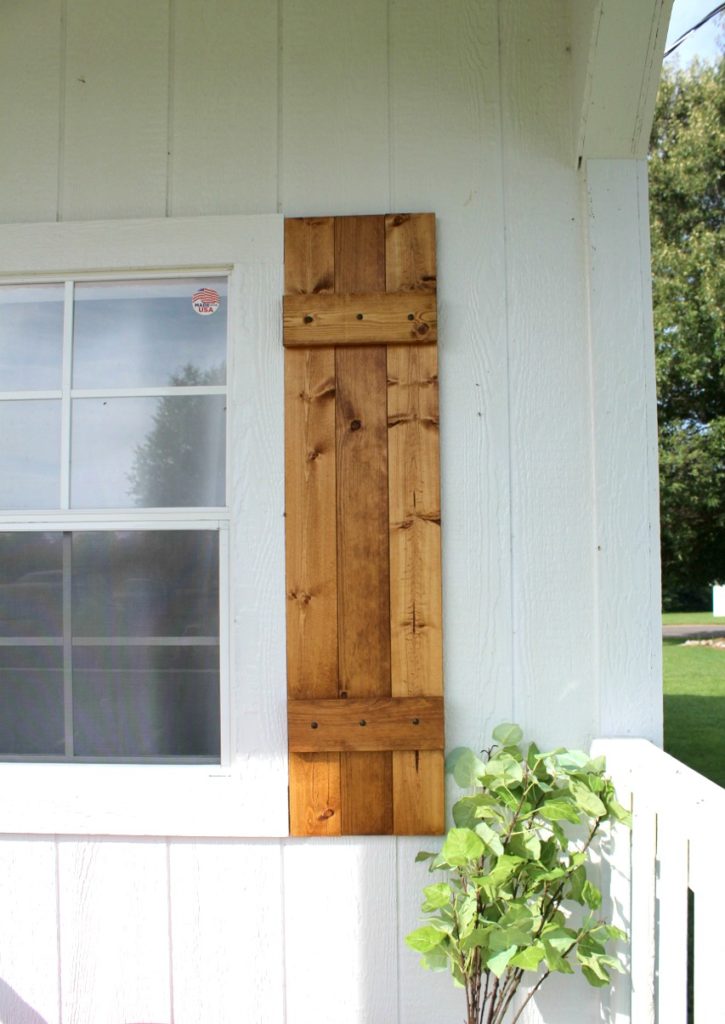
1. Cut Shutter Boards to Size
Cut three 1x4s the height you want your shutters and two pieces of 1×4 at 10 ½″ long FOR EACH SHUTTER.
She had three windows, so needed 6 shutters total. So I cut all the pieces at one time.
For shutter length, I don’t know that there is a definite RULE for what they should be.
But I’d recommend adding a few inches to the height of your actual window and making your shutters this tall.
Determine this height and multiply by 3, then add (2 x 10 ½″) = 21″.
That gives you how many feet of 1×4 you need PER shutter. Typically, you have two shutters per window.
This will help you determine how many feet of 1×4 you will need per window.
2. Finish the Shutters Before Assembling
This isn’t absolutely necessary, but I think it makes things easier and allows you to cover all wood surfaces for better protection.
I stained these with an outdoor deck stain (Olympic Canyon Brown Wood Toner).
We have used this on all our outdoor furniture and I love the color.
Since these shutters will be outside, I suggest you use a good outdoor sealant or good outdoor paint.
I stained before assembling so the stain and sealant would get on all the surfaces and between the boards as well..
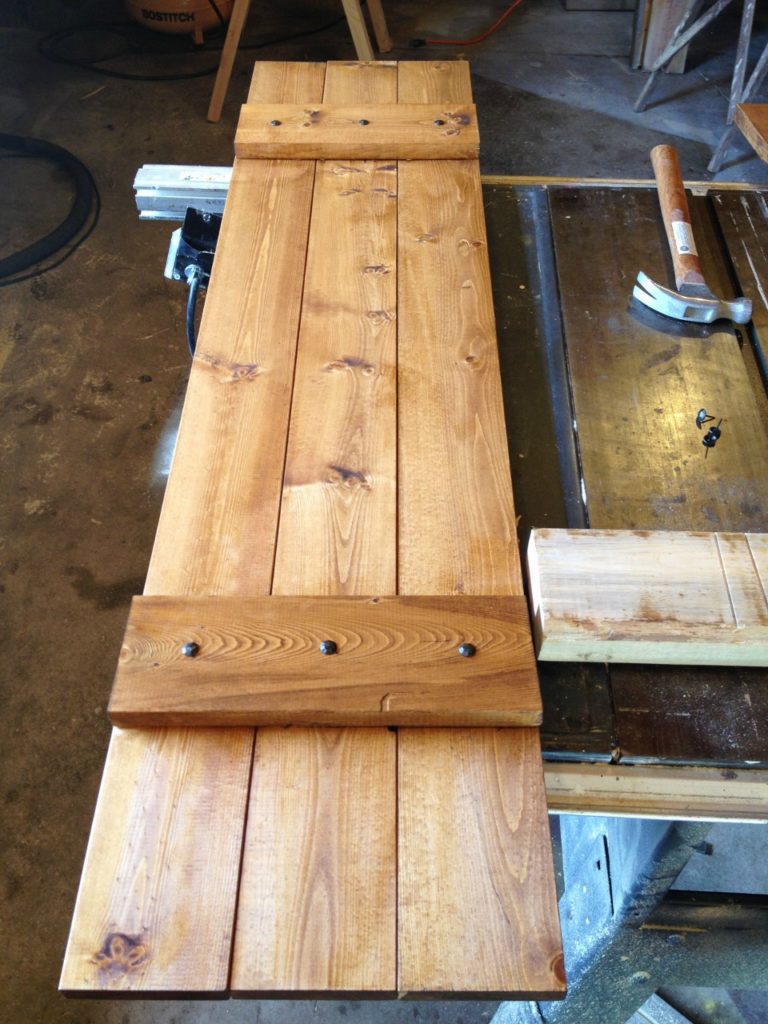
3. Assemble the DIY Shutters
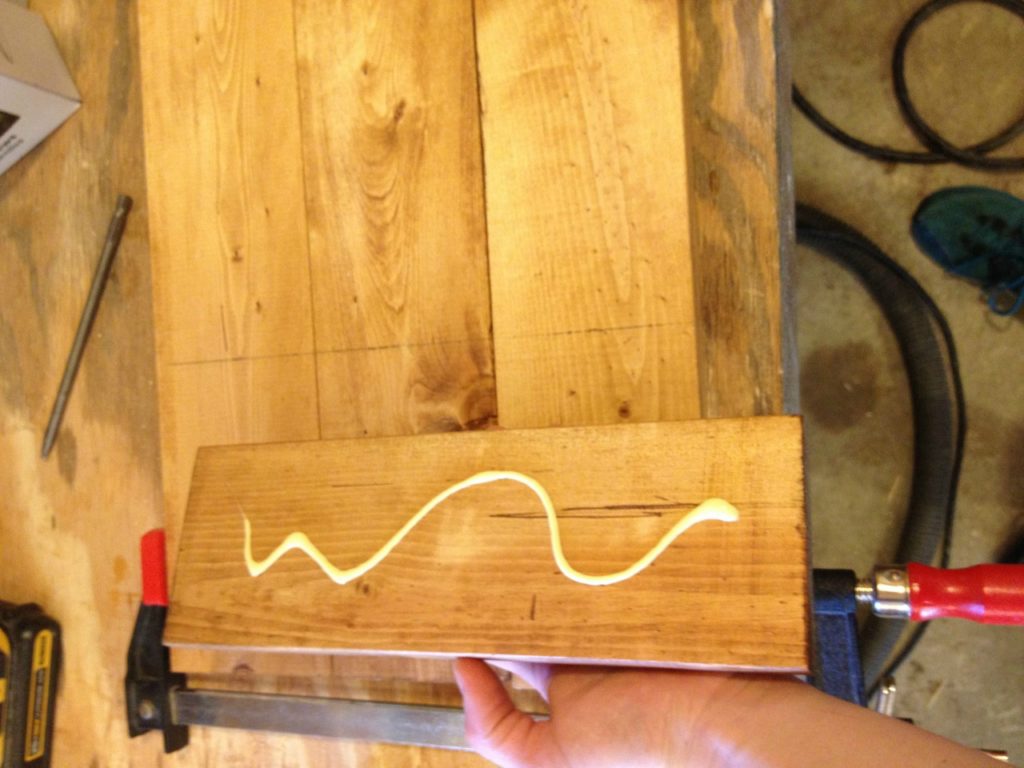
I used glue and 1 ¼″ exterior grade screws to assemble these shutters. I laid out the three long boards and clamped them together.
I measured 6 inches in from each side and drew a mark with my speed square.
This is where I want to line up the short boards.
I put glue on the short boards and tacked them in place with my nail gun. You could use hammer and nail here.
Basically, you just want to hold this board in place so you can flip it over.
Clamps would work as well.
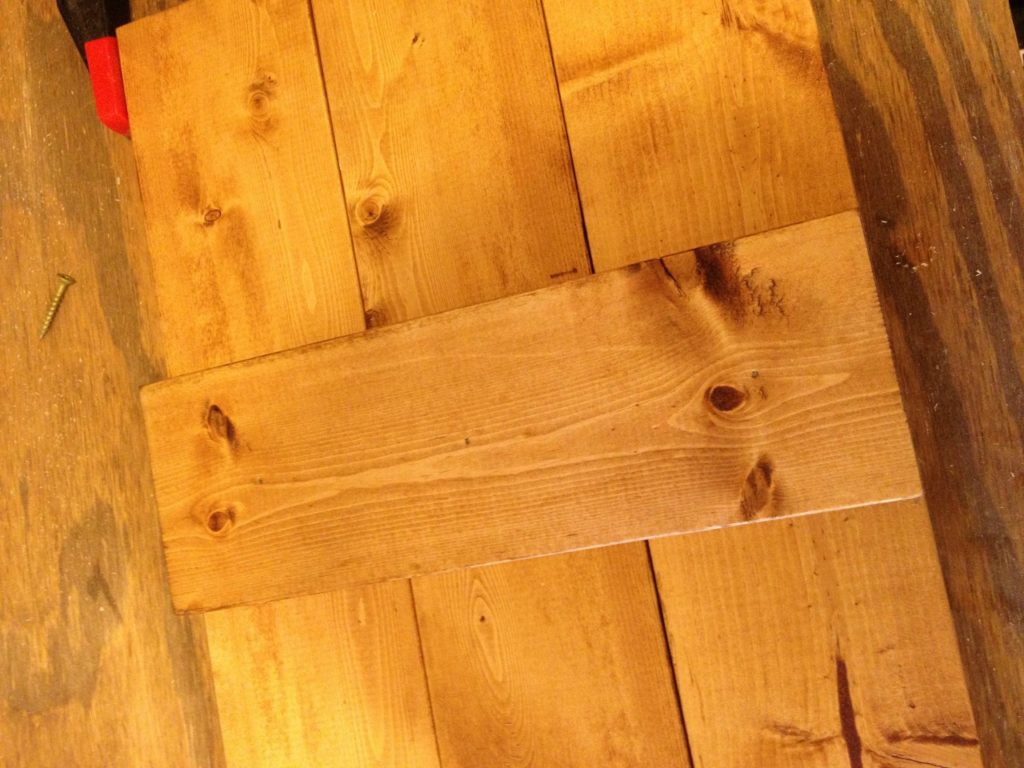
Then, I flipped it over so that it is face down on the work surface.
Used 1 ¼″ EXTERIOR deck screws and screwed three screws into each short piece to connect the three long boards to them.
I forgot to stain the backs of these boards prior to assembly *face palm*.
But, I DID go back and stain them before I hung them up.
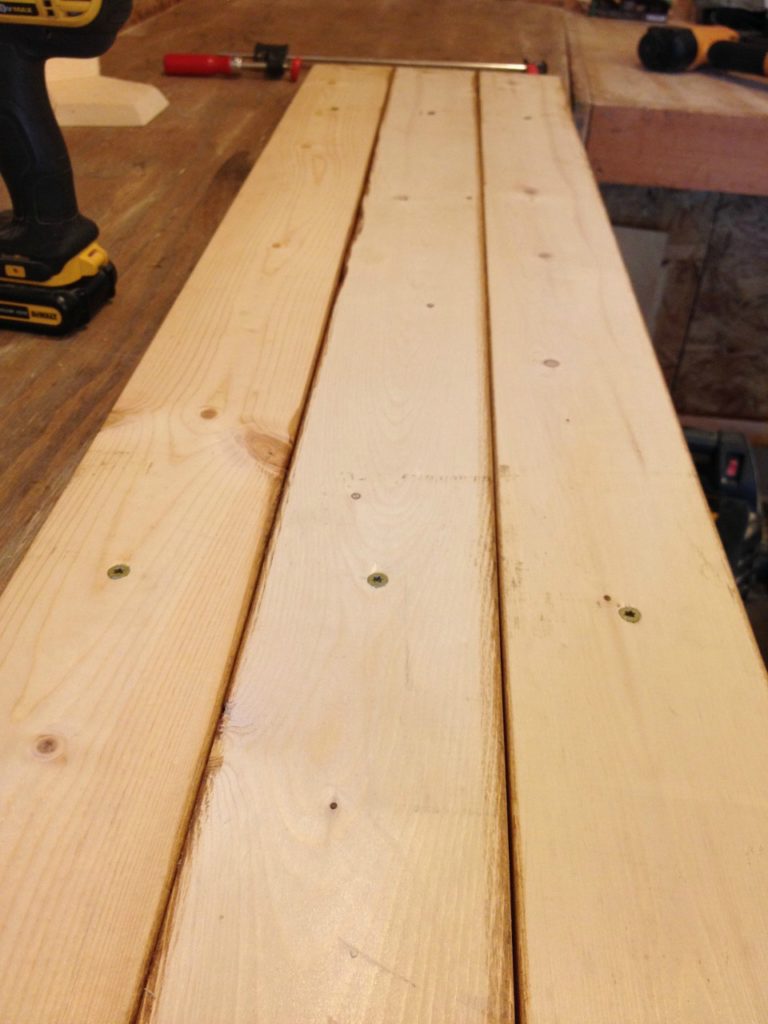
Now these shutters are ready to go.
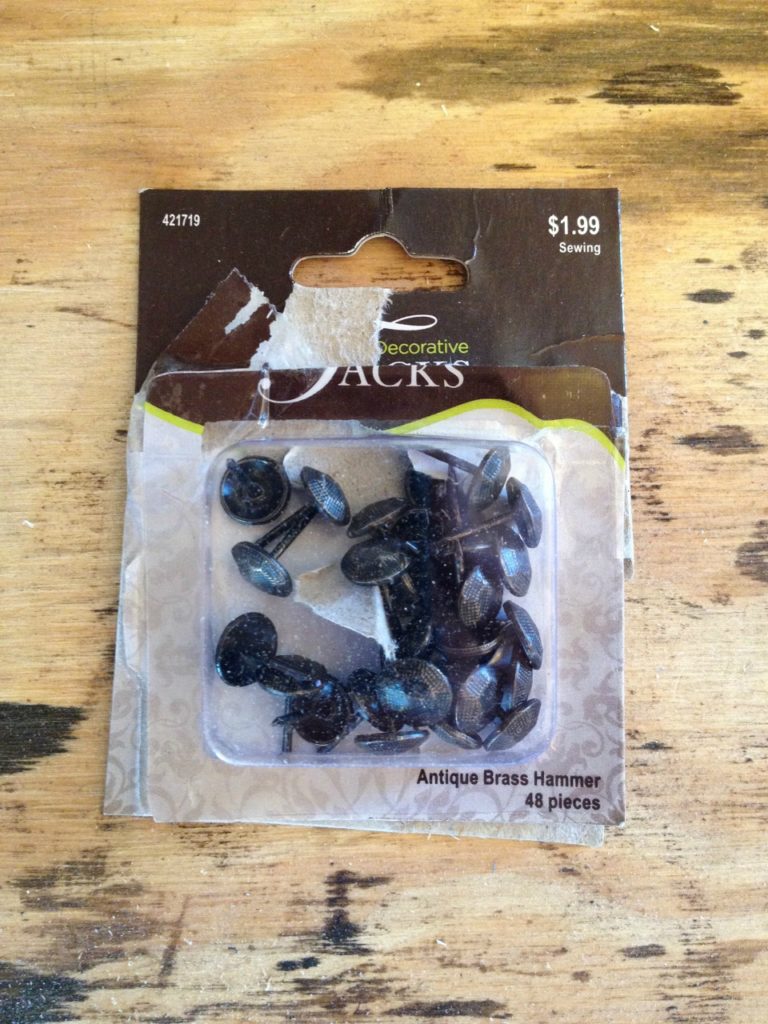
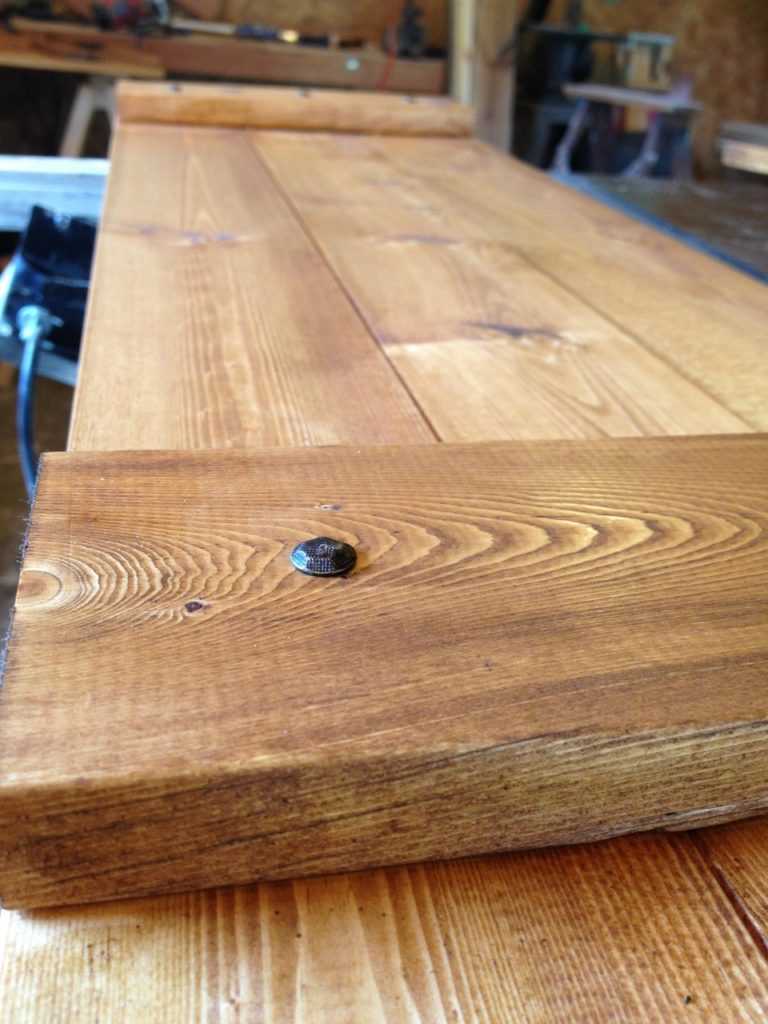
4. Add Nailheads to Front of Shutters
For a little extra detail, I added these super cute nailheads to the front of the shutters.
They are actually upholstery tacks. Who knew, right?
I got mine at Hobby Lobby in the fabric/sewing department. They have several styles.
I simply tacked the nails onto the front of the boards with a hammer.

They add so much detail. Totally worth the extra couple bucks.
You could also use some decorative outdoor and decking hardware to spruce these up a little.
Now, before you hang them, be sure to stain the back if you haven’t already (looking at myself on that one…).
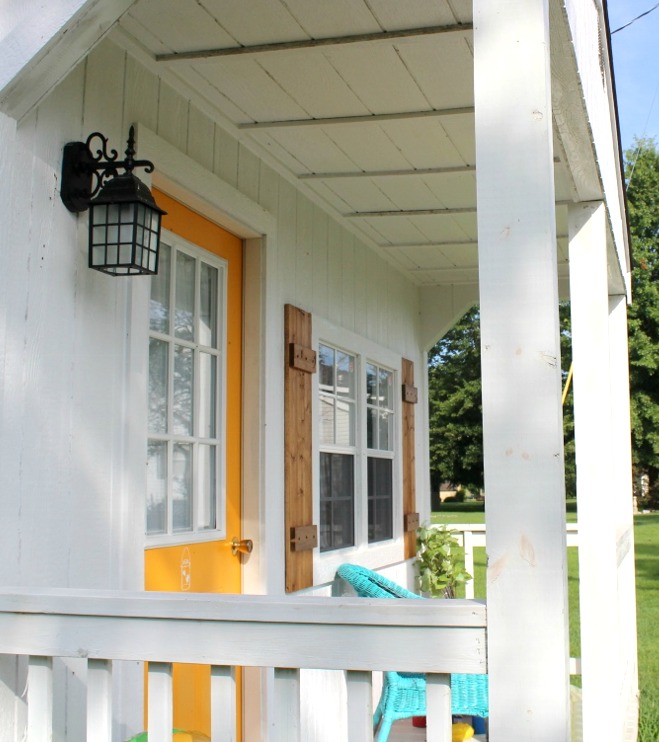
Step 5: Hang DIY Shutters
To hang them, I used 2 ½″ outdoor deck screws and screwed them into the siding.
I used 4 screws per shutter.
The exterior of this shed was wood, so it was easy to hang.
However, depending on the exterior of your own home, you may need to hang differently.
If going into brick, you may need to use special screws for brick. Same for vinyl.
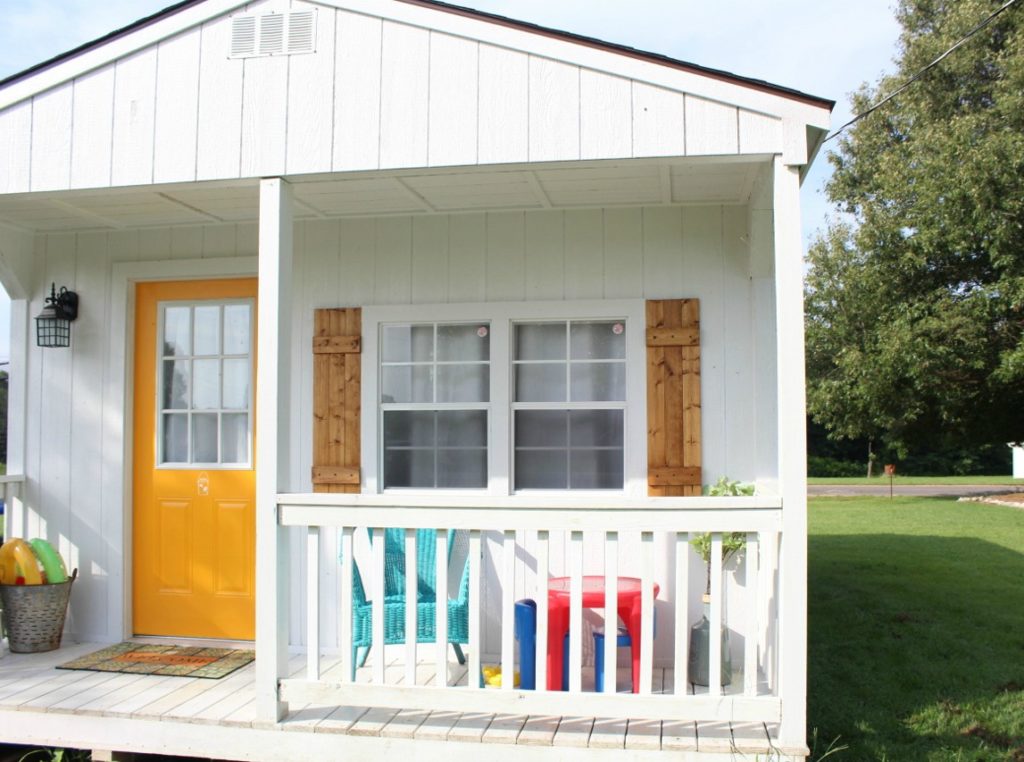
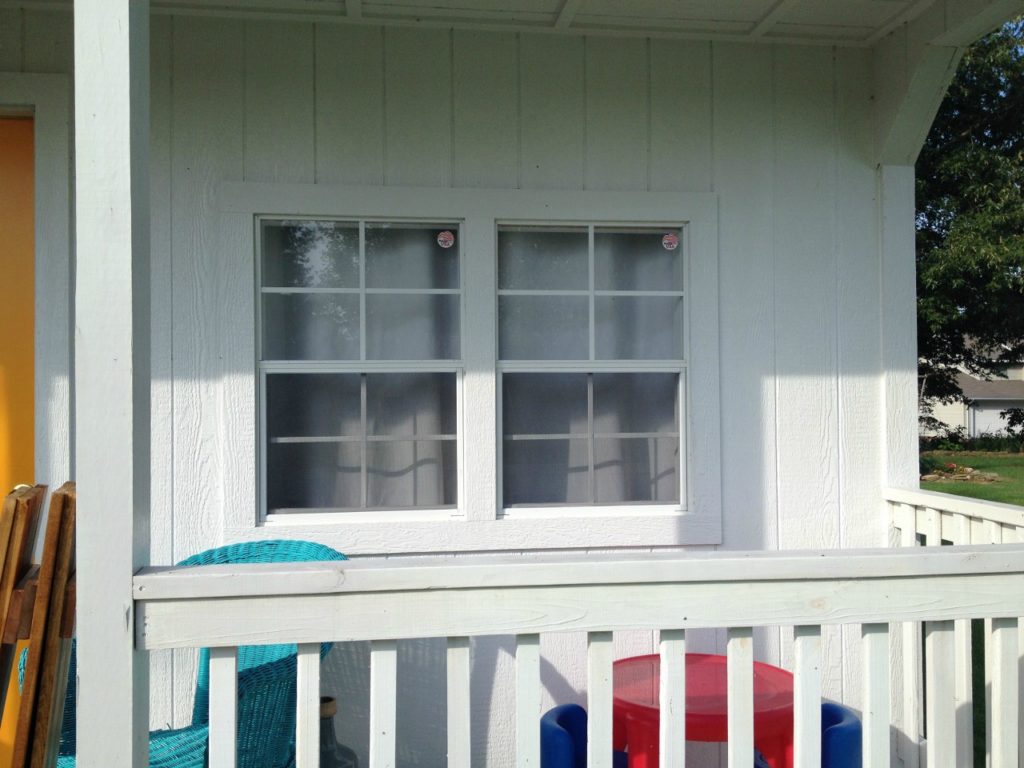
Here is her adorable office before the shutters. It’s cute even without them.
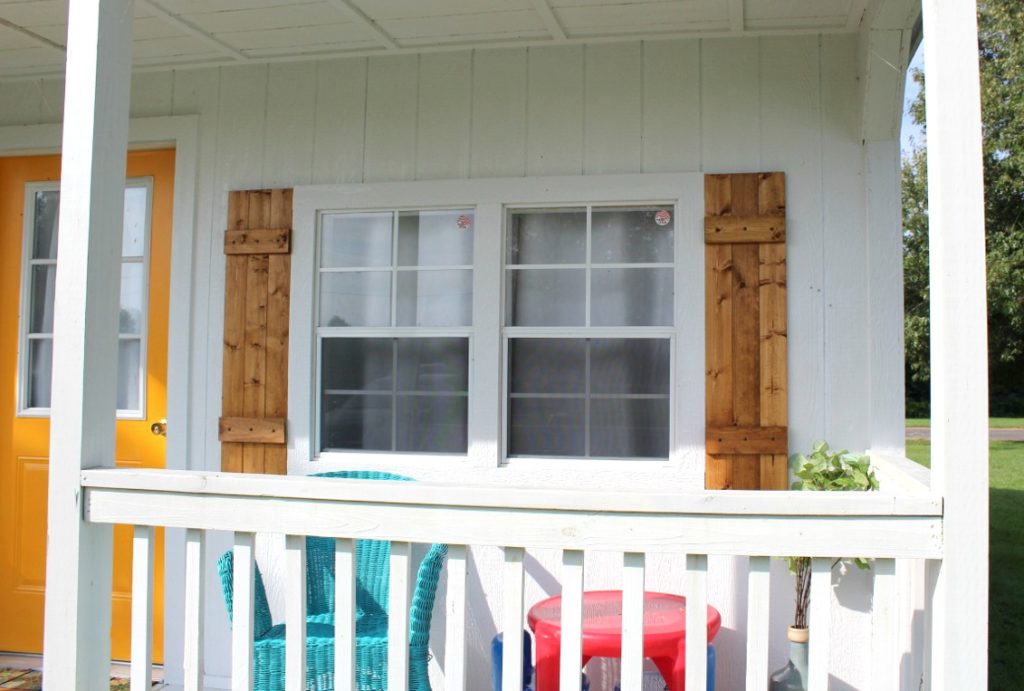
But, then look how much cuteness they add once they are up on the windows?
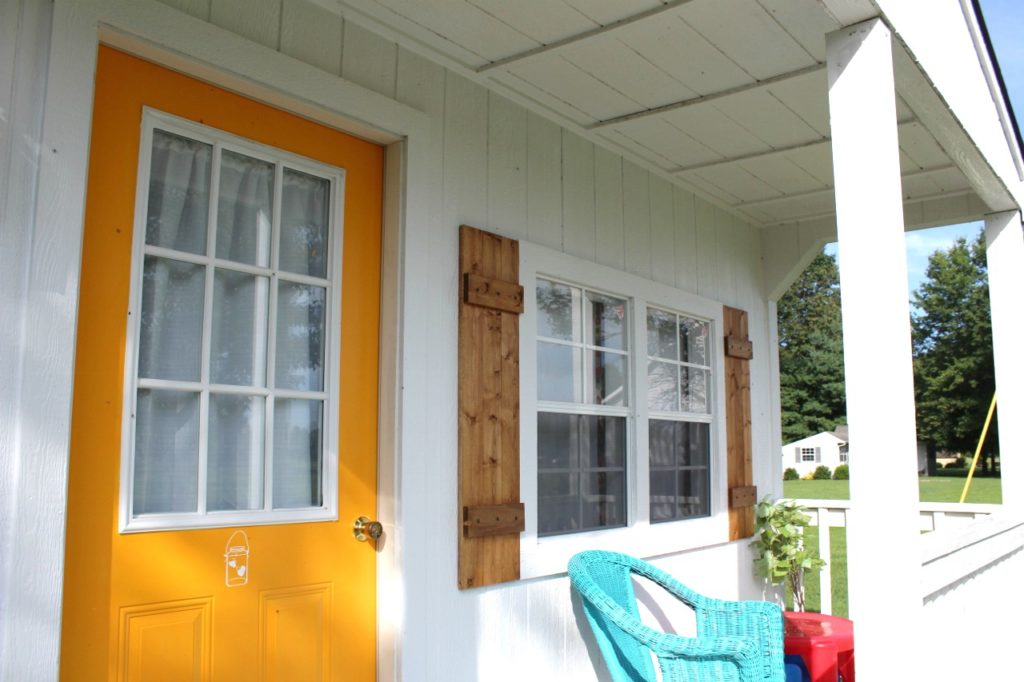
See how cute?! I know, right? These simple projects can have such a big impact.
If you’re looking for more ways to spruce up your home’s exterior, check out some of my favorite outdoor projects:

If you enjoyed this simple DIY shutter project, don’t forget to Pin for later!
Until next time, happy building 🙂

Michelle Casto says
What type of sealant did you use? I used minwax stain and am wondering what type of sealant would work best for stained untreated wood.
Shara, Woodshop Diaries says
I always use Minwax Polycrylic. It’s a water based poly so it’s easy to apply, and clean up and it doesn’t yellow over time.
Robin says
So you used plain 1×4’s not cedar?
Shara, Woodshop Diaries says
Yes, for this project, I used plain 1x4s (spruce wood) and used an outdoor sealant on them.
Deanne says
Where are your mounting screws? They don’t show in the picture.
Shara, Woodshop Diaries says
I screwed them in with two screws right under the bottom horizontal piece and two screws right above the top horizontal piece. This way they are pretty well hidden.
Cecilia says
Adorable! I’ve been after my husband to make shutters for our house…just like these! Going to show him this post! What a difference they made on the shed. Looks great!
Shara, Woodshop Diaries says
Thank you!! They are so easy to make…maybe you can talk your husband into it soon 😉 Good luck!