
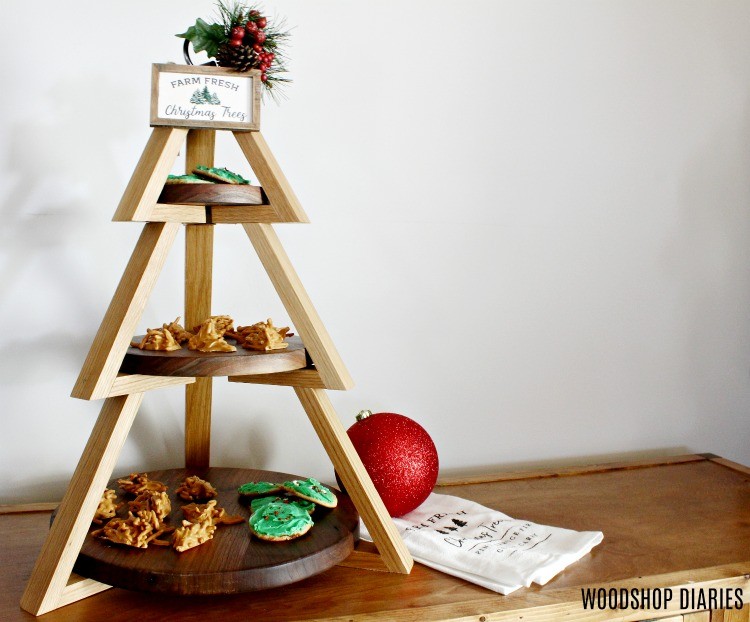
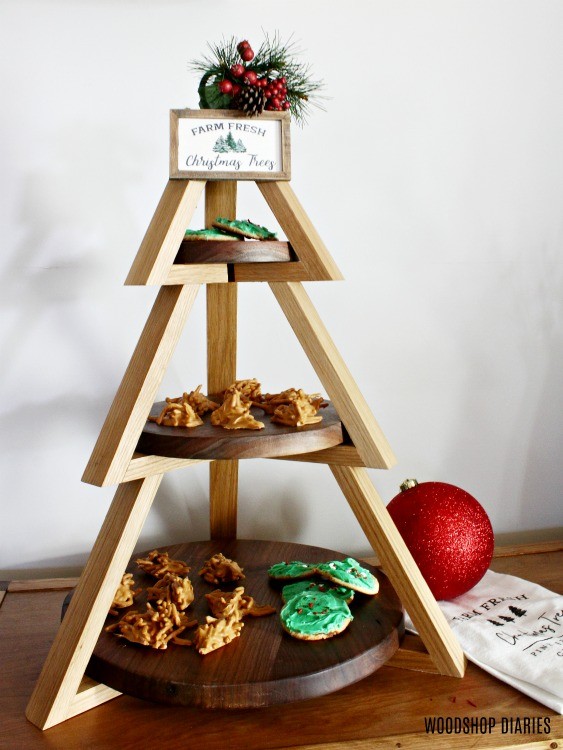
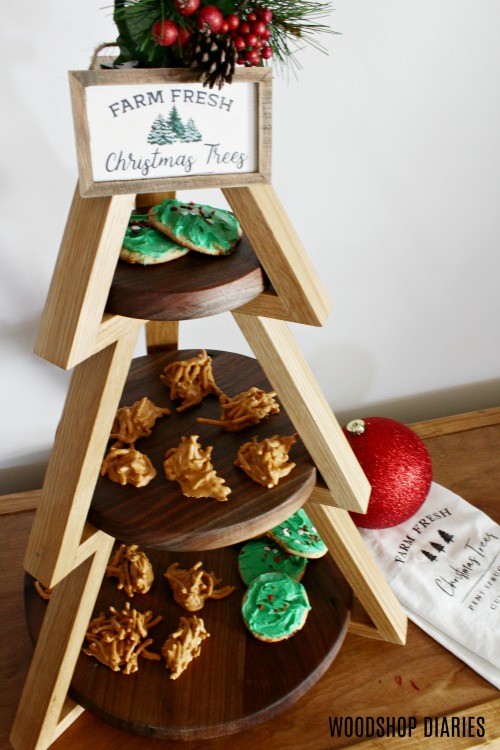
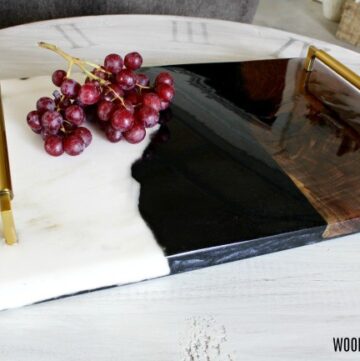
Hey friends! I’m so excited to share with you how to make this Christmas Tree shaped DIY Tiered Plate Candy Stand.
As a bonus, I’m also sharing my absolute FAVORITE easy 3 ingredient Christmas candy recipe!
I don’t normally share recipes on my woodworking website, for obvious reasons.
BUT I figured since I’m showing you a project to display all your Christmas candy, I might as well show you how to make easy Christmas candy to put on it.
That way, you’ve got everything you need to COMPLETE the project…candy and all 😉
I’m not a huge homemade candy fan, but I do have a few favorites that I make every year.
Typically, I bring them to family get togethers in an old scratched up tupperware container and that’s just kind of…..lame.
.
So this year, being full of festive-ness, I headed to the shop to whip up something a little less lame to display and serve my candies on.
I’ll show you how I put it together and then I’ve got my fav recipe after the tutorial 🙂
This post contains affiliate links. See policies for more info.
.
How to Make a DIY Tiered Plate Candy Stand
This is a simple project you can certainly complete in a weekend and makes an excellent DIY Christmas gift idea!
.
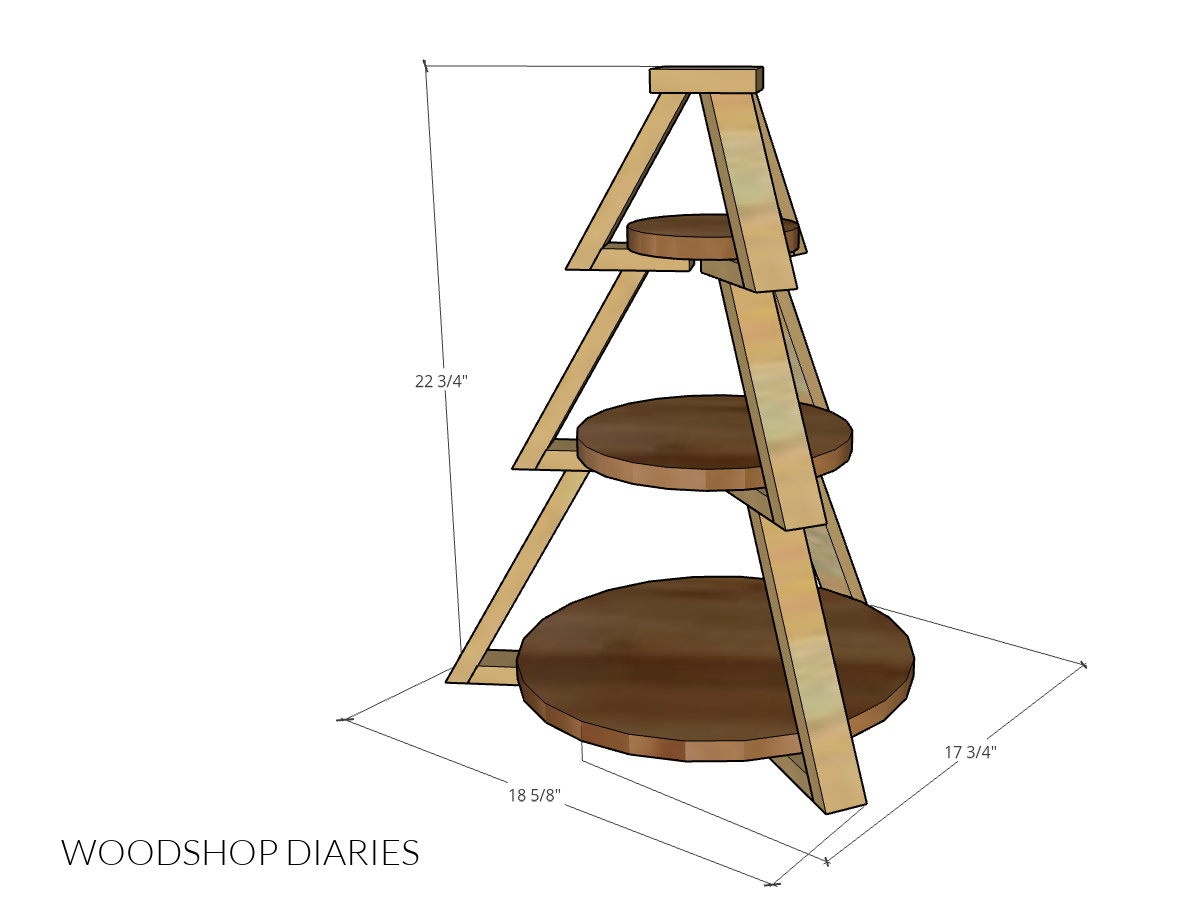
Overall project dimensions for this tiered candy stand are approximately 17 ¾″ x 18 ⅝″ x 22 ¾″.
For this DIY Tiered Plate Candy Stand, you will need:
Materials:
- (2) 1×2 boards (I used oak for this)
- Scraps for plates (plywood works great–I used some scrap walnut)
- Wood Glue
- Painters Tape
- 1 ¼″ wood screws
I’ve detailed how to build the tiered candy stand below.
But if you prefer to print your plans, I’ve included cut diagrams, a complete cut list and helpful diagrams in the printable plans here:
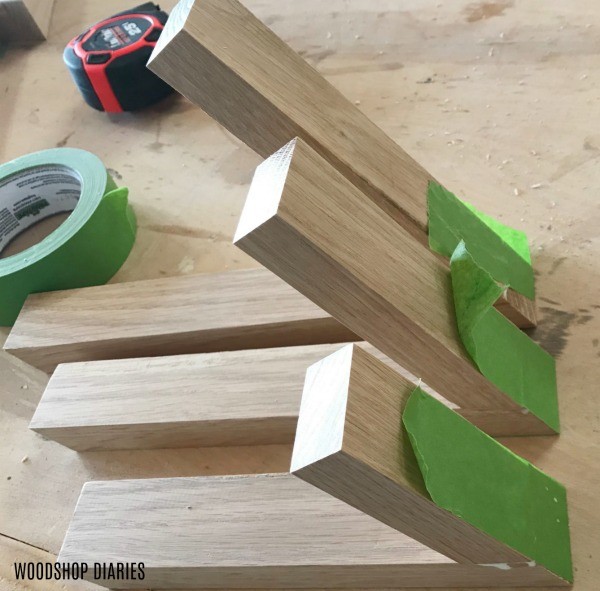
Step 1: Cut 1×2 Boards for Candy Stand Tier Supports
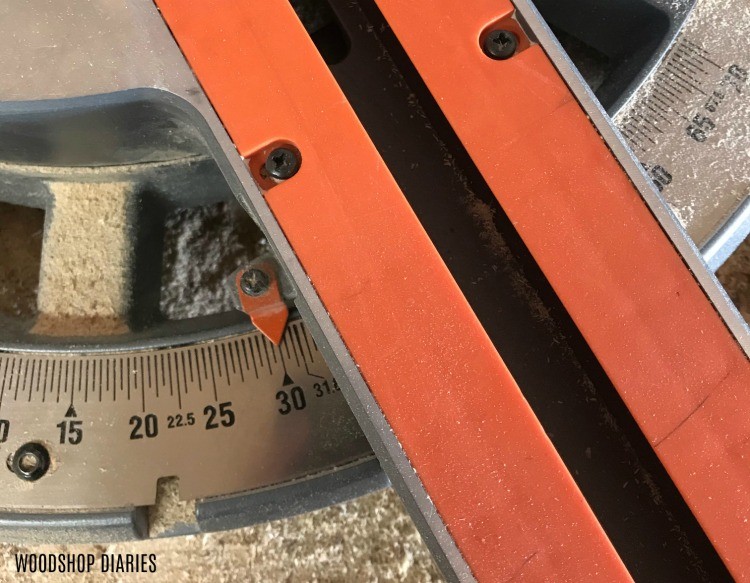
I cut all my angles for this project at 30 degrees and 90 degrees.
First I set my miter saw to 30 degrees and cut all the pieces that needed 30 degree ends.
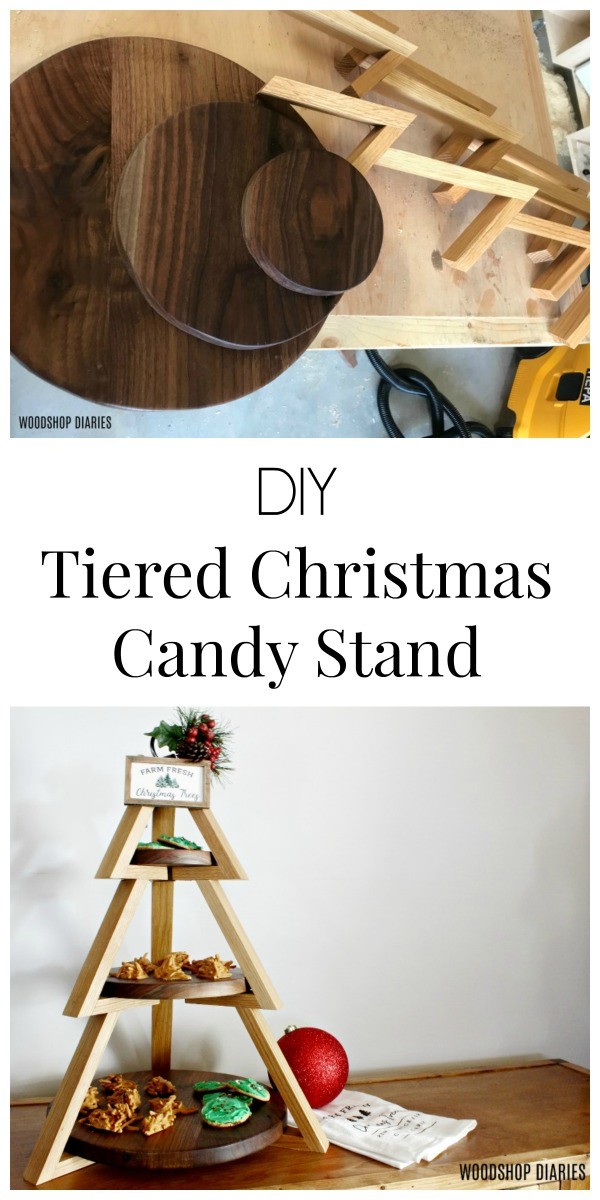
This project has three total supports each made up of three tiers. For each support, I cut six boards as shown.
Three boards (bottom left) with 30 degree bevels on each end parallel to each other.
Prefer printable diagrams? Grab the printable plans with full cut list here.
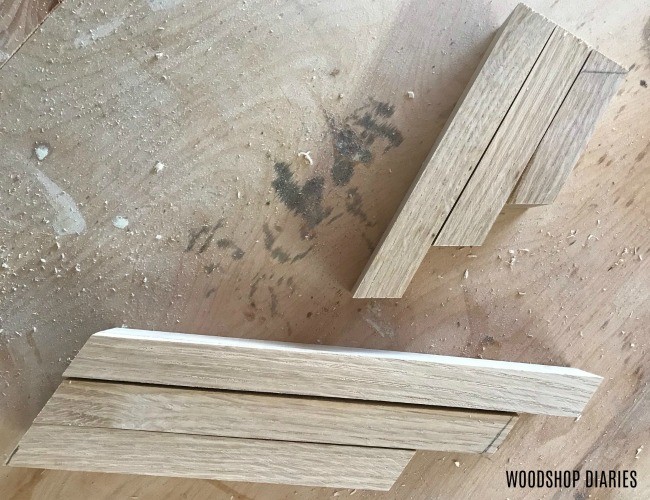
The other three boards (top right) have a 90 degree cut on one end and 30 on the other.
Now it’s ready for glue up!
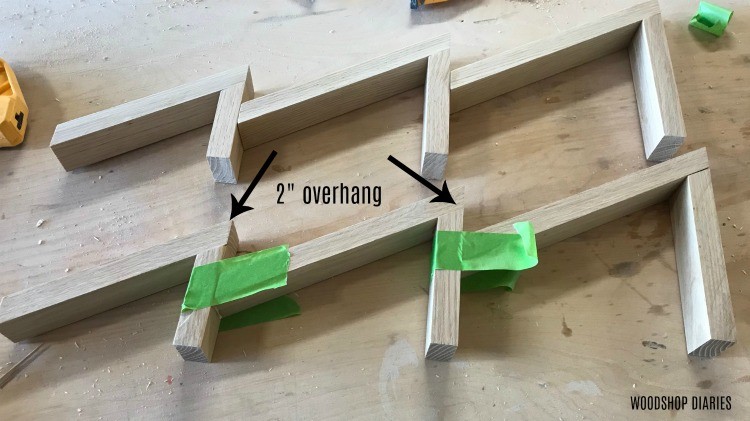
Step 2: Assemble Three Support Tiers for Candy Stand
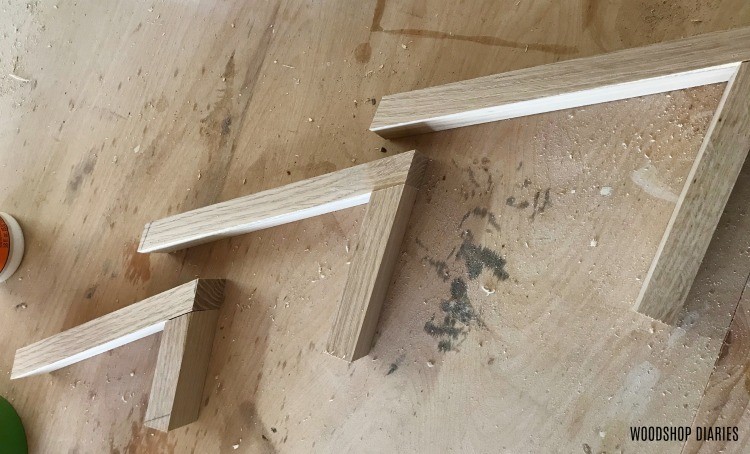
I paired the long pieces, the middle pieces and the short pieces and started gluing them together like shown below.
I used some wood glue and painter’s tape and let the glue dry completely before moving on.
If you are confident enough with a nailer and want to drive a nail or two to hold these together while the glue dries, that certainly would be fine.
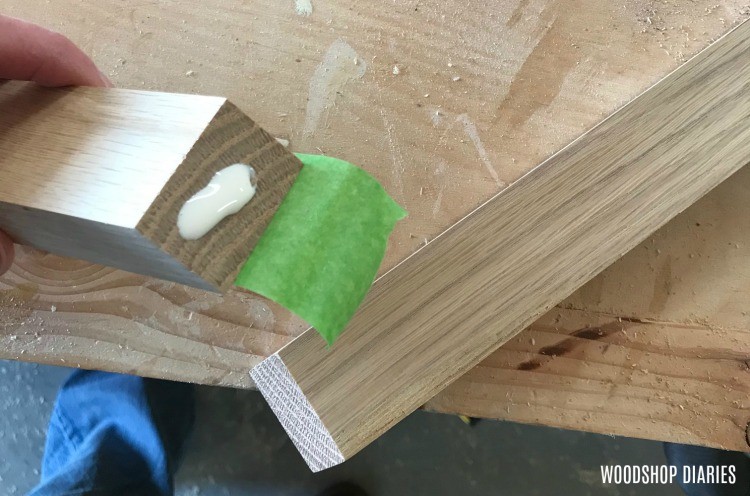
Once the glue dried completely, I removed the tape and sanded off any glue squeeze out.
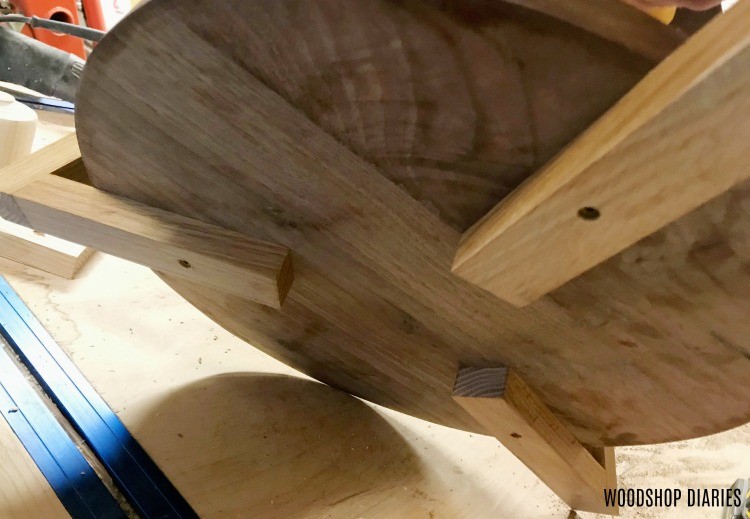
Then I marked about 2″ in from the pointy tips of the short and middle pair and glued these together using wood glue and painters tape again like shown.
I lined them up so that the tops were on the inside of the 2″ marks…so there was a 2″ overhang. There are three sets of these.
Grab the printable tiered tray building plans here.
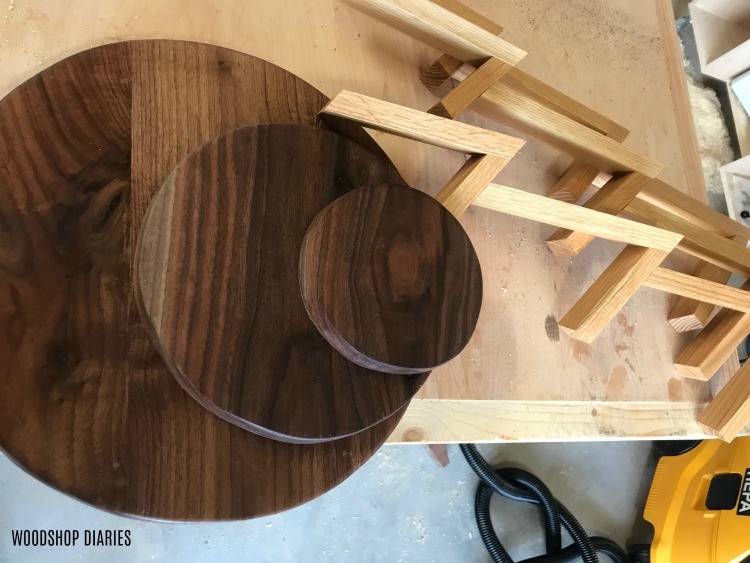
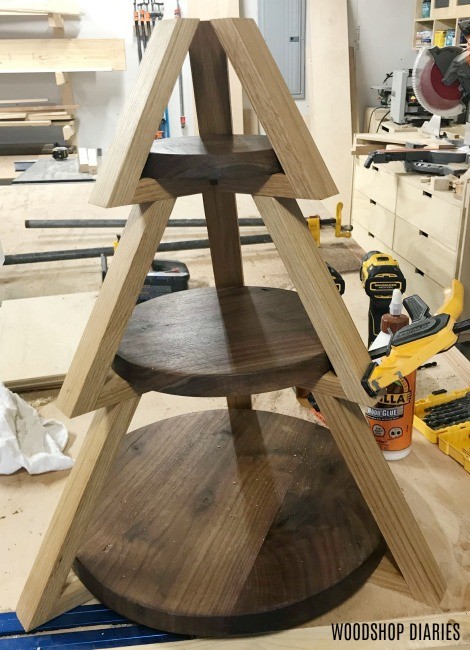
Step 3: Cut Plates for Tiered Candy Stand
I test cut several circles to see what sizes I needed for these plates. I tried this with plywood first and didn’t like the exposed plywood edges.
I decided to go with some walnut pieces for the plates instead.
I cut three round plates for this using my jig saw and ended up with one small, one medium and one large to fit my tiers.
I could have made the middle and bottom slightly larger, but it is what it is and I didn’t want to cut new ones haha.
I had walnut scrap boards large enough for the small and middle plate, but ended up gluing up a couple of boards to cut one large enough for the big plate.
To get my circles traced onto my boards, I found it easiest to find a round object about the size you want the plate and trace it onto the boards then cut that out with a jig saw.
You can also make a simple jig like I used in this round tray project to draw your own circles to the exact size you want.
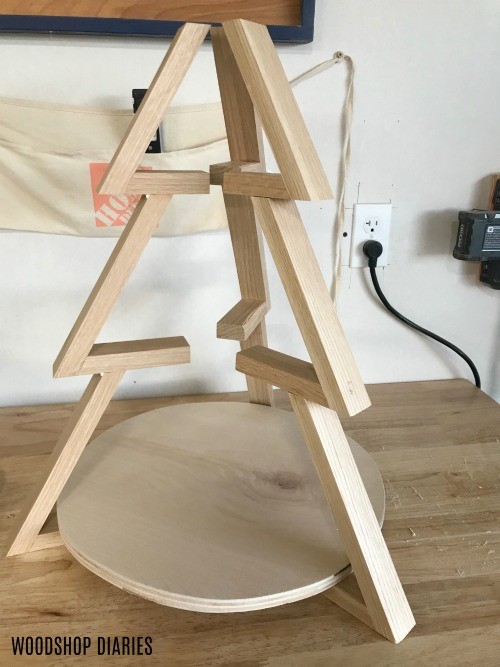
Step 4: Assemble DIY Tiered Candy Stand
Before putting all the pieces together, it’s best to go ahead and finish all pieces. I used a simple food-safe beeswax finish for this.
You could also use a water based poly. Once these are fully cured, they’re usually considered food safe (check with manufacturer to be sure).
Next, I started screwing the pieces together.
I dry fit all the plates in on the supports and arranged the supports so that they looked pretty evenly spaced.
Starting at the top, I predrilled and drove 1 ¼″ wood screws through the bottom side of the supports.

I’d like to say this whole process went smoothly, but I ended up breaking one of the three supports while screwing the middle piece in place.
Whoops.

I went ahead and screwed the second tier in the same way I did the first, and then glued the support back together.
See the clamp in the bottom right?
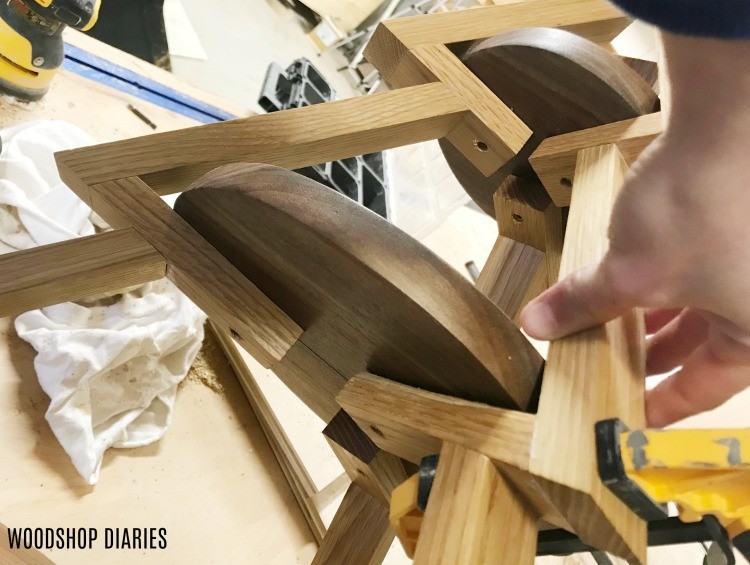
Then I screwed the bottom plate in place and let the glue dry on my broken support.
If you have a 90 degree drill attachment, it would definitely come in handy here.
Also, if you wanted, you could skip screws altogether and use brad nails or just wood glue to secure the plates to the frames instead.
Step 5: Add Top Block and Hardware
I cut a scrap piece of 1×4 and glued it onto the top of the stand just to kind of tie together the loose ends at the top.
Then attached a hitching ring, that I spray painted black, to the top of the block.
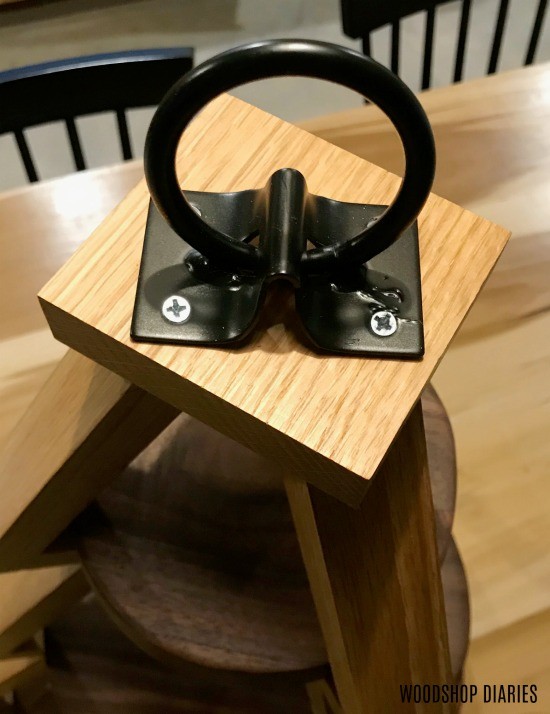
I attempted to super glue the ring in a vertical position and it worked okay for decoration, but probably won’t hold if I actually used the ring to carry the stand.
That’s okay, though…I just wanted it as decoration anyway.
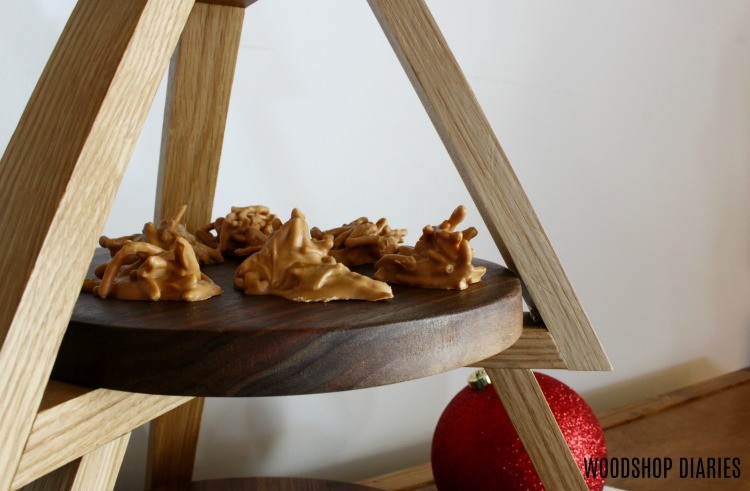
I added some candy, some sugar cookies that Danny made, and a little decoration and she’s all dressed up and ready to head to the next Christmas party.
Or just hang out on my kitchen table so I can eat all the candy 🙂
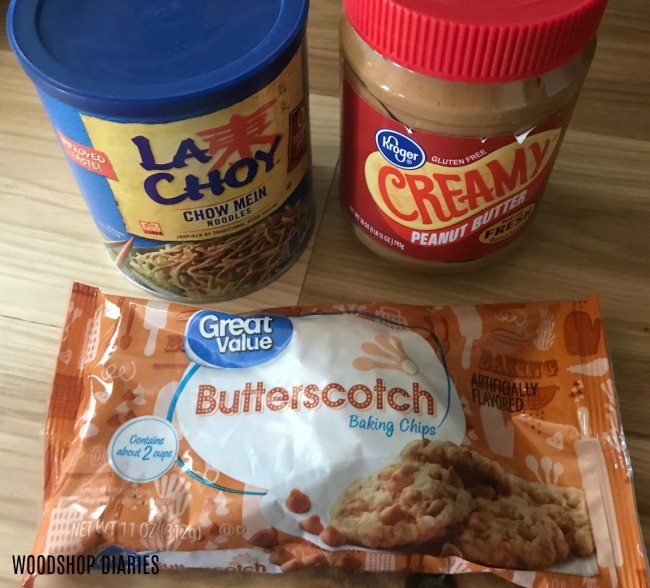
Speaking of candy, I promised I’d share my favorite SUPER EASY 3 ingredient candy recipe with you.
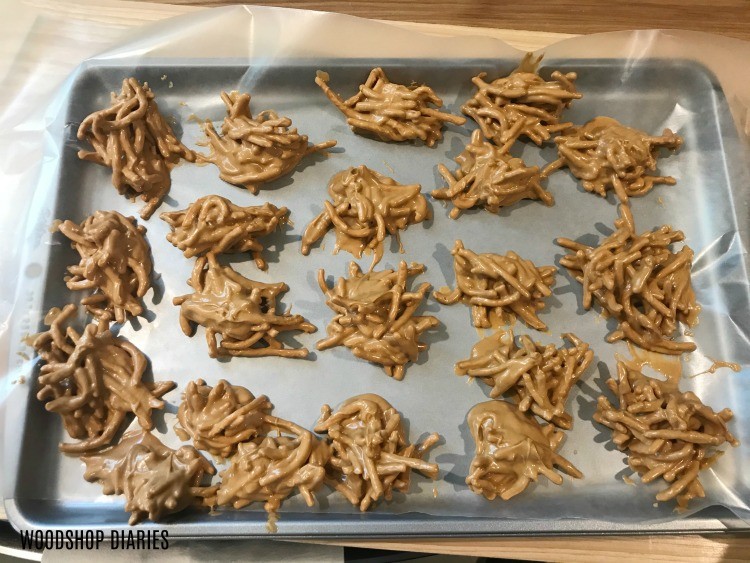
By the way, we call them haystacks.
.
Ingredients:
- 5 oz Chow Mein Noodles
- 1 bag butterscotch chips
- ½ cup peanut butter
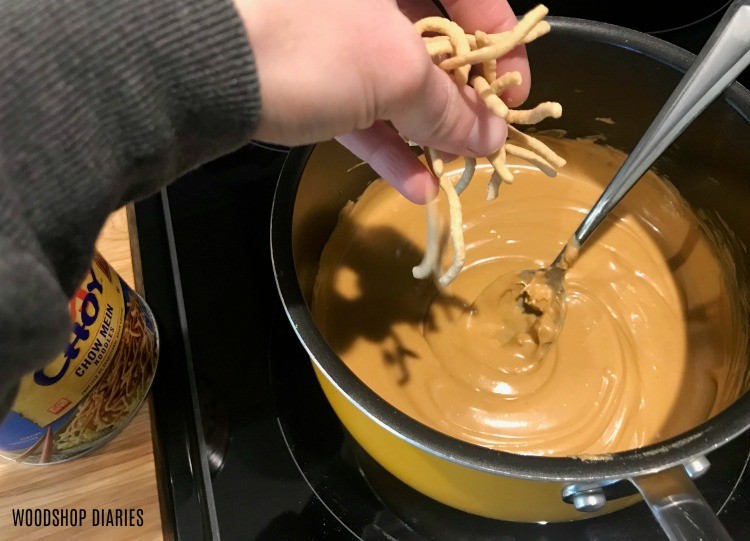
On LOW HEAT (don’t get it too hot or it’ll burn and taste gross), melt the ½ cup peanut butter and butterscotch chips in a medium pot on the stove.
.
Stir and melt until it’s smooth (not lumpy), then drop in a few noodles at a time, stirring to get them covered before dropping in some more.
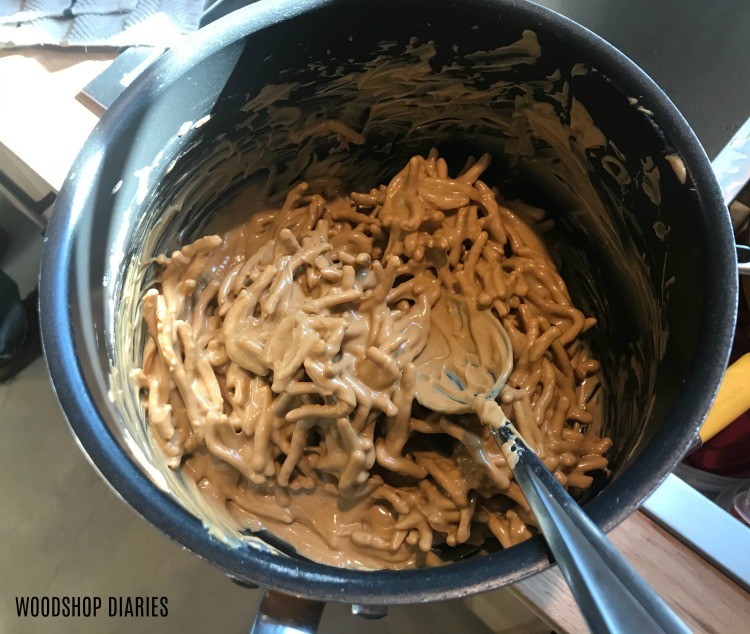
Once all the noodles are mixed in, spoon onto wax paper on a cookie sheet then refrigerate until they’ve hardened.
Then try one….AMAZING 🙂 haha.
And that’s it! An easy way to display your Christmas candies or appetizers, and an easy candy recipe.
Now you’re ready to dive into the holiday season 😉
If you want to check out some other fun holiday projects, here’s a few favorites 🙂

If you enjoyed this project, pin this for later 🙂
Until next time, happy building 🙂

Sheila says
I am going to make this ASAP, thanks so much for the plans. Hope you realize how talented you are.
Shara, Woodshop Diaries says
So glad you enjoyed this project! Thank you so much!
Sheila Igne says
Too cute! I had been looking for a ladder serving tray to make the past few days for the holidays. then this popped up. Thanks for this holiday tip!
Shara, Woodshop Diaries says
So glad you enjoyed it!