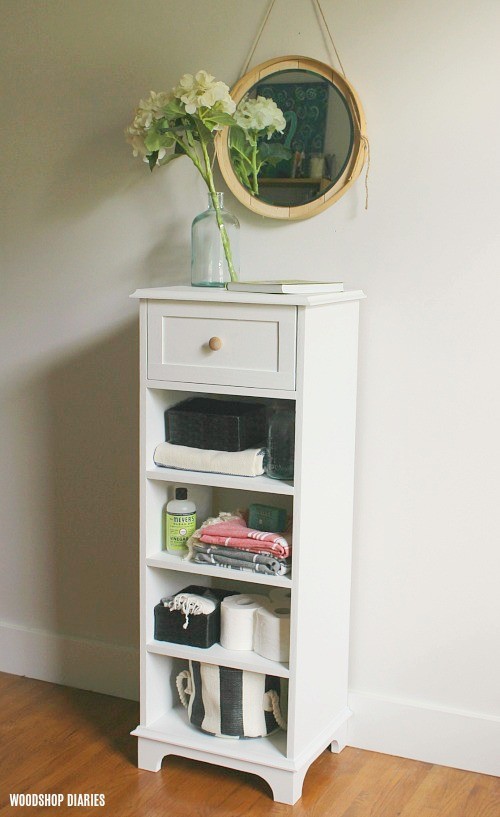
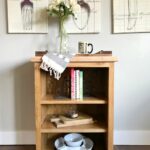
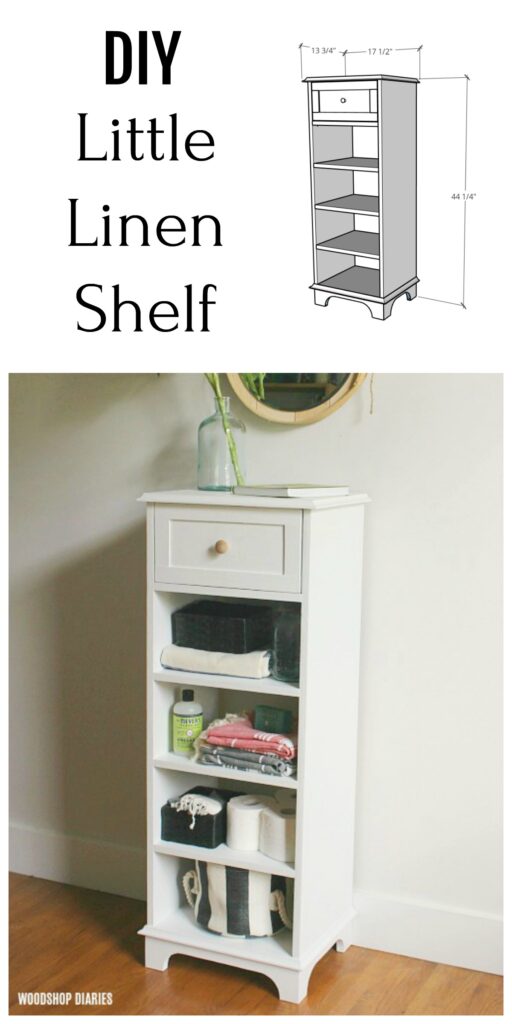
If you haven’t noticed, I love building storage pieces. Many of these storage builds are large armoires or hope chests. But this little linen shelf cabinet is a change of scenery and is a great beginner build that is perfect for adding a little storage to a bathroom or laundry area.
I actually built this a few years ago for a friend, but I wanted to update this post with some better drawings and instructions and re share it with you! So if you don’t recognize the shop space, it’s because it’s my old shop 😉 If you want to take a tour of my current shop, check out my workshop tour here.
.
I’m sharing the FREE plans for this little linen shelf cabinet below, so if you’re ready to get building, let’s get to it!
.
This post contains affiliate links. See policies for details.
.
And if you’re looking for more shelving ideas, these are a few of my favorites!
- One Sheet Plywood Shelf
- Scrap Wood Wall Shelves
- Modern Bookshelf
- Small Simple Bookshelf
- X Base Console Shelf
Tools and Materials to Build Linen Shelf Cabinet:
- (1) sheet ¾″ plywood (you’ll use about ⅔ of the sheet)
- 2’x2′ piece of ¼″ plywood (dig around in your scraps first–you only need a 12″ x 14″ piece)
- (1) 8′ stick ¾″ cove molding
- (1) 1x4x8 board
- Wood Glue
- 1 ¼″ pocket hole screws
- Nail gun and 1 ¼″ brad nails
- Drill
- Kreg Pocket Hole Jig
- Miter Saw
- Circular Saw and Saw Guides (saw guides optional–See this post for how I cut down plywood sheets)
- Jig saw (optional)
Cut List:
For Cabinet:
- (2) ¾″ x 13″ x 40″ plywood
- (5) ¾″ x 13″ x 14½” plywood
- (1) ¾″ x 13″ x 16″ plywood
- (2) 1″ x 4″ x 13″ (beveled 45 degrees on one end)
- (1) 1″ x 4″ x 16″ (beveled on both ends)
- Cove molding cut to fit
For Drawer:
- (2) ¾″ x 5½” x 12″ plywood (for drawer sides)
- (1) ¾″ x 5½” x 12¾” plywood (for drawer back)
- (1) ¾″ x 7″ x 14¼” plywood (for drawer front)
- (1) ¼″ x 12″ x 14” plywood (for drawer bottom)
.
Step 1: Cut Down Plywood and Build Linen Shelf Carcass
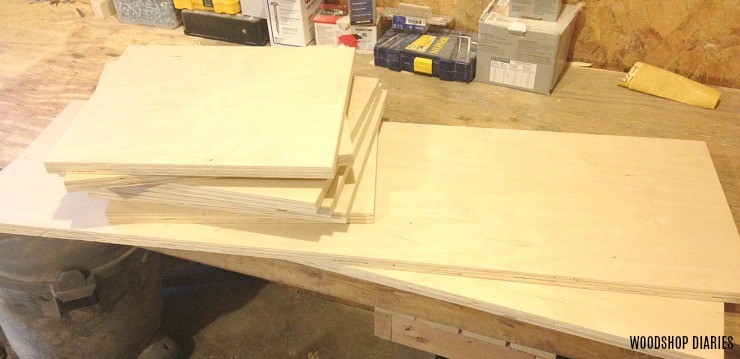
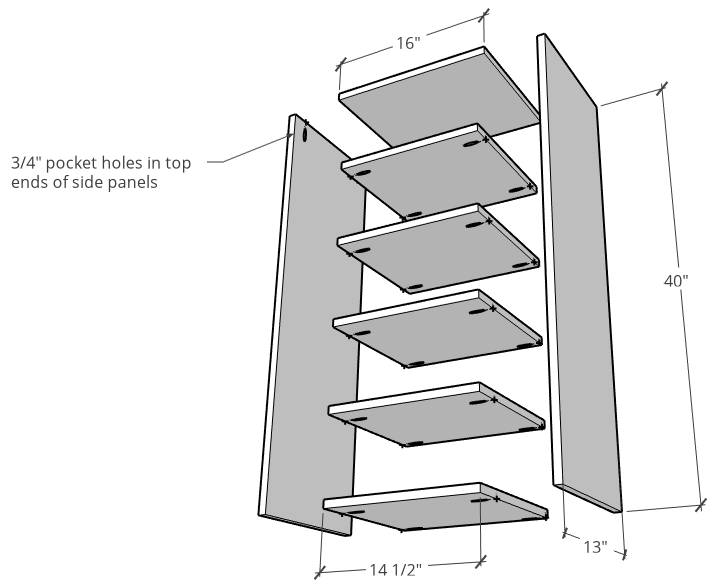
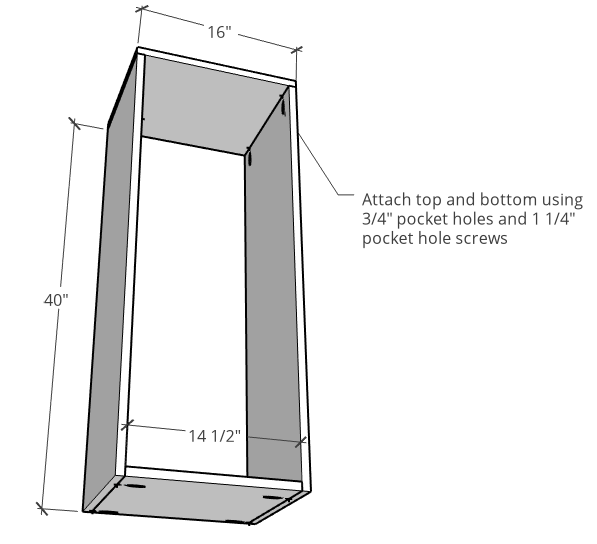
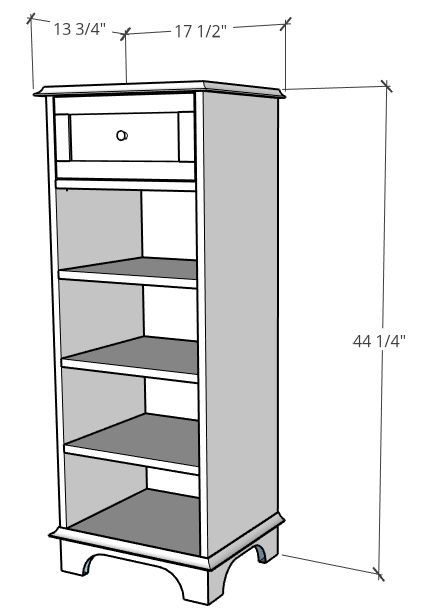
The body of the shelf is all cut from 13″ wide ¾″ plywood. So, I ripped two pieces of 13″ wide plywood from my full sheet and cut two pieces down to 40″ long for the sides, one piece to 16″ long for the top, and five pieces 14 ½″ long for the shelves.
I drilled ¾″ pocket holes into the TOP ends of the sides and into both ends of the 14 ½″ long shelves.
Then, I assembled the shelf carcass like shown using wood glue and 1 ¼″ pocket hole screws through the pocket holes.
Step 2: Add the Linen Shelf Cabinet Shelves
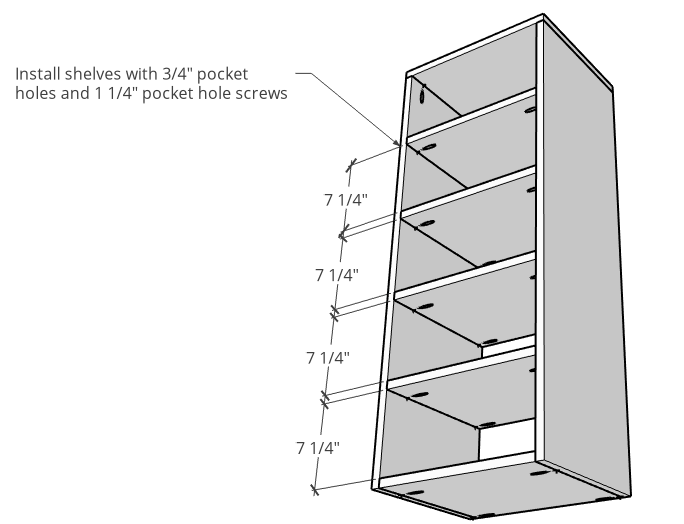
I installed four shelves into the cabinet like shown using ¾″ pocket holes and 1 ¼″ wood screws. I spaced these out evenly, but if you wanted to leave out a shelf or space differently, that’s totally fine as well.
Step 3: Add Decorative Base to Linen Shelf
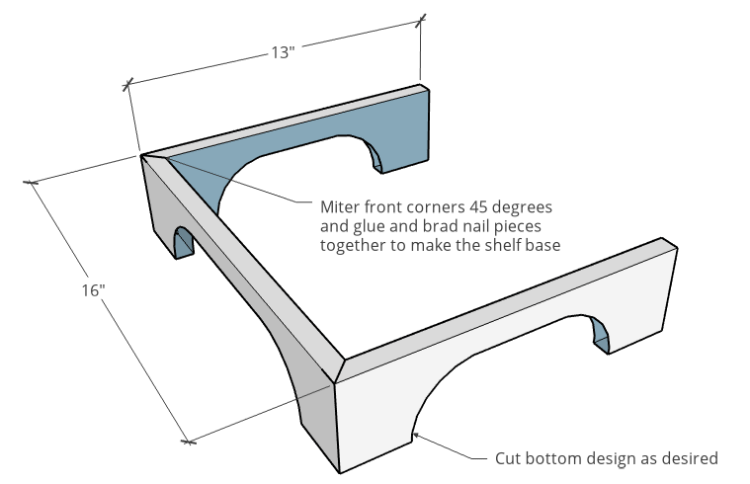
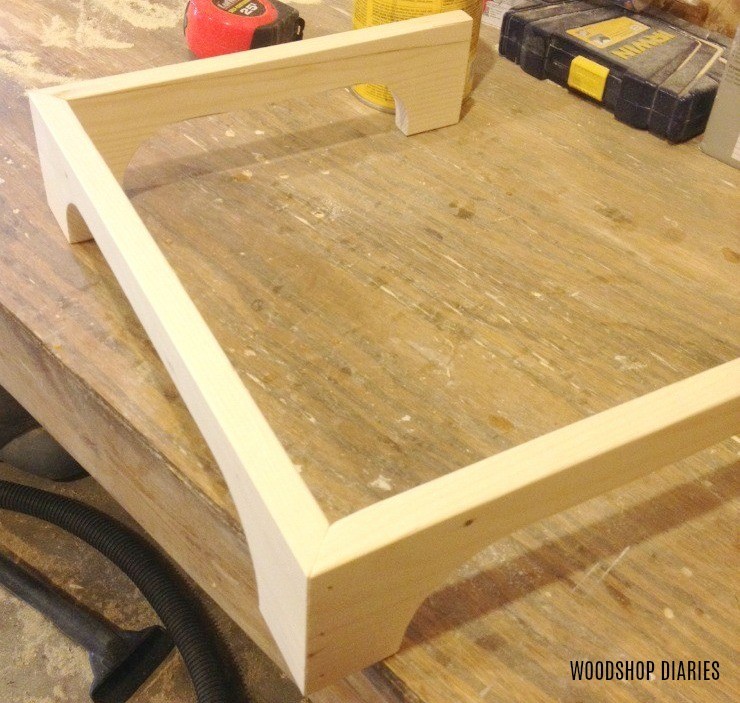
This step is optional, but I really liked adding this simple little decorative base to this piece. I used a 1×4 and cut like shown (one 16″ piece and two 13″ pieces), mitering the front corners at 45 degrees.
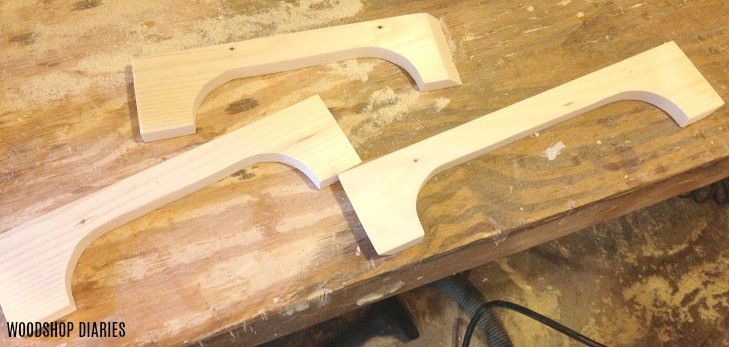
Before gluing and nailing together at the corners, I cut a little decorative design along the bottom. I actually used a stain can to trace the curves, then connected a straight line between the peaks…but you can draw this out and cut it however you think easiest. Once I had my design traced on it, I used a jig saw to cut it out.
Then I glued and brad nailed the corners.
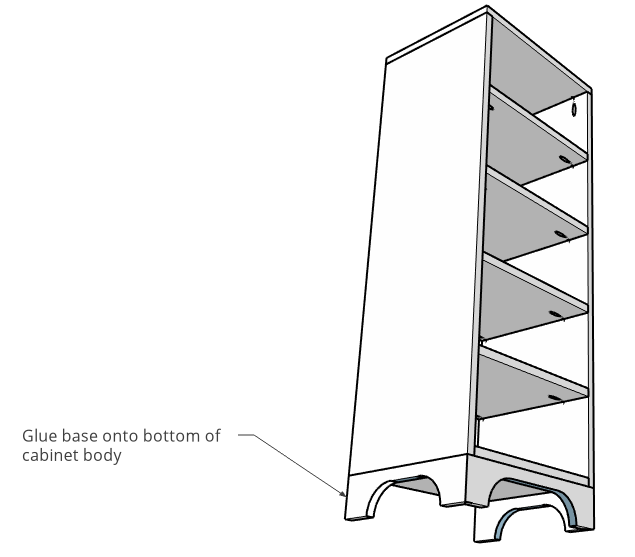
Once the glue dried, I flipped the cabinet upside down and glued this base onto the bottom of the cabinet.
Step 4: Add Decorative Cove Molding
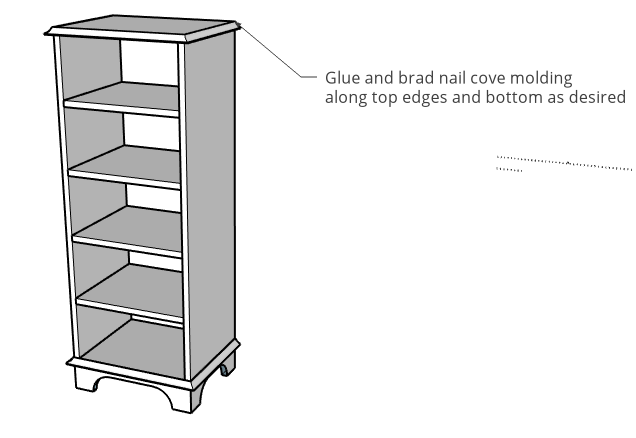
This is another optional step 🙂 But to cover the plywood edges on the bottom and to blend in the glue joint between the base and the shelf, I attached some ¾″ cove molding along the top and bottom like shown. I mitered the corners 45 degrees on this trim.
Step 5: Build and Install Drawer Box into Top Shelf
Finally, I added a small drawer in the top. I have a really detailed tutorial for how to build a drawer, but since this is just a tiny, little drawer in the top of the shelf, I skipped using drawer slides and just made it a pull out drawer. Feel free to make it whichever way feels right to you haha.
.
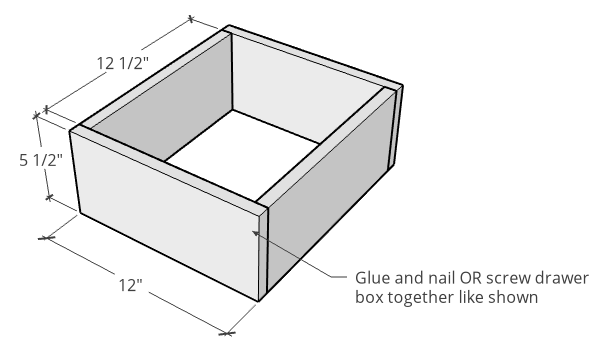
For this project, to keep things simple, I just cut some plywood (or you can use 1×6 boards) and glued and nailed them together like shown to make the drawer box.
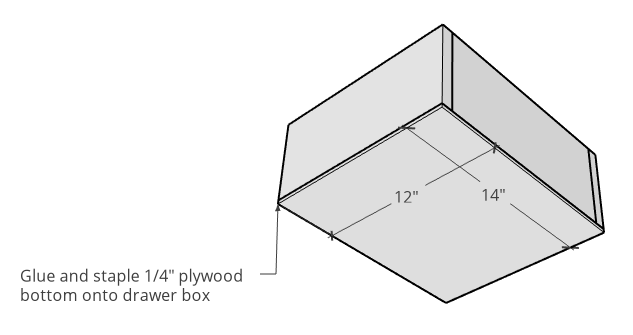
Then, I glued and stapled a piece of ¼″ plywood onto the bottom of the drawer box.
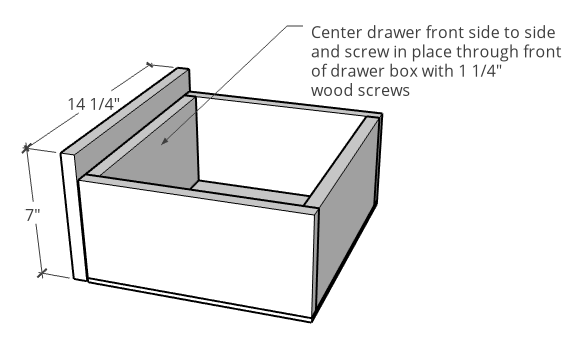
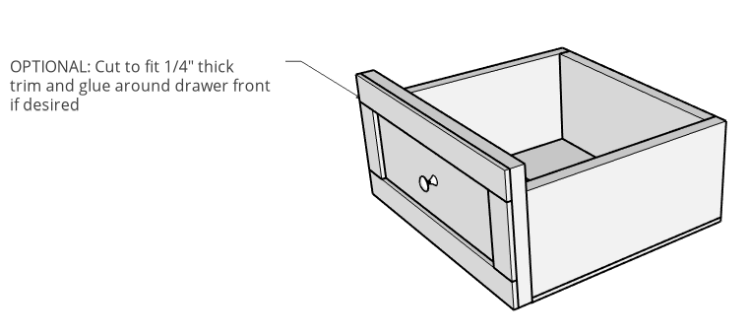
I cut a piece for the drawer front and screwed it in through the front of the drawer box. To give it a little extra detail, I also cut to fit and glued some ¼″ thick x 1 ½″ wide trim around the front of the drawer.
The box should slide into the top section of the shelf and have a little wiggle room on each side. Since it’s not on slides, it is possible to pull the drawer all the way out and it will tilt down when pulled out. But since it’s just a little drawer, I was okay with that.
But, again, if you want to use slides, be sure to check out this drawer building and drawer slide guide to help you build it using slides instead.
And that’s it…give it some paint, or stain and a little knob on the drawer and it’s ready for use! I really loved this project–years ago and still today. It’s just a quick and easy build perfect for a tight space.
.
I really hope you enjoyed this fun little project and if you want to save it, be sure to pin this for later 🙂
Until next time, happy building!!


