
Can I be honest for a second? I really hate football. It’s not that I hate the game, or the players, or the coaches. I just hate that you run the ball for 5 seconds and it’s 30 more seconds before the next play. And I’m REALLY impatient. Guys, what takes that long? GET ON WITH IT ALREADY!!!! I just can’t deal.
.
On a semi-related note, do you guys ever watch the Bad Lip Reading videos on YouTube? The football ones CANNOT BE BEAT. So there is that.
.
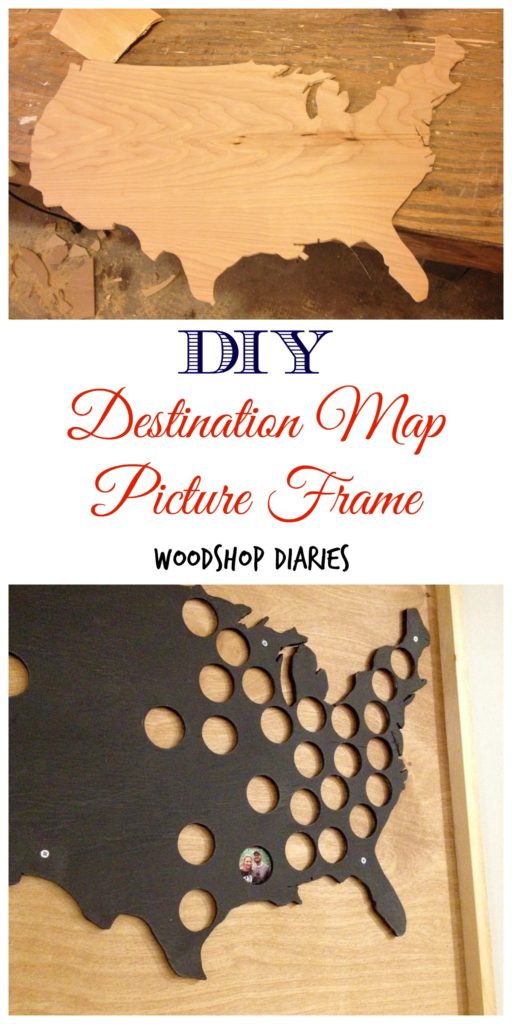
But, why am I talking about football? Well, because sometimes you have a friend who likes football (she’s obviously got more patience than me) and she wants a map of all the stadiums so she can put pictures of all the ones she’s been to in it.
.
Which…that’s kind of a really cool idea. So even though you (I) don’t like football, you (I) go with it because how cool is this?
.
And I’m going to be honest again, I have no idea what you would call this thing. A destination map picture frame thingy? Sounds good to me. Someone is TOTALLY going to search that exact phrase on Pinterest, I just know it.
.
But, what if you’re just like me and hate football? This idea can be used for just about ANYTHING…not just football (phew, that’s a relief, right?). Vacation destinations, family members who live all over, places you’ve lived previously, or even basketball stadiums (because basketball > football #sorrynotsorry). The possibilities are endless!
.
Ready to make one?? Great 🙂 You can make this as just the U.S. cutout alone, or you can also add a back and frame like I did. The backing and frame is optional.
.
This post contains affiliate links for your convenience. If you purchase from one of these links, I may receive a small commission at no extra cost to you. This helps to pay for the cost of maintaining the site and keeping the content free. Thank you for supporting this site! See disclosure policy for more information.
.
What you need to make a Destination Map Picture Frame thingy:
For the cutout only:
¼” plywood (I made my map about 2 ft wide and bought a quarter sheet)
Jig Saw (or scroll saw)
Boring bit or hole saw (I used 1 ⅛” holes)
Sandpaper
Dremel tool (helpful for sanding)
Orbital sander (helpful, not necessary)
Stencil (I made mine from regular printer paper…details below)
.
For the backing and frame:
¾” plywood (optional for mounting to-quarter sheet is plenty)
1x2x8 (optional—used to make outside frame)
Miter Saw (only needed if using 1x2s for frame)
Nail gun, or 1 ½” screws, or hammer and nails (if using 1x2s on frame)
Create your stencil
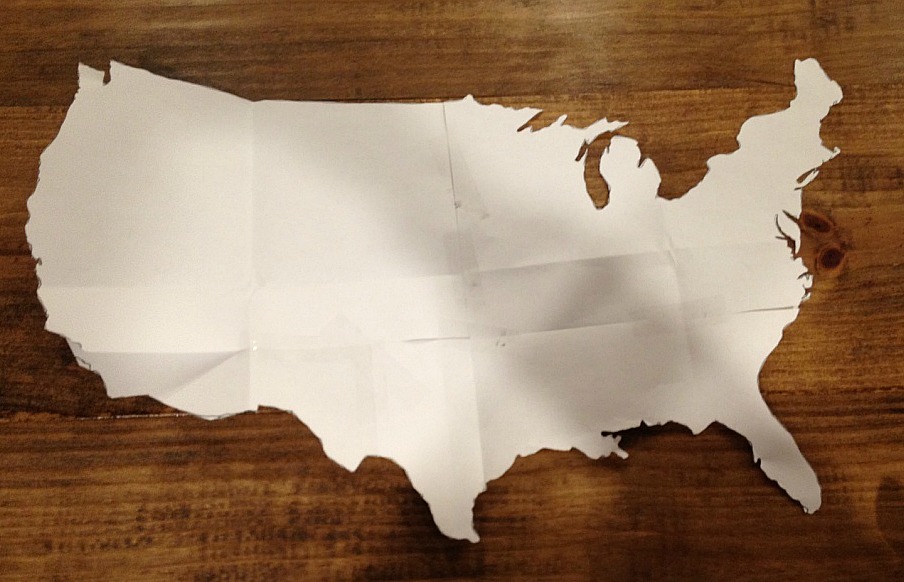
You can probably purchase stencils, but I used the same method as I used with the Grinch Pillow project (because I’m cheap) to get a stencil of the United States. By the way, you can do individual states, countries, whatever for this.
.
I found a picture online of the country and sized it as needed to get it to be about 2 ft wide. I traced it onto printer paper from my computer screen (it took a couple sheets) just like in this post. Then I cut it out carefully. And there I had my stencil!
 .
.
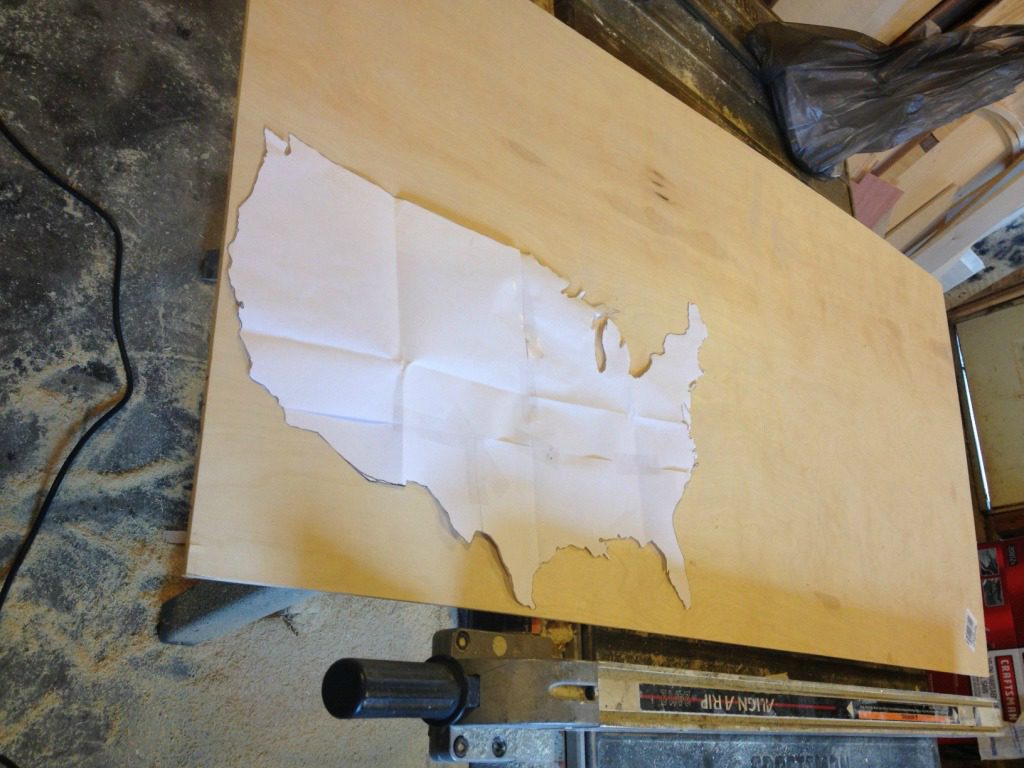
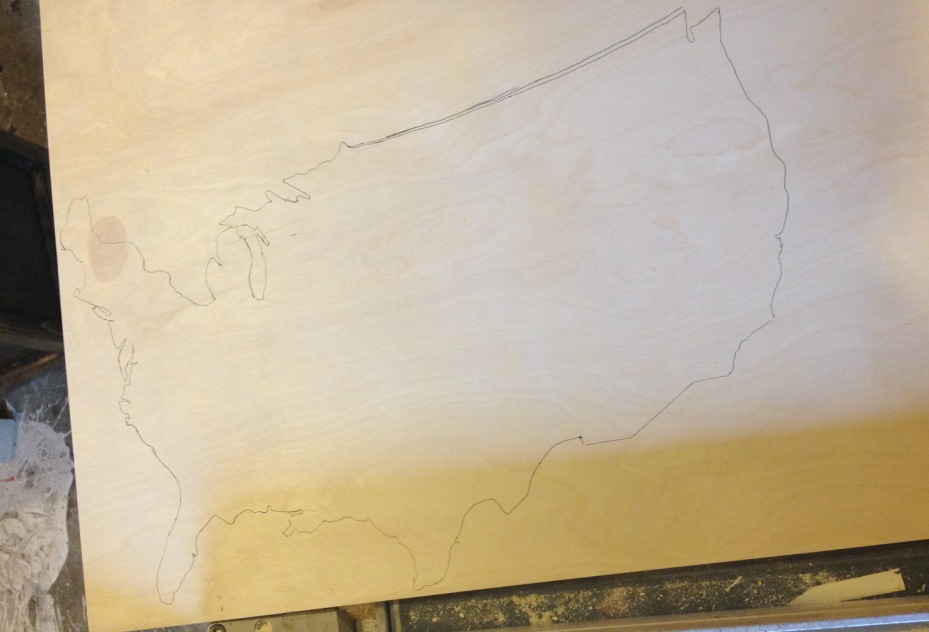
Cut out the shape
Now that I had my stencil, I traced it out onto ¼” plywood with a pen. (Yes, I know the that in second picture the drawing is mirrored…my bad.)
 .
.
I used my jig saw with a scroll blade for careful cutting to cut out the shape. Go slow and be careful. If you are good with a scroll saw, you could use that instead. I still need A LOT of practice on my scroll saw (I’m pretty much the worst at it), so I just used the jig saw.
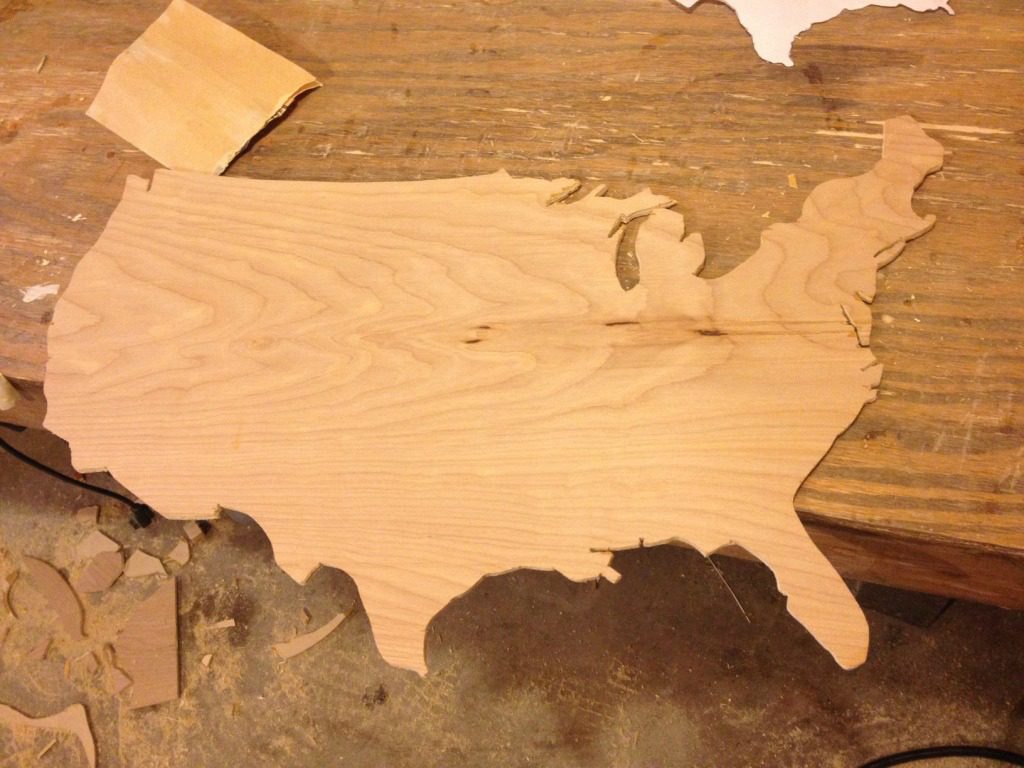
Once it’s cut out, the Dremel tool with the little sanding attachment makes the edges pretty smooth.
Map out and cut your holes
Here’s where it might get hairy (oops, I forgot to mention a razor in the list of supplies! Just kidding…no shaving required for this project.). Depending on what you are mapping, you may have trouble getting all your holes to fit. With my football example, I mapped on my stencil where all the stadiums were. 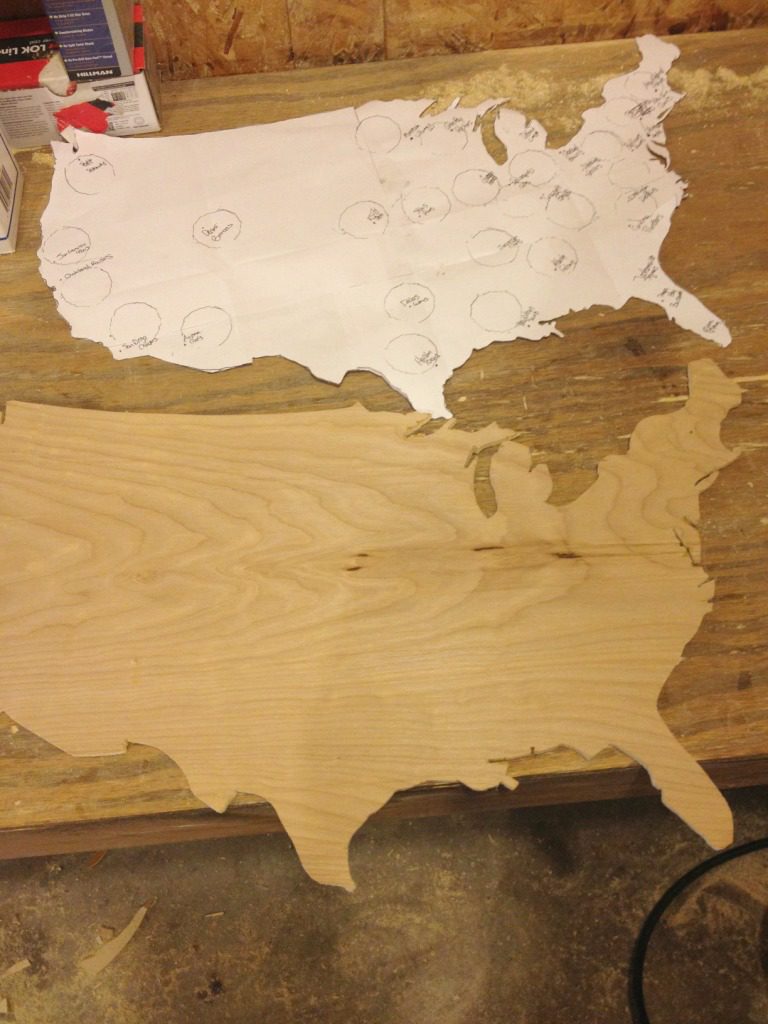 Since most of them are along the east coast, the holes are pretty close together. My only advice is to be as careful as possible to place the holes where they won’t overlap. Go slow.
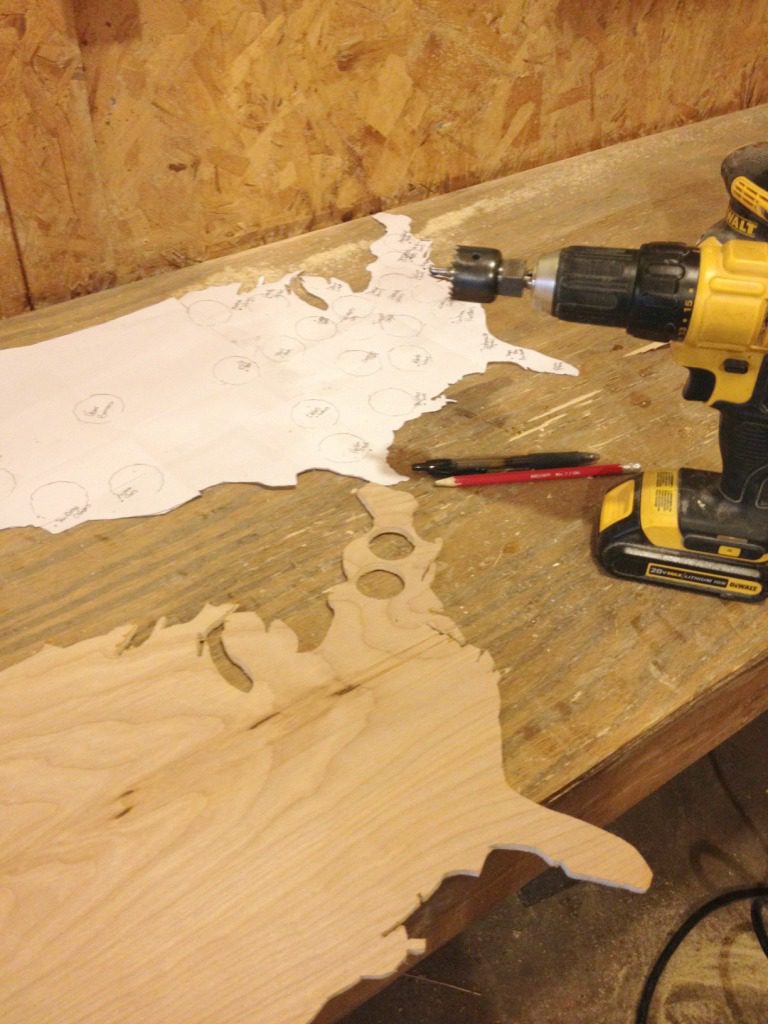
I used a 1 ⅛” hole saw to cut the holes. It took a while, but once the holes were cut, I sanded them really well with the Dremel tool again.
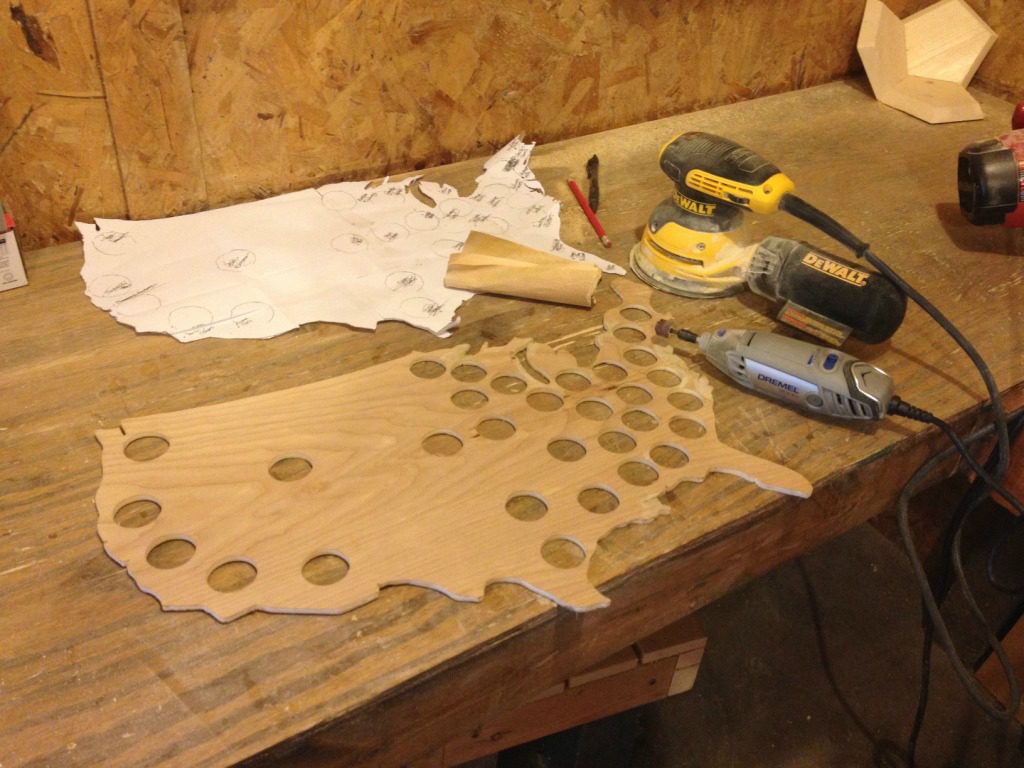
I accidentally sanded a little too far on one hole close to the edge and it broke.
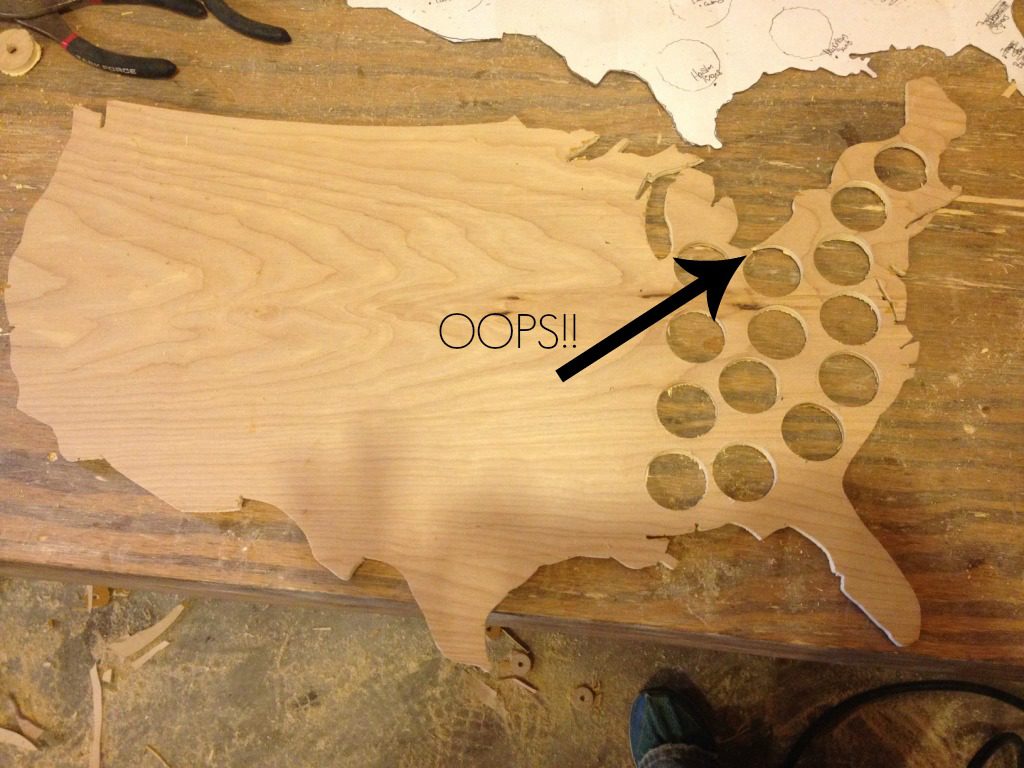
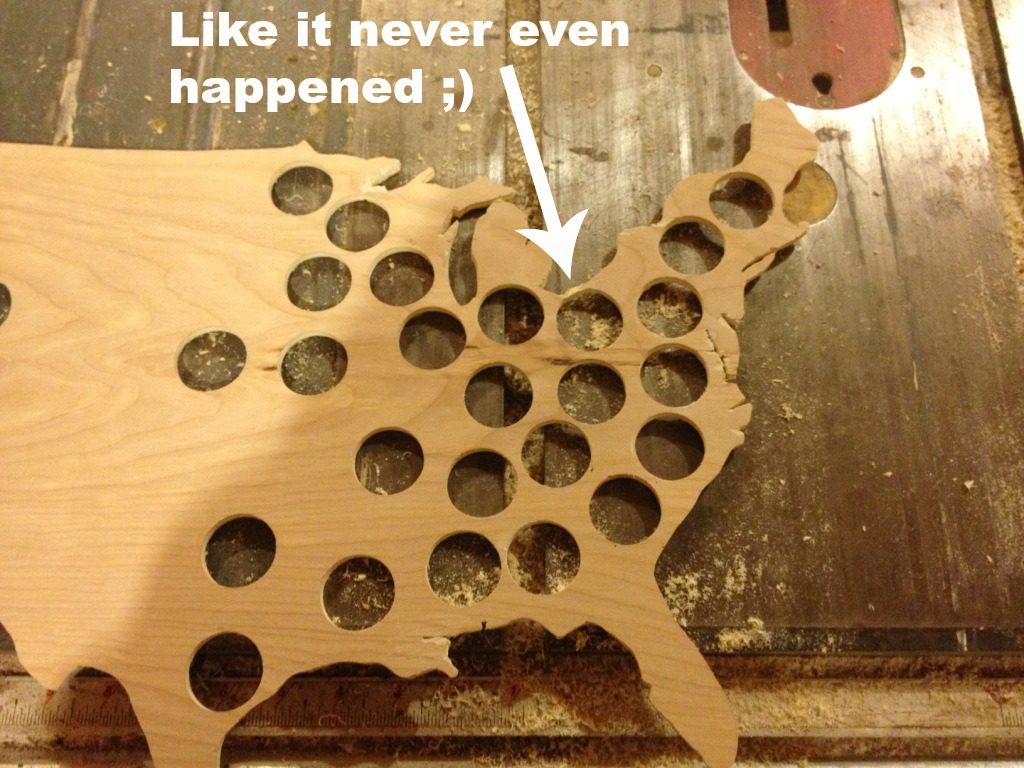
If this happens to you, you can mix a little glue and sawdust and “mold” it in to fill the gap and let it dry really well. Then carefully sand around it with the Dremel again. Good as new 🙂
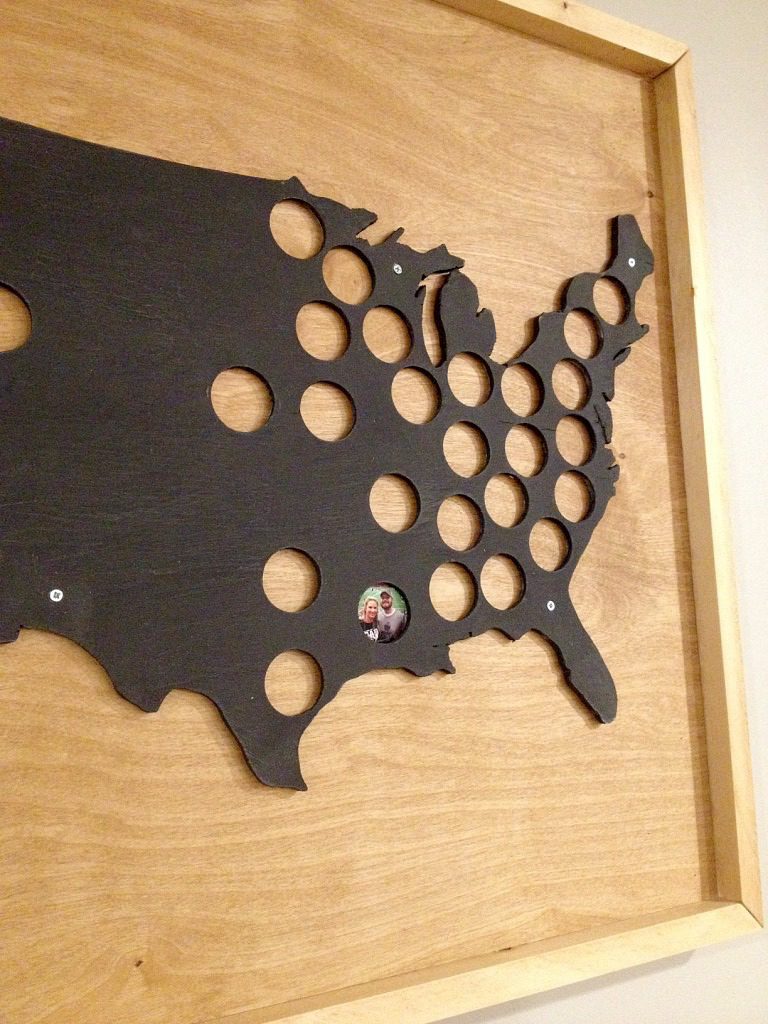
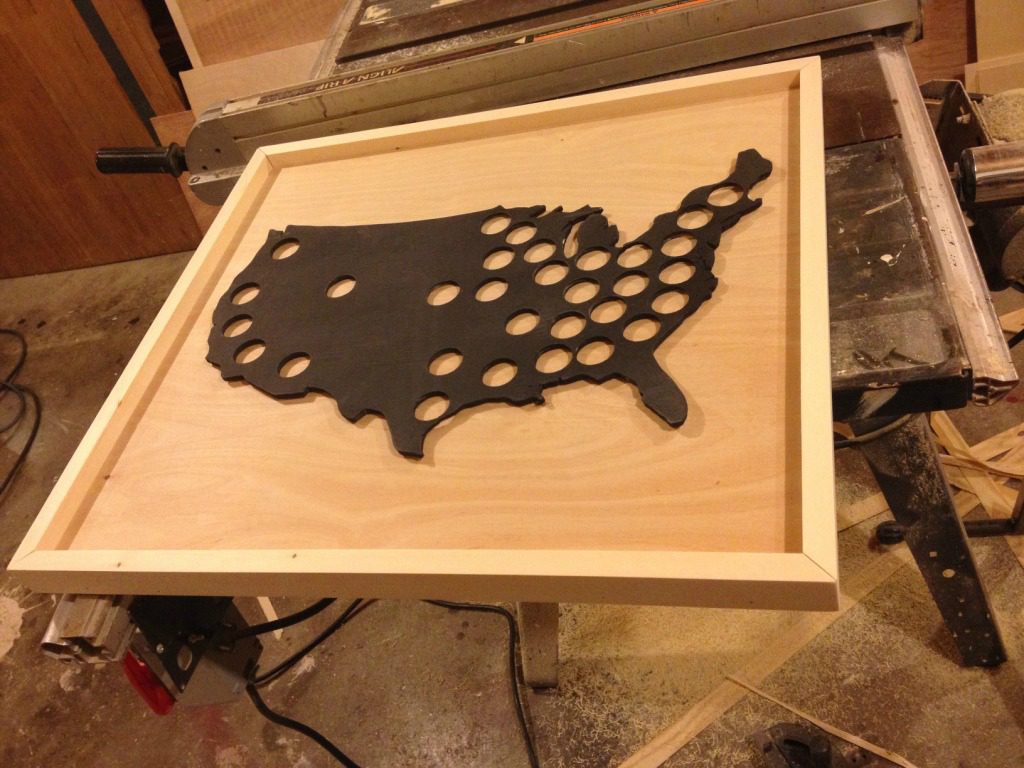
Build the Backing and Frame (Optional)
For the backing, I simply cut a piece of ¾” plywood large enough for the cutout to fit on it. I used my circular saw for this. Then I cut some 1x2s with mitered ends (45 degrees) to fit along the edge of the plywood. I nailed it on with a nail gun, but you could also screw them in with 1 ½” screws, or use a hammer and nails. You can see this post for more details on making a similar frame.
Finish
I spray painted the cutout black and stained the backing with Minwax Puritan Pine. Once everything was dry, I used some small screws to attach the cutout and slipped a few pictures in place. Each year she plans to visit a new stadium and add a picture. It would be fun to make one and watch it fill up with memories pictures. Let’s not go getting all sentimental and stuff.
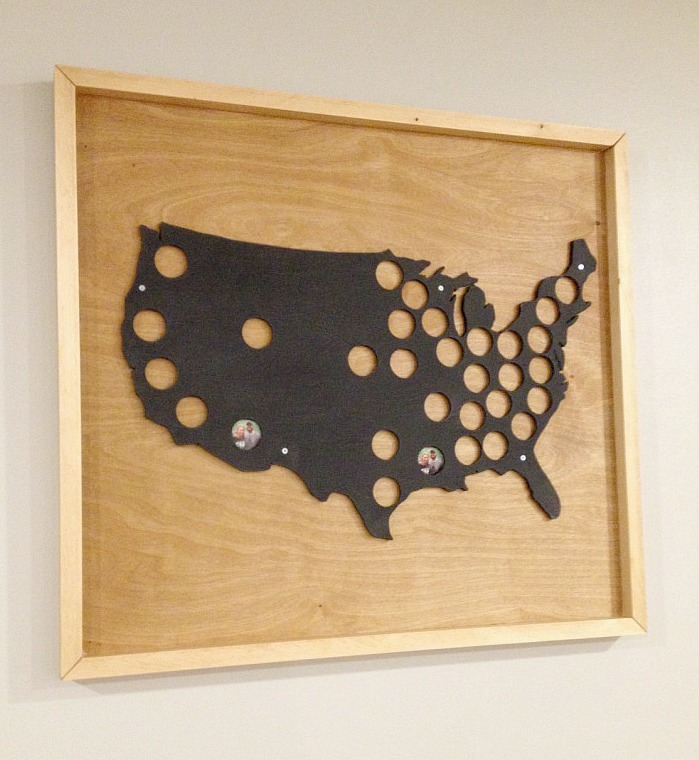
If you didn’t do a backing, you could simply glue or tape the pictures on the back. With the backing, you can just slip the pictures in place and the screws hold it tight so it doesn’t fall out.
.
I also suggested to my friend that when she starts putting pictures in those east cost places, to cut it fairly small, then once it’s placed in the right hole, use an exacto knife or a pocket knife to carefully cut the picture out of any holes it might spill into.
.
So what do you think? Is this something you’d try? Also does anyone have a term for this? Something better than “destination map picture frame thingy”?? HAHA
.
Because no one will be searching for that on Pinterest, do me a favor and pin it for me so people out there can see it 🙂
Stay tuned for more fun projects I’ve got in the works in the next couple weeks! Until next time, happy building!

[…] is exactly the same as the backing I made for the U.S. Destination Map Frame, except a different size. You can use 3/4″ plywood, or cut a 1×10, or a 1×12 for […]