In this post, I’m sharing how to build a rotating puzzle board with drawers!
I love jig saw puzzles. But, there never seems to be a good place to work on one where it isn’t in the way.
I really needed a dedicated surface…but one that was also mobile so I could easily put it away when not in use.

I had seen some neat puzzle boards online, but they were a bit pricey. So I decided to build my own from plywood scraps! It’s got four drawers to store the loose pieces, and can easily slide under the couch, under the bed or under the table and out of the way.
Plus, it rotates on a lazy susan!
This puzzle board is such a fun project to build, but even more fun to use, and I’m excited to share how to build it below!
*This post contains affiliate links. See website policies.
What to consider before building
This project was built entirely from plywood scraps. However, if you’d like to trade some of the plywood pieces for solid wood, you can.
This really is a great scrap plywood project because it needs a small amount of each: ¼″, ½″ and ¾″ thick material.
But, if you prefer to use solid wood, swapping the framing in step 1 and the trim in step 3 for solid wood pieces (cut to the same size, of course) is fine.
But, if you swap the ½″ plywood drawer trim in step 2 with solid wood, it’s important to ensure the overall height of the drawer is less than the height of the framing used in step 1. The drawers must be able to slide into the “cubbies” of the puzzle board.
NOTE: Plywood thickness is nominal. Typically, ACTUAL plywood thickness is slightly under the nominal value (different grades and brands may vary slightly). So ¾″ plywood may actually be closer to 23/32″. And ½″ plywood may be closer to 29/64″, etc. THAT IS OKAY–in this case, that actually works out for the best.
The main thing to make sure of before building is that your your ¼″ and ½″ plywood stacked together is thinner (even just barely) than your ¾″ plywood.
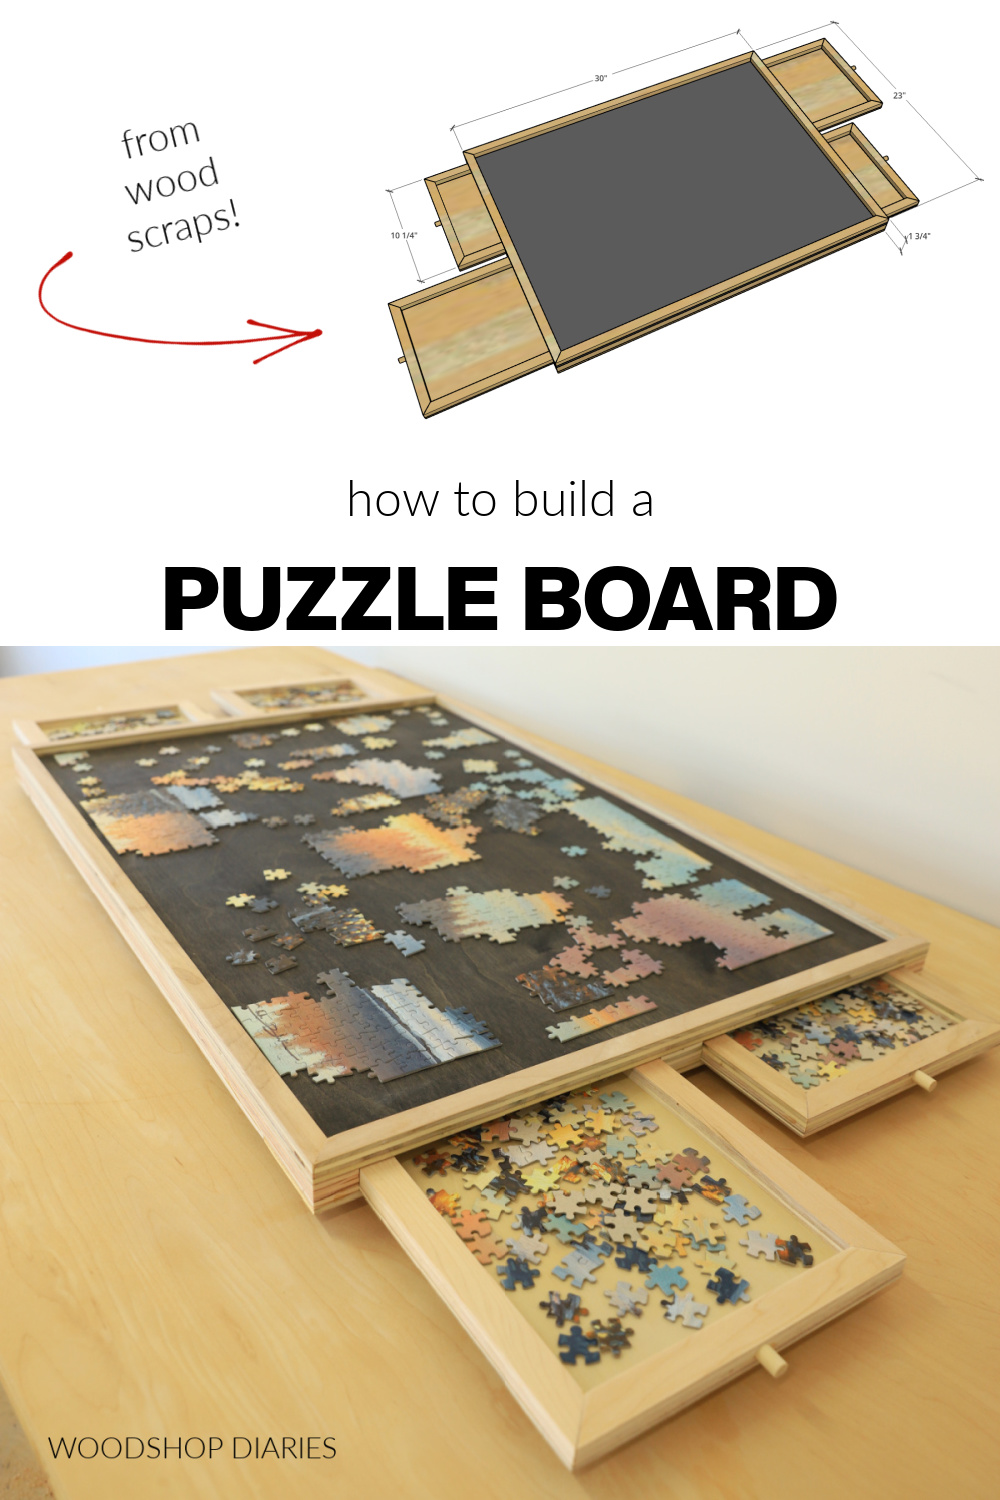
Overall Dimensions
I built this puzzle board to fit MOST basic 1000 piece puzzles. You can adjust the sizing for a larger puzzle if desired.
As is, this puzzle board ended up being about 23″ deep x 30″ wide x 1 ¾″ tall (not including the Lasy Susan hardware).
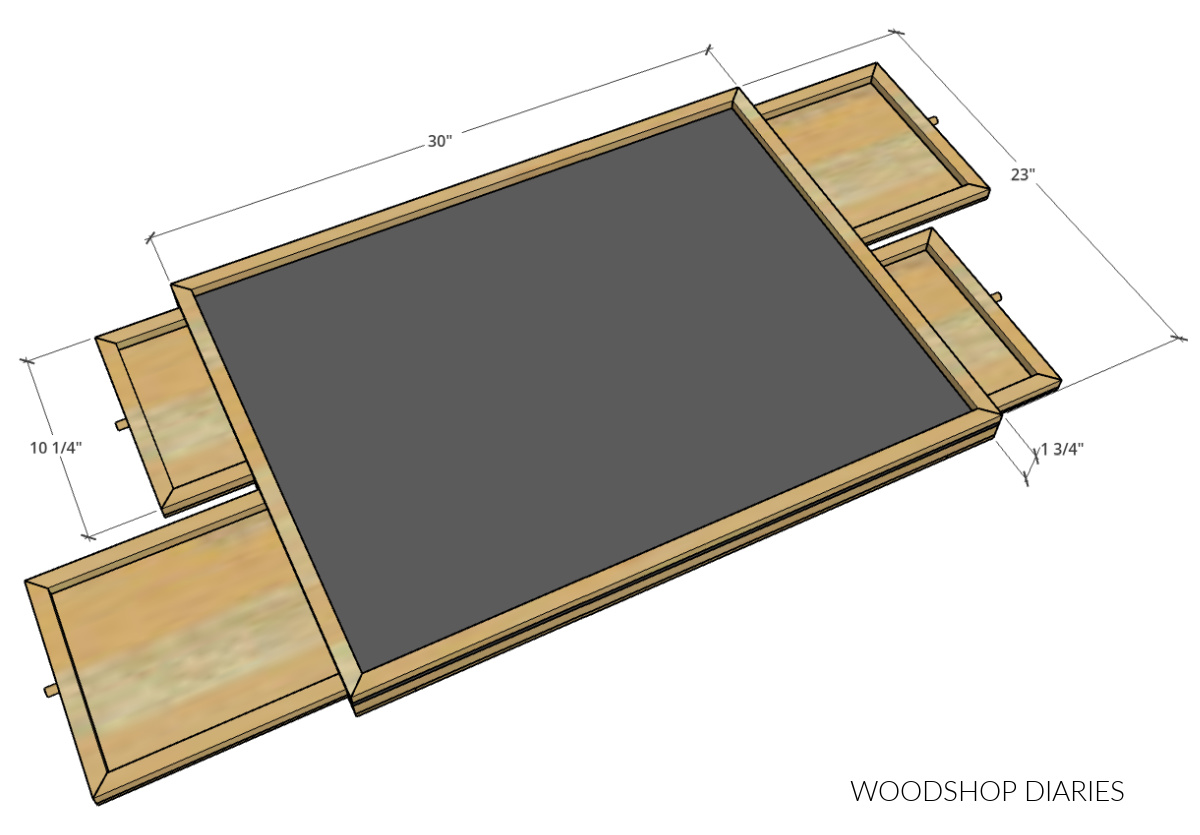
This can fit puzzles up to 21 ½″ x 28 ½″.
Enjoy DIY projects and woodworking plans? Sign up for priority access for the latest posts on Woodshop Diaries!
How to build a puzzle board with drawers
If you prefer to watch, here’s a quick video tutorial, but I’ve also got the step by step instructions below.
Love watching how-to videos? Subscribe to my YouTube channel for plenty more where that came from!
Prefer to print? Grab the printable puzzle board building plans available here:
Tools & Materials
Tools:
- Miter Saw
- Table Saw
- Brad Nailer
- Clamps
- Drill
Materials:
- (1) 4’x4′ sheet ¼″ plywood
- (1) 4 ½″ x 30″ piece of ¾″ plywood (or solid lumber–see notes)
- (1) 9 ½″ x 34″ piece of ½″ plywood (or solid lumber–see notes)
- ⅜″ dowel rod (only need 4″)
- Wood Glue
- 1″ brad nails
- Large 12-16″ lazy susan (optional)
Step 1: Assemble Puzzle Board Frame
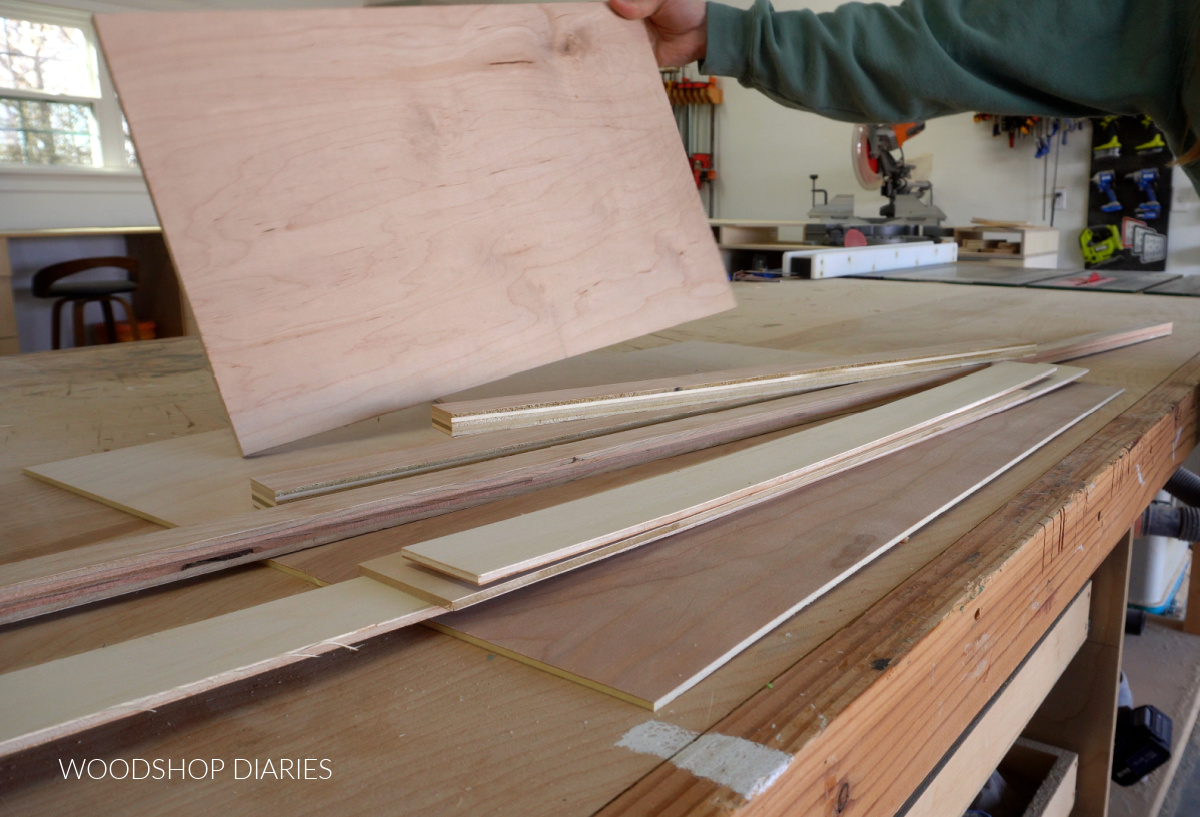
First, I cut a piece of ¼” plywood to the size I wanted my puzzle board top. You want to make sure this is a couple inches bigger than the size of the typical puzzles you like to work.
Then, I trimmed some ¾” plywood strips to make the framing. I already had some thin strips of plywood for this, so I just trimmed these to length, but in hindsight, I wish I’d trimmed these a little narrower to be able to make my drawers larger.
So I’ve adjusted this in the printable plans here.
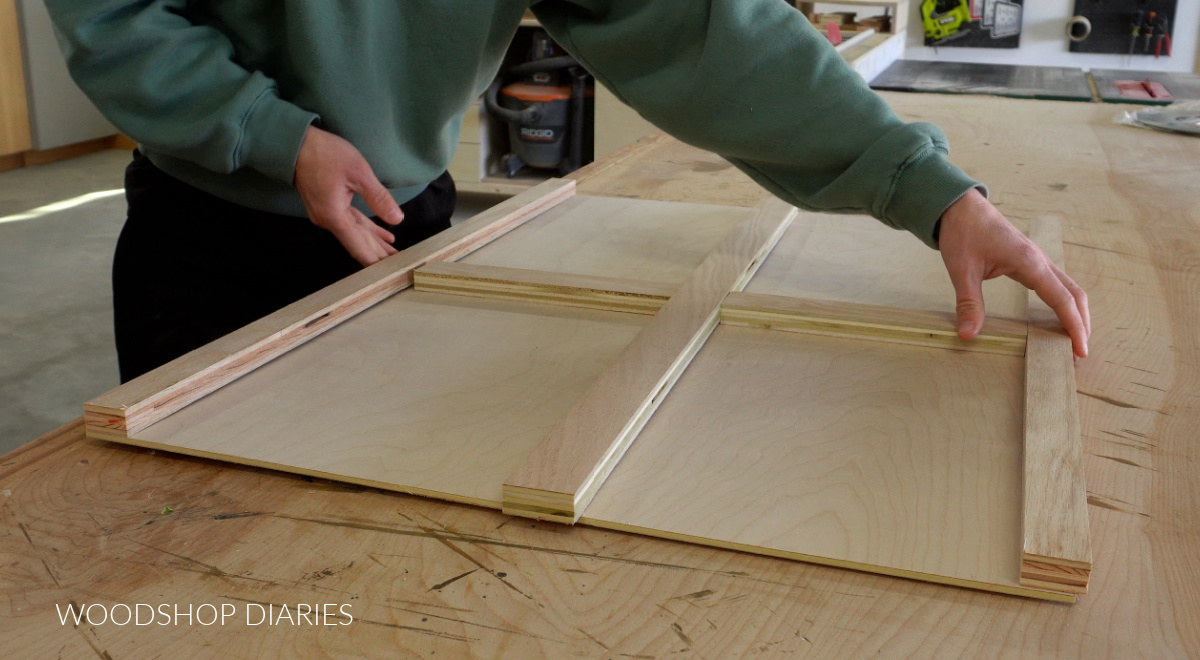
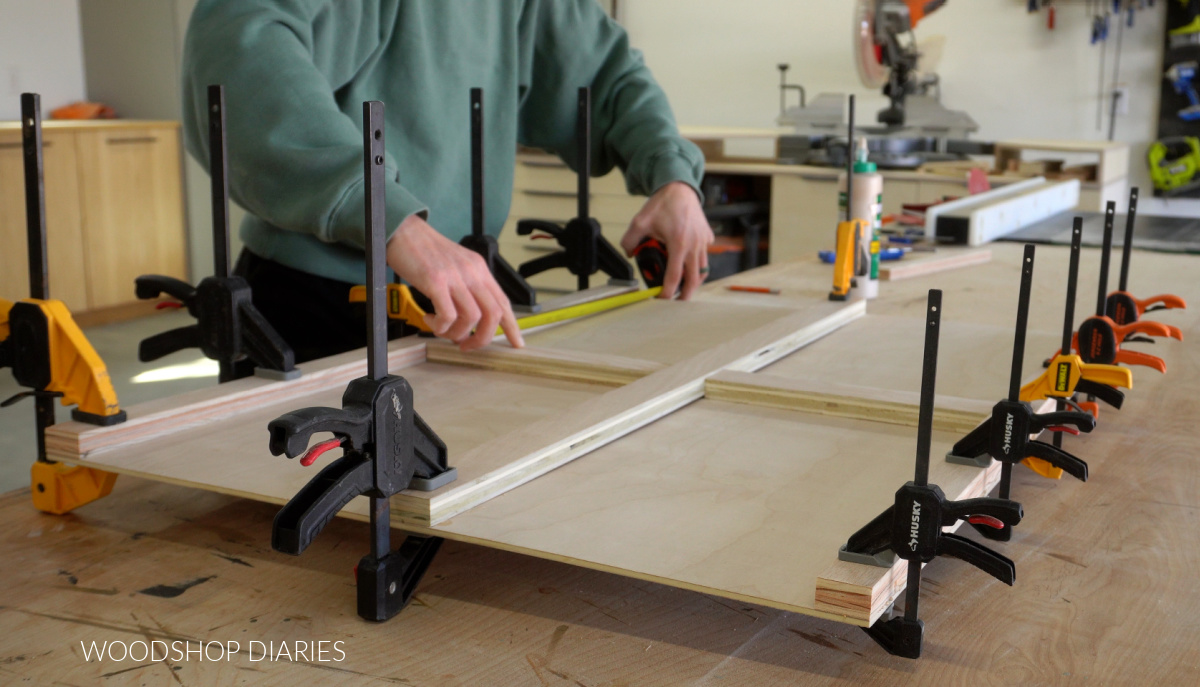
I cut two strips for the sides, one for the middle, and two to connect them at the center. Then I glued these onto the bottom side of my ¼” plywood panel.
By the way, I could have edge banded these pieces to hide the exposed plies, but I opted to leave them as is.
If you’d like to cover the plywood edges, iron on edge banding is a great option! Learn how to apply edge banding here.
Step 2: Build Puzzle Board Drawers
While that dried, I moved on to building the drawers. This frame can fit four drawers, so I searched one of my many scrap piles for some ¼″ plywood pieces to use for the drawer bottoms.
I trimmed four pieces just about ⅛” narrower than the openings between my frame so they will be able to slide in and out.
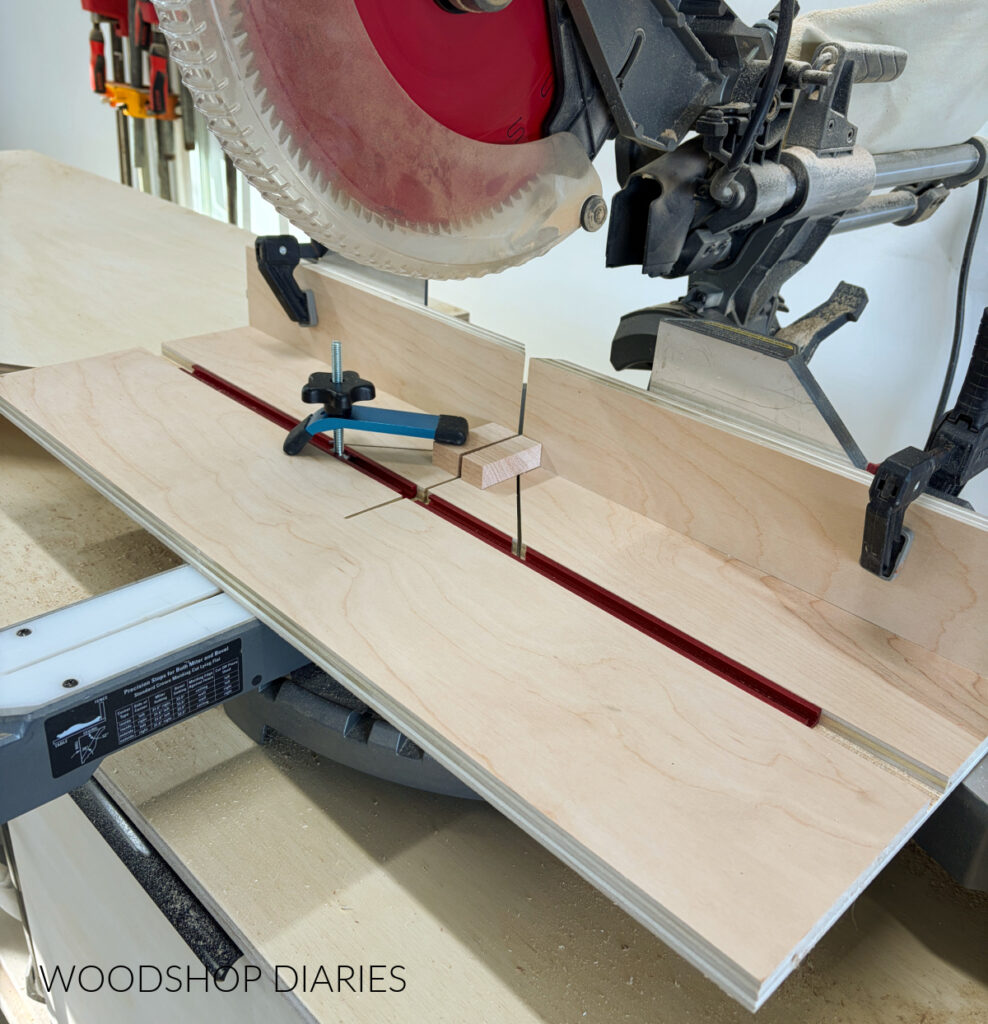
Then, I ripped some ½” plywood into ¾” wide strips to make the drawer sides.
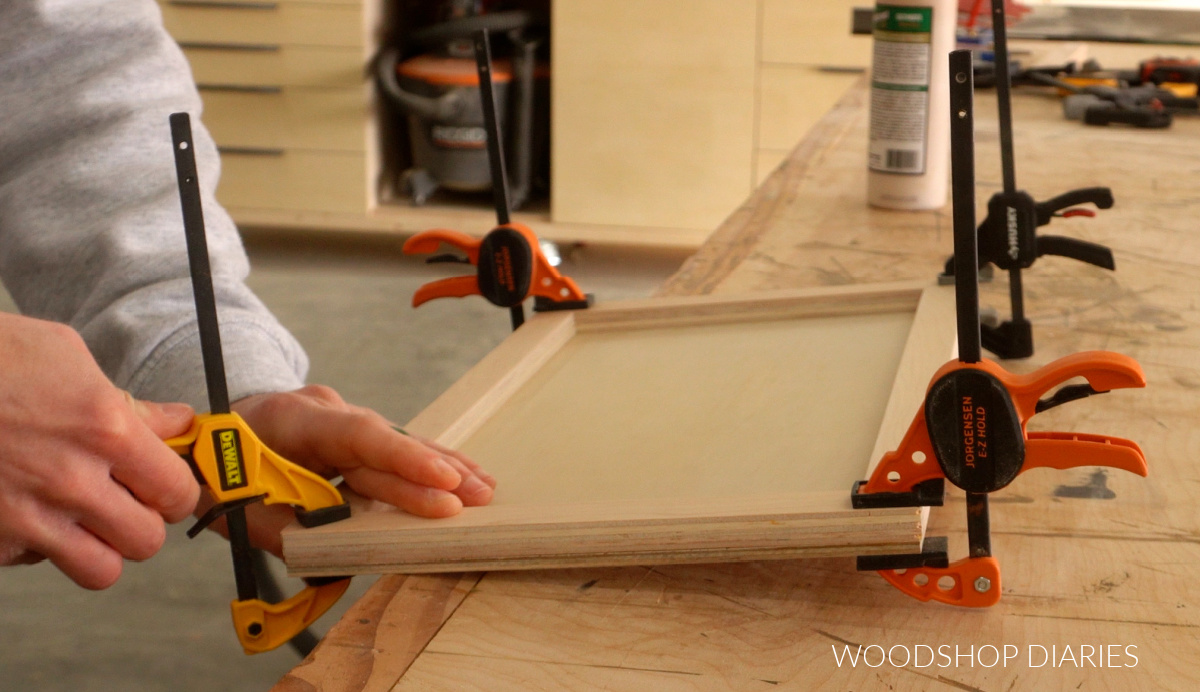
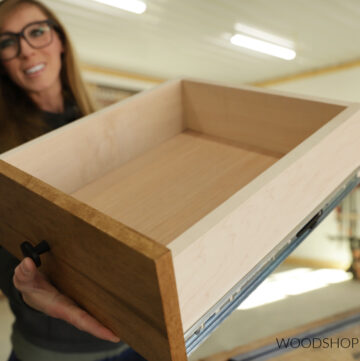
I cut four pieces from these strips with 45 degree mitered ends to glue around the edges of each drawer bottom. This gives me four really shallow drawers, which is perfect for puzzle pieces.
After my ½” plywood is glued to my ¼” bottoms, they end up being just slightly less than the thickness of my ¾” plywood. Which works out well for these drawers to slide into these puzzle board cubbies.
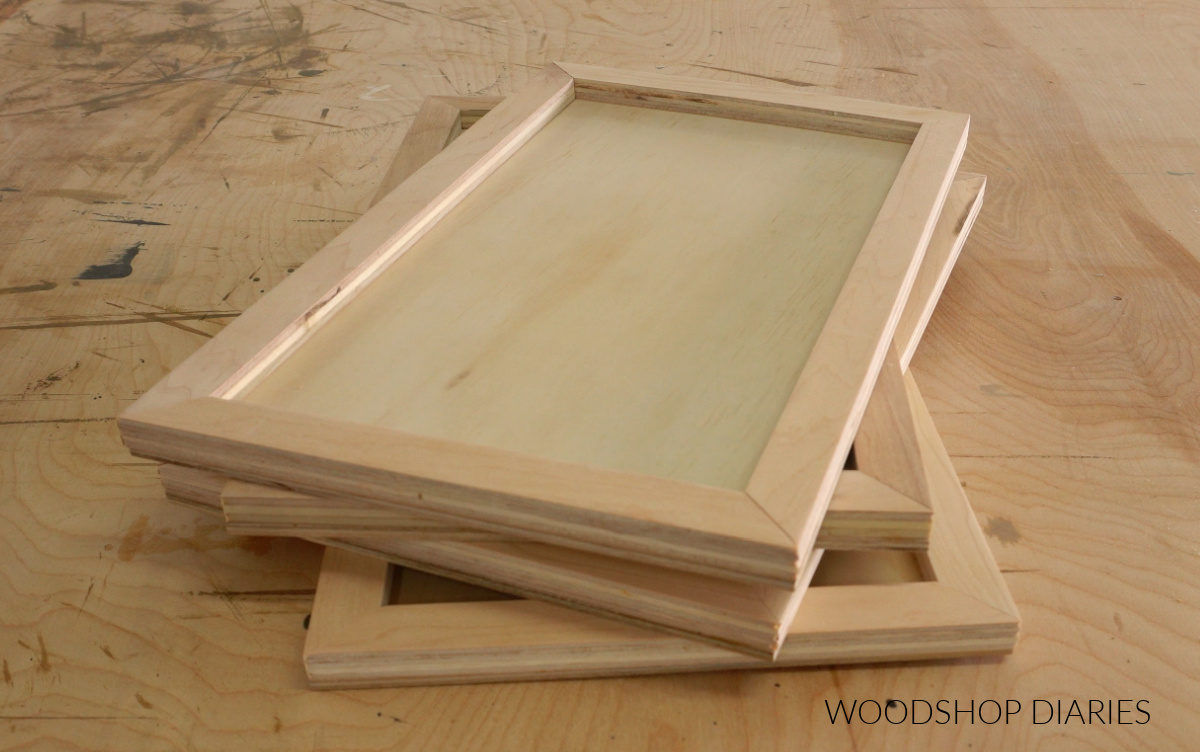
Step 3: Attach Top Trim
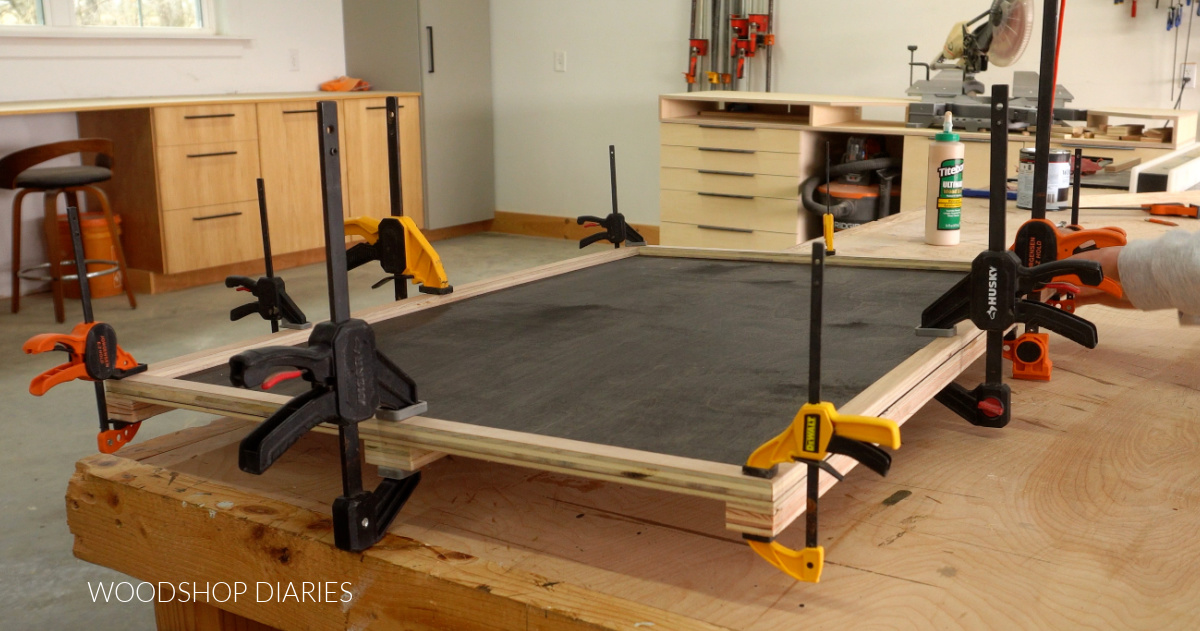
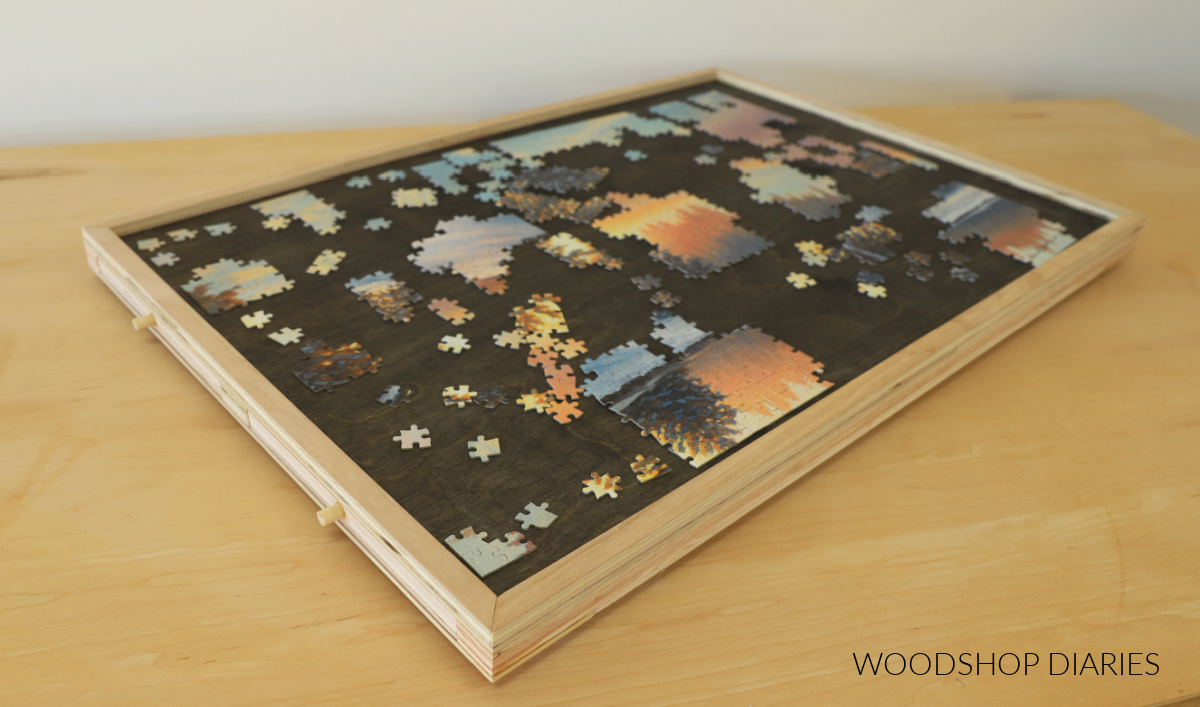
While the glue dried on my drawers, I moved back to the main board. I decided to stain my top black to give it some contrast. This is completed optional, but I used Minwax Water Based Stain in True Black.
Then, just like the drawers, I cut to fit and lined the top panel with ½” plywood strips as well. That way, my puzzle can stay contained in the top and not slip off the edges.
And again, all of these edges could be banded, but I opted to leave them. I’m not really a big fan of the exposed edges, but it would have been a lot of banding.
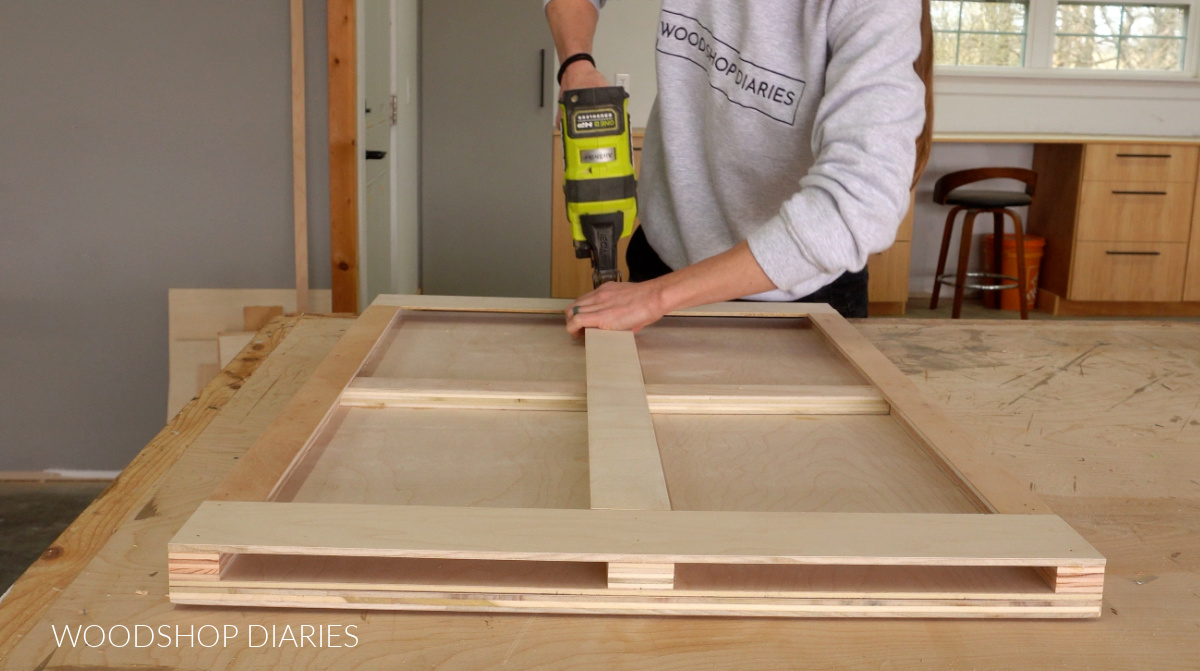
Step 4: Install Bottom Supports
Now the doors can slide into the puzzle board frame (two on each end), but nothing keeps them in if it’s lifted or moved.

So I needed to add something to the bottom to help hold the drawers in place.
For this, I ripped some strips of ¼″ plywood to kind of “line” the frame. I cut these to fit and they should overhang the inside edges of the framing at least ¼″ so the drawers can rest on them.
All the dimensions, details, and cut lists can be found in the printable plans here.
Then, I glued and brad nailed these pieces onto the frame.
Step 5: Add Knobs and Lazy Susan Hardware
While this was upside down, I went ahead and added the Lazy Susan hardware to the center. This is completely optional, but it is kind of nice to be able to rotate the board when using it.
There are a TON of lazy susan options out there and most will fit this application well. I’d recommend a 12″-16″ size.
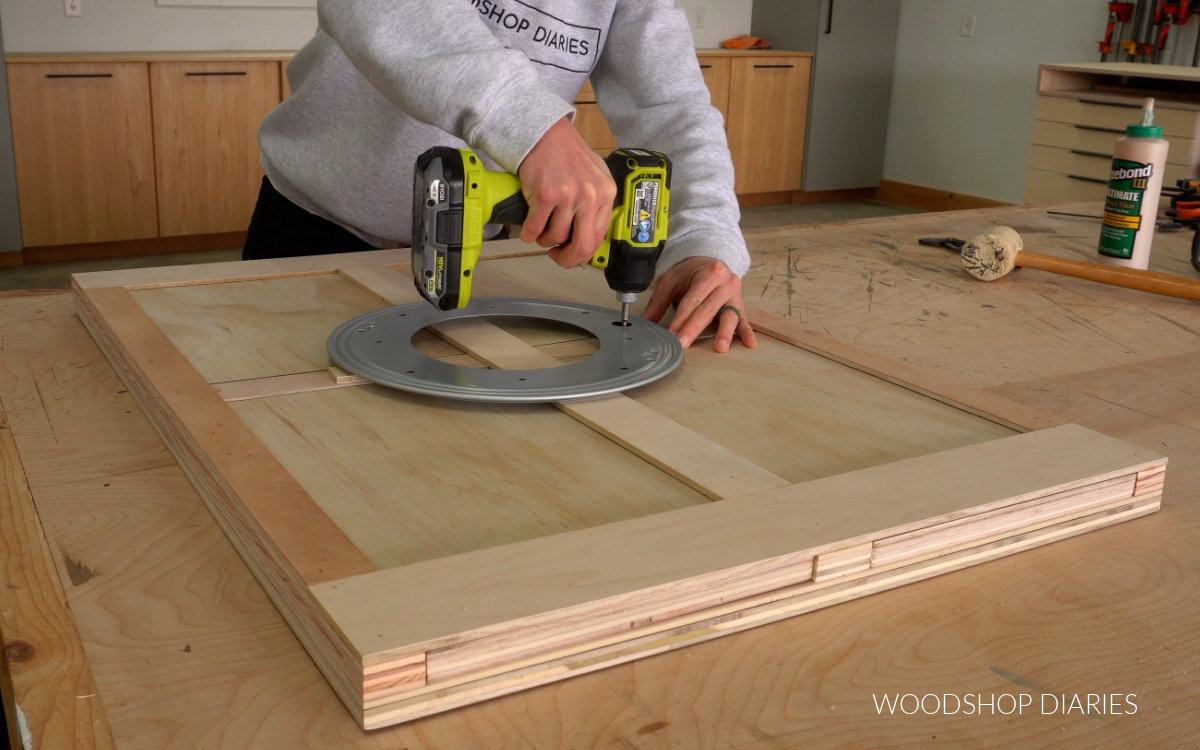
The Lazy Susan should be secured to the puzzle board framing. As seen above, some small ¼″ plywood spacer blocks may be needed where the Lazy Susan doesn’t contact the bottom supports from step 4.
Then, the last part was simply adding some knobs to the drawers so you can slide them in and out.
This is obviously not the ONLY option, but I cut some small wooden dowel pegs to use as my knobs. I drilled holes in the front of each drawer and glued them in place.

And now this board is ready for a brand new puzzle!
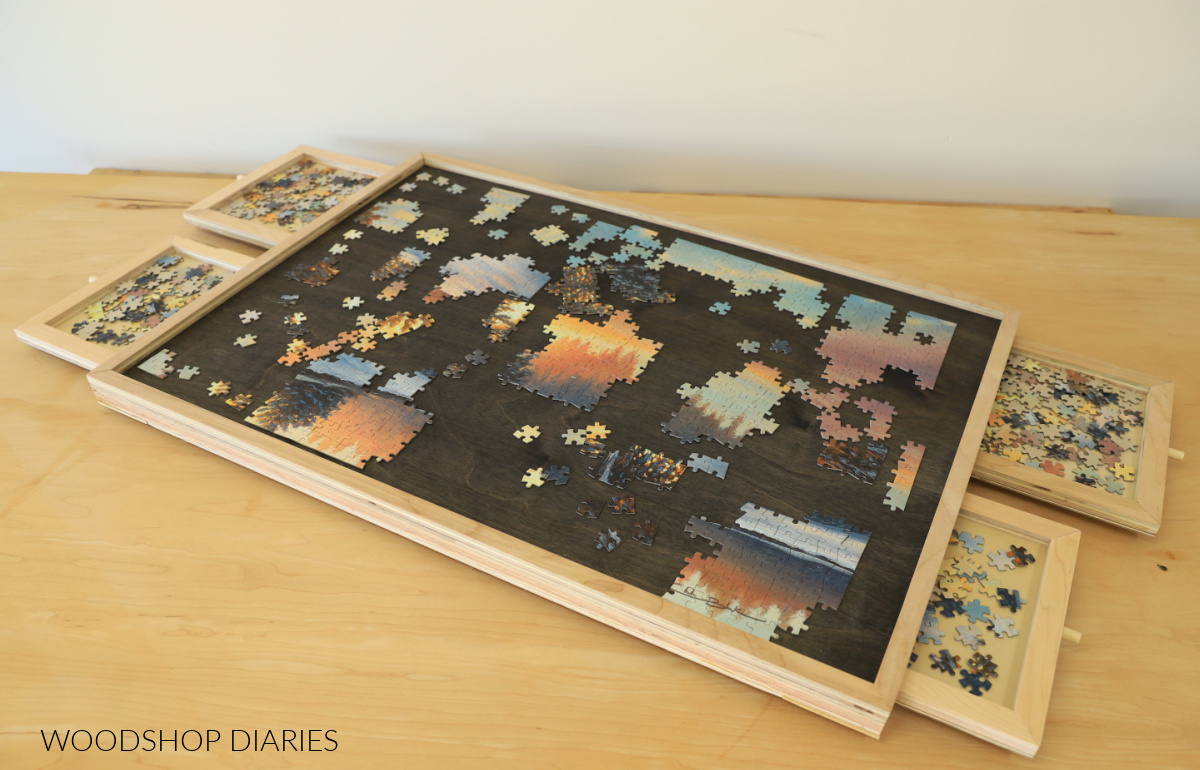
I love how the spare pieces store away in the drawers, so I don’t have to worry about losing them.
If you’d like to build your own, grab the printable plans for this puzzle board here!
Looking for more scrap plywood projects?
Enjoyed this scrap plywood project, but looking for more ideas? I got you! Click on the images below to check out these popular scrap wood projects:
If you’d like to save this project for later, don’t forget to pin it or share to your favorite social channel!
Until next time, happy building!