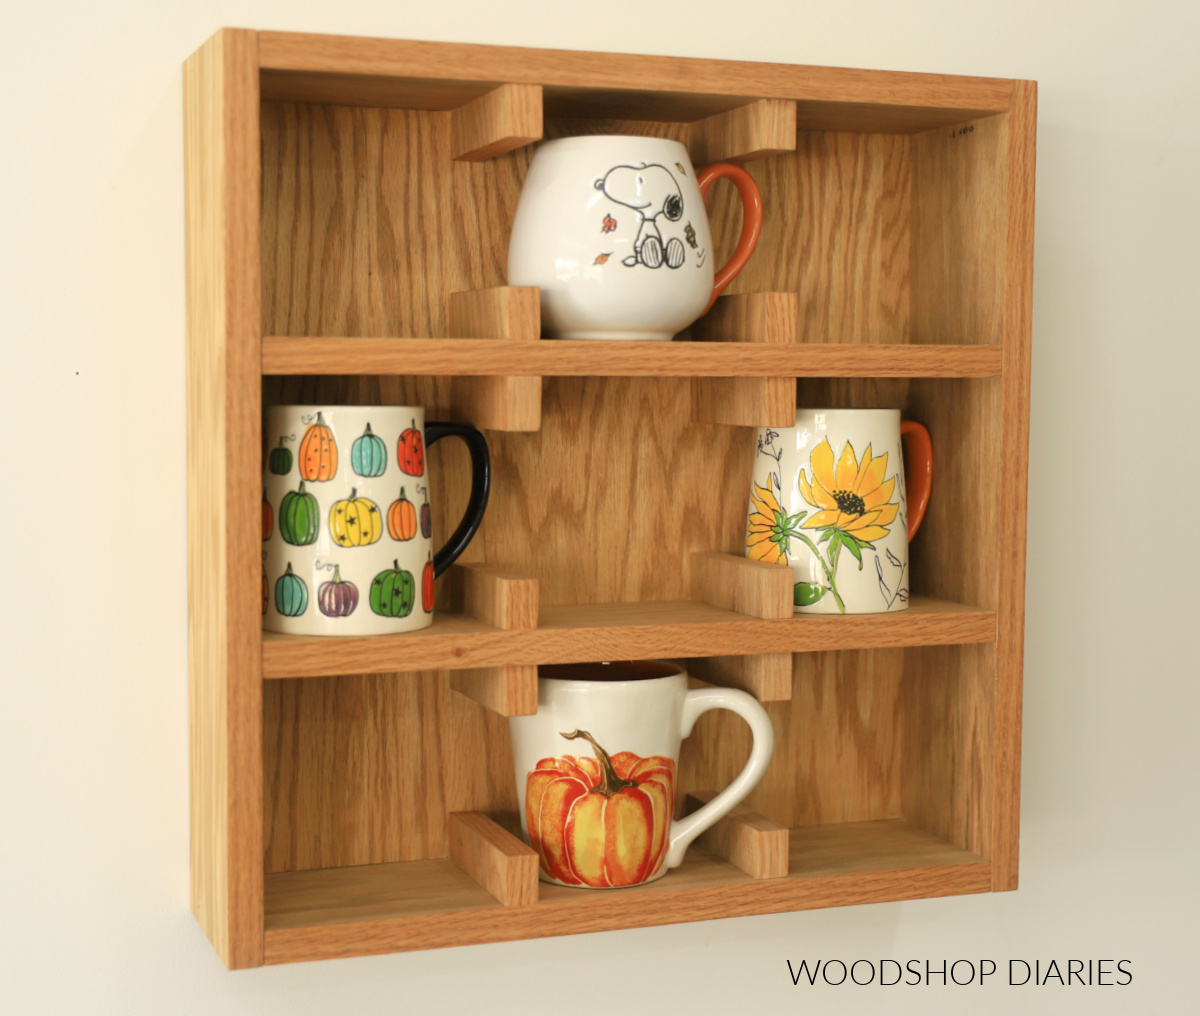
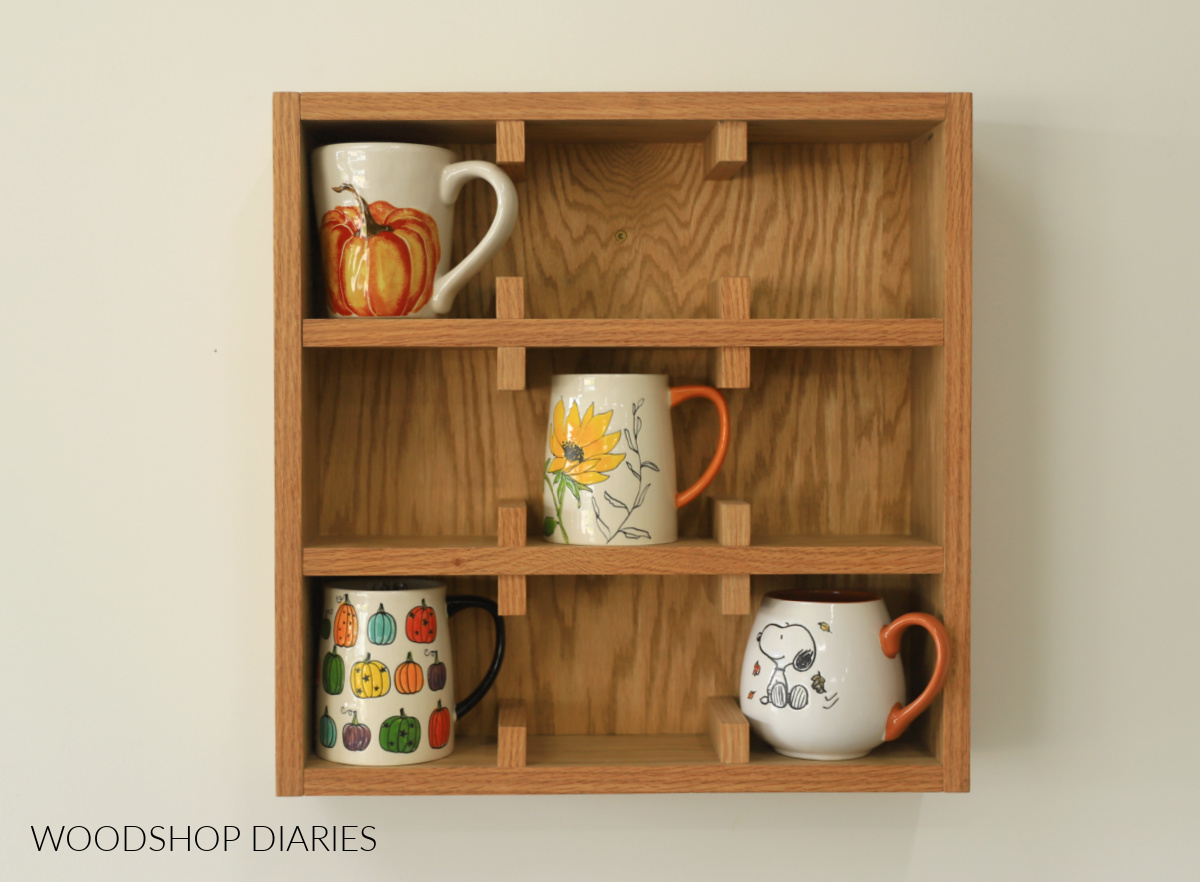
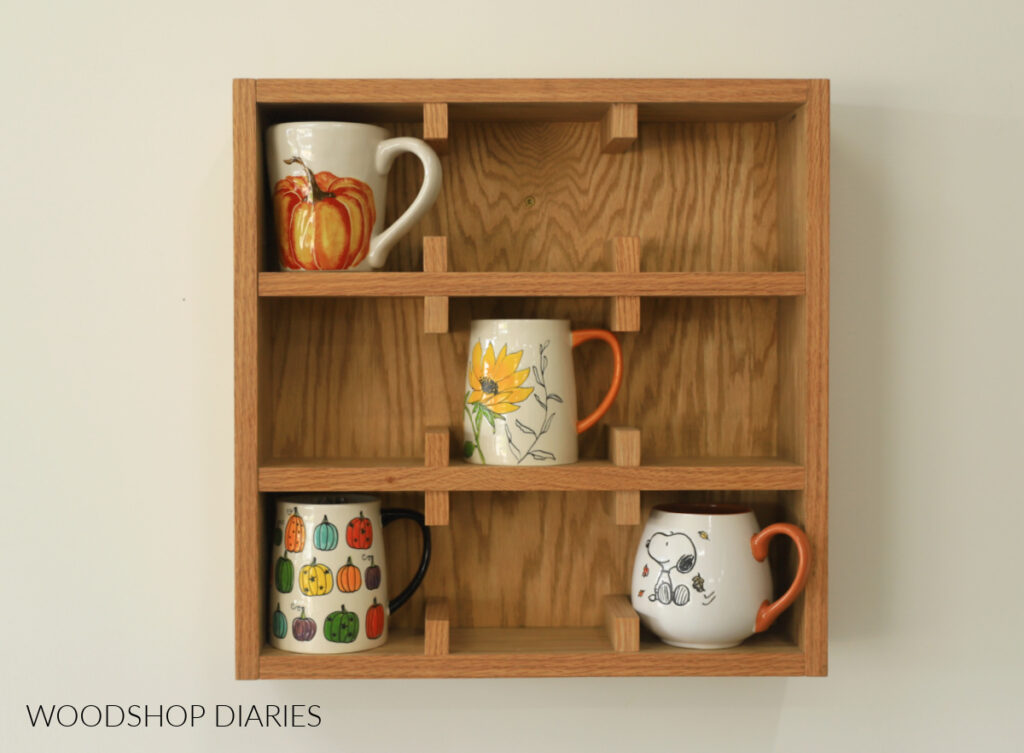
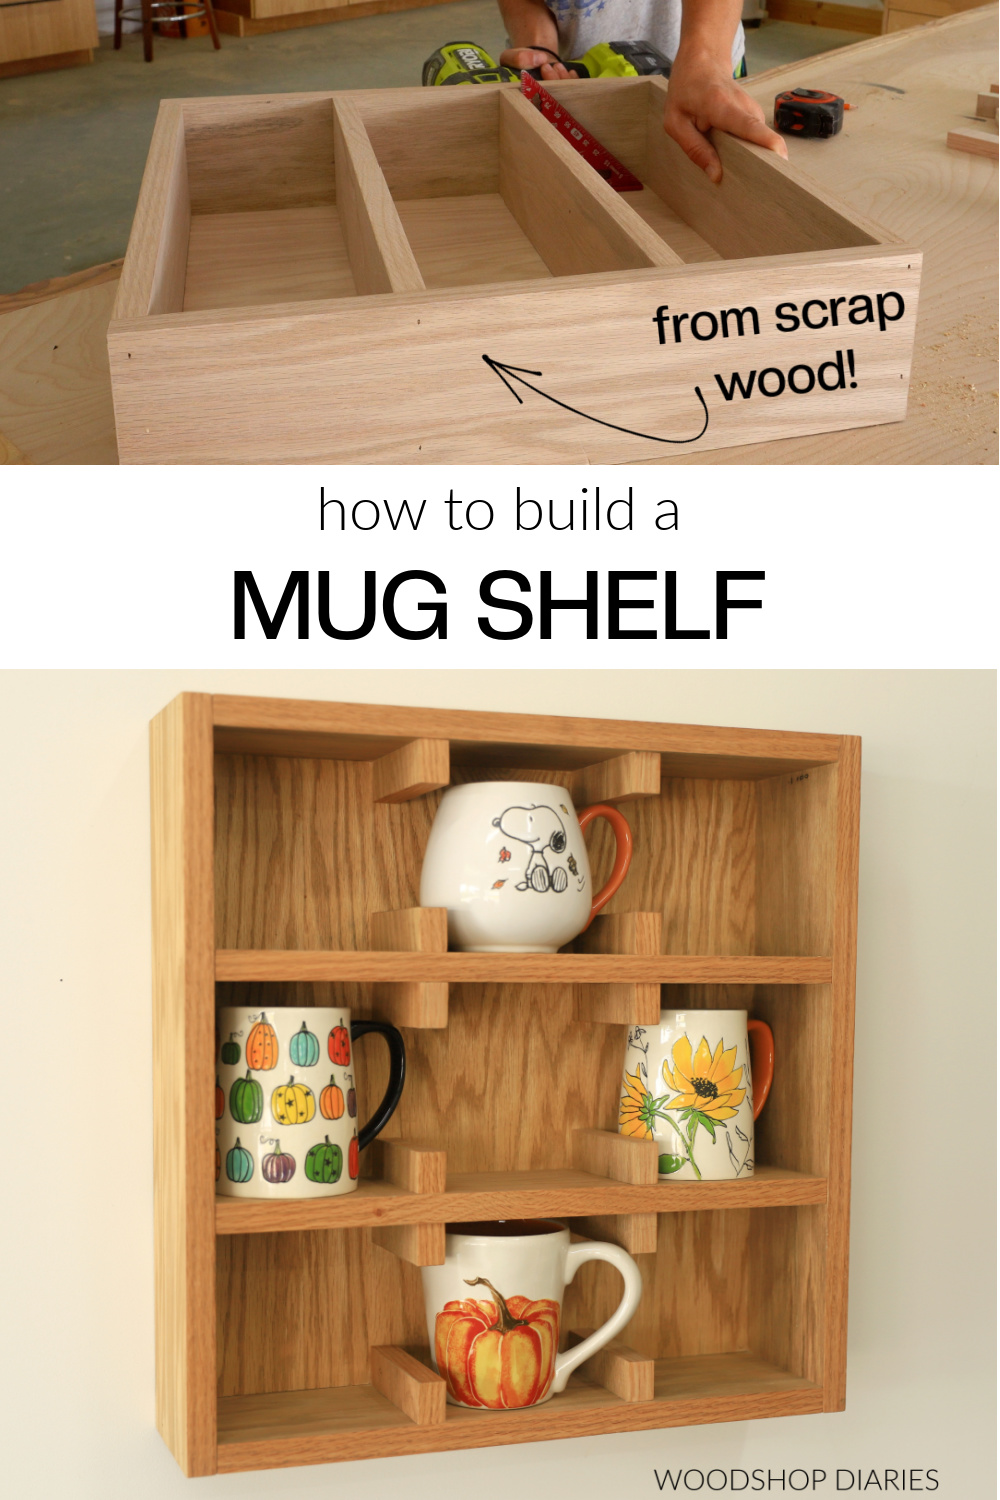
In this post, I’m sharing how to build a simple DIY mug display shelf using scrap plywood!
I have a mug problem. Well…I’m not sure “problem” is the right word. It’s more like a mug collection that might be a bit out of hand (depends on who you ask haha).
I just like to have a variety of mug options for my morning coffee for each season–some for spring/summer, some for Christmastime, but most of my mugs are fall themed. Those are acceptable for year-round use because fall is my favorite 🙂
Anyway, my mug collection brings me a lot of joy but it’s a little sad they stay hidden away in the cabinet, only to be seen each morning when I reach in to grab one.
So I decided to build a simple mug shelf to keep my favorite mugs organized and on display during their appropriate season.
This is a great little project to use up some of those plywood scraps on, so if you’d like to see how to make one of your own, I’ve got the details below.
*This post contains affiliate links. See website policies.
What to consider before building
I built this DIY mug shelf using scrap (red oak, but other types would work fine) plywood. I used ½″ plywood for the back panel and ¾″ plywood for the sides, shelves and dividers.
But, you could build the entire thing using all ½″ plywood, all ¾″ plywood, or use solid 1x boards instead of plywood.
There’s no “hard rules” here on what materials to use to build this with, so I encourage you to take a look at your scrap pile and see what you’ve got to work with.
Mug Shelf Sizing
This mug shelf ended up being about 5 ½″ deep x 18″ wide x 18″ tall. It’s got 9 “cubbies” for mugs all 5″ cubed (so each section is 5″ x 5″ x 5″).
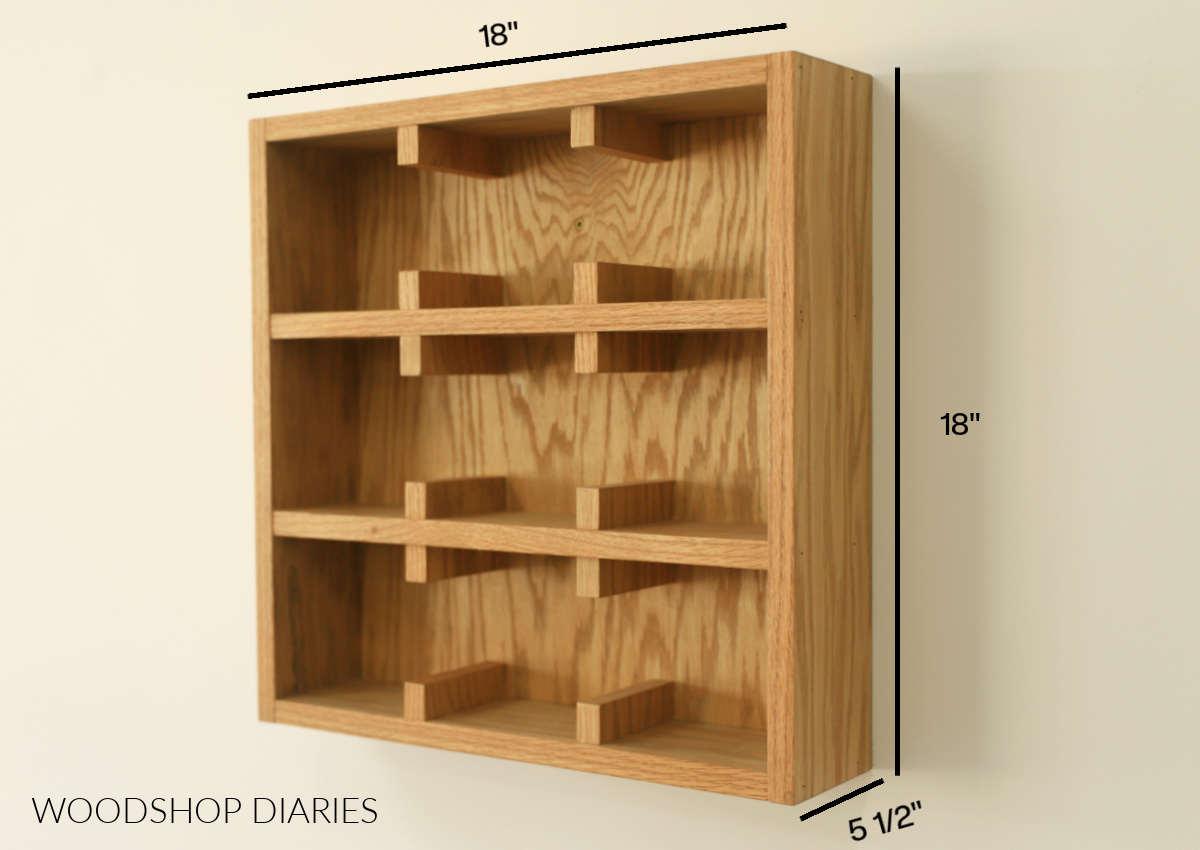
If you wanted to make a mug shelf with more rows or columns and with smaller or larger cubbies, feel free to customize it. See step 1 for tips on adjusting the size.
Are DIY projects your thing? Sign up for our newsletter for priority access to the latest projects and build plans!
How to Build a Mug Shelf
If you prefer to watch, I’ve shared the build video with tons of tips, behind the scenes, and additional information here:
Love watching how-to videos? Subscribe to my YouTube channel for plenty more where that came from!
Tools & Materials
Tools:
- Miter Saw
- Micro Pocket Hole Jig (optional)
- Drill/Driver (optional)
- Brad Nailer
- Clamps
- Table Saw or Circ Saw (optional–to cut plywood as needed)
Materials:
- ½″ plywood (for back panel)
- ¾″ plywood OR 1×6 boards (for sides and shelves)
- 1 ¼″ brad nails
- 1 ¼″ pocket hole screws (optional)
- Wood Glue
- Edge Banding
Step 1: Cut Backer
For this shelf, I used scrap ½″ plywood for the backer. If you didn’t have ½″ plywood, ¾″ would also work fine.
*I used red oak plywood scraps for this, but you can use any wood type you have available.
Since I was working with scraps, I didn’t have a lot of flexibility on size. The piece I had was about 16 ½″ wide, so I just marked it at 16 ½″ long and cut it so it was square.
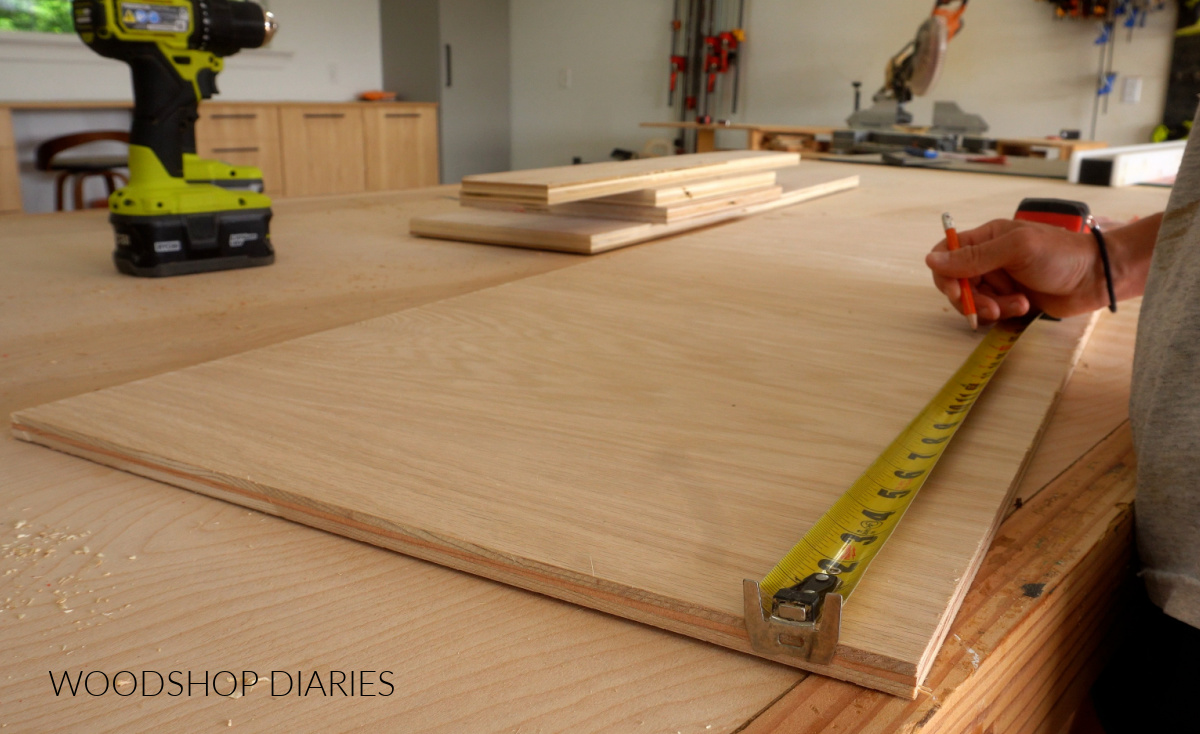
A note about sizing: Before cutting the back, I recommend measuring your mugs to get their overall dimensions.
Since I cut my back piece 16 ½″ square, after I add two ¾″ plywood shelves and dividers, that leaves me with nine 5″ square cubbies. This size seemed to work well for most of my mugs, but if yours are larger or you want to add another row/column, adjust your back panel size as needed.
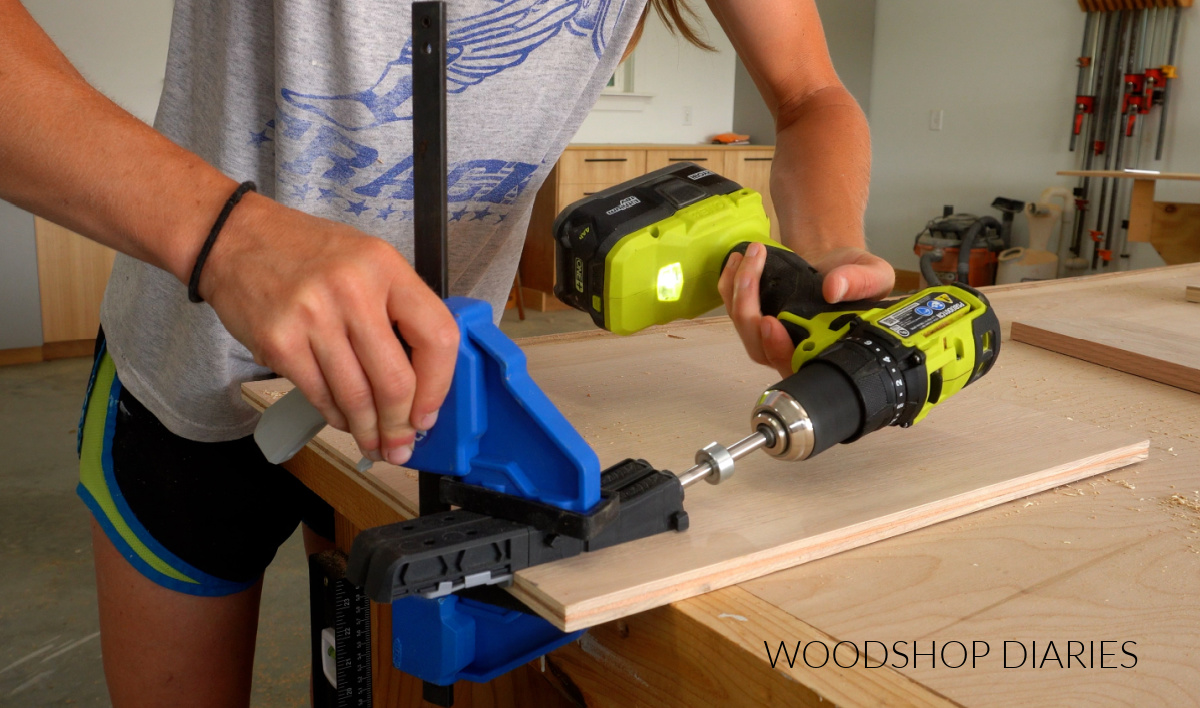
Then, I drilled pocket holes along all four edges of my back panel. When drilling pocket holes in ½″ thick material, I prefer to use the Kreg Micro pocket hole jig, but a standard size jig can also work.
Learn how and why to use the Kreg Micro Pocket Hole Jig here.
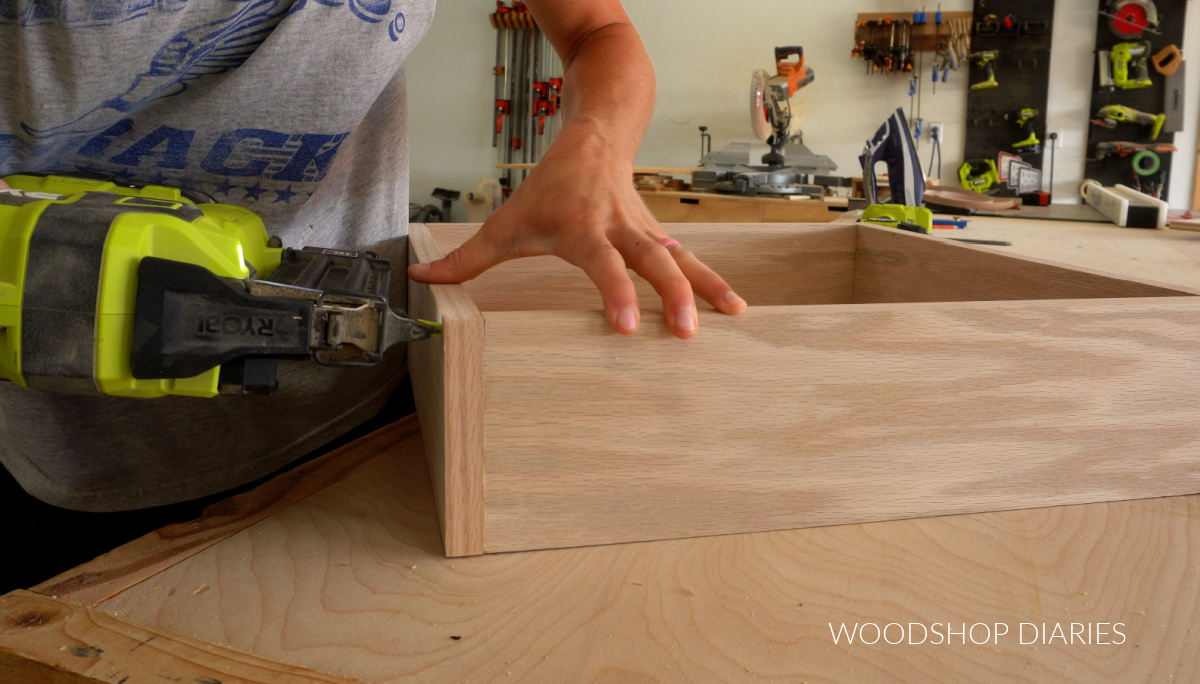
Step 2: Attach Mug Shelf Sides
Next, I ripped some ¾″ plywood scraps to 5 ½″ wide and cut these to fit around my backer panel.
*If you didn’t want to use plywood, 1×6 scraps would also work well here for the sides since they’re already 5 ½″ wide.
Because I was using plywood here, I laid my pieces out and marked which edges will be exposed when assembled so that I could apply edge banding.

Edge banding is optional, but it just makes these edges look a lot cleaner. Learn how to cover plywood edges with banding here.
So I applied iron on edge banding to the front edges of the side pieces before attaching them around the backer with pocket hole screws.
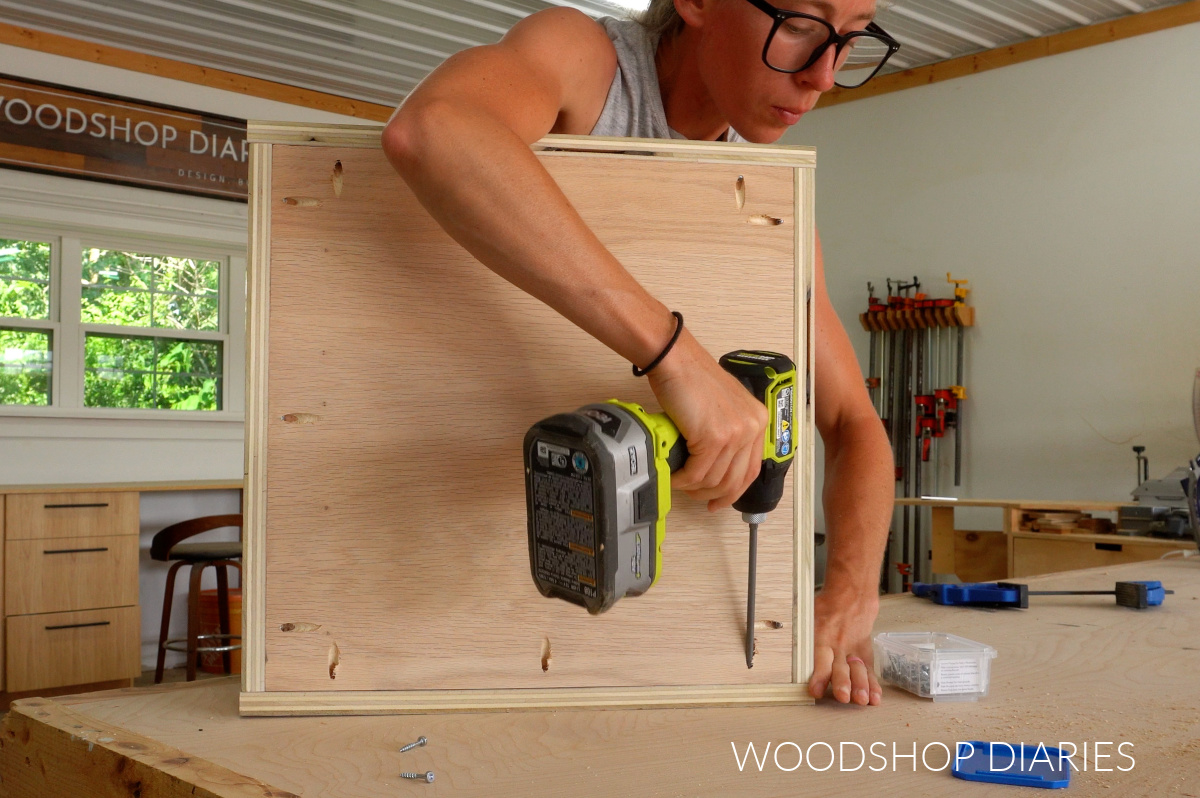
After the sides were secured around the back panel, I tacked the corners together with a couple brad nails.
Step 3: Install Shelves
Next, it was time to add the shelves, so I ripped some more ¾″ plywood to 5″ wide and cut two pieces to fit inside the box. I applied some more iron on edge banding to the front edges of these shelves.
Then, I applied wood glue to the back edge, and slid them into the box making sure they were evenly spaced (about 5″ space between each shelf and the top/bottom).
I tacked these in on each side with a few brad nails. If you wanted to use wood screws instead, you can.
TIP: Use a speed square to make sure shelves stay level and square as you nail them in place.
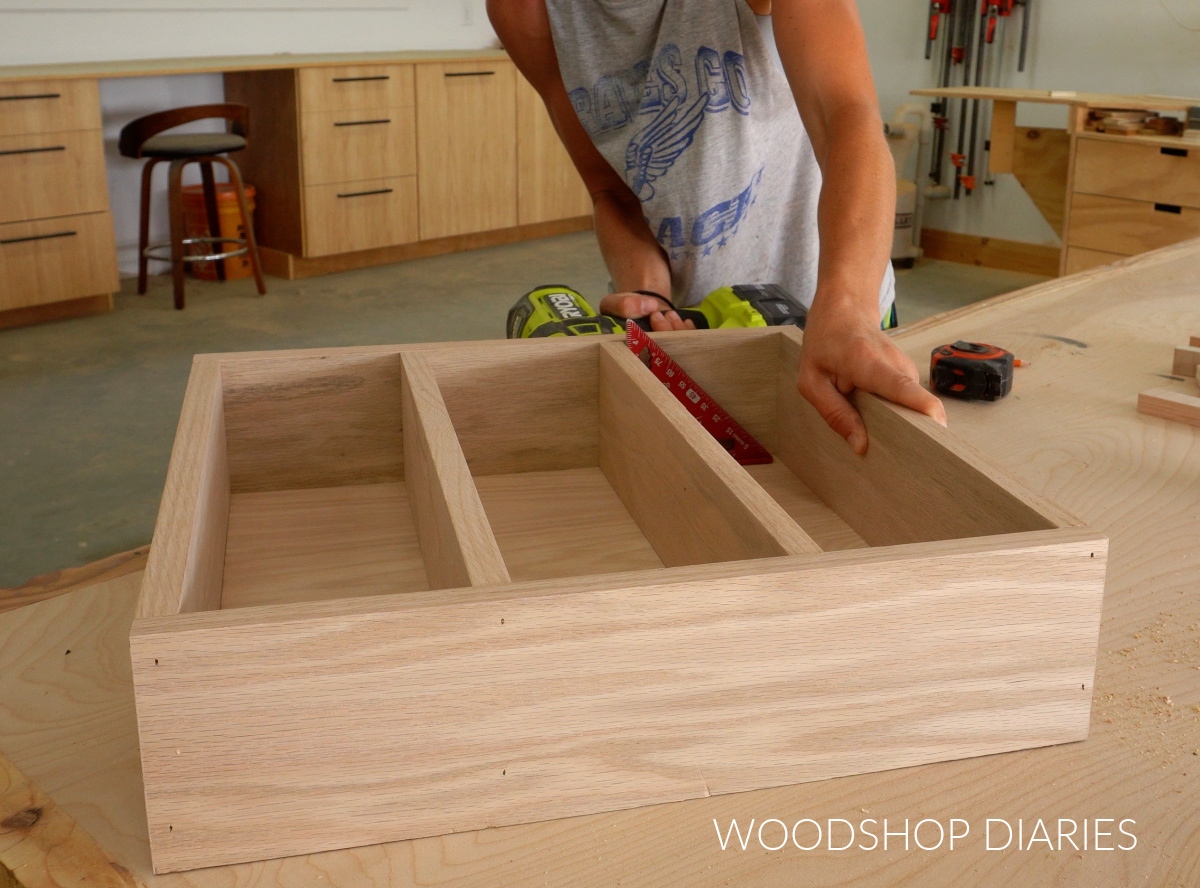
Step 4: Add Dividers
Adding dividers is optional–you can stop after step 3 and just have simple shelves. But these dividers added a little more interest.
To make them, I ripped some more scrap ¾″ plywood to 5″ wide, then cut twelve 1″ long pieces from that.
It was tedious, but I applied edge banding to one short and one long side of each of these pieces to cover the plywood edges. If you had solid wood to use for these dividers, that might be a better choice.
Then, I glued and clamped them like shown below onto the top and bottom of each shelf to divide the cubbies.
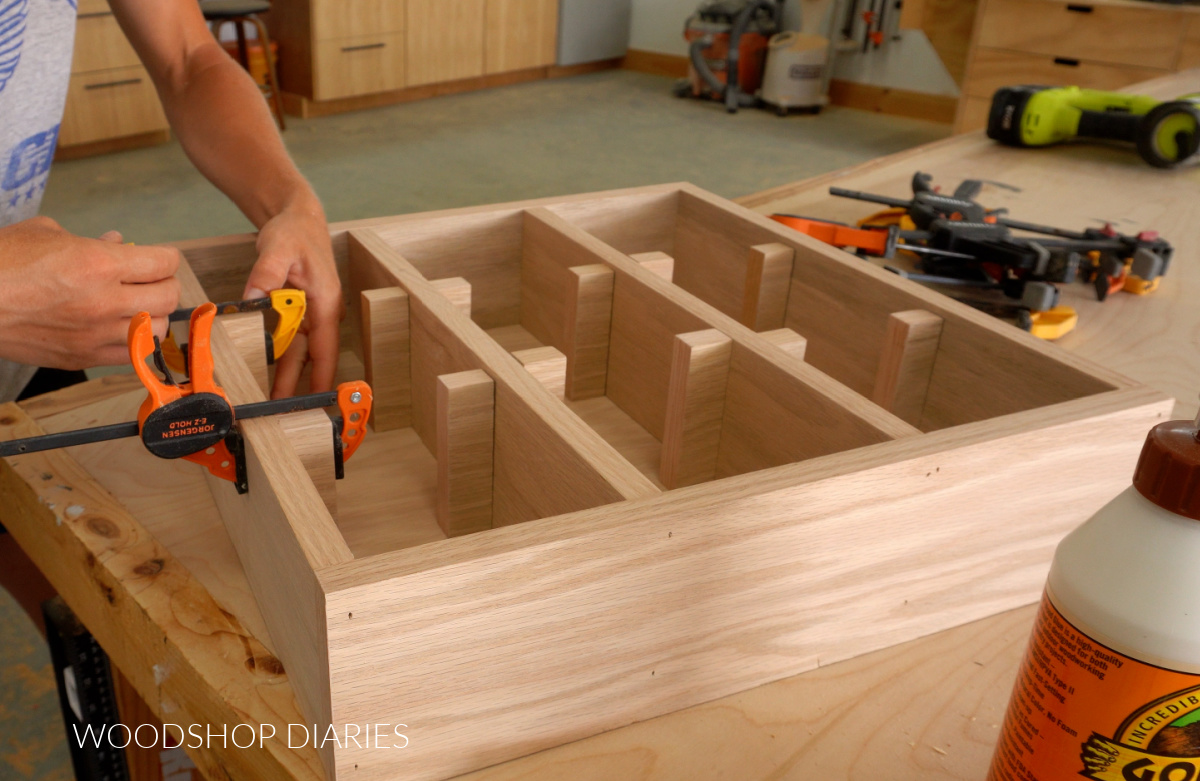
I carefully measured that these dividers were evenly spaced (should be about 5″ between each divider and the sides) as I glued them on.
Step 5: Finish and Hang
Once the glue was dry, I stained my shelf in Minwax Weathered Oak, and gave it a few coats of clear poly (I used Minwax Polycrylic in the spray can so it was easier to apply in all these little nooks and crannies.)
Then, I secured it to the wall studs with screws through the back panel making sure to keep it level.
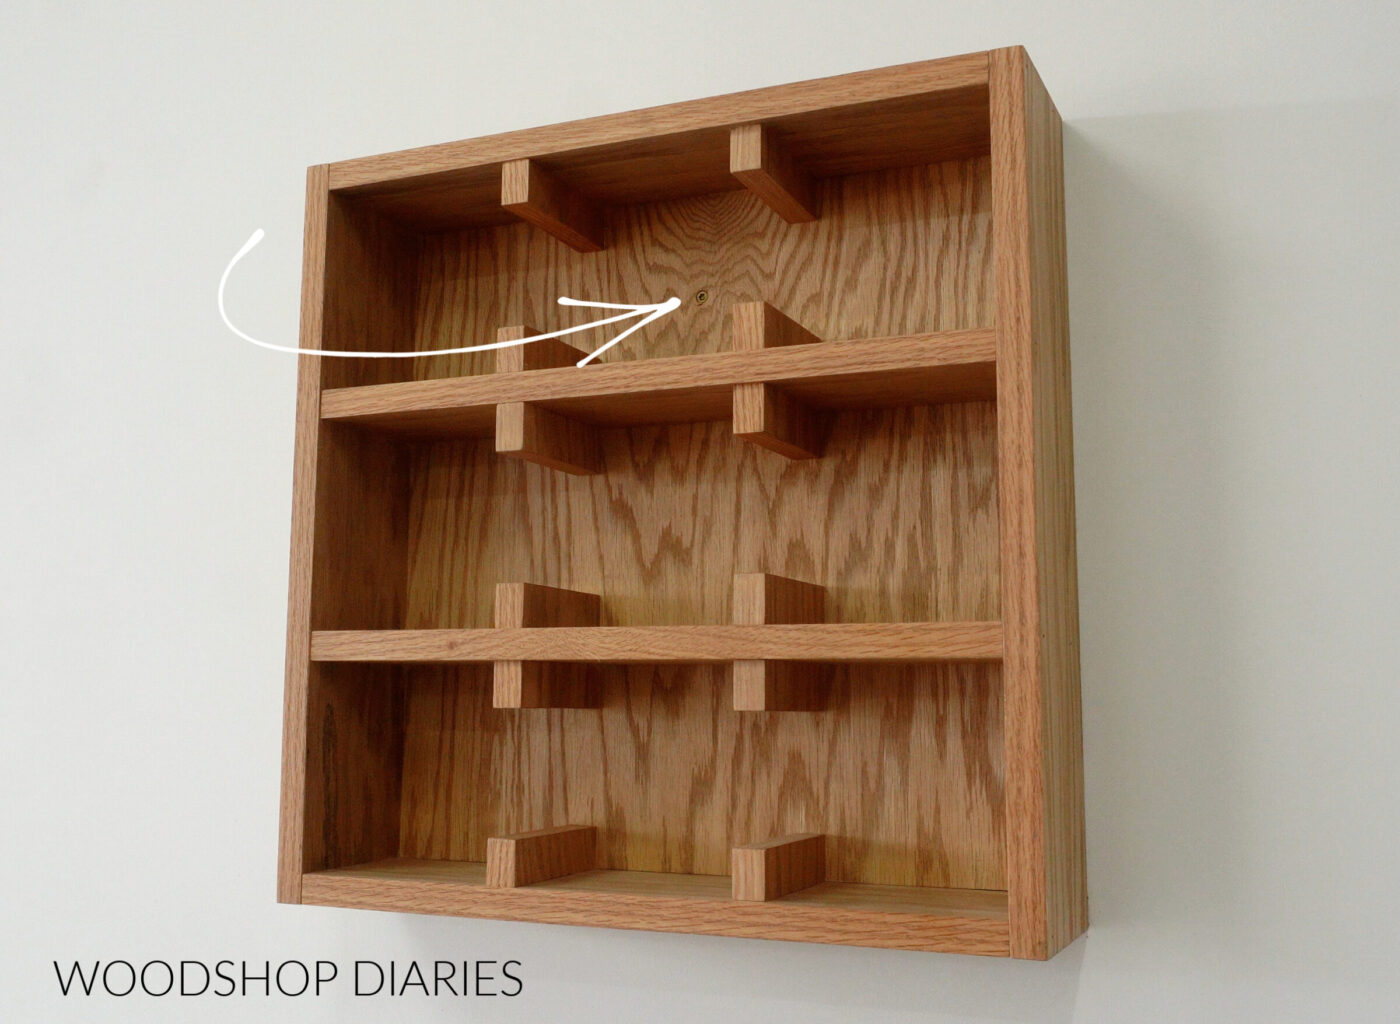
*I recommend using at least two screws to hang this because with just one screw, it can twist and become unlevel.
And now it’s ready for my favorite mugs of the season. This is such a fun addition to add to the kitchen or pantry or in the coffee bar if you have one.
It’s designed to hang on the wall, but can also sit on the countertop, if you’d like. I hope this gave you a fun idea to use up some of those plywood scraps!
By the way, if mugs aren’t your thing, this makes a great way to display other things like baseballs, awards, toy cars and other collectibles, too!
Looking for More Scrap Wood DIYs?
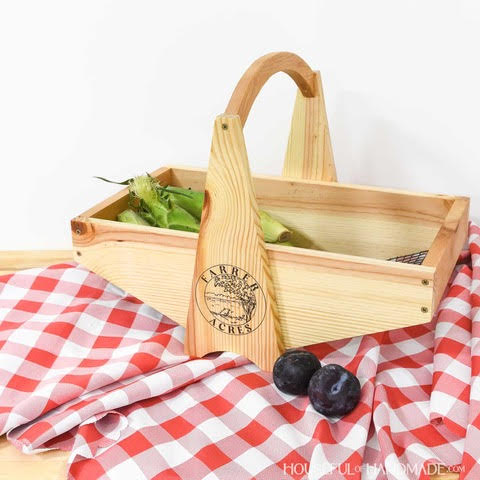
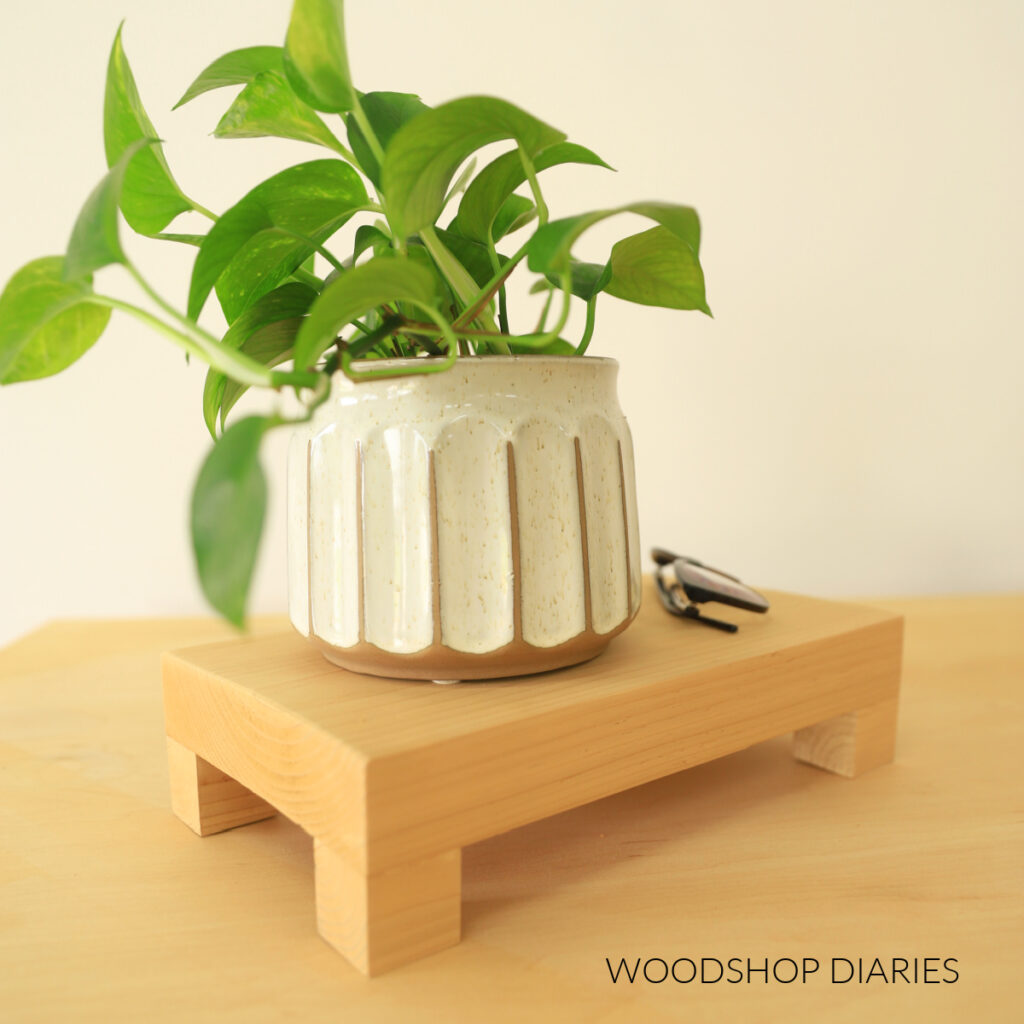
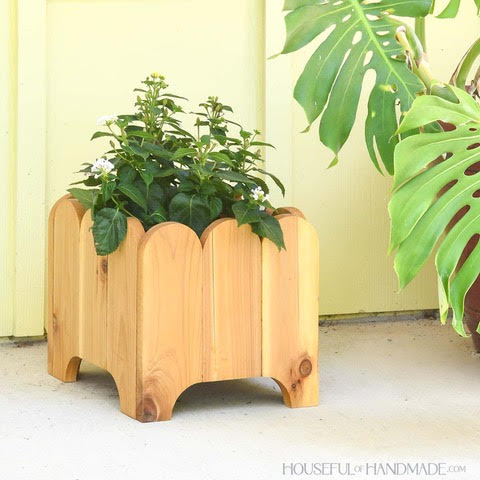
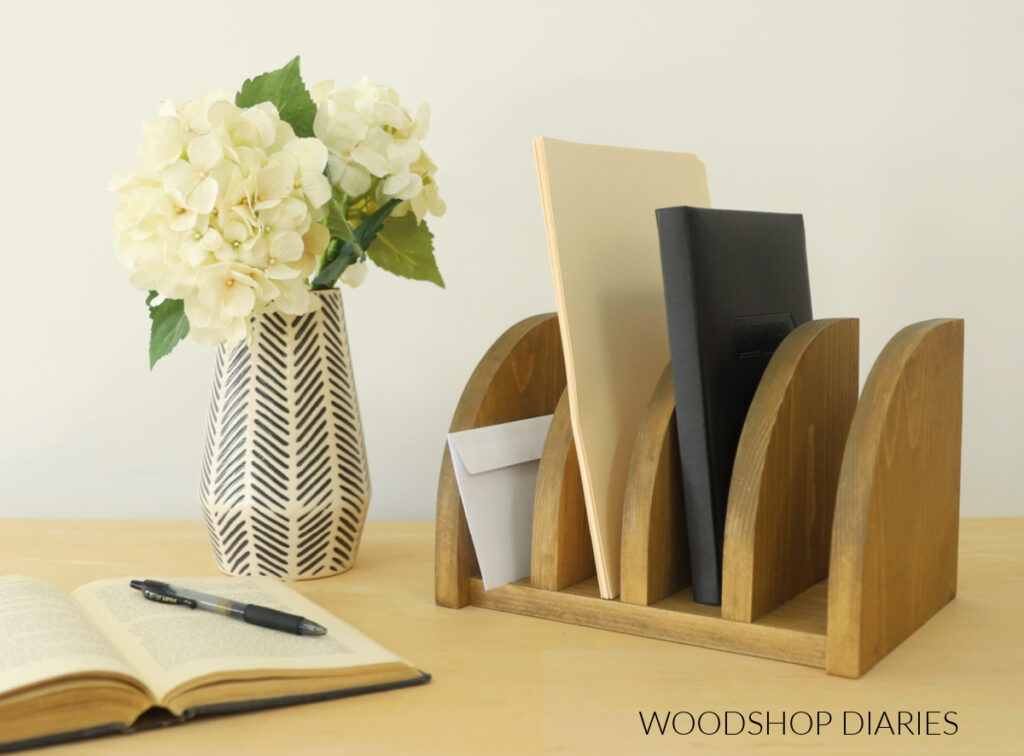
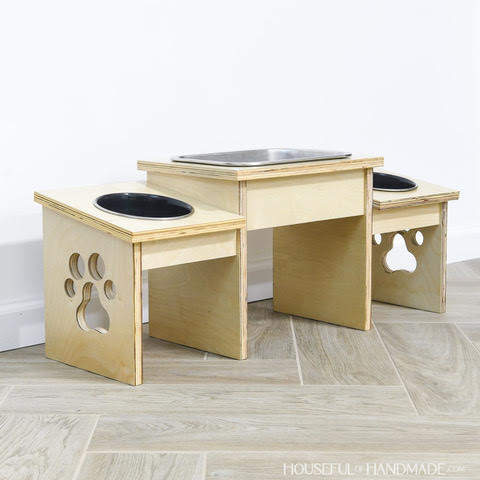
Can’t get enough scrap wood projects?? I’m teaming up with my friend, Kati, from Houseful of Handmade all month long for “Scrap Wood Summer!”
Check out all the projects in the series below. Click on the images to learn how to make each one!
This is our fourth year hosting Scrap Wood Summer and I enjoy it a little more each time. But, if you’ve never heard of it before, that’s okay!
Essentially, we each share a new scrap wood project every Tuesday throughout the month of August. So by the end of the month, you’ve got 8 new project ideas to try.
So stay tuned to see all the other fun ideas we are so excited to share with you!
Can’t wait? Check out previous Scrap Wood Summer projects plus other scrap wood ideas here.
If you’d like to save this DIY umbrella stand table for later, be sure to pin it or share to your favorite social channel!
Until next time, friends, happy building!