
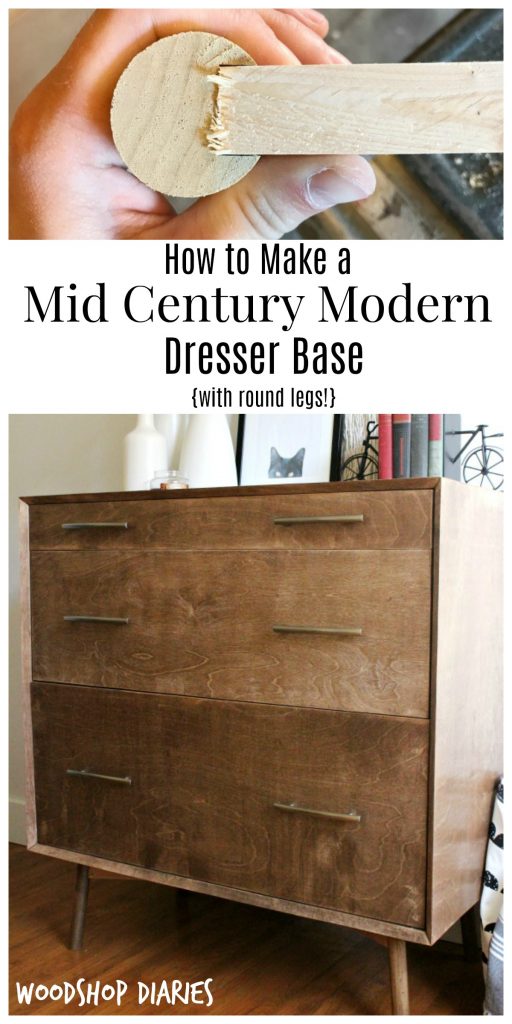
If you’ve been around very long, you know that I love mid century style furniture. That retro look brings out my inner hippie and makes me want to grab my bell bottoms and my guitar and turn on some 70s rock.
.
But, I’ve struggled a little bit trying to figure out how to get that fun looking retro mid century style furniture base with the round, angled legs. I just couldn’t figure out how to connect a straight board end to a round, angled leg. Flat ends just don’t work with round edges, know what I mean??
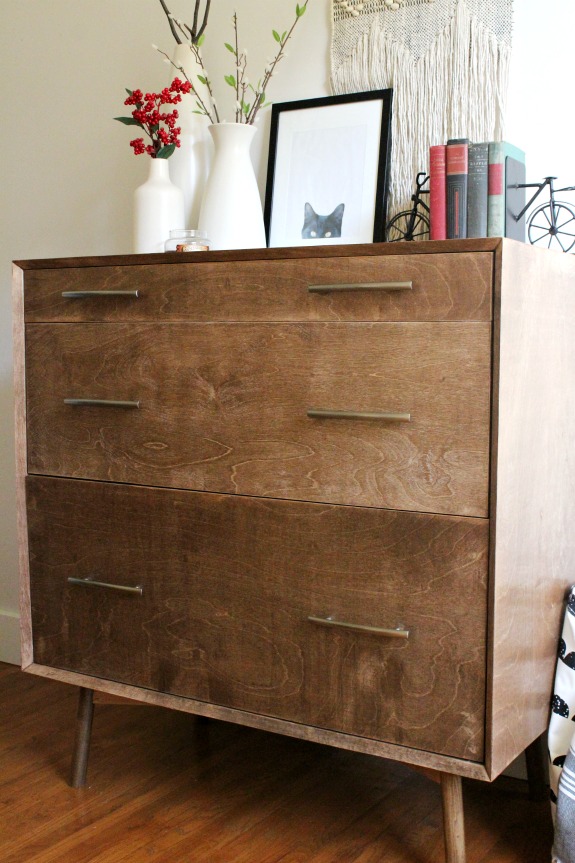
Last year, I built a Mid Century Style Dresser and wanted so bad for my legs to be round, but instead went with a tapered straight leg because I was too scared to try something new.
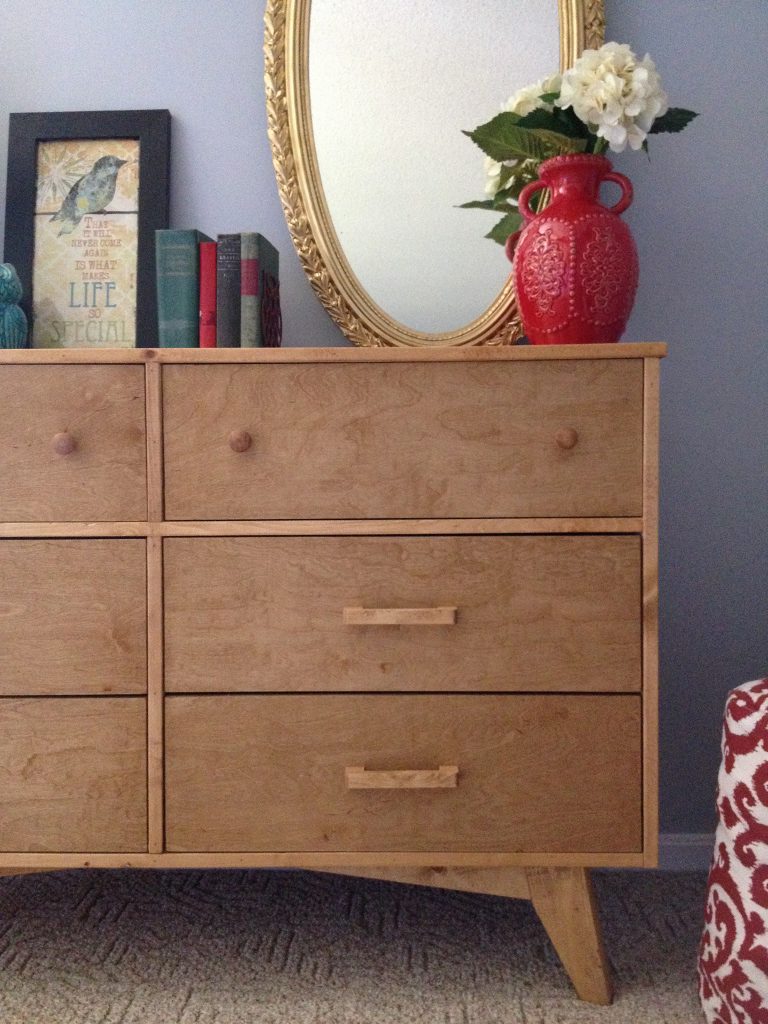
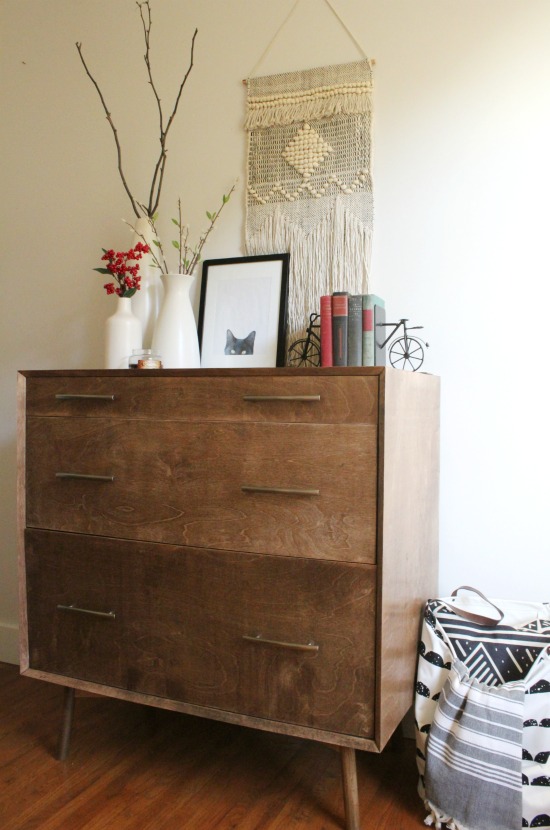
But, this year, I built another one and was determined to make the round legs work. There was a bit of trial and error, but I got a technique that worked and wasn’t too difficult.
.
So if you’re ready for a bit of a challenge….and an AWESOME looking piece of DIY mid century furniture, let’s get to it 🙂
.
This post contains affiliate links. Please see disclosure policy for more details.
.
You will need….
.
Tools and Materials:
1 ½″ dowel rod (length depends on your application)
1×3 boards (length depends on your application)
Scraps to make jig
1 ¼″ wood screw
Chisel and Hammer
Router and router table
Tape Measure
.
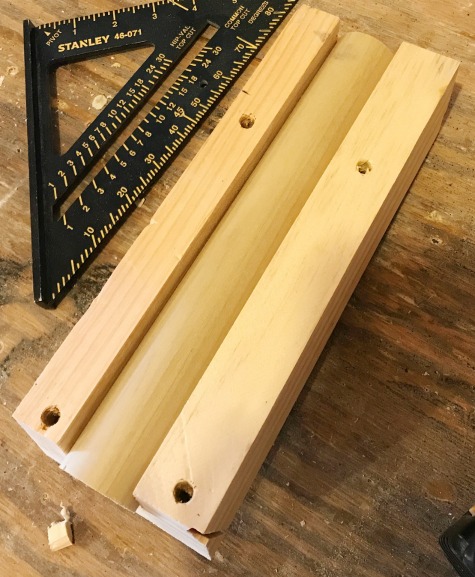
Step 1: Make a Jig to Hold the Mid Century Legs
First, I needed to make a jig to hold the round legs so it stays in the same place while you cut and route. I grabbed some scraps and made something like this:
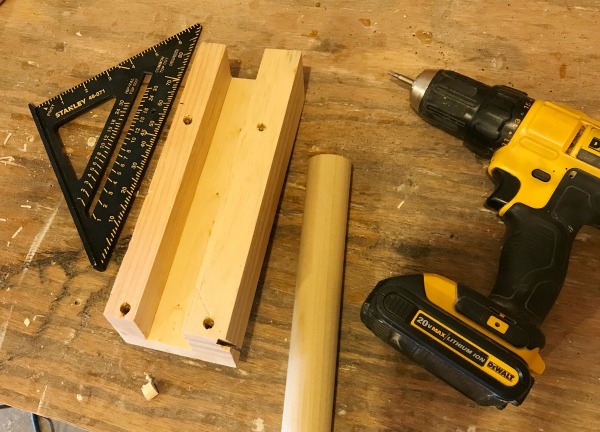
I used a 1×4 piece for the bottom and two 2x scraps for the sides. It doesn’t matter the exact measurements as long as the height of the sides matches the height of the dowel and the width between the sides matches the width of the dowel. If you use 1 ½″ dowels like I did, then the width and height should be 1 ½″. Use screws to attach the sides like shown. Make sure the length of this jig is greater than or equal to the length you want your legs. I made mine about 10″ long.
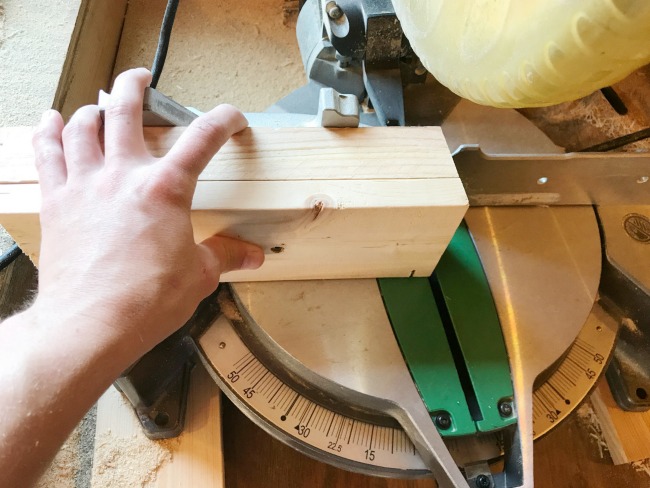
Step 2: Miter the Ends of the Jig
Because I wanted my round legs to be angled in, I needed to miter them. So I first mitered the ends of my jig at 7 degrees parallel to each other using my miter saw.
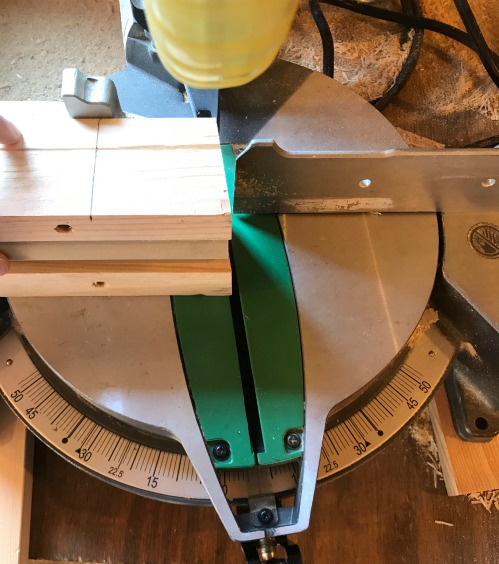
Now, I can cut a piece of dowel rod slightly longer than the jig. I don’t want it to move within the jig while I was making the cuts, so I used a small wood screw to screw the piece in place from the bottom side of the jig.
Also, notice here that on the bottom side of the jig, I marked 2 ½″ from one end (you want to mark the end that is longer on the bottom than the top…if that makes sense. Also, ignore the extra mark…I mismeasured the first time). I planned to use 1x3s for the bottom cross pieces of the base and these are 2 ½″ wide. So I went ahead and marked how far I needed to cut the groove for the next step.
,
Anyway, now you should have your first leg in the jig.
Now, trim your leg down to the same size and miters as the jig. Be careful not to trim the jig itself, but just miter the dowel rod to the same length as the jig.
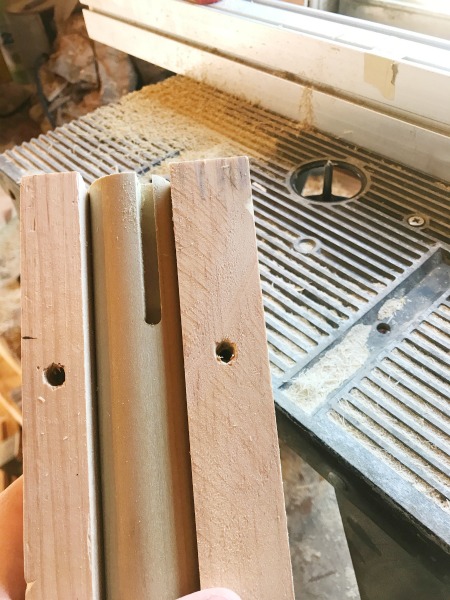
Step 3: Route Out Grooves In Legs
Don’t remove the piece from the jig yet! Leaving the leg in the jig, I then set up my router table. I don’t have a fancy table, just a little table top hand me down. You could easily rig up something like this for this application. Also, for this, I made three swipes with a ¼″ straight router bit. It would be much easier if you had a ¾″ straight bit or something larger than ¼″, but if not, ¼″ works okay.
.
First, I set my bit height above the table at ½″. Then I measured from one side of my jig to the center of my dowel and set up my fence this distance plus ¼″ from the center of my router bit. I also used a piece of tape to mark the edge of the bit so I know where to stop pushing the piece through (remember that mark from step 2?).
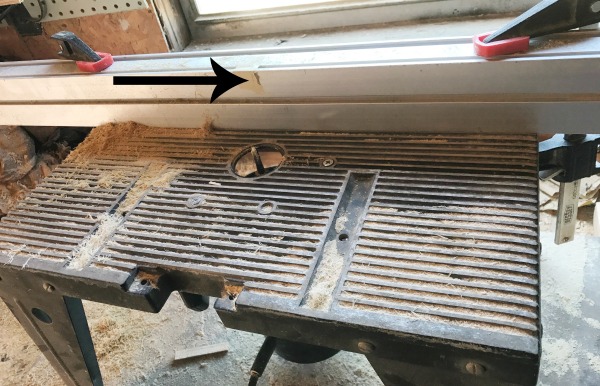
Make sure you route the right side of the leg. Try to visualize it. You need to route out the end that will face towards the middle of the piece of furniture you are building. I screwed up a piece before I got it right…sometimes you just have to test it out before you know 🙂
.
I ran my piece through until my mark on the fence matched the mark on the jig.
I double checked my measurements to make sure that I was routing 2 ½″ down the leg. Then, I adjusted anything as needed.
,
Once I was ready to go, I adjusted my fence another ¼″ closer from the bit and ran it through again.
Then, I adjusted the fence once more another ¼″ closer and made one more pass.
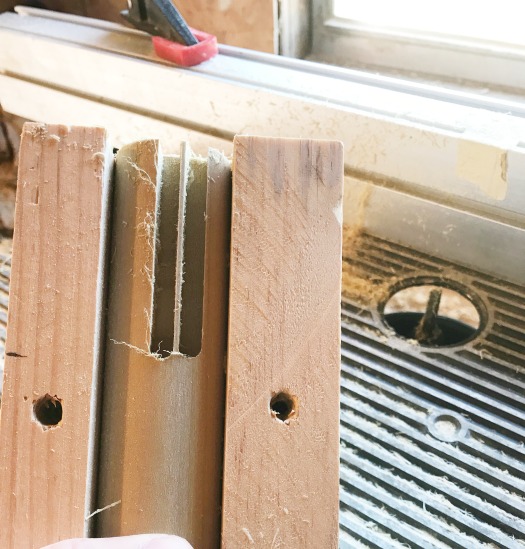
Now I had a ¾″ groove cut 2 ½″ down in to my leg.
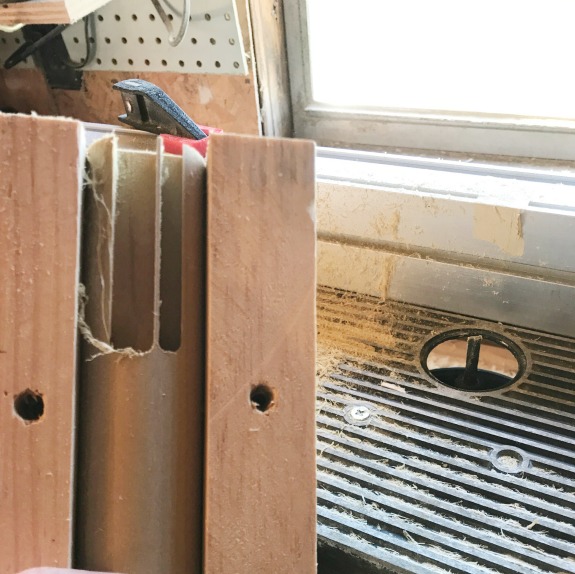
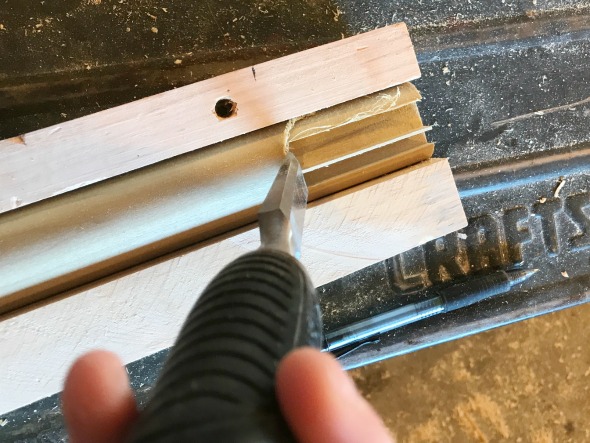
Step 4: Clean It Up
I used a ¾″ wood chisel and a hammer and cleaned up the rounded end at the bottom. I also tried to chisel at a slight angle down into the leg. This is to compensate for the 7 degree mitered end.
Then, I removed the screw on the bottom of the jig and removed my first leg. I followed the same process to make four legs total.
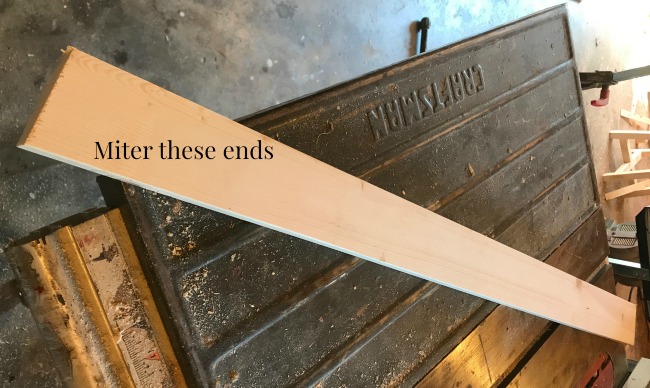
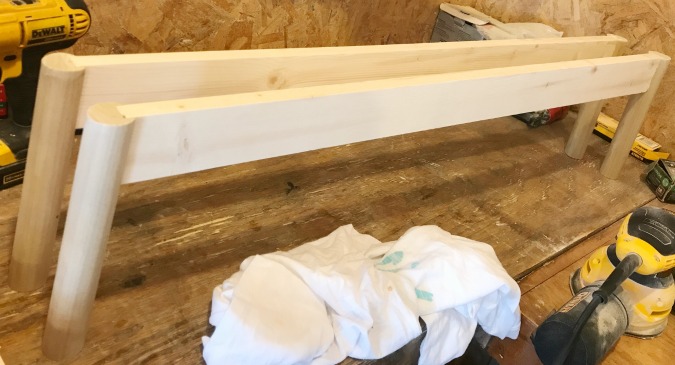
Step 5: Cut the Mid Century Modern Furniture Base Cross Supports
As I stated before, I used 1x3s for my cross supports, but you could use something else if you wanted, you just have to make adjustments to the depth of your routed groove. I determined the length of the pieces I needed based on the size of the dresser I was building (plans coming soon!). I made mine about 33″ long.
.
Once I had my length determined, I cut two supports. Then, I trimmed the ends to a 7 degree miter not parallel to each other.
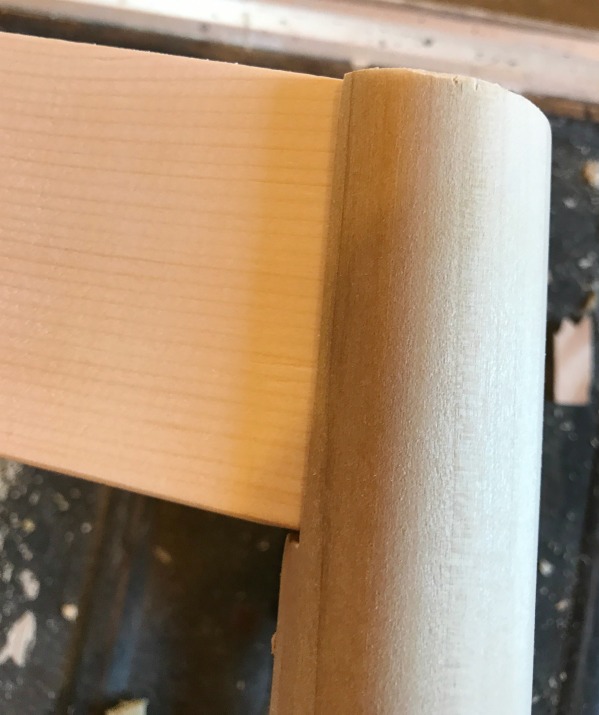
These should fit into the leg grooves like shown and the tops should be flush. Or at least close enough that you can sand it down flush 🙂

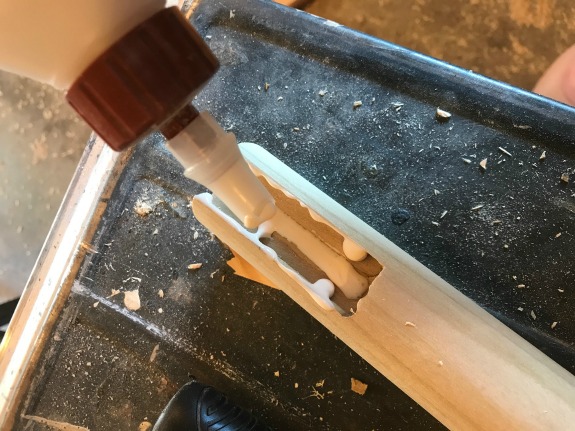
Step 6: Glue Legs to Supports
Now, it’s time for a glue up. I used wood glue in the grooves of the legs and placed the supports in. It was a tight fit, so I didn’t use clamps, but you could clamp if needed.
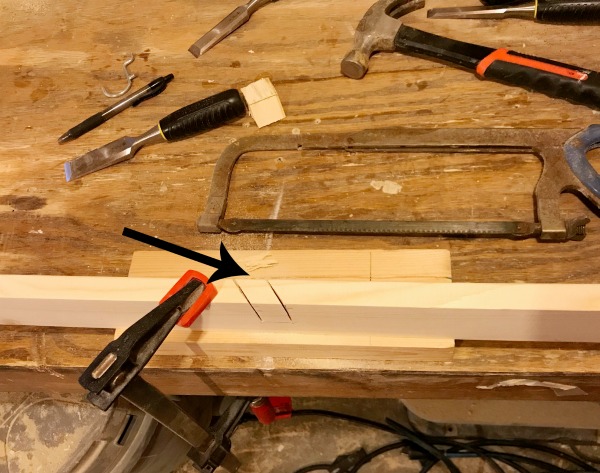
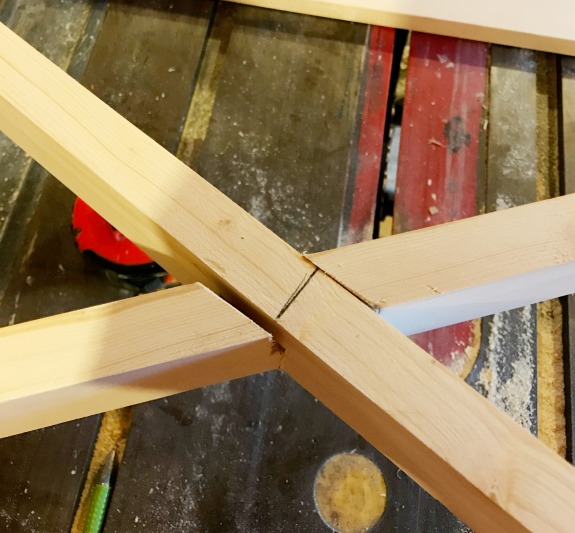
Step 7: Cross the Two Mid Century Modern Furniture Supports
Now, all that’s left is to attach these two pieces to finish up the base. Once the glue was dry, I marked the centers of each piece and situated them together on the centers so that they would be the right width and depth to fit under the dresser I planned to make for it. The exact angles will depend on your application, but there’s no need to measure them. Just fit them together where you want and make marks where they will intersect.
.
Then, I clamped the board down to the workbench and used a hand saw to cut HALFWAY through the top of one piece on the marks and the bottom of the other.
I double checked to make sure I cut them the right direction. Then used a chisel to knock the cut piece out. They should then fit together like shown. This is called a lap joint.
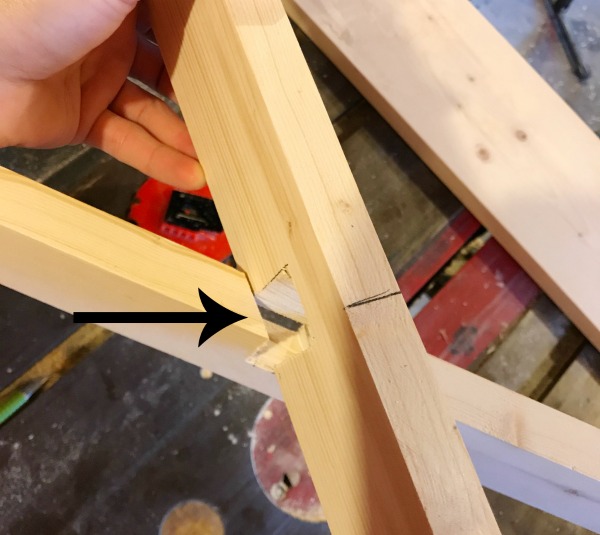
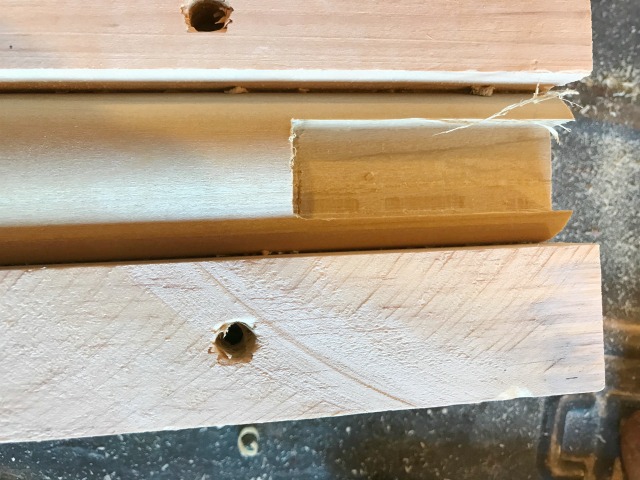
I screwed up and cut one a little too wide as you can see below. But, I cut a small shim to fit in the gap and after everything was glued, you’ll never notice it 🙂
Step 8: Final Glue Up
Finally, glue up the two pieces. Add some glue in the cuts and clamp together. Once it’s dry, you are ready to go!

Putty the screw holes in the legs leftover from the jig and sand smooth.
.
And that’s it! It’s a little more difficult than when you use straight legs and pocket holes, but what a fun look, right??
 .
.
Now, that’s how you build the base…you can build a top for it a million different ways and styles, but for the tutorial on this particular piece, stay tuned. It’ll be posted in the next couple days! If you aren’t already signed up, feel free to sign up below for email updates when new posts come out!
If you’d like to try this on a build, don’t forget to pin it for later 🙂
Until next time, happy building! 🙂
[…] You can see the mid century style dresser base in the picture above. That’s the next step in the process here. This base isn’t hard to too, but requires some explanation. So I wrote a detailed post about how to build a DIY mid century dresser base here. […]