
 I know it’s August, so I’m a little behind here to be showing you landscape ideas to improve your curb appeal.
.
Or am I?
.
Actually, the fall is a GREAT time to be thinking about that! Just to prove it, here is a great article that will explain why you should be planning your landscape project for the fall! So since it’s August, that gives you a couple months to get your ideas together and get started.
.
So, looks like I’m just in time then, huh? 😉
.
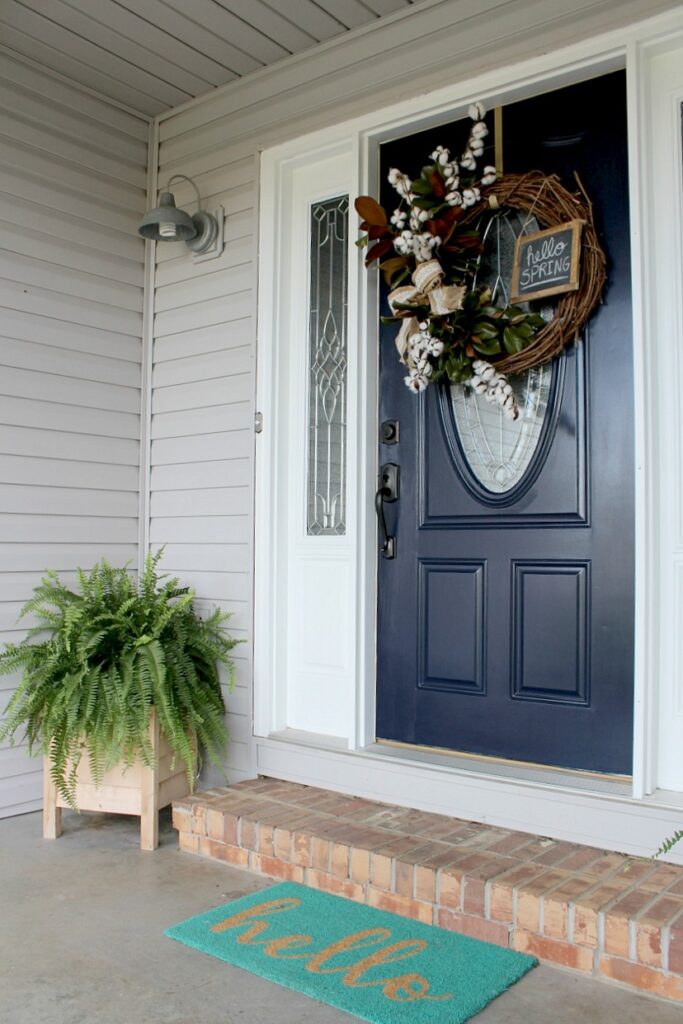
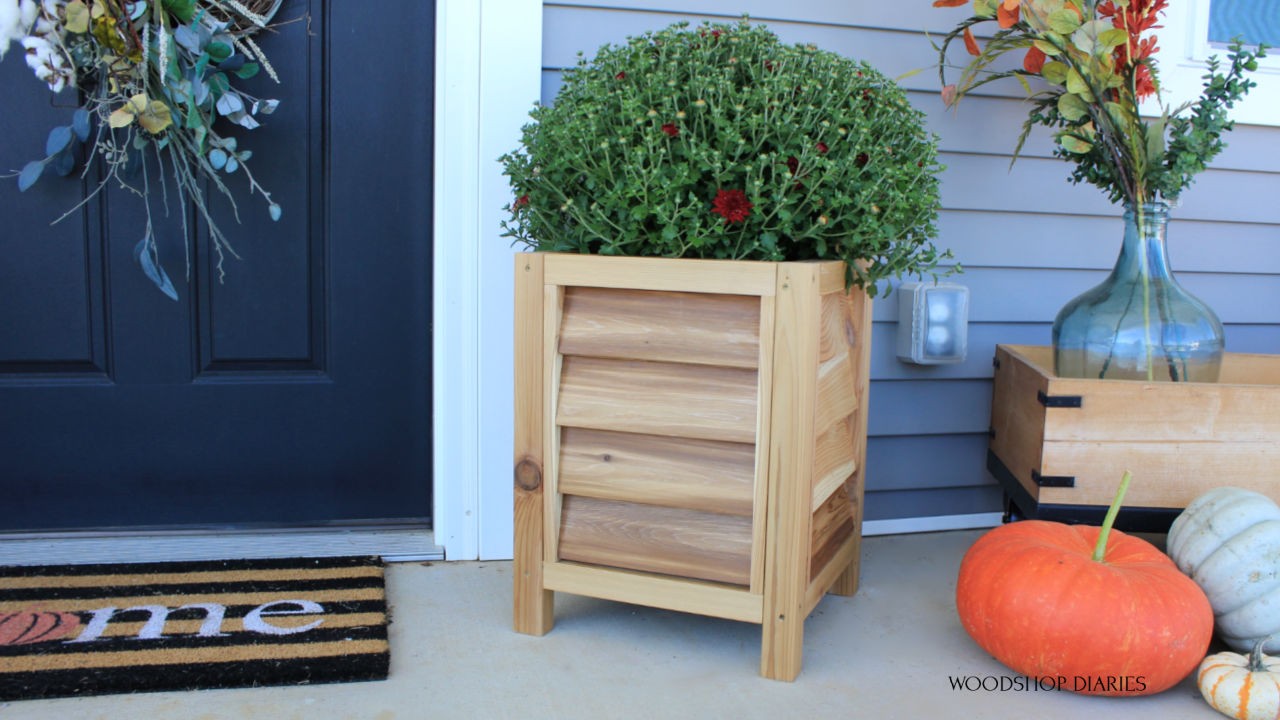
If you remember, several months ago, I painted my front door and built some wooden planters for my front porch.
I mentioned that we were finally improving our curb appeal after living in our house for 3 years. We DIYed all of it, saved a ton of money, and really improved the look of our front yard. And I’ll show you exactly what we did 🙂
.
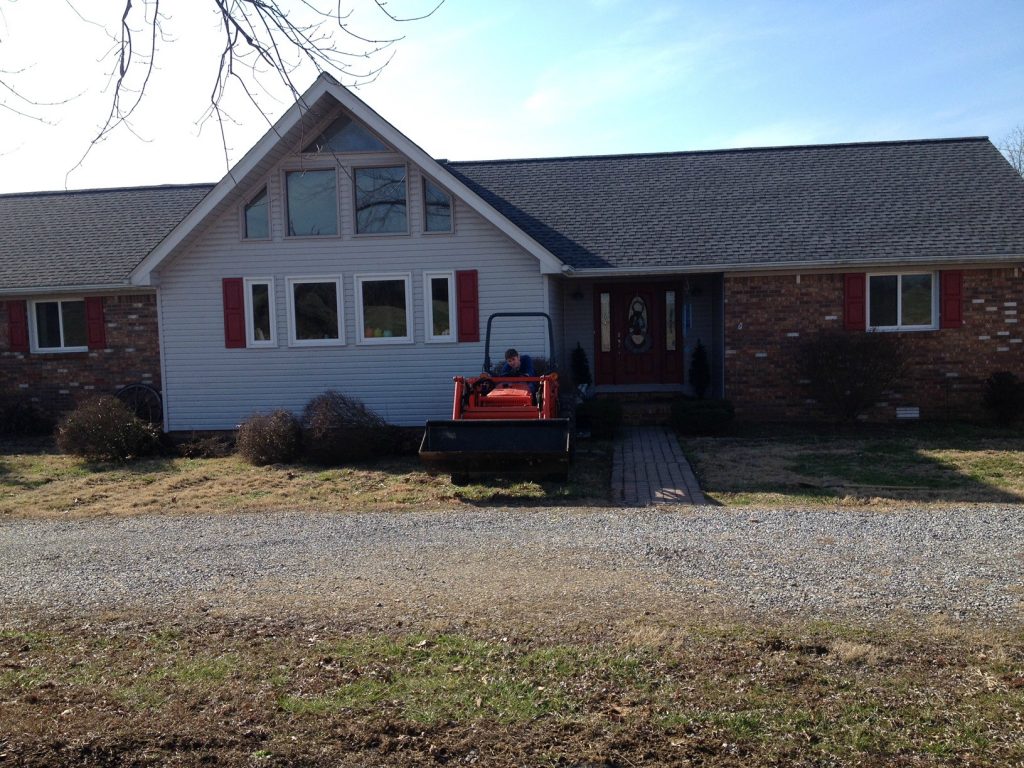
But first, the before.
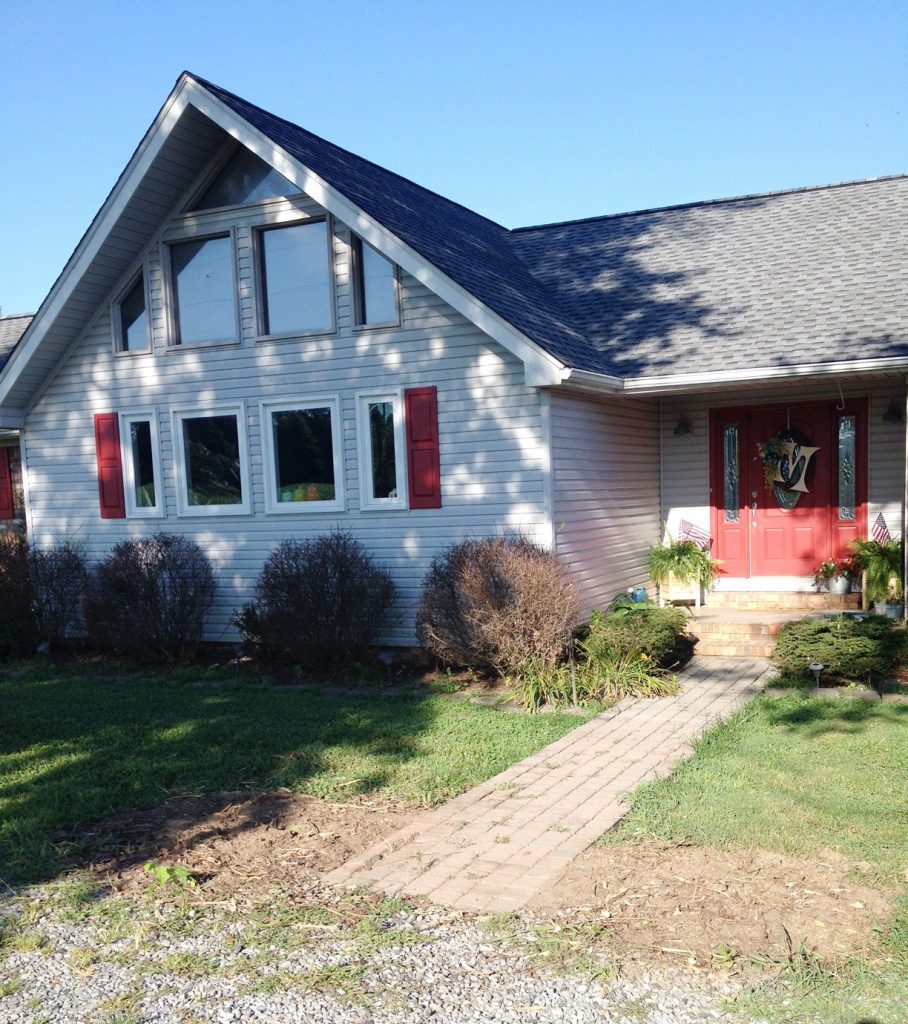
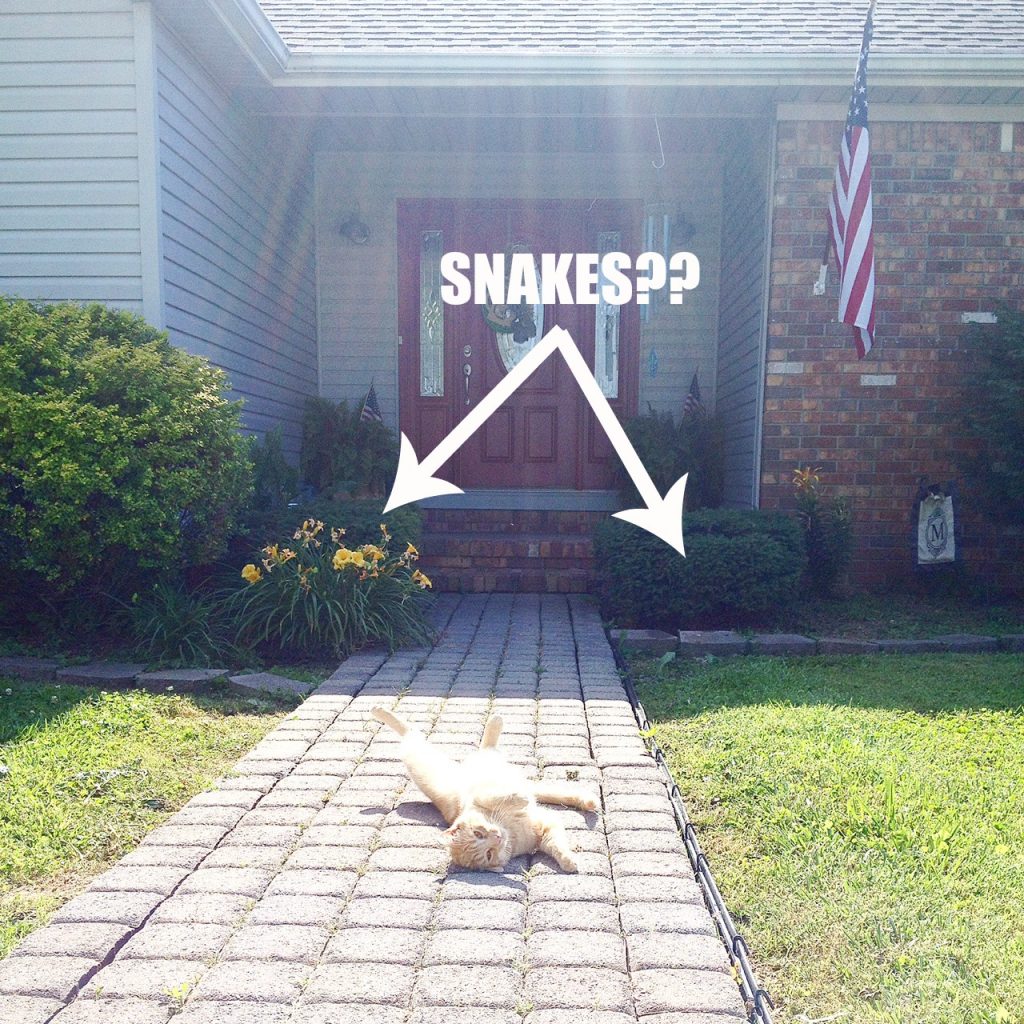
The old landscape was a hot mess. Ignore the cat rolling around on the sidewalk. Also, don’t these bushes scream “WATCH OUT FOR SNAKES HIDING IN THIS JUNGLE!?”
What do you see here? A million plants. There are flowers, bushes, more bushes, more flowers, a couple hostas. WAY too much going on here. PLUS, those four massive bushes right in the front of the house only have little leaves on them about 3 months of the year. THREE MONTHS. They just look like huge dead prickly bushes the other 9 months. NICE.
.
The mulch had washed away and the edging blocks were all sunk into the ground. It just needed some updating.
.
So we decided that in order to keep things simpler, we would minimize the bushes and get rid of all the flowers along the walkway. We would do something besides mulch (too much maintenance), and cut back on how many weeds we would have to deal with. SOOOOO, here’s what happened.
.
Danny got to play with his tractor to pull out the old bushes. (Side note: Why do I feel the need to find a way to somehow throw in the words “bush whacker” somewhere in here??)
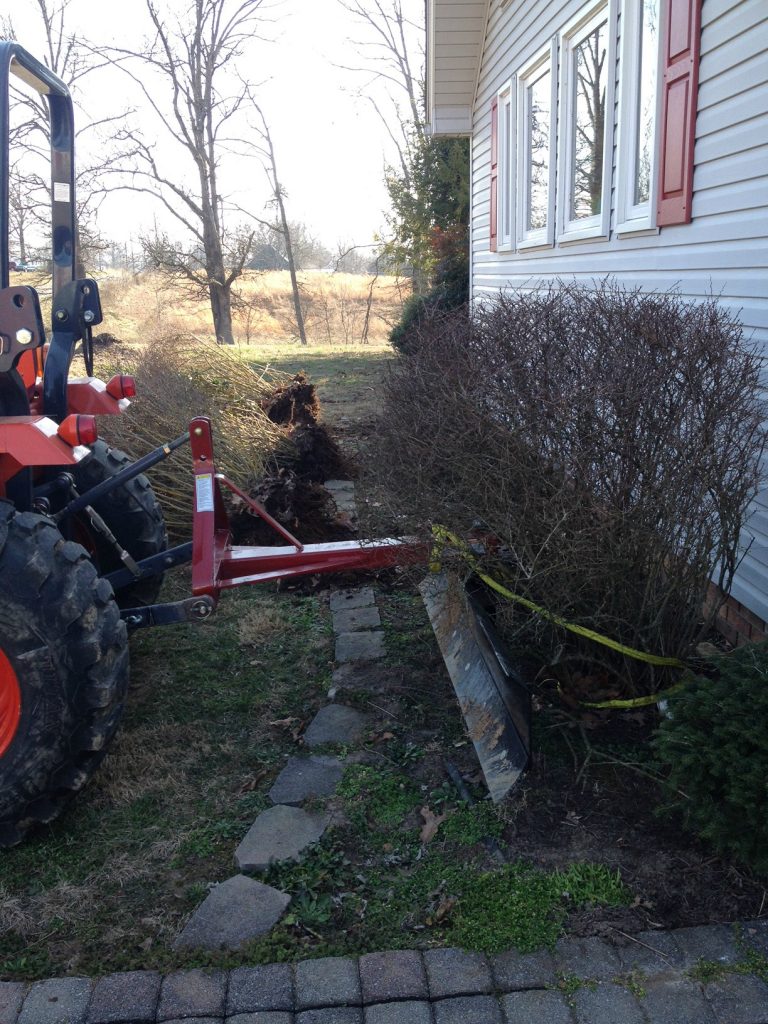
Once the bushes were gone, we dug up the flowers and replanted them around the back or in flower pots that we can move around. I wanted a clear path to walk up to the house on because I was always afraid a snake was going to come out of those flowers and bushes one day! I WOULD DIE.
.
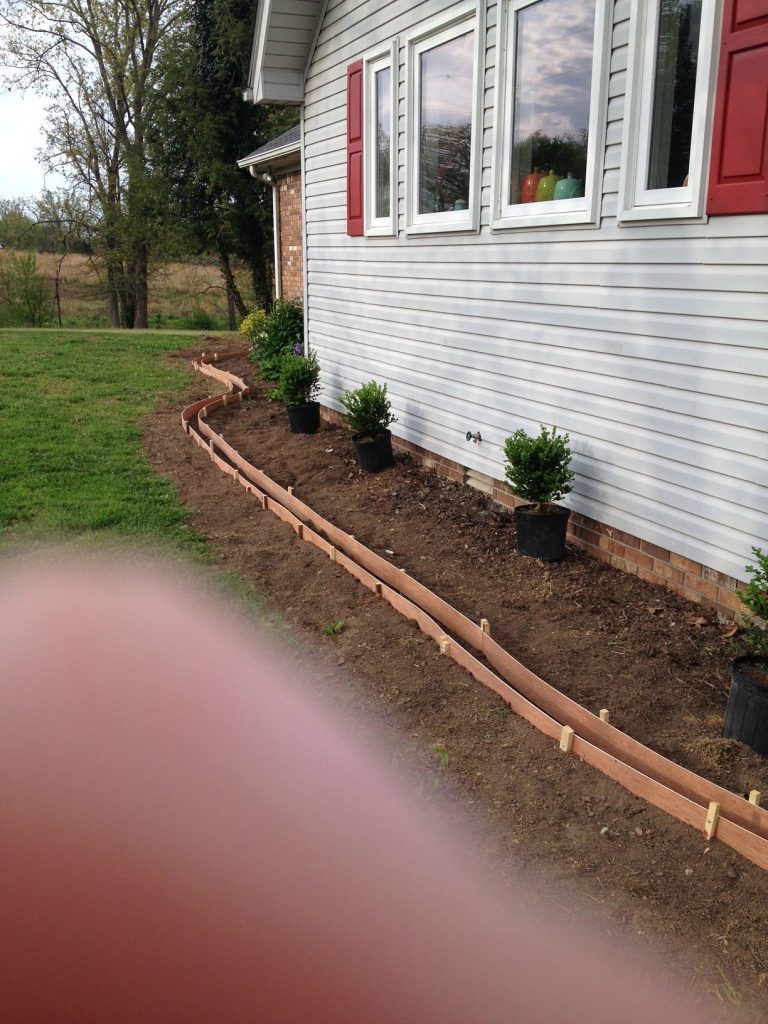
We also cut down a Crepe Mertle that was dying on the other side of the house. Once it was all cleared out, we removed the old edging blocks and used some luan (cheap ¼” plywood) strips and stakes to outline where we wanted to new edging to go and used Quikrete concrete to install a new concrete edge.
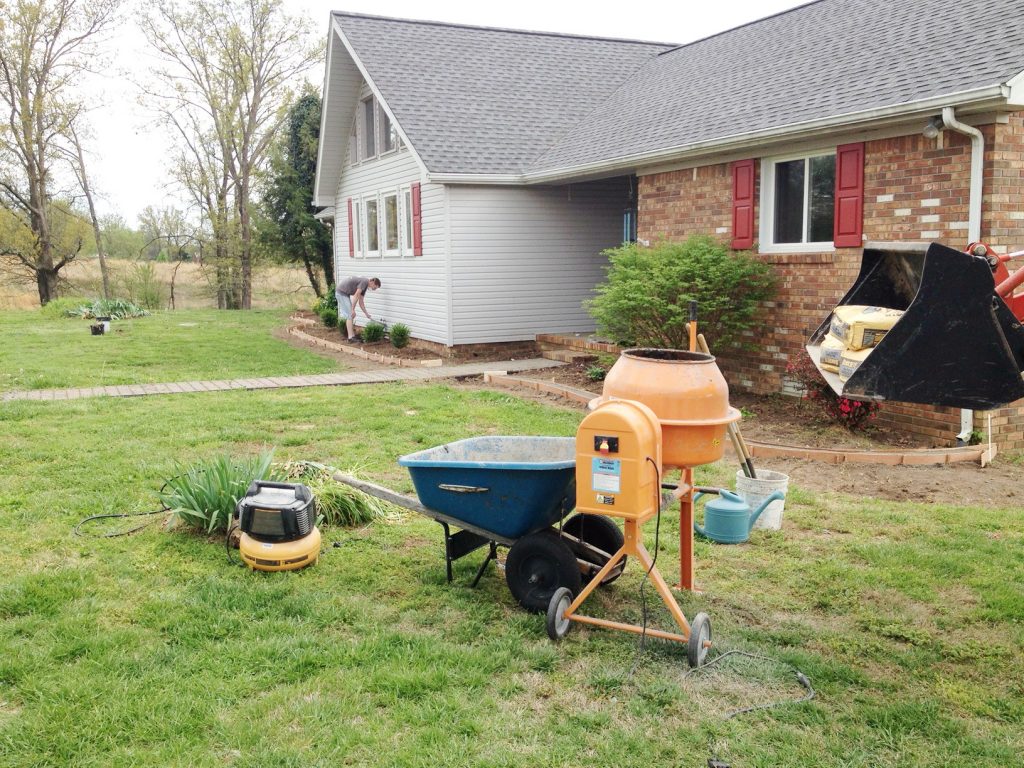
Dad let us borrow his concrete mixer for the project, but even still we were worn out by the time it was over. If you ever want to feel old, carry around 80 lb concrete bags all day.
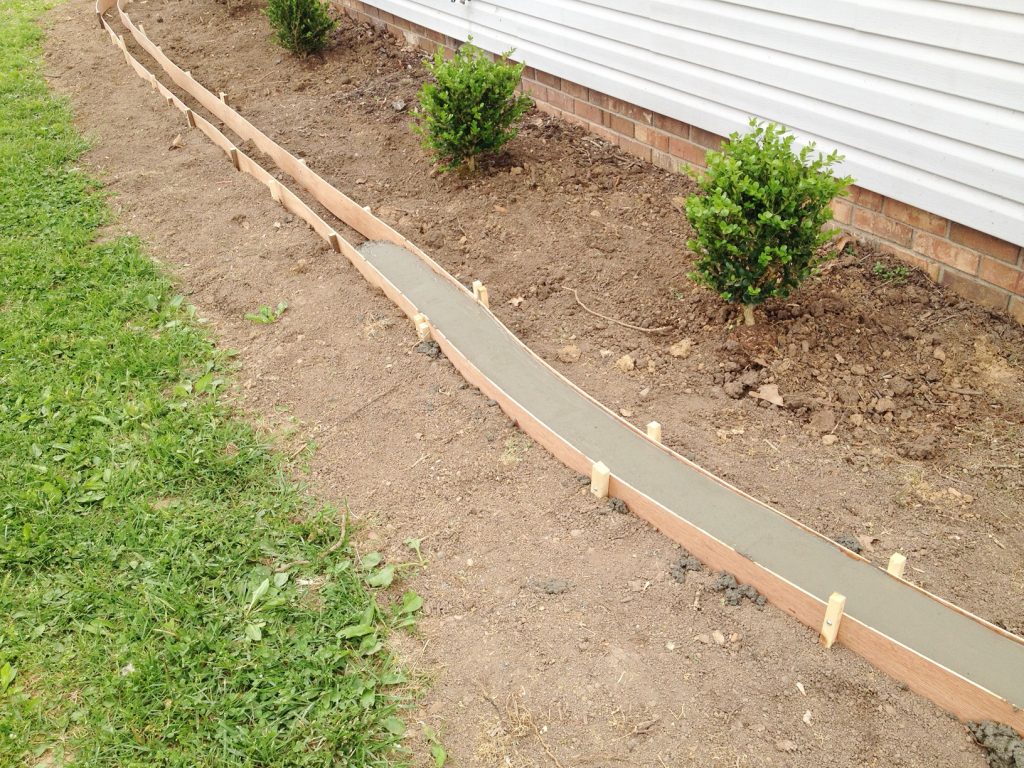
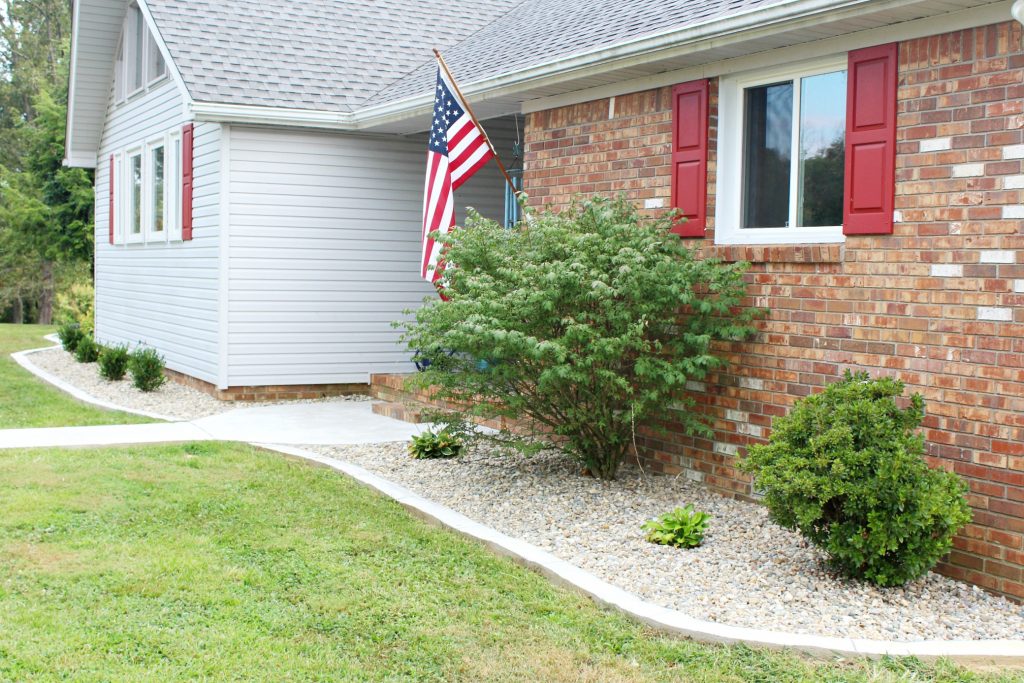
Once the edging was done, we laid down garden mesh (to keep weeds out) and planted a few small bushes (hopefully they will grow bigger soon!) to replace the basically dead ones. Then we added some Indiana river rock from the local nursery.
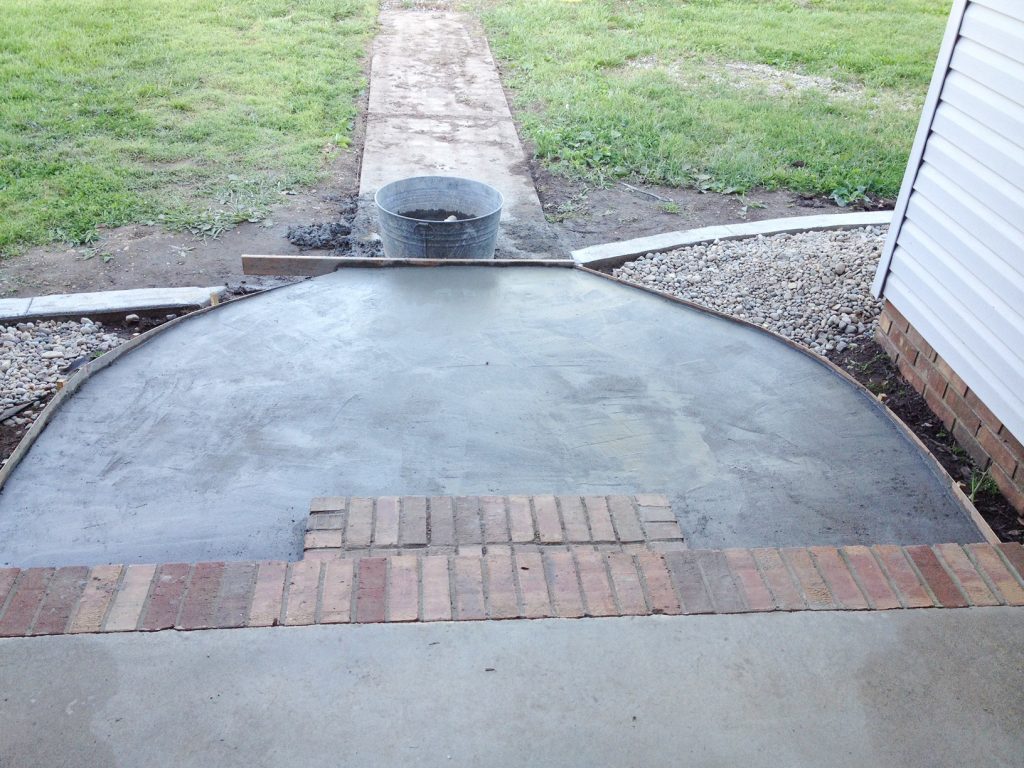
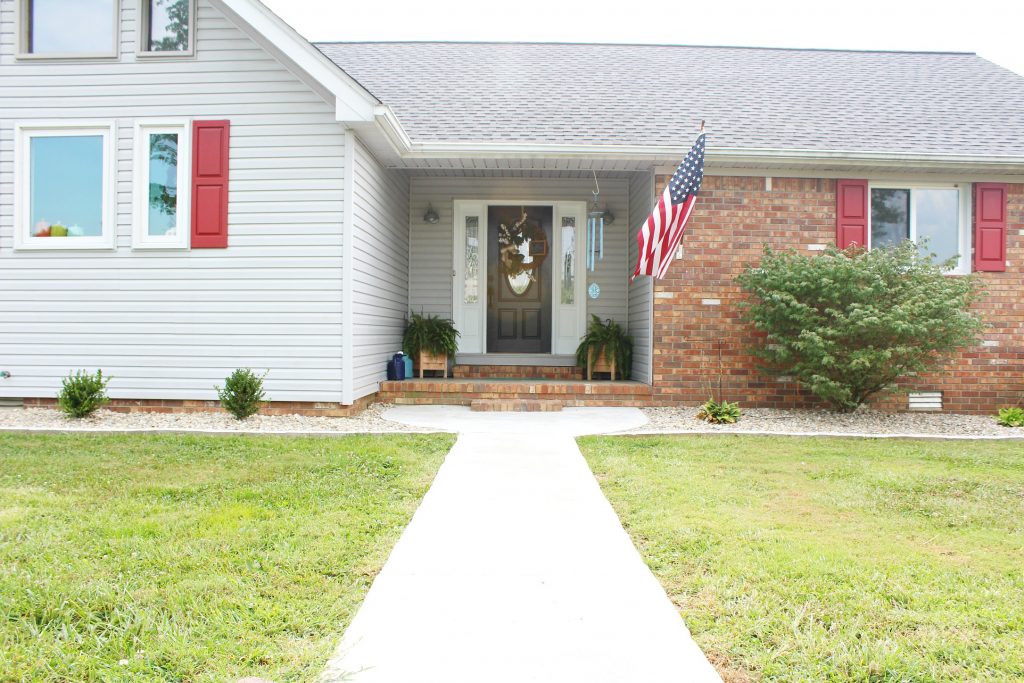
Finally, we replaced the sidewalk. I would have liked to do a tutorial on this, but we were pressed for time and I didn’t get all the pictures I needed of the process, but it’s pretty straight forward.
.
The old sidewalk pavers were uneven and had a lot of grass growing between them and just looked bad. We pulled up all the pavers and outlined the shape we wanted for the sidewalk using luan and stakes. There was an old sidewalk under the pavers on part of it so we just laid the new one on top of it.
.
We mixed up the concrete according to the instructions on the bag and worked in sections. The first day, we did the section around the porch. We decided to make this large and kind of “funnel” into the rest of the sidewalk. This would be a good place to set planter boxes, chairs, or pumpkins (I’m already thinking about fall 🙂 ).
A few days later (once that was cured), we did the straight part of the sidewalk one evening after work. I gave it one last “smoothing” to make sure it was nice and even before I went to bed, but of course, the cats left their marks in it and by the time I woke up, it was too hard to fix it. STUPID CATS. Adds character, right? HAHAHA
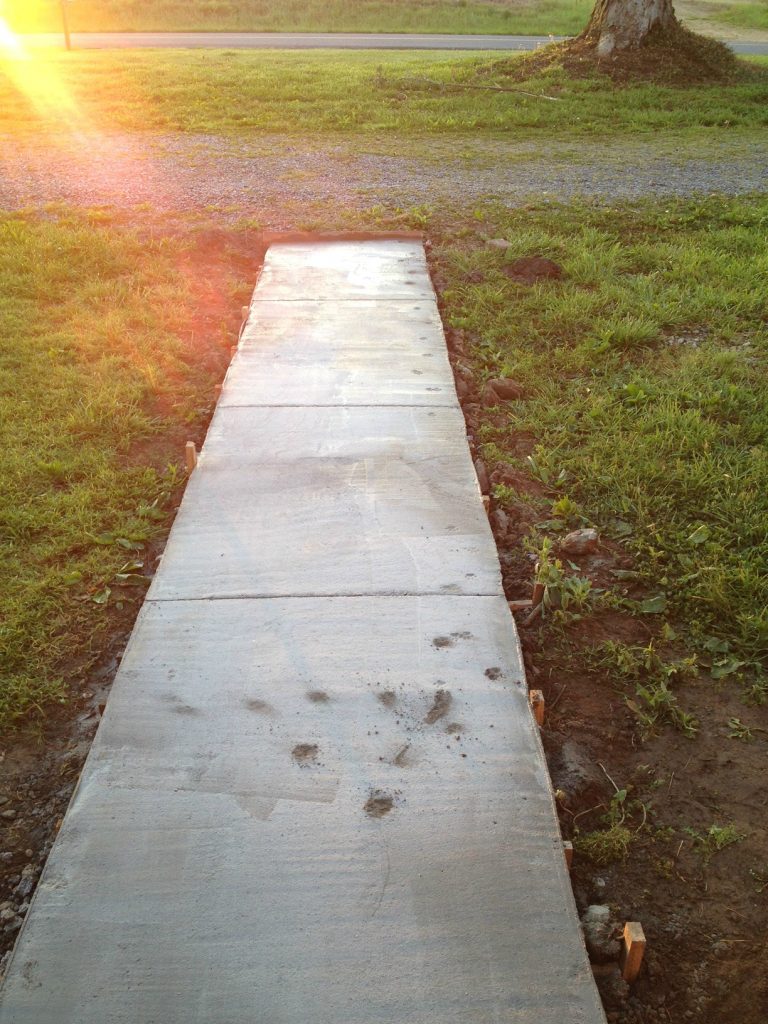
Once it fully cured, you don’t notice the prints too bad anymore. THANK GOODNESS!
.
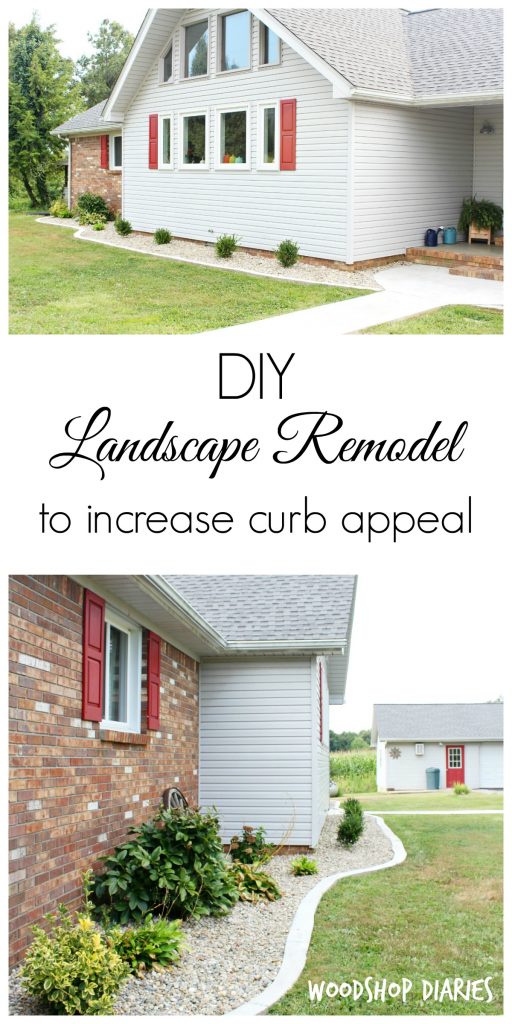
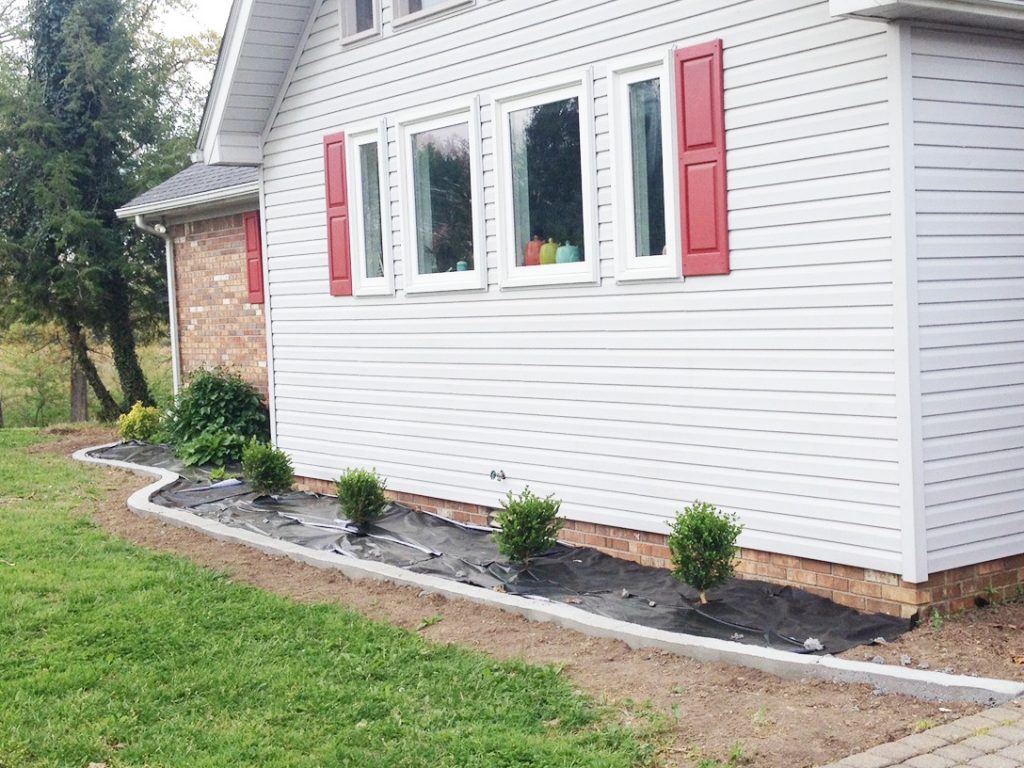
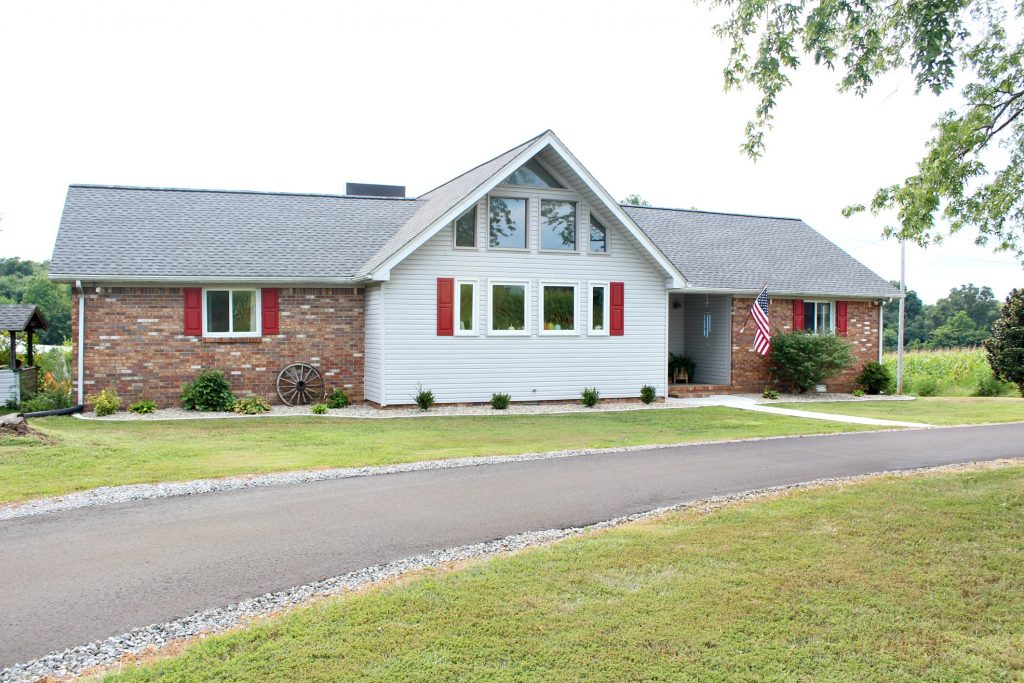
And now, this is what our new landscape and front yard looks like!
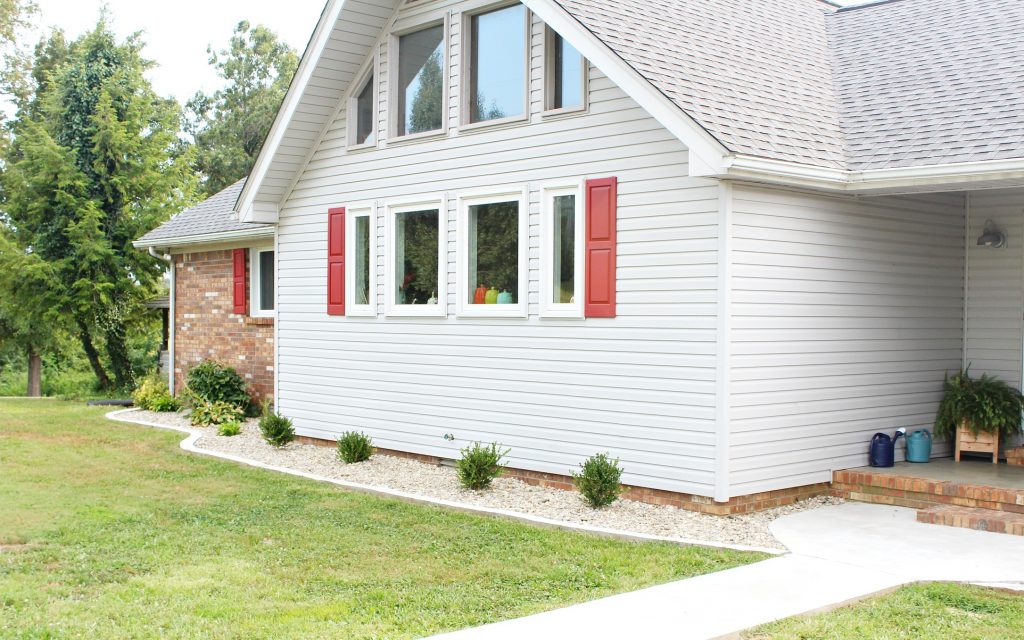
What a change! And I’m not scared to walk to my front door now because a snake may be hiding in a bush haha.
I love how much cleaner it looks and how much easier it is to maintain. River rock is more expensive than mulch, but it should last a long time and with the mesh underneath, there is no grass or weeds to spray!
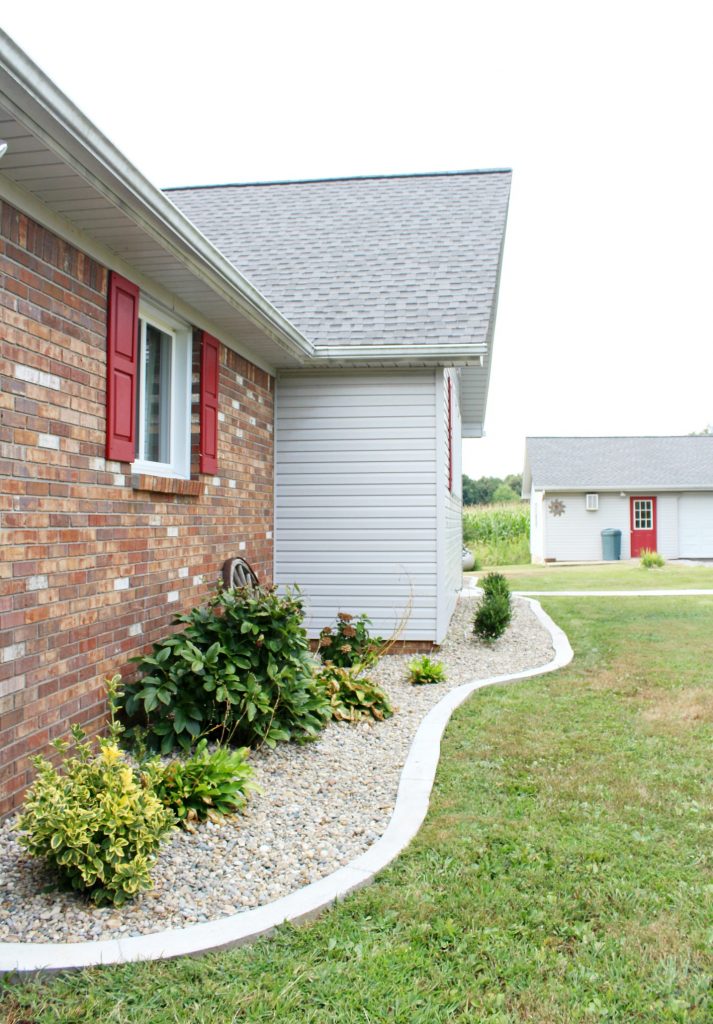
What do you think of the concrete edging? Danny was unsure at first, but I really like the look. It was a lot of work, but it’s a lot cheaper than buying new edging blocks if you don’t already have some.
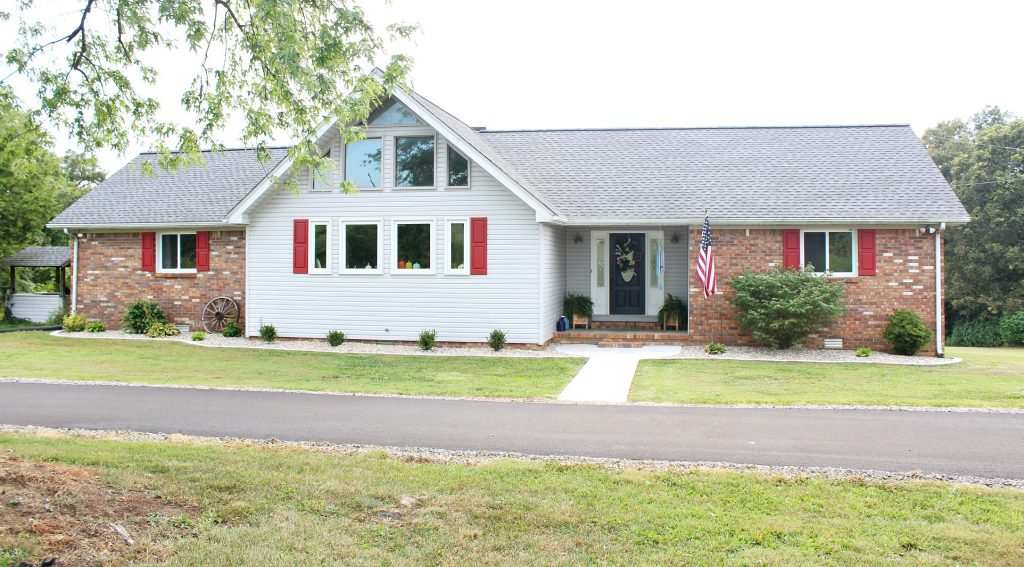
You notice here that we also paved our driveway. It’s a long story, but we made a spur of the moment decision to pave it and it really made a huge difference in our front yard. But even without the driveway, the landscape is still a huge improvement that I am SO happy to finally have finished!
I’m hoping our baby sized boxwoods will grow soon so the house doesn’t look so naked, but this is much better than the huge dead bushes.
.
The project took us several weeks to complete. We worked on it off and on, but it was definitely worth the time and effort.
.
I would love to know what your favorite part of the transformation is in the comments below.
.
PS I’d also love it if you’d pin this for later!!
If you have any questions on how we did anything, feel free to ask 🙂
.
Until next time, happy DIYing.
Alexandria Martinez says
This was such a fun post to read and sighed in relief when you showed how the prints didn’t show up. My fiance and I are thinking about getting landscape curbing done and we love the look. However, both of us are busy people and we wouldn’t have time to do this by ourselves so we will contact a service. Thanks for the awesome post!
Shara, Woodshop Diaries says
Thank you! Yes, I am glad the prints didn’t show up so bad once everything dried good haha. Silly cats!! Good luck with your landscape project. It’s always worth it once it’s finished 🙂
Lourdes says
Even though the bushes are going to grow the whole look is very open and clean, it Weill be easy to maintain now and still have clean open look. I congratulate you and your hubby for such great work. I do like very much the cement edging, it looks great !!!
Shara, Woodshop Diaries says
Thank you! We love the new look and it’s such low maintenance! He wasn’t sure about the concrete edging at first, but I thought it turned out better than we expected!
Jennie says
Shara & Danny it looks great and your detail on the edging WILL be replicated in FL in the near future lol! Love, Jennie & John
Shara, Woodshop Diaries says
Thank you so much! So glad you liked the edging! Danny was skeptical, but I think it turned out awesome and looks really clean! 🙂 Good luck with yours, I would love to see when you get finished!
Janet says
I love the new look. We just took out a huge bush I hated and are waiting until fall to put in a new one. Now I have more ideas on what to do. Thanks!
Shara, Woodshop Diaries says
Thank you! So glad this was helpful and gave you some ideas for your own yard!!
Vangie says
You really opened up you entry. Looking good.
Shara, Woodshop Diaries says
Thank you so much! I love how open and bright it feels now!