
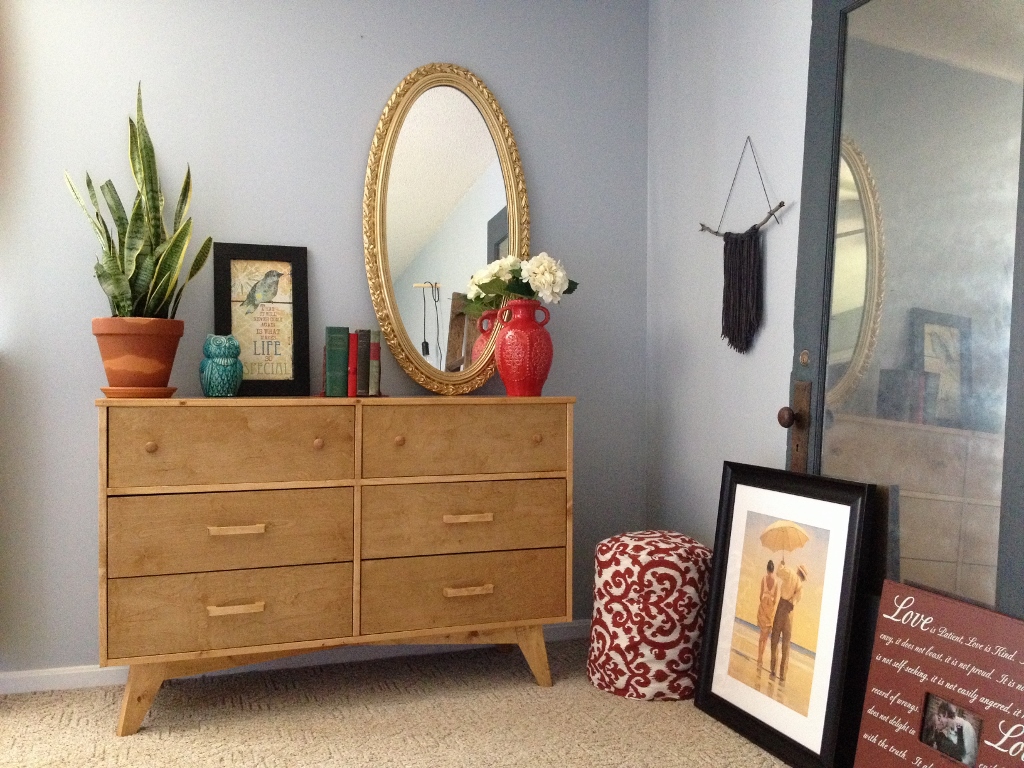
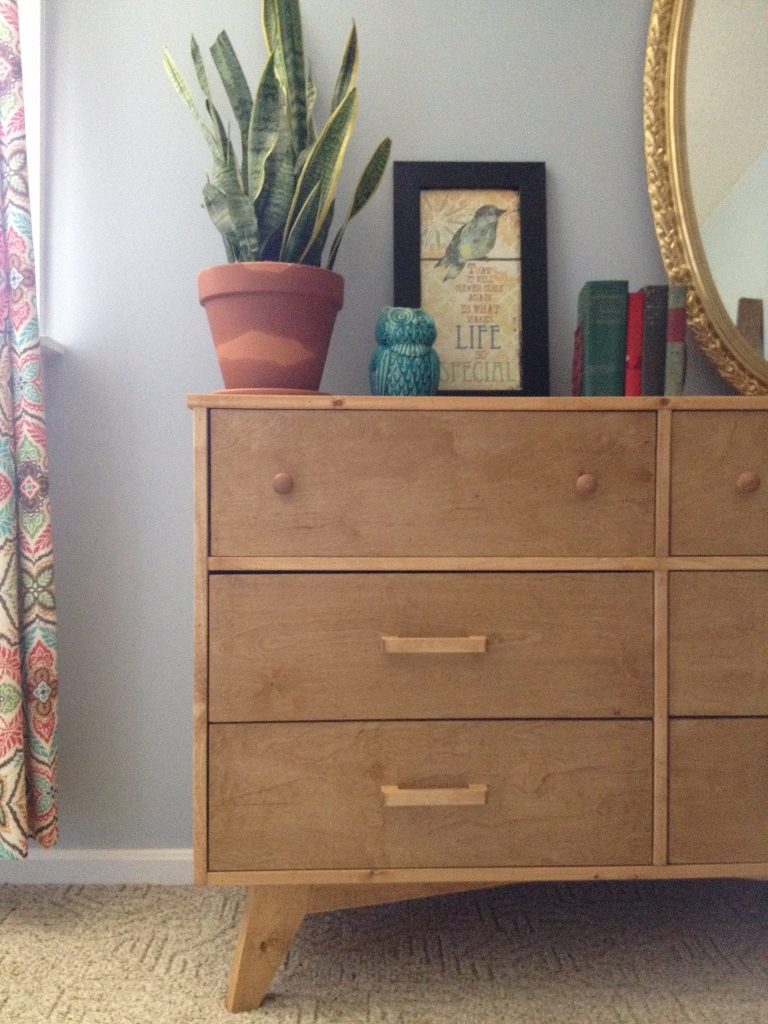
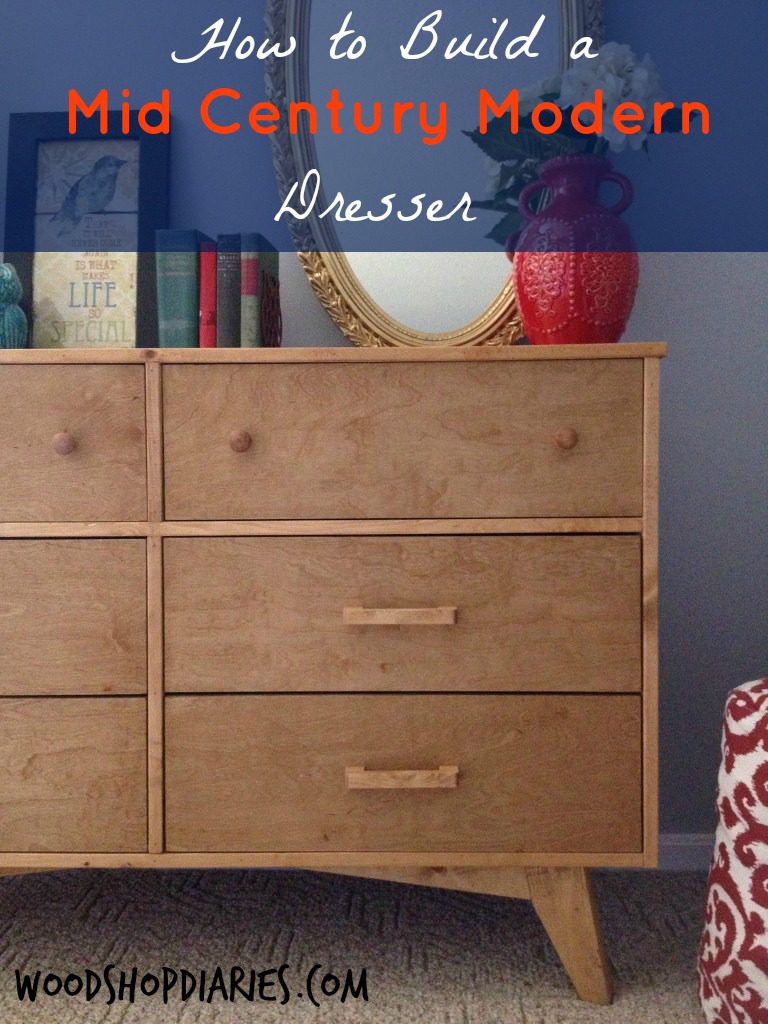
The best compliment I have gotten on my new DIY dresser was “that looks like it came straight out of the 70s.” Why, thank you, sir, that was the point. Guess I made it well 🙂 haha
If you follow me on Instagram (and you totally should…I’m @woodshopdiaries), you will have seen like a billion pictures of this project already, but I am just now getting around to finally posting about it. It’s been rough, to be honest. I’ll get to that in a minute.
.
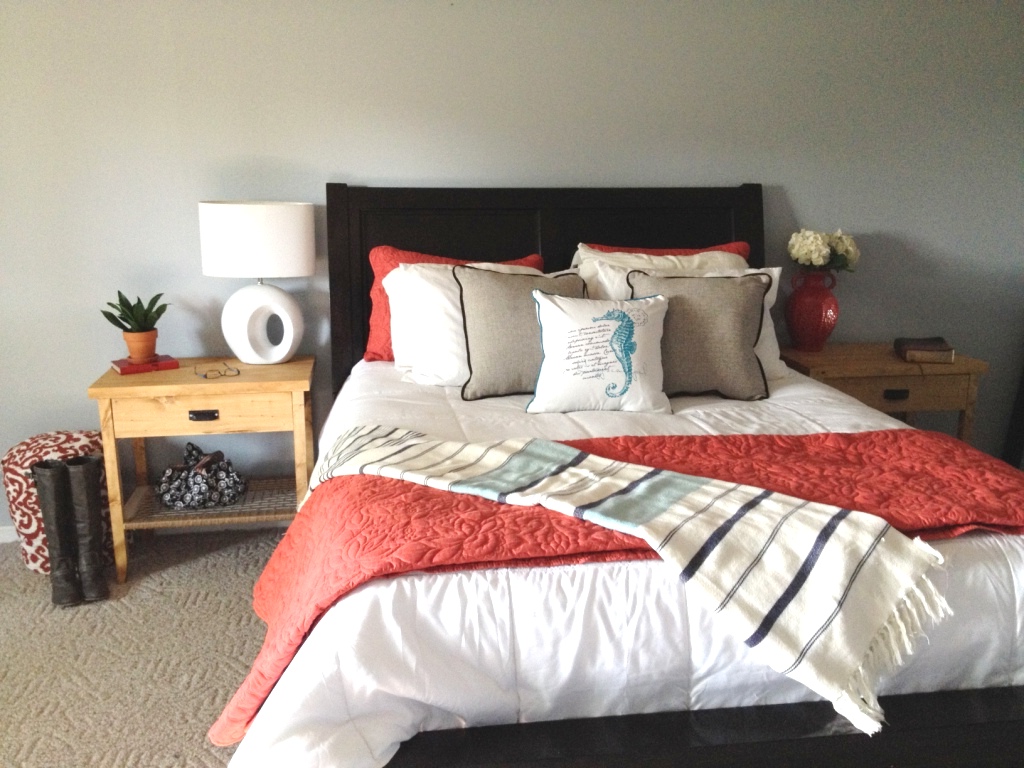
First, let me refresh your memory on what the “South Wing Project” is. You can check out part 1 and part 2 for a few more details. Basically, the south side of our house is where our master bedroom, master bathroom, and closet are on. I’m “redefining” my personal style as we redo this area in the next few months. We redid our closet a while back, but our bathroom is our next big project. While we are preparing to redo it, I’ve also started to work on our bedroom a little.
Actually, the truth is, I’m having a hard time making decisions about the bathroom, so I’m making other things in the mean time 🙂
.
So after I made new nightstands, I wanted a retro/mid century style dresser like this one I saw at West Elm. But the price tag was $999. Umm, no. So I figured out a way to make a similar one myself for about $100. And that is (one of the many reasons) why I DIY.
.
NOTE: This post contains affiliate links for your convenience. See disclosure policy for more information. As always, I only link to products that I personally use and/or highly recommend.
.
For this project, I used:
Materials:
Birch plywood (2 sheets)
A couple 2x4s (some 2x4s were cut down to 2x3s on the table saw)
¼″ plywood for drawer bottoms and backing
Edge banding or thin strips of ¾″ wood
Pocket hole screws (1 ¼″ and 2 ½″)
2 ½″ wood screws (just a few)
1 ¼″ wood screws (just a few)
6 (pair) ball bearing drawer slides (I bought the 10 pack because it was cheaper)
Knobs and pulls
Tools:
Circular Saw (this is the link to the one I have, but apparently, there is a newer model now)
Tape measure
Pen/pencil
Hammer & Small finish nails (or nail gun is even better)
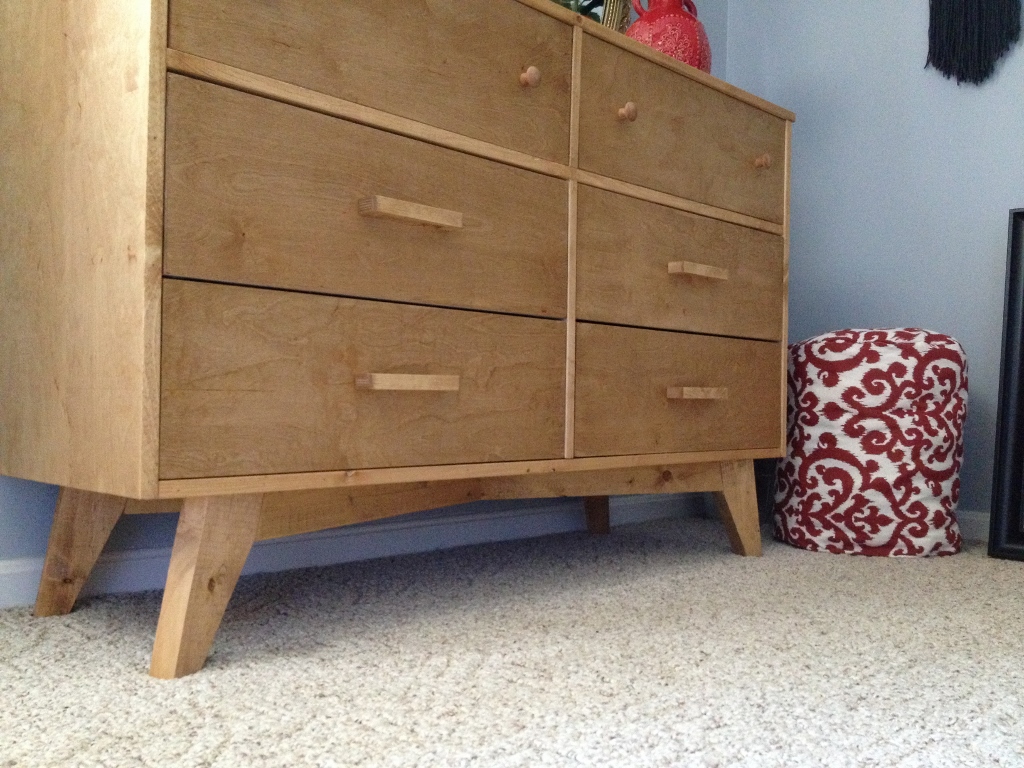
Making the Base
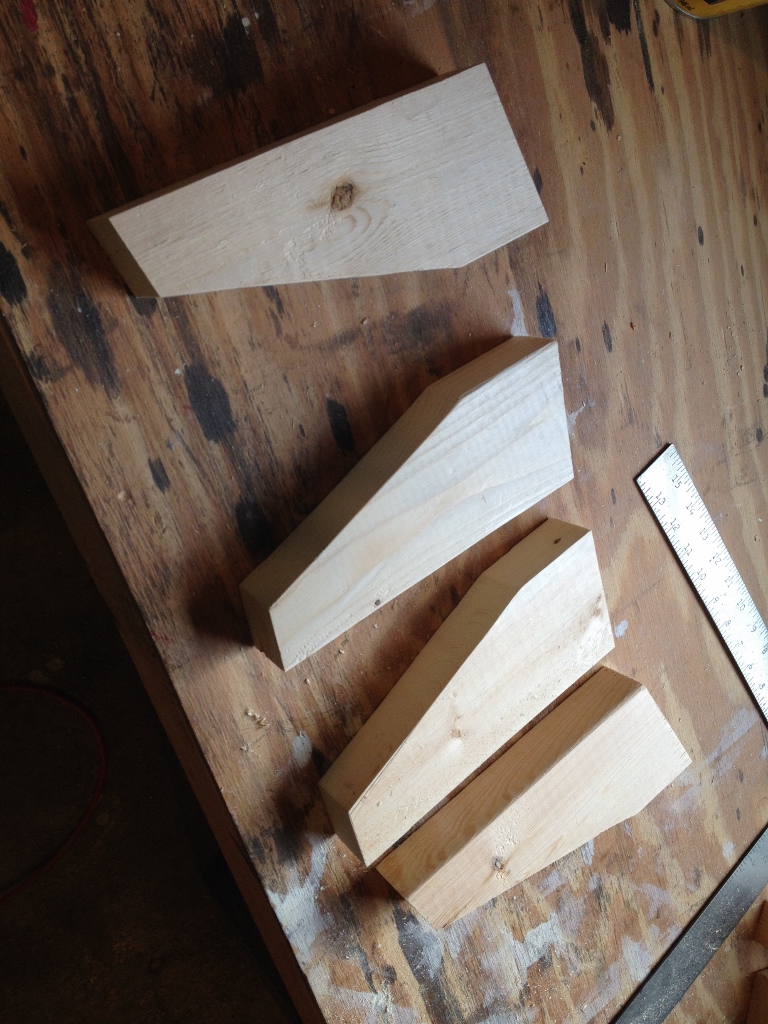
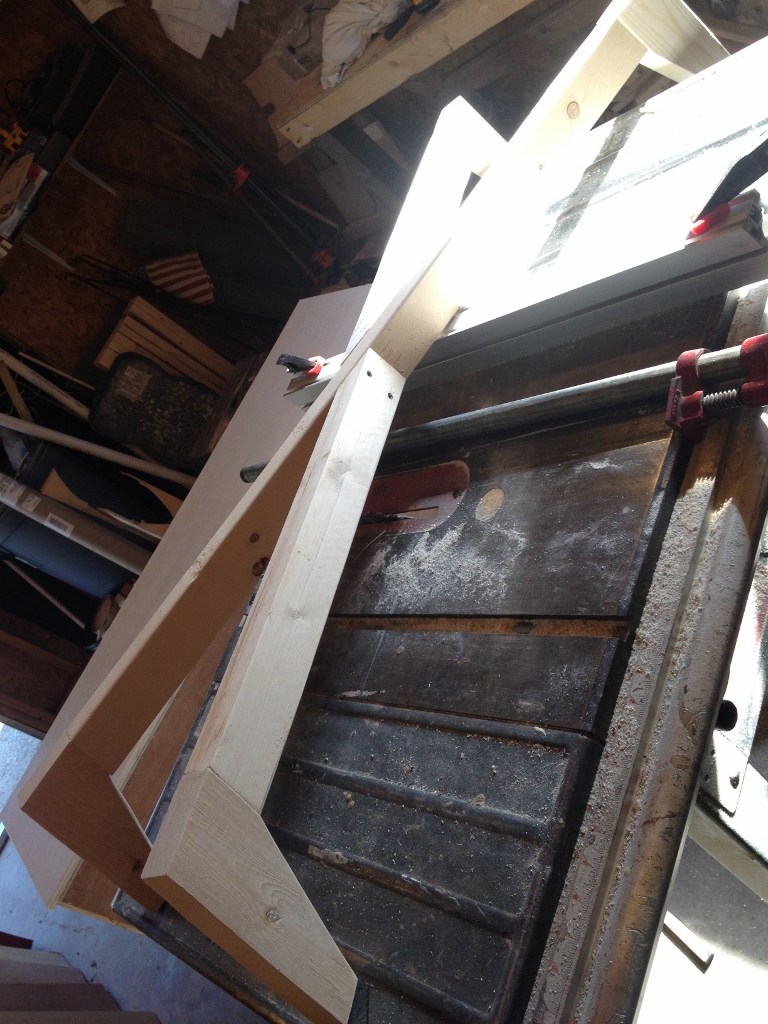
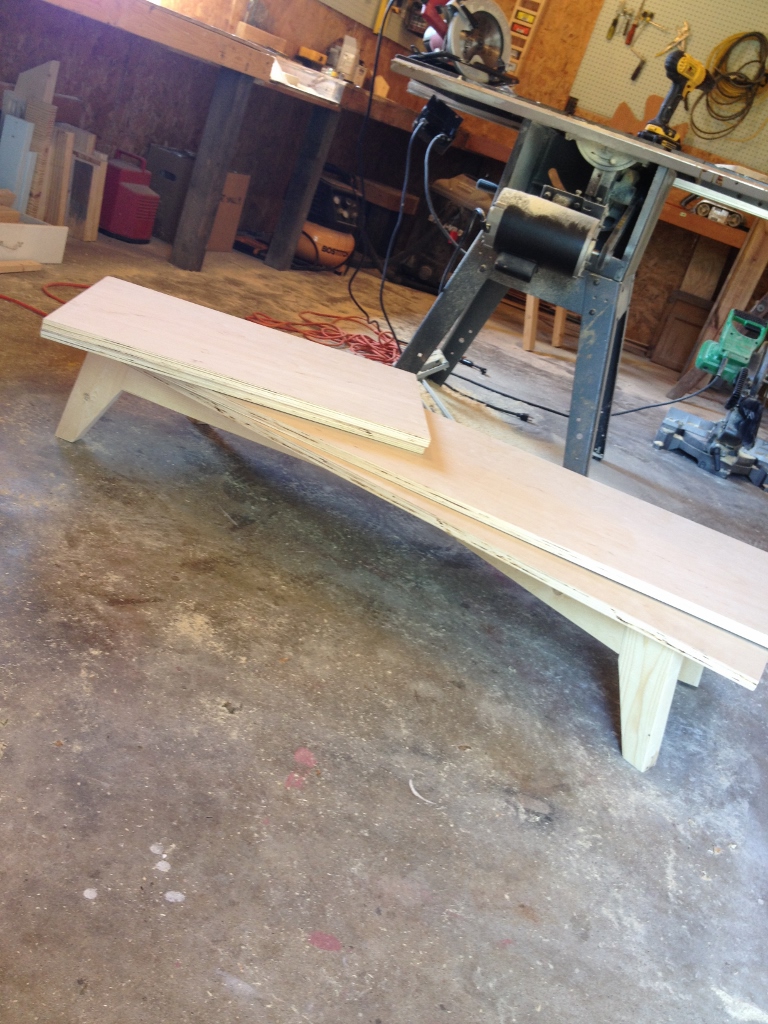
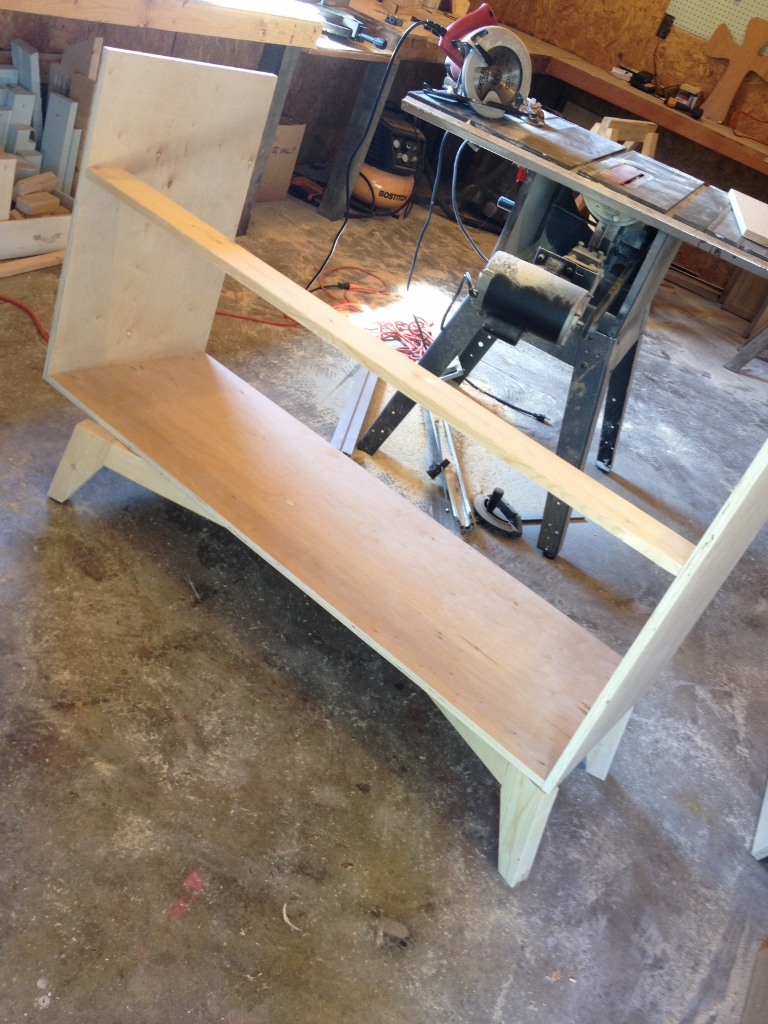
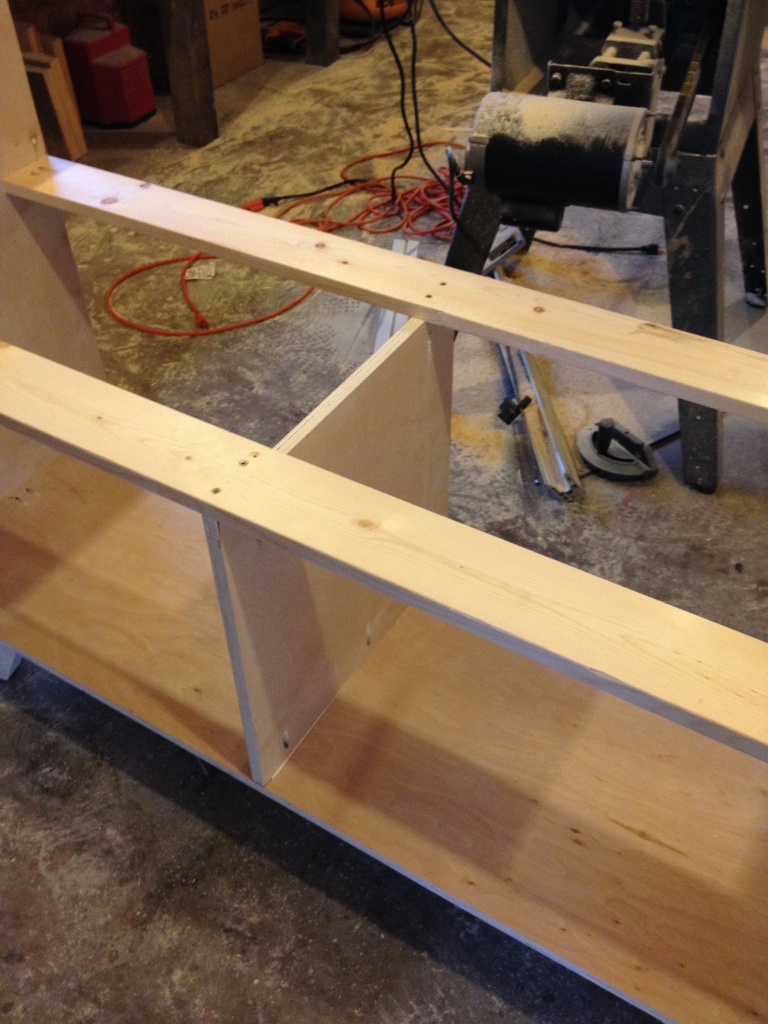
First, I made the legs/bottom frame. I used my miter saw to cut four 2x4s 8″ long with a 7 degree miter on each end parallel to each other. Then I marked on each block 2 ½″ down from the top and 1 ½″ from the outside at the bottom. See picture below. I drew a line between the two marks and used a jig saw to cut along the line. These will be the legs.

I cut one 2×3 (2x3s are 1 ½″ thick and 2 ½″ wide) about 43″ long with each end mitered at 7 degrees not parallel to each other. I screwed each end into a leg using pocket holes and screws. (By the way, if you don’t already have a Kreg Jig for pocket holes, you NEED to get one. I use mine ALL THE TIME. Check out all my favorite tools here.)
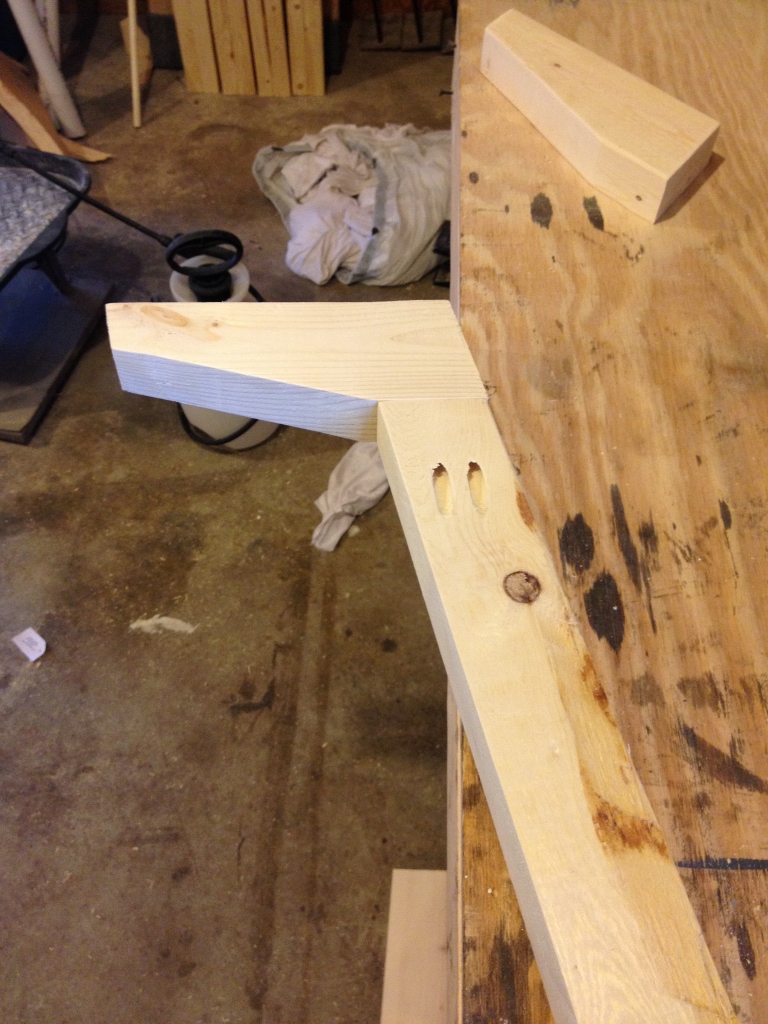
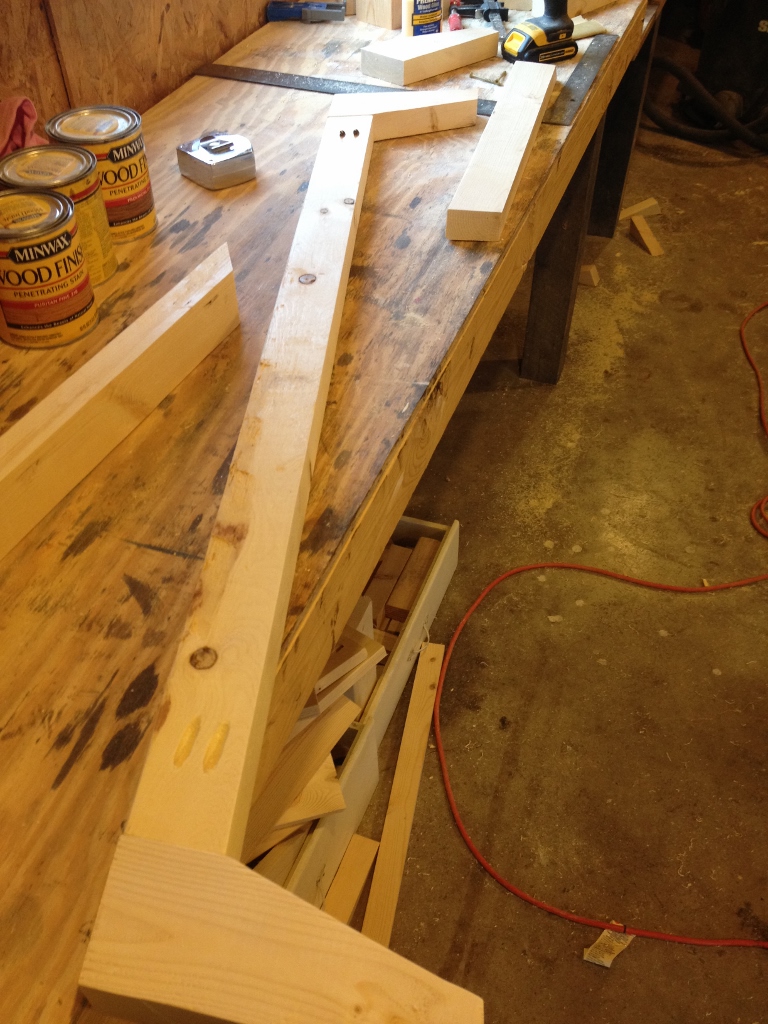
The next part was tricky. I needed my dresser to be about 18″ deep. So the angles between the other 2×3 and this 2×3 across the bottom were pretty big. Too big for my miter saw to cut normally. I can’t even tell you what angle I cut (I think it was around 60 something), but I ended up having to do some maneuvering on my saw to cut the angle.
.
Your angle would depend on how deep your dresser would be. As long as the distance between the two legs (front to back) is smaller than the depth of your dresser, it’s fine. No specific angle is required.
.
I ended up with two pieces to screw into this first 2×3. The picture below shows better what I’m talking about. I attached these two 2×3 pieces with pocket holes and screws to the other two leg pieces. Then I screwed them into the long 2×3 in the middle with 2 ½″ screws. Instead of screwing 2 smaller pieces into the one long piece like I did, you could mark and notch out the two 2x3s to fit together. I was afraid it might lose some of its strength if I did that and it might have ended up with a sag in the middle. In hindsight, it probably would have been fine.
Making the Main Dresser
Once the bottom was together, I started on the top part. I used birch plywood (because it’s cheaper than oak and because for some reason, I think the grain is pretty). I basically make a big box. I ripped my plywood into two 18″ pieces with my circular saw. Then, I cut a piece 18″ wide x 52″ long with for the bottom and screwed two 18″x28″ pieces to it using pocket holes and screws. Seriously, I don’t know what I’d do without my Kreg pocket hole jig.
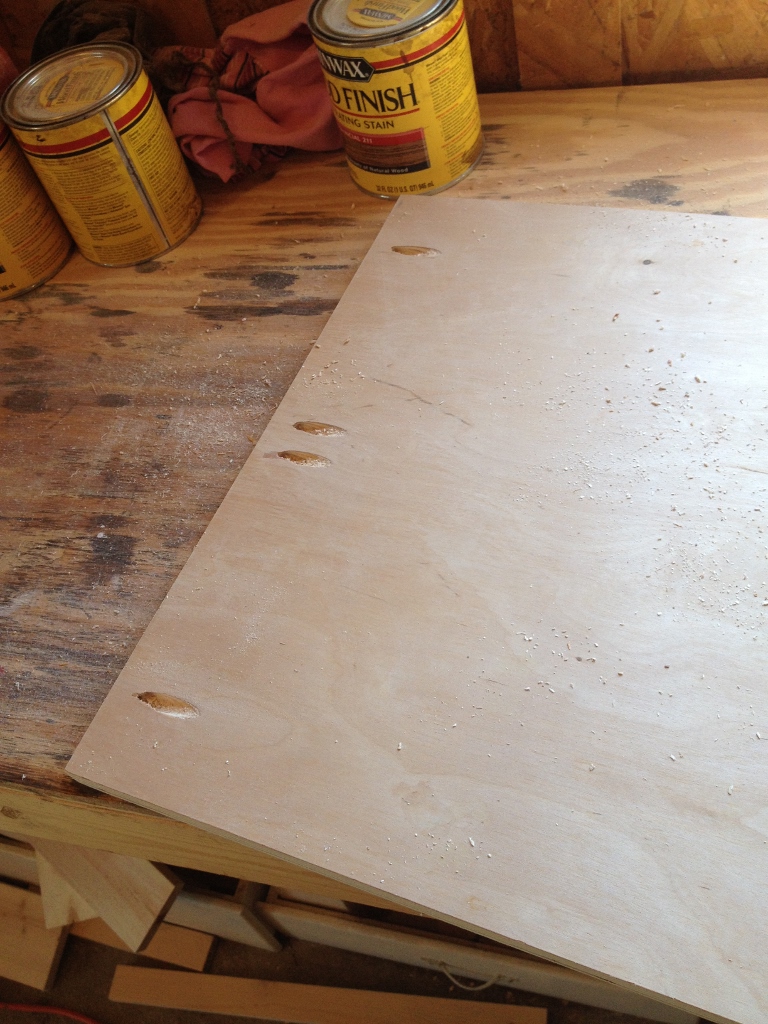
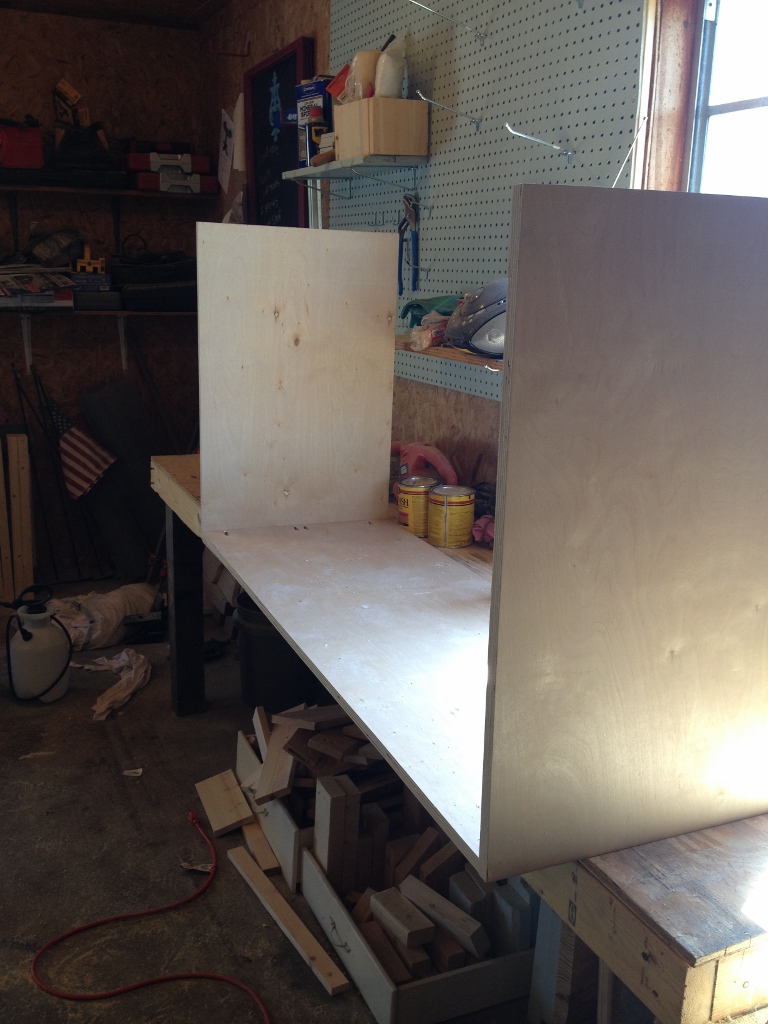
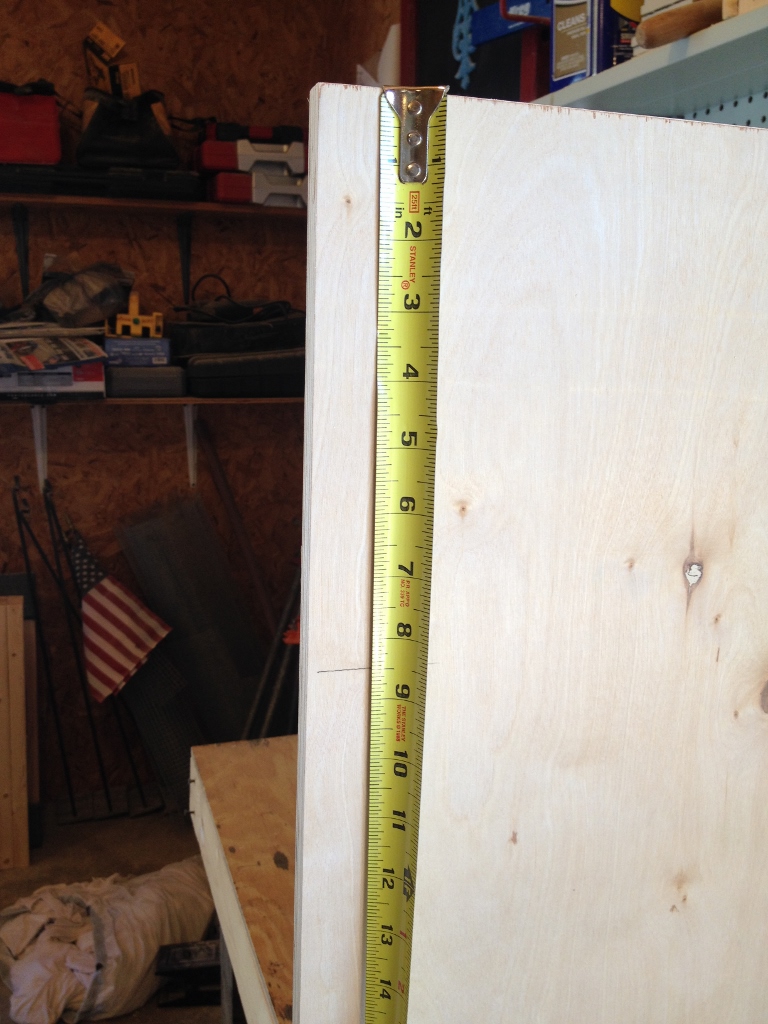
Then I attached a 1×4 between the sides about 8 ½″ down from the top (again using pocket holes and screws).
Then I added another 1×4 the same way in the back side. I attached a “divider” piece of plywood in the middle and on top of the 1x4s using pocket holes and screws on the bottom and using 1 ¼″ screws from the top. Make sure it is exactly in the middle and square. NOTE: in the first picture, I set the top piece on just to see what it looked like…at this point I had not attached it yet.
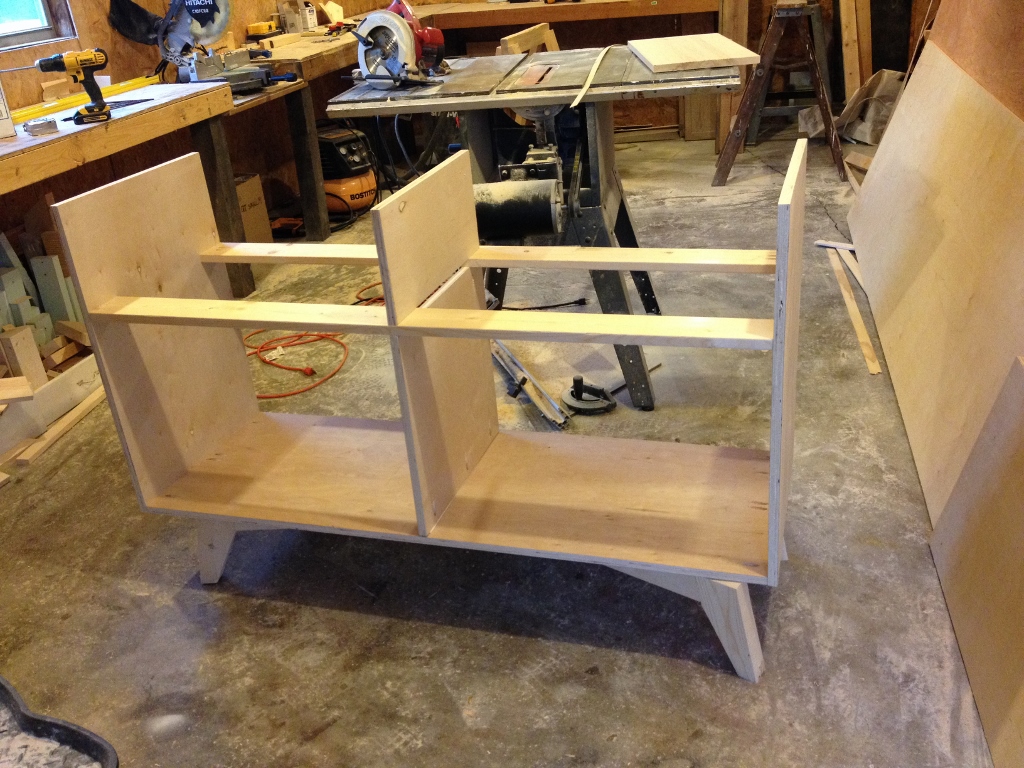
I then attached a backing–I used cheap ¼″ plywood backing–with small finish nails.
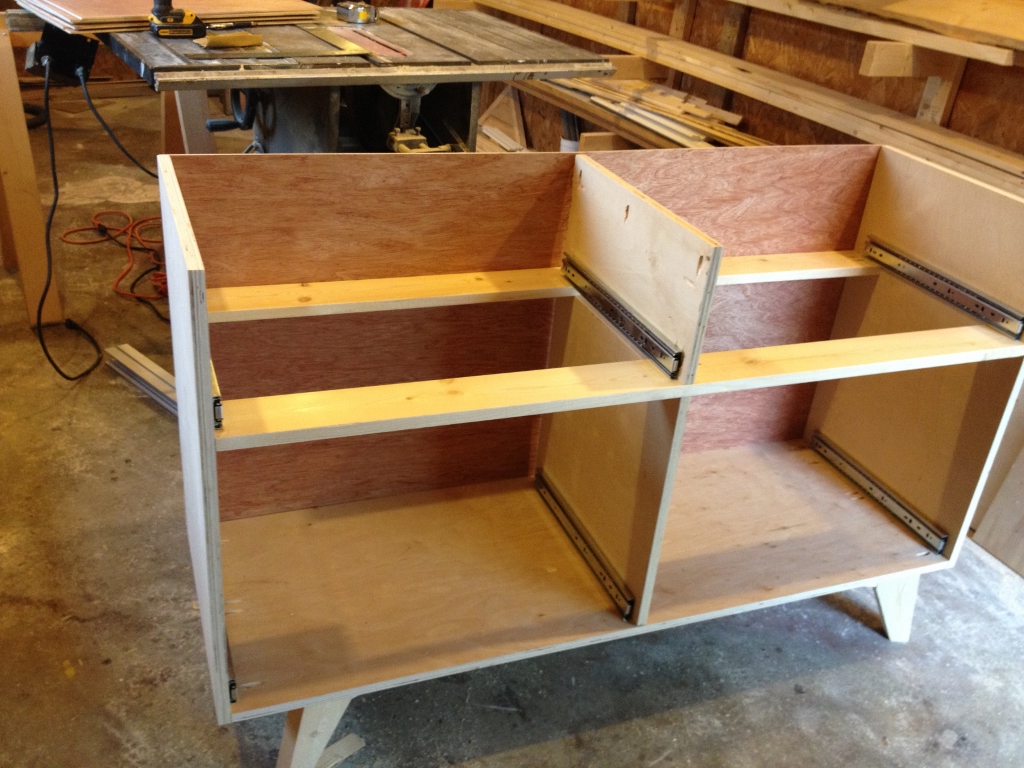
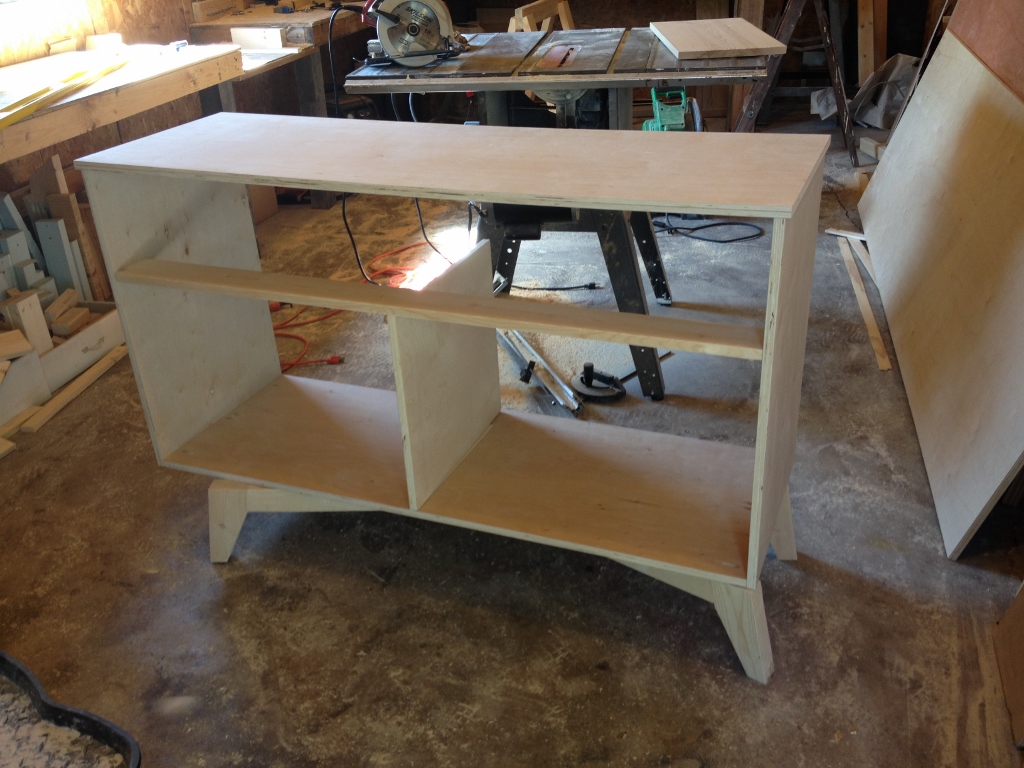
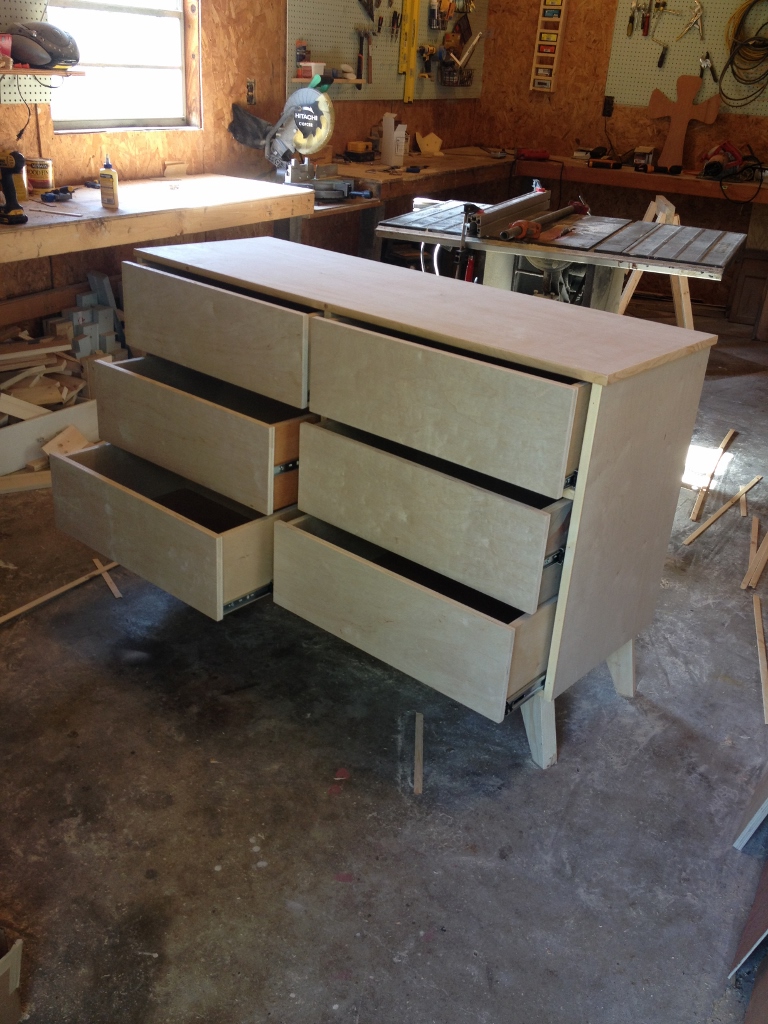
Adding the Drawer Slides and Drawers
It was easier to attach the drawer slides to the dresser before putting the top on. So, I attached the two bottom and the two top first. This was my first time using ball bearing drawer slides. They are expensive, but they are really nice. I highly recommend them. And these from Amazon are seriously the cheapest I have found anywhere.
.
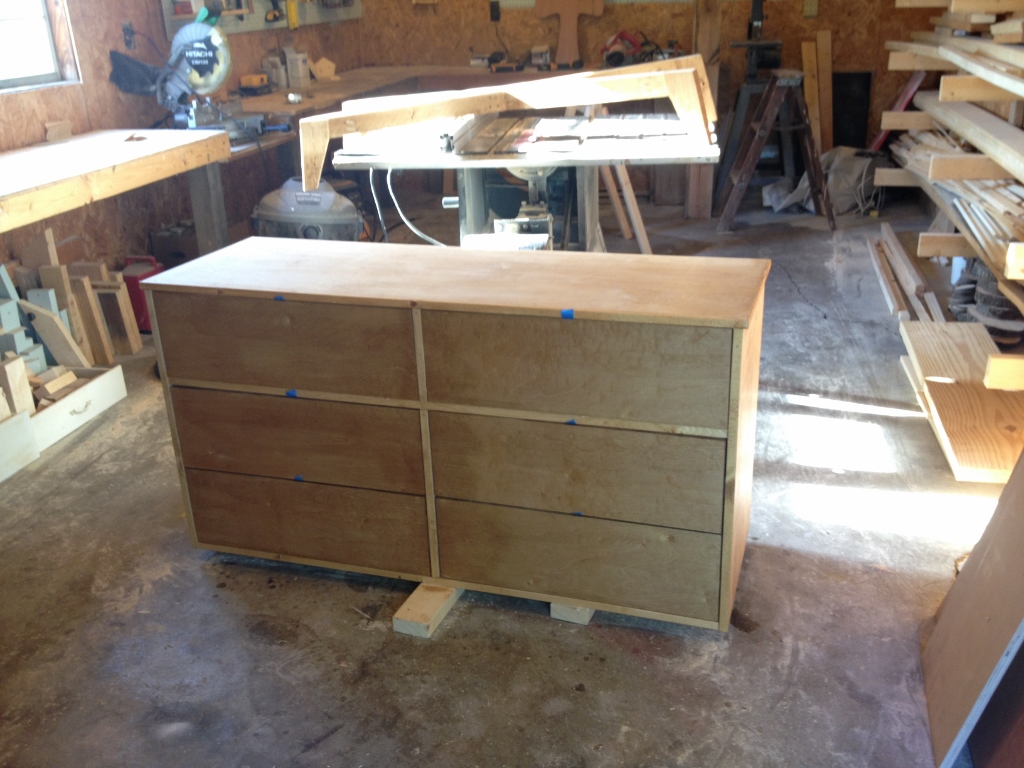
I’ve got another post to detail how I made the drawers (here it is!! :)), so I will skip that part for now. Once I attached the drawer slides, I then attached the top (which I made slightly longer than the bottom piece so it would have a little “lip” on each side) using pocket holes that I drilled into the sides (sorry I forgot a picture), then attached the drawers to the slides.
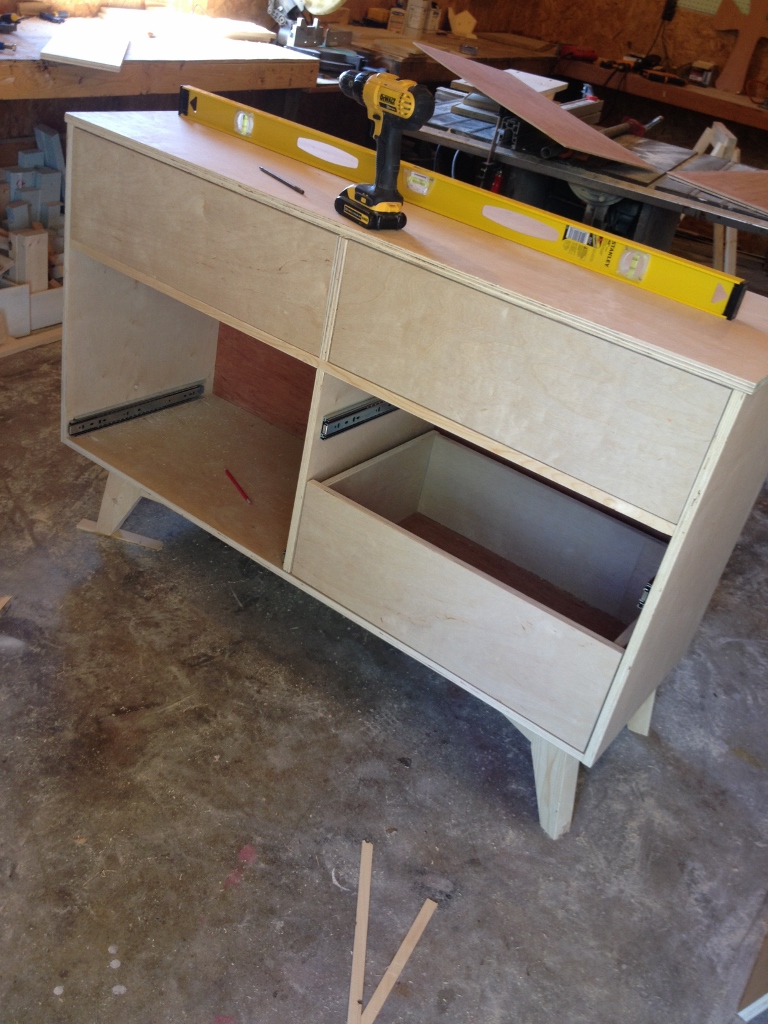
Finishing
I covered the plywood edges with some thin strips of wood I had on hand. I tacked them on with a few finish nails. You could use edge banding, but I have a lot of thin strips in the scrap pile to get rid of, so I used that.
.
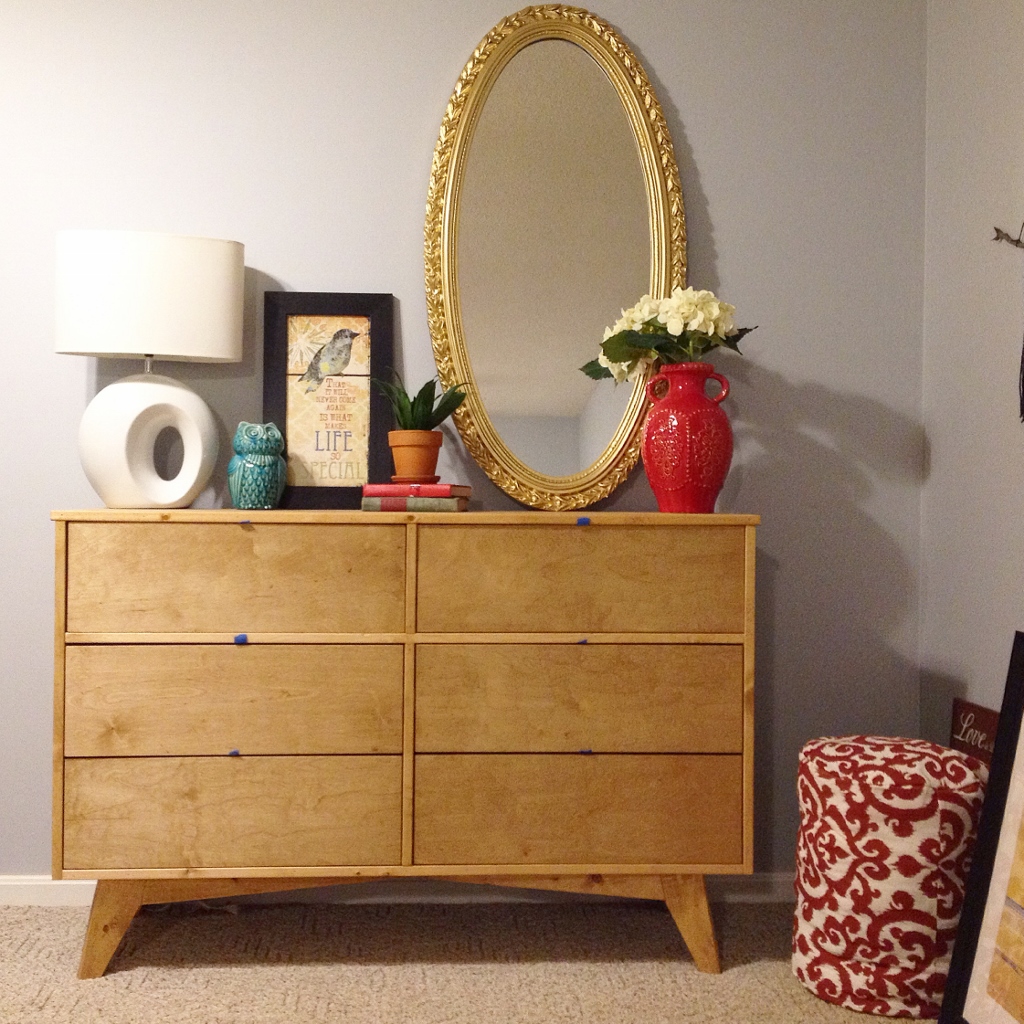
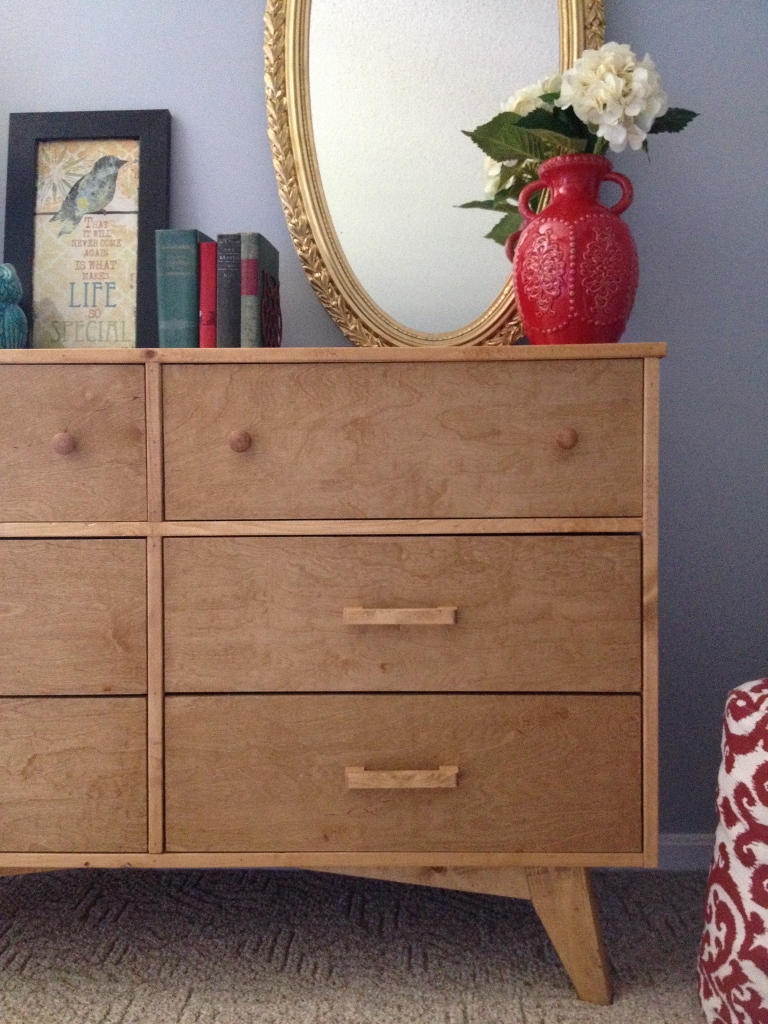
I stained both the bottom legs/frame and the top piece separately (I used Minwax Puritan Pine) then attached them together. To attach them, I turned the top piece on its side and screwed the bottom frame into the top “box” from the bottom (so you couldn’t see the screws). Then I finished it with Polycrylic clear coat. I LOVE that stuff.
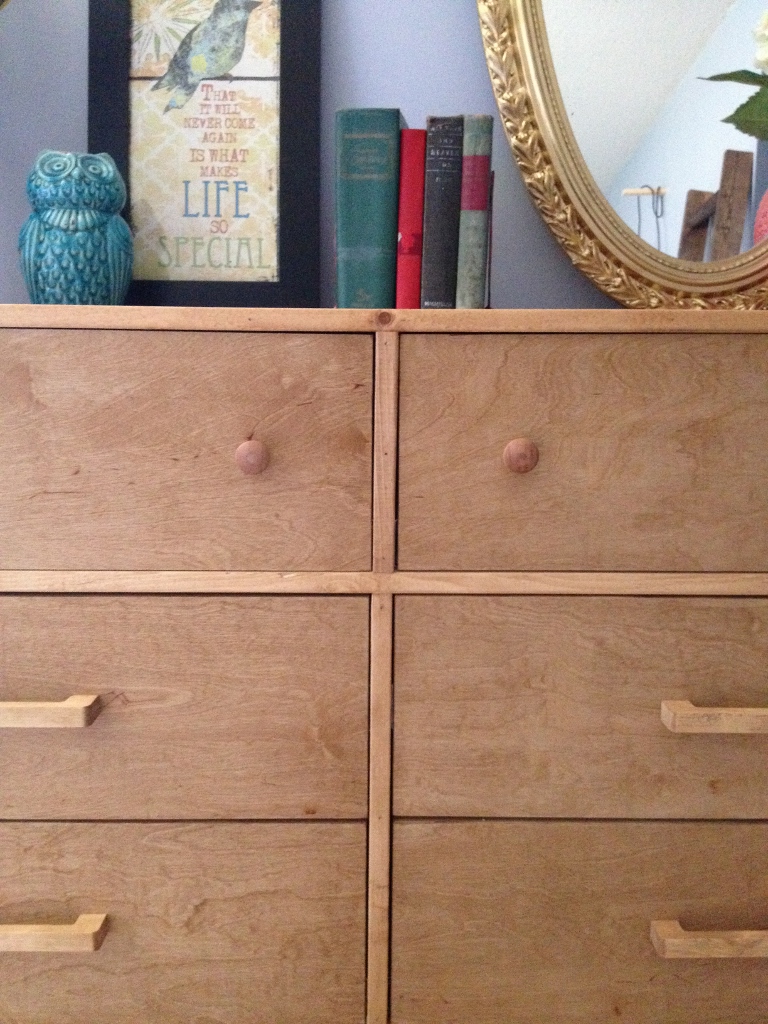
Adding Hardware
It really wasn’t too difficult of a project. Seriously the hardest part was deciding on hardware. I got Danny to help me bring it inside and I left this painters tape on them (so I could open the drawers) for about 2 or 3 weeks trying to decide.
The original one that I wanted had brass hardware and had two knobs on each top drawer and long handles on the four bottom drawers. But have you looked at prices for long drawer pulls? I would literally have spent more on the hardware than I did the entire dresser!! I’m cheap. Totally not doing that.
.
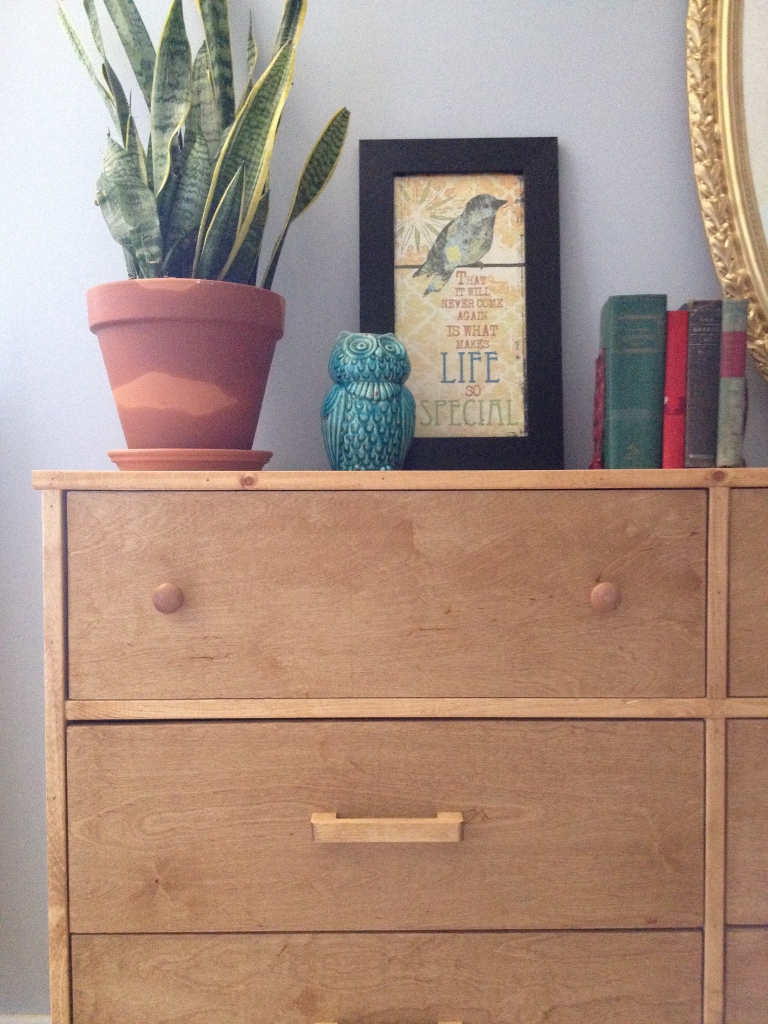
I bought wood knobs for the top with the intention of spray painting them to look like brass and making my own wood handles. Long story short, I accidentally stained the wood knobs and kind of liked it. But my wood drawer pulls didn’t work out.
.
So then I bought some cute brass pulls at Hobby Lobby, but I just wasn’t feeling them. I didn’t think they fit the dresser style. So Danny’s friend at work has a CNC machine and he cut me a few wood ones. At first, I hated them. I seriously hated everything I tried to put on this dresser. I was having a breakdown every time I tried something haha…it was bad.
.
So I stared at my options for a while. And for some reason, I was still liking those stained wood knobs.
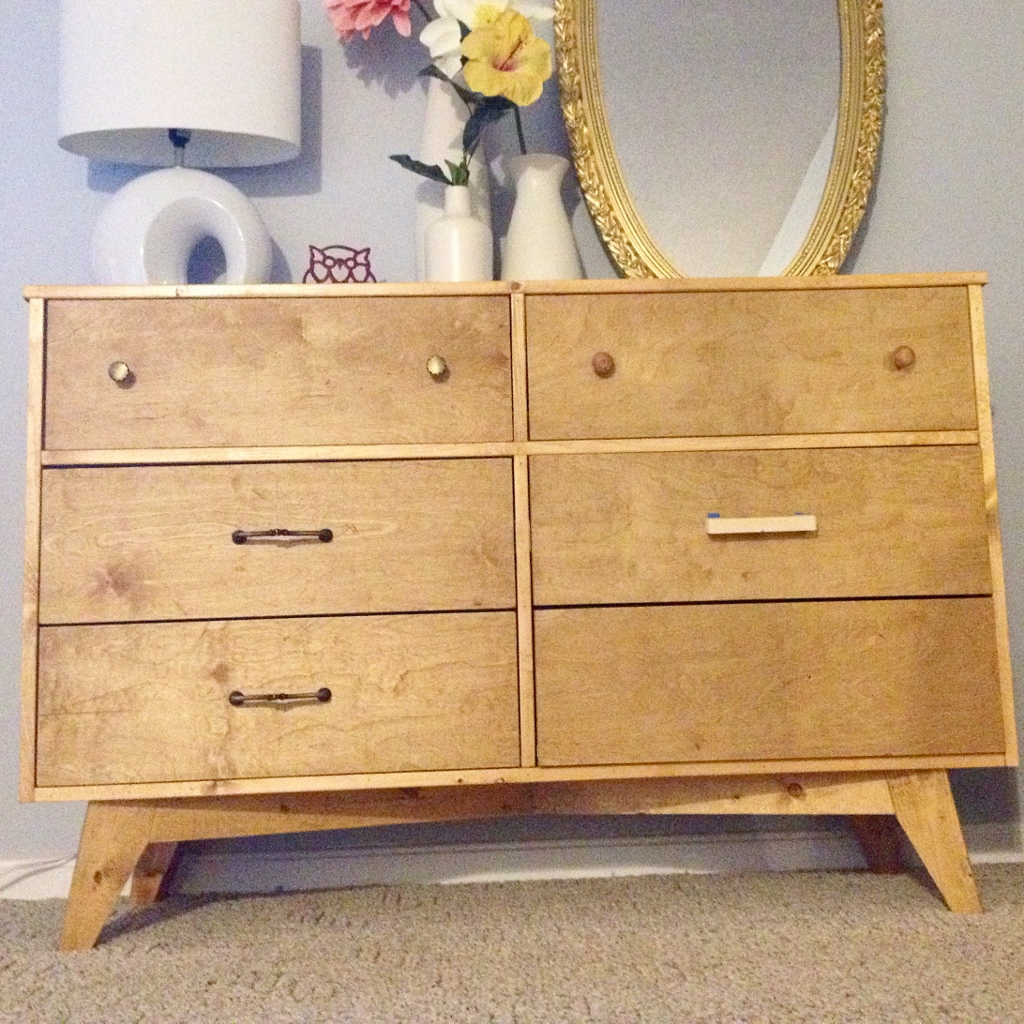
So, I finally stained the wood pulls and attached them just to see what I thought. I was pleasantly surprised that I really really liked them.
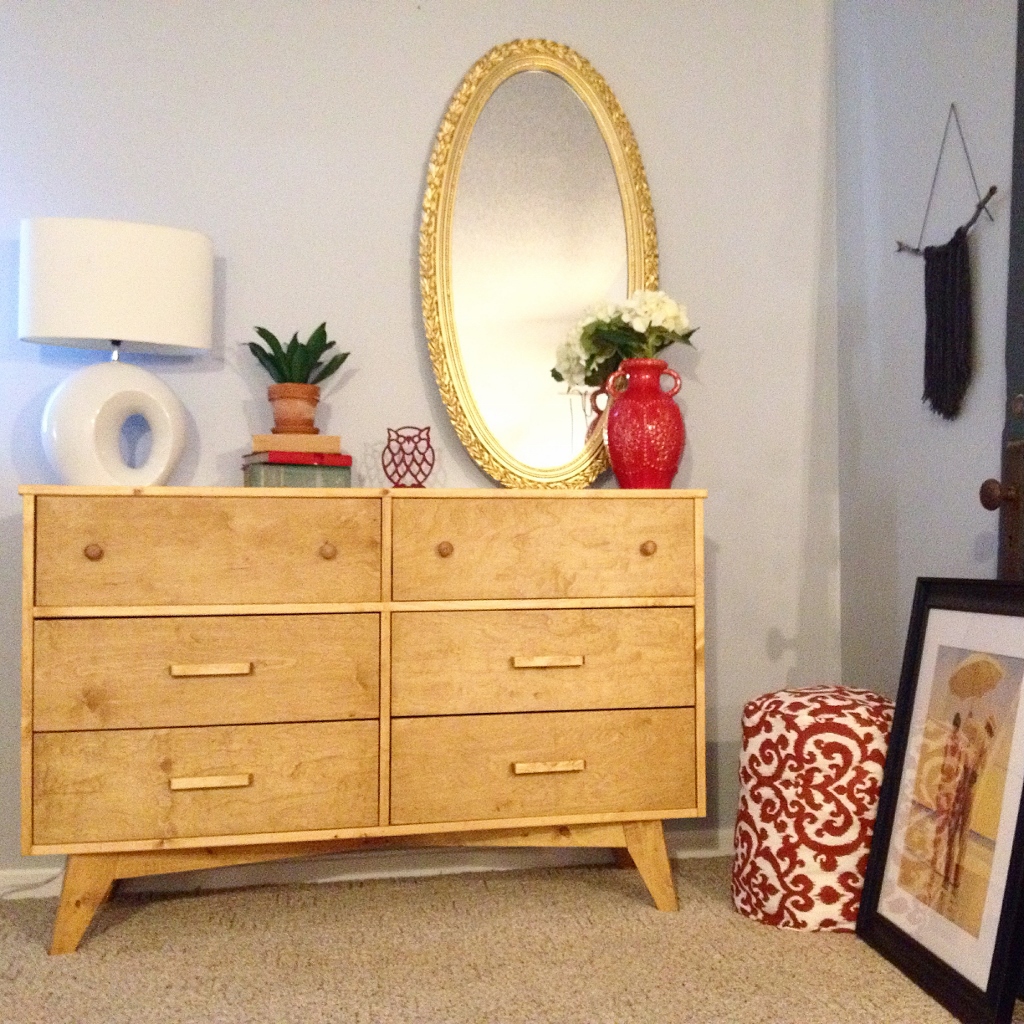
It only took me a month, but I FINALLY LOVED my dresser…and dresser pulls 🙂 The struggle has been real.
.
I am quite possibly, the only one who likes this dresser, but I’m seriously so excited about it. Like it’s one of my favorite projects I’ve ever done.
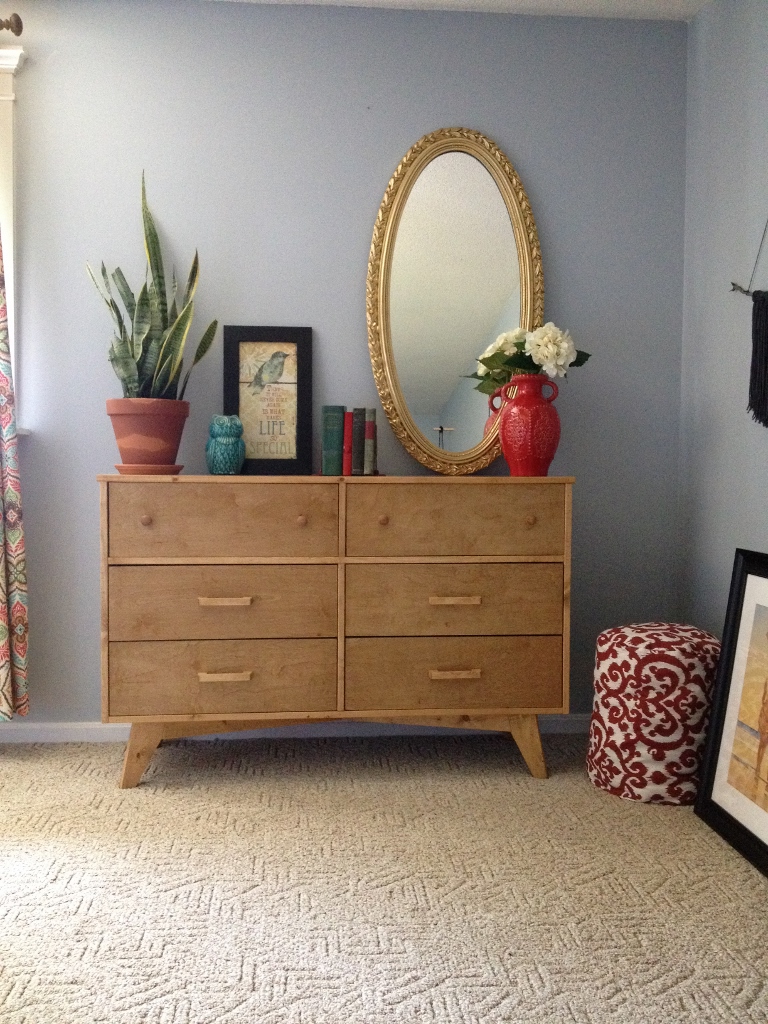

What do you think? Does it make you feel like throwing on your bell bottoms and getting out the disco music? HAHA.
.
I will post a how to on the drawers later this week. Sorry for such a long post, this dresser just makes me so happy 🙂
.
Don’t forget to pin for later!
Kelsey says
Hi Shara — love this dresser. I was browsing Pinterest today when I stumbled on your site. I’m so inspired by your work! I just bought my first home and have been working on updates too.
Oh, and one tip (that you may totally already know about): D. Lawless Hardware is an online shop that sells amazingly priced pulls, knobs and other hardware. They’ve been a fantastic resource for me. It just takes some patience and poking around in all the different categories they have. http://www.dlawlesshardware.com
Shara, Woodshop Diaries says
Thank you so much! I had heard of this website, but never really looked through it. Thanks for the reminder!! I have several projects coming up I could use some cute hardware for 🙂
loribethmerrill says
Very nice. I can relate to the obsessing. Me, I would have had mini handles just like the ones you used on the big drawers for the small drawers. I really admire your level of skill.
Shara, Woodshop Diaries says
Thank you! 🙂
Shonee says
seriously love love!! It looks like it came from west elm! Congrats. What color/brand of stain did you use?
Thanks
Shonee
Shara, Woodshop Diaries says
Thank you so much!!! I used Minwax Puritan Pine stain color with a Polycrylic clear coat on top.
Shonee says
Awesome, thanks. Would it be ok if I added this to my weekly Main Scoop post on my blog? http://www.hawthorneandmain
-Shonee
Shara, Woodshop Diaries says
You’re most welcome! And yes, that would be great, thank you!
Erica @ Dwell Beautiful says
My goodness you are the queen of DIY! I totally thought that was a vintage thrifted piece at first. You are a master! Thanks so much for linking up at The DIY Collective! 🙂
Shara, Chasing A Dream says
Thank you again! 🙂 you are so sweet! This was one of my favorite builds ever. I am glad you liked it too!
Julie Jones says
What I’m most impressed with is your abilities to make your cuts so straight and consistent! I have attempted nightstands and cabinets and my cuts are something that still needs work. Look at how balanced your drawers are and how they are spaced consistently all around the sides. I know the trim can hide a lot of faults, but you’ve still got to have the spacing correct. I’m very impressed, very impressed!
Shara, Chasing A Dream says
Thank you so much! I’ve practiced A LOT, but I’m still not perfect! I was honestly surprised my drawers turned out as straight as they did. I was VERY careful to check for square after each step because I knew if the dresser wasn’t square, my drawers wouldn’t fit right. I’ve learned that the hard way before 🙂
tarahlynn says
Gorgeous, saving this to my DIY Inspiration board!
Shara, Chasing A Dream says
Thank you so much!
Victoria @DazzleWhileFrazzled says
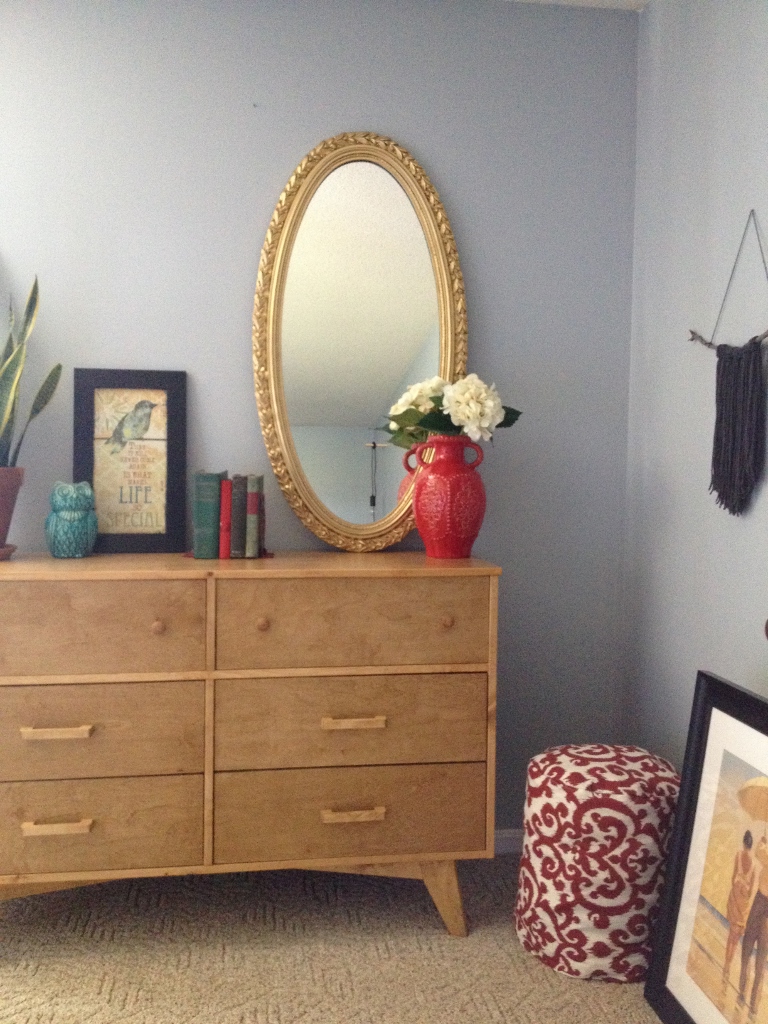
Amazing that you built that dresser! It’s awesome. I also love the oval mirror; something I’m currently looking for! Visiting from DIY Collective party.
Shara, Chasing A Dream says
Thank you so much! The oval mirror was actually my grandmother’s. She gave it to me a few years ago. She had had it for as long as I can remember 🙂
Cindy says
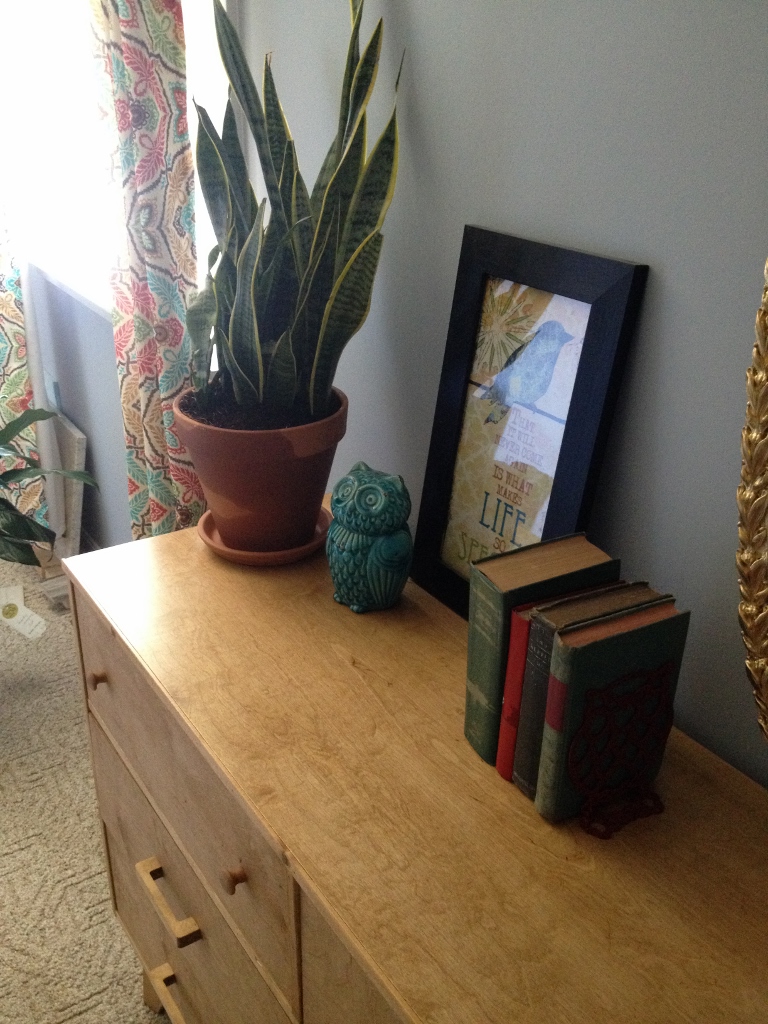
Oh, I am so bird obsessed. Can you recall where you picked up the bird print? I have a dresser that needs that on top of it!
Shara, Chasing A Dream says
Hi! My grandmother got me that for a Christmas gift a couple years ago. She got it from a little local boutique called the Tin Roof. I’m sorry that’s not much help!
Ivory says
Wow, I could not believe my eyes seeing this beautiful dresser come to life. You did and excellently job, had I not saw the steps taking place, I would have thought it was made at a factory. You guys ROCKED!
Shara, Chasing A Dream says
Thank you so much!!
Tammara says
Love this dresser especially the base!
Shara, Chasing A Dream says
Thank you!
Tom Clarke says
The legs give the basic box real class. I love the pulls as it reminds me of a smiley face with two mouths.
Shara, Chasing A Dream says
Thank you!