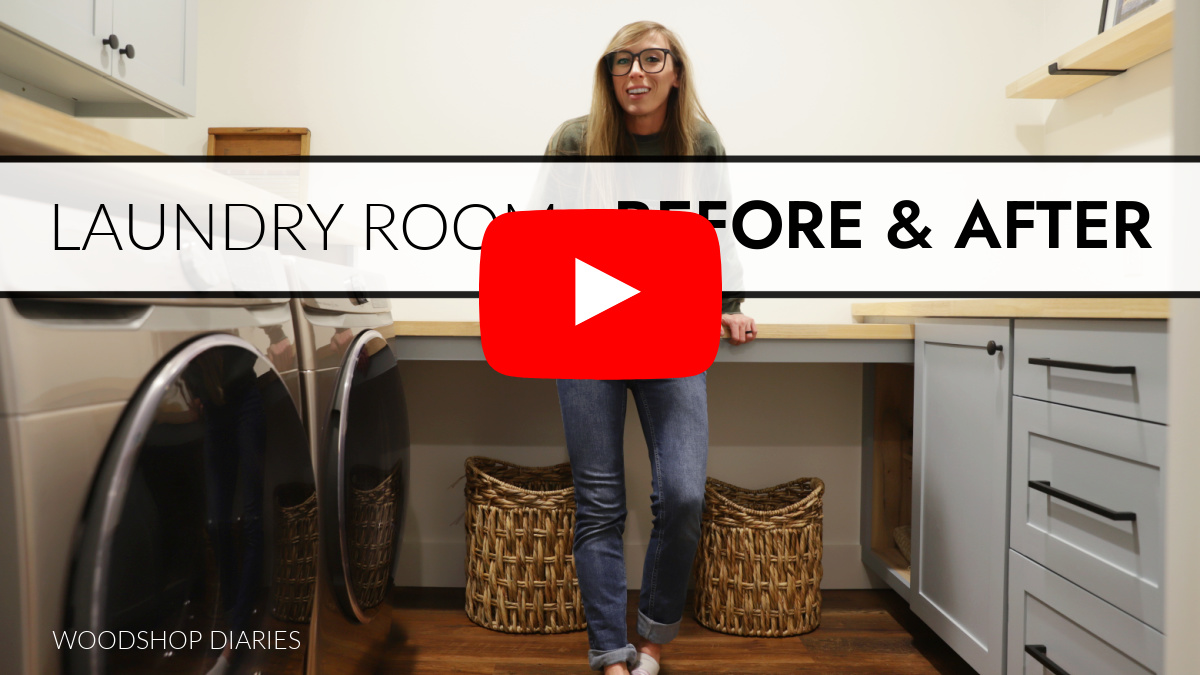
In this post, I’m sharing how I transformed our boring, builder grade laundry room with custom built in storage cabinets!
Our laundry room was a dark, sad, poorly utilized space in our home. The room was a nice size, but so much of it was basically empty.
It packed so much potential, but as it was, it just looked very much like a thrown together afterthought.
So I set out to brighten it up, add some practical (and pretty!) storage, and turn it into a place I didn’t mind folding clothes in.

Below, I’ll share my plans for the space and how I brought them to life to give you some ideas and inspiration for your own laundry room!
*This post contains affiliate links. See website policies.
Prefer to watch? I’m sharing the whole laundry room transformation in this video on my YouTube channel!
Love watching how-to videos? Subscribe to my YouTube channel for plenty more where that came from!
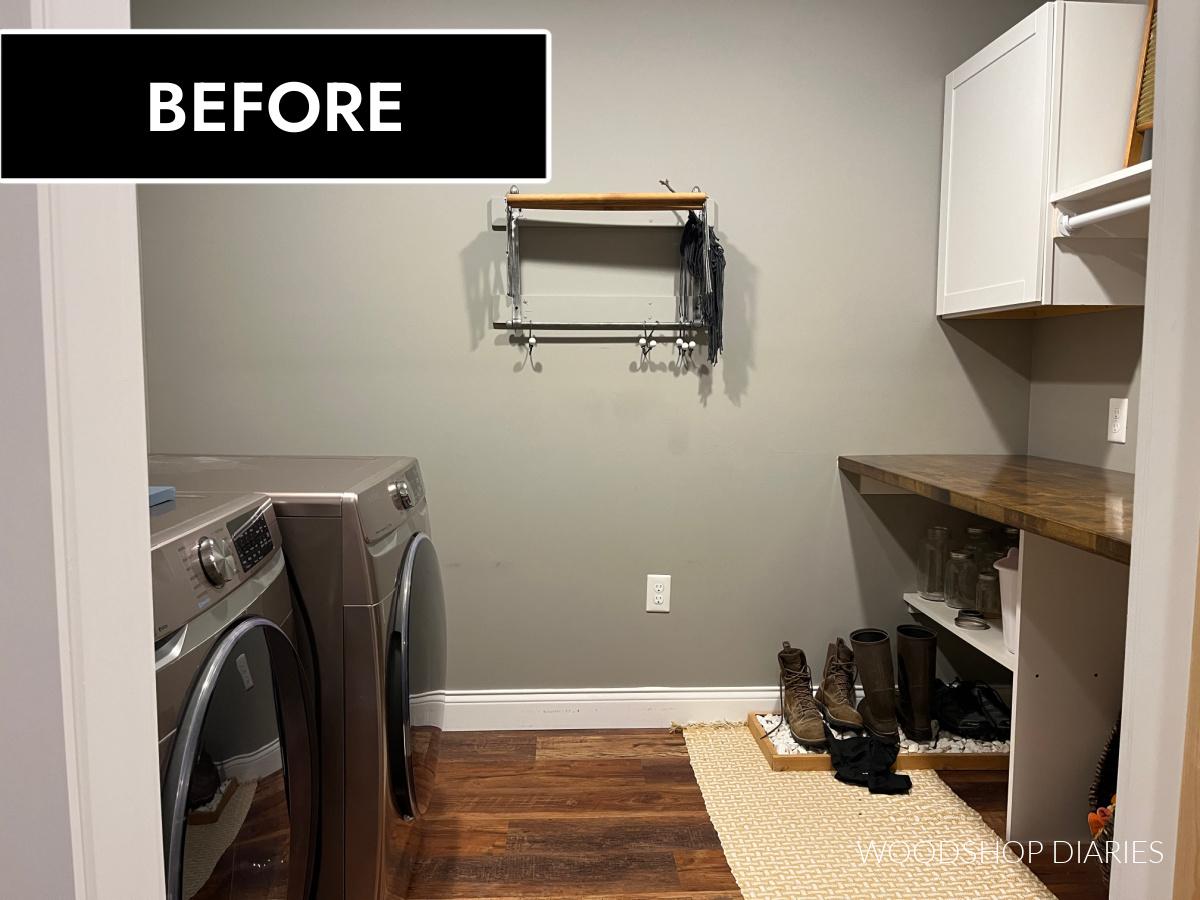
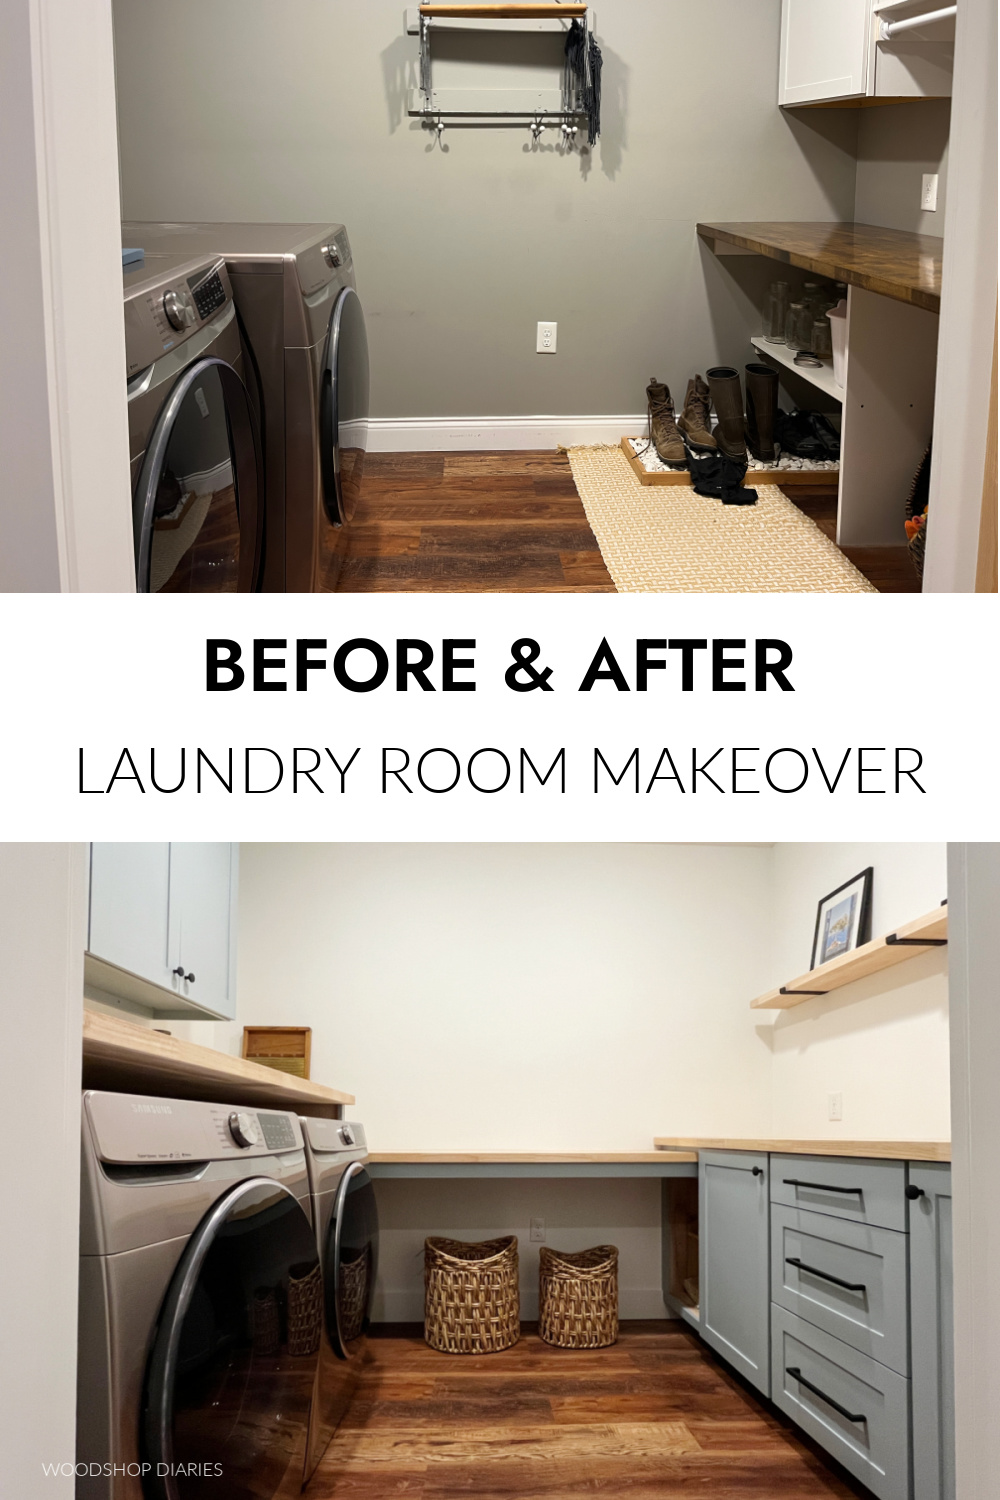
The Laundry Room Before
It’s hard to appreciate the after without seeing the before. So, let’s take a closer look at the laundry room before.
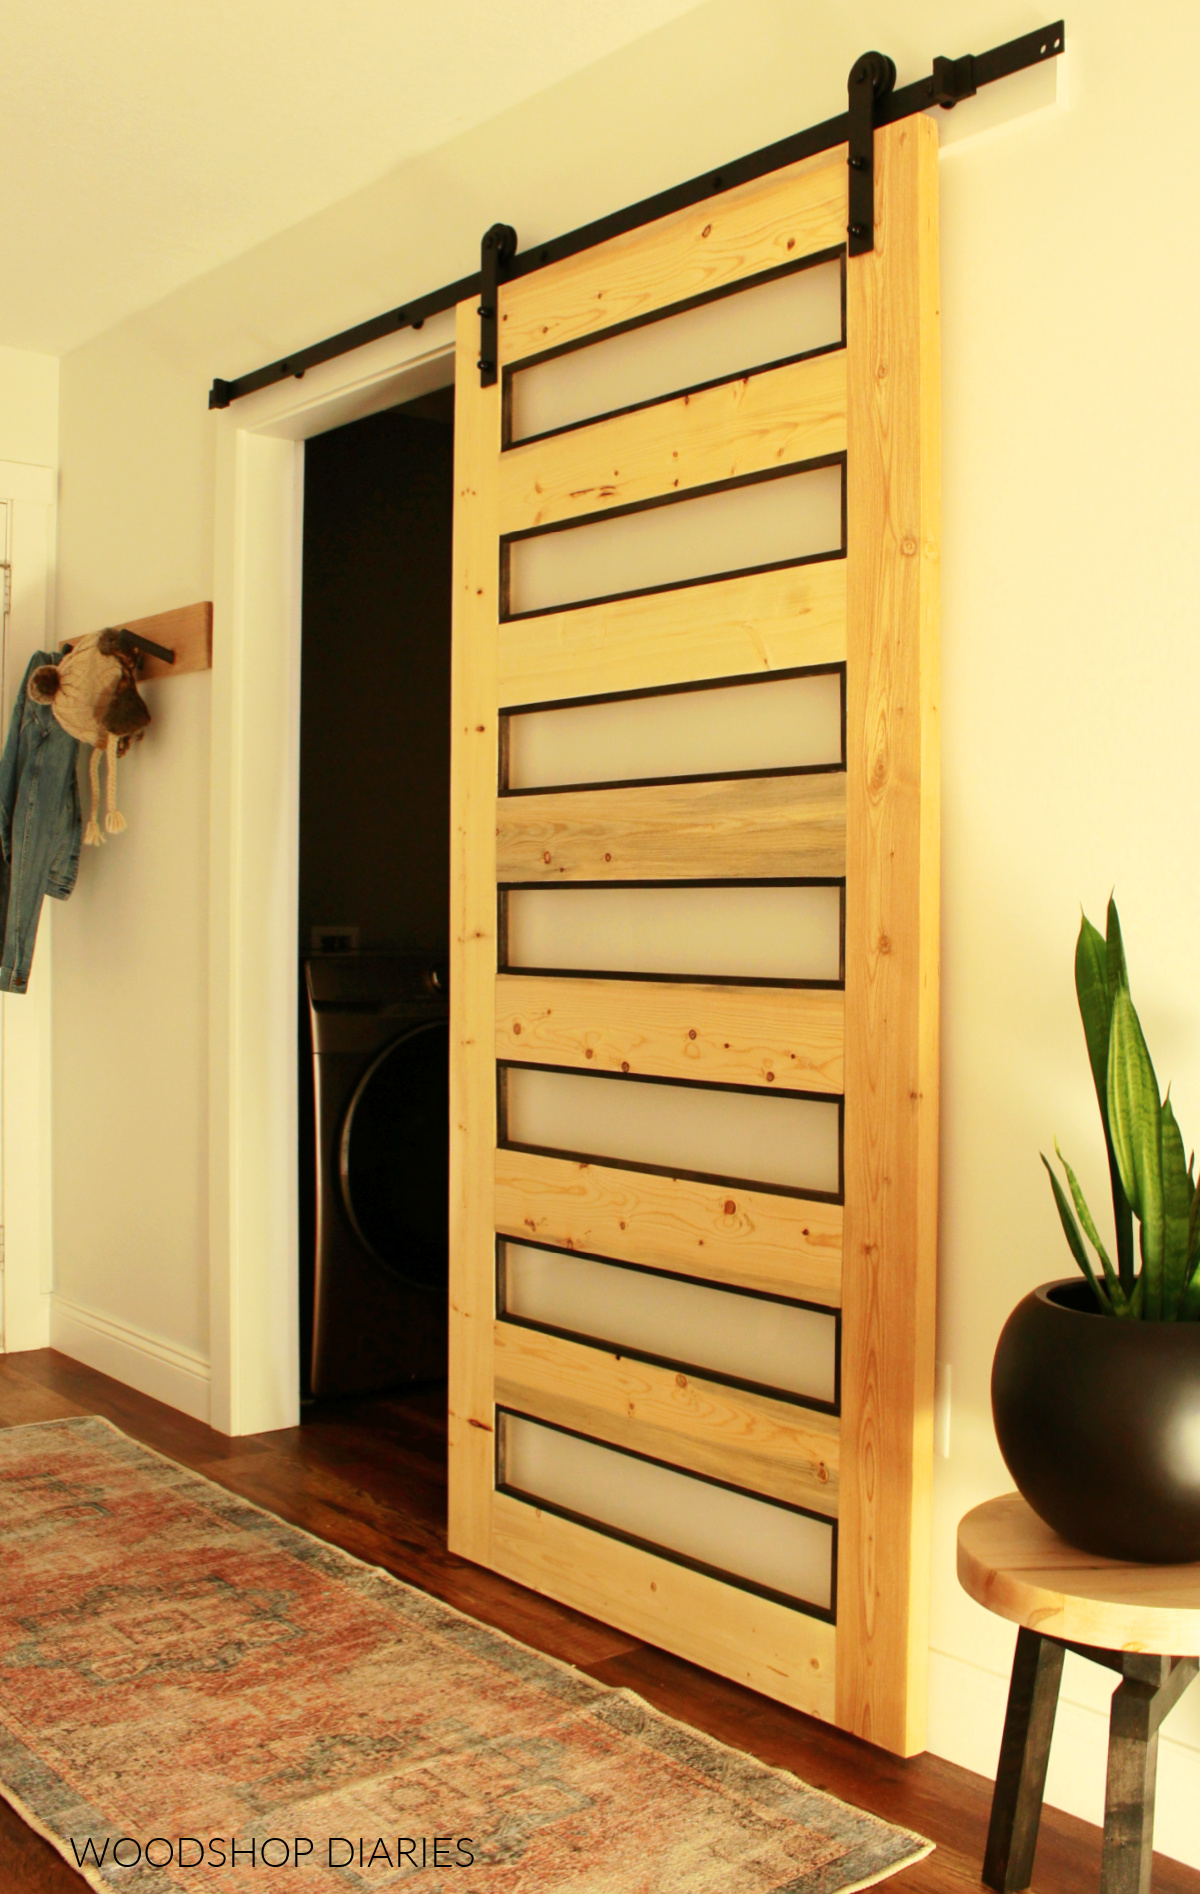
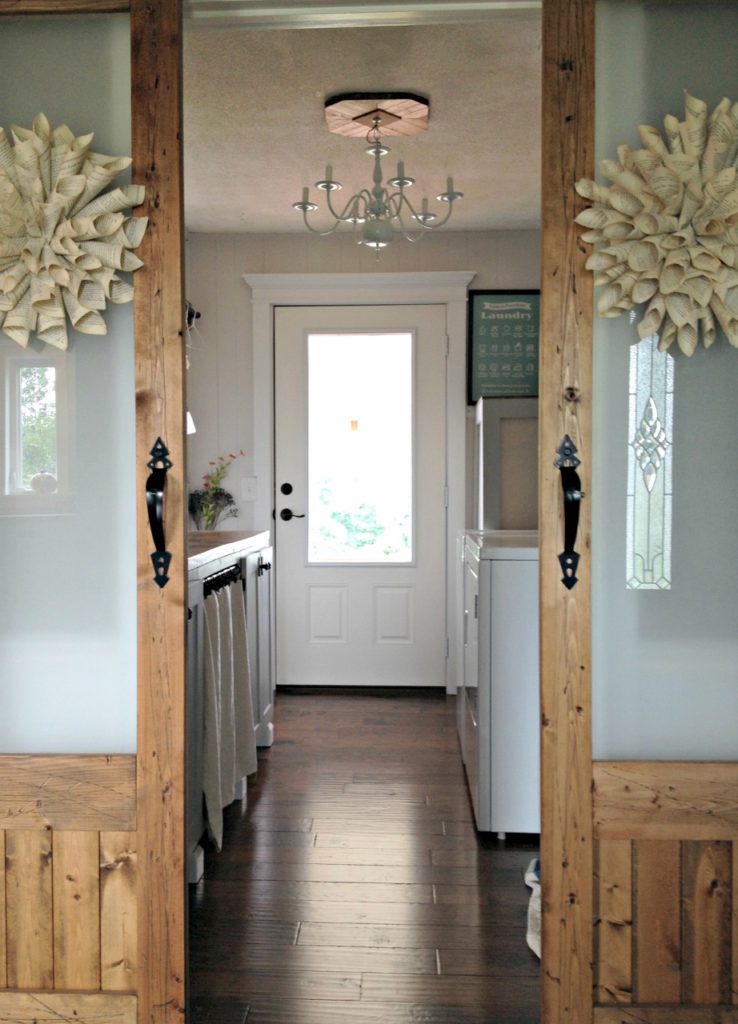
I had previously already replaced the swing door on the room with a DIY modern sliding door.
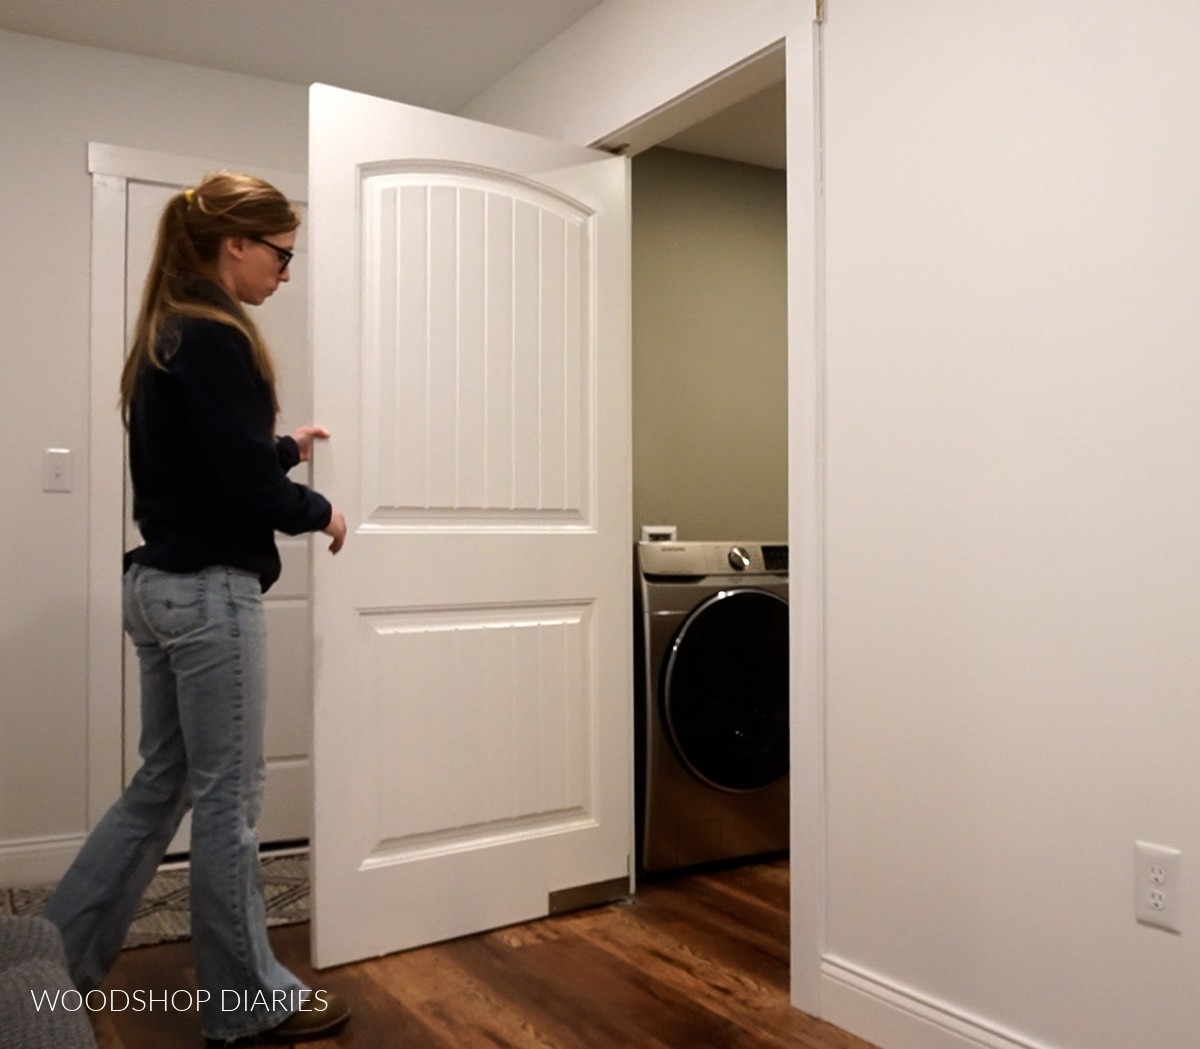
The swing door was annoying because when you opened it into the room, it hit the washing machine.
Then you had to shut the door back to be able to open the washer door.
So replacing the entrance was the first improvement to the space. But now we needed to work on the INSIDE of the room.
This laundry room is approximately 7′ deep and 9′ wide–which is a great size.
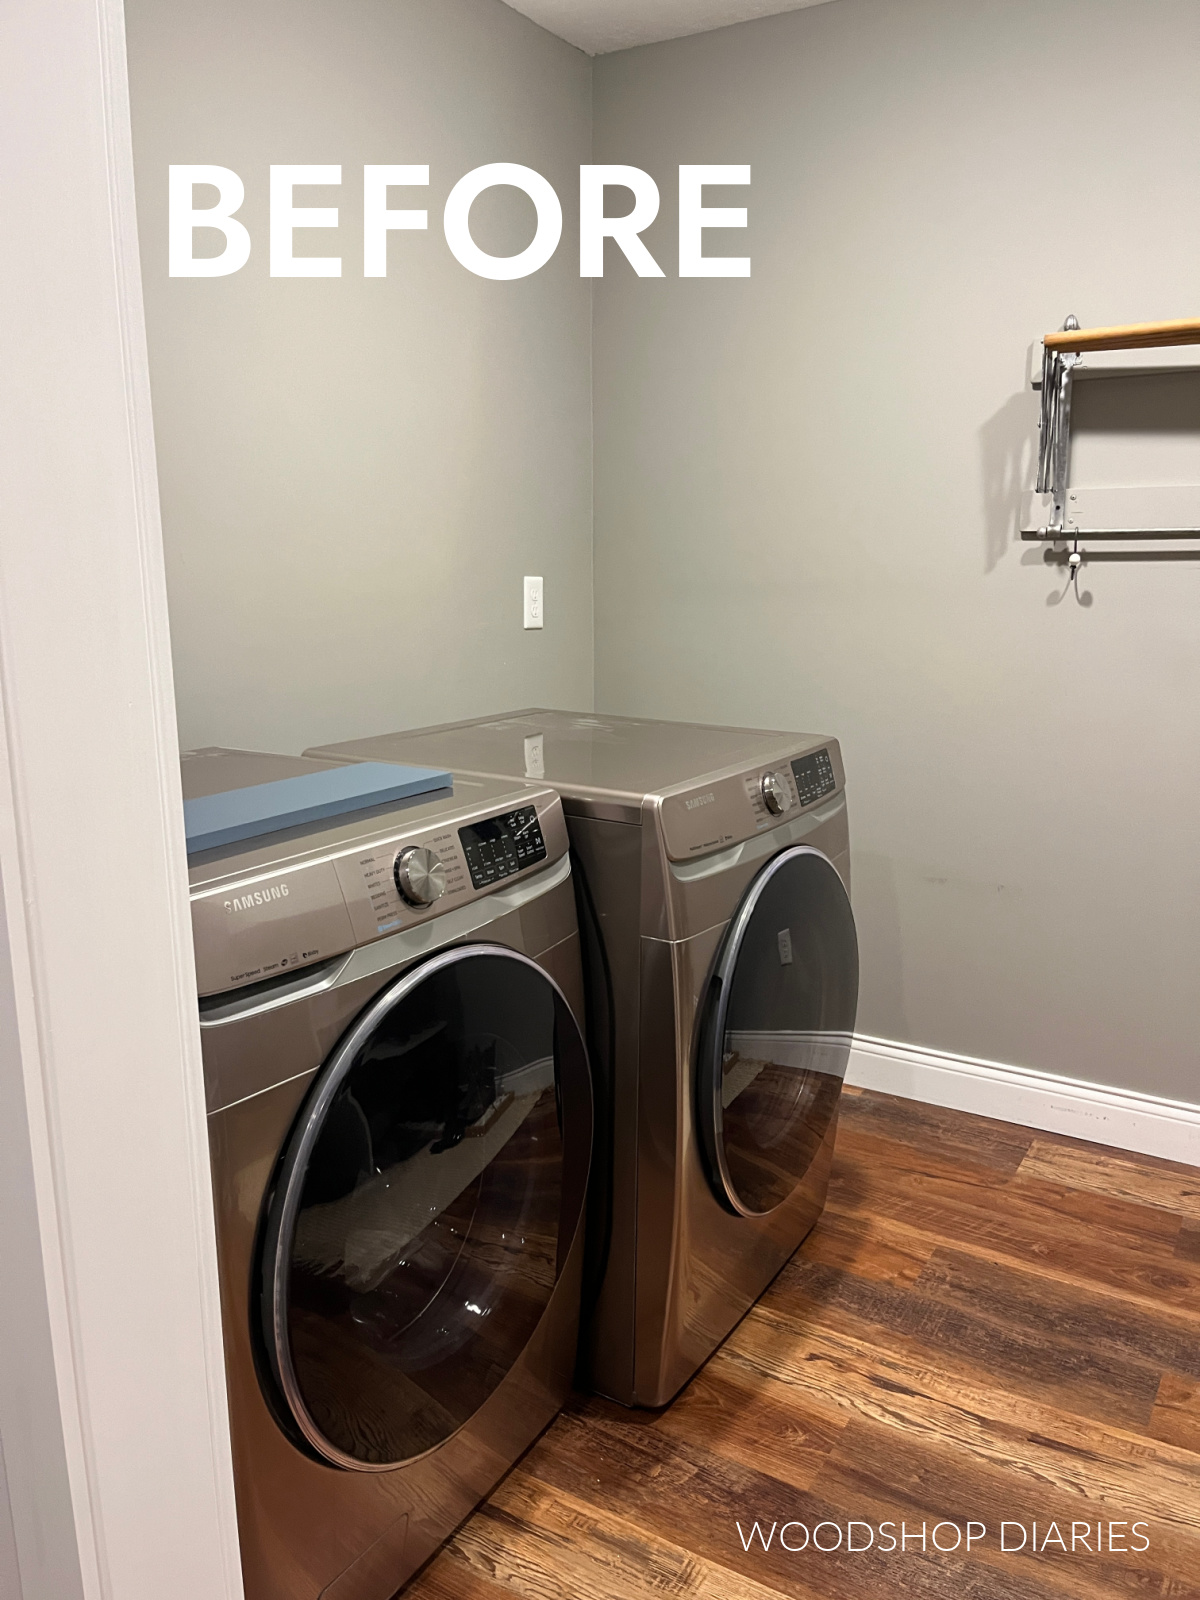
But the only things in here were the washer and dryer on one side. And on the other side, two cheap particle board cabinets, and a countertop supported by some screwed together scrap shelving.
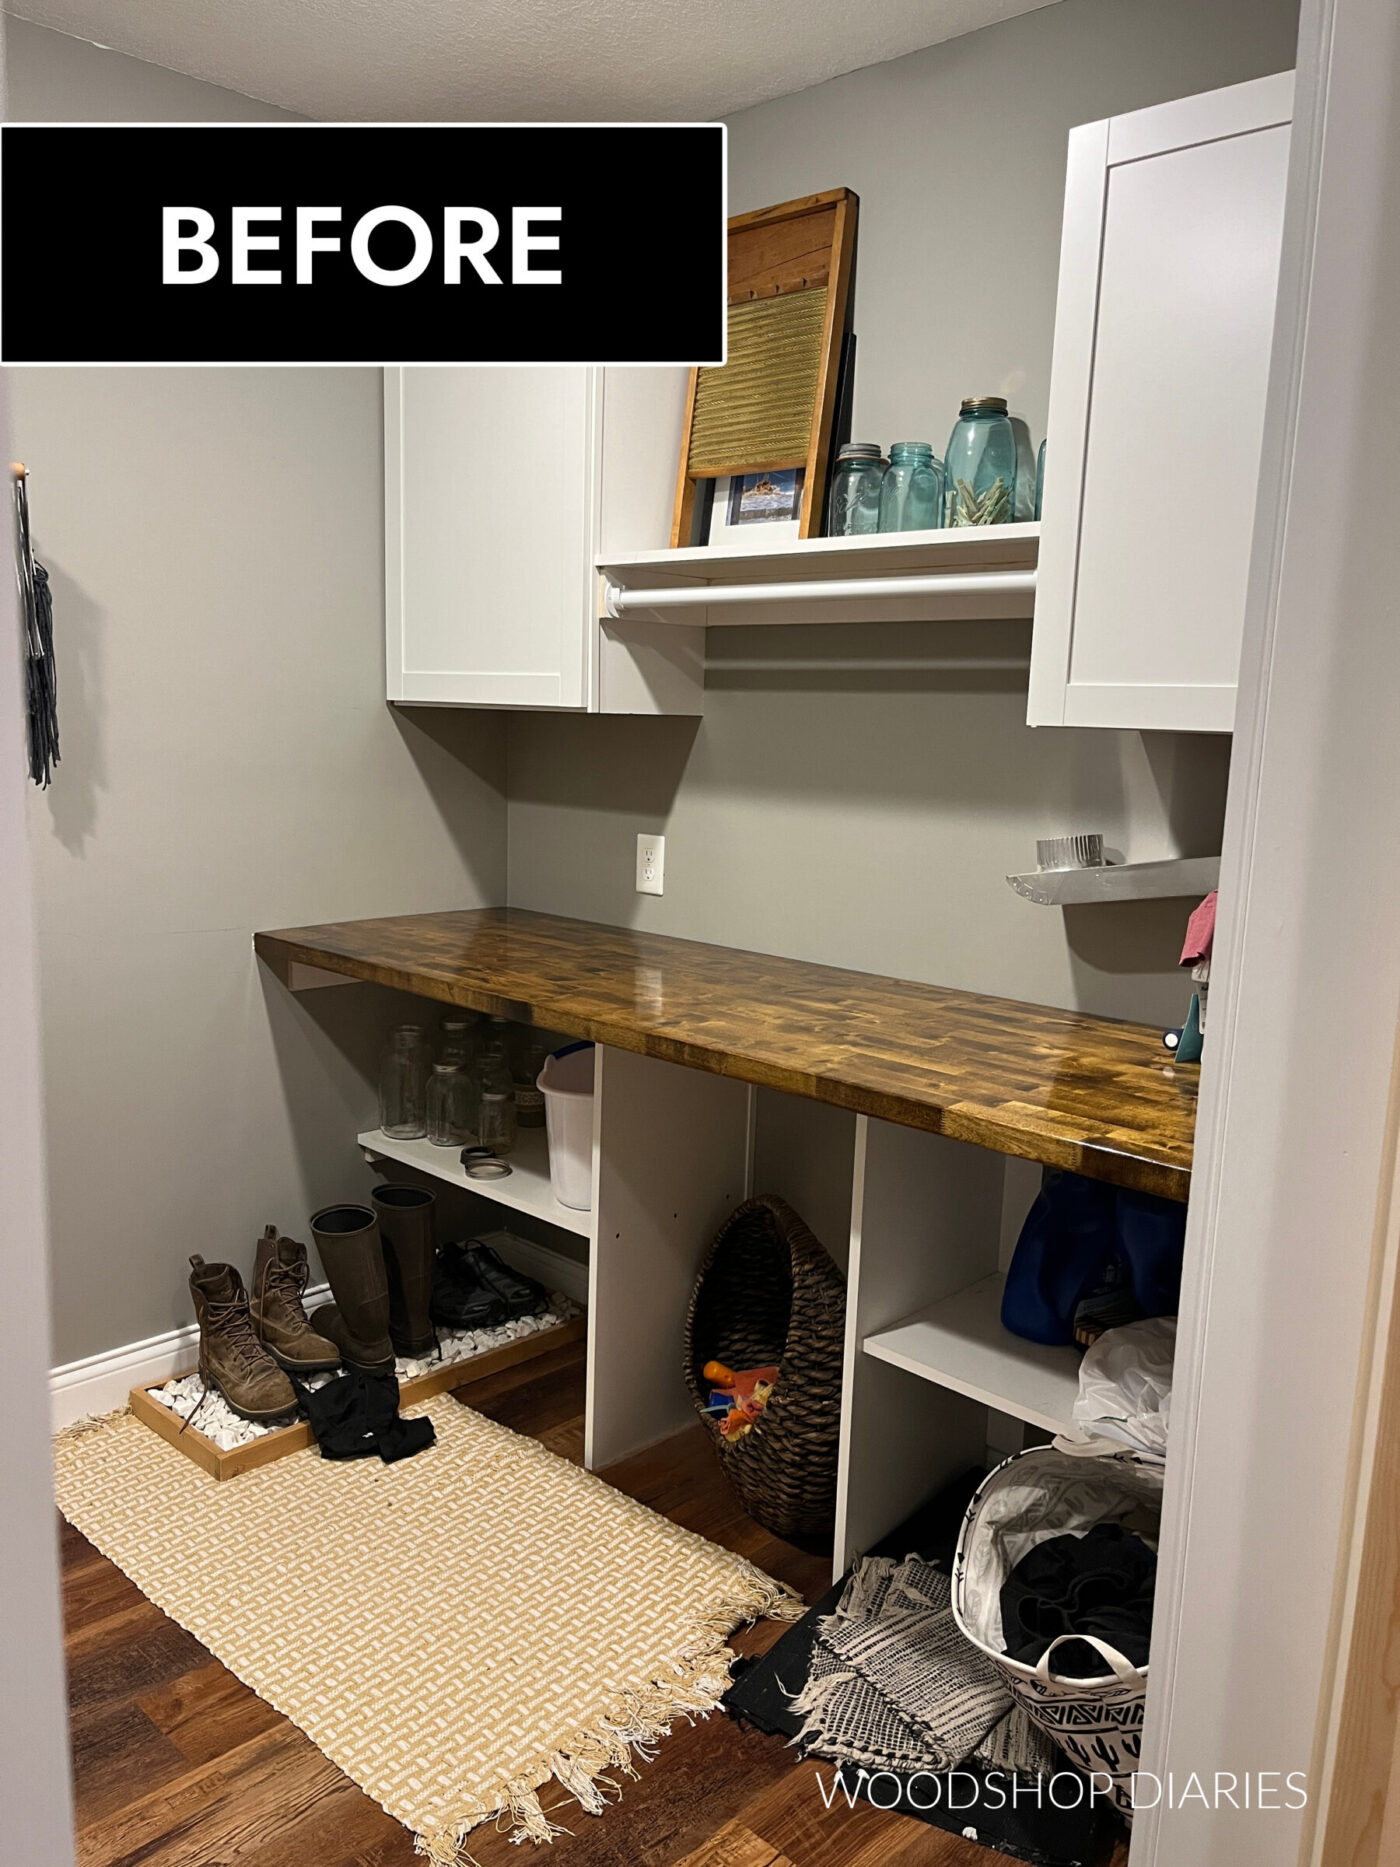
The storage offered just wasn’t very practical, the space was poorly laid out, and it just felt dark and dreary.
So while there’s not much here to salvage and reuse, the good news is that it’ll be easy to tear out to start with a completely blank slate.
Are DIY projects your thing? Sign up for our newsletter for priority access to the latest projects and build plans!
Laundry Room Design Plan
When I decided to update the laundry room, I knew I wanted three things that this existing space didn’t have.
Must haves in the new laundry room:
- Practical Storage (that’s hidden behind doors)
- More Countertop Space
- Brightness + Some Color
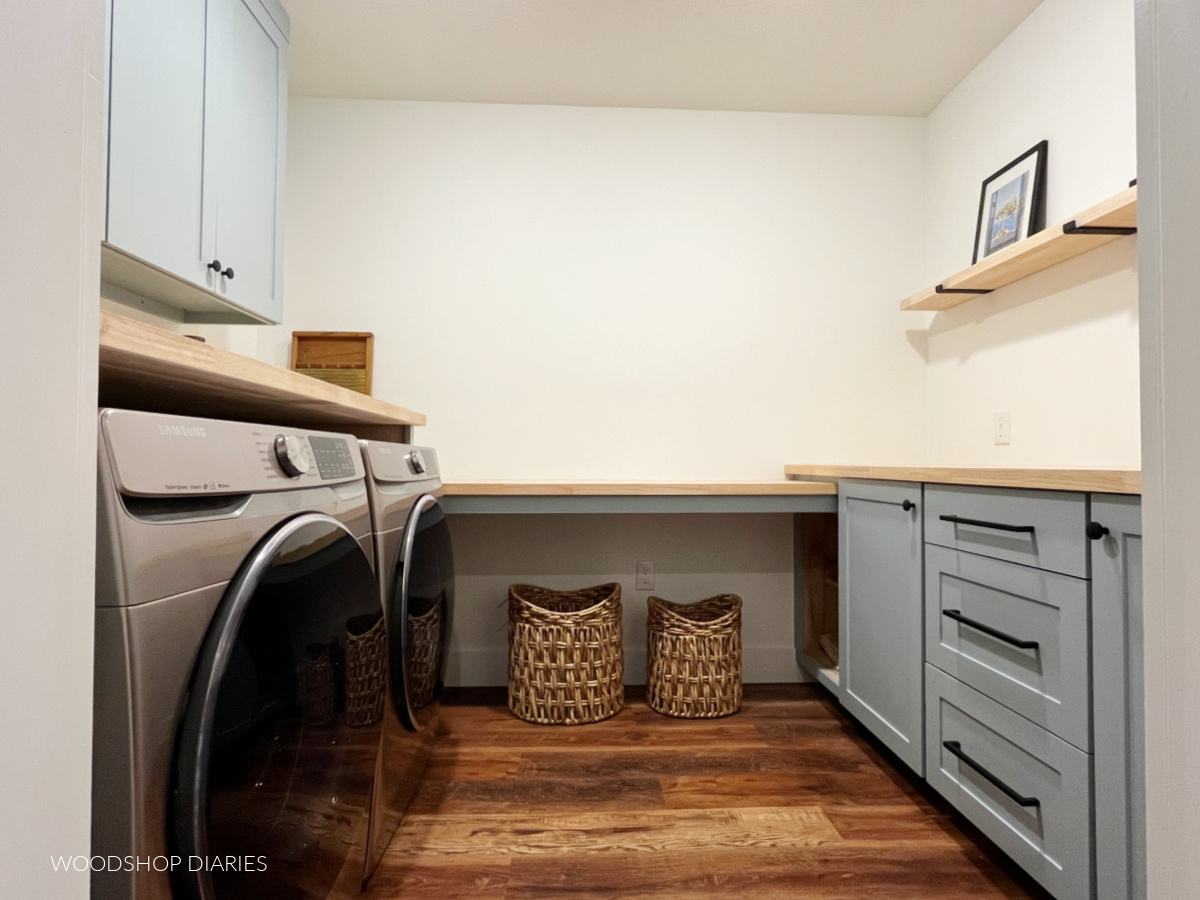
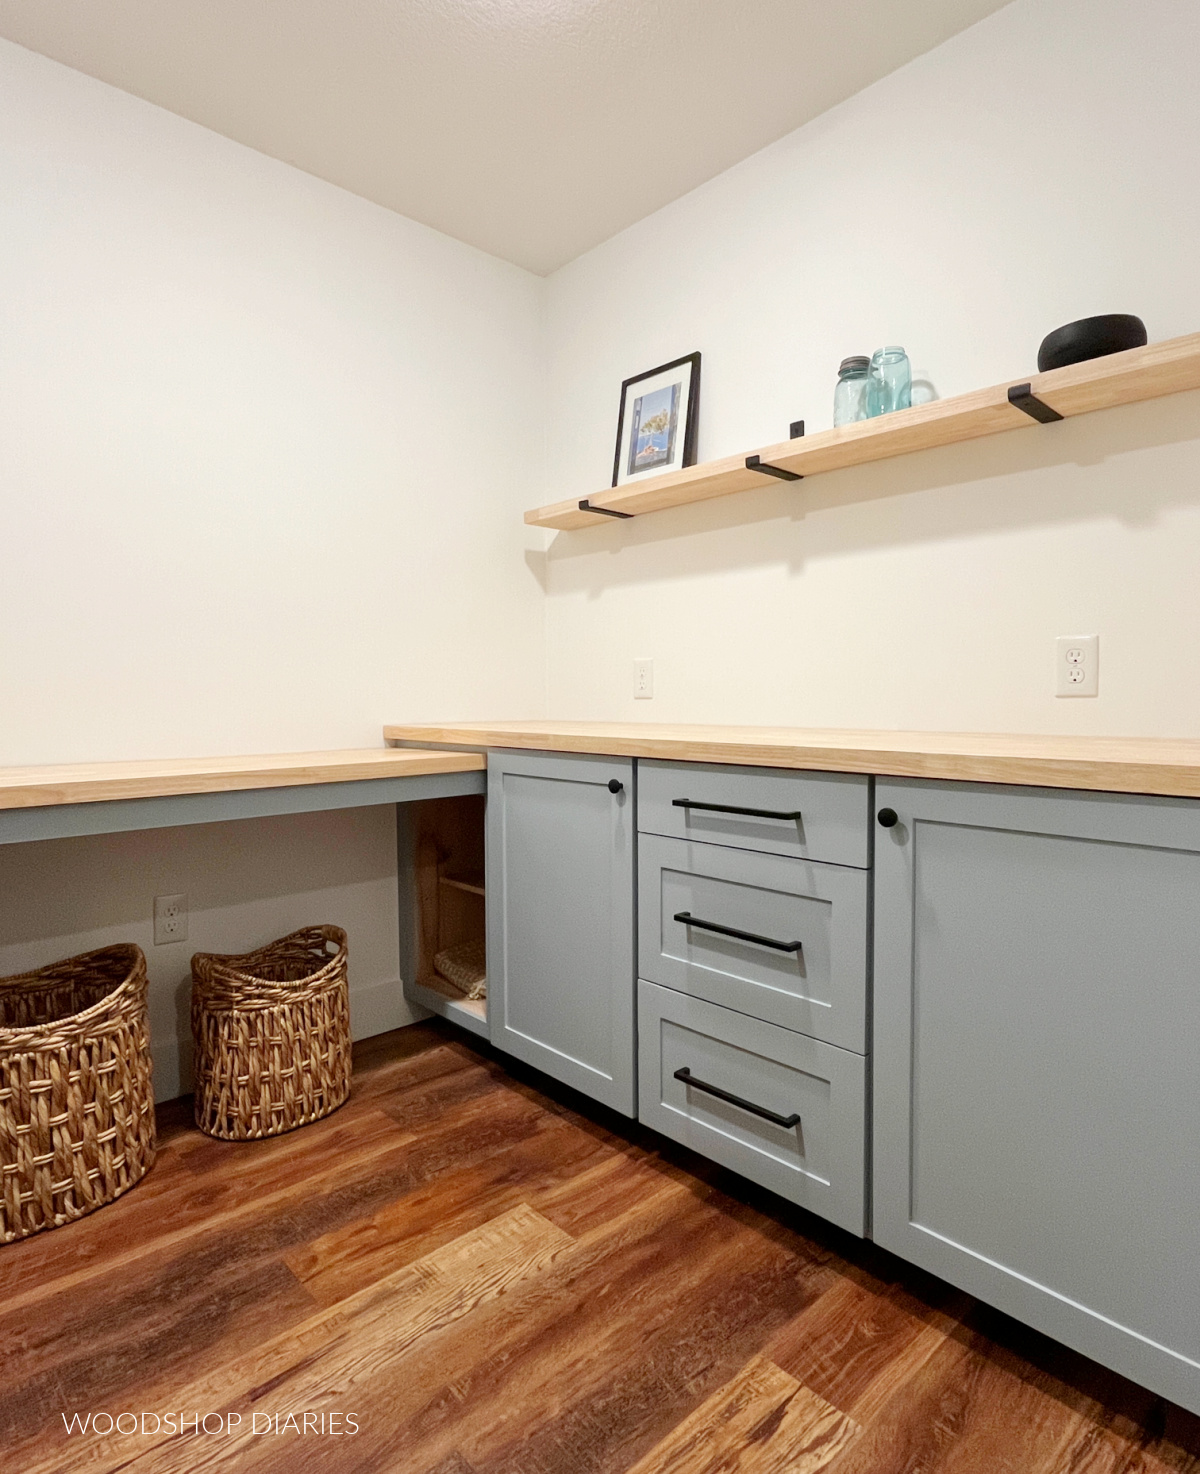
First, I planned to add wall to wall base cabinets across the left side of the room where the open shelving was previously.
This would give me plenty of “hidden” storage for cleaning supplies, and other odds and ends.
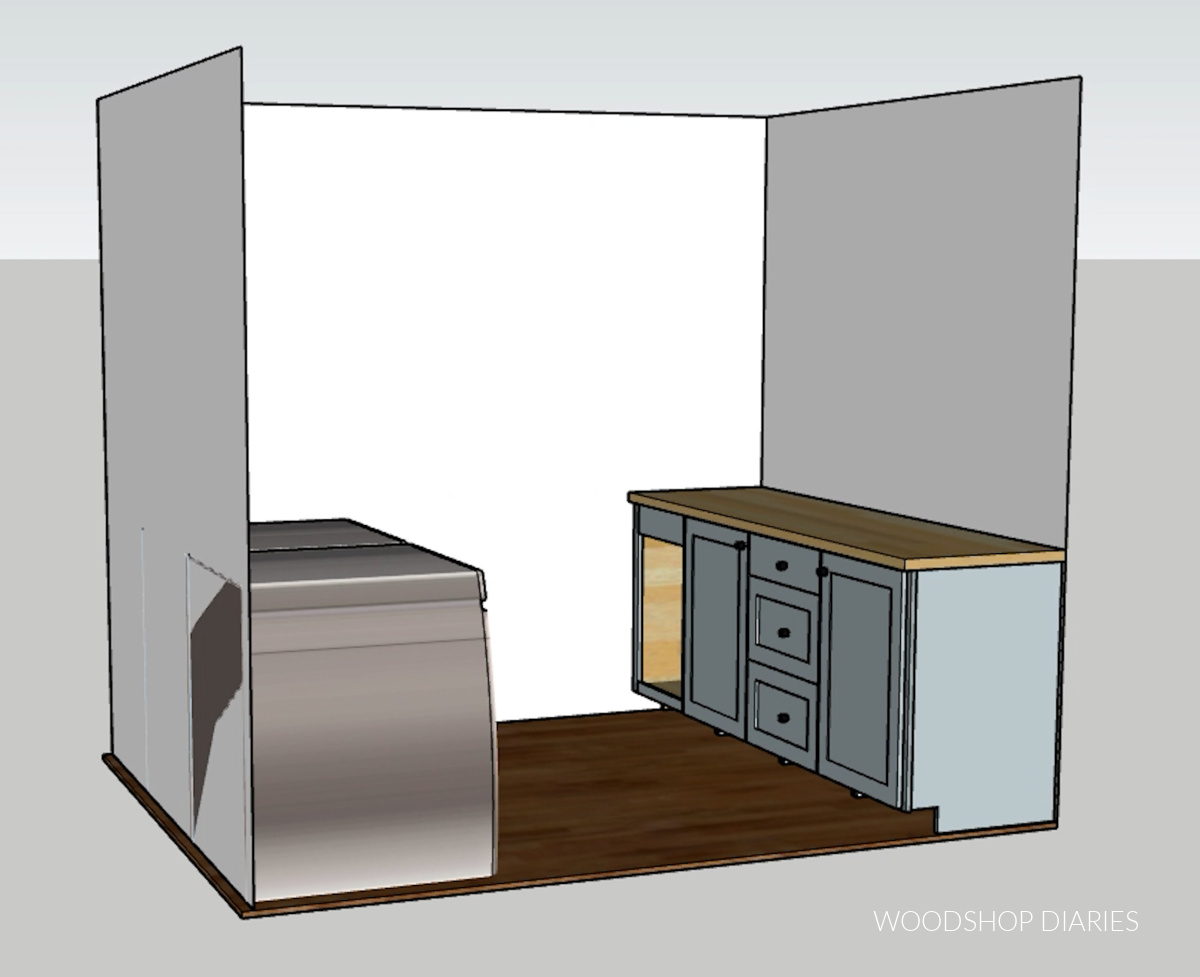
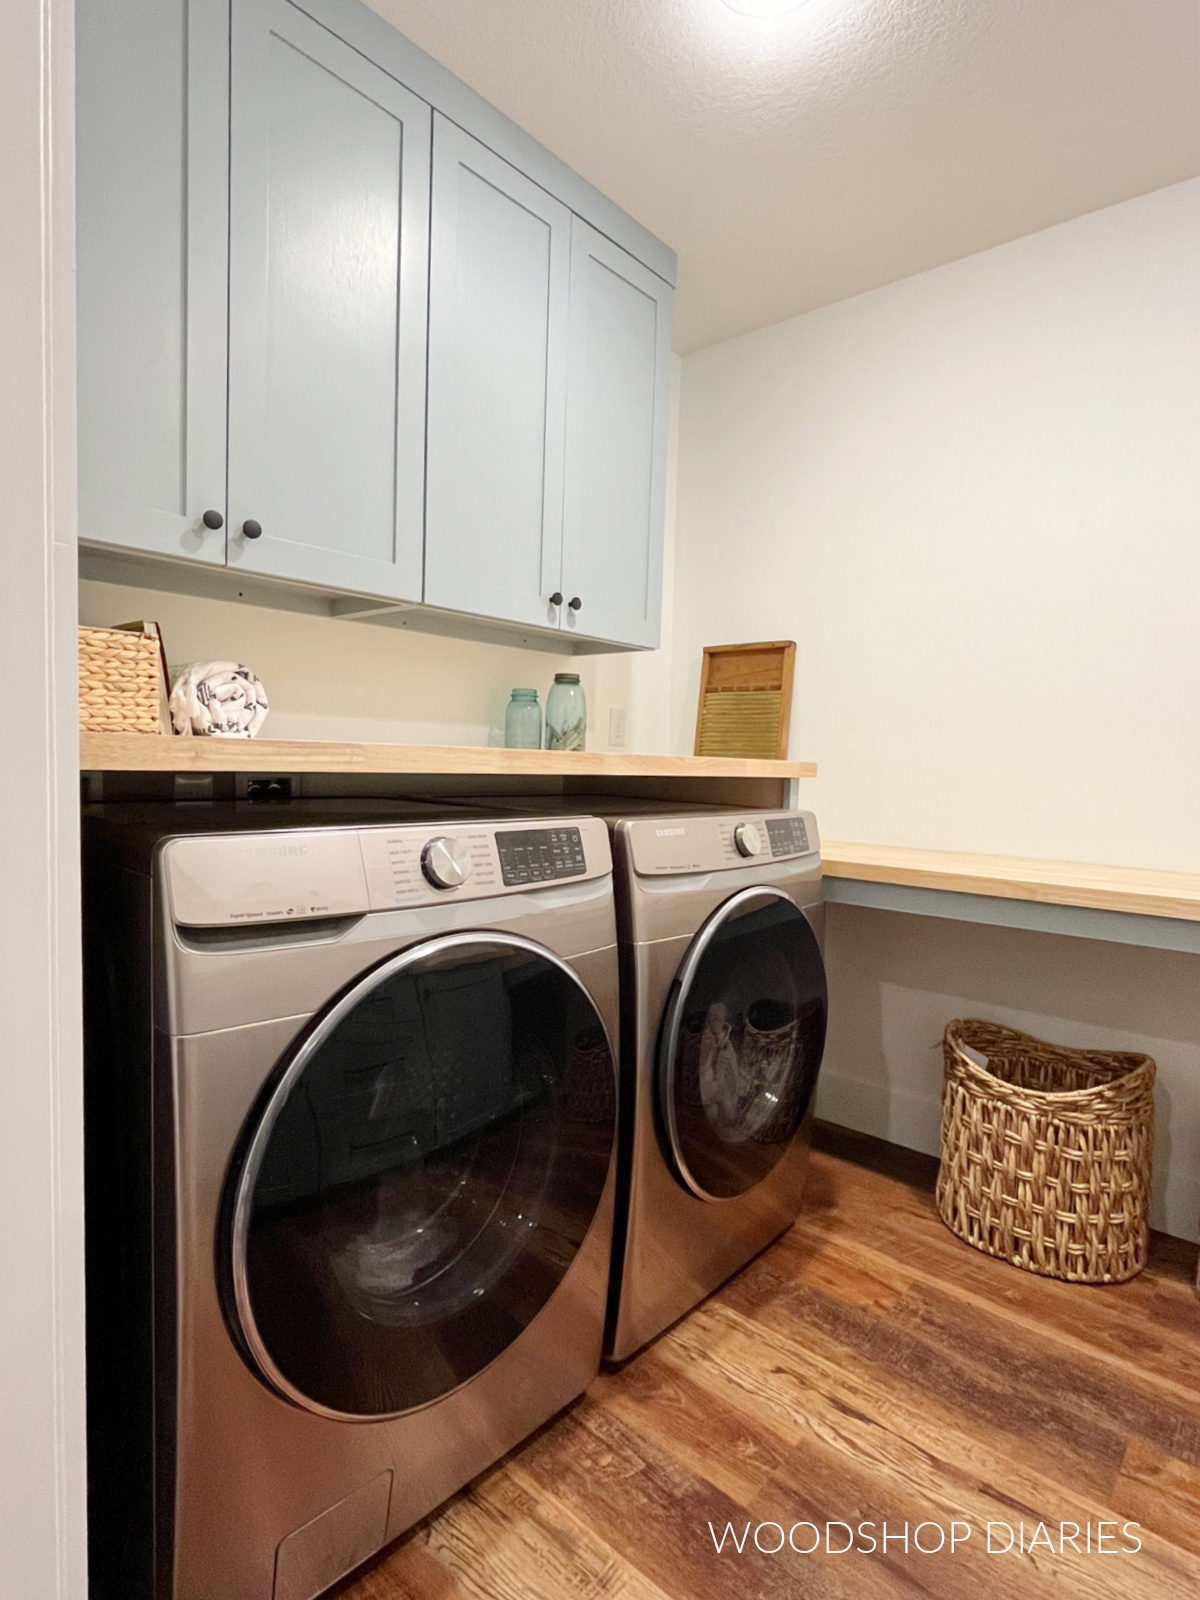
Then, I planned to add a countertop over the washer and dryer, plus some wall cabinets above.
But that left an awkward space in the back left corner beside the dryer that I wasn’t sure what to do with.
So, I decided to build another simple base cabinet, a few inches shorter than the cabinets on the right side of the room.
Then, I could slide it into this corner and run another countertop across it to connect it to the other base cabinets. This would fill the awkward space, but also give me even more countertop space–which I wanted to maximize anyway.
To be honest, this was WAY more storage than I actually needed (of course, you can never have too much storage), so I decided to leave the space underneath the back countertop open for now.
Additional cabinets underneath here felt like it might be a little TOO much. But if it ended up looking odd, I can always add them.
Spoiler alert: it was fine without cabinets. But, it’s always nice to have options and to plan for the “what ifs” haha!
Adding Custom Built Ins to Laundry Room
To kick off this laundry room renovation, first, I emptied the room. So basically, I removed the existing two wall cabinets, shelving, and the trim.
Then I could start completely fresh with a coat of paint. I painted the walls in here SW Pure White to brighten it up.
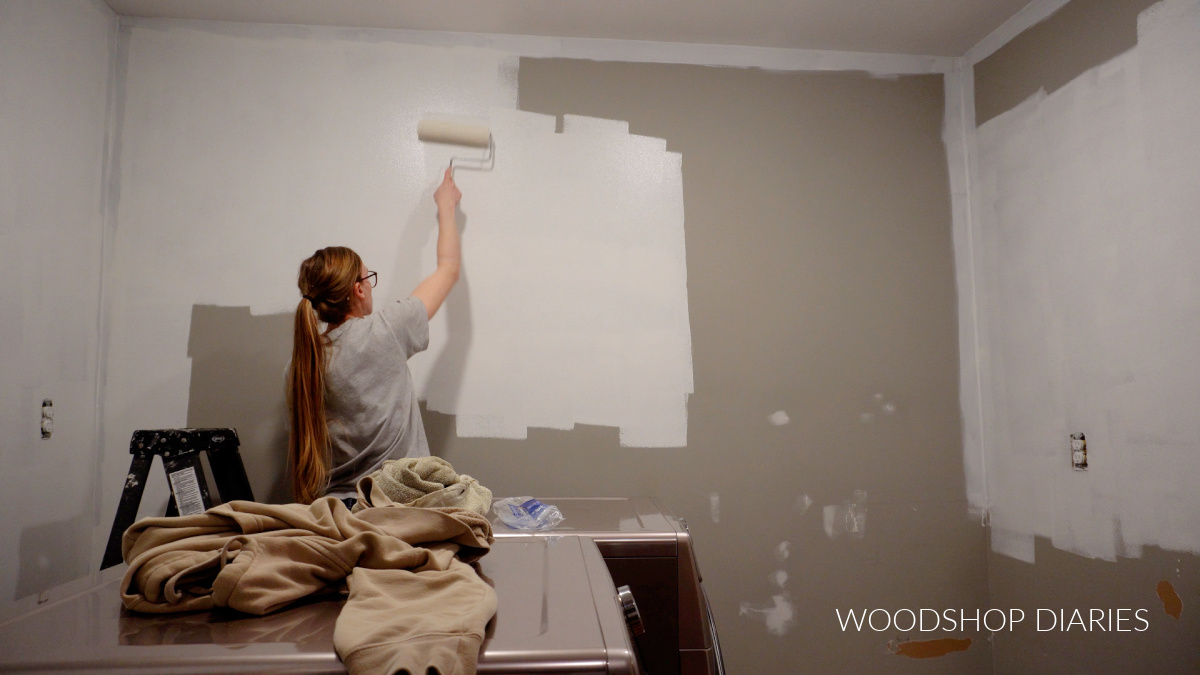
Paint alone made a huge difference and this room felt so much cleaner and brighter. Paint works wonders.
Adding Base Cabinets to the Right Wall
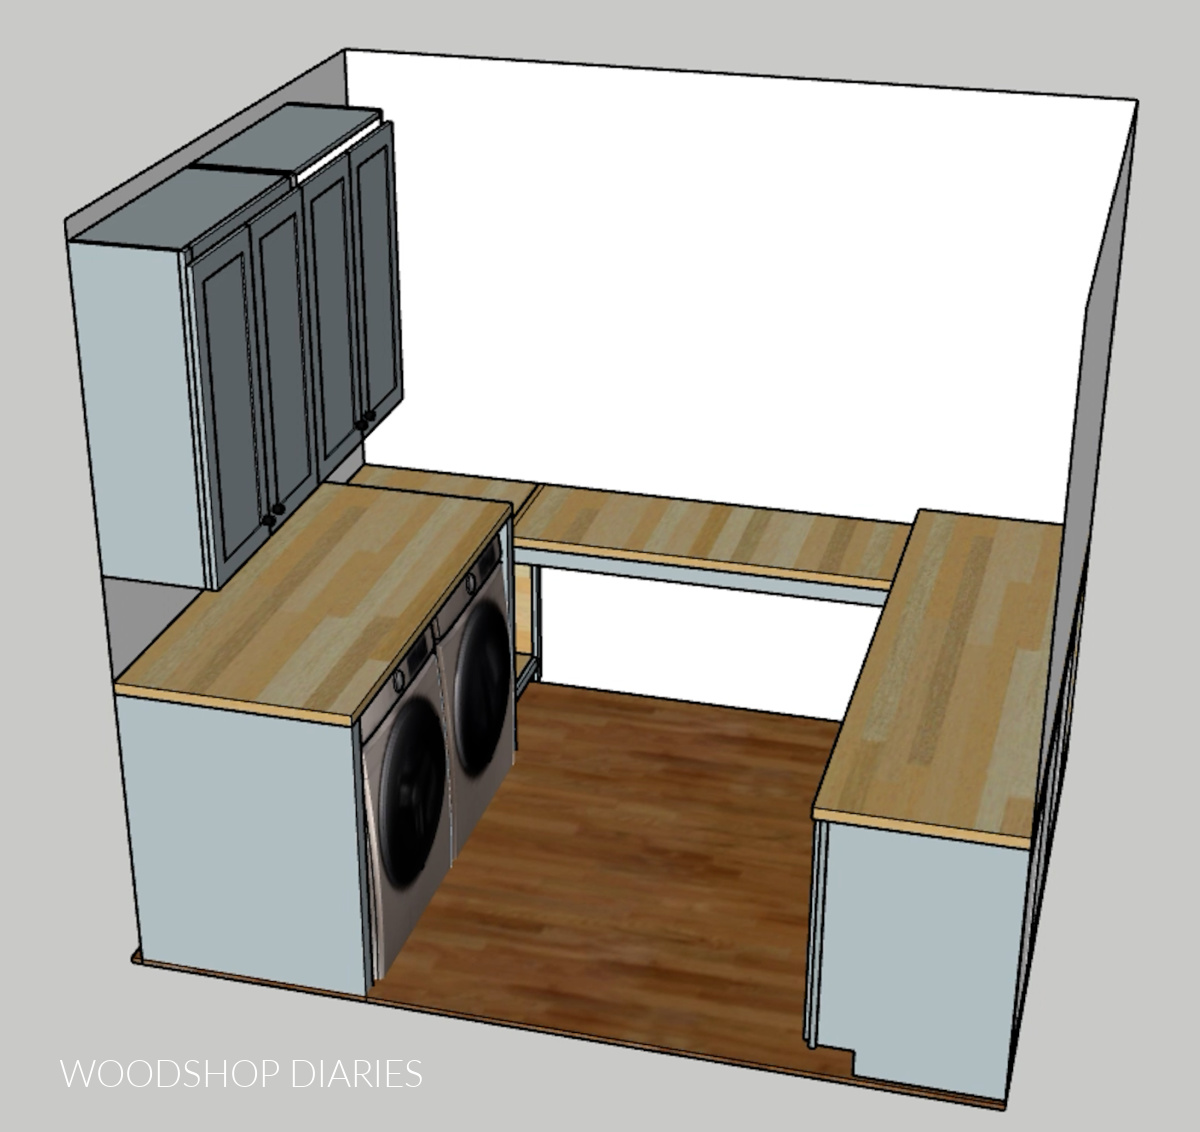
Then, I built the custom base cabinets for the laundry room. I built these to fit perfectly between the walls on the right side of the room so they would feel built in.
I built four cabinets total–two with doors, one with drawers, and I left the one that will go against the back wall open.
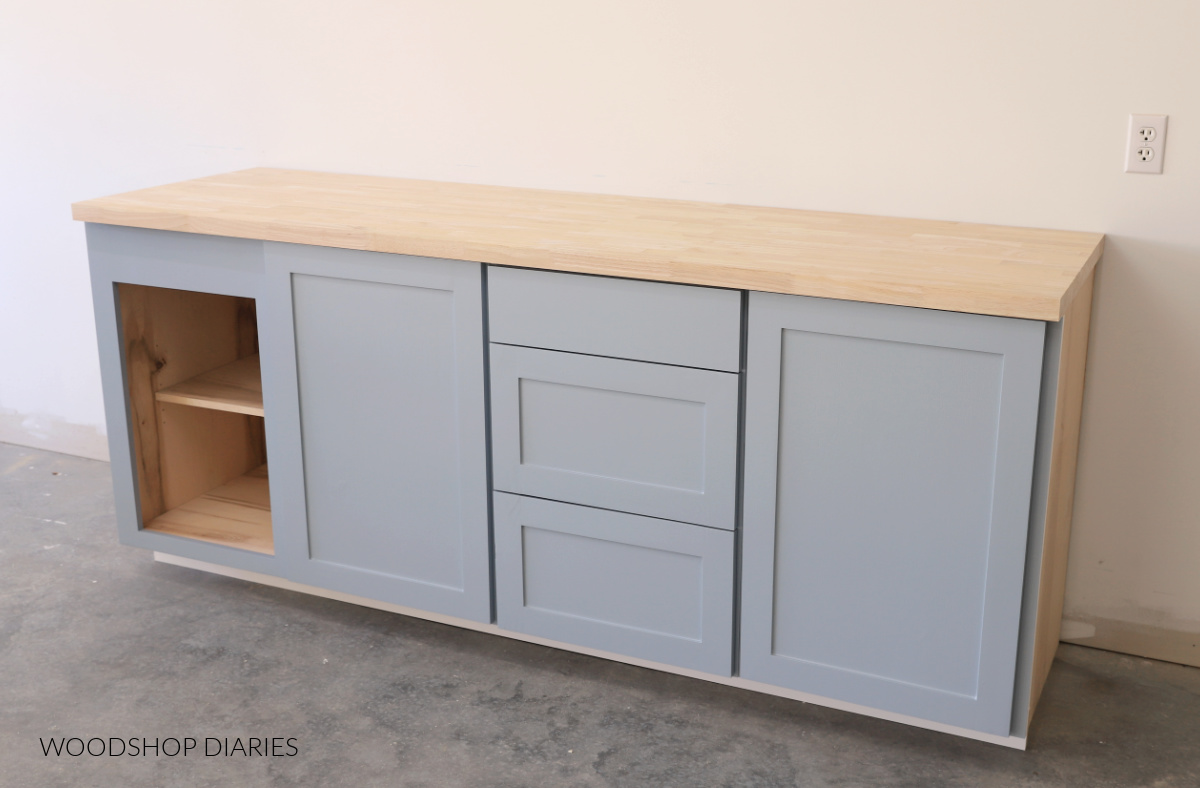
Check out this post to see how I built these base cabinets.
The top of the face frame was intentionally left taller on this open cabinet. It’ll make more sense once we get to the next part of the room.
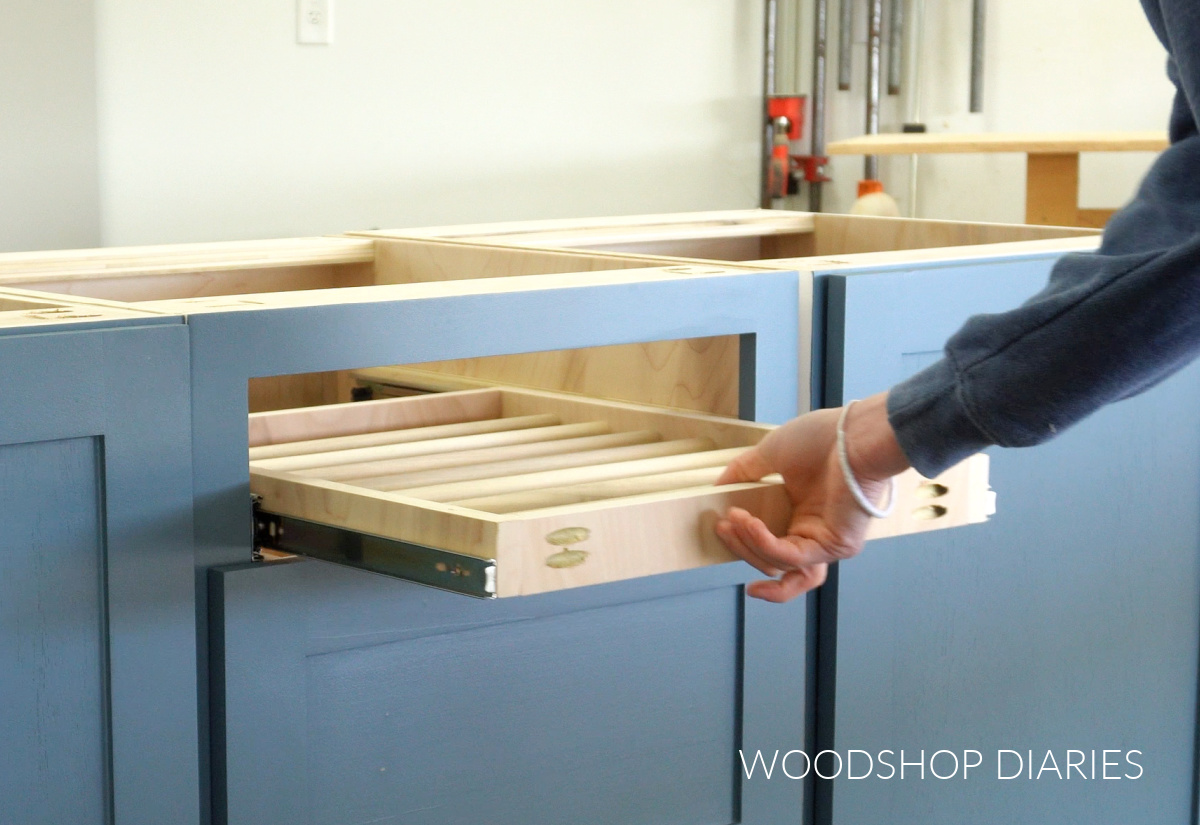
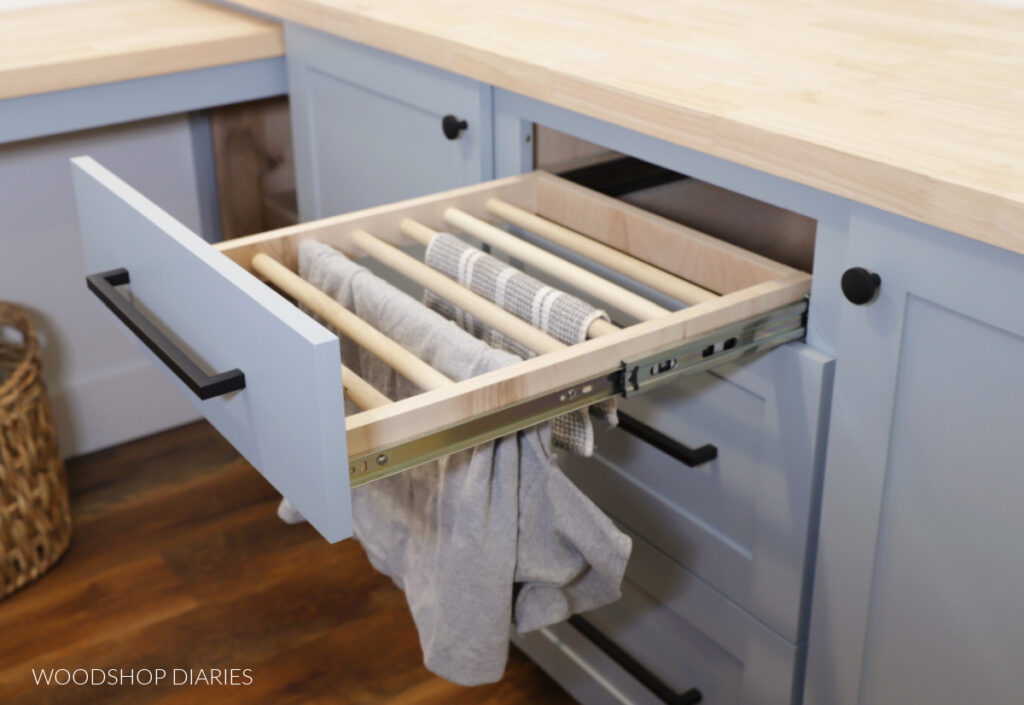
Since I was putting these cabinets in the laundry room, I decided to get a little creative and I also turned one of my drawers into a drying rack.
I’m personally not a huge fan of the wall mounted drying racks and I don’t one often. But it’s nice to have when I do need it, so I thought adding it into a drawer so I could hide it away when not in use was a neat idea for the laundry room.
You can check out how to turn a new or existing drawer into a drying rack here.
Once the base cabinets were assembled, I wanted them to be modern and clean, but with a touch of color. So I painted them SW Stardew.
I really like this color, but I went back and forth on using a darker blue for a more classy look or a lighter blue for a more fun and playful feel. Ultimately, I went with the lighter, but a navy color would have looked nice, too, I think.
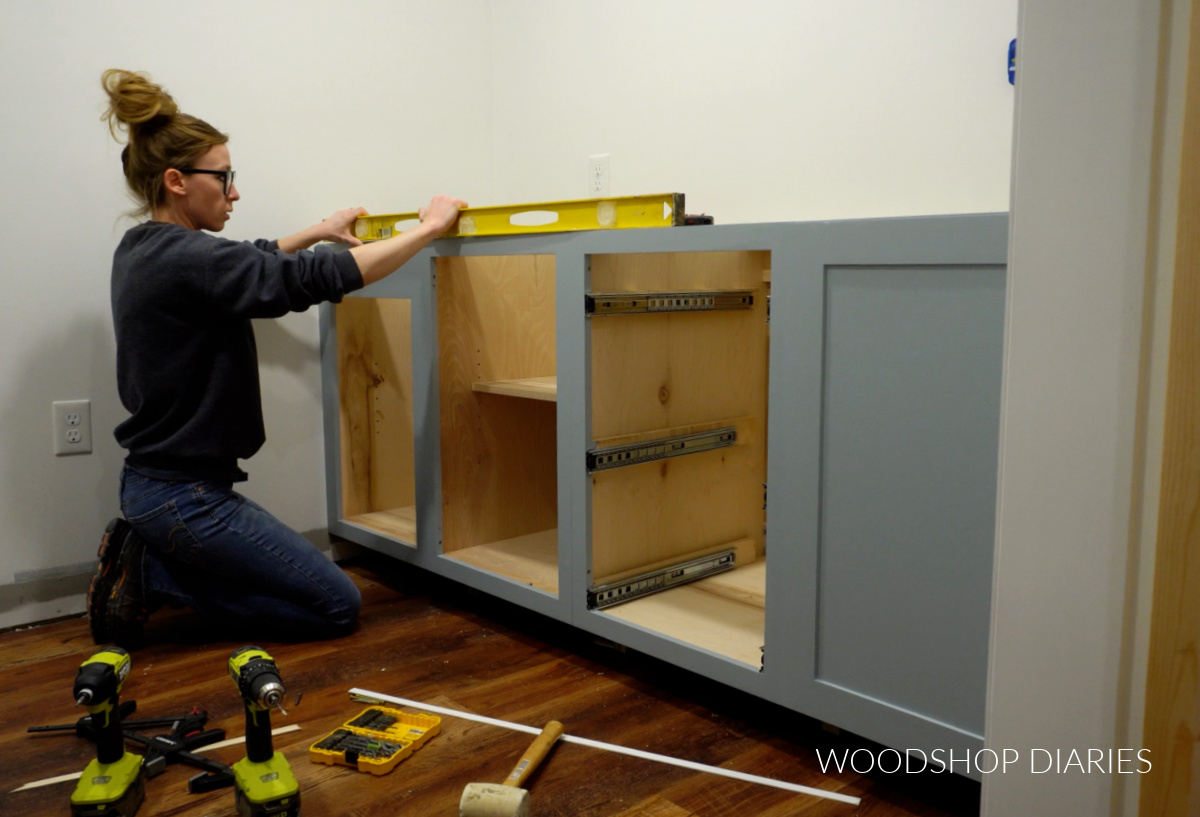
I installed the cabinets into the room, making sure they were level and securing to the wall studs. Then, I added a premade butcherblock countertop cut to fit over the top.
Installing Countertop Along the Back Wall
With the right side of the room together, I moved to the back. In the design plan, I mentioned that the space in the back left corner of the room was kind of awkward.
I built and installed a simple base cabinet in that corner between the washer and the wall that was about 2 ½″ shorter than the height of my other base cabinets.

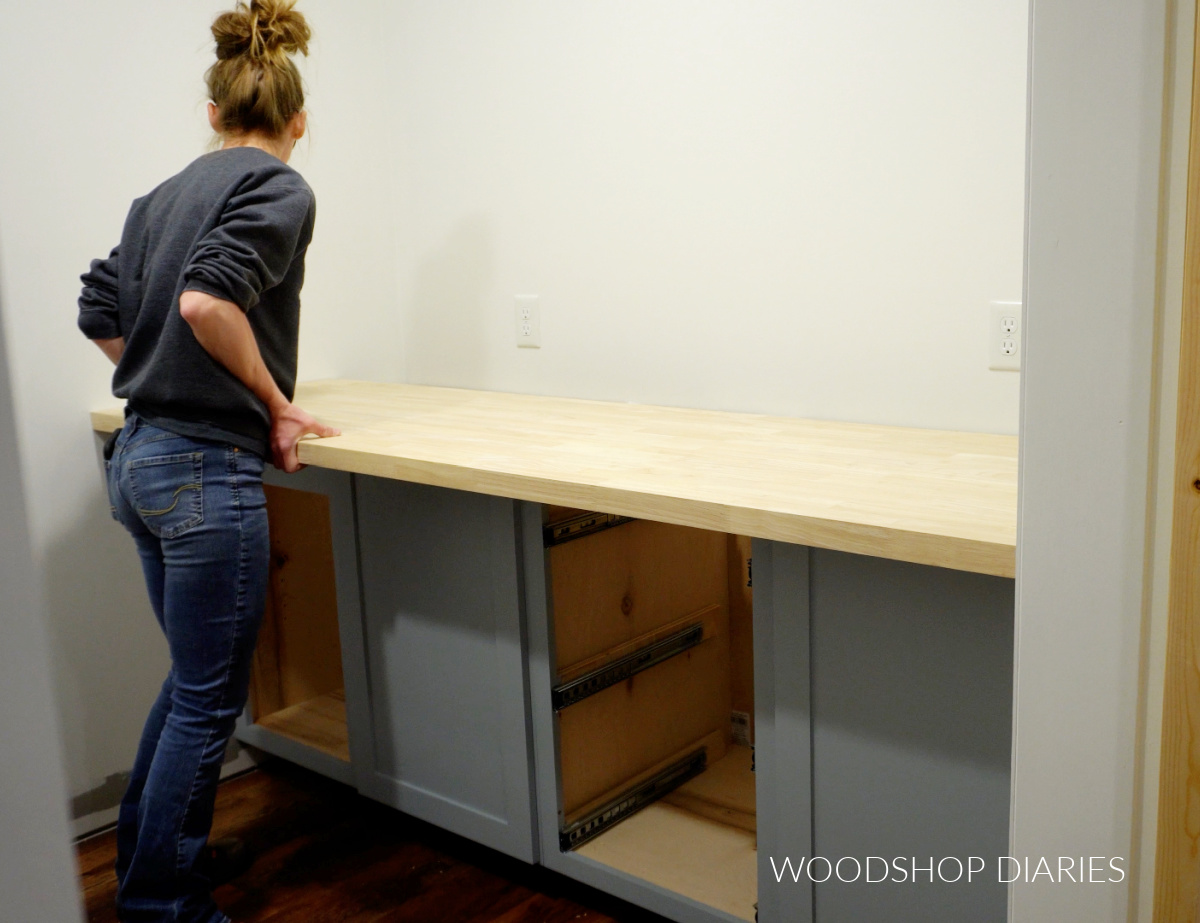
Once it was in place, I could cut and install another butcher block countertop to fit along the back.
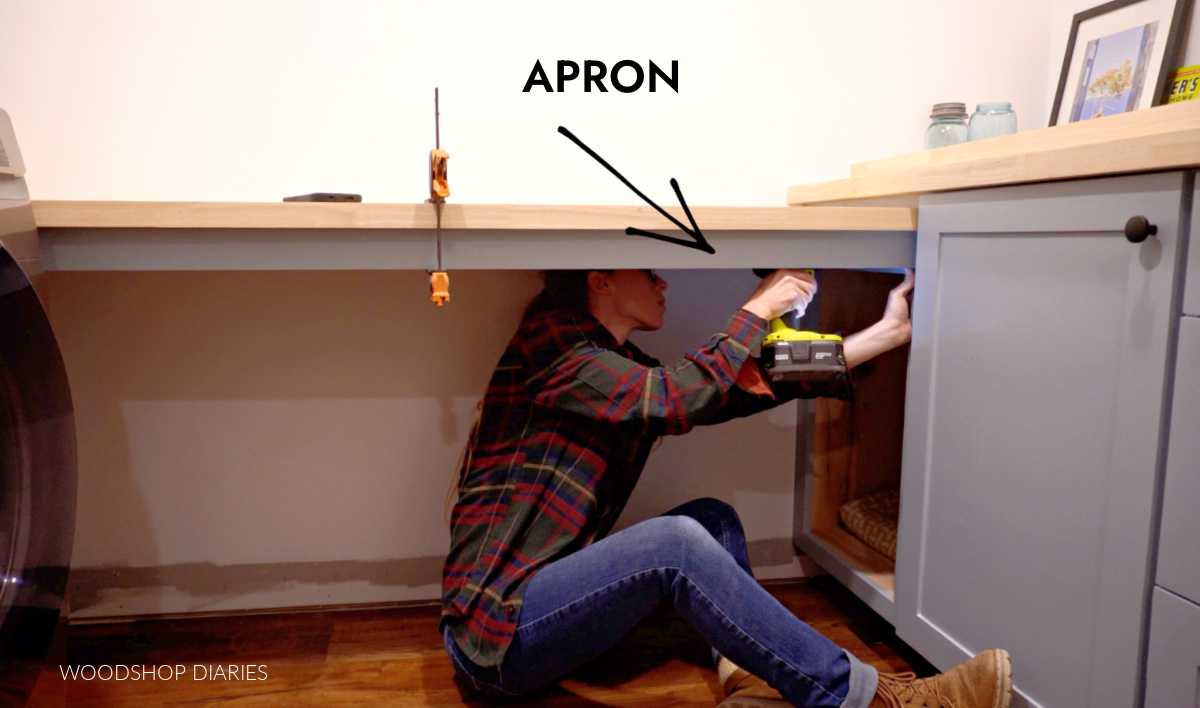
You may have been wondering why the top of the face frame on the open shelf base cabinet was taller than usual. I made it that way so that I could screw a scrap block into it to hold the other end of this countertop.
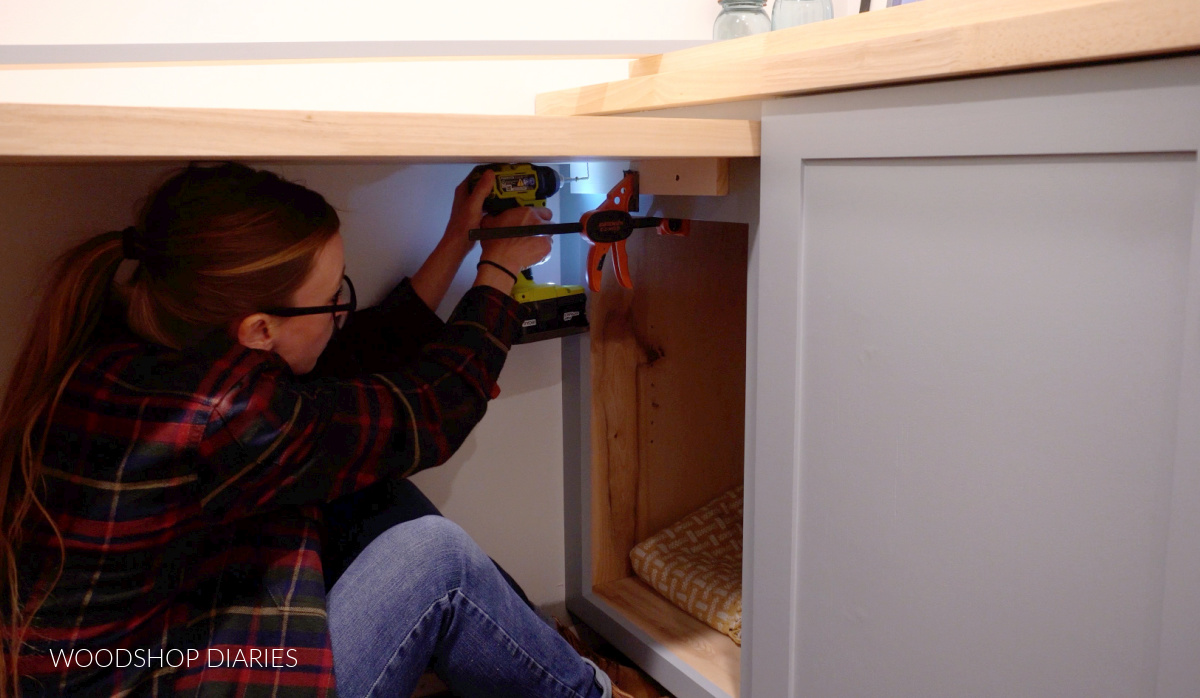
I installed the countertop below the other as you can see, making sure it was level side to side. Once it was installed, I felt like it needed an apron underneath–more for looks than for support.
So I used pocket holes and screws to run a 1×3 apron piece along the front and attached to the face frame between the two back base cabinets.
Adding Cabinets and Countertop Above Washer and Dryer
Now, I finally shifted focus to the washer and dryer part of the room. I had planned to add a countertop here above the machines, so first, I needed a support on both sides.
I screwed a piece of scrap plywood to the wall to support the left side of the countertop. Then, I cut a piece of ¾″ plywood and nailed a 1×3 on the front to support the right side.
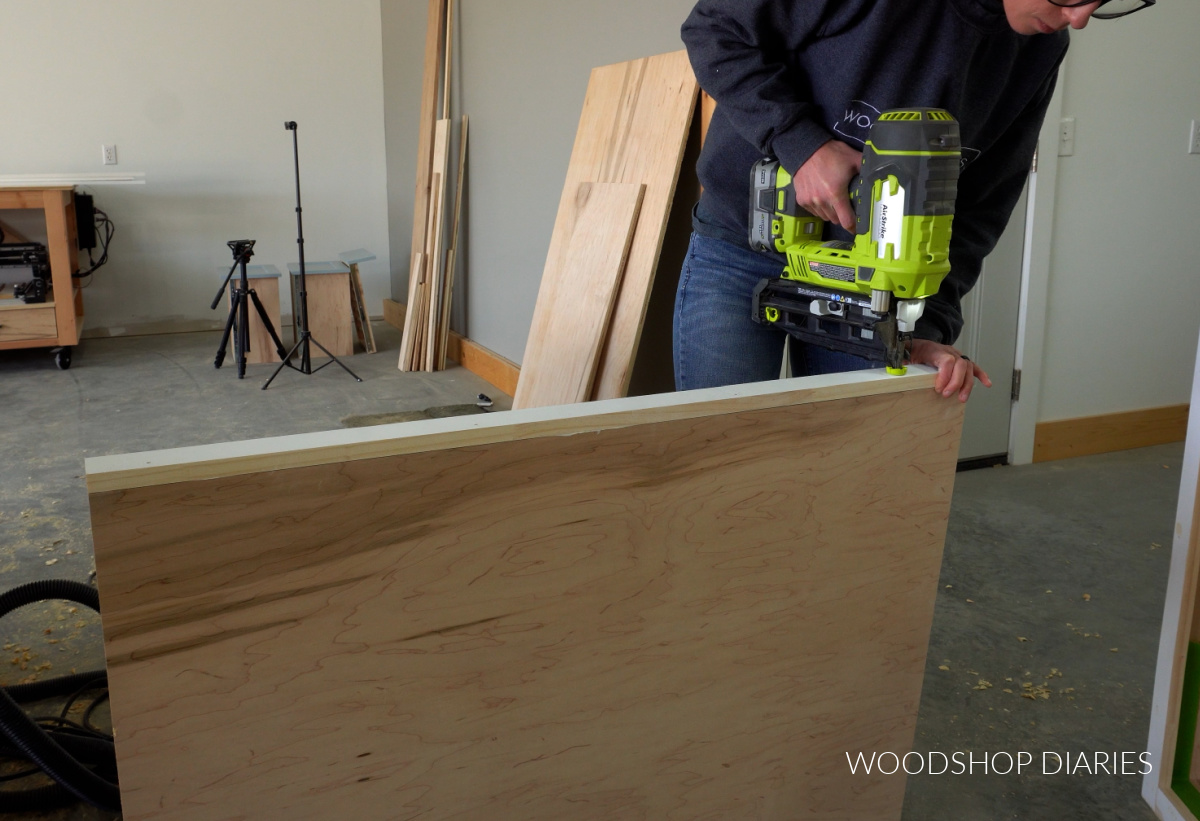
I screwed the plywood panel to the back cabinet in the corner so it would stay in place.
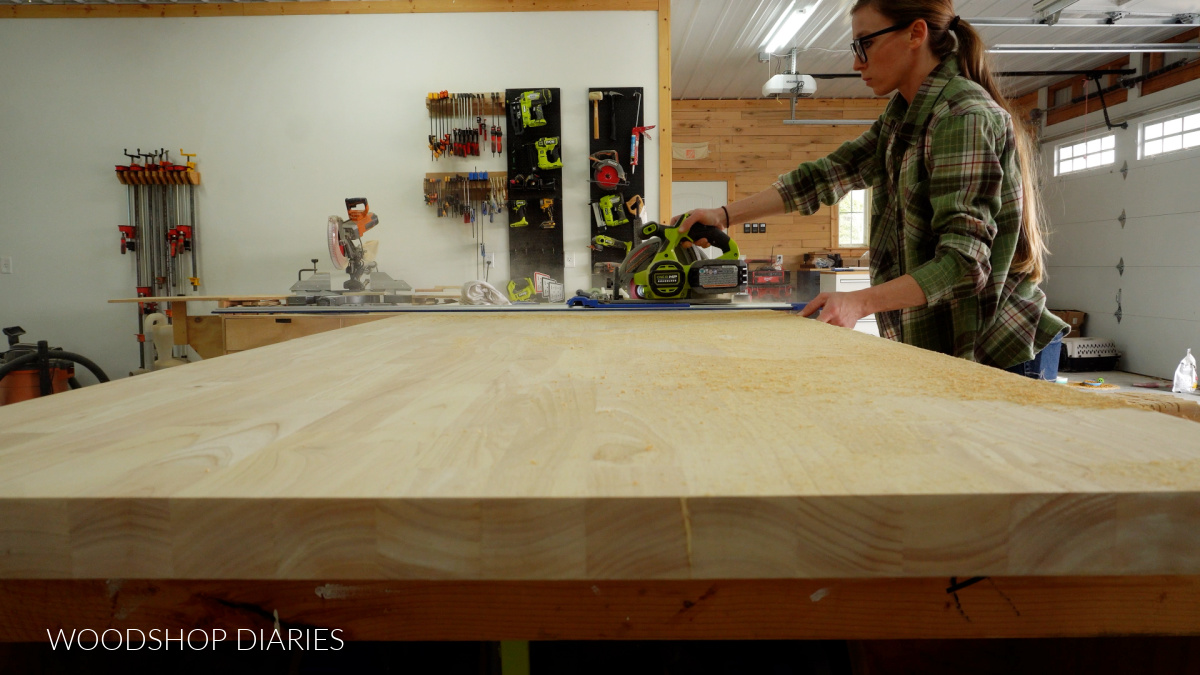
Then I cut to fit another butcherblock countertop to rest across these supports. This one had to be quite a bit deeper to cover the washer and dryer, so I cut it from an island top (which was 39″ x 72″ originally).
Now, I attached the other two countertops to the cabinets below them.
However, for this one above the washer and dryer, I didn’t want to attach it because I wanted it to be easy to remove if we needed to get behind the machines to check for leaks, clean the dryer duct, etc.
It’s SUPER heavy, so it’s hard to move even with it not being secured. So this one is just resting on the supports and not attached.
If we decide later to attach, some corner brackets from the bottom side or a few screws through the top down into the supports below would work well.
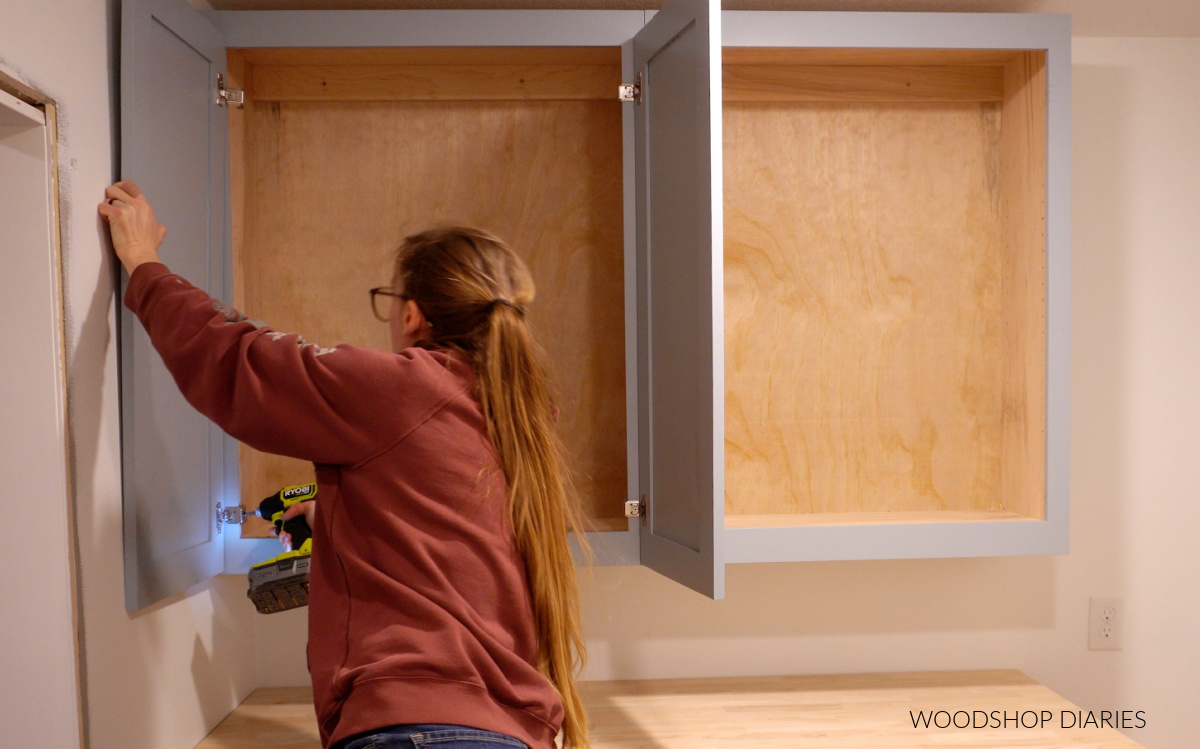
Then, I added two wall cabinets above the washer and dryer to finish this side of the room.
You can see how I built these simple DIY wall cabinets here.
I made these cabinets so they they go all the way to the ceiling. This really made our short 8′ ceilings feel much higher.
I didn’t build these cabinets to run wall to wall because with the countertop across the back, a cabinet in the back corner would be difficult to get to. So this far corner is a bit awkward since it’s empty.
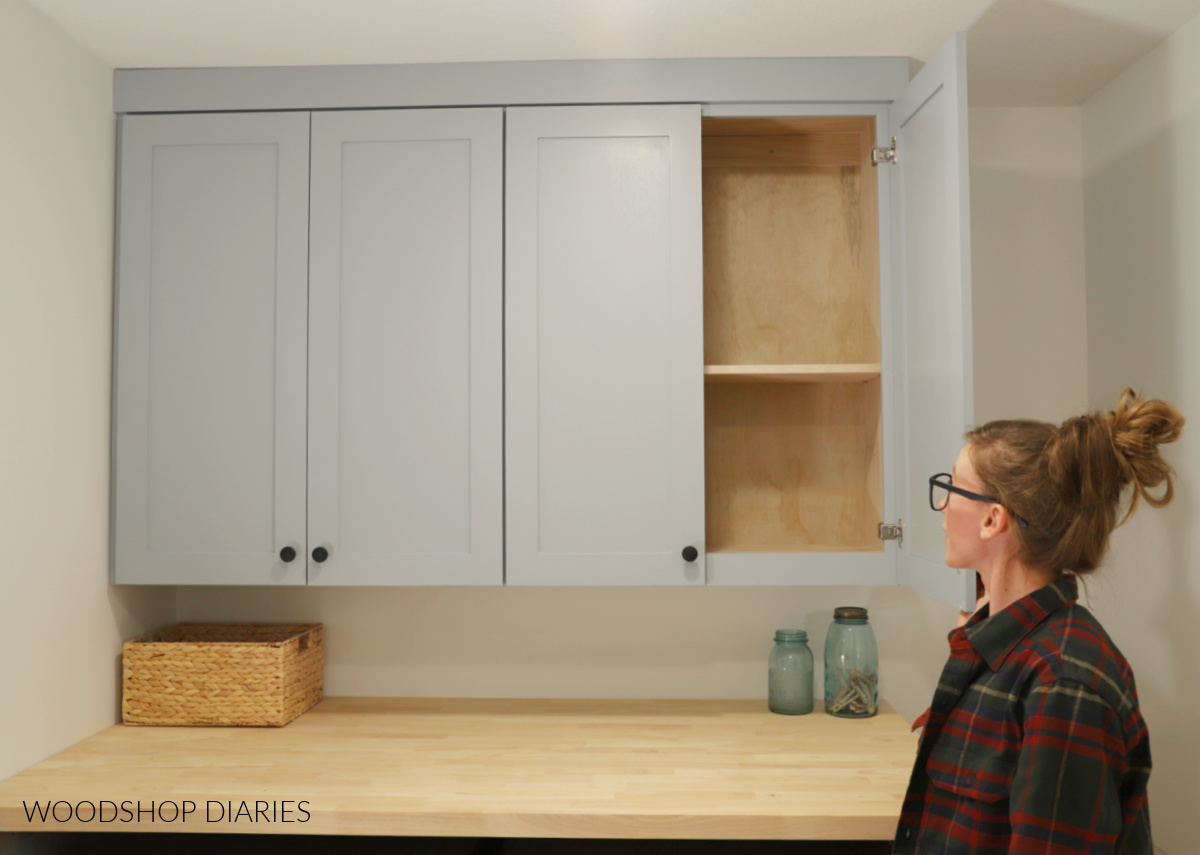
I may come back later and add some shelving there just for decoration, but practically speaking, it’s a difficult to access space, so it’s not great for storage. But it may be a fun place to display some decorative jars or some art work.
Finally, I installed the toe kicks around the cabinets, baseboards and door trim, then stepped back to look it over.
Finishing Details and Final Reveal
After stepping back and looking, the right side of the room felt like it still needed something on the wall. It just looked…bare.
I didn’t want to add any more cabinets because I just really didn’t need any more storage. Full transparency, 5 of the 7 cabinets in this room are empty!
But, I thought a simple shelf across the wall would be nice. So I used some basic shelf brackets to hang a piece of leftover butcherblock countertop as a shelf.
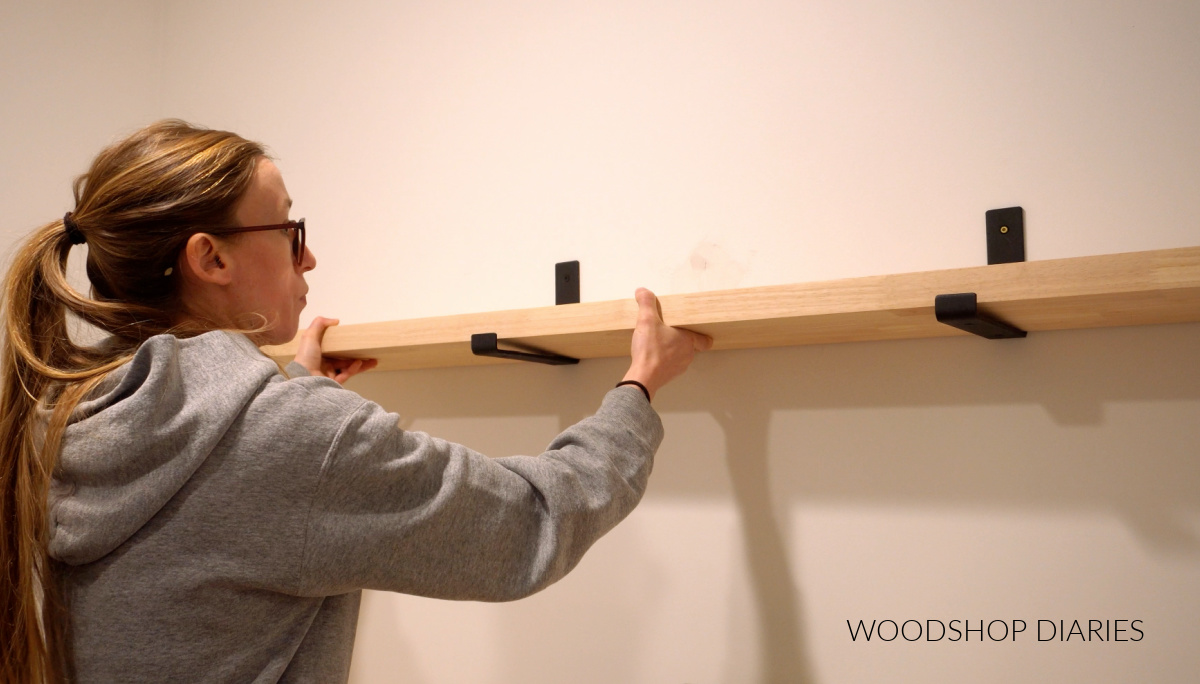
I sealed all the countertops and the shelf with Minwax Polycrylic and with that, this room is complete and ready for all the laundry!
I actually am still on the lookout for a large piece of art to hang on the back wall. I want something simple, but large art is expensive!
So I have a good feeling we will revisit this space again soon and I’ll make my own art for the wall.
Until then, I’m more than happy to do my laundry in this space and the difference between the before and after is amazing! I wish I could show you this in person–the lighting doesn’t allow the pictures to do it justice.
But trust me–the after is a definite improvement. The cabinets and countertop add so much function and storage to this space while also making it look clean, organized, and inviting.
I hope this gives you some inspiration and ideas for your own laundry space!
Just looking for links to everything? I got you! Here are the links and info to everything used for the space:
Paint Colors:
- SW Pure White on walls
- SW Stardew on cabinets
Countertops:
- Butcherblock countertops
- Minwax Polycrylic clear coat sealer (no stain)
Other Parts & Accessories:
- Shelf brackets
- Door Knobs
- Drawer Pulls
- Base Cabinets
- Wall Cabinets
- Drying Rack Drawer
- Baskets–Home Goods
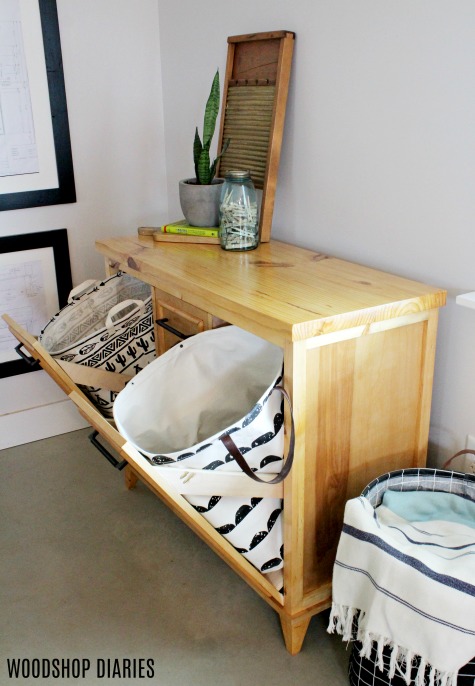
Looking for more Laundry Room Ideas?
Here are a few more laundry room ideas you might enjoy browsing through if you’re looking for inspiration for your own laundry room remodel!
If you’d like to save this for later, be sure to pin it or share to your favorite social channel!
Until next time, friends, happy building!