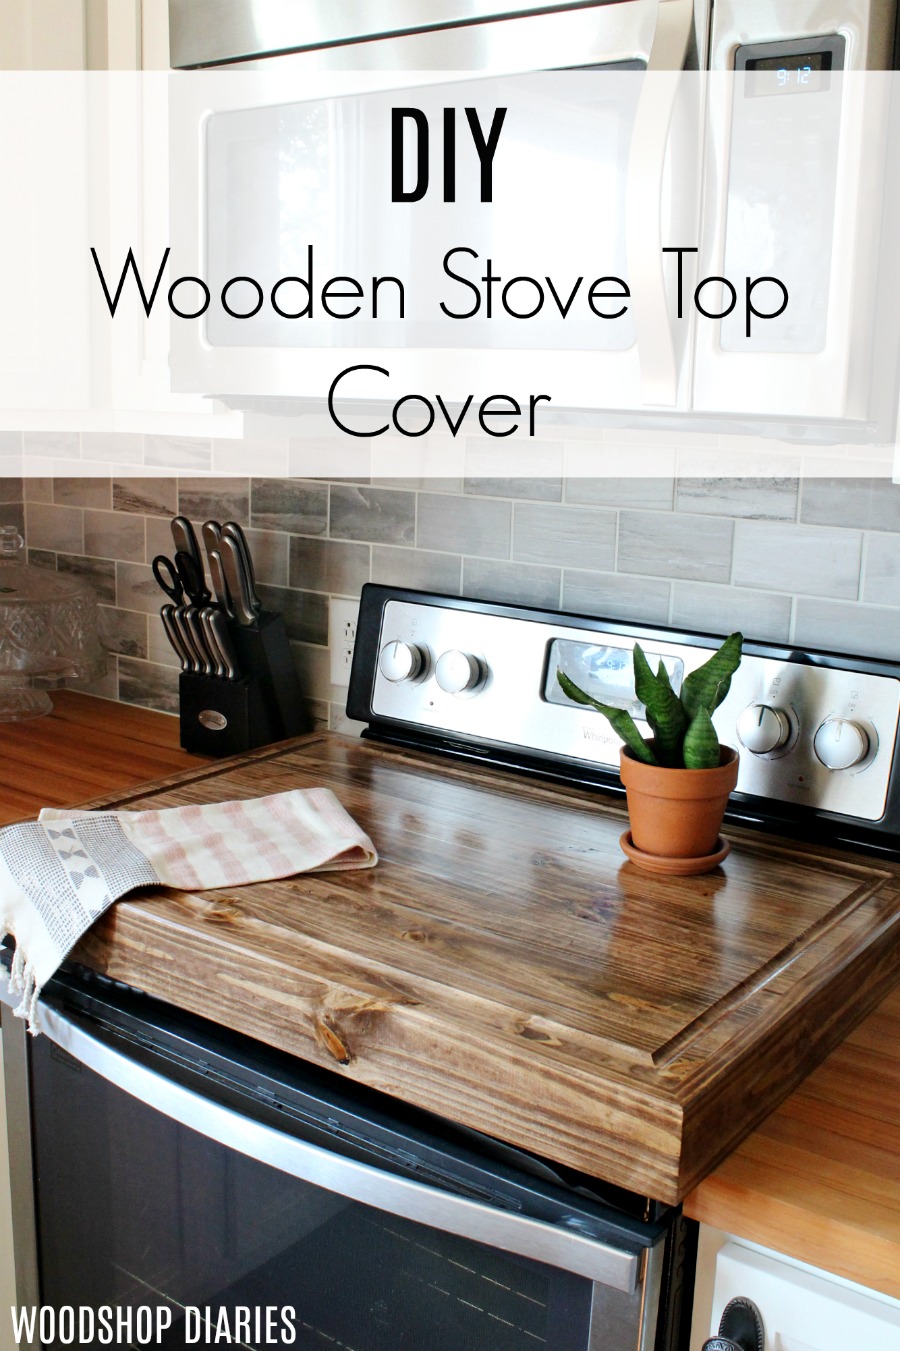
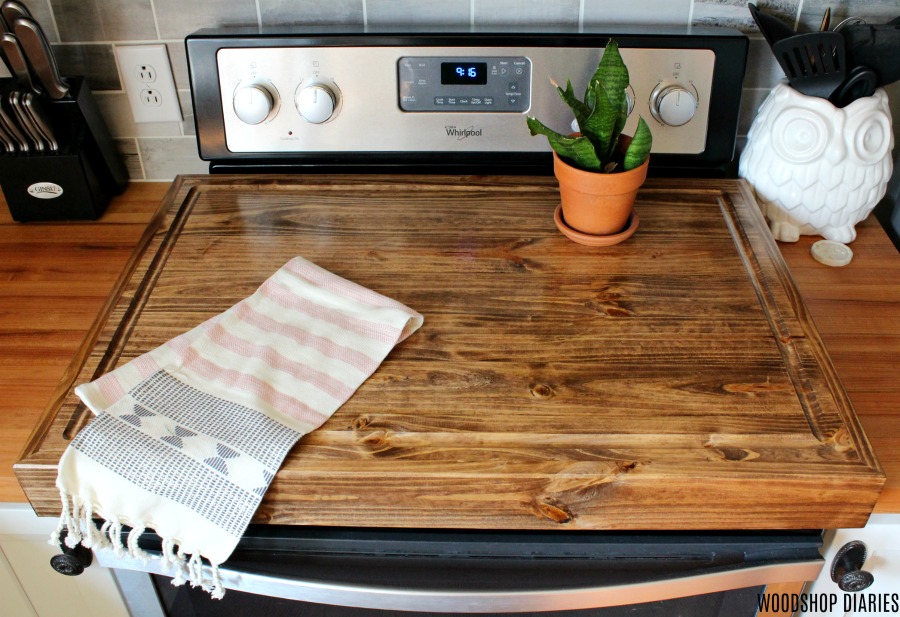
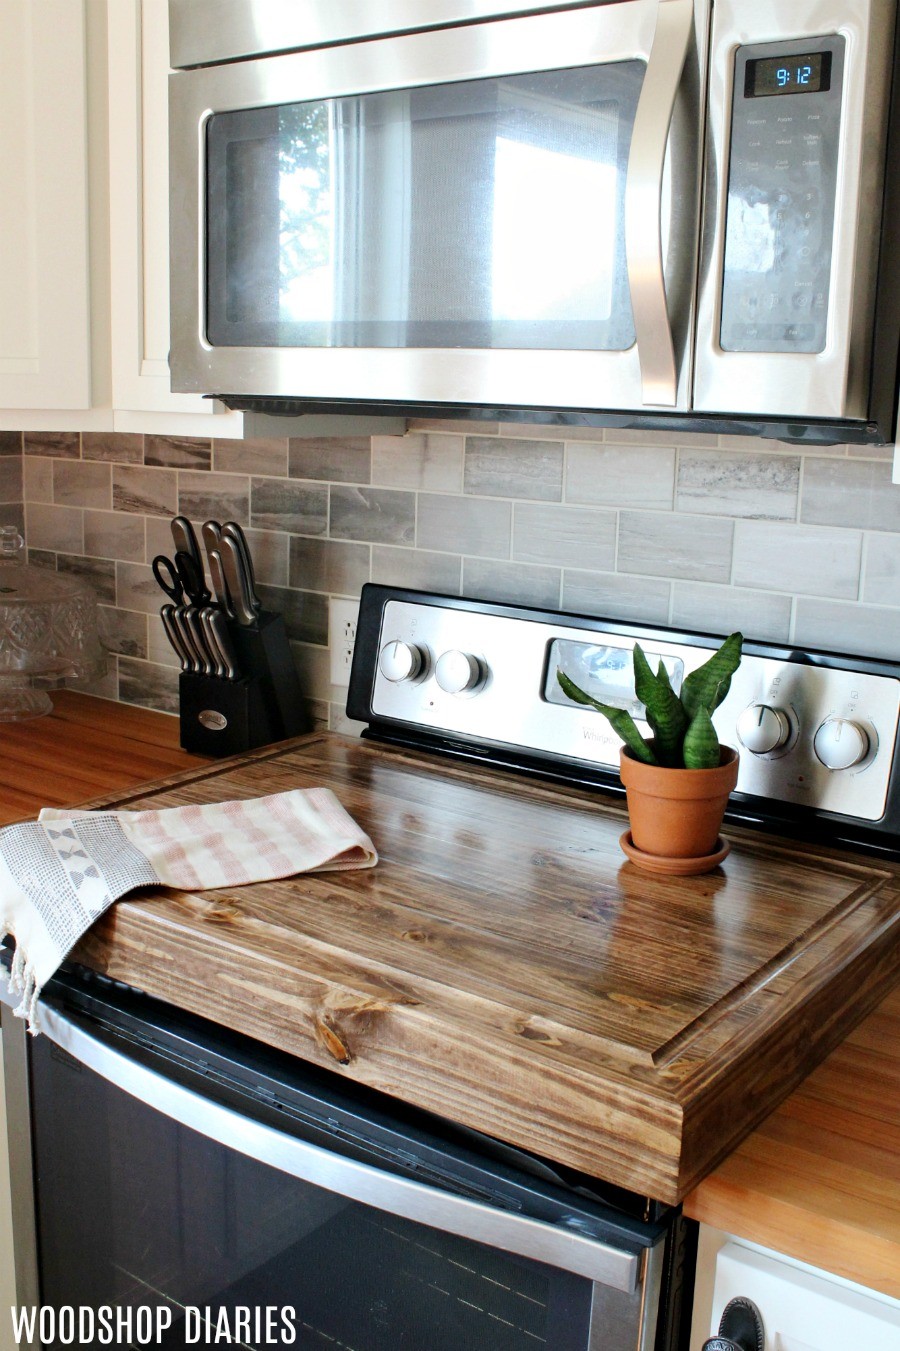
In this post, I’m sharing how to build a DIY Wooden Stove Top Cover or–as some people call them–a noodle board!
Have you ever looked around your kitchen and thought to yourself how big of a waste of counter space your stove is when it’s not in use?
I mean, maybe you use your stove more than I use mine…which, based on the amount of frozen pizza in our freezer, that’s likely HA!
BUT, still, when you aren’t using it, all your stove is doing is collecting dust, crumbs, and crud…and taking up 2 ½ ft of counter top.
But, you can get that space back while simultaneously protecting your stove top from dust and crumbs with this easy DIY wooden stove top cover.

I’m sharing how I made it plus some tips to get the most use of of a noodle board in this post below.
If you’re ready to get building, let’s go!
Tools & Materials
*This post contains affiliate links. See policies.
Tools:
- Miter Saw
- Table Saw or Circular Saw
- Sander
- Router
- Juice Groove Router Bit
- Nail Gun
- Clamps
Materials:
- (4) 1x4x8 (I used tongue and groove here, but standard is fine, too)
- Scrap wood for Routing Guide (See step 5)
- Wood Glue
- 1 ¼″ brad nails
- Wood Finish
What to know before building a wooden stove top cover
If you want to double your stove top cover and also use it as a cutting board, I recommend using hardwood to make it.
I built this one out of basic pine lumber, so it wouldn’t be a great option for a cutting board. However, it still works great as a prep and serving tray.
A note of precaution
Please take note that this is obviously intended only for use when the stove is OFF and completely cool.
Do not use wood to cover a stove that is ON or is still hot. It is wood. It can catch fire.
Also, always follow manufacturers instructions for your particular stove. This is used on an electric stove top.
I am not sure if this would be acceptable on a gas stove. Check with the manufacturer.
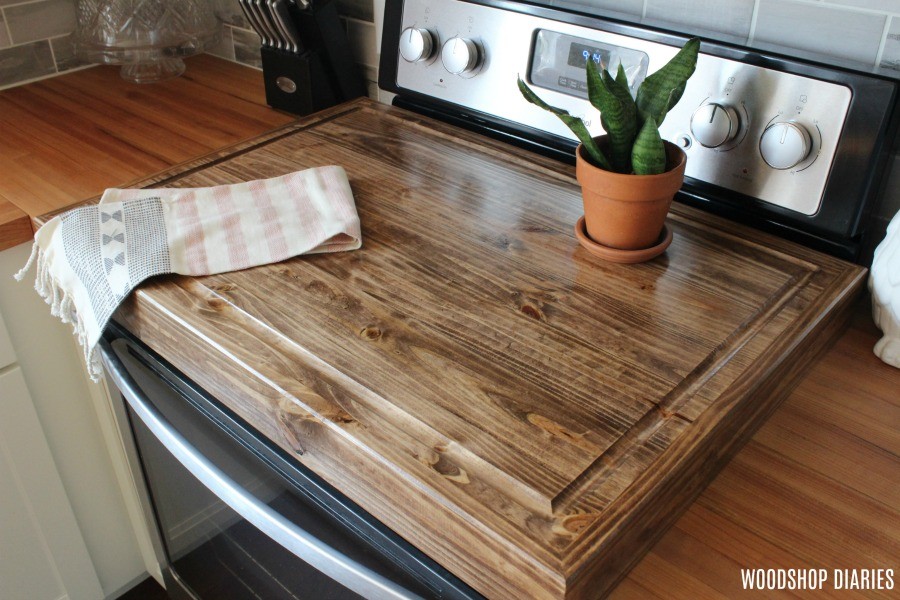
Cutting a Juice Groove
Juice grooves are typically found on thick cutting boards. They’re like little “ditches” around the edge to catch the juices that run out of whatever is being cut.
I mentioned earlier that I used pine so this wouldn’t make a great cutting board. However, I went ahead and cut the juice groove just for looks.
I never cut a juice groove before, but it was really simple with the right router bit.
I got a special router bit just for this and it made it super simple. The link to the juice groove bit I used is here.
How to Make a Wooden Stove Top Cover
Now, let’s get to the how to. I’ve got the step by step tutorial for you below, but if you prefer to watch, I’ve also got a video for you here as well 🙂
This is a really great project for any DIYer!
Step 1: Measure Your Stove
First, measure your stove top–the area you are covering.
MOST stoves (not all) are standard width of 30″, but the top depth can sometimes vary, especially if it’s got controls on the back like mine.
Make sure to make the interior dimensions of your cover big enough to fit over your stove.
Step 2: Cut Pieces for Top of DIY Wooden Stove Top Cover
Using a miter saw, cut 7 or 8 pieces of 1×4 board to slightly more than the width you need the stove top cover opening to be.
NOTE: 7 boards put together will create a 24 ½″ wide piece. You can trim down later, but if you need larger to fit your stove, go with 8 instead of 7.
If you have 8 ft boards, three 32″ lengths works out well. You can trim down later.
So, long story short… cut approximately 7 pieces of 1×4 to 32″ long.
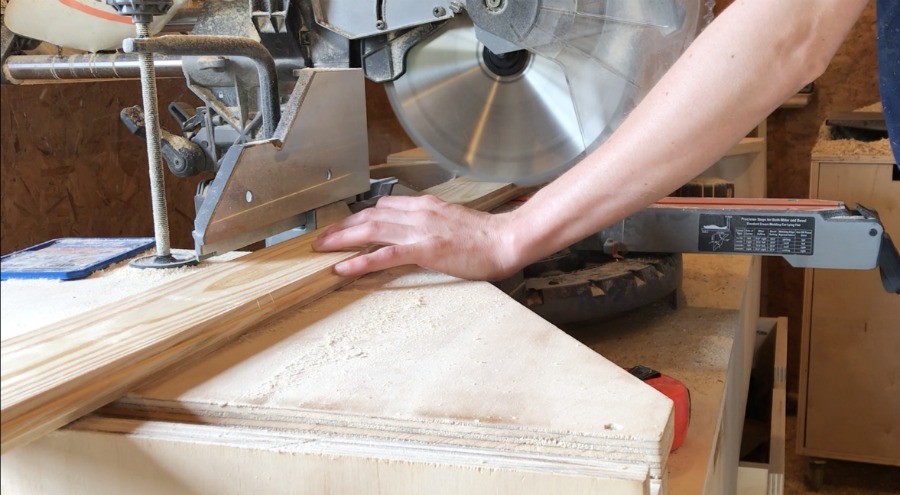
As you can see from the pictures, I used 1×4 tongue and groove pine since that’s what I had available in my shop already.
You can certainly use tongue and groove as well, but standard 1×4 without the T&G works just fine (if not better!) for this.
Step 3: Glue Boards Together for Stove Top Cover
Apply glue in the grooves of the boards (if you’re using tongue and groove) or along the edges and clamp together as shown. Allow the glue to fully dry.
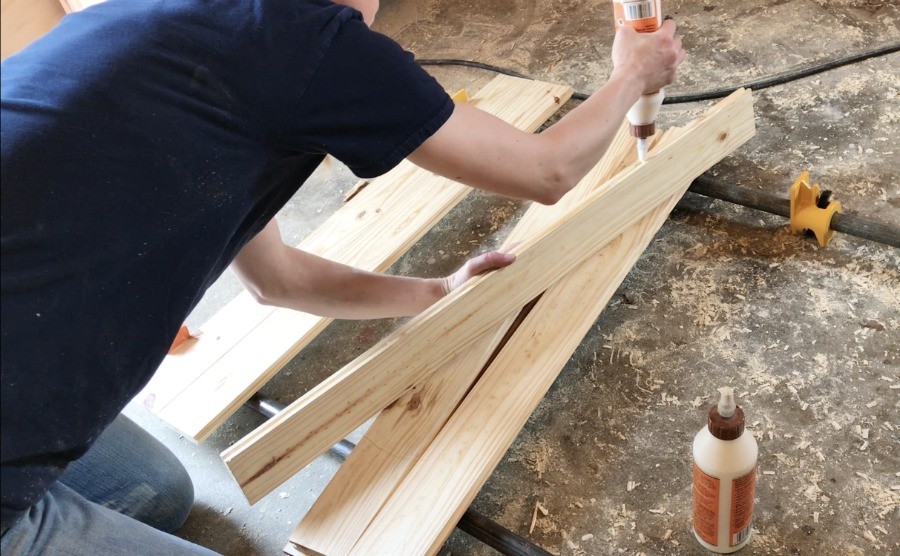
NOTE: It may be helpful to glue this up in sections vs all at once. You can glue up a few boards at a time until you get them all glued together if you’d like.
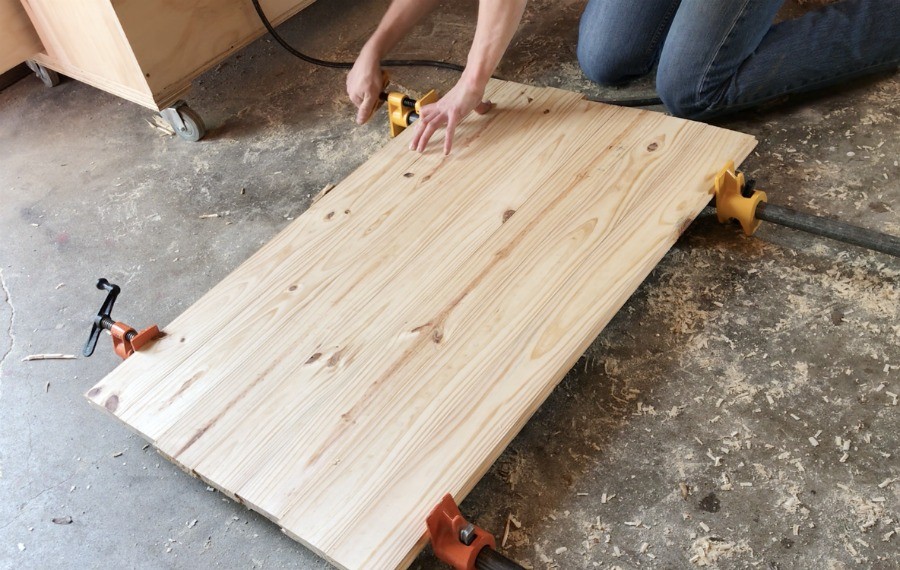
Step 4: Trim Down and Add Sides
Once the glue is fully dry, remove the clamps and use a table saw or a circular saw and a straight edge to trim down all sides to your desired opening size–from step 1.
Make sure to trim all sides smooth (so no tongues or grooves are showing).
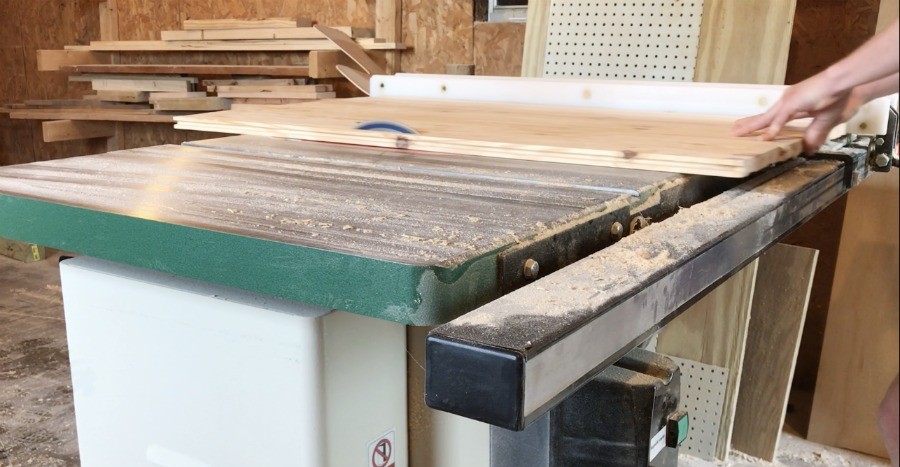
Then, cut pieces of 1×4 to trim out around the edges of this piece.
If you’re using tongue and groove, be sure to trim the tongues off, first, using a table saw.
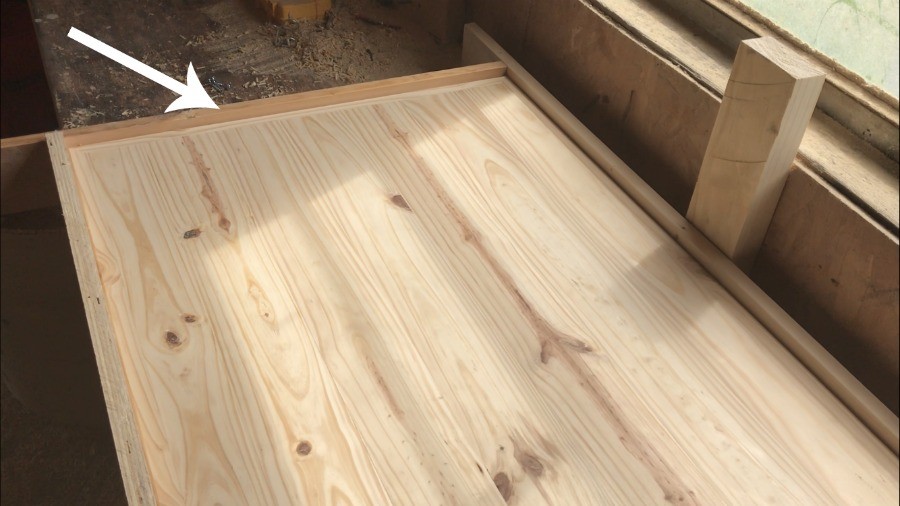
Then, cut these to fit around the top with the smooth side facing up. Miter the corners 45 degrees for a more seamless look.
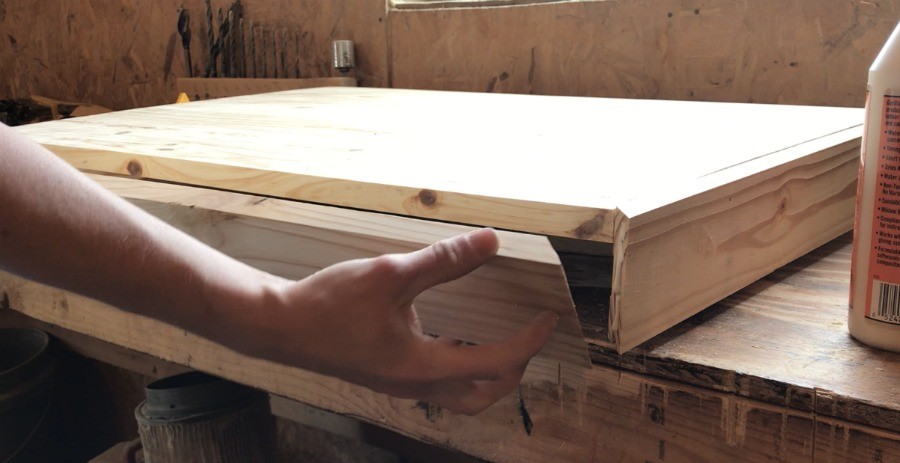
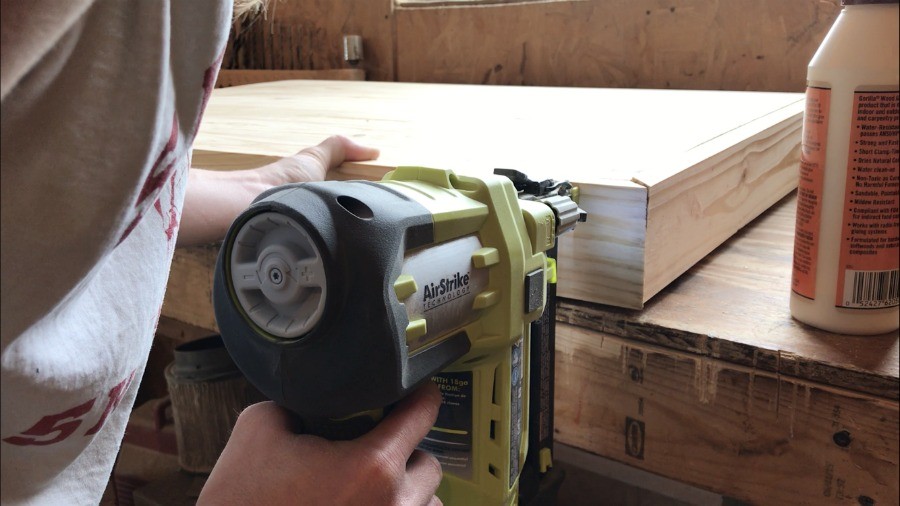
Glue and brad nail these pieces into place like shown (ignore the ugly corner joint here, I was just holding in place for a picture) making sure the smooth sides (not the grooves) face upward.
NOTE: In hindsight, gluing this way may cause issues later with wood movement. I’ve not had issues with this in the past, but just note, over time, seasonal wood movement MAY cause some small gaps here.
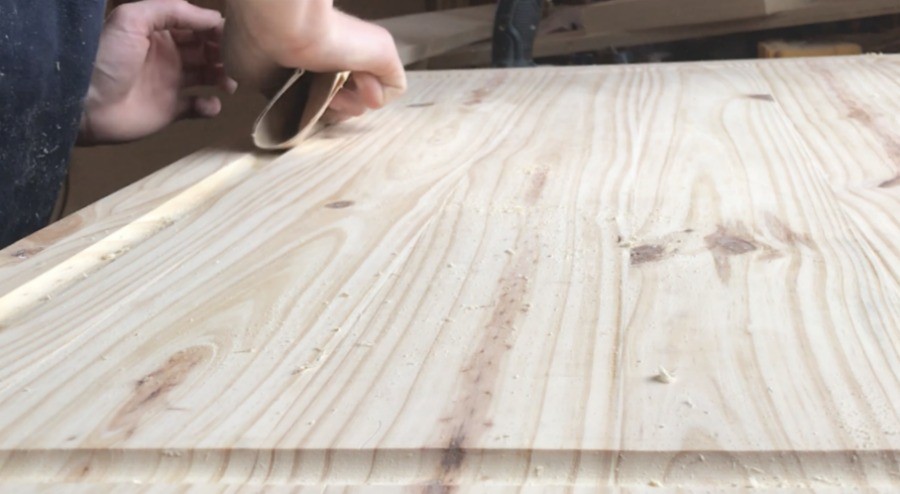
Allow glue to dry completely, then sand all the joints and corners smooth.
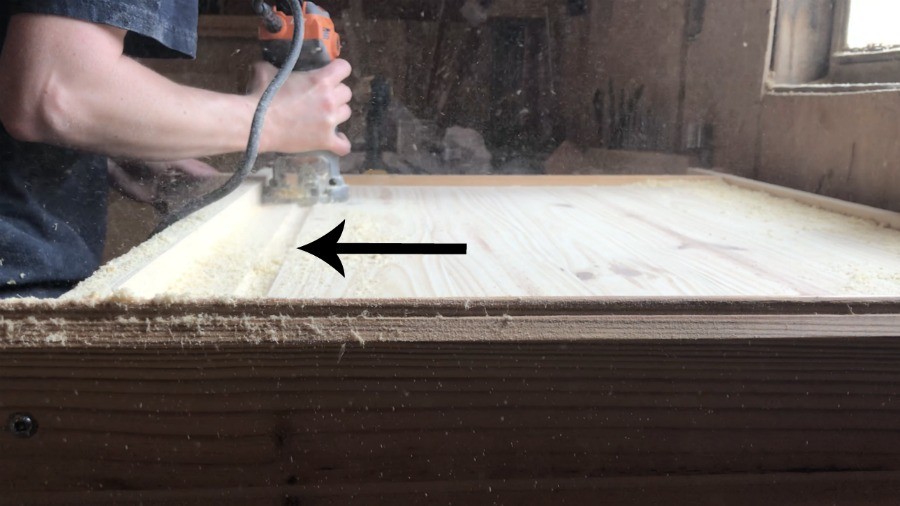
Step 5: Add Juice Groove to Stove Top Cover
At this point, you could stain or finish as desired.
But I added a juice groove. It’s mostly decorative just to make it look like a real cutting board, BUT could also come in handy if you spilled something on it.
A juice groove is just like a little groove you cut along the edges to catch any liquids or spills from your cutting board.
To do this, I screwed some scraps together around the cover. Don’t screw directly to it, but screw the boards together TIGHTLY around the stove top cover like shown.
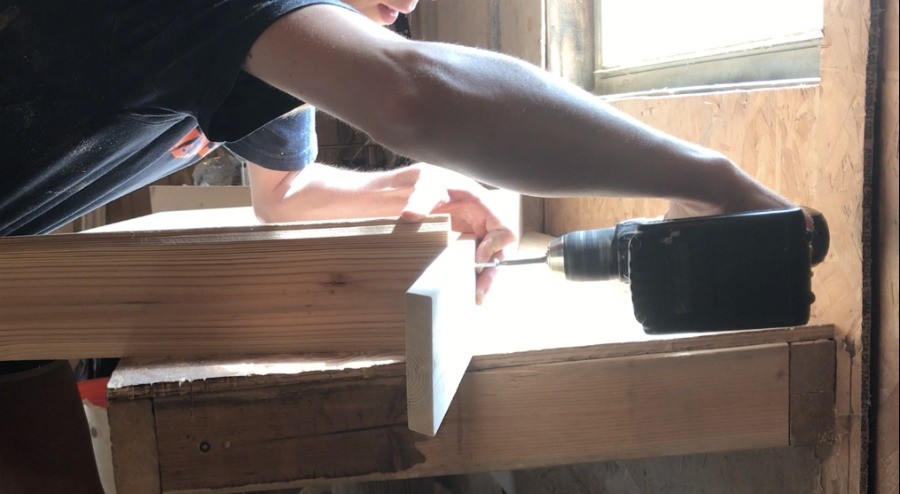
This will be used as a routing guide. Insert a juice groove router bit into your router and SLOWLY and CAREFULLY run your router along the outside edge.
Keep it pressed against the lip of the boxed edge all the way around.
RELATED: How to use a router
Remove the router guide boards and sand the groove smooth.
Step 6: Finish Stove Top Cover
Finish as desired. I stained mine with Minwax Provincial and finished with a water-based clear coat.
I was not planning to use this to cut on. However, if using to prepare food, be sure to use a food safe finish (not oil based stain), something like a mineral oil or butcher block oil.
If using as a cutting board, it’s best to use a hardwood as well.
Once you have your finish applied, simply set in place 🙂

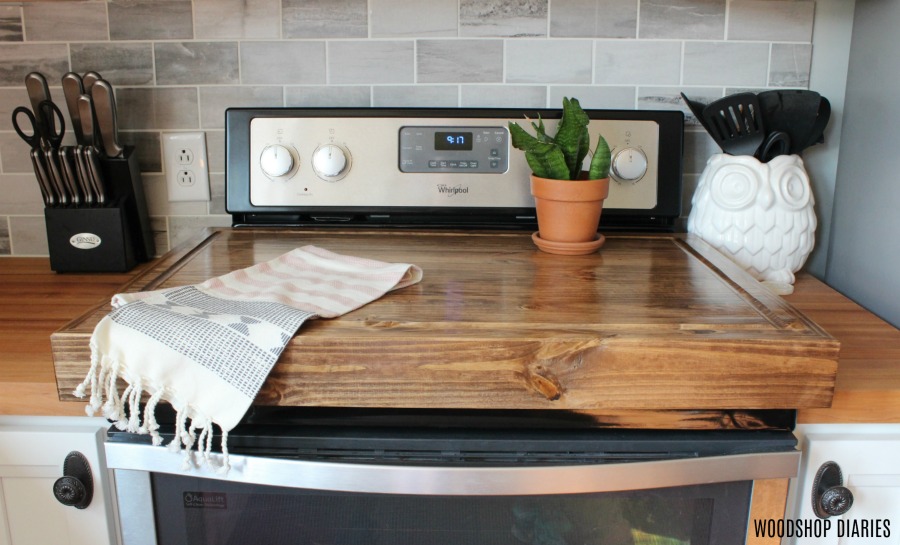
It’s great for adding a little extra counter space when you aren’t using your stove.
You could also flip it over to use as a wooden serving tray if you wanted.
This is a great weekend project or gift idea and is a simple way to add some extra counter space to your kitchen.
So if you’re ready to take back your counter space, get out there and get building this easy DIY Wooden Stove Top Cover!
Then, check out these other favorite kitchen projects:

And don’t forget to pin this for later 🙂
Until next time, happy building 🙂