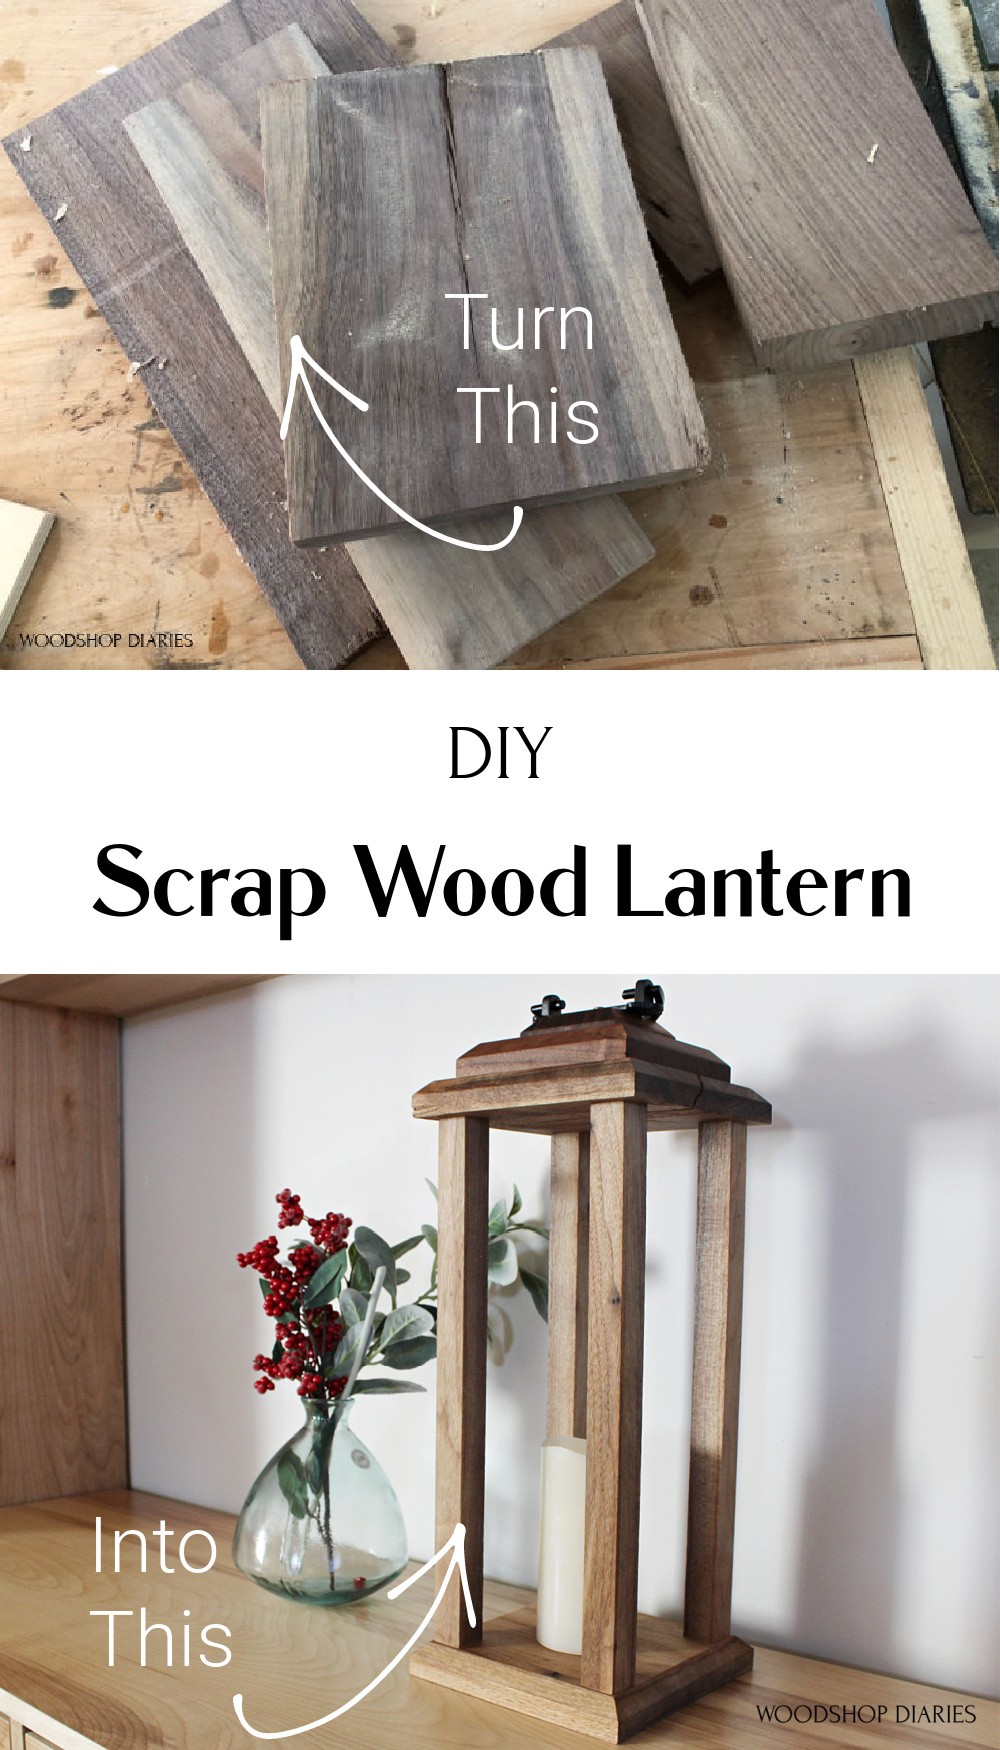
In this post, I’ll show you how easy it is to make your own DIY Wooden Candle Lantern with just two tools and some scrap wood!
These make excellent handmade Christmas gifts, too!
I recently built a friend of mine a huge wooden lantern and while it was pretty, it was INVOLVED. I thought about sharing the tutorial with you guys, but I think halfway through, most people would be a little put off by all the details.
SO, instead, I decided to take a few minutes, make this easy little scrap wood lantern and share it with you instead.
RELATED: Check out a HUGE DIY wooden lantern tutorial from a few years ago here.
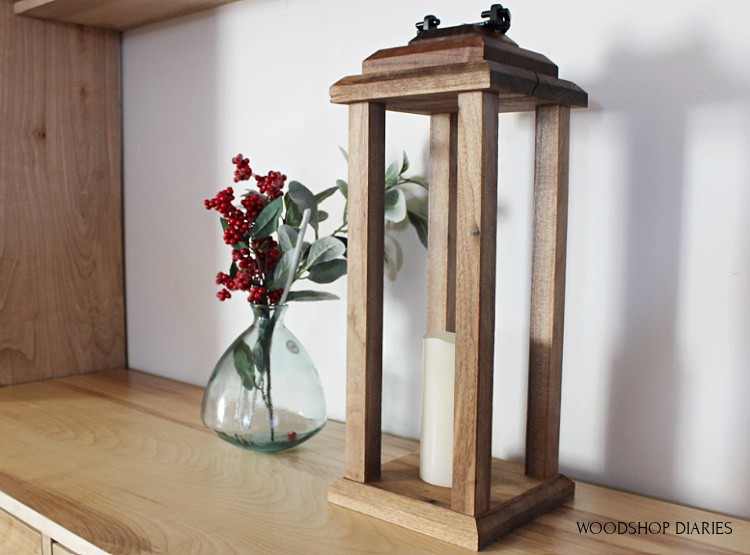
It’s tall, skinny, and the PERFECT size for a little battery powered candle or a small vase. Paired with some greenery, it would make a nice centerpiece lantern, too *wink wink*
RELATED: Check out how to make a Christmas Lantern Post here.
Anyway, the build is SUPER SIMPLE, so I’ll jump right in 🙂
For these Scrap Wood DIY Wooden Candle Lanterns, You Will Need:
This post contains affiliate links. See policies page for more information.
Materials:
- ¾″ OR 1″ square dowels (you can make your own if you have a table saw, or buy them if you don’t)
- 1×4 scraps
- 1×6 scraps
- 1×8 scraps
- 2″ wood screws
Step 1: Shop Your Scrap Wood Pile for Supplies
I used some scrap walnut I had leftover from some past projects for this wooden lantern build, BUT, I cut them down to standard lumber sizes to make this easy.
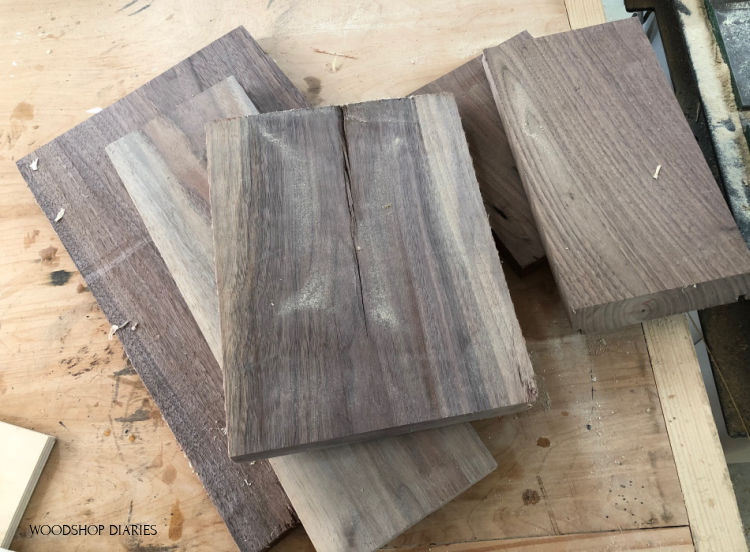
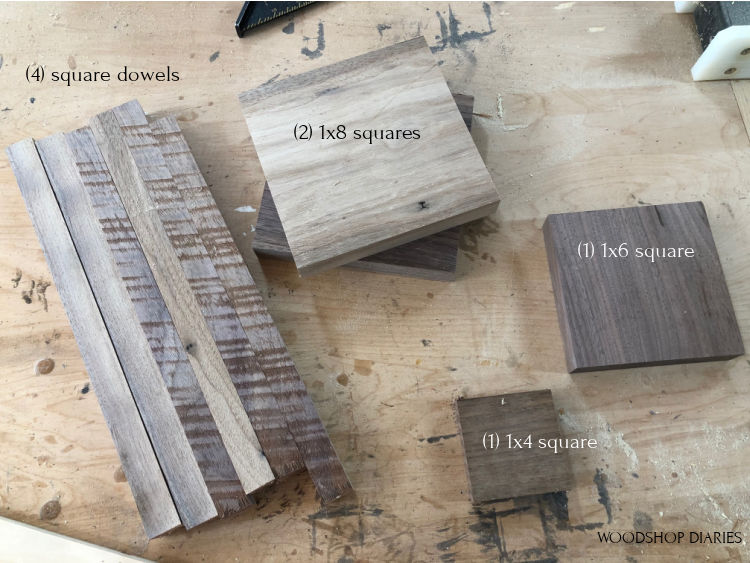
So I took this pile above and cut it down into:
- (2) 1×8 squares (7 ¼″ square)
- (1) 1×6 square (5 ½″ square)
- (1) 1×4 square (3 ½″ square)
- (4) square dowels (cut to desired length)
So basically, if you have 1×8 scraps, you can cut two 7 ¼″ pieces. If you have 1×6 scraps, you can cut a 5 ½″ piece and if you have 1×4 scraps, you can cut a 3 ½″ long piece to get what you need.
If you have a table saw, you can rip your own square dowels (¾″ or 1″ square work well for this), or you can purchase some here. The length of your dowels depends on how tall you want your lantern.
I made mine about 16″ long, but if you wanted a taller lantern, you could cut them longer.
Step 2: Add Decorative Edges (OPTIONAL)
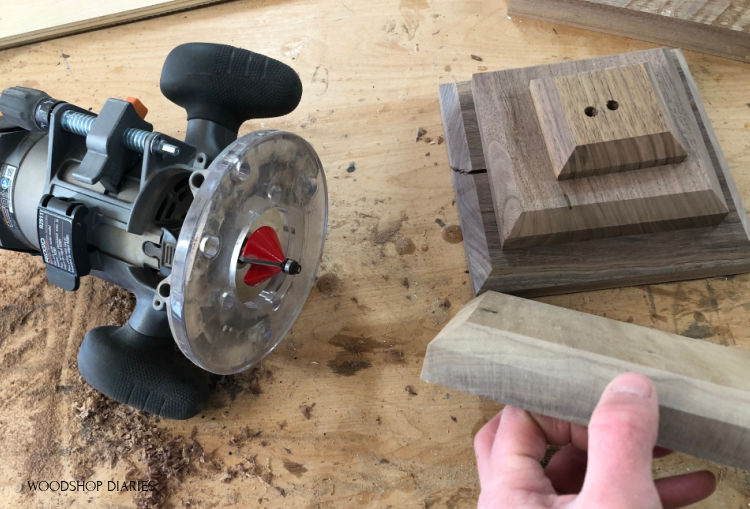
Before assembling anything, I used a router and a chamfer bit to cut a chamfer around the edges of all the square pieces.
This step is totally optional and you can leave them as is. BUT if you like the detail, but you don’t have a router, you can use a jig saw with blade tilted 45 degrees and cut along these edges OR bevel a miter saw blade 45 degrees and cut these edges, too.
RELATED: Want to know more about routers? Check out my detailed router guide here.
Another option is just to sand the corner edges kind of rounded instead of cutting them.
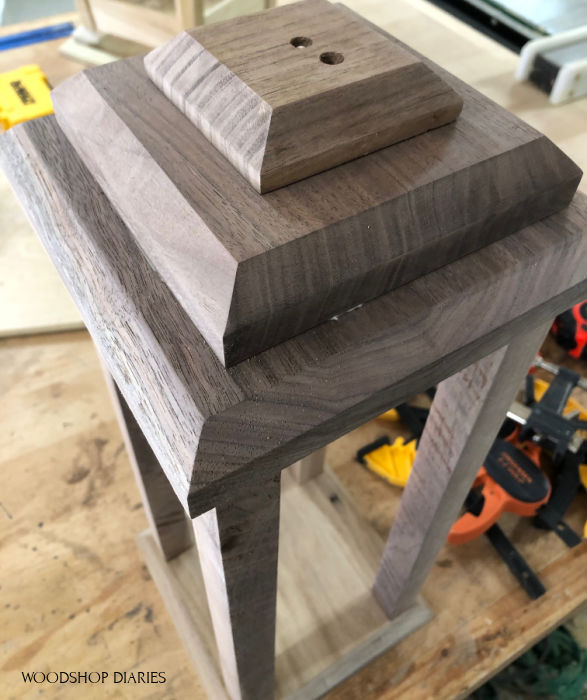
ALSO NOTE: the 1×4 block is fairly small, so be careful if/when cutting the edges. I ended up having to screw it to the workbench in order to route it because it was too small to clamp.
That’s why you see the screw holes in the top of it. I’ll cover those later.
Step 3: Attach Wooden Lantern Sides to Bottom
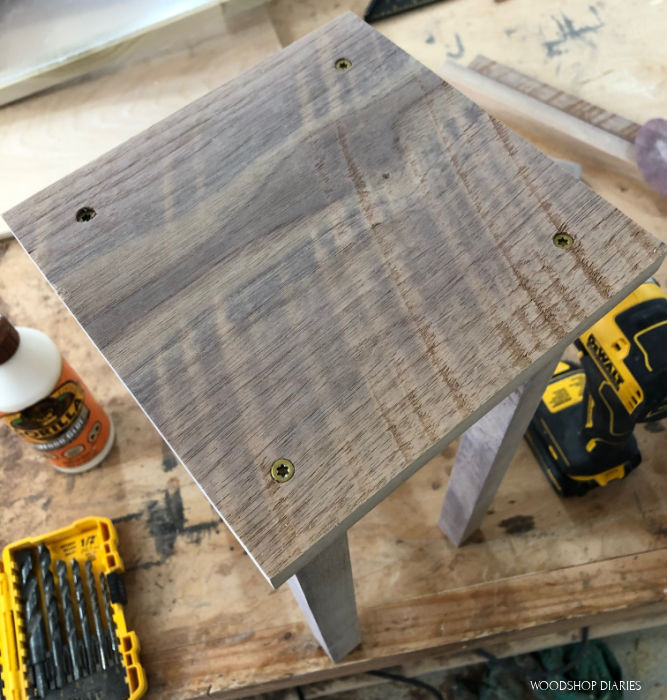
Now everything is ready for assembly. I simply used wood glue and 2″ wood screws to assemble this wooden lantern.
I was sure to predrill before driving the screws to avoid splitting the thin dowels. I lined the dowels up on the corners of one of the 1×8 squares inside the chamfer, and attached through the bottom like shown.
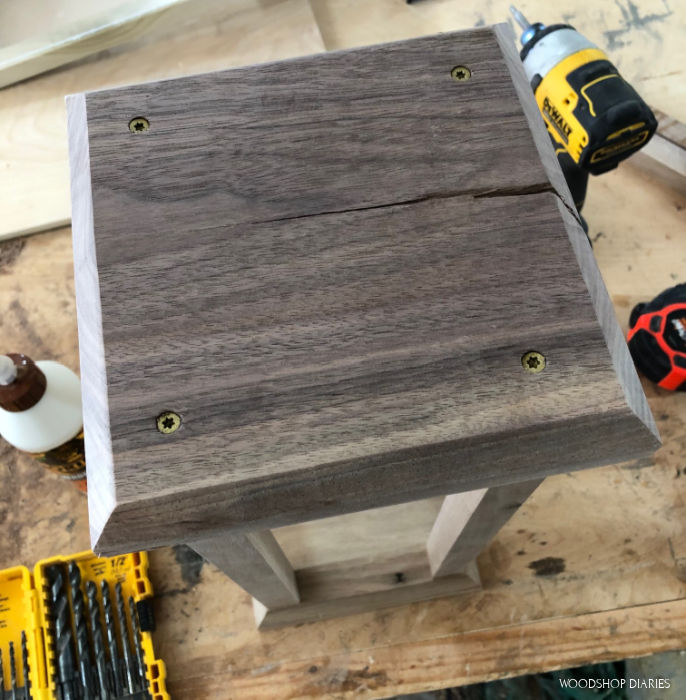
Step 4: Attach Wooden Candle Lantern Top
Once the bottom was attached, I flipped it over and did the same at the top with the other 1×8 square. (Side note: See that crack? I just left it to add some extra character.)
Now, how much the top needs to overhang the corner posts here depends on how much you routed or cut (if you routed or cut) from step 2.
This isn’t the most important thing in the world. You can measure the bottom overhang and match the top, or simply eye ball it. If you’re off ¼″, likely no one is going to notice.
Once the top piece is installed, I just glued the 1×6 on top.
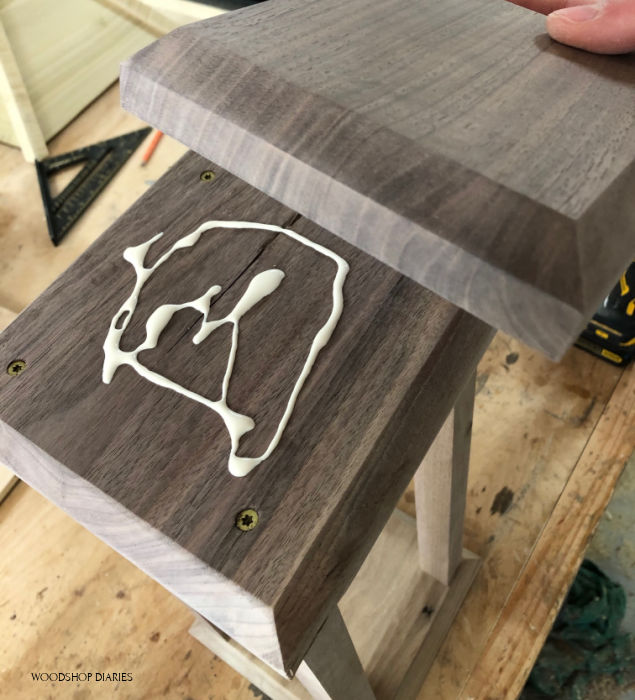
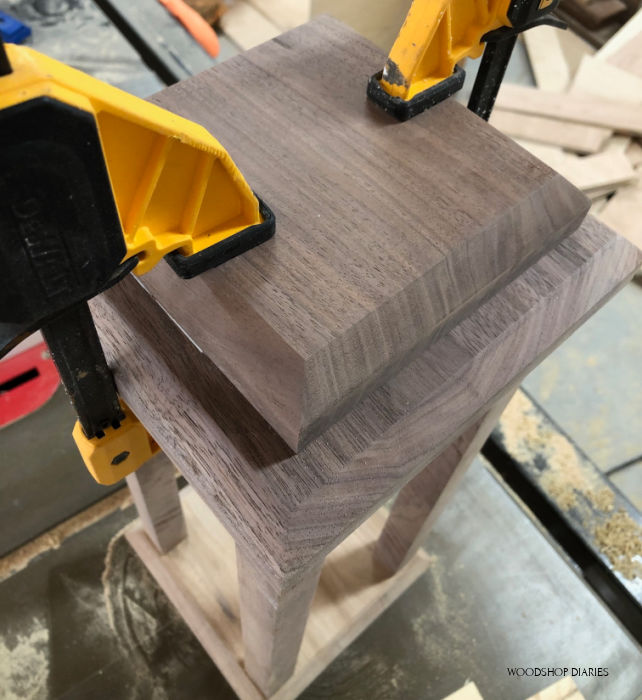
And once that was dry, I glued the 1×4 on top of that. Side note: if you don’t have clamps, You can use painters tape to hold the pieces while the glue dries.
Step 5: Finish DIY Wooden Candle Lantern
The last thing to do is finish and attempt to cover the screw holes I made at the top on the 1×4 piece haha.
I gave the lantern a coat of Walrus Oil Furniture Finish (you can stain, paint, poly, or use another type of finish as desired), then attached this little handle on the top. (I found it at Hobby Lobby.)
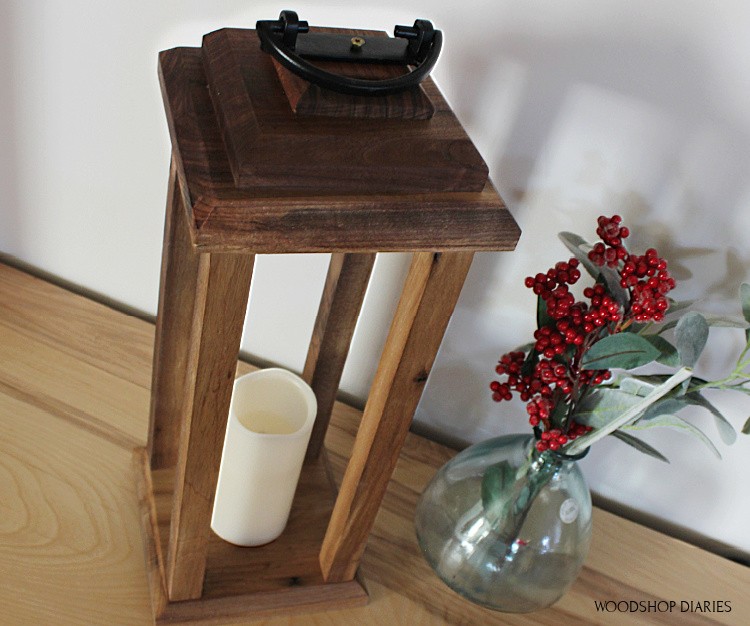
I threw (okay, I gently placed, I didn’t THROW haha) a simple candle in and now it’s ready to enjoy 🙂

This is literally one of the most satisfying and simple projects that works great for centerpieces, holiday decor, gift ideas, etc. I really enjoyed making it while waiting for the glue to dry on another project I was working on.
So I really hope you enjoy making one (or a few), too 🙂 If you liked this project and want to save it for later, be sure to pin it!
And if you want to be the first to know about new projects as they are posted, be sure to subscribe to my newsletter below.
Until next time, friends, happy building 🙂