
I had the hardest time this year deciding on Christmas gifts to give my grandparents and my boss this last year. They all like when I make them something, but I didn’t know what in the world they would like me to make and didn’t want to fill their homes with useless junk they feel obligated to keep because I made it for them. Been there, done that before. You guys do not want to see what I gave people a few years ago for Christmas. SO embarrassing. It was in my early DIY years….
.
So, anyway, last minute (like seriously three days before Christmas), I decided to make them wooden lanterns.
.
I spent almost my entire Christmas break (every spare moment I had) in the shop whipping these up. It was a fun (yet time consuming) project (because you have to let all the wood glue dry after every step). FYI glue doesn’t dry very quickly when it’s cold and wet outside…just like the weather we had ALL CHRISTMAS BREAK.
.
But, nonetheless, I got them done and they turned out great.
.
So, without further blabbering from me, let’s just jump in to the how to, shall we?
.
This post contains affiliate links for your convenience. If you purchase from one of these links, I may receive a small commission at no extra cost to you. Thank you for supporting this blog so that I can continue to post free content. Please see disclosure policy for more details.
.
Materials needed:
¼″ plywood (a quarter sheet is plenty for one lantern)
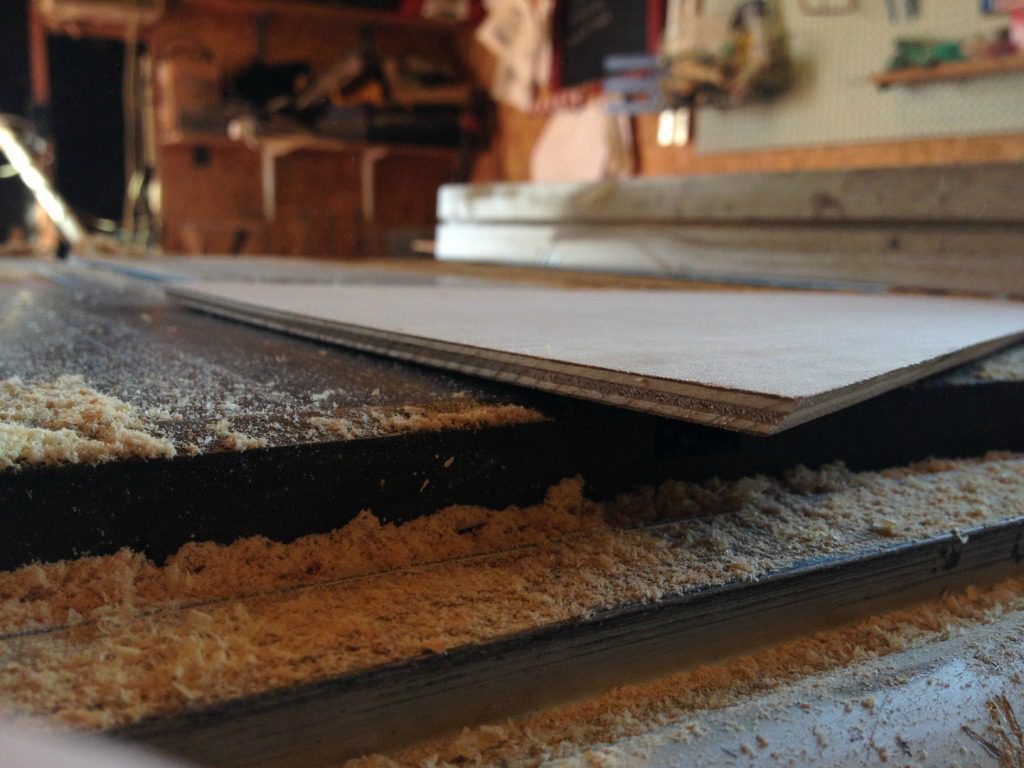
Strips of ⅜″ thick x 1 ½″ wide wood (I ripped a scrap 2×10 down to ⅜″ strips on the table saw. You could buy some ½″ thick stock from the box store instead. Exact dimensions don’t really matter–I’ll explain further down)
Decorative Wooden Rail (Optional)
Wood Filler
2 small hinges
Tools Needed:
Table saw
Jig Saw (optional)
Miter or Chop saw
Clamps (you can never have too many)
Orbital Sander (optional, but VERY helpful)
Small screwdriver for attaching hinges
.
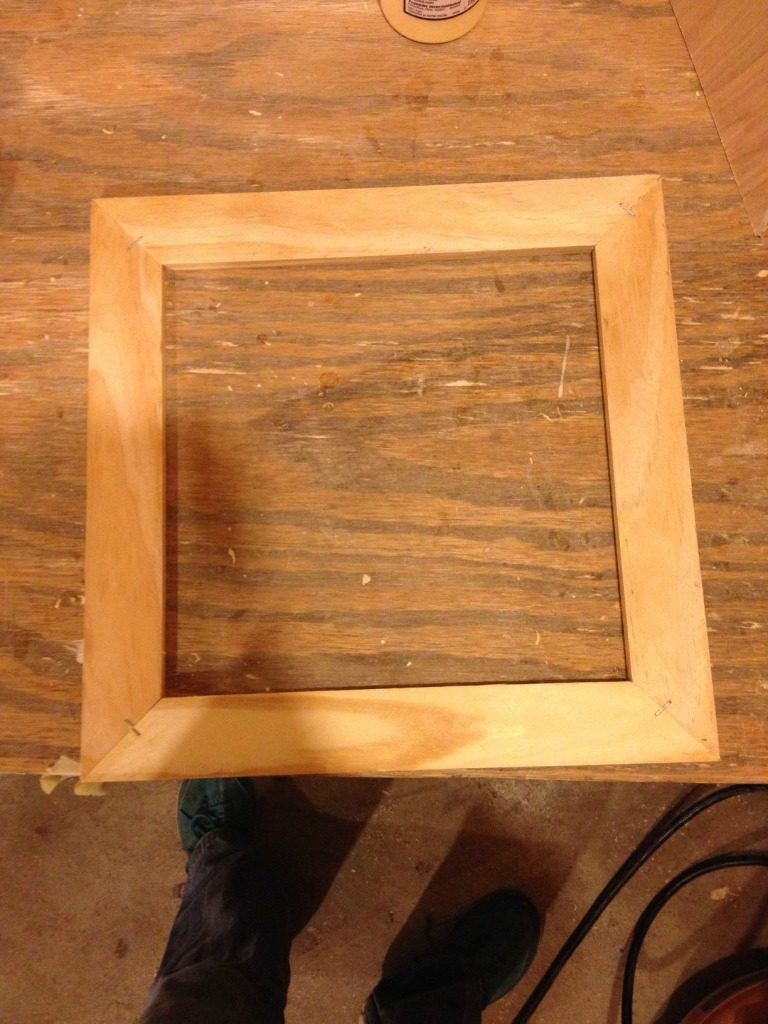
1. Make the top
The top of the lantern is the hardest part. But, you can do this. Trust me.
.
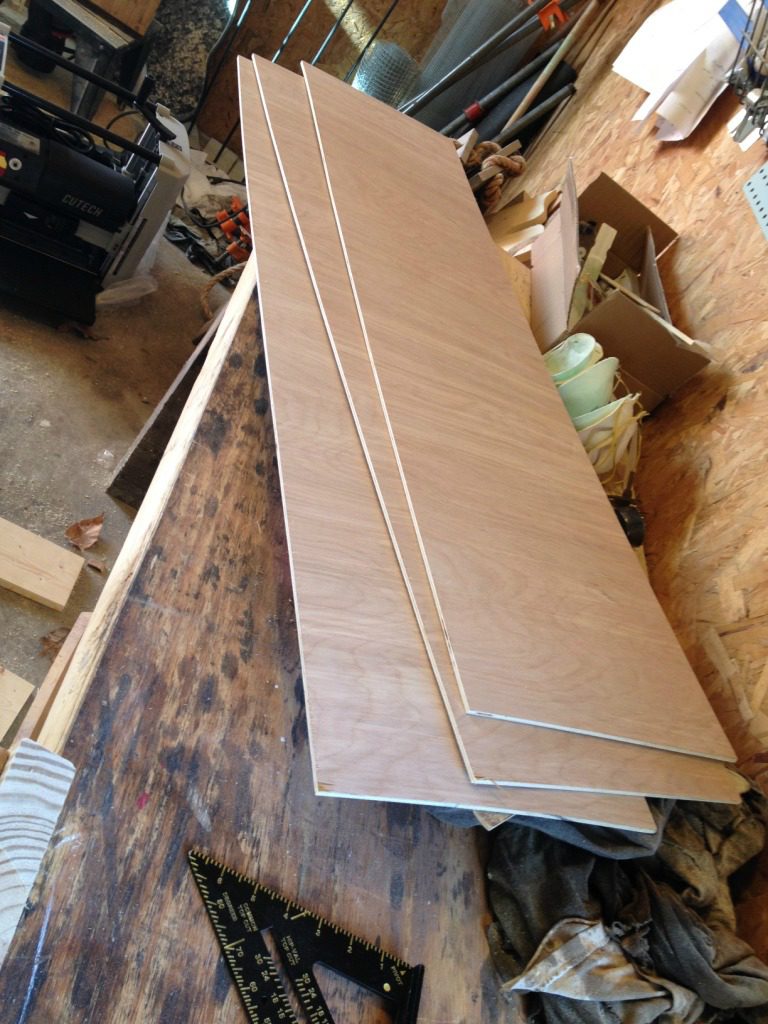
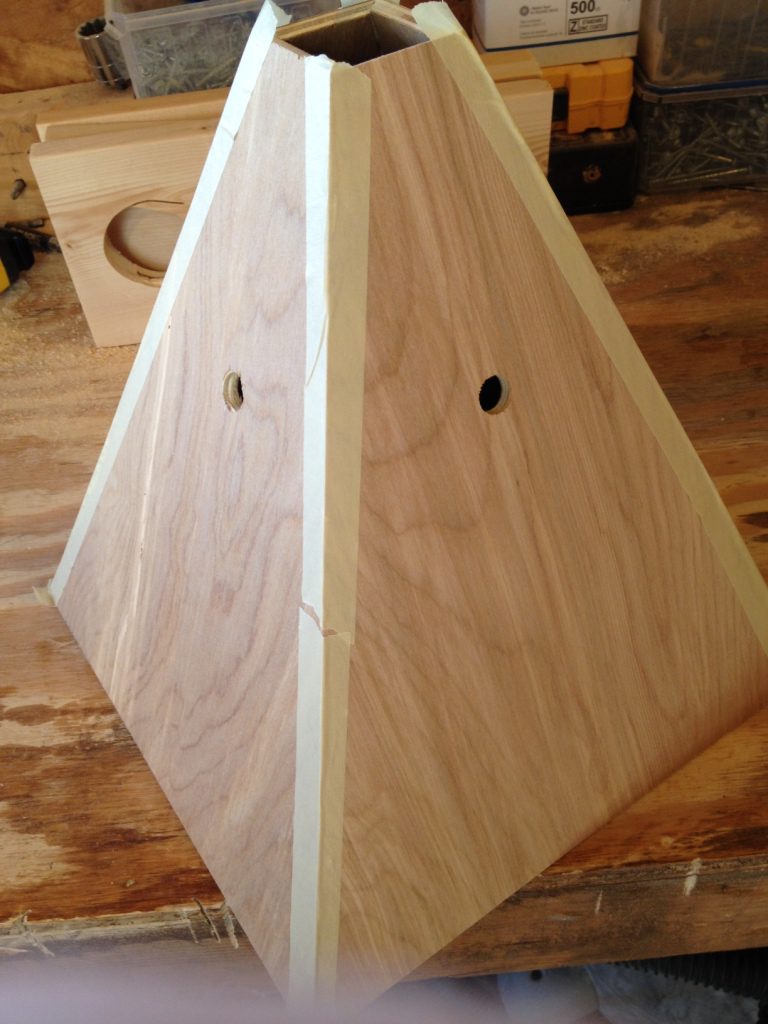
I ripped my sheet of ¼″ plywood (I bought a 4×4 sheet because I was making 4 lanterns total) to 11 ¾″ strips (wood grain running perpendicular to the long side).
Then, I tilted my table saw blade to 45 degrees. I cut a compound angle (those sound scary, but they aren’t) to make four identical sides to form a “pyramid” by cutting the pieces with a 45 degree bevel and running it through the blade at an angle of ABOUT 20 degrees.
.
First, I set my thingy-ma-jig to about 20 degrees (I have no idea what these things are called, but they come with table saws and you can adjust the angles with a twisty knob on top). I know I’m using super technical language here. Just see picture below. You could use a taper jig instead, or make your own thingy-ma-jig. And I cut off the end of a board at that angle. (NOTE: Update…I just googled it and the thingy-ma-jig is called a miter gauge)
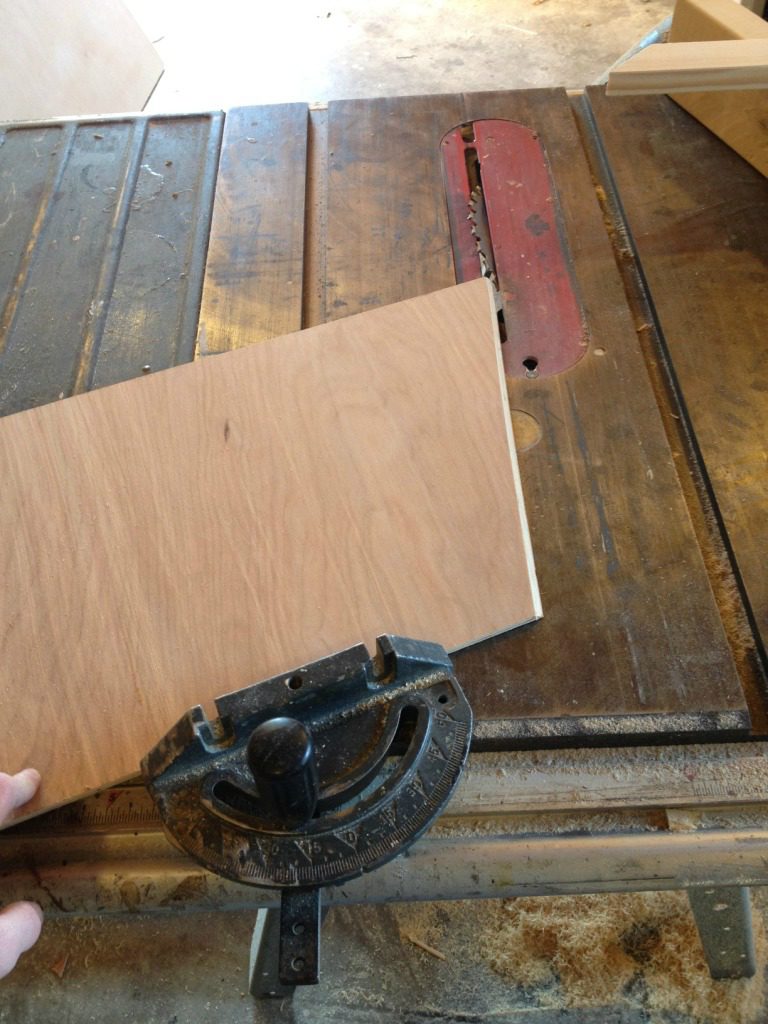
Then I flipped the board over and measured and marked 1 ½″ from the top edge. This is where the next cut will be. I lined it up with the blade and adjusted the rip fence to where it was just touching the bottom corner. PS…dad came over to hang out/help me in the shop when I made these, so he’s holding the boards while I take pictures. Just in case you were wondering when my hands became so manly looking.
I ran this through the saw just like this with the corner running along the fence, then flipped it over and did it again and again and again and again (does that make four yet?) until I had four identical pieces.
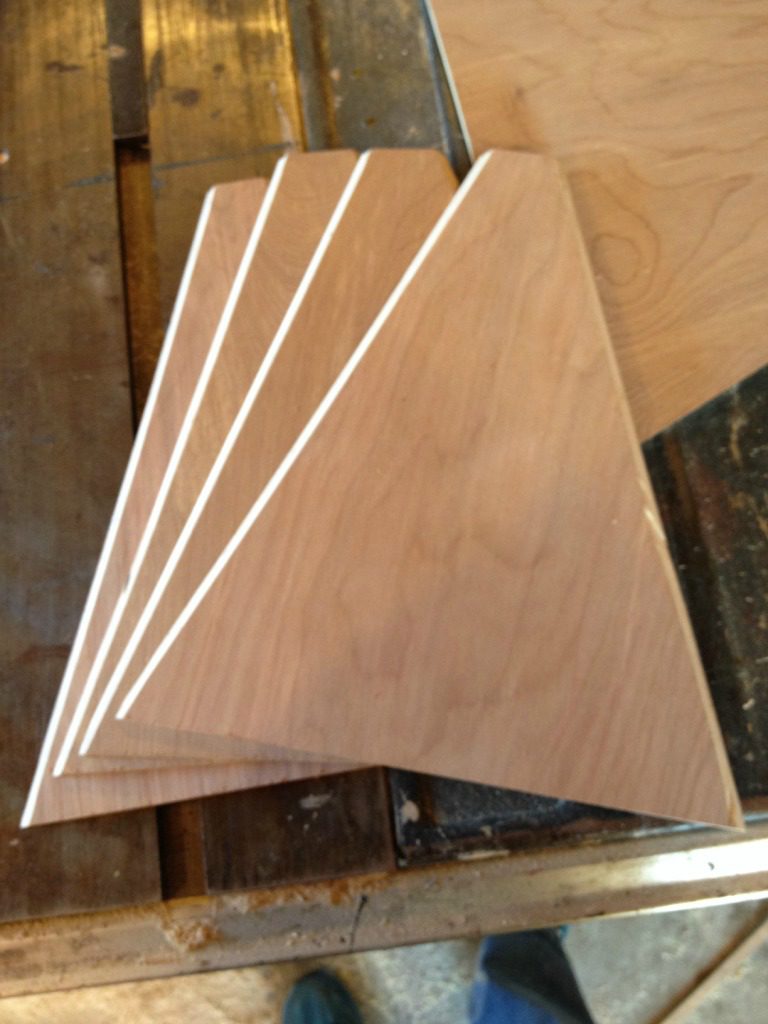
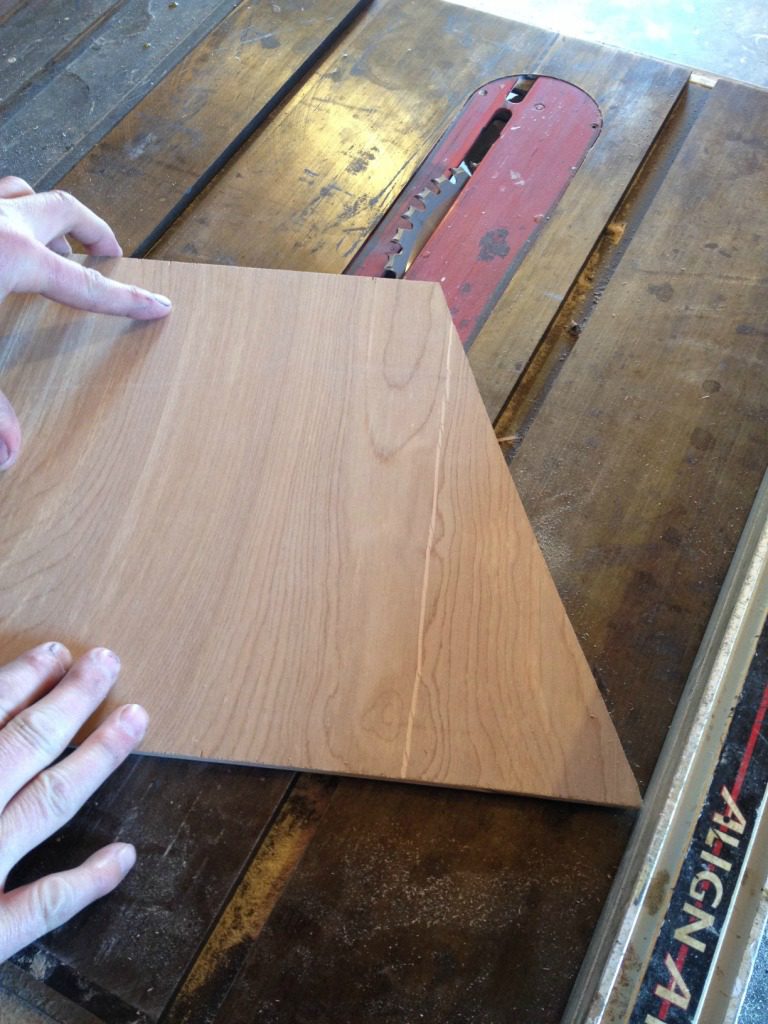
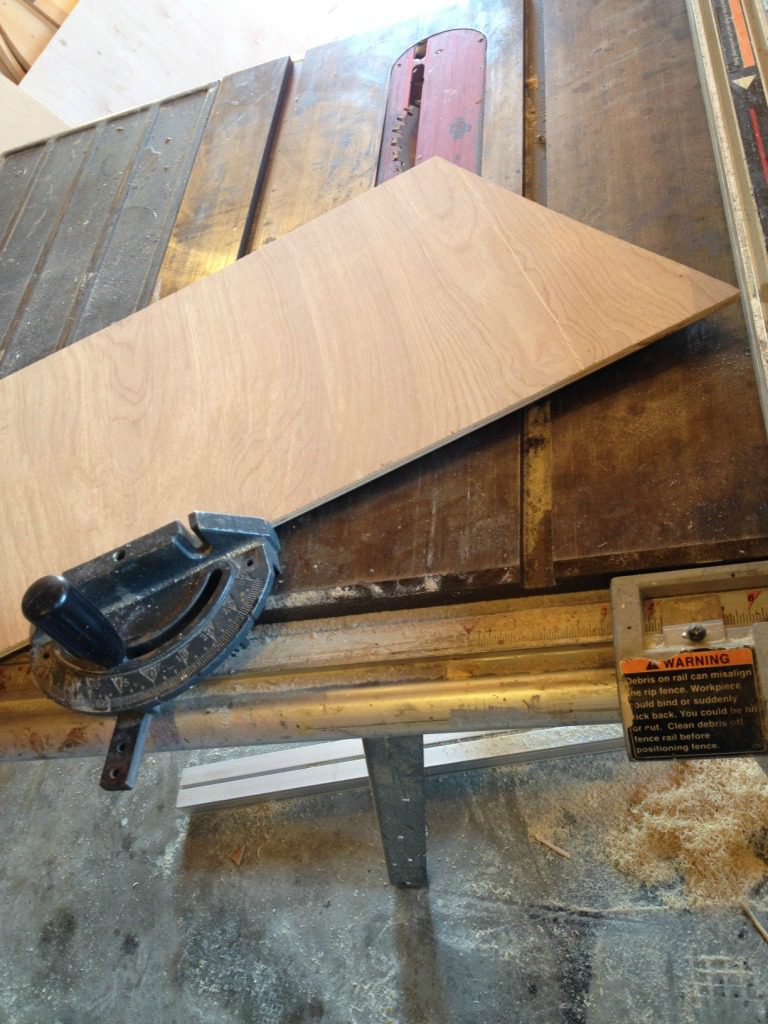
Then I ran them through the saw again with the blade tilted to about 20.5 degrees. I ran the tops of the pieces flat against the rip fence, this time trimming only the bottom of the pieces at a slight bevel so it’ll sit flat on a surface once it’s made into a “pyramid.” You could also do the tops with the bevel, but sanding it flat once it’s assembled is quicker. This step is optional, but will help later when it’s glued.
Once all the pieces were cut, I lined then up and drilled a decorative hole in them. This step is optional, but it makes it look nice and helps with the gluing later. Then, I laid them on the work surface and taped the OUTSIDE edges with masking tape. So the cut bevels are on the bottom side. Don’t worry if they don’t line up PERFECT. I just got mine as close as I could.
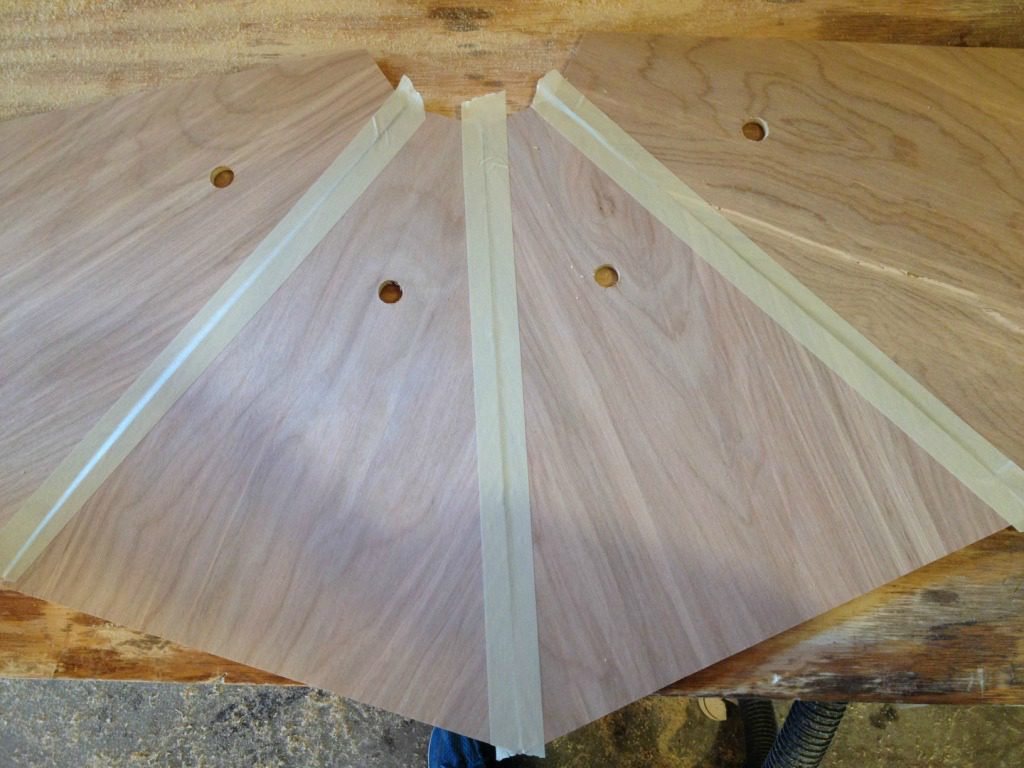
Then I flipped it over and filled the joints with glue. It will be messy. Be prepared.
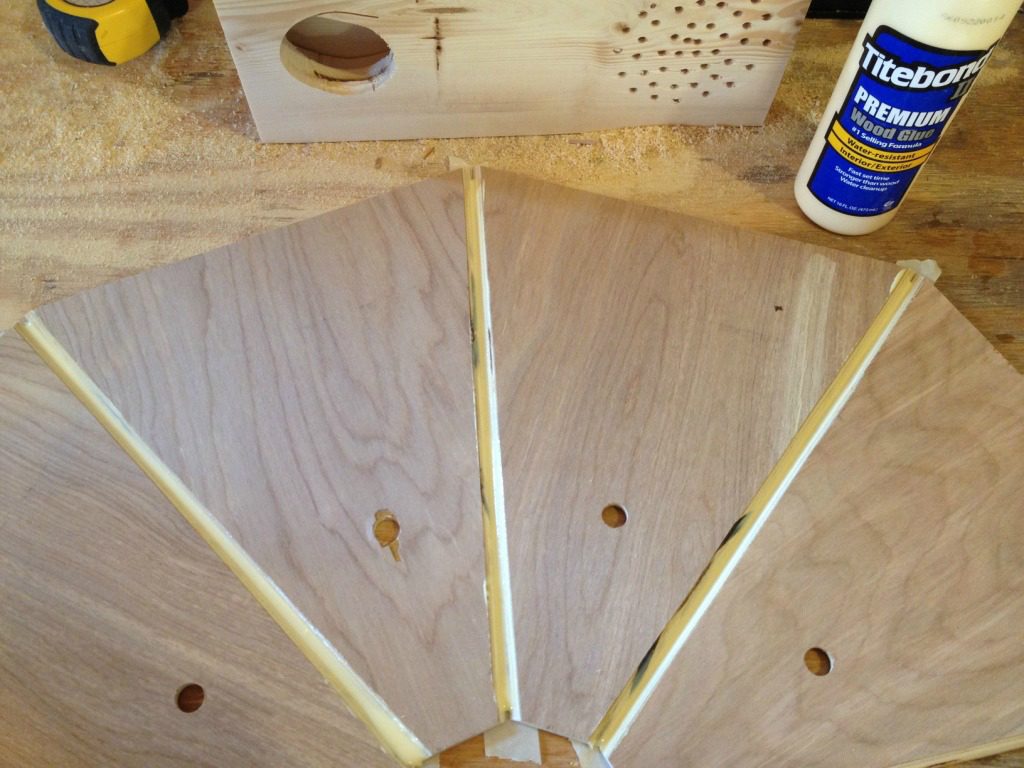
I put some glue on the two outside edges, then folded it together and taped the final joint. I feel weird saying “joint.” I just needed to confess that.
Then I took them inside to let the glue dry really good overnight. These things are a little fragile.
2. Make the bottom.
Now at this point, I had already ripped down my 2×10 scraps into ⅜″ strips. LOTS OF THEM. I made four lanterns and had some leftover.
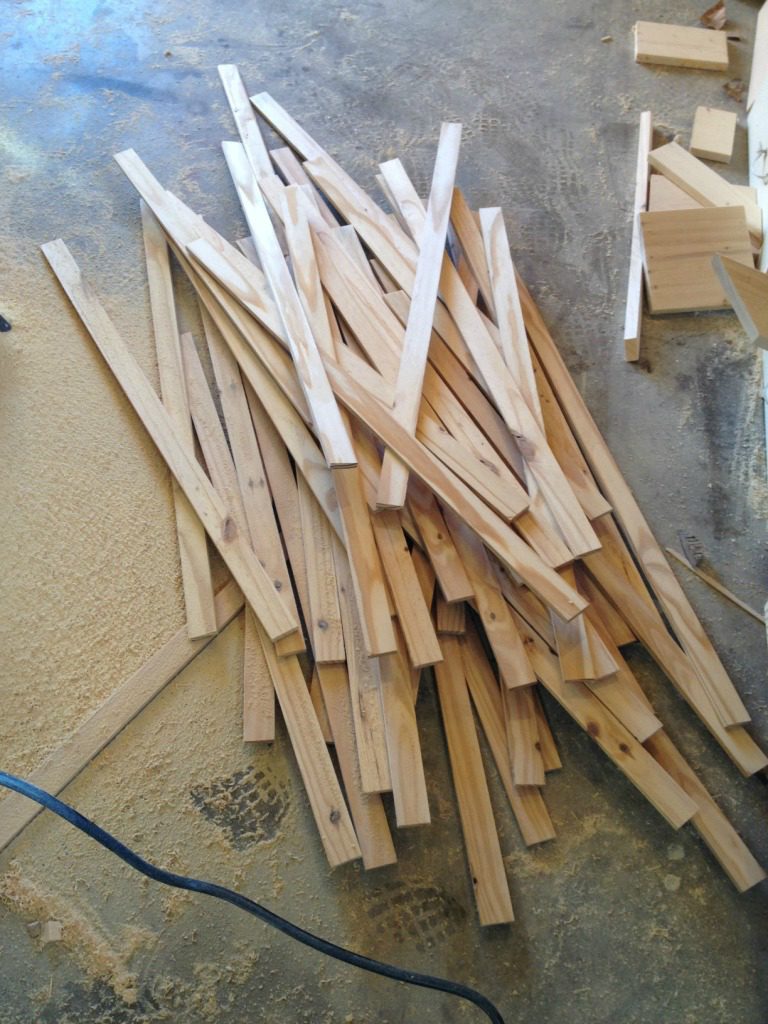
As I said earlier, you totally don’t have to do this. It’s by far the cheapest way of doing it, but you can get ½″ (and I think ¼″) strips at big box stores if you don’t want to rip them down. If you do that, however, be mindful of your measurements because they will not be the same as mine.
.
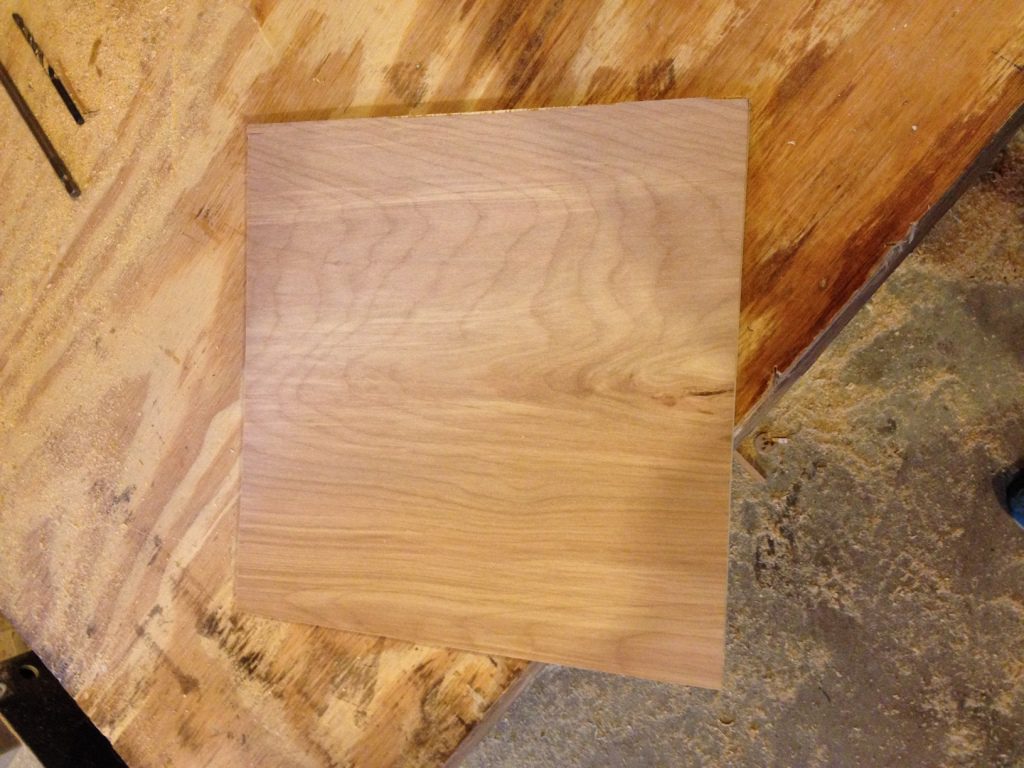
So, from the leftover plywood, I cut a 10×10″ square and cut four strips to fit around it. I used my jig saw to cut a decorative design, but that’s optional.
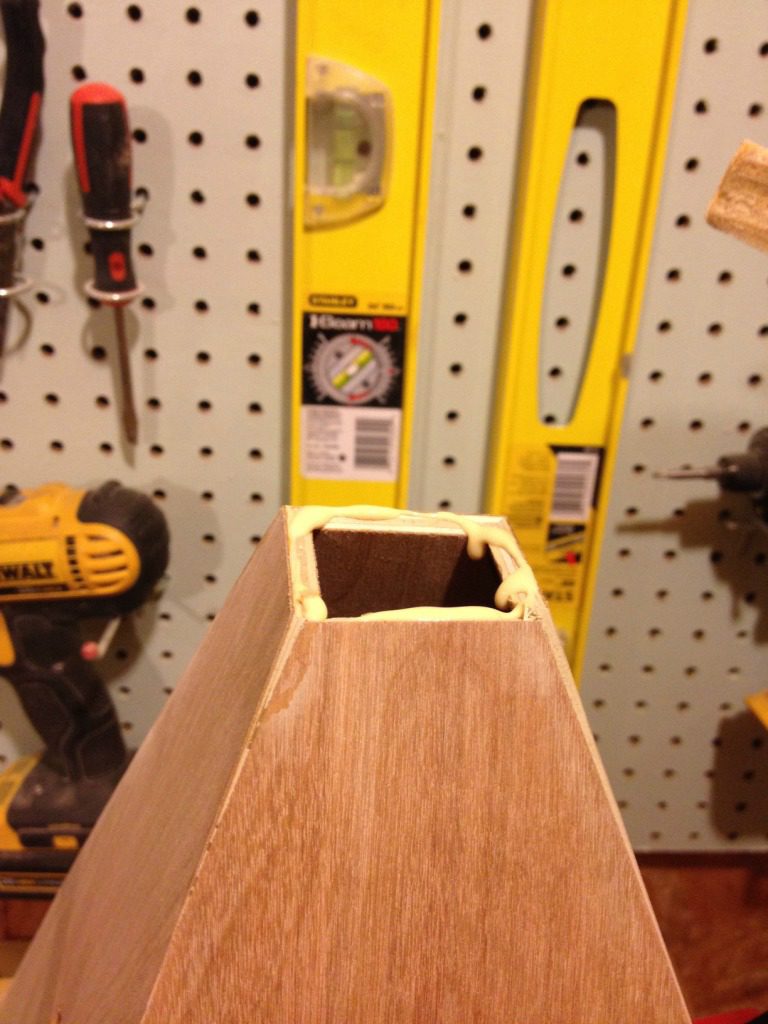
I glued and nailed them together, then added a small scrap block to the corners ¼″ from the top. This was so the plywood bottom could be supported.
Then I glued around the edges of the plywood and slid it in place and clamped.
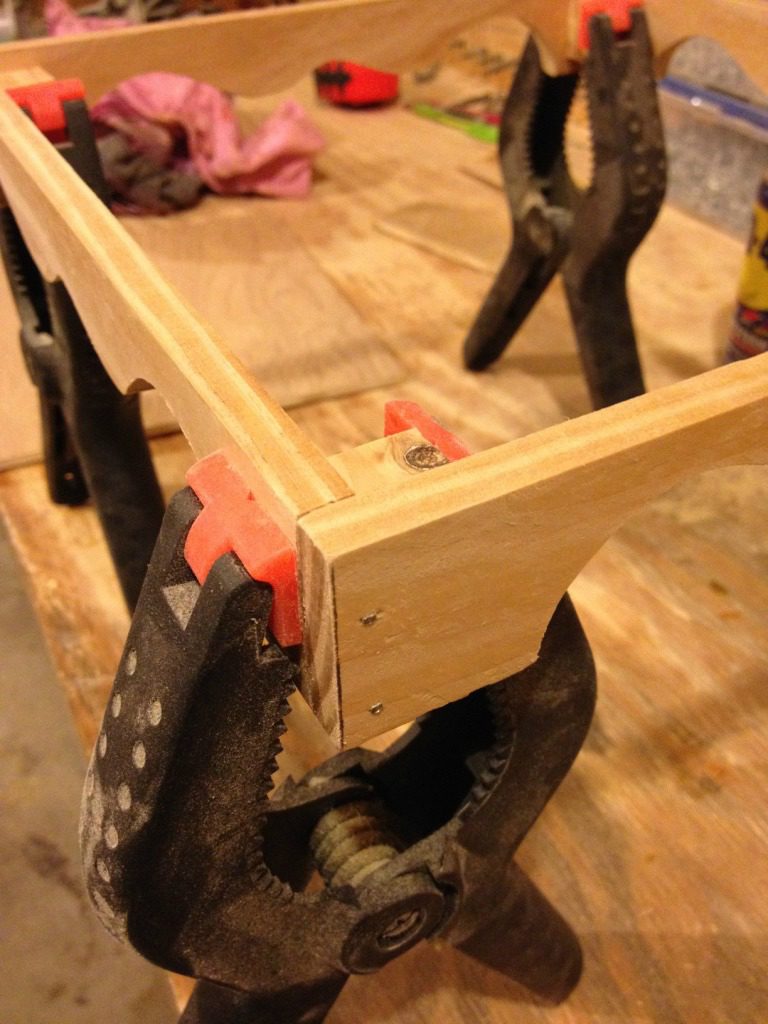
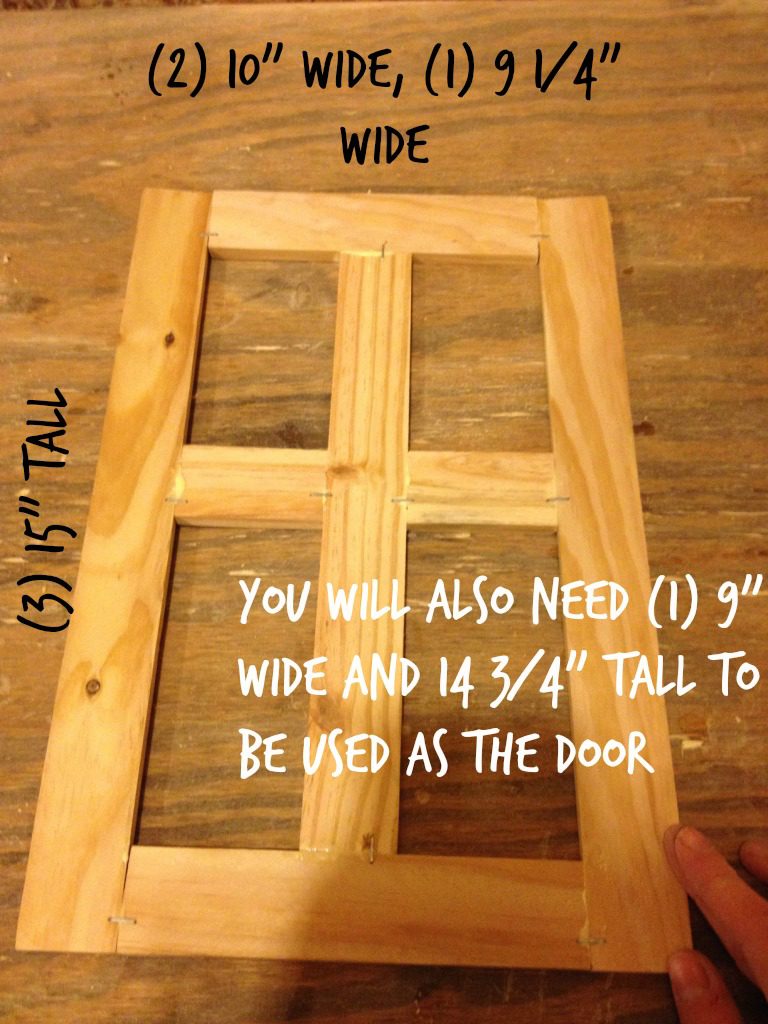
3. Make the sides
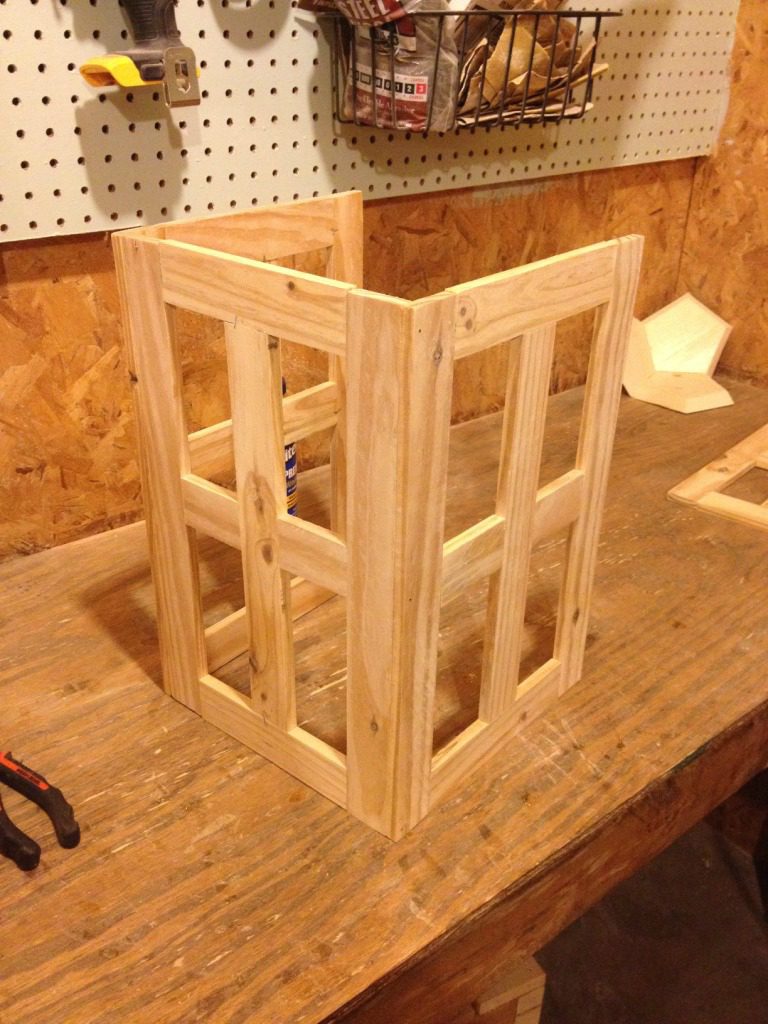
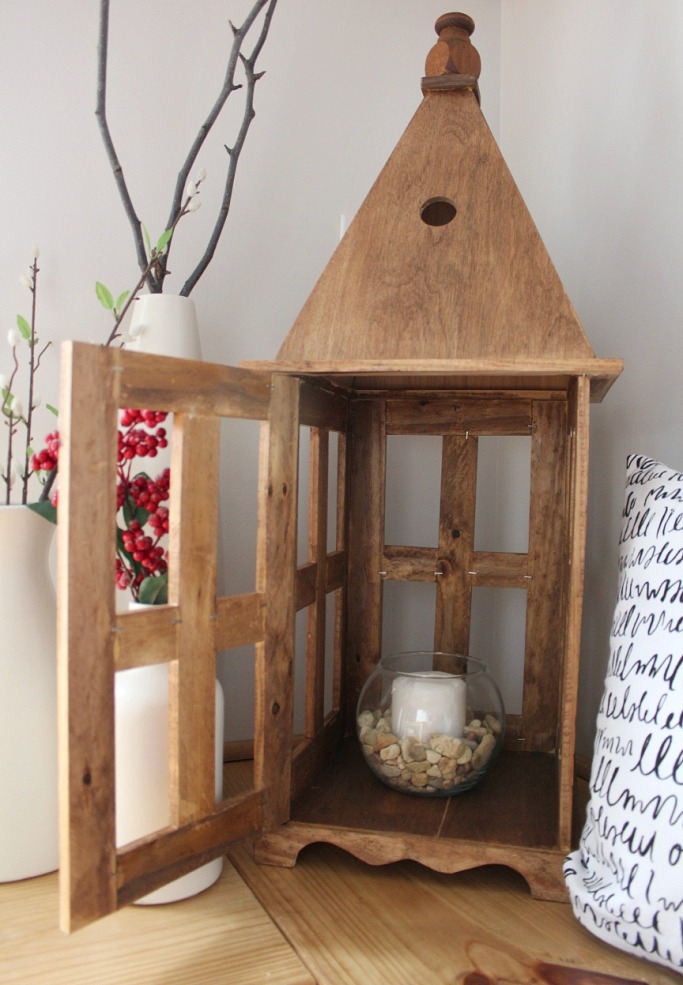
This part is so easy. I just made four panels (one slightly smaller than the rest for the door) and nailed them together.
.
Two panels are identical dimensions (15″ tall x 10″ wide), one is 15″ tall x 9 ¼″ wide, and the last one (to be used as the door) is 14 ¾″ tall x 9″ wide.
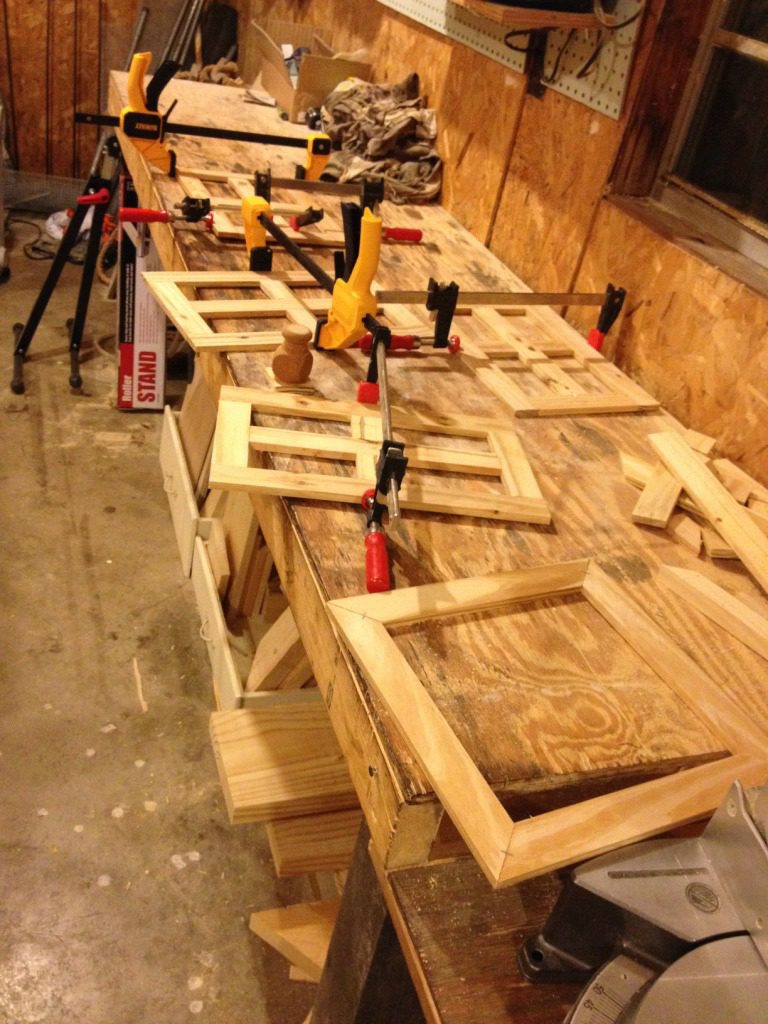
I glued all the joints, then stapled them together (only on the back side). Then I clamped them until the glue dried.
4. Finish the top
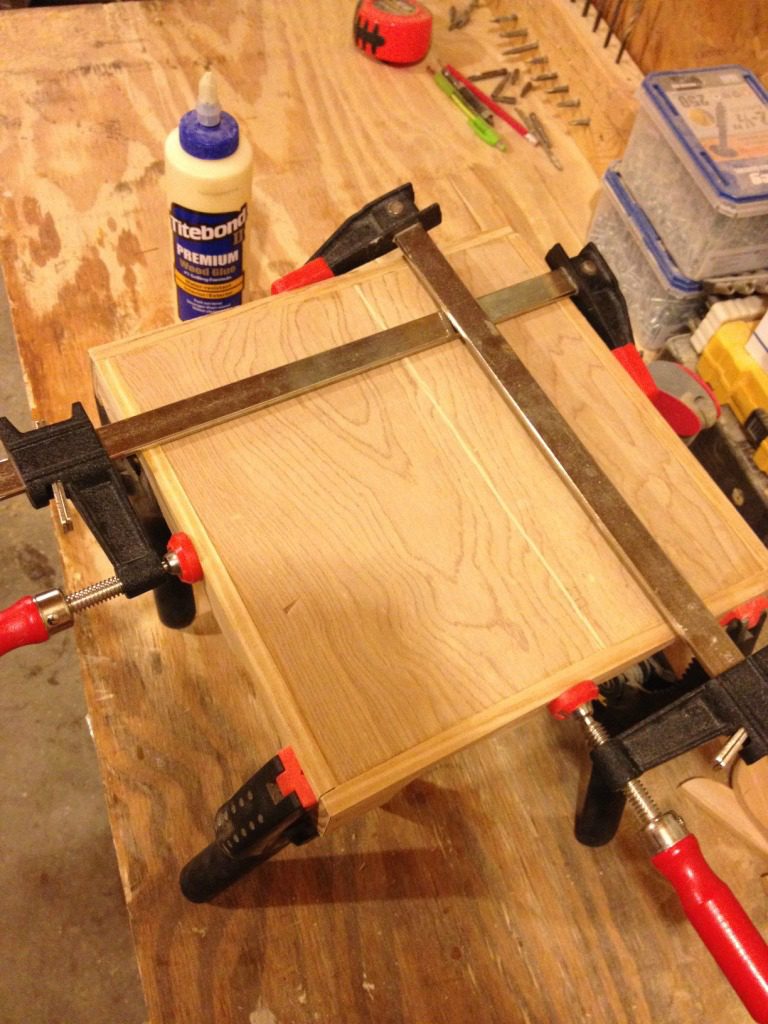
While all this is drying, I made a square (I think it was about 12″x12″…as long as your top sits on it, it’s an okay size) from the ⅜″ strips. I mitered the corners, then glued and stapled both sides to hold it together.
Then I took all the tape off the pyramid and glued and clamped this to it.
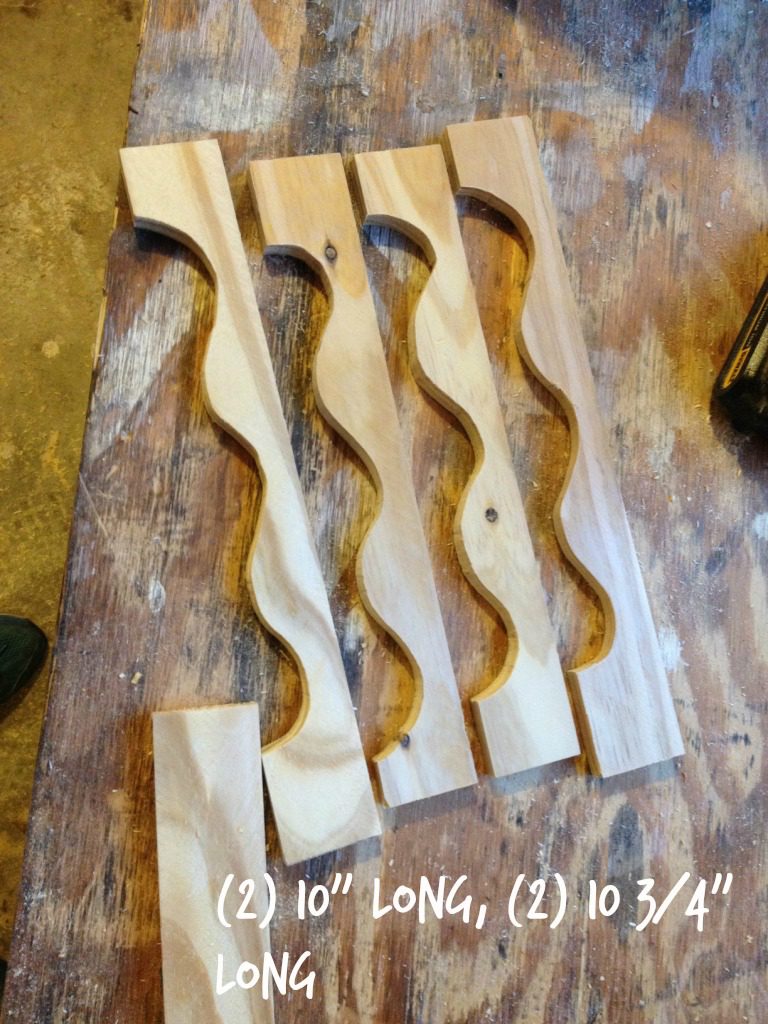
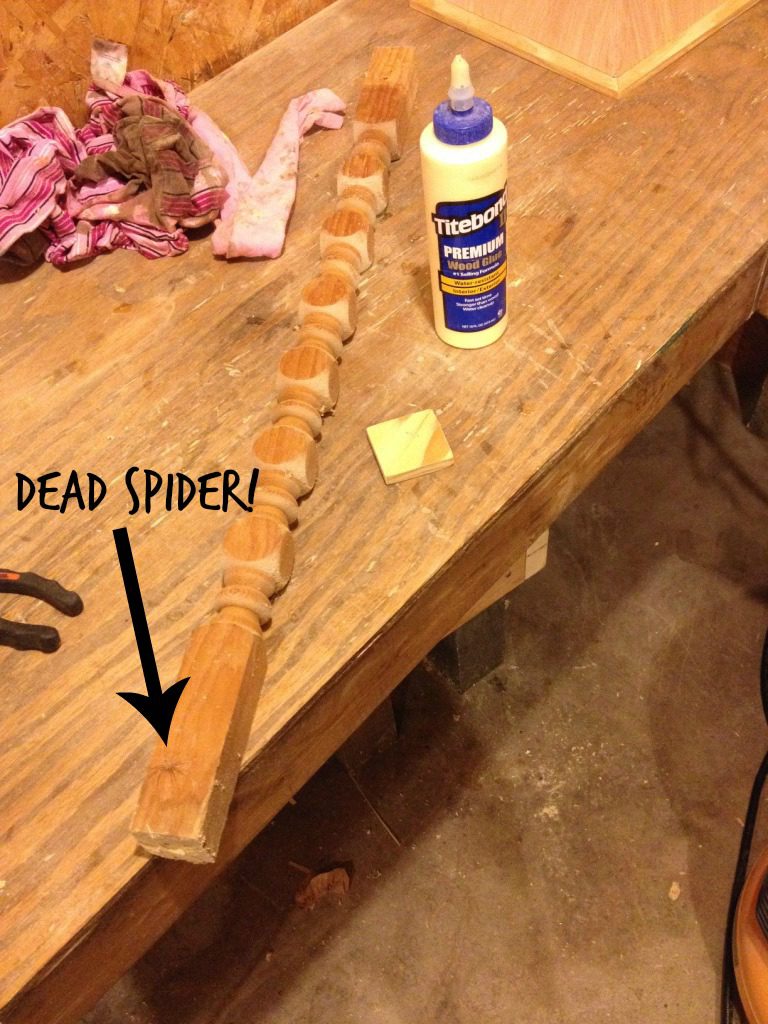
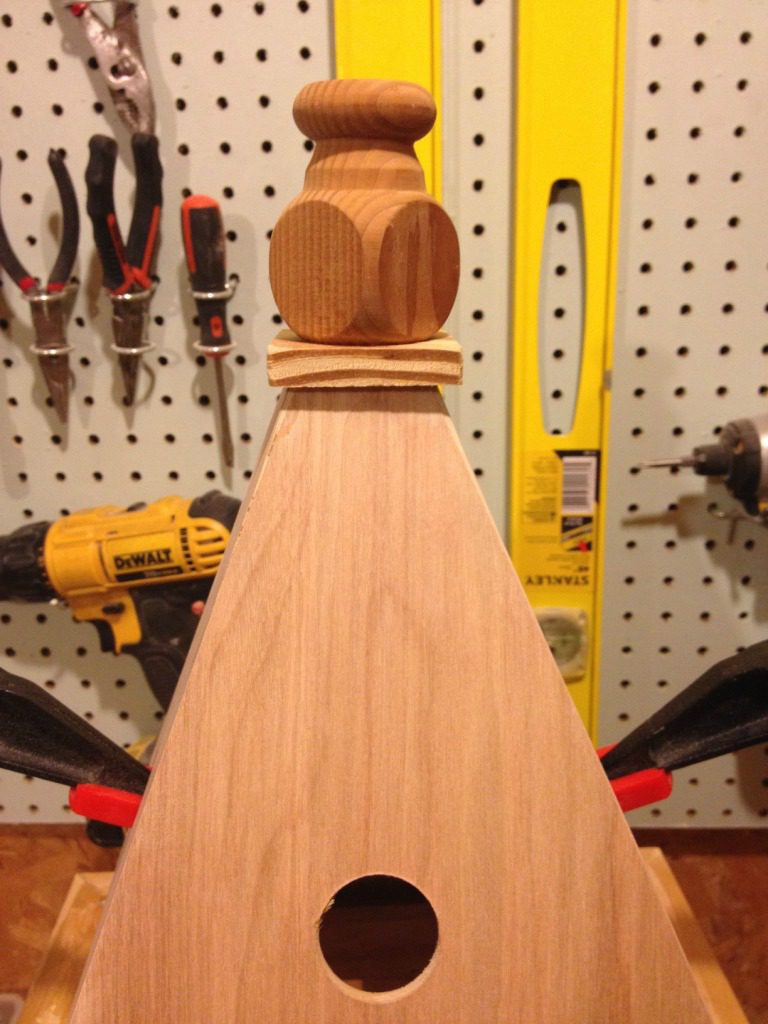
While this was drying, I made a decorative piece for the very top. I cut two triangles from the ⅜″ strips to make a square and stapled them together. I took an old decorative wooden railing I’ve had in the shop (I’ve been trying to find something to do with it for years) and cut a piece off and glued it on the square. Did you notice the dead spider? Don’t worry, I’ll point it out for you 🙂

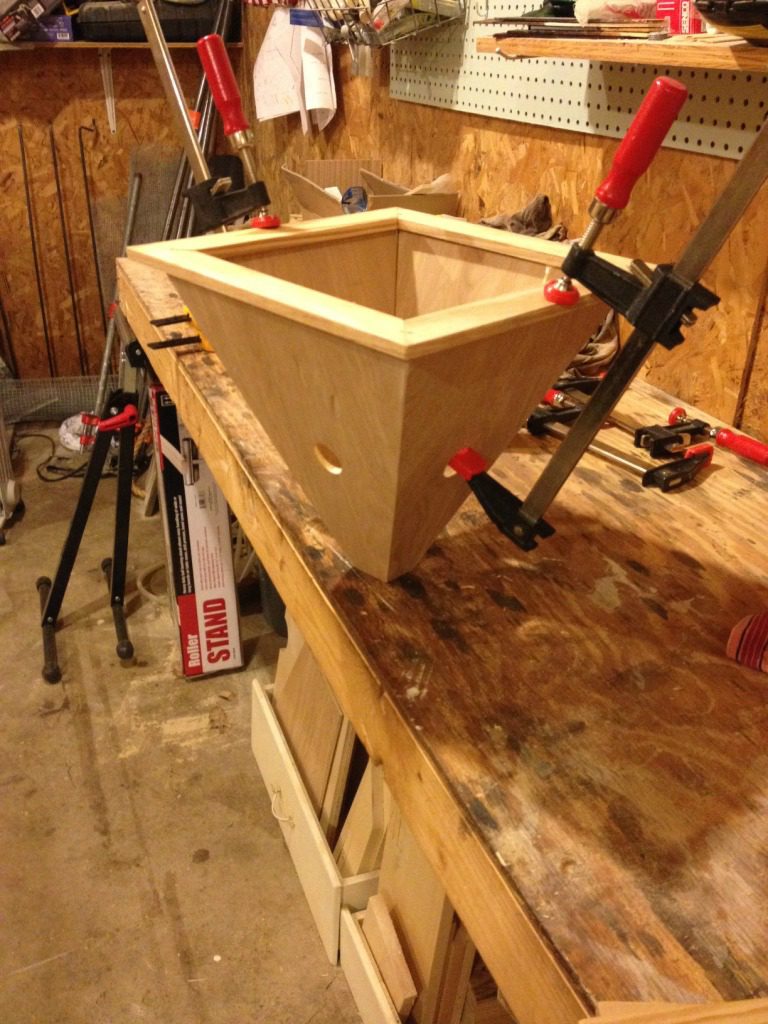
Once the glue was dry, I glued this to the top of the pyramid part.
5. Assemble the bottom panels
Once the panels are dry, I recommend sanding the glue off the fronts. An orbital sander is AWESOME for this. Then I glued and nailed everything but the door together.
Then, I nailed the bottom to the panels.
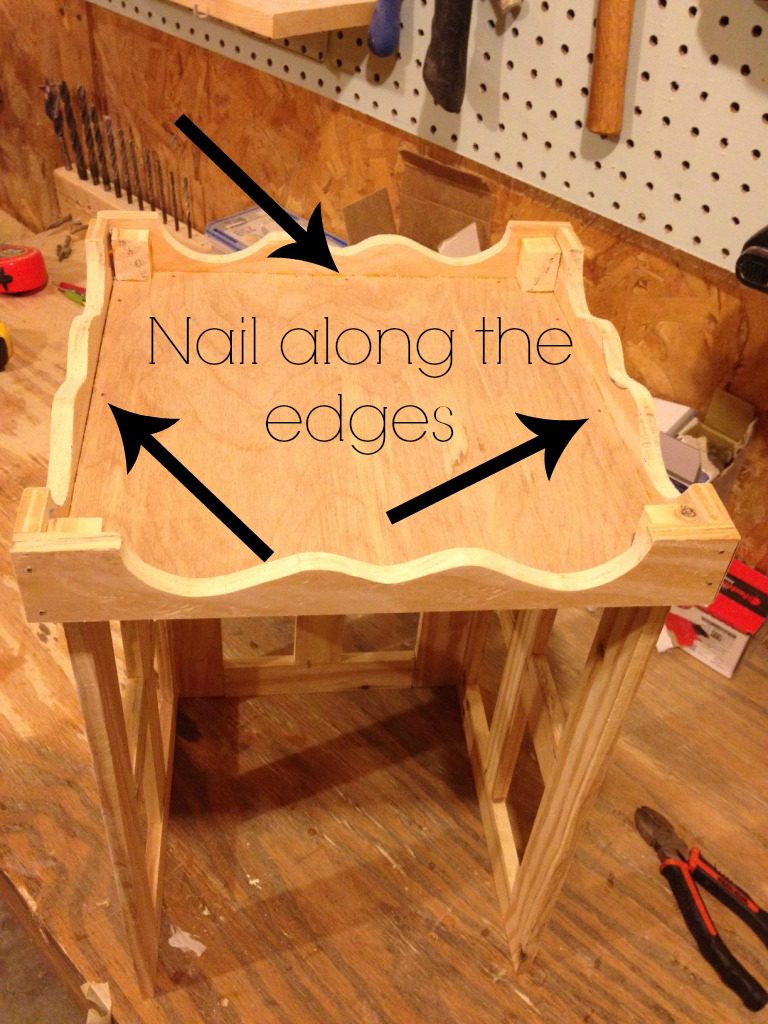
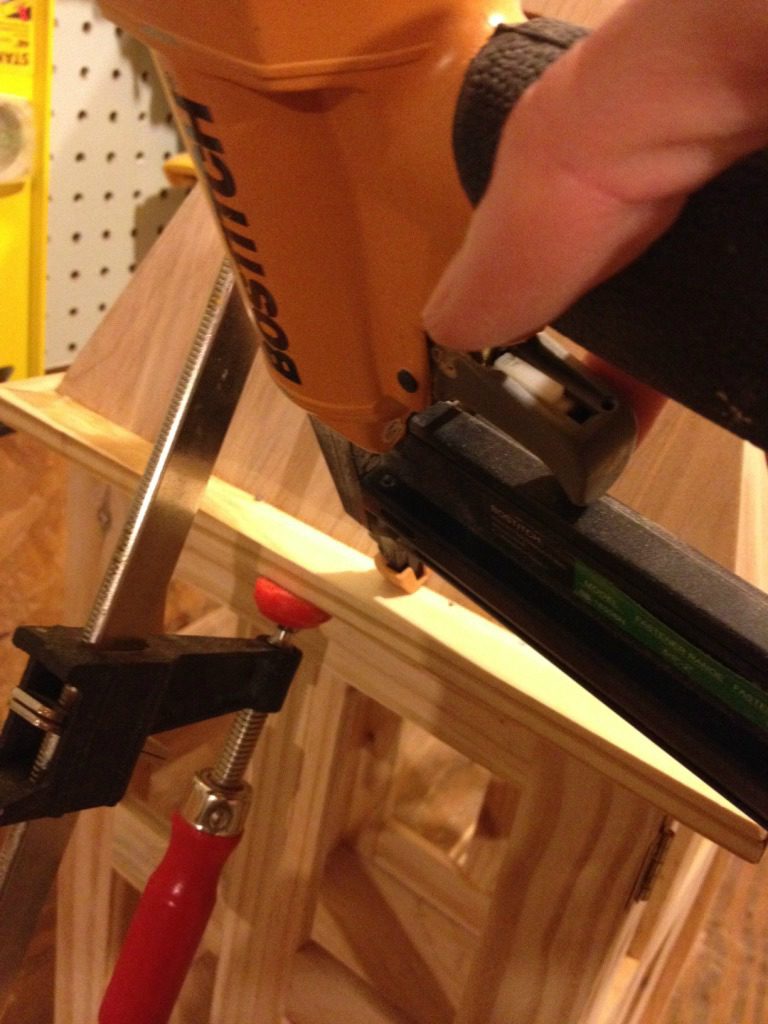
6. Attach the top and door
Then I carefully attached the top by gluing and nailing at a slight angle. You may have to trim some stray nails if you miss (and you probably will). But side cutters work great for this and you won’t even notice. My top is still clamped here…I was getting tired of waiting for the glue to dry, so I let it dry while I moved on to the next step here. Once the top was attached, I used some small brass hinges and attached the door on the front.
7. Putty, sand, and finish
I highly recommend puttying the corners on the pyramid and where the pyramid meets the square where you nailed the top on. If you plan to stain, use stainable putty. I like this stuff, but Elmers is good, too.
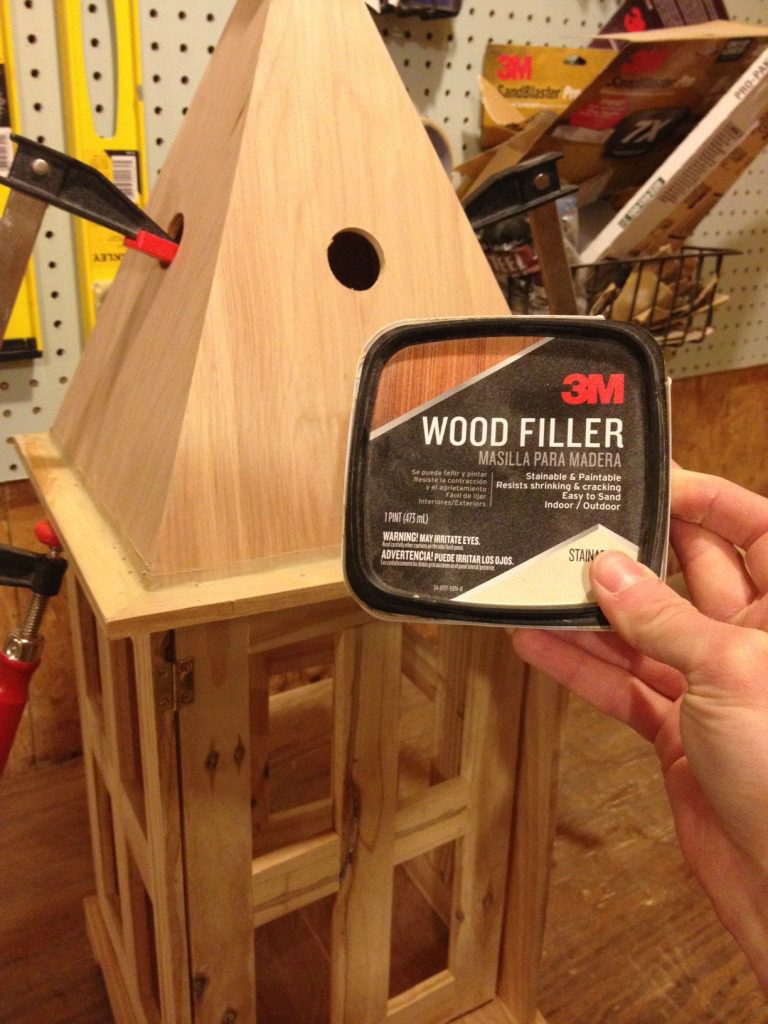
Once it’s good and dry, I use an orbital sander and sand off what I can. And to sand off any remaining glue. Orbital sanders are life savers.
.
Then I stained it in Minwax Early American. And I wrapped them up and gave them away 🙂 But not before I got a few pictures of them.
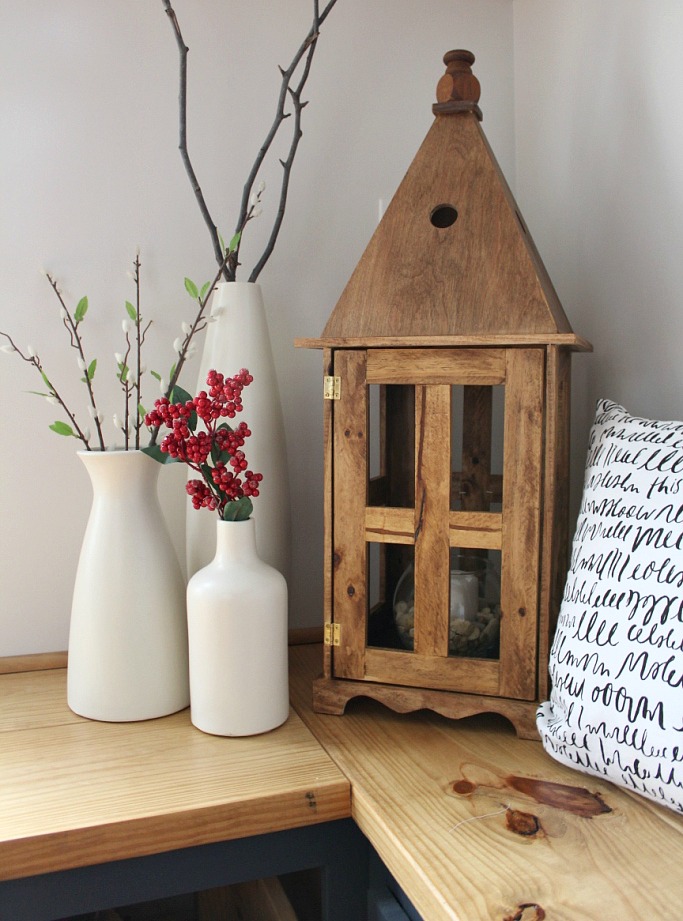
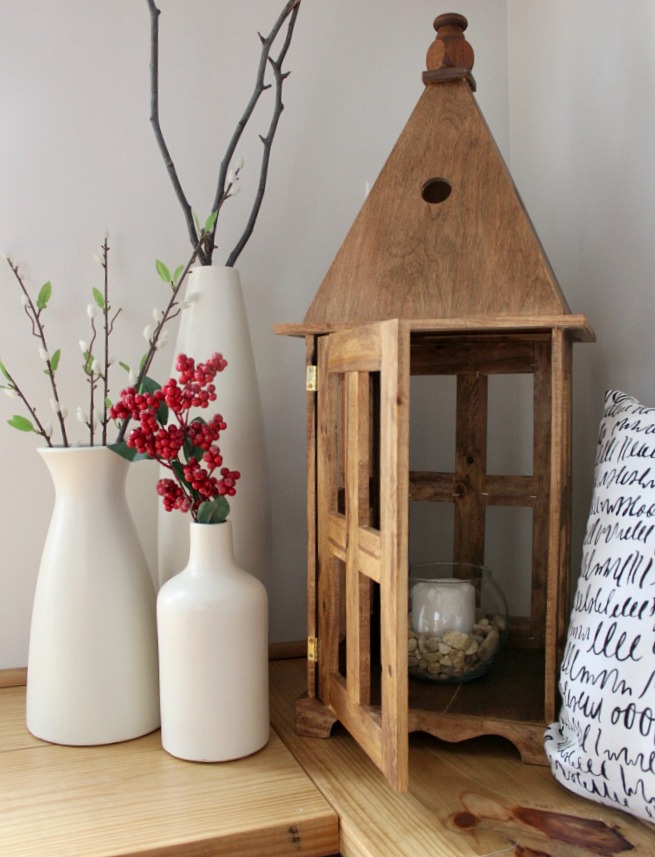
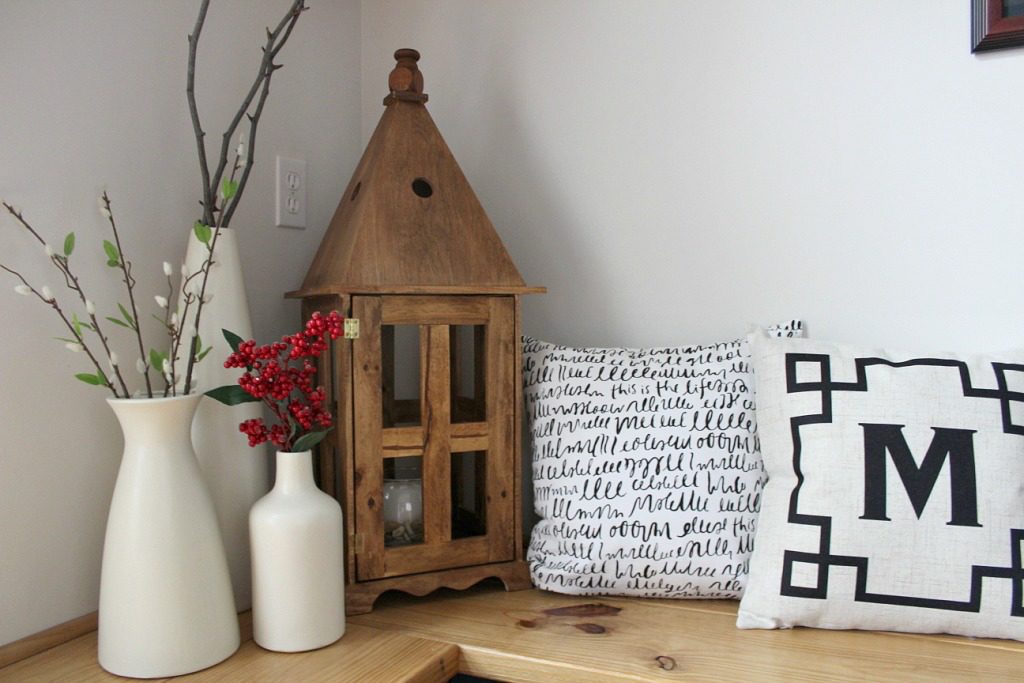
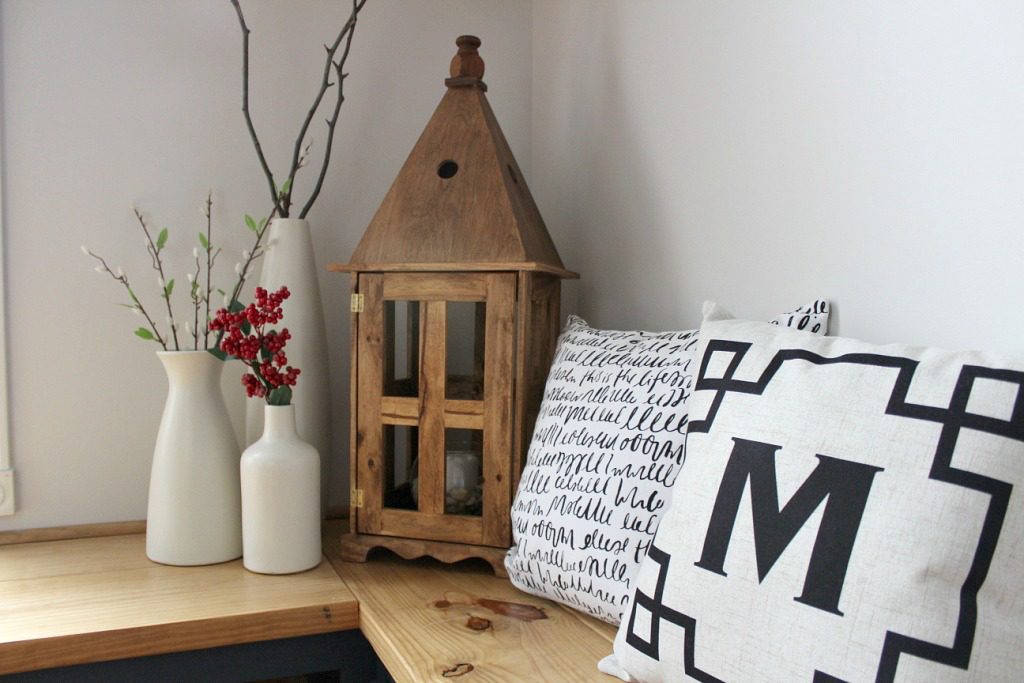
So what do you guys think? So sorry for such a long post! But didn’t it turn out beautiful? I was pretty excited to give them away.
.
I have several more projects up my sleeve to show you guys now that the holidays are over, so stay tuned!
.
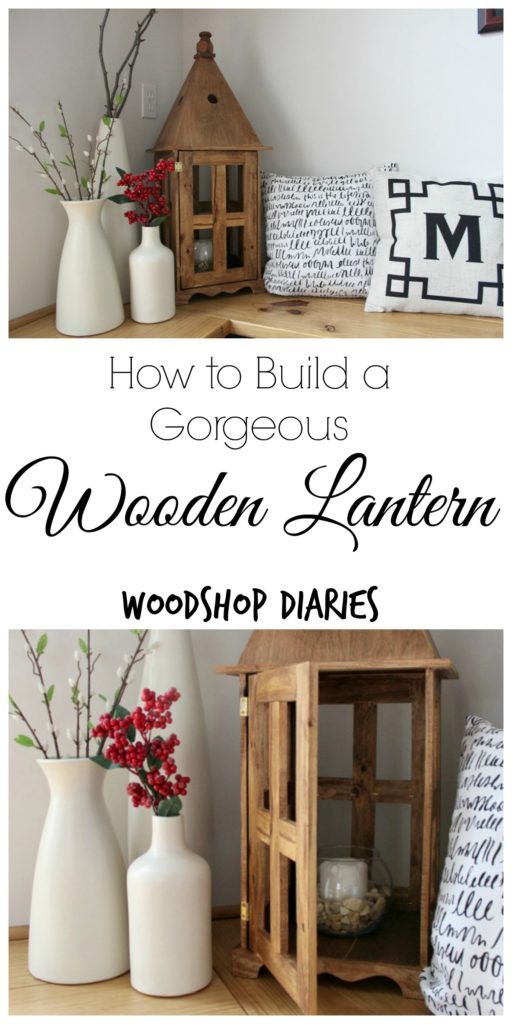
But first, pin this baby for later!
Until next time, happy DIYing!!!

Ivory says
OMG, girl you always do excellent work. When you are doing a project, it blows my mindd how fabulous your results are. Who taught you how to do this? I would love to know how to do half of what you do, and with such signingup results. Happy Holiday’s
Shara, Woodshop Diaries says
Thank you! I learn from experience…lots of things done wrong so I can figure out how not to do them the next time haha. If you want to get started, you just have to start 🙂 And don’t be afraid to screw up a time or two before you get it right 🙂
Paul W. Abelquist says
Very nice project. What are the overall dimensions?
Shara, Woodshop Diaries says
Thank you! It’s about 12″ x 12″ and about 32″ tall.
Tom Clarke says
Shara, just finished assembling the top and brought it inside to dry in the warmth. I had to comment on your technical term of “thingy-ma-jig” and I chuckled out loud when I assembled the last “joint”. I love your humor and sarcasm. It’s almost as good as your projects. Ever think of taking it on the road?
Shara, Woodshop Diaries says
Haha, thanks! If I could figure out how to make money going out on the road, I’d do it in a heartbeat! Thanks for always following along 🙂
R Smith says
Wonderful work, great idea, going to make them for myself and others this year. Love all your projects, I have saved a larger majority of your projects for endeavors in my new house…Thank you for sharing.
Shara, Woodshop Diaries says
Thank you! Good luck with your projects 🙂 I’m sure they will turn out awesome!
Linda says
Beautiful job – wish I had one….definitely NOT something I’d try to make though!
KathleenC says
Those turned out really attractive! Something to display proudly. And, as a knitter and seamstress I know what you mean about not wanting to make junk that people keep just because you made it. I try hard not to think of some of my early project/gifts… and I’m sure so do they.
ps I think you let off “dead spider” from your materials list… is that an optional decorative touch? Because it’s the one material I have tons of.
Shara, Woodshop Diaries says
Thank you so much!! And yes, the dead spider is totally optional 🙂 But it does seem to add a nice touch haha.
Kraig Elliott says
Nice work! Love the rustic look of the Early American stain.
Shara, Woodshop Diaries says
Thank you! 🙂
Tiana says
Have I ever told you that you are my real life hero??? I’m probably old enough to be your mother, but when I grow up I want to be just like you! I love your ideas, I love your detailed instructions in learning to make the same beautiful items in our shops, I love your sense of humor. These are gorgeous… I’m going to make one for every person I know….. prolly ought to start now!! Thank you!!
Shara, Woodshop Diaries says
Haha Thank you! You made my day! I’m so glad you are enjoying following along 🙂 Good Luck building all those lanterns!!