If you’ve got scrap wood, a few basic tools and about an hour, you’ve got everything you need to make this simple DIY wooden lantern with curved top. Oh…and you’ll need this tutorial, of course 😉
I’ve been all about some scrap wood projects lately. Have you noticed? I actually just made a different DIY scrap wood lantern not long ago. But this one’s got a few extra details with the curved top.
.
So for this project, I whipped out my scraps again to see what I had on hand.
.
I already had a bottom panel glued up and ready to go because I accidentally made it the wrong size to use with my DIY Christmas Tree Nesting Shelf project.
.
And I also had some ¾″ square dowels leftover from that project as well. So all I needed was to grab some small pieces to cut the curves out of and add to the top.
.
This DIY wooden lantern project is easy to customize, so feel free to play with the measurements here to use whatever size lumber you’ve got handy.
This post contains affiliate links. See policies.
.
To Build this DIY Wooden Lantern with Curved Top, You Will Need:
- Scrap wood
- Miter Saw
- Drill
- Jig Saw
- Sandpaper
- Measuring tape
- Wood Glue
- 2″ wood screws
RELATED: Need some help organizing your scrap wood? This mobile scrap wood storage shop cart may help!
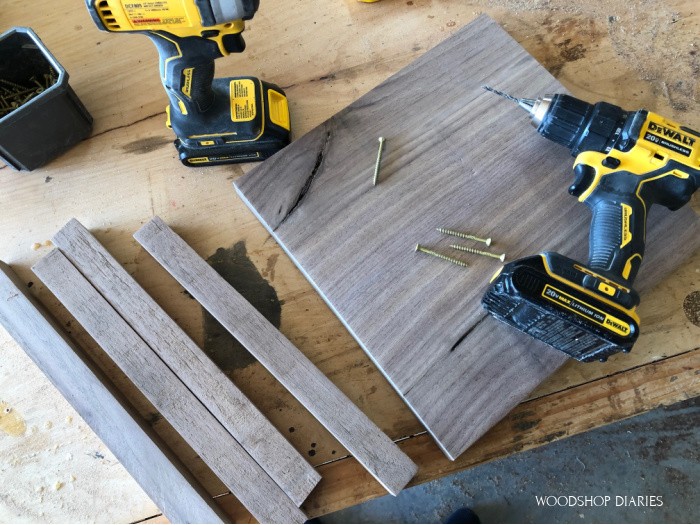
Step 1: Gather Your Wood Scraps
Now, you can use what you have on hand, but I used some scrap walnut.
.
I used a bottom panel about 12 ¾″ square. This was made by gluing up 1x boards into a small panel, then trimming the panel down to the size I wanted. BUT, you could also use some ¾″ plywood for this, too.
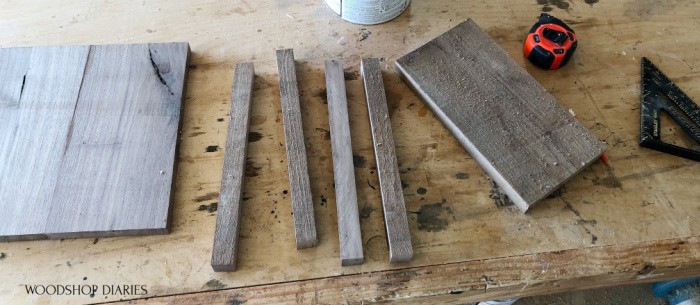
I also used four ¾″ square dowels about 12″ long. If you have some 1x boards and a table saw, you can make your own ¾″ dowels. But if you don’t have a table saw, you can buy them already cut here.
.
Lastly, I used some 1x scraps to cut the curves and top plates. Plywood also works for this, but the edges won’t be as pretty.
.
Keep in mind, these measurements are rough, this is a scrap wood project, and you can modify as needed–this doesn’t have to be complicated.
Step 2: Cut Corner Posts for Wooden Lantern
I set my miter saw to cut a 5 degree miter.

Then, I cut four ¾″ square dowels to about 12″ long with mitered ends PARALLEL to each other.
.
When I say parallel to each other, I mean the long sides are opposite each other.
.
NOTE: Yours don’t have to be 12″, but whatever length you pick, make sure they’re all the same or your lantern will be lopsided.
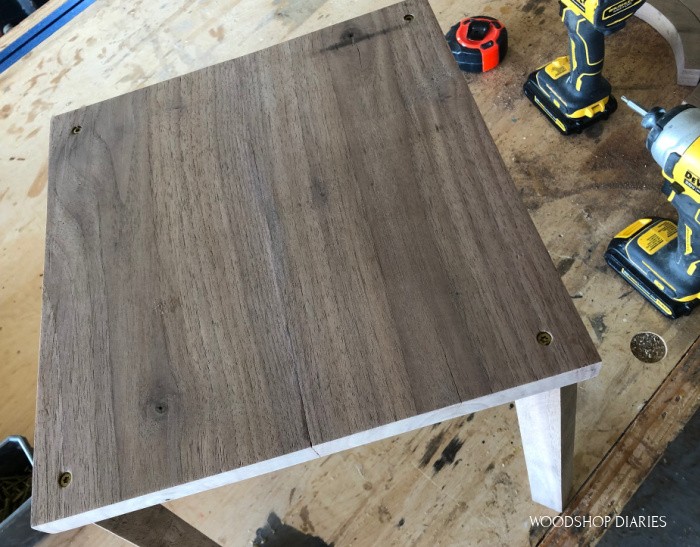
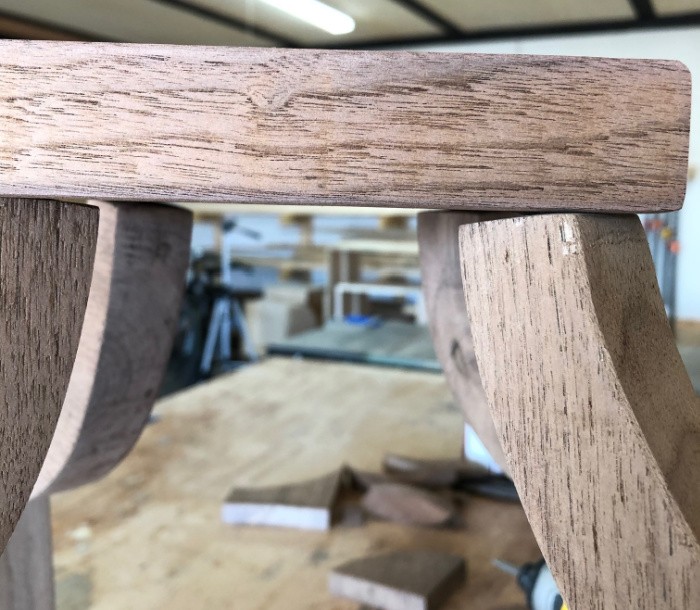
Step 3: Attach Corner Posts to Lantern Base
Using 2″ wood screws through the bottom, attach the corner posts to the base so that they are slanted out at the top (the lantern gets wider at the top).
.
Be sure to predrill your holes to prevent splitting. Also note, these corner posts are turned 45 degrees from the base corner…you’ll see why when you attach the curves.
Step 4: Cut Curved Pieces for Lantern Top
Now the base and corners are complete, but I still needed to add the top.
.
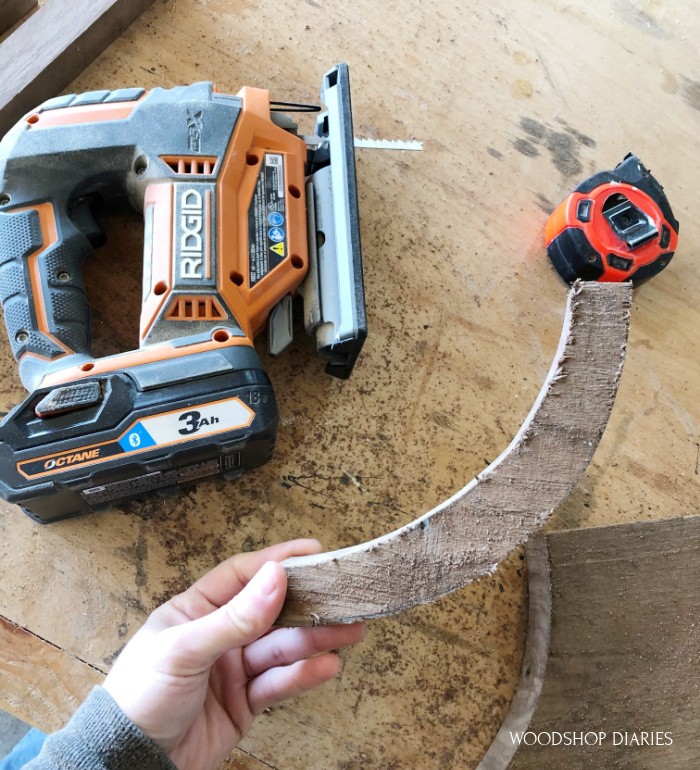
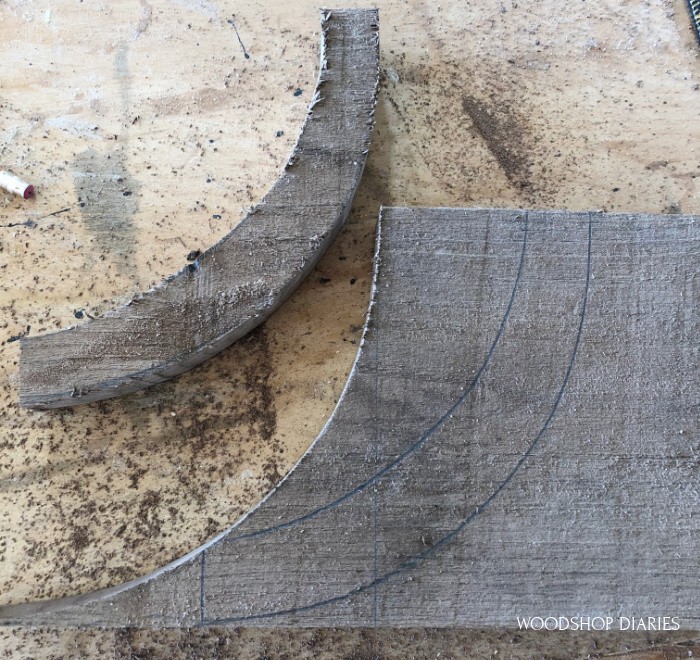
I grabbed a piece of scrap 1x board and marked 6″ down from the top left corner and 6″ over from the same corner and used a water bucket (you can use any round object) to trace a radius between these marks.
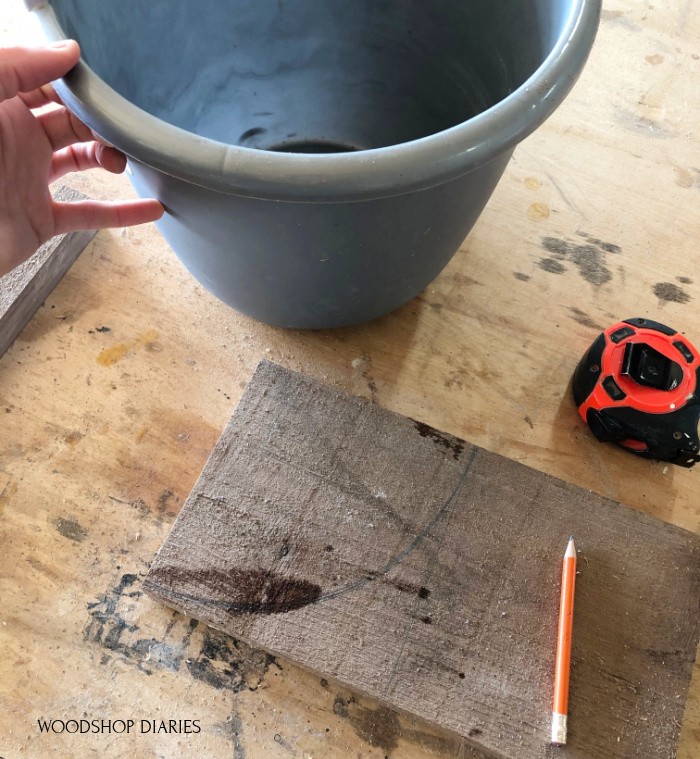
Then, I marked 5 ¼″ from the corner and drew another radius to give me a curve about ¾″ thick.
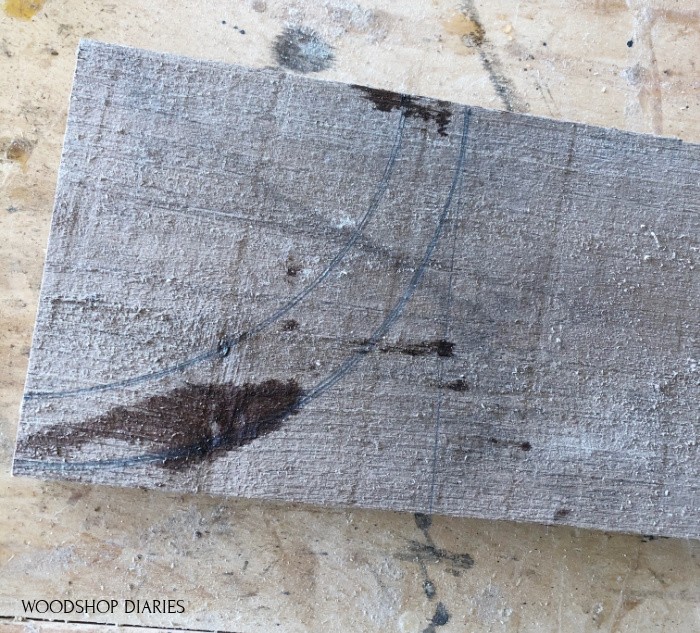
I used a jig saw to cut this out.
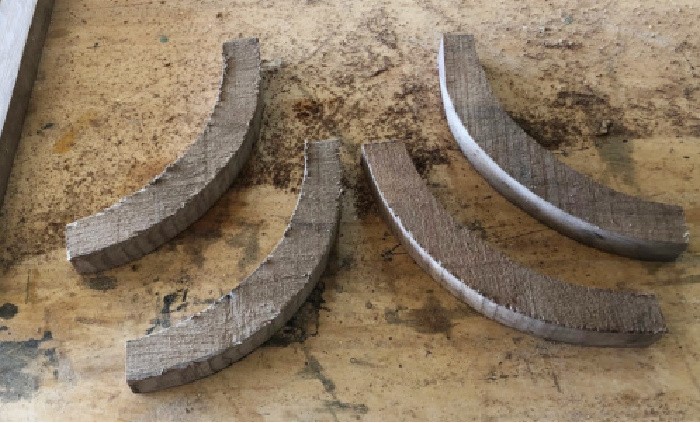
I traced this shape three more times on the board and cut out four total curves.
Step 5: Attach Curves onto Lantern
After a good sanding, I screwed these curves on the corner posts using 2″ wood screws.
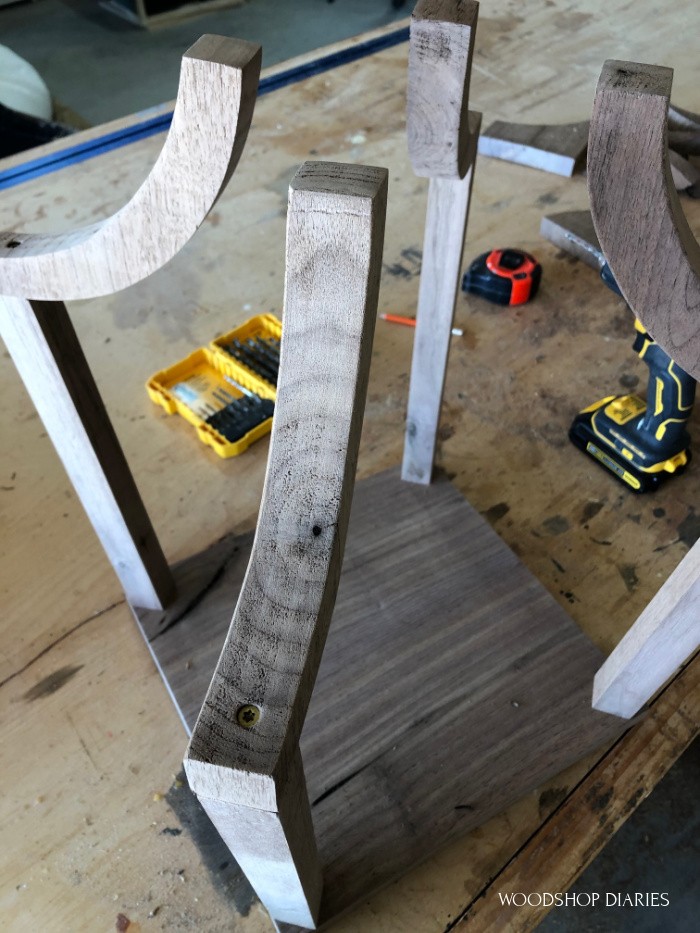
Be sure to predrill here to prevent splitting.
Step 6: Attach Top Plate to Wooden Lantern Frame
Now, I didn’t do any math here to figure out if this was 100% correct or not. But at this point, I just used a tape measure to get a rough idea of how large the top plate needed to be to cover the top ends of the curves.
.
I just measured outside corner to outside corner and figured that about a 6″ square plate would work well, so I cut a piece of 1x scrap 6″ square and attached with–you guessed it–2″ wood screws.

So if you modified these dimensions, just measure when you get the curves installed and cut your own size piece–see? This isn’t complicated 🙂
.
As a note: TECHNICALLY, these top curve ends need to be mitered for the top plate to sit flat on them. But I didn’t bother with it.
.
The angle here is pretty small and it would be difficult to cut these consistently on the miter saw. So there are some small gaps on the bottom side–but it’s the bottom so I didn’t mind.
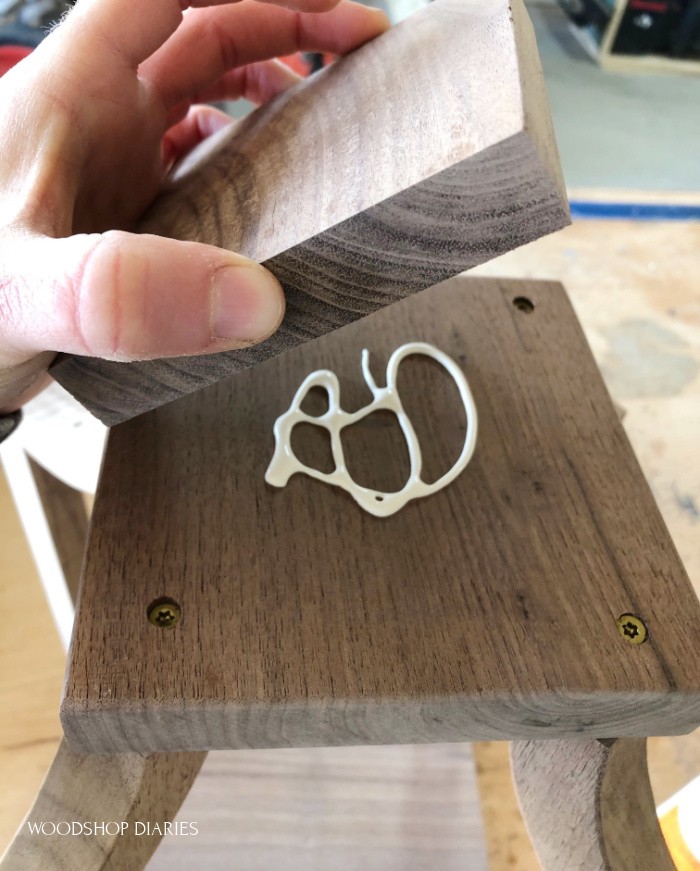
And just for some extra detail, I added a little 4″ square piece on top of this. I just glued it in place.
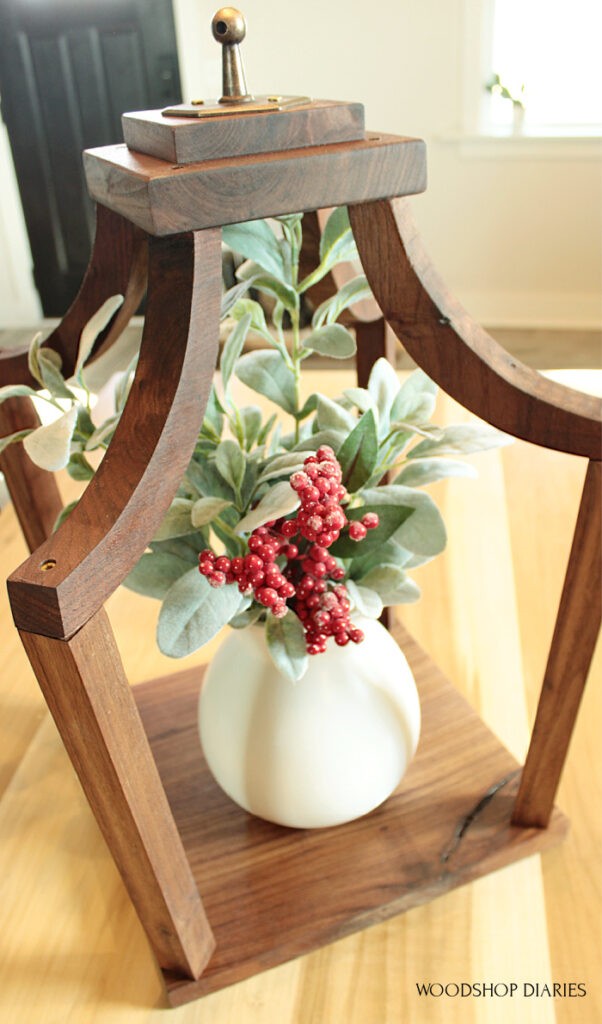
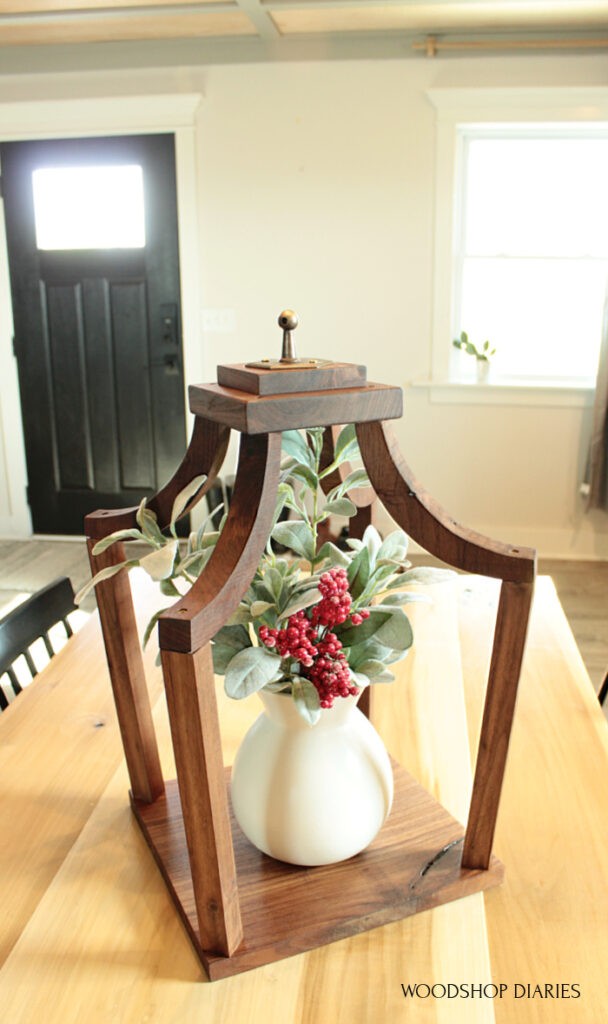
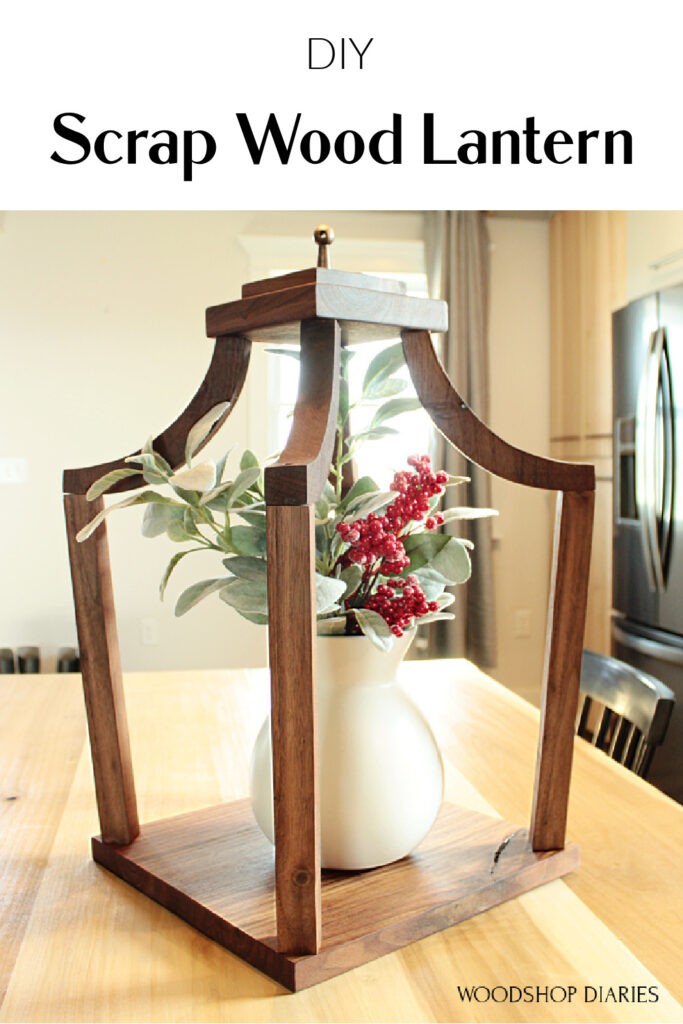
To top it off, I added a small decorative piece. Do you remember the 3 tiered tray from a few posts ago? Well, for the top handle, I removed the ring from a towel rack I found at Hobby Lobby.
.
So the piece of that towel rack that was left is what I used for this.
It looks kind of funny, but did add some detail. I may replace it later–who knows haha.
.
To finish it up, I just applied some Walrus Oil Furniture Finish since this was walnut and I wanted to keep the natural color. But you could paint or stain as you wish.
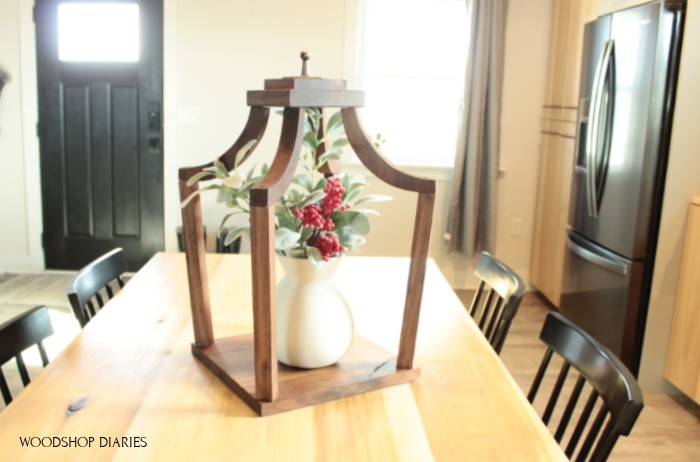
This project is fairly large, and would look just as good even smaller, too. This size could fit several large candles–or a flower arrangement haha.
.
Build a set in multiple sizes to set on a console or dresser. This would even look cute hanging from the wall or ceiling. Simple project…endless possibilities 🙂
.
I hope you’ve enjoyed this fun and easy DIY wooden lantern project and if you want to check out more scrap wood projects, I’ve got plenty more here.
.
And if you’d like to save this for later, be sure and pin it!
Until next time, happy building 🙂