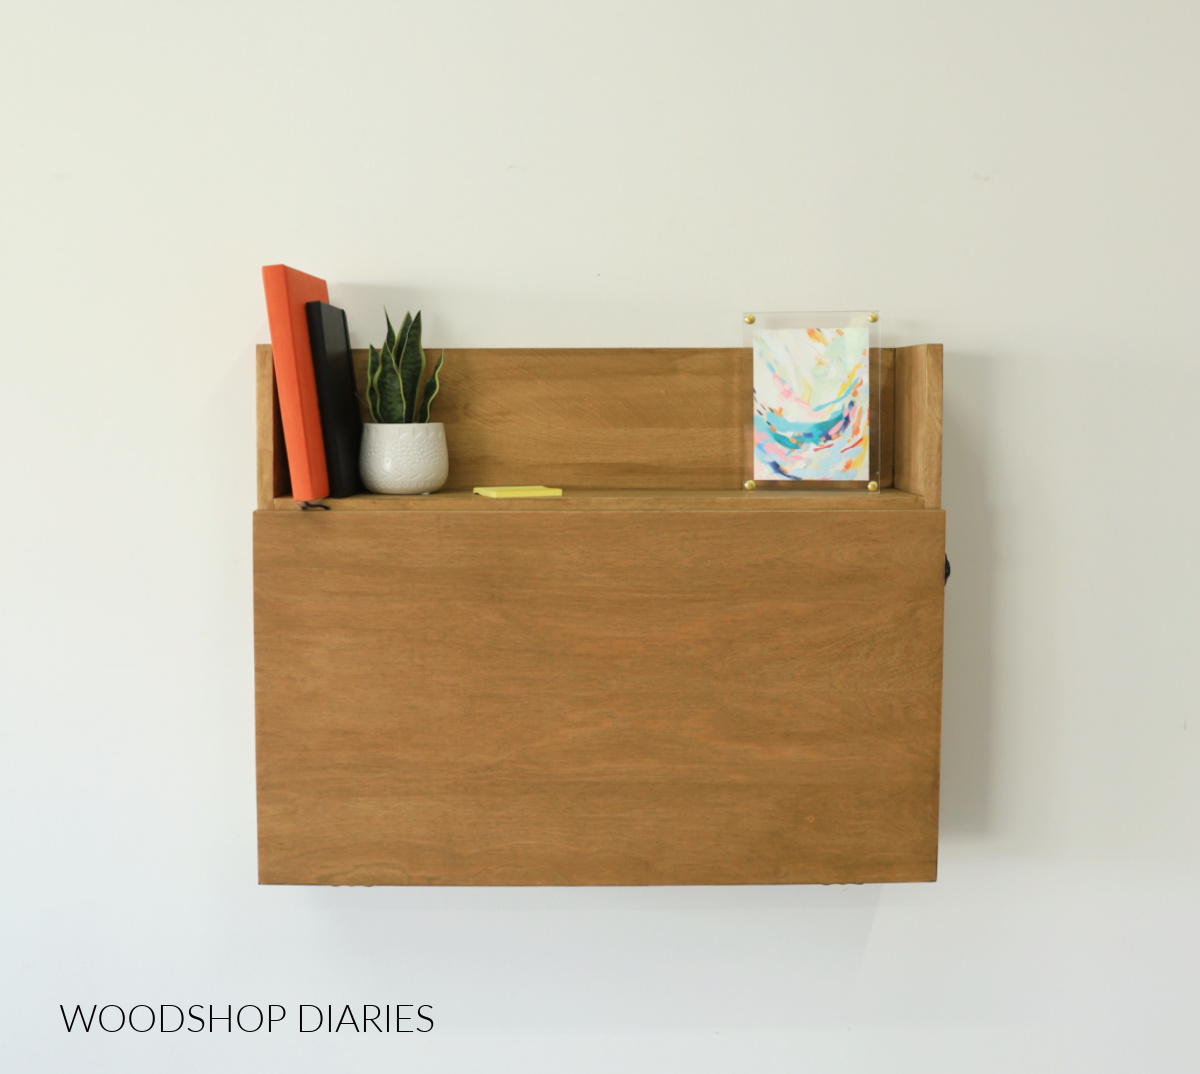
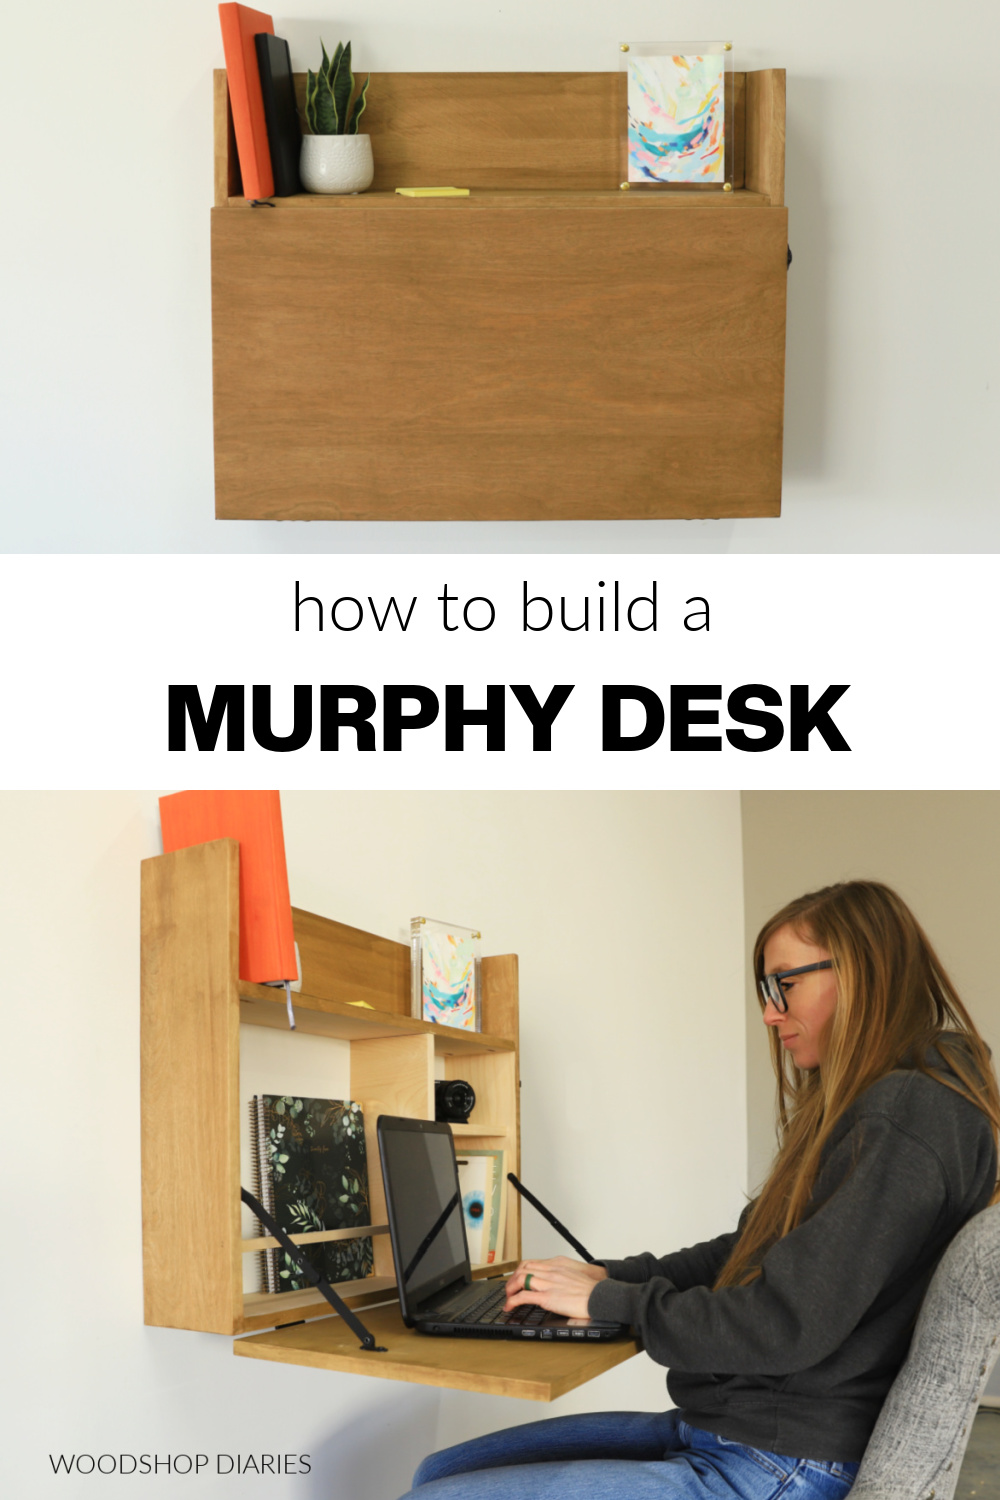
In this post, I’m sharing how to build an EASY DIY Murphy Desk that folds out from the wall!
This super simple build can be made completely from plywood scraps…OR just a half sheet of plywood if you don’t have scraps. PLUS, it’s so easy to customize.
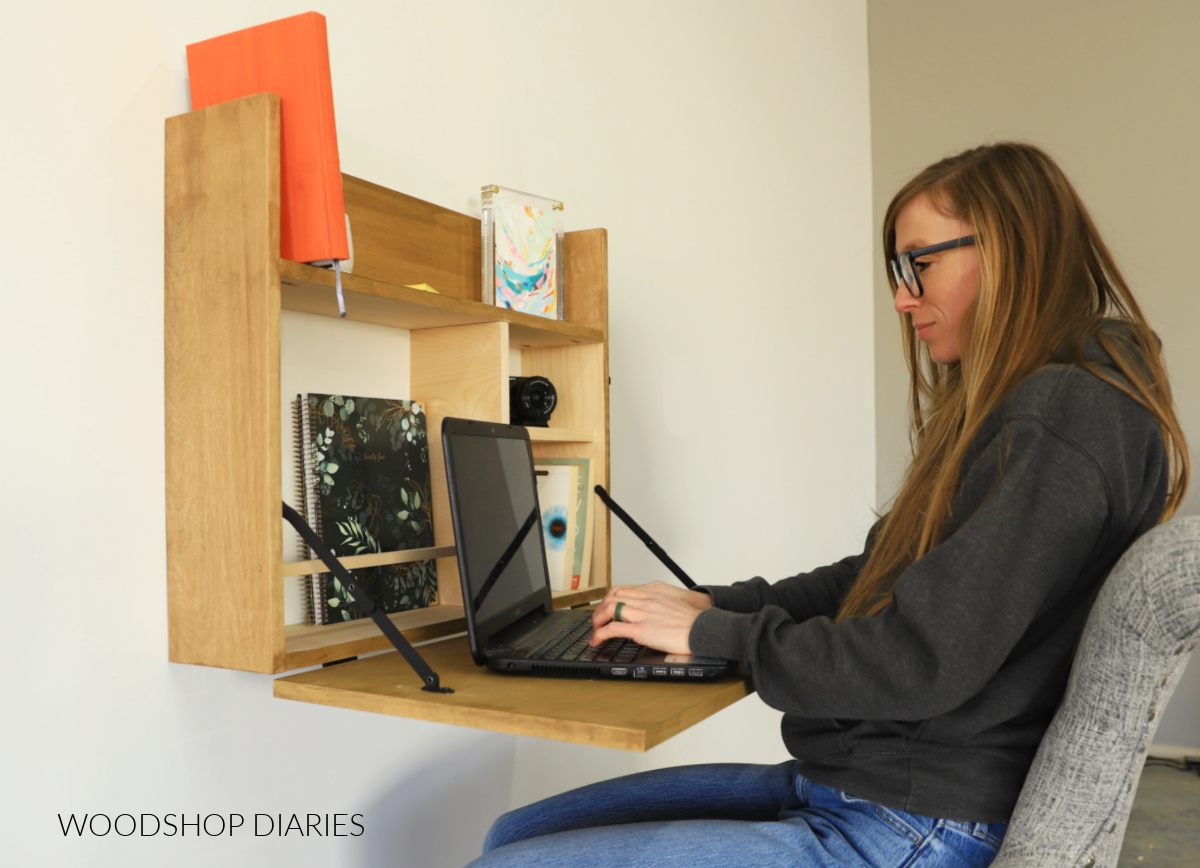
Because it folds up when not in use, it’s the perfect solution for small spaces where you don’t have the floor space for full size desk.
It could even work well as a folding table in the laundry room, a craft desk, or a music practicing station.
It’s such a practical project and I’ll show you how easy it is to build below.
*This post contains affiliate links. See website policies.
What to consider before building
This Murphy desk was built entirely from plywood scraps. However, if you’d like to trade some of the plywood pieces for solid wood, you can.
One of the best features of this design is that it’s really easy to customize. You can adjust the size to make a smaller or larger work surface. And you can divide up the inside with shelves to fit whatever items you’d like to store inside.
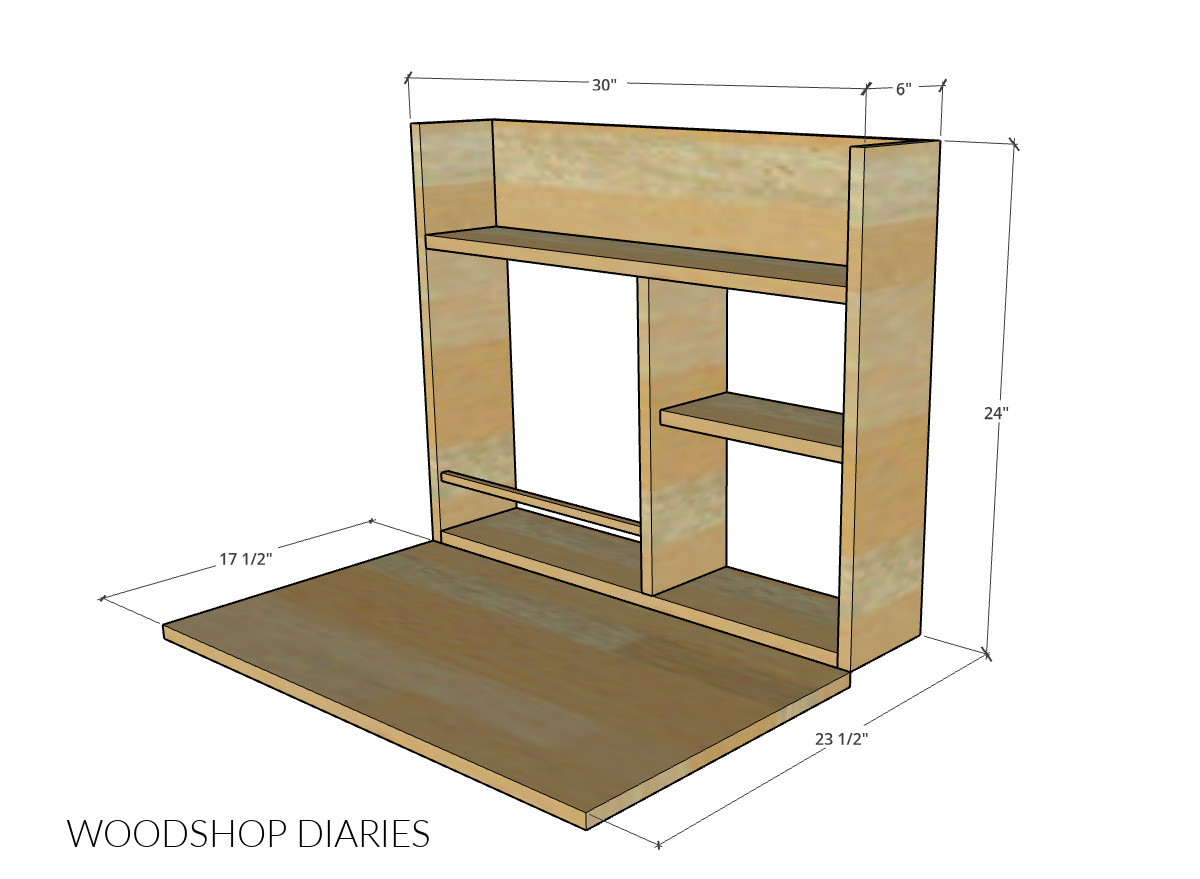
As is, this desk is about 6 ¾″ (including the door) deep x 24″ tall x 30″ wide when closed.
And the fold out desk is about 17 ½″ deep, so that makes the overall depth when open 23 ½″.
INSTALLATION
This murphy desk should be securely fastened to the wall studs with at least 4 screws. To hang it, I drove 2 ½″ wood screws through the back support of the desk frame into the wall studs.
You can mount this as high or as low as you’d like, but standard desk height is 30″, so I installed it so that the bottom of the desk frame is 30″ above the floor.
Enjoy DIY projects and woodworking plans? Sign up for priority access for the latest posts on Woodshop Diaries!
You may find these resources helpful throughout the build:
How to build a Murphy Desk
If you prefer to watch, here’s a quick video tutorial, but I’ve also got the step by step instructions below.
Love watching how-to videos? Subscribe to my YouTube channel for plenty more where that came from!
Prefer to print? Grab the printable Murphy Desk building plans available here:
Tools & Materials
Materials:
- (1) 4’x4′ sheet ¾″ plywood
- (1) ½″ square dowel (16″ long–optional)
- (15) 1 ¼” pocket hole screws
- (4) 2 ½” wood screws
- 1 ¼” long brad nails
- Edge banding (optional, but recommended)
- (2) 1 ½″ x 2 ½″ butt hinges
- (2) Lid Supports
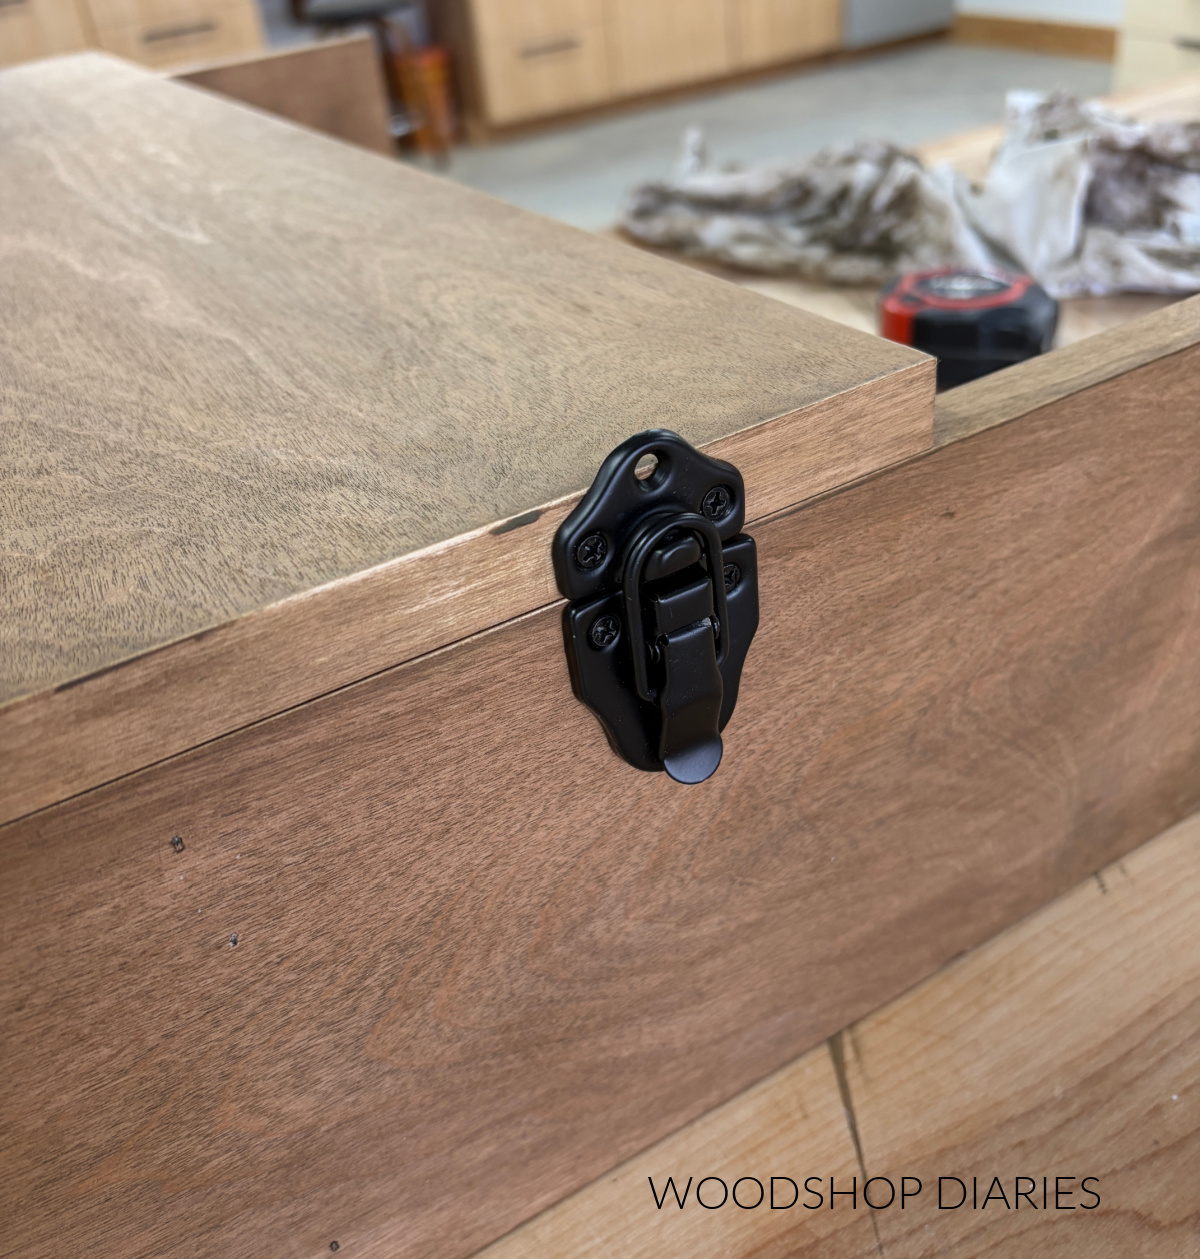
- (1) Chest Latch
Step 1: Assemble Murphy Desk Frame
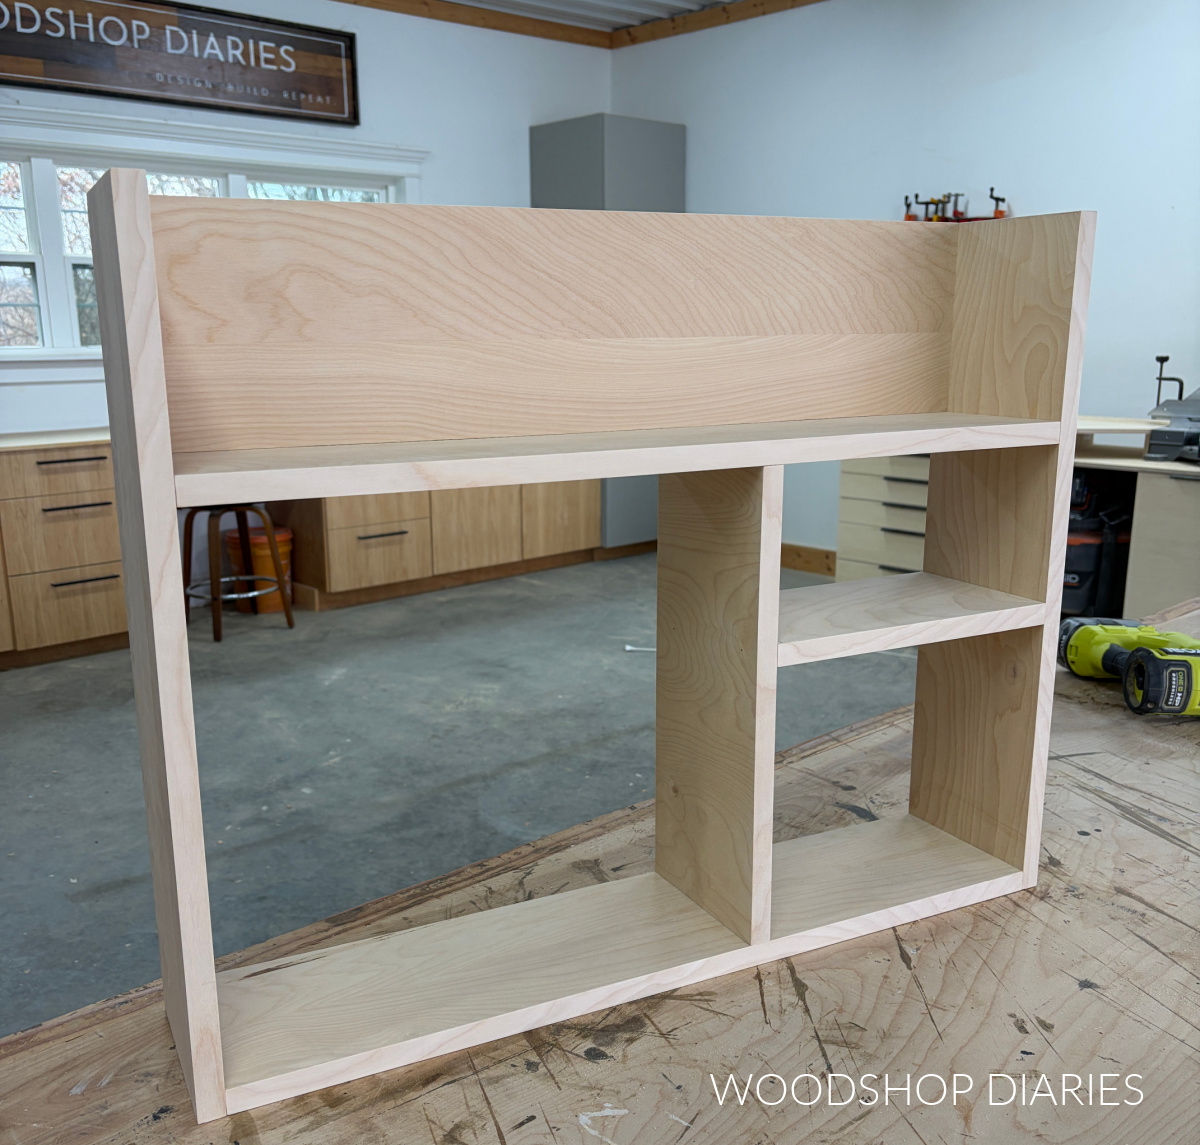
Because I was building this from scrap plywood, the first thing I did was cut down my scraps into five pieces to build my desk frame:
- (2) Sides
- (2) Top & Bottom Shelves
- (1) Back
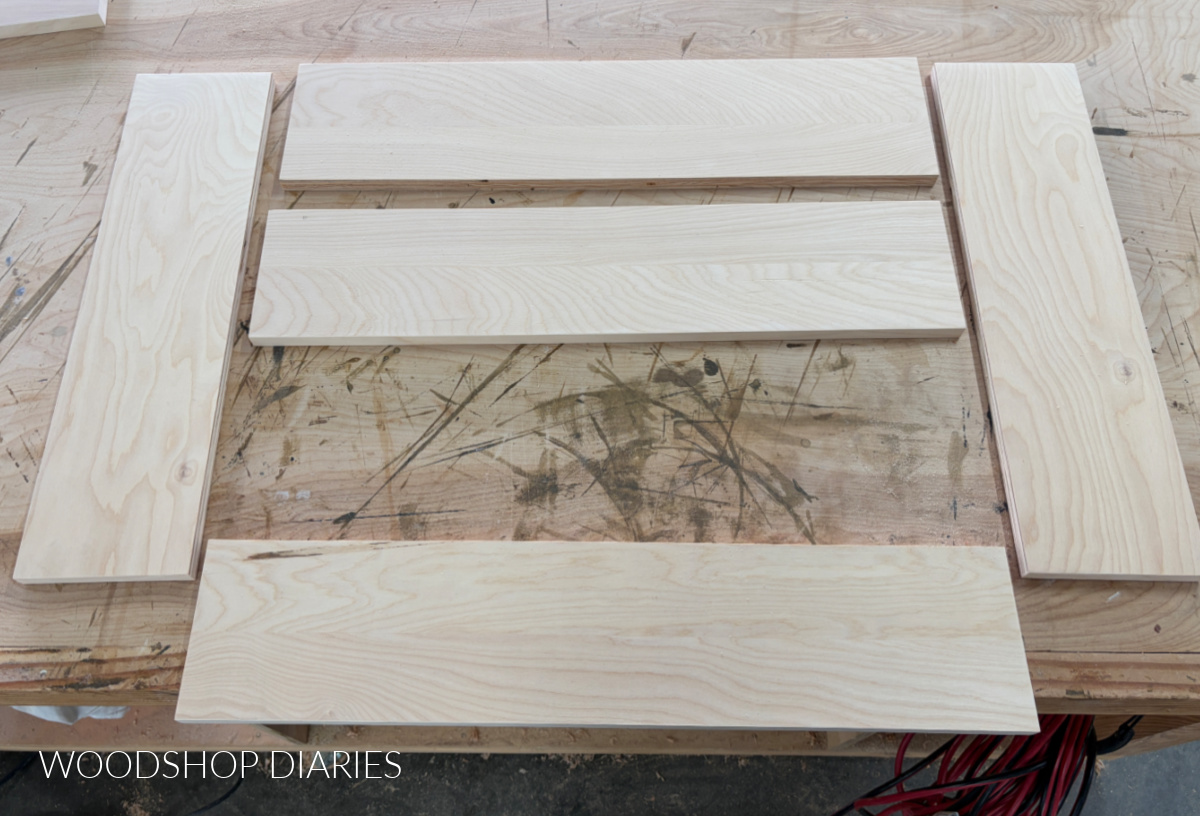
I edge banded the front edges of the shelves, the front, top and bottom edges of the sides, and the top edge of the back because these will all be exposed in the finished project.
Learn how to cover plywood edges for a more finished look here.
Then, I drilled pocket holes into the ends of the shelves and into the ends and along one edge of the back piece.
RELATED: How to use pocket holes
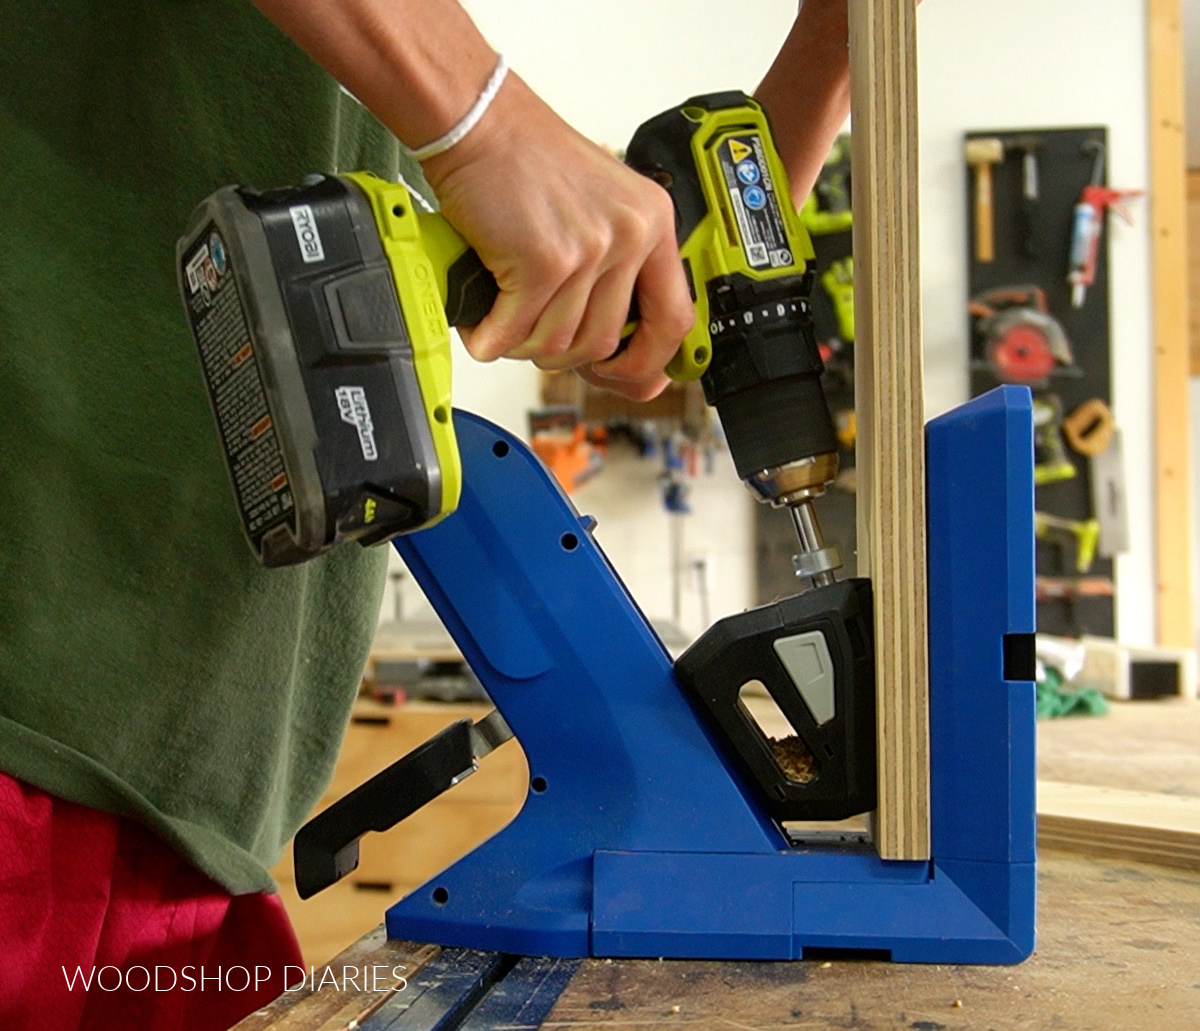
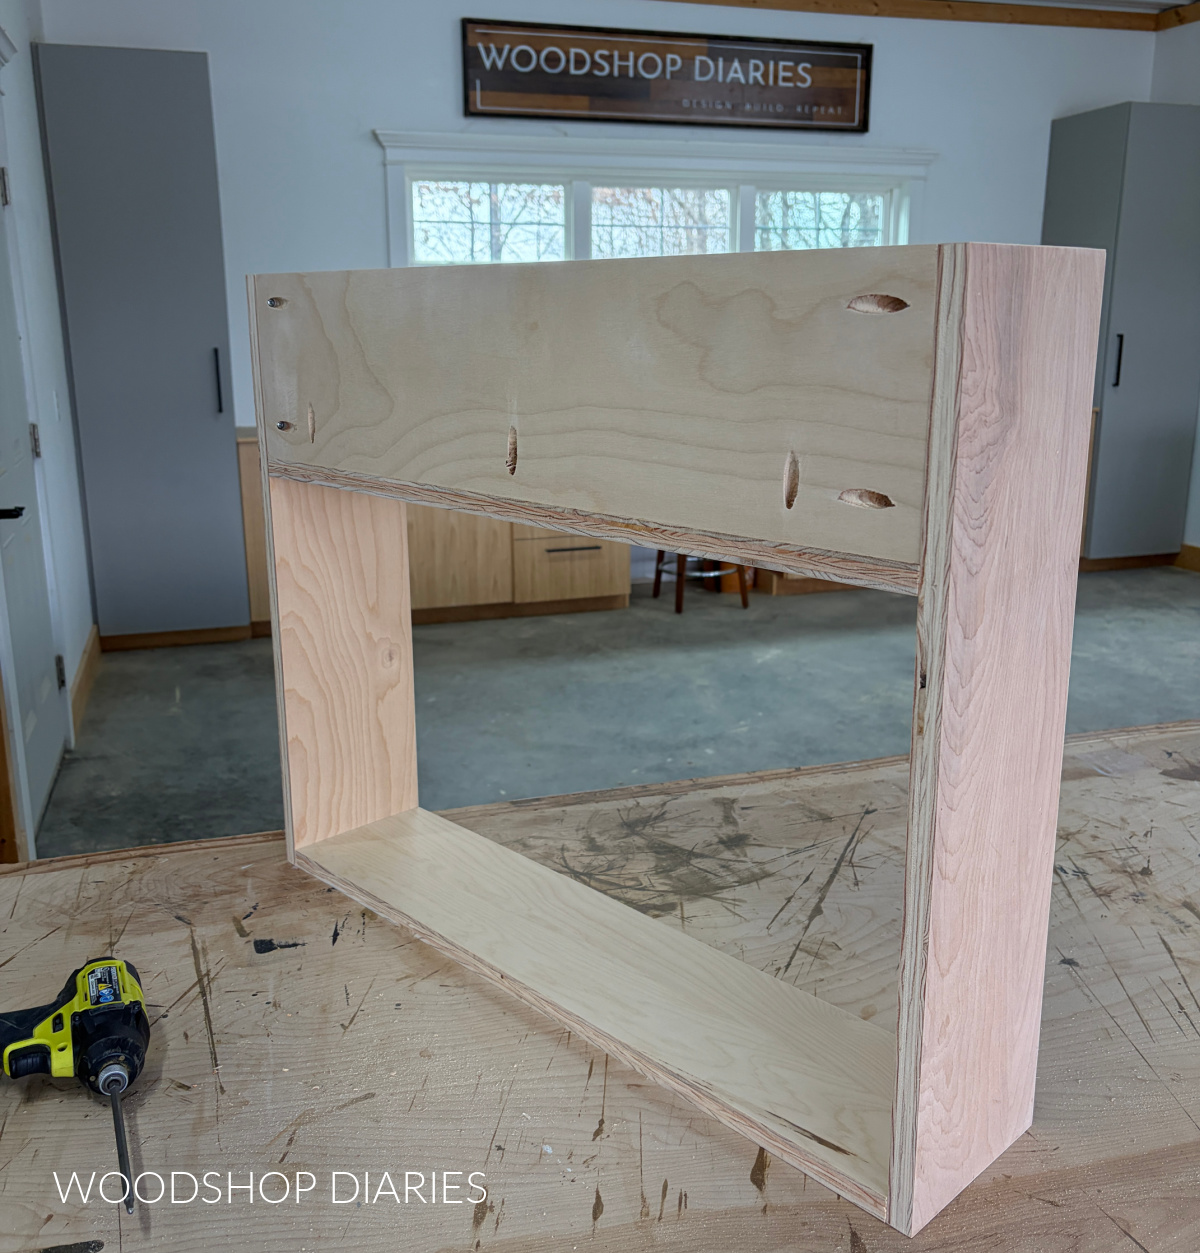
Then, I assembled the main frame of the Murphy desk with pocket hole screws. The back piece goes flush to the back and top edges of the sides like you see below.
One shelf goes below the back and the other goes at the bottom.
Prefer to print? Grab the printable plans for this project with full cut list here.
Step 2: Customize the Inside
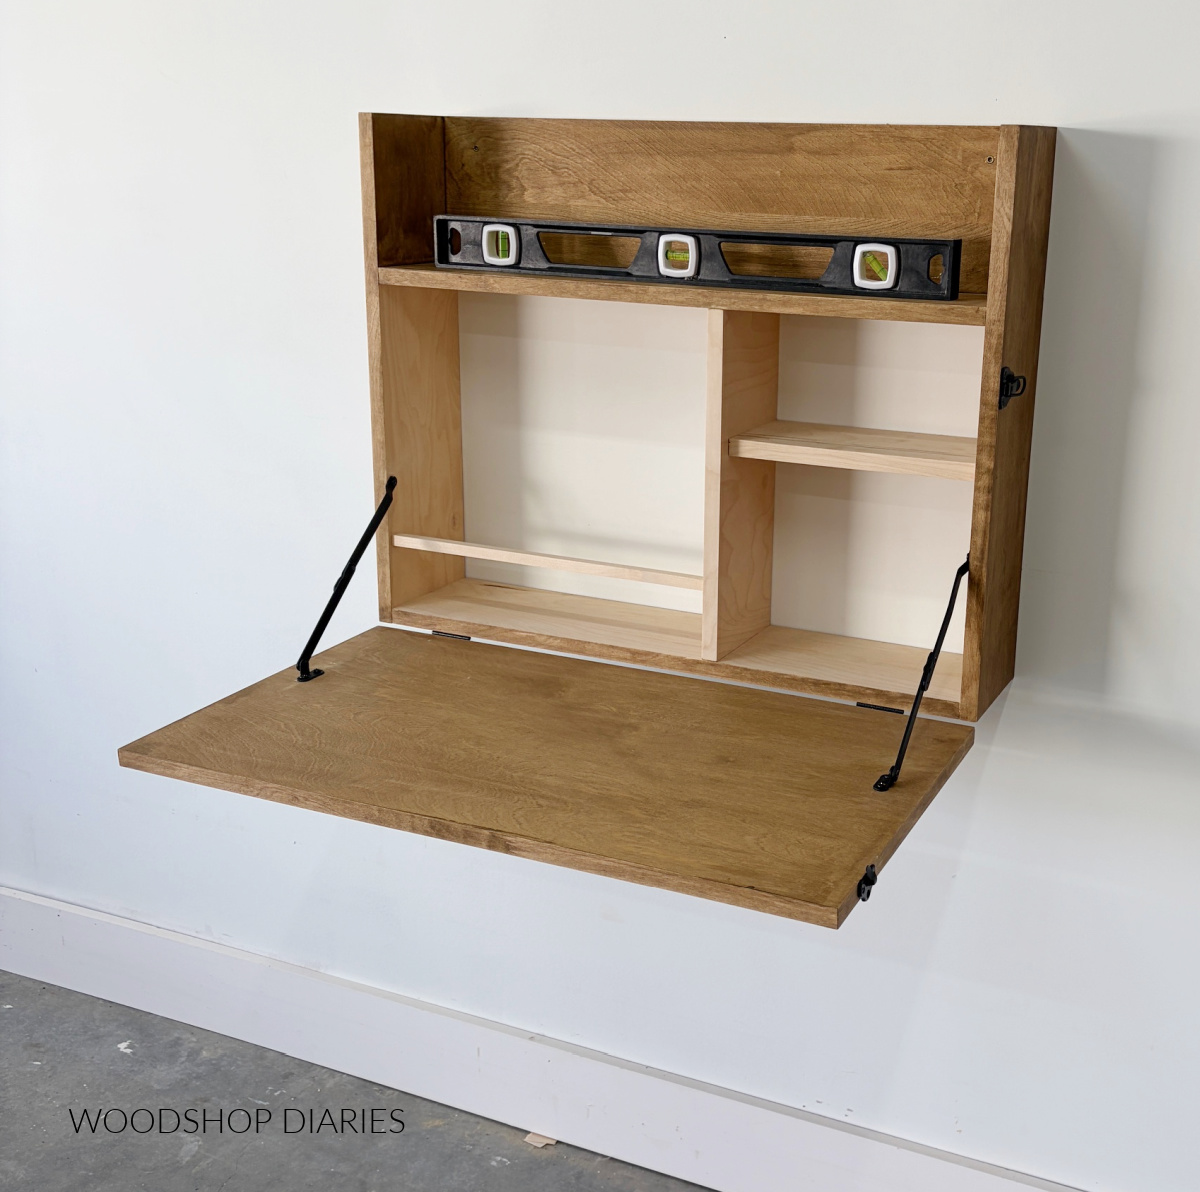
Now that the frame was together, I moved on to customizing the inside. This is where you can get creative to add shelves or dividers to fit whatever you’d like to store inside.
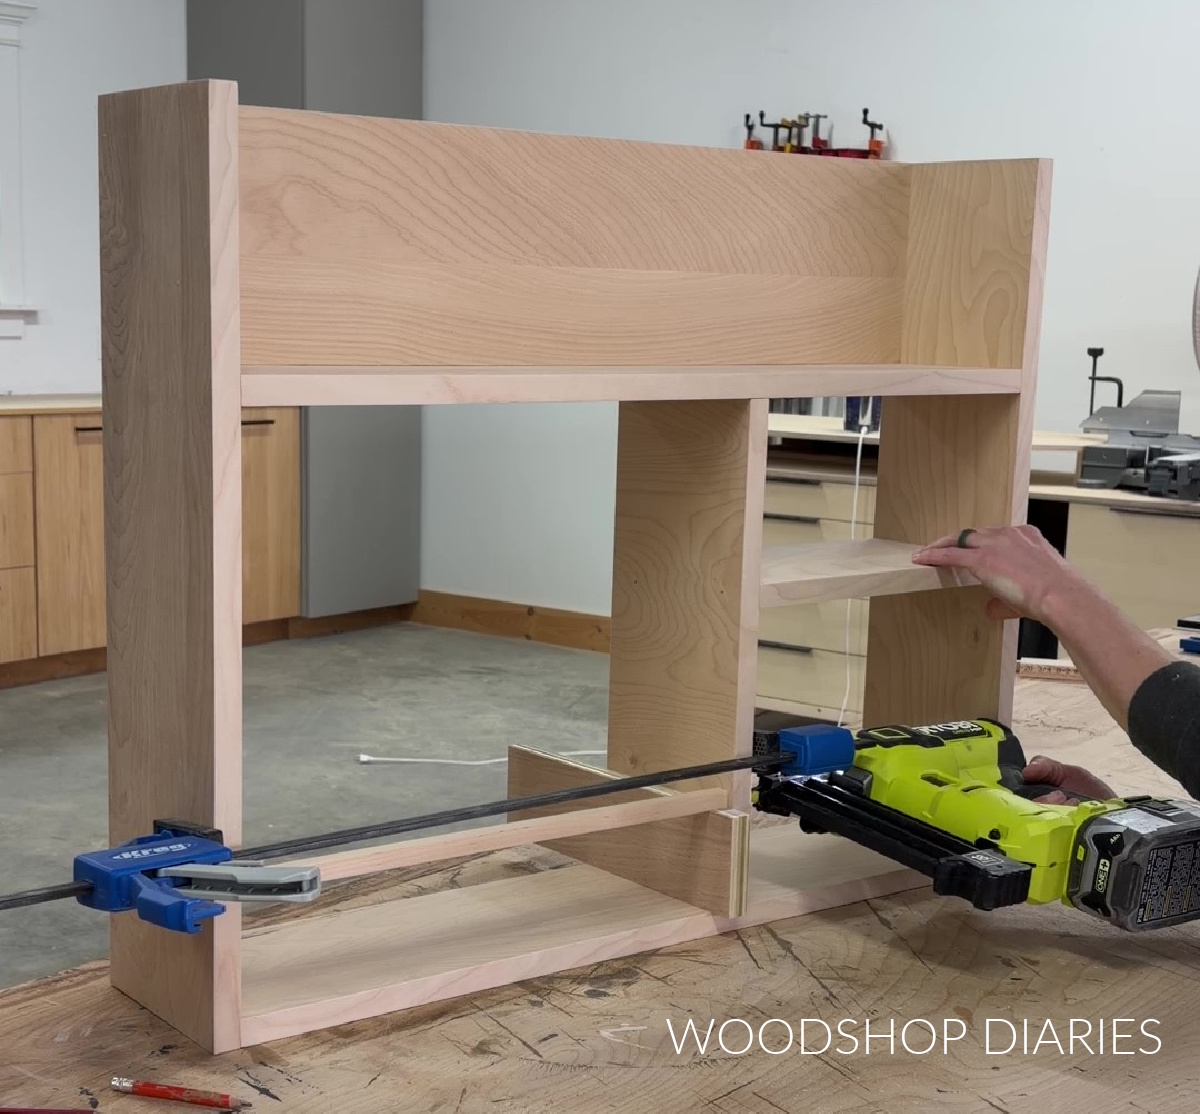
I kept things simple and just cut some scrap plywood to add a divider and a small shelf in the right section. I brad nailed these in place.
NOTE: You’ll notice that in the photo, the shelf is the same depth as the frame. But when I got to step 4, I realized the lid supports wouldn’t work because the shelf was in the way. So I ended up having to remove it and trim it about ¾″ shallower. This is noted in the plans.
I planned to store taller books, notebooks, and a laptop in the left section, so I added a small piece across the front to help keep those things from falling forward.
I cut to fit a piece of ½″ square dowel for this, but a small piece of plywood or other size lumber would work as well. I just brad nailed this piece through the side and divider panels.
Step 3: Install Murphy Desk Fold Out Door
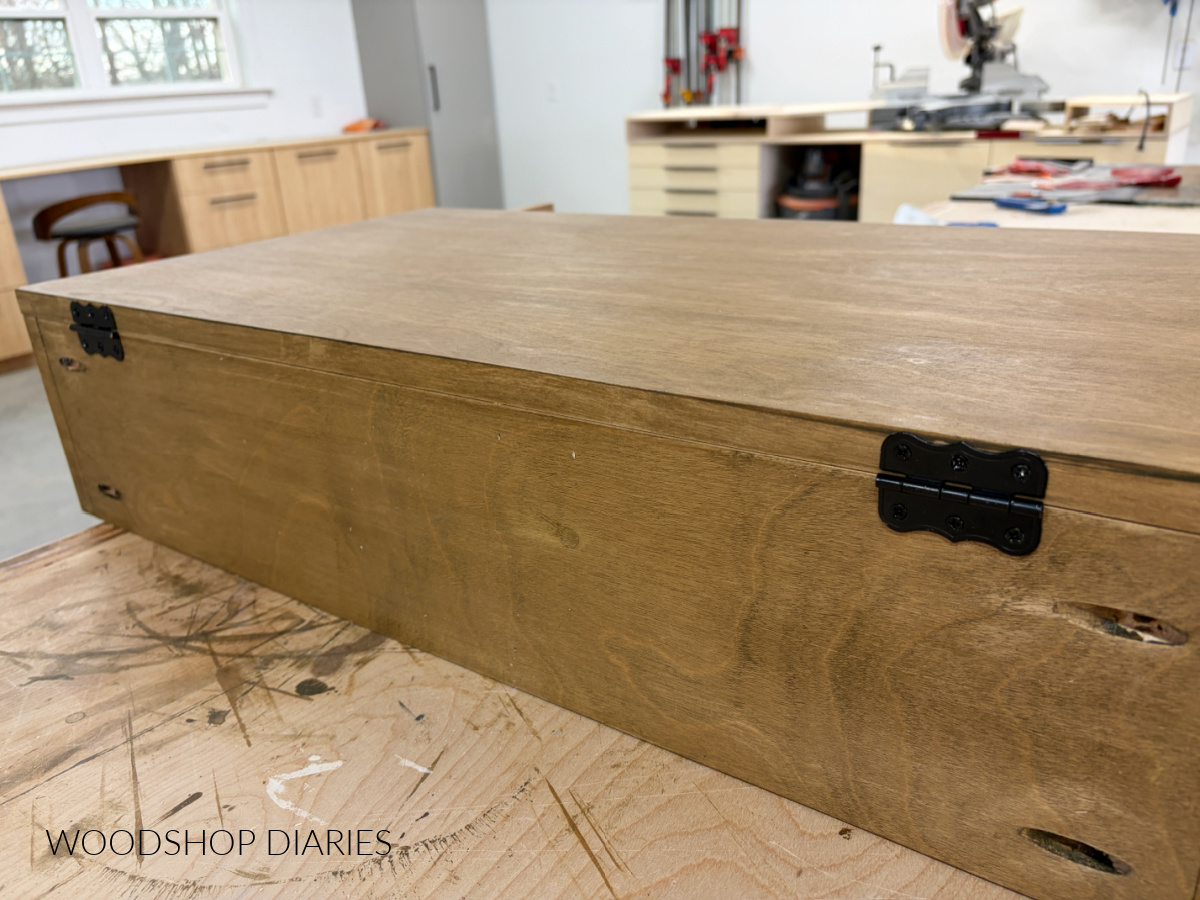
For the fold down desk piece (or the door, depending on how you’d like to label it haha), I cut another piece of ¾″ plywood to fit over the front.
After edge banding all the sides, I stained the desk frame and this fold out piece separately. I thought it would be easier to stain them before attaching, so I applied Minwax Water Based Wood Stain in Driftwood and allowed to dry.
Then I attached the fold out panel to the desk frame with some cabinet butt hinges along the bottom.
That way, this piece can fold open once it’s hung on the wall.
Step 4: Add Murphy Desk Supports and Latch
But the problem with basic hinges is that they allow the fold out piece to fold ALL the way down, so to keep it in a square position, I added some chest latches to each side.
These worked really well to help “lock” the front in the open position.
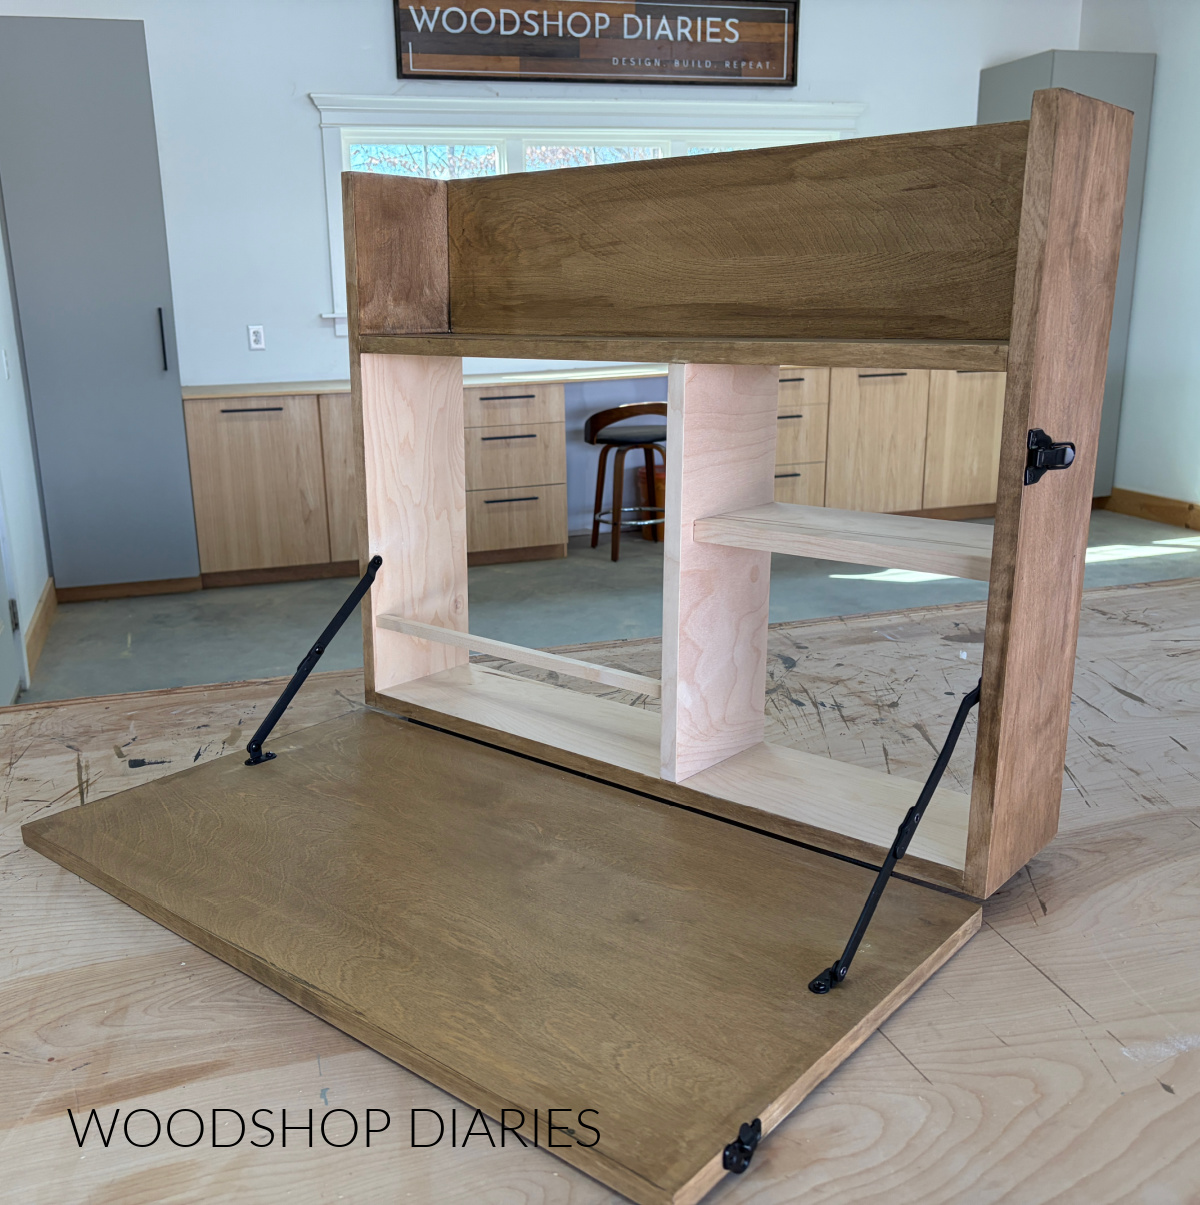
And to keep it securely closed, I added a simple chest latch on one side. That way, it doesn’t accidentally fall open.
Step 5: Hang Murphy Desk on Wall
Now this desk is ready to hang, so I measured up from the floor about 30″ and raised the frame so that the bottom was even with my mark.
Then, I secured it to the wall studs with screws through the back support. A level helps ensure it’s not crooked while being installed!
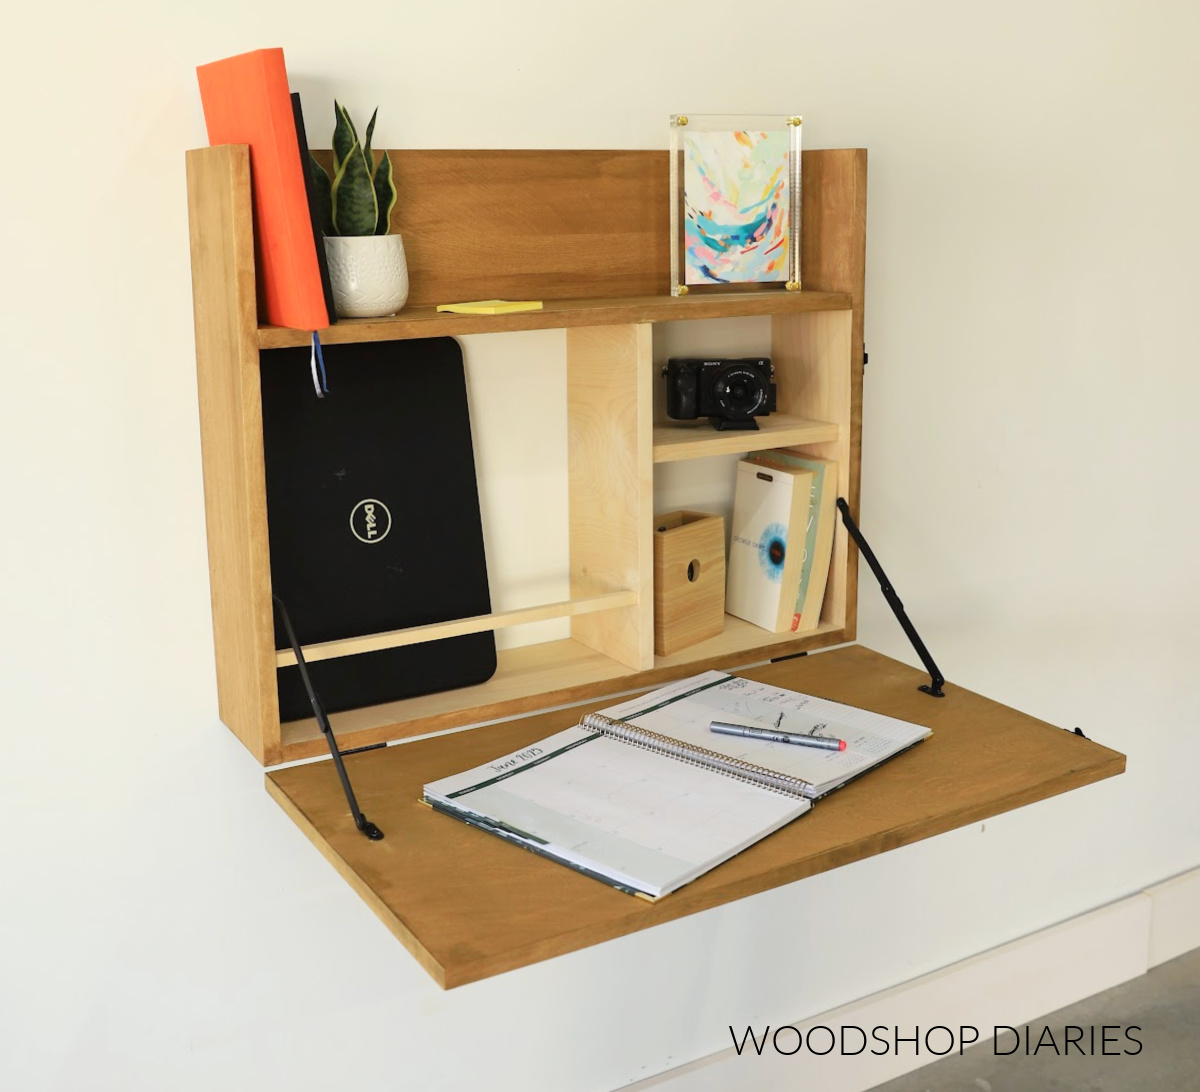
And with that, it’s ready to be put to work! The small shelves on the right are perfect for notebooks, pens, camera equipment, and other odds and ends.
The large section on the left is perfect for storing laptops, large notebooks, and binders.
If you’re ready to build your own, don’t forget to check out the printable plans available here.
Looking for more scrap plywood projects?
Enjoyed this scrap plywood project, but looking for more ideas? I got you! Click on the images below to check out these popular scrap wood projects:
If you’d like to save this project for later, don’t forget to pin it or share to your favorite social channel!
Until next time, happy building!