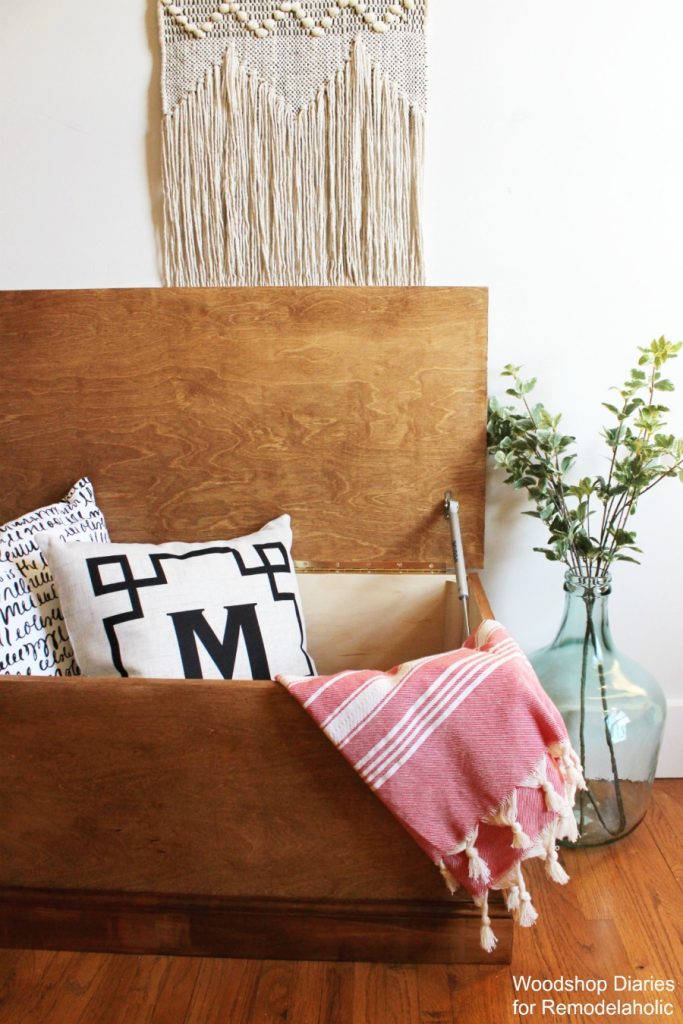
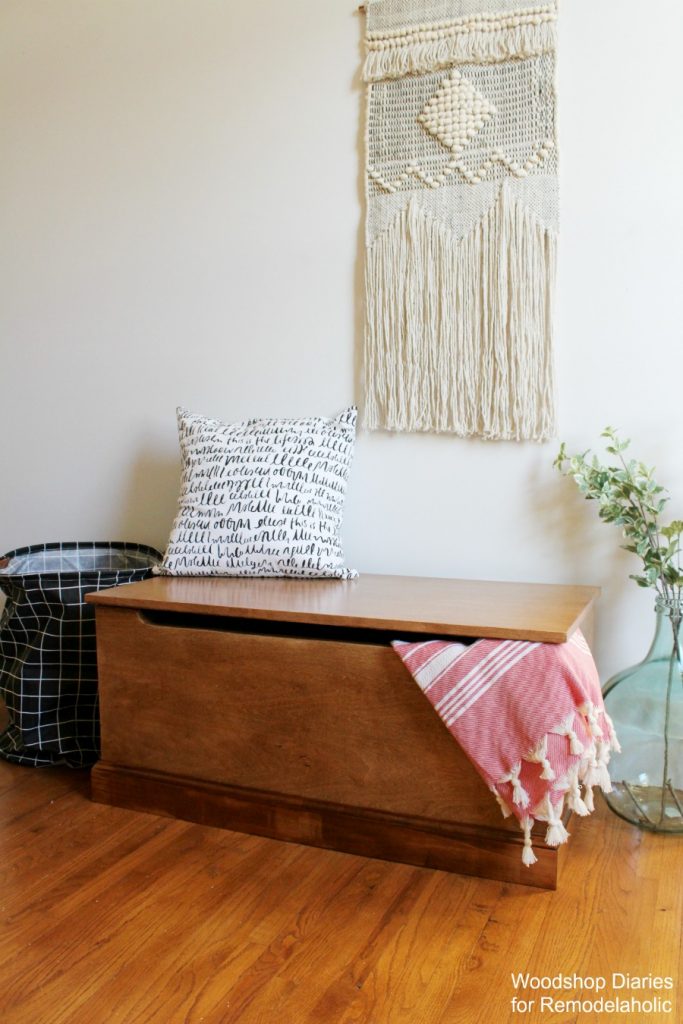
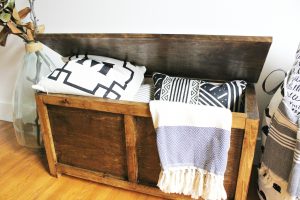
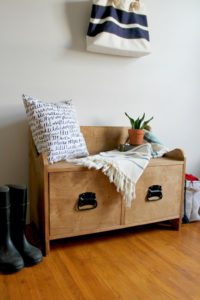
The older I get, the simpler I like things. This goes for food (especially when I’m cooking it haha), clothing, paperwork, and storage solutions. You can get “fancy” with large complicated storage solutions and systems, or you can build a simple, stylish box. Yeah, I’m going to go with the simple DIY storage trunk box idea 🙂
This post contains affiliate links. Please see disclosure policy for details.
.
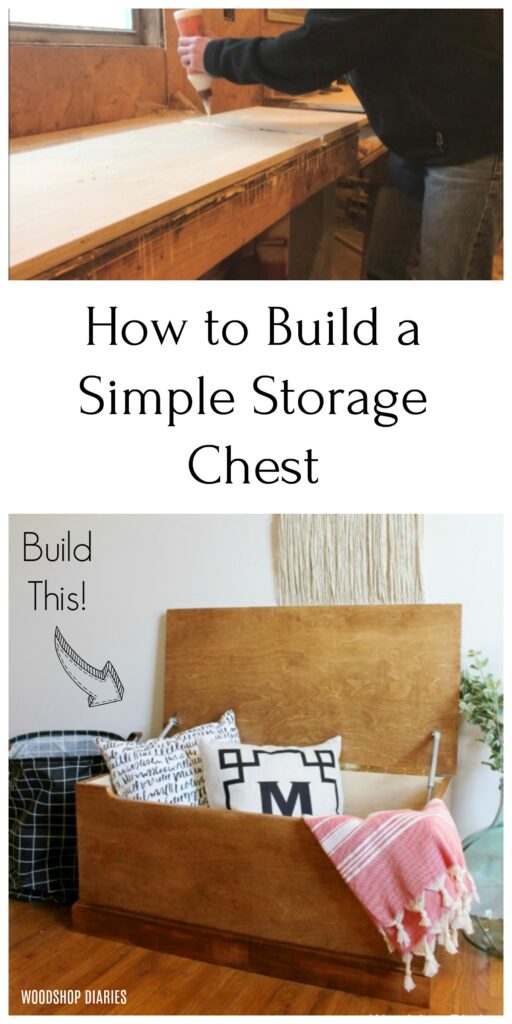
I’ve built a storage trunk in the past that was about this same size, but the design was a little more detailed. I really like the simplicity of this plywood box with mitered corners. And the added baseboard is just enough detail to make it pop 🙂
For this build, I mitered the corners of the plywood pieces to 45 degrees and glued together. But, to make it even simpler, you could totally just butt the pieces together and cover the edges with edge banding. I explain all the details in the plans below.
.
Tools and Materials:
- Circular Saw (and AccuCut saw guide–optional)
- Jig Saw
- Table Saw (optional)
- Band Clamp or Ratchet Straps
- Drill
- Nail Gun
- Miter Saw
- Iron to apply edge banding (optional)
- (1) Sheet ¾″ plywood
- (1) 2x2x8 (for inside corner supports)
- (1) 10′ stick of 3 ¼″ baseboard trim
- Glue On Edge Banding
- (1) 30″ piano hinge
- (1) pair soft closing lid hinges (optional)
- Wood Glue
- Brad Nails
- 1 ¼″ wood screws
Cut List:
- (2) ¾″ x 16″ x 34″ with 45 degree beveled ends (box front and back sides)
- (2) ¾″ x 16″ x 17″ with 45 degree beveled ends (box short sides)
- (1) ¾″ x 15 ½″ x 32 ½″ (box bottom)
- (1) ¾″ x 18″ x 36″ (box top)
- (4) 2×2 @ 14 ½″ (see step 7 below)
- Baseboard Trim cut to fit
Step 1: Cut DIY Storage Trunk Side Pieces
This box was made with mitered corners for a cleaner look. But, this makes this project a little more challenging. If you wish, feel free to not miter the corners and just join the boards by butting them together using wood screws or pocket holes. However if you choose to miter them like I did, you can do this with either a table saw, a circular saw, or miter saw (if you have a miter saw large enough, this would be the easiest option) by setting the blade tilt (bevel) to 45 degrees.
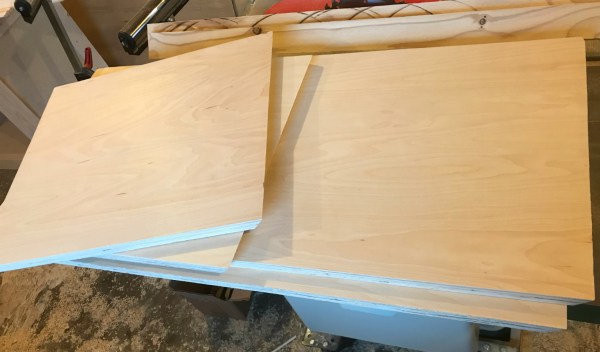
If you choose not to miter the corners, just cut the pieces to size without a miter. And also, if you don’t miter the corners, you need to adjust your short side pieces to be only 15 ½″ long instead of 17″.
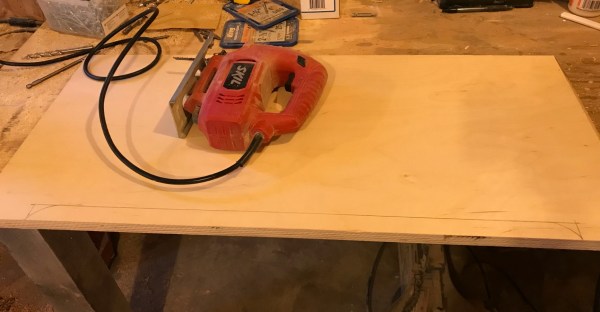
Step 2: Cut Front Side Finger Slot
Before assembling the pieces, I wanted a slot on the front along the top to help prevent smashed fingers. For this, I used a straight edge and marked out where I wanted my slot on the front side piece. I used a stain can to trace around for the rounded corners. Then, I carefully cut along the line with a jig saw.
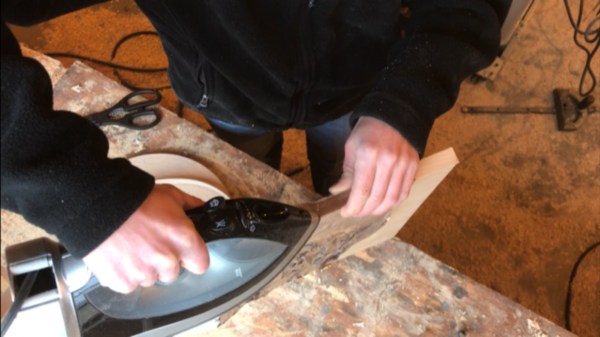
Step 3: Finish Edges of DIY Storage Trunk Pieces
One more step before putting the pieces together…this is optional, but gives the project a more finished look. I applied glue on edge banding to the top edges of the plywood box pieces using an iron before assembling the pieces together. I sometimes use tin foil between the iron and the edge banding to help keep glue from getting on my iron.
Step 4: Glue Together Storage Trunk Sides
Now, this is the hard part. It’s helpful to have some clamping jigs or an extra set of hands (so grab a friend!) for this. I laid out my side pieces with the miters facing up and applied wood glue in the grooves. If you’ve seen my tile top keepsake box project, this is a large scale version of that glue up process. NOTE: If you skipped the miters and chose to butt join instead, you can simply screw the pieces together using pocket holes for a much easier assembly process.
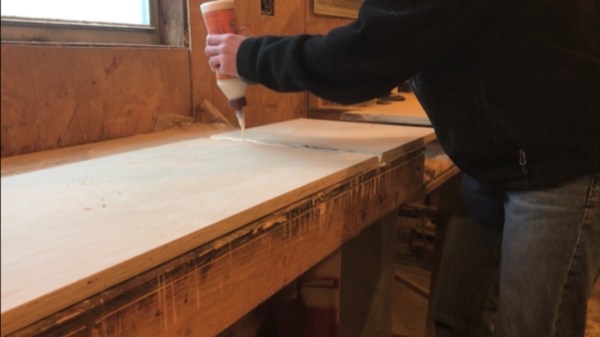
I carefully folded up each side and secured using a brad nail or two. You can also use painters tape, but since this glue up is so large, it might need more than just tape.
Once all the corners were glued together and nailed, I quickly moved onto the next steps before the glue dried.
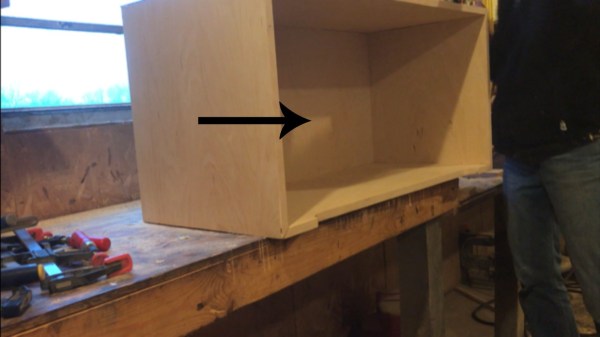
Step 5: Install the Bottom of DIY Storage Trunk
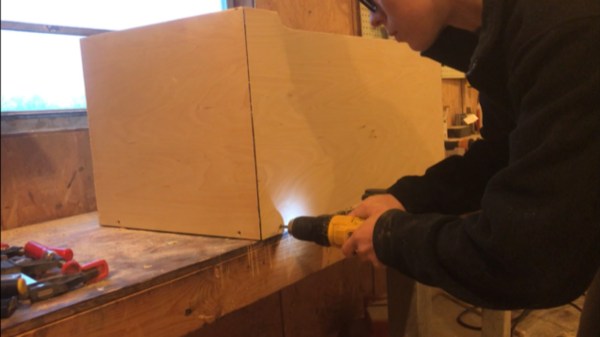
I cut the bottom of the storage trunk box and placed it into the bottom of the glued up box. Once it was flush along the bottom of the box, I used 1 ¼″ wood screws along the bottom of the sides to secure this piece in place. These screws will be covered later.
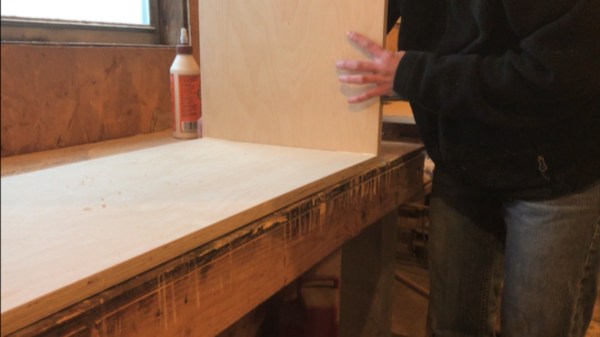
Step 6: Clamp Storage Box While Glue Dries
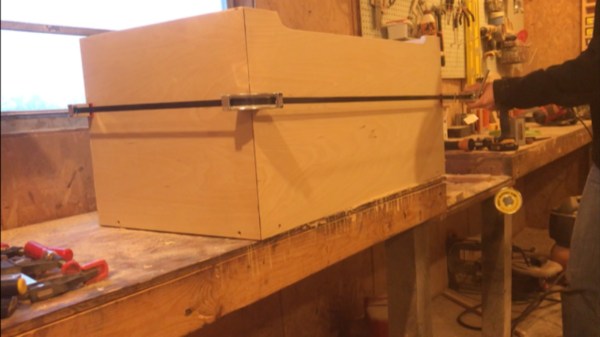
Now, my corners weren’t perfect so to help clamp everything together while the glue dries and pull my corners closer together, I used a band clamp (ratchet clamp works well, too) to wrap around the box. If you still have some gaps or the corners still aren’t perfect, you can fix that later.
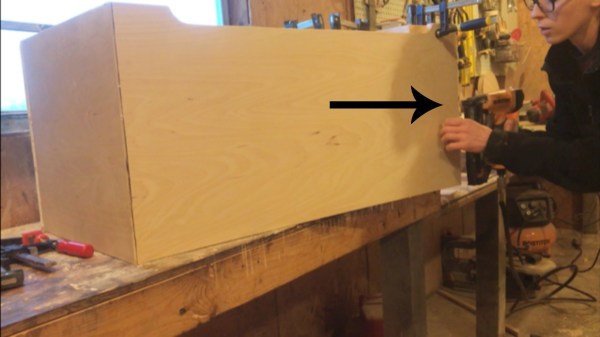
Step 7: Add Inside Braces to Storage Trunk
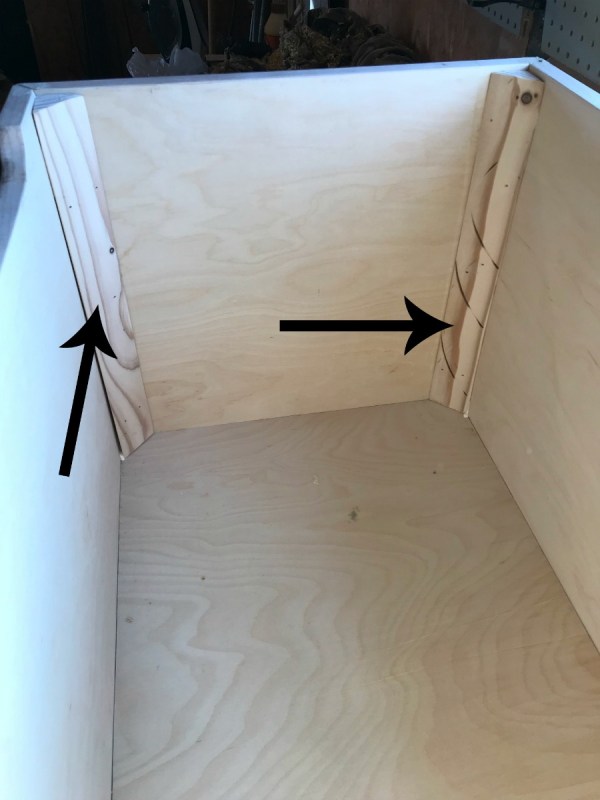
I added some scrap blocks to the inside corners for extra support once the glue had dried. To make these blocks, I cut a couple strips of a scrap 2x board with my blade tilted 45 degrees on my table saw. You could also do this with a circular saw, or simply use some 2×2 blocks. This just gives the corners a little extra holding support. I glued and nailed (or you could screw if you wish) these blocks into each corner.
Step 8: Add Base Board Around Bottom of Box
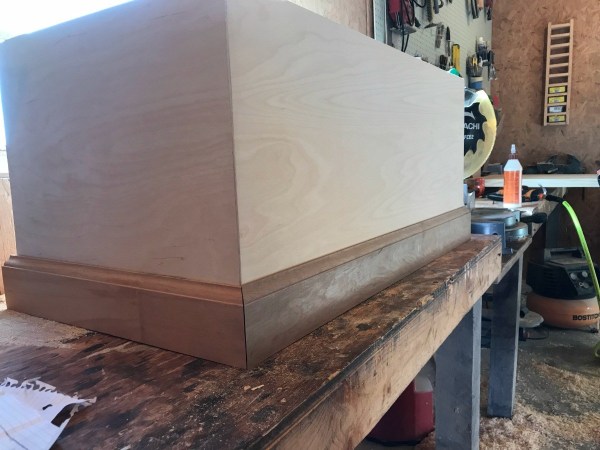
I cut to fit the baseboard trim along the bottom of the box and mitered the corners at 45 degrees so they line up nicely at the corners. I simply glued and nailed each piece in place and worked my way around all the sides.
Step 9: Add the Top and Finish
Now that the box was complete, I cut the top according to the cut list and applied edge banding on the sides for a cleaner look.
.
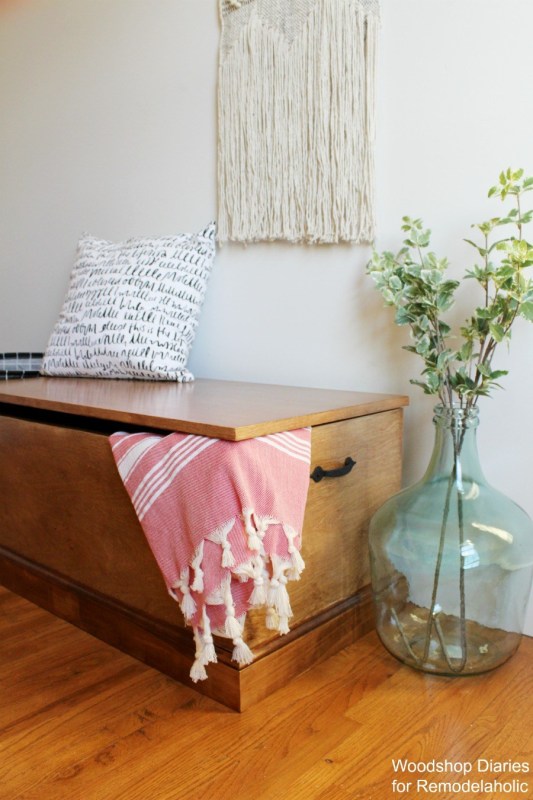
It’s easier to go ahead and finish the box before attaching the top. So, because mitered corners are really hard to get perfect, I puttied the corners of the box and the trim and also all the nail holes. Once it was dry, I give it a good sanding and stained the box and the top with Minwax Early American wood stain and sealed it with a couple coats of Minwax Polycrylic.
.
Then, I attached the top using a 30″ piano hinge making sure to leave equal overhang on both the left and right side. I found it easiest to attach the hinge to the top first, then attach that to the box. As an optional step, you can also add some soft close hinge supports to the sides if you wish. And that’s it! You have a pretty new storage chest!
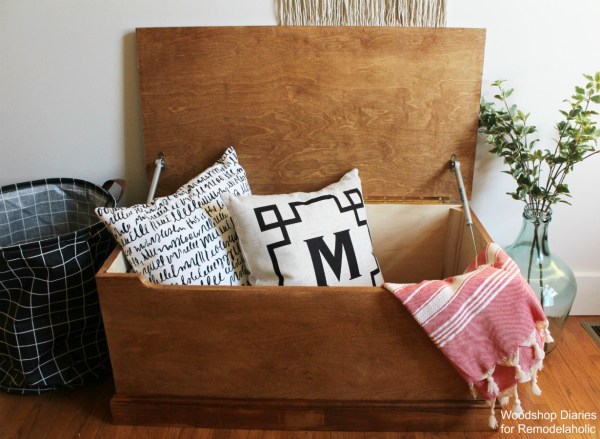
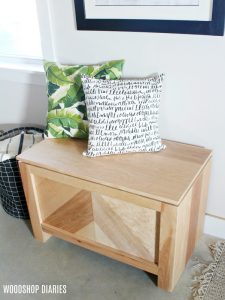
It’s a really simple design that is great for end of the bed storage, toy storage, or even a coffee table or entryway storage bench. It’s nothing fancy, but perfect for simple storage without all the bells and whistles. Sometimes a box works just fine 🙂 Plus, you can build the whole thing from a single sheet of plywood!
.
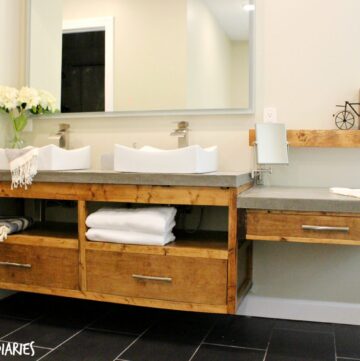
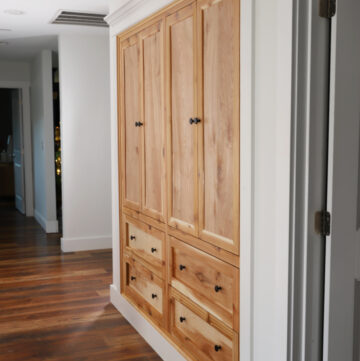
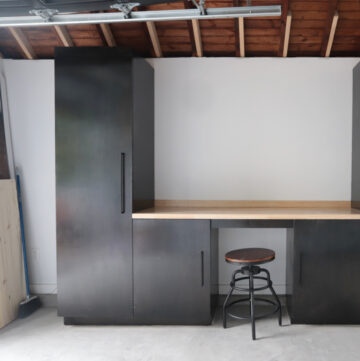
Speaking of other simple storage solutions, be sure to check out these other DIY storage ideas:

![]()
So whatever your preference, there’s plenty of storage options. Get out there and get building your favorite…Right after pinning this for later 🙂
 .
.
Until next time, happy building 🙂