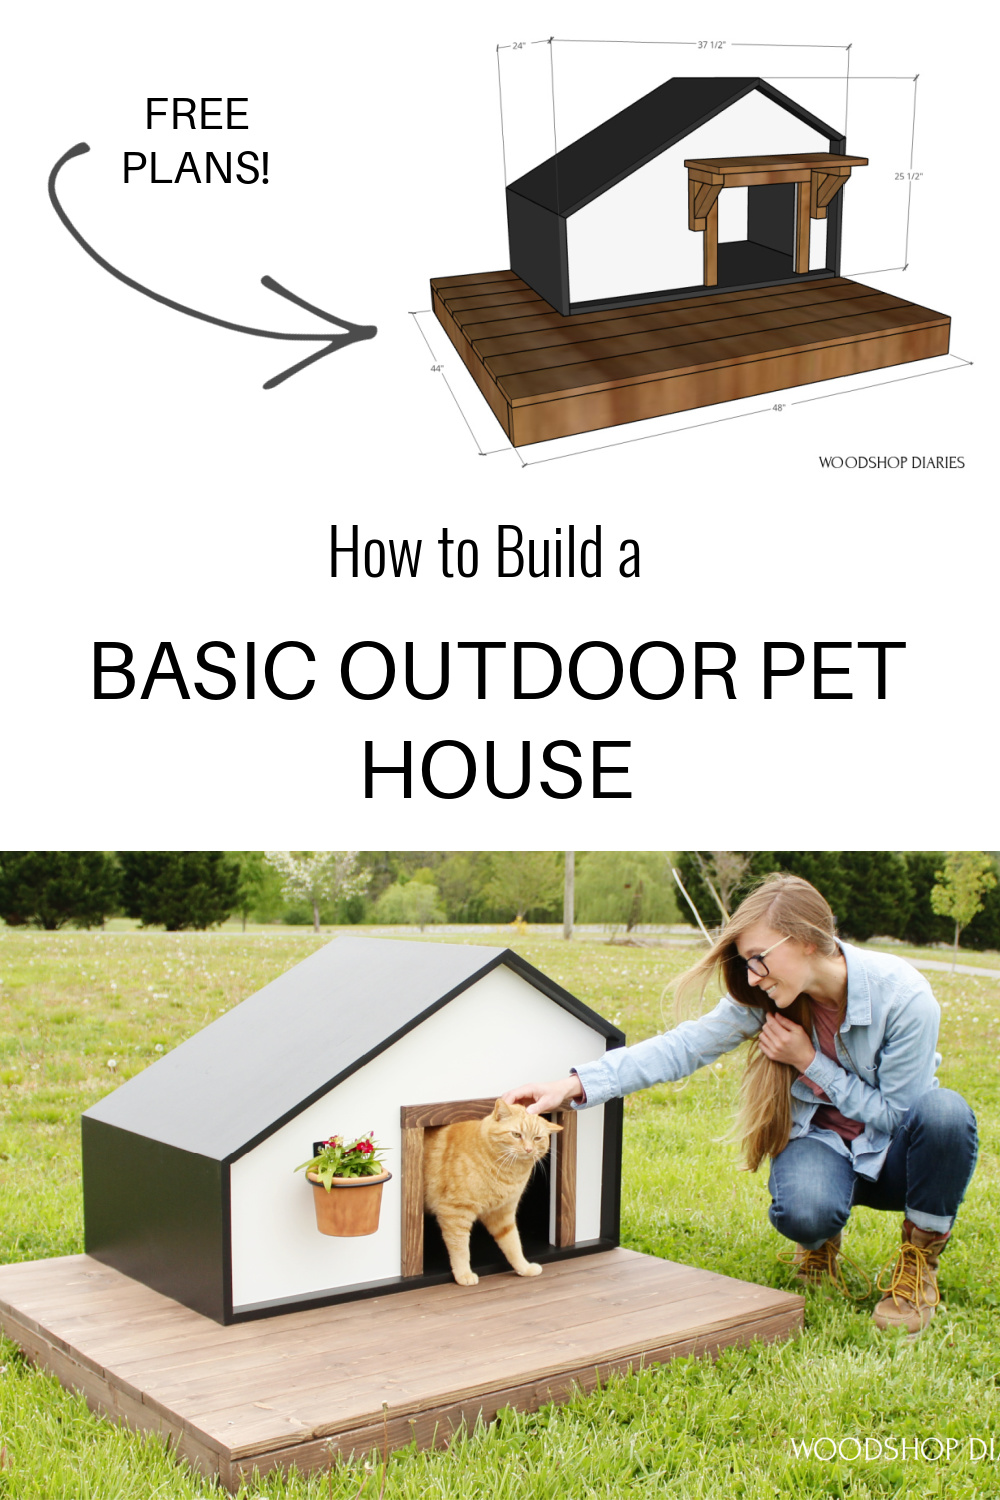
In this post, I’m sharing this easy to build DIY outdoor pet house you can make with just a few basic tools!
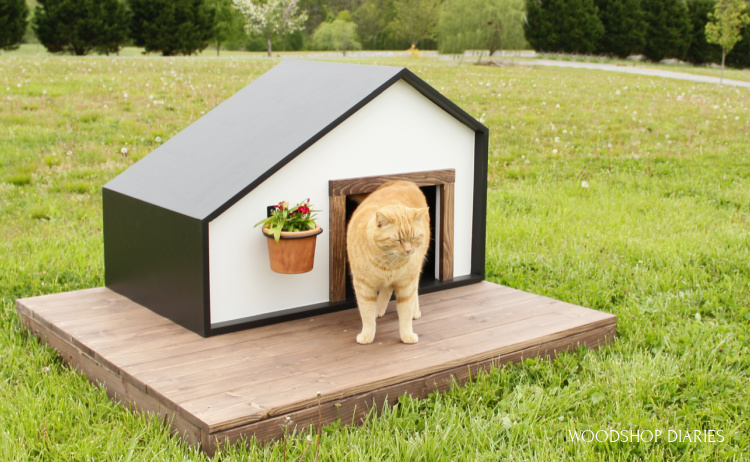
A few years ago I built my favorite shop dog, Lucy, an outdoor dog house.
.
But as things often happen, she quickly became an inside dog and the outside cats ended up taking it over. It’s been in pretty rough shape for the last year and it was really too big for the cats anyway.
.
So I decided to replace it with slightly smaller house to better fit them, and use the opportunity to play around with a new design. This house would also fit a medium sized dog and could be easily modified for larger or smaller pets as needed.
.
I’m sharing the building plans below and the video here:
This post contains affiliate links. See policies for details.
For this DIY Outdoor Pet House, You Will Need:
Materials:
- (1) sheet ¾″ plywood
- (3) 2x4x8 boards
- (4) 1x6x8 boards
- 1 ¼″ exterior wood screws
- 2 ½″ exterior wood screws
- Exterior Wood Glue
- 1×2 for door trim (optional)
- DAP Platinum Patch Exterior Filler
- DAP Extreme Stretch Caulk
- Exterior Grade Paint/Stain
Tools:
- Circular Saw & straight edge/cutting guide
- Jig Saw
- Miter Saw (optional–can use circ saw for all cuts if needed)
- Drill/Driver
- Nail Gun (optional)
- Measuring Tape
- Speed Square
NOTES BEFORE BUILDING:
You can use treated/exterior grade lumber for this project if you’d like. I used untreated lumber and was careful to cover all surfaces with an exterior finish to protect it. That should help it to last several years.
.
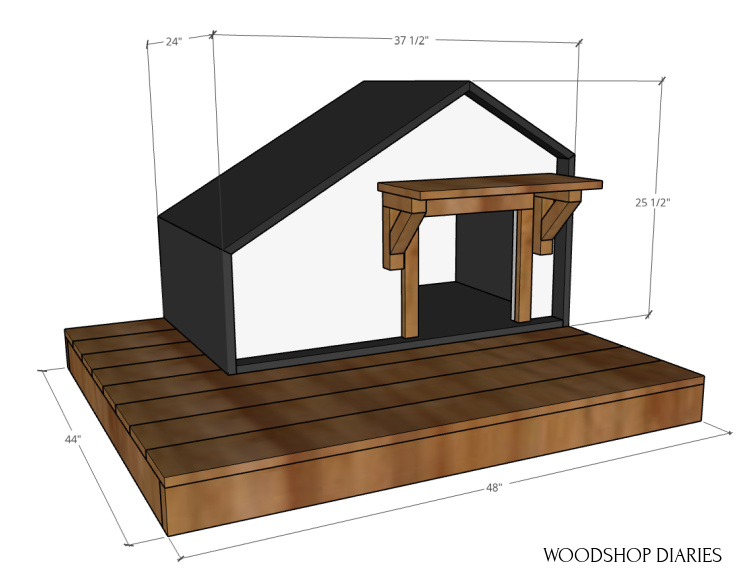
The deck on this project is optional and you can easily adjust sizes as needed. This house should fit a small-medium sized dog and most cats.
.
Before you get started, you may find this plywood cutting guide helpful in making some of your cuts.
Overall DIY Outdoor Pet House Dimensions:
Step 1: Cut Plywood Sheet into House Parts
I built the main pet house body from a single sheet of ¾” plywood.
.
I’ve provided a plywood cut diagram here. Read carefully and watch the video…this gets a little hairy, but it’s not difficult:
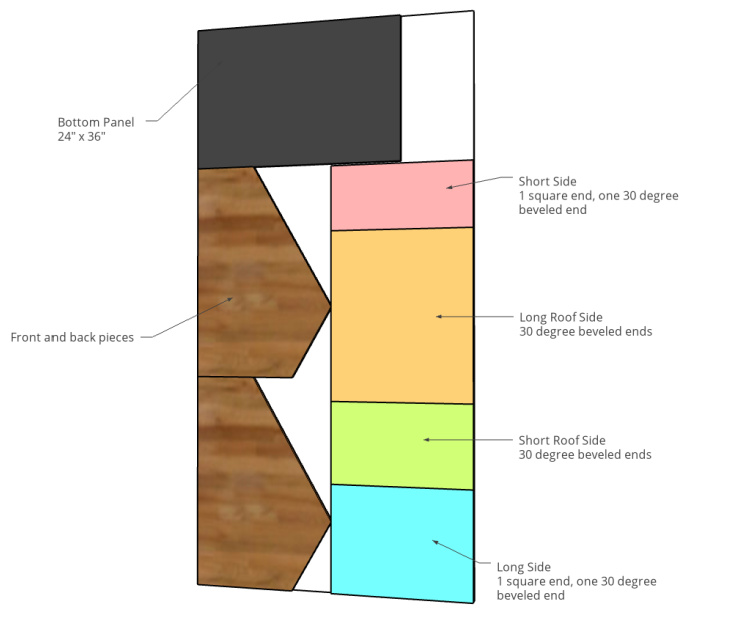
I first set my Kreg rip cut up for a 24” wide cut and ripped a piece off the end of the plywood sheet (See in the diagram above–that piece on the top?? That’s this piece).
.
I’ll cut this down to use as the bottom later, but for now, I set it to the side and ripped another strip 24” wide off the remaining sheet (see the multicolor pieces on the right side of the diagram??).
.
This piece will be the sides and top of the house, so I set it aside with the bottom for now.
.
Cut Front and Back Panels
From the remaining plywood, I began to cut down the front and back sides of the house (see the pieces on the left side of the diagram above??).
.
I made these 36” wide, so I cut two 36” long pieces first, then started to draw out the roofline on the first piece.
.
I wanted the roofline to be off center to give it a more contemporary look, so I measured 12” from one edge and made a mark—this will be the roof peak. Don’t freak out with all these numbers…just get them close, and you can cut to fit your sides to fit in the next part 🙂
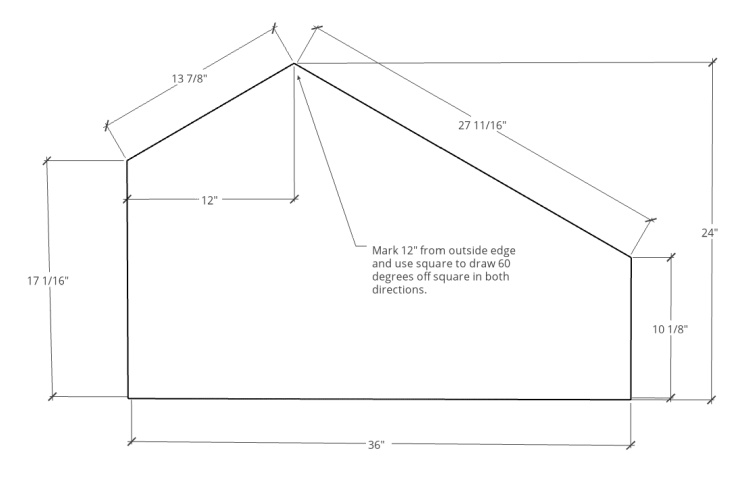
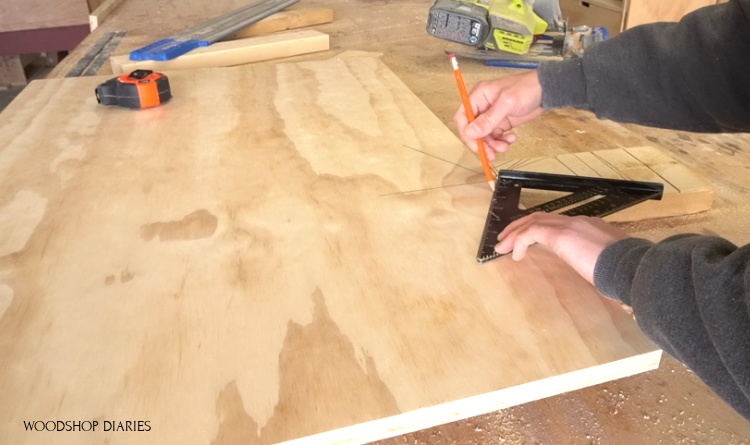
Then, I used my speed square to draw lines 60 degrees off square so the roof peak is 120 degrees. I used a straight edge to extend these lines, then used my Kreg AccuCut and circular saw to cut along these lines. Check out the video to see it all in action.
.
You could also clamp a straight edge here to make these cuts.
Once I had one cut down, I traced it onto the other to make two identical pieces for the front and back.
.
Cut Sides and Bottom of Pet House
Now, I pulled out the 24” wide strips I ripped off the plywood sheet at the beginning to start cutting the sides, top and bottom.
.
I started with the longer strip to cut down the sides and top first.
.
Now, most likely, even though you tried to be as accurate and careful as possible, between the measuring and the cutting, your front and back pieces will not be EXACTLY like what the plans say above. THAT IS OKAY!!!
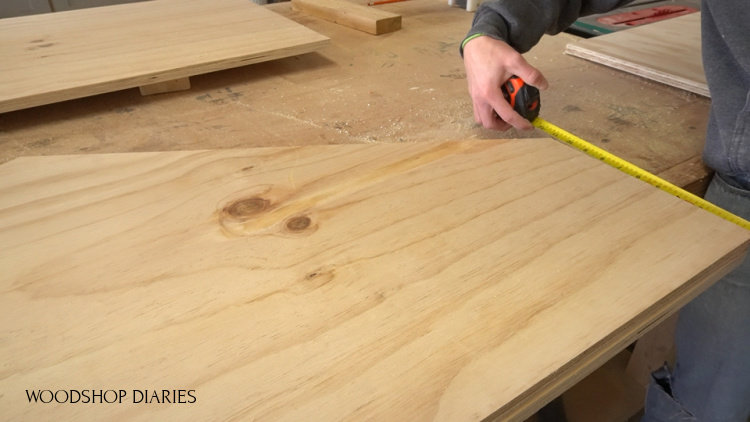
The front/back panel diagram above is a great guide, but I found it much more accurate to measure each side exactly before cutting–your pieces may be off ⅛″ or so from what’s shown above.
.
So I started with one side and worked my way around cutting to fit the pieces as I went. The left and right sides of the house will overlap the bottom, so for these pieces, I measured the length of the side and added ¾”.
.
The cuts need to be beveled 30 degrees around the roof for the pieces to fit tight. So I adjusted my circular saw’s bevel to 30 degrees to make these cuts.
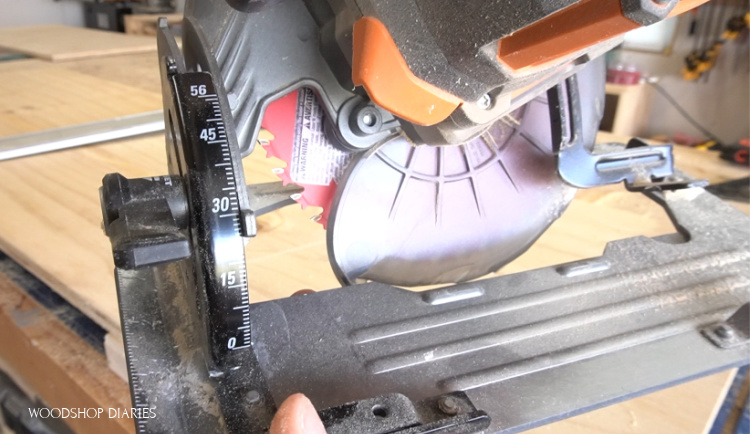
On this first side piece, the bottom edge will be square, and the top is beveled. So I measured off the square end and set my straight edge up so that the SHORT side of the bevel is the side measurement plus the ¾”.
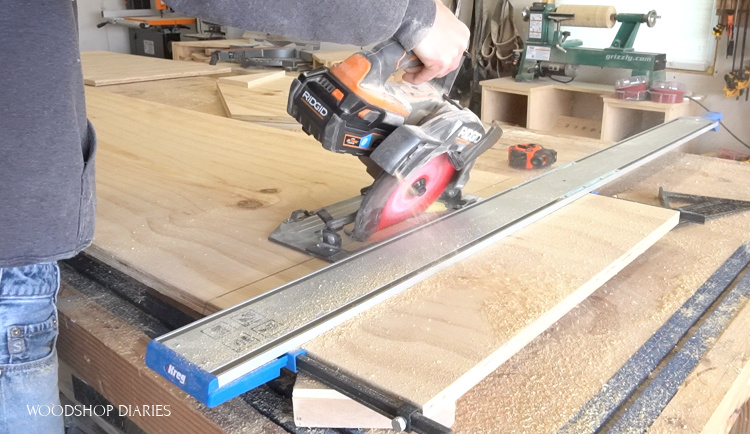
This piece should fit the side and hang off the bottom about ¾” so it can overlap the bottom panel when assembled.
.
I repeated measuring and cutting each side the same way making sure to bevel the edges the right direction.

Now since I already beveled this plywood edge 30 degrees with my first cut, I just flipped it over, measured off the short end, and made another 30 degree cut the same way. You should only have to make 4 cuts total (shown above). See video for more information.
.
I test fit each piece after cutting, and when I got to the last piece, I cut it just like the other side so that the bottom edge was square, the top was beveled 30 degrees, and it overhung the bottom edge by about ¾”.
.
And finally, I cut the bottom piece 24″ x 36″ to fit with square edges.
Step 2: Cut Out Door Opening
You can make this door any size you want or need.
.
But I used a scrap piece of plywood to trace out an opening I thought was a good size—it ended up being about 11” tall and 14” wide.
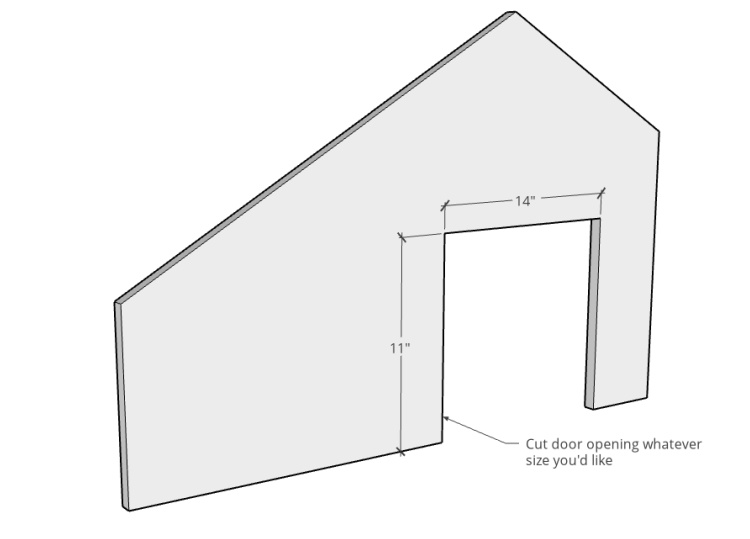
I just cut this out with a jig saw.
Step 3: Prep and Finish Pet House Pieces
Since I was painting these pieces two different colors, I went ahead and finished them before attaching anything. Honestly, this would have been SO much easier if I had just painted the whole thing one color…but that’s no fun, so I made things more difficult and went two-tone haha.
.
Now, because I was using some lower quality plywood, there were some voids to cover on the edges. To help better seal this wood, I used DAP Platinum Patch for exterior use on the plywood edges and in any knots or voids in the wood.
.
I applied it on all the plywood edges on the outside pieces and let it dry well.
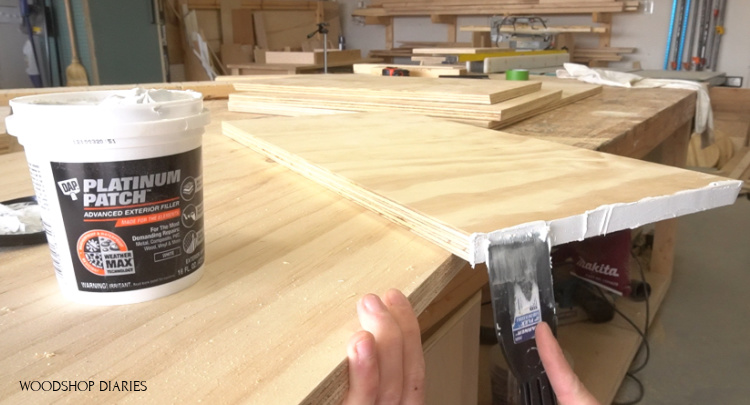
After the putty was dry on the edges, I sanded it smooth and began priming and painting the outside pieces black and the front and back pieces white.
RELATED: How to Paint/Stain Raw Wood
.
I gave them each several coats and once they were dry, I could finally screw them together.
Step 4: Assemble DIY Pet House
I started by attaching the back panel to the bottom panel using 1 ¼″ exterior grade wood screws so that the back was inset about 1 ¾”. I just picked 1 ¾″–you could attach them flush or further in or whatever you wanted.
.
Then, I did the same with the front panel.
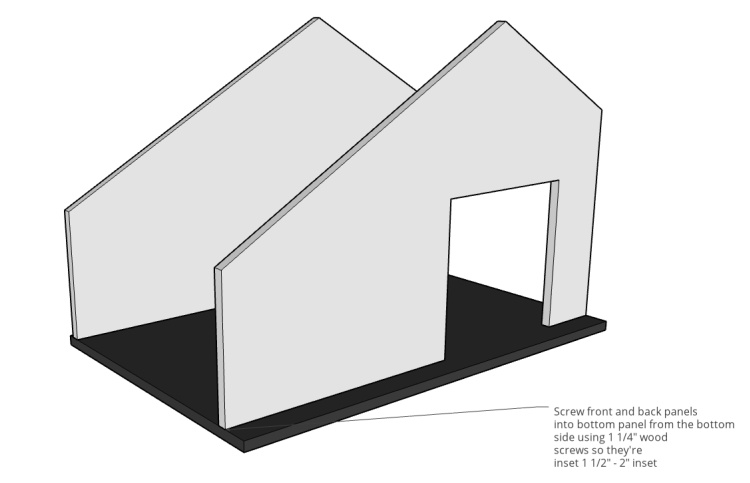
Once the back and front panels were attached to the bottom, I just wrapped the sides and top around them and screwed them in place.
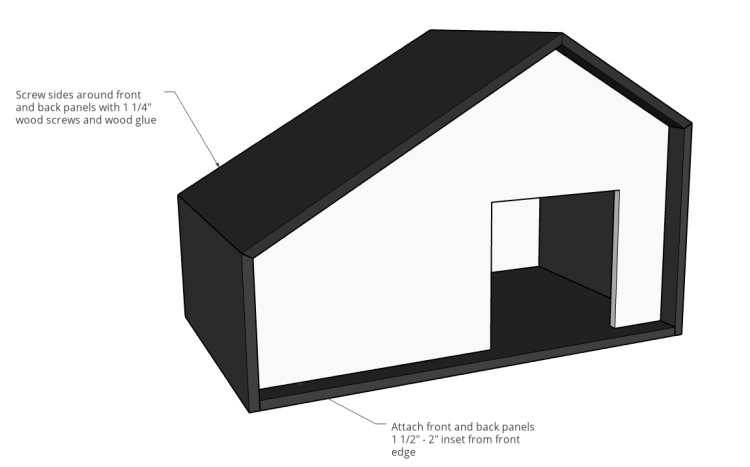
I used some exterior grade wood glue at the angled joints and made sure the front and back panels stayed inset 1 ¾’” from the edges.
Step 5: Seal and Caulk Outdoor Pet House
The pieces fit together really well, and the glue should hold the seams tight, but to cover and seal off any gaps—and also to smooth things out, I used some more DAP platinum patch to cover the screw heads and the seams.
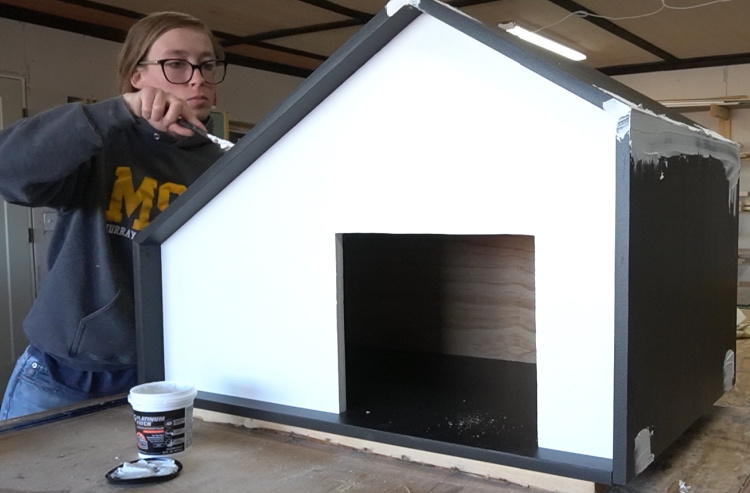
And then, to seal off and help waterproof the rest of the house, I used DAP extreme stretch caulk to fill in all the joints around the front and the back panel.
.
This should just help seal off everything from rain, wind, etc.
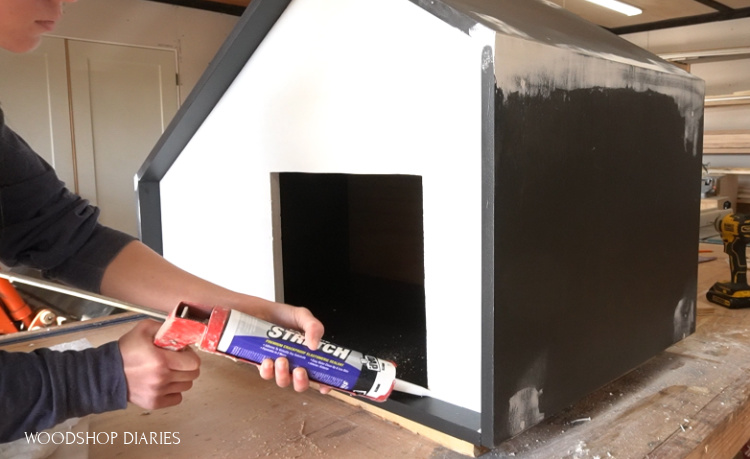
After the caulk dried and I gave the house a final sanding, I touched up the paint and began working on the deck.
Step 6: Assemble Optional Deck
Now, the deck is a totally optional step. I added it on my old dog house and I liked it, so I added it again here.
.
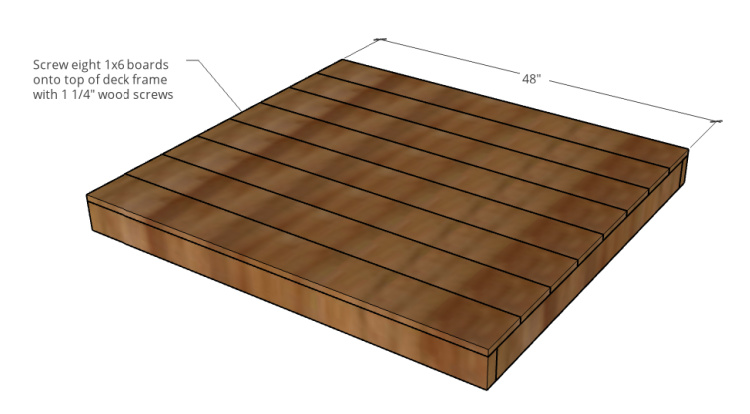
To build it, I used 2x4s for the frame and 1x6s for the decking. I cut down my 2x4s to (2) 48″ long pieces and (3) 41″ long pieces. Then, I cut my 1x6x8 boards in half into (8) 48” long pieces.
.
Before assembling, I stained everything with an exterior stain and sealant so that I could cover all the edges.
.
Then, I assembled the frame using 2 ½” wood screws like shown below.
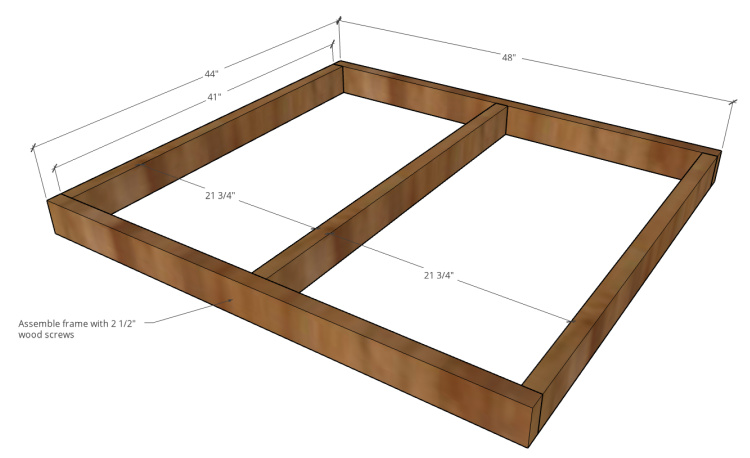
And once the deck frame was together, I screwed in the decking.
Then, I set the house on the back corner of the deck and used a few screws through the bottom of the house to screw it in. This was a really tight squeeze, so it might be better to flip it on the back and screw it in place from the bottom side.
Step 7: Trim Front Door & Add Decorative Details
All that’s left is the trim and decorative details. I cut some scrap 1x2s to fit around the door opening, stained them with an outdoor stain and sealant, then nailed them in place.
.
I had intentions of adding an awning here above the door, but I didn’t really have scraps long enough for what I needed for that, so I decided against it.
.
Lastly, just for a little decorative detail, I attached a flower pot hanger and added a pop of color to the black and white house and called it complete.
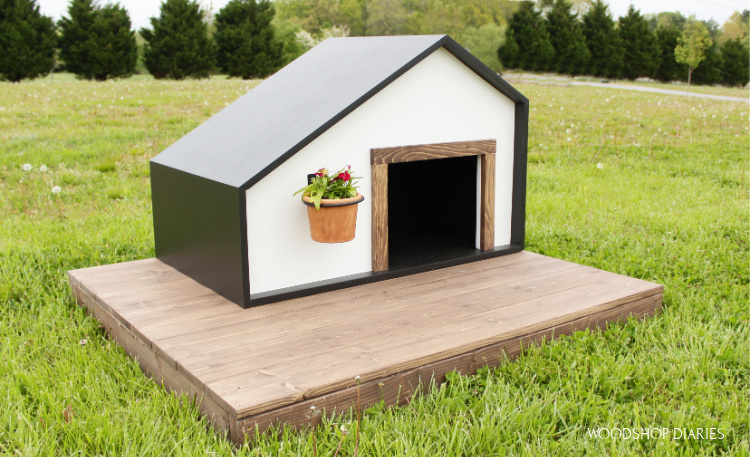
I’m really happy with the result here and excited to trash the old dog house and give the cats a fresh, new hangout.
.
I think they’ll appreciate the modern design haha.
.
If you’d like to build one for yourself, be sure to check out the video above for more information. And if you enjoyed the project and can’t want to see more, be sure to subscribe to the newsletter to stay up to date on all the latest builds.
If you want to save this DIY outdoor pet house project for later, don’t forget to pin it and share it on your favorite social channel!
Until next time, happy building 😊


