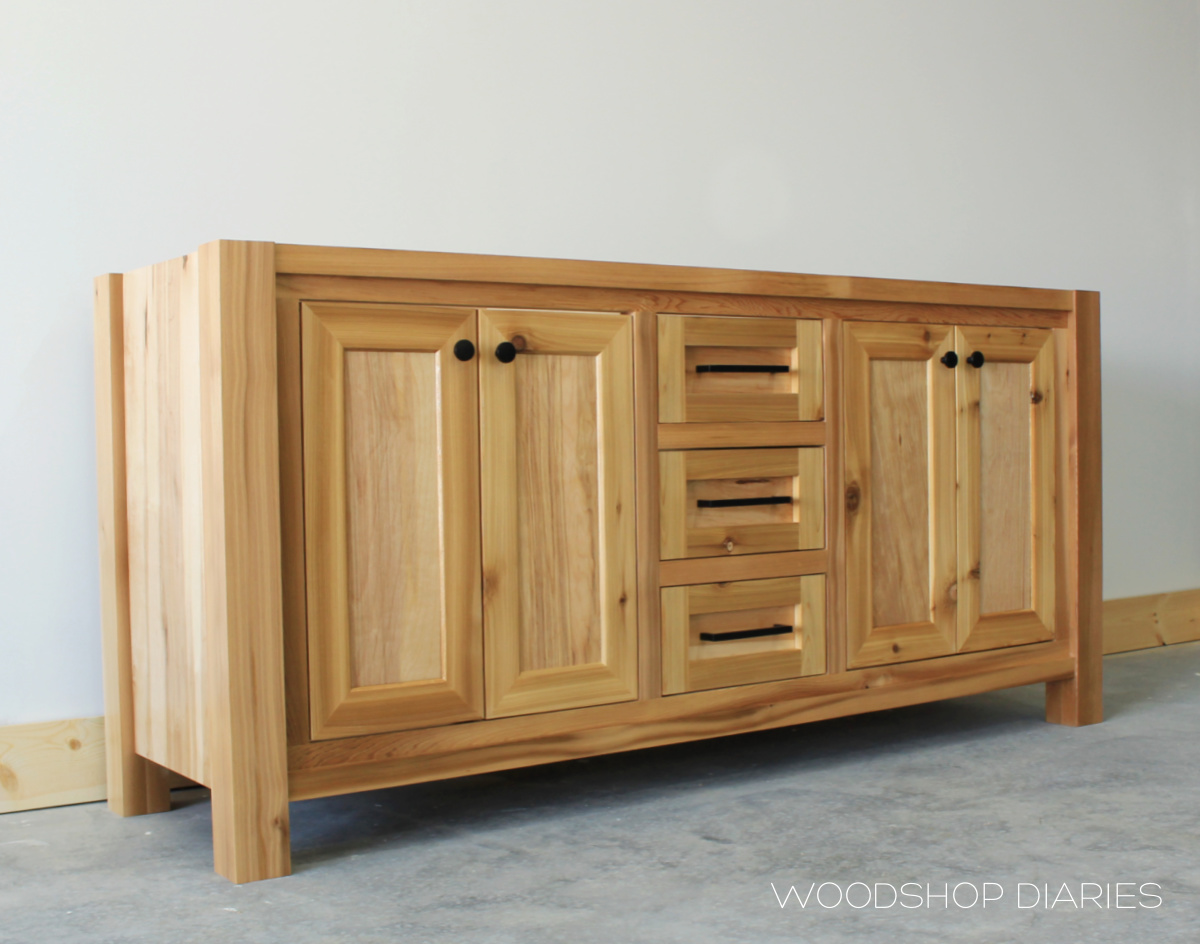
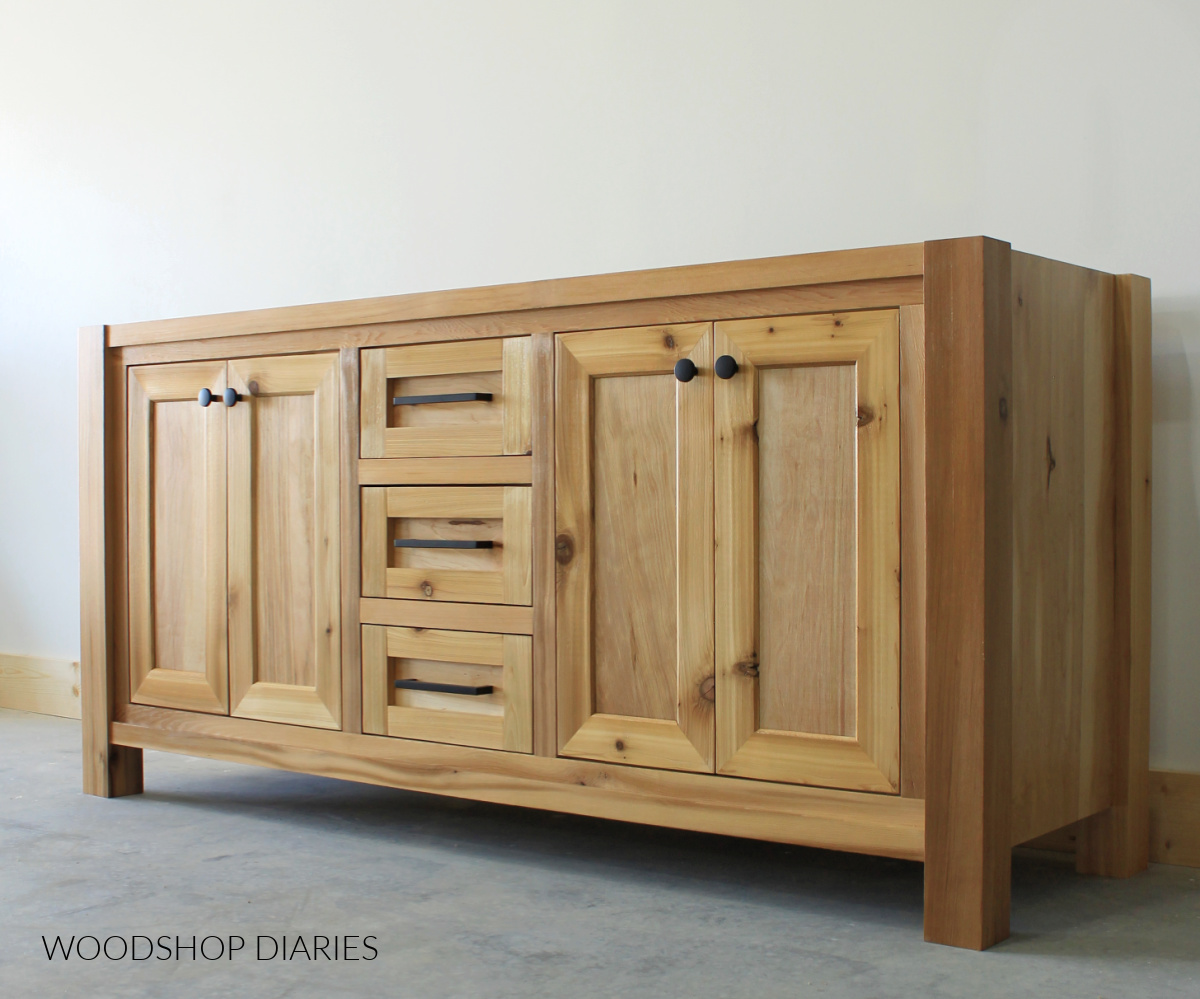
In this post, I’m sharing DIY bathroom vanity plans for this beauty with room for double sinks!
I’m about to tackle a bathroom remodel (AGAIN!) and before I started tearing into anything, I wanted to make sure I had something to replace it with, so I kicked off the remodel project by building the vanity.
.
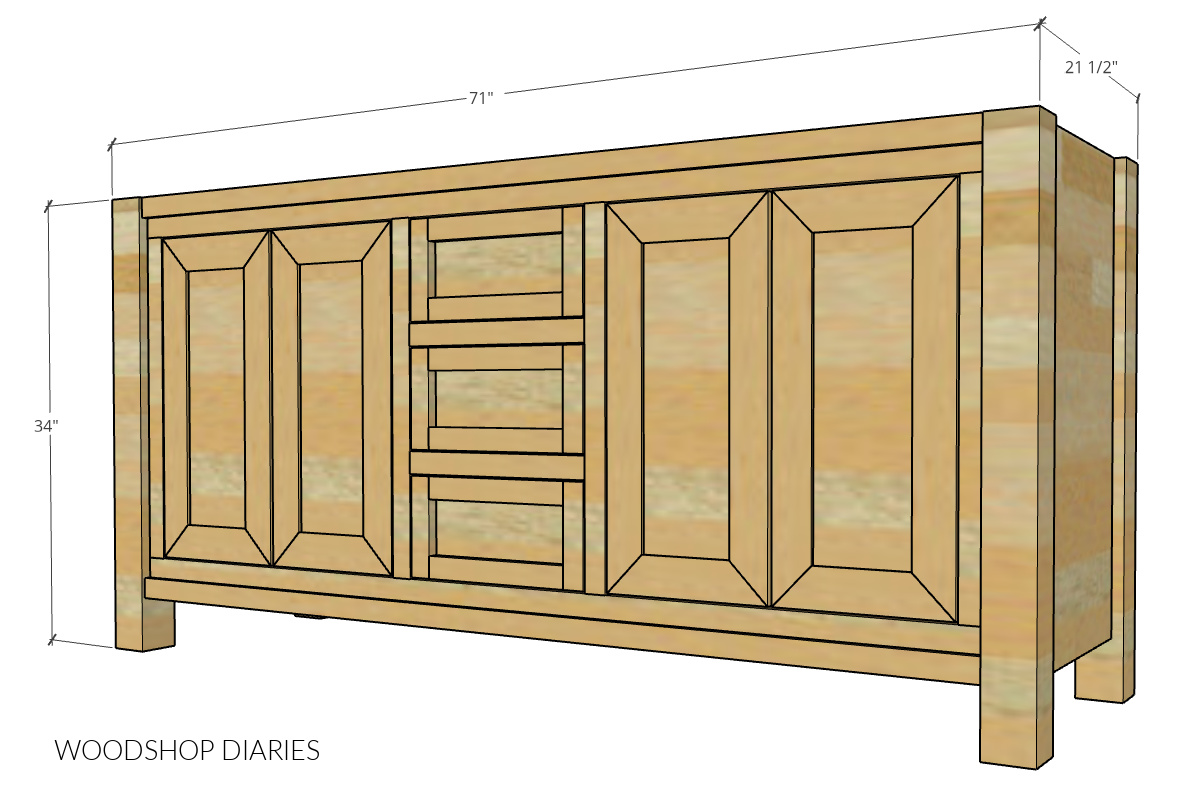
I designed this vanity to replace our existing one and to have space for two sinks plus some drawer storage in the middle.
.
I’m still waiting for the granite top to be cut for it, so please ignore the fact that right now, it’s….topless, HA! #awkward
.
This was a really fun build that I’m excited to share, and I’ve included several helpful tips in the video, so I’d encourage you to give it a watch! After that, I’ve got the DIY bathroom vanity plans, dimensions, and project details to build your own below.
*This post contains affiliate links. See policies page.
Tools & Materials:
Tools:
Materials:
- (1) sheet ¾″ plywood (birch used here)
- (½) sheet ¼″ plywood (birch used here)
- (7) 2x4x8 boards (cedar used here)
- (3) 1x6x8 tongue and groove boards (cedar used here)
- (1) ¾″ x ¾″ x 8′ square dowel (or can cut your own from scraps)
- (3) pair 16″ drawer slides
- (4) pair inset concealed hinges for frameless cabinets
- 1 ¼″ pocket hole screws
- 2 ½″ pocket hole screws
- 2″ wood screws
- ⅝″ wood screws (for installing drawer slides)
- ⅜″ x 1 ½″ wood dowels (for assembling doors)
- Wood Glue
- Knobs
- Handles
Some Notes About this Bathroom Vanity Build:
Lumber Type/Sizes:
This project was built using cedar 2x4s, cedar 1×6 tongue and groove boards, and birch plywood. You’re welcome to use whatever type of lumber you prefer for this build.
.
I made my own 2x2s from 2x4s. This cuts down on material waste, but if you prefer to buy precut 2x2s, you certainly can.
RELATED: Check out this post on how to cut your own 2x2s from 2x4s
A “Cheat” To Making Cabinet Doors:
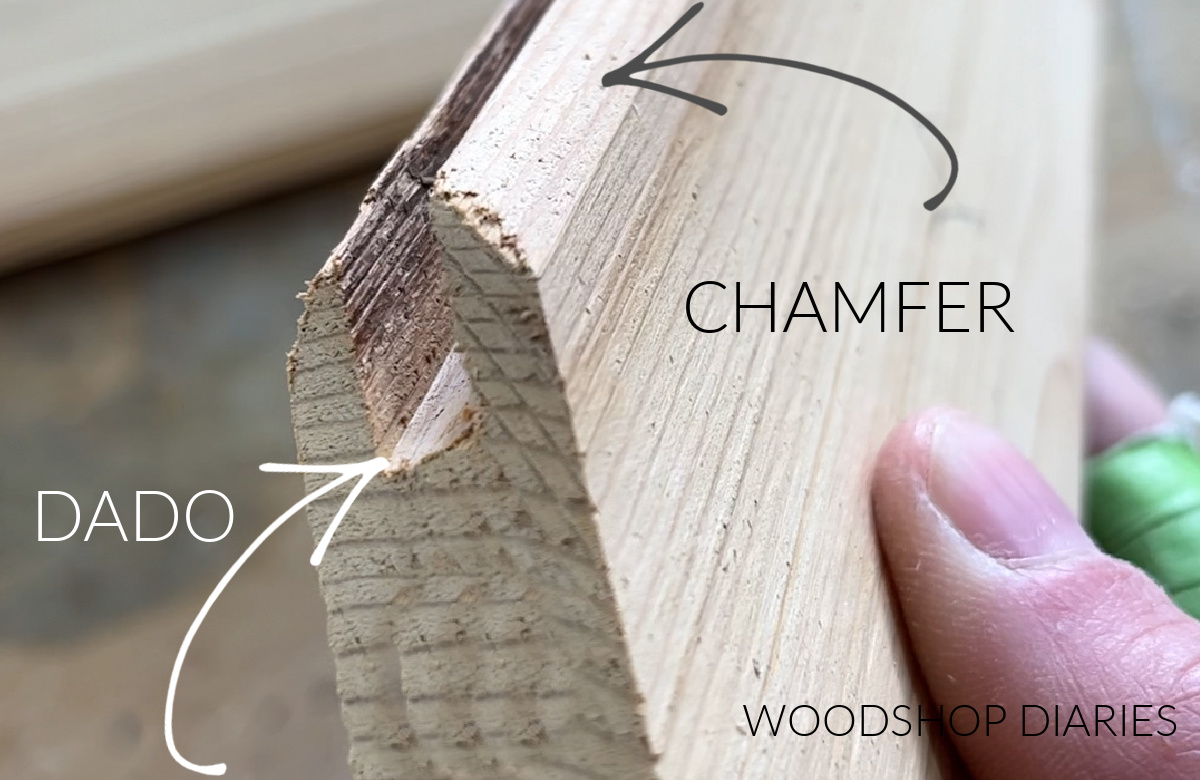
I made the doors using 1×6 tongue and groove lumber as it already had a ¼″ dado cut down the middle.
.
Be sure to check your tongue and groove lumber before buying to make sure the tongue is at least ¼″ wide and ¼″ deep. OR you can cut your own dadoes on the table saw or router if you prefer.
.
This 60 second video shows a quick overview on how I made these doors using tongue and groove material.
.
But, if you don’t like that method, I have a guide for how to build these same style doors without using T&G lumber here.
Bathroom Vanity Top Options:
It is recommended to have your vanity top custom cut to fit this design or to build your own from wood, concrete, etc.
.
Many local granite shops can custom cut a vanity top from a leftover piece of granite for a reasonable price. That’s what we are doing here.
.
However, this design was made to accommodate a top 22″ deep and 72″ wide–which is a common size.
.
You can find many options for precut tops this size from the big box stores. If you go that route, just make sure to check the measurements of the top you intend to use AND MAKE SURE IT WILL WORK WITH THIS BEFORE YOU BUILD IT.
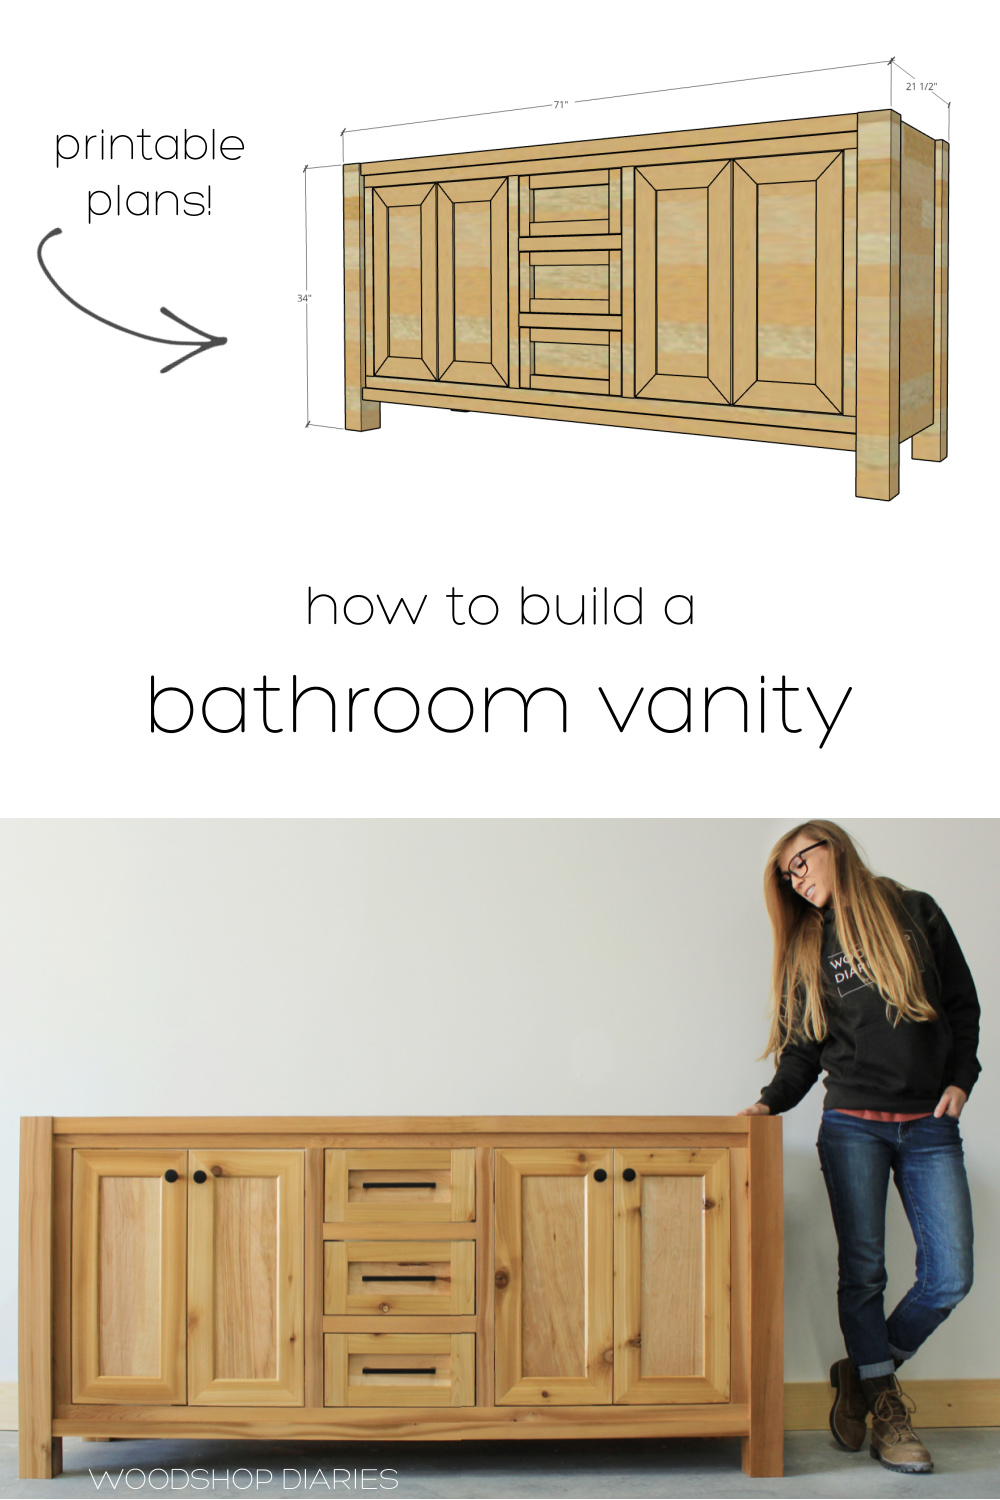
Overall Size:
The overall size of this vanity is 21 ½″ deep, 34″ tall, and 71″ wide.
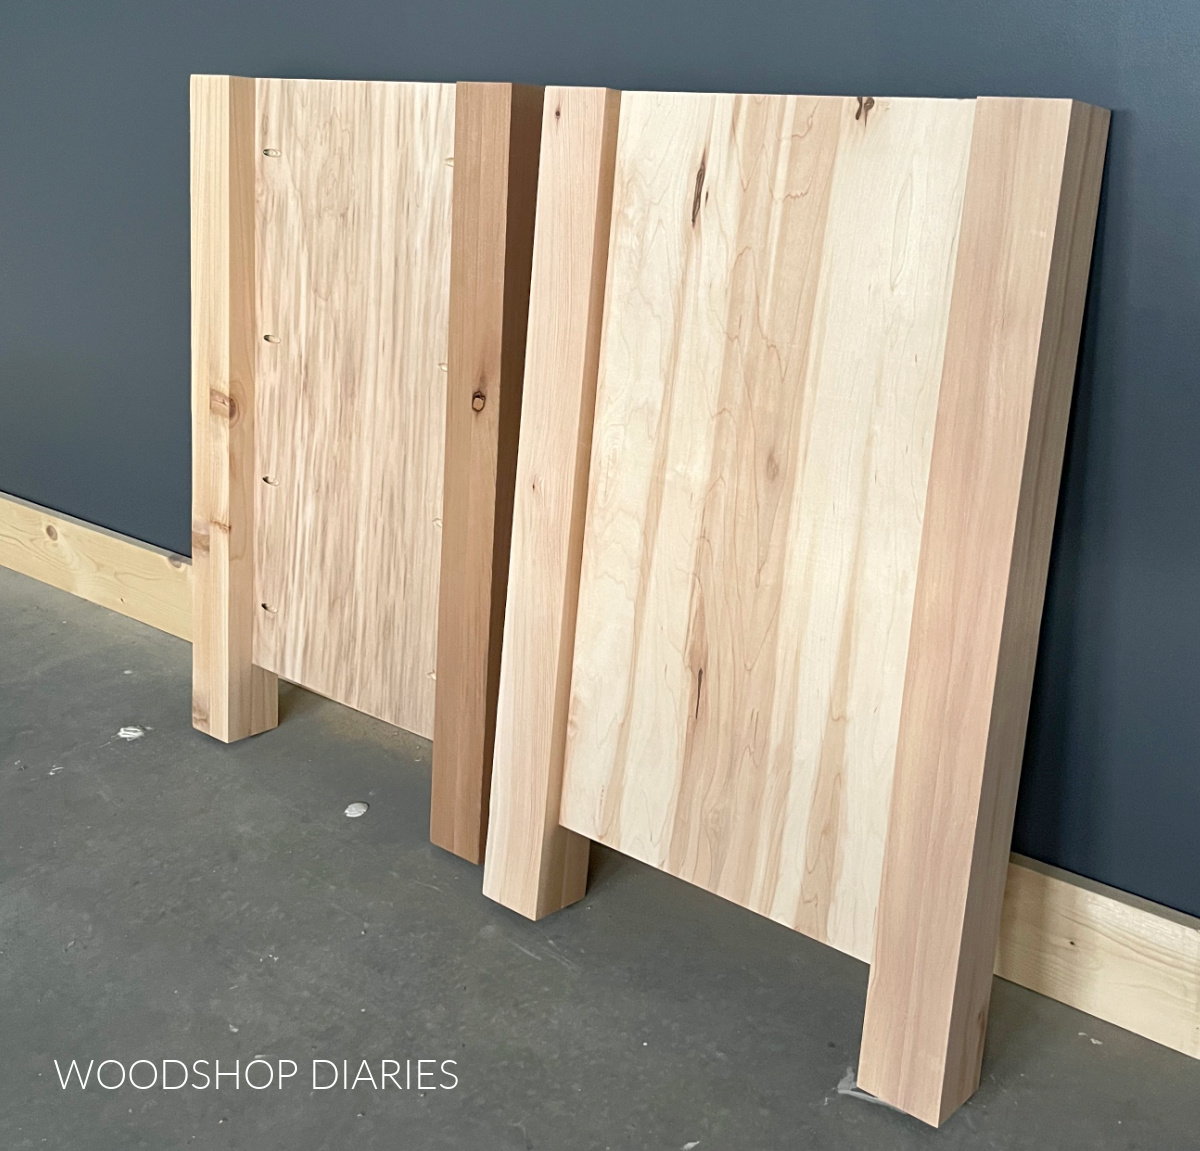
Step 1: Assemble Vanity Side Panels
I glued up my own vanity legs by gluing together 4 pair of 2x4s. After the glue was dry, I trimmed the edges to clean them off and give me 3″ x 3″ posts.
.
You could use a 4×4 post for the legs instead of gluing up your own, but typically 2×4 material is a little nicer and cheaper than buying 4x4s.
.
I cut two pieces of ¾″ plywood to assemble between the legs to give me two side panels using pocket holes and screws.
RELATED: How to cut plywood sheets
ALSO RELATED: How to use a pocket hole jig
.
I screwed these in about ¾″ inset from the outside of the legs.
NOTE: All the project dimensions can be found in the printable plans here.
Step 2: Assemble Vanity Frame
For the vanity frame, I used 2x4s at the front and 2x2s in the back. You could also use 2x4s at the back, but 2x2s are sufficient and that saves a little lumber.
.
Before installing anything, I ripped the two 2x4s for the front to 3″ wide and saved the thin piece leftover to use as trim later.
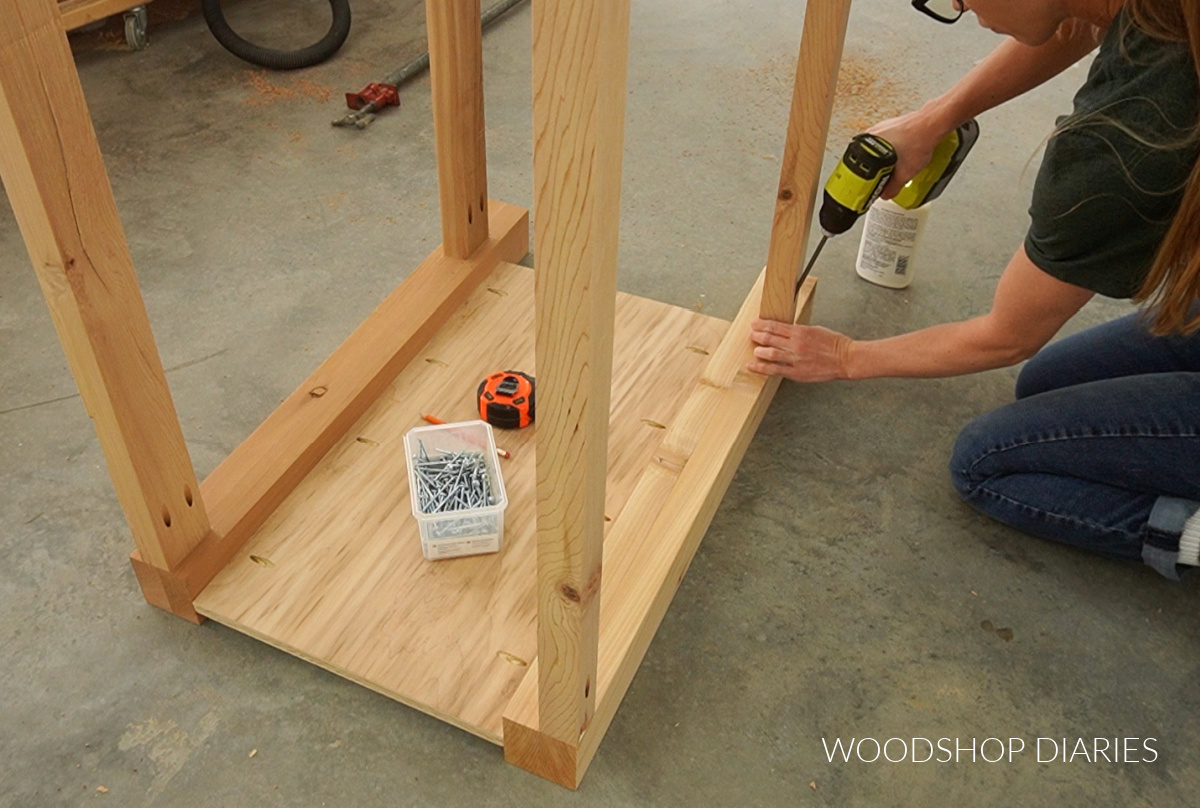
Then, I assembled the vanity frame together using 1 ½″ pocket holes and 2 ½″ pocket hole screws.
.
To divide the door vs. drawer sections of the vanity, I cut down some 2x2s and installed them between the front frame pieces using pocket holes and screws from the INSIDE so the holes are hidden.

Then, just for looks, I also cut two more 2x2s and glued then at the far left and far right between the frame pieces.
.
These pieces aren’t structurally necessary, but they add some nice dimension.
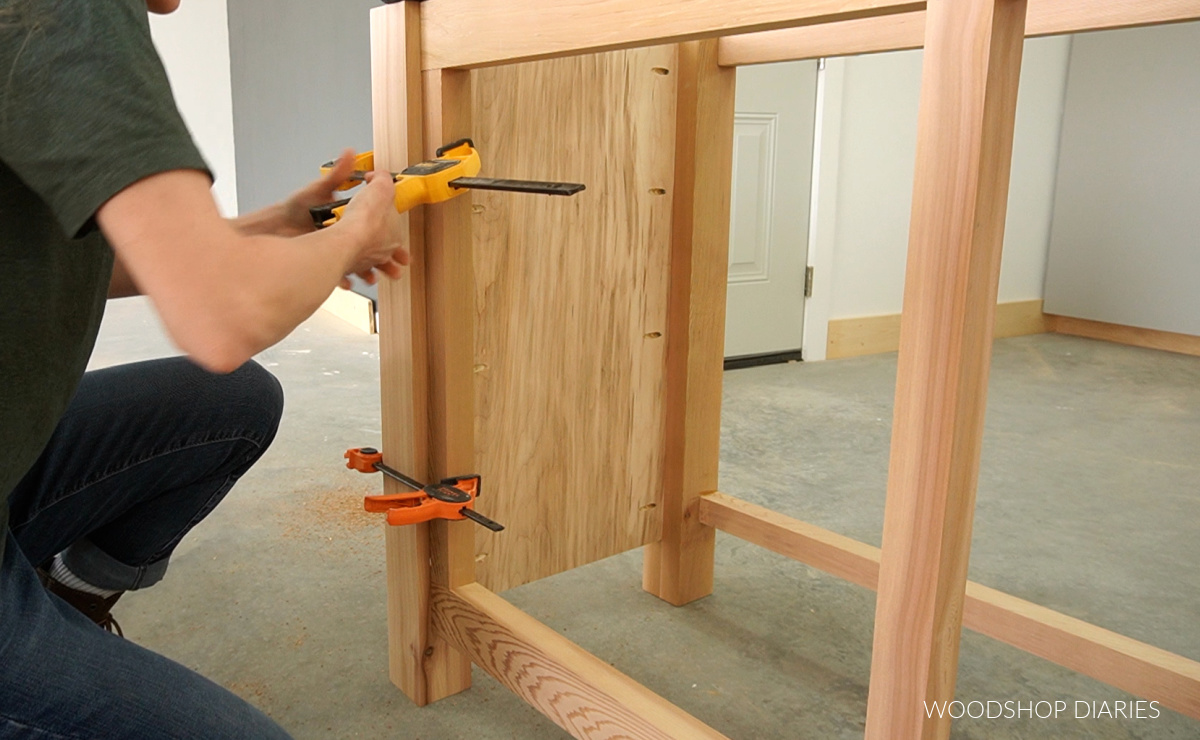
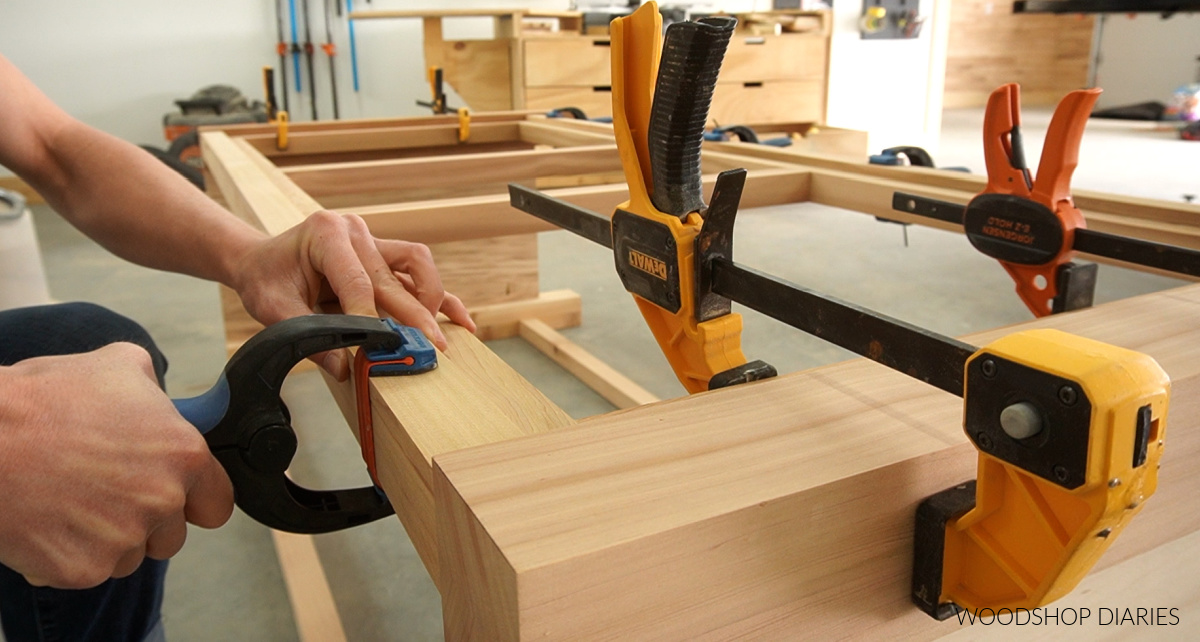
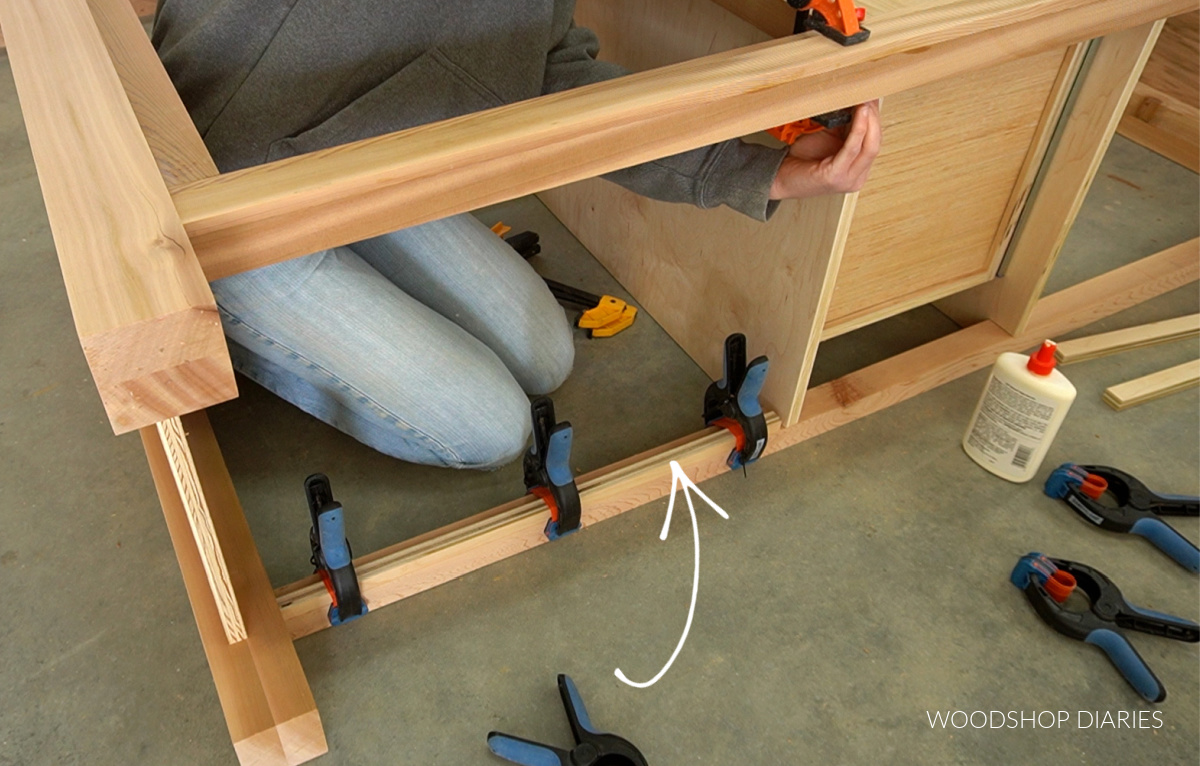
To give the piece a little extra dimension and detail, I glued the thin pieces I ripped off the 2x4s for the front frame at the top and bottom on the front.
.
I just ran a bead of glue along the boards and clamped these pieces until dry.
Step 3: Add Dividers to Vanity Frame
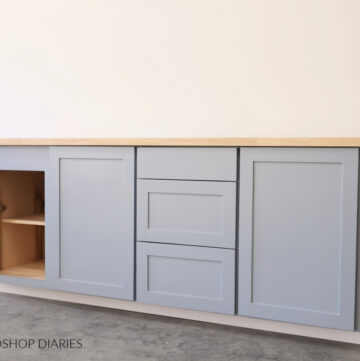
With the frame complete, I added plywood panels inside to divide up the cabinet from the drawer sections and give me somewhere to mount the drawer slides to.
.
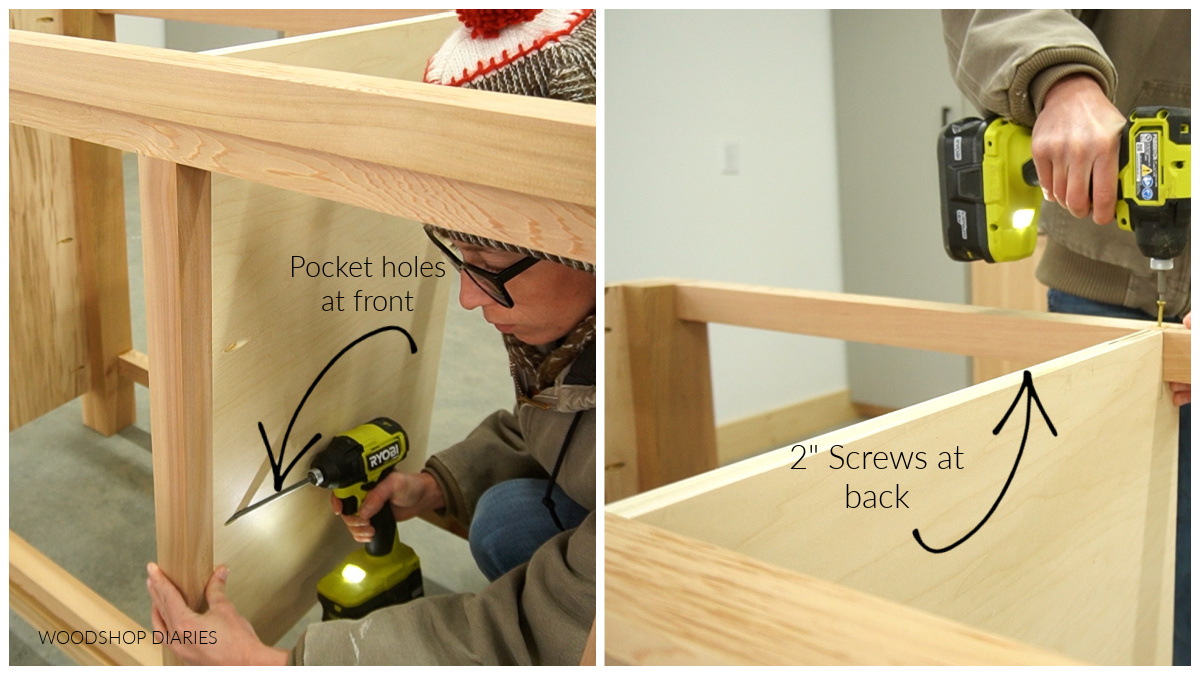
I cut these panels from ¾″ plywood and used a jig saw to notch out the back corners to fit around the back 2x2s on the frame.
.
I installed them flush to the inside of the 2×2 dividers in the front using pocket holes and screws. Then, secured them at the back using 2″ wood screws through the 2×2 frame pieces.
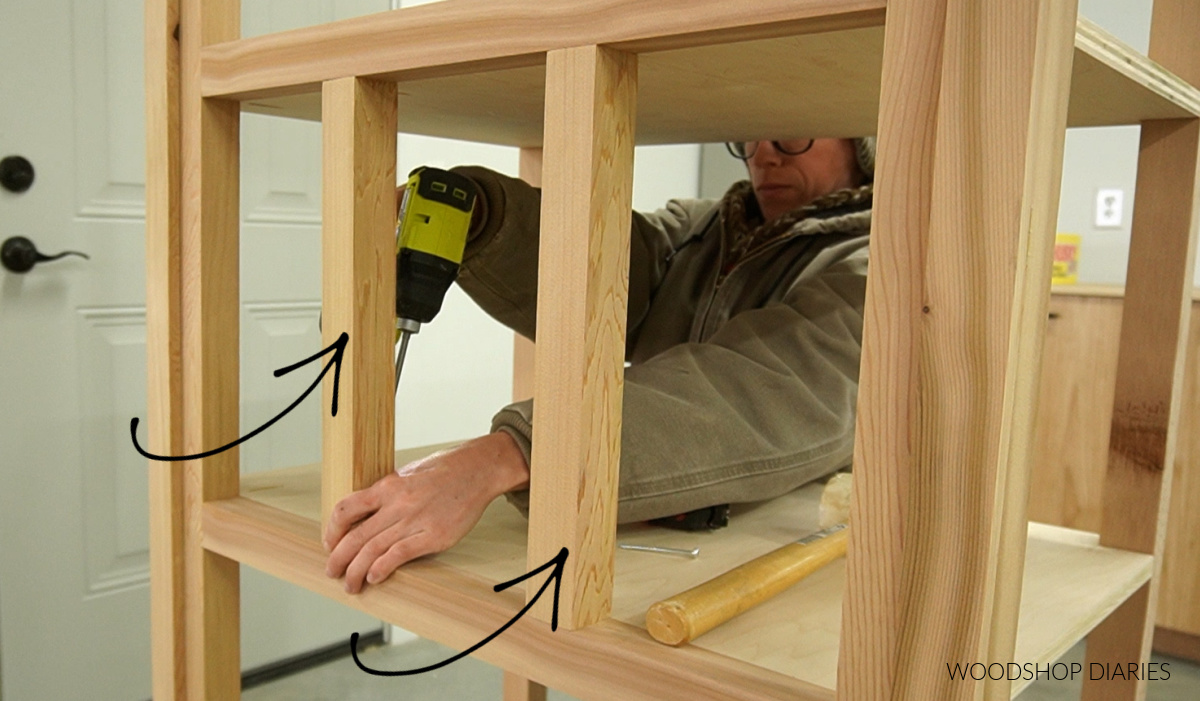
Then, to divide the three drawers in the middle section, I added 2x2s using pocket holes and screws.
.
These dividers are optional, but I liked how they looked. I found them easiest to install by flipping the vanity on its side, so that’s what’s shown here.
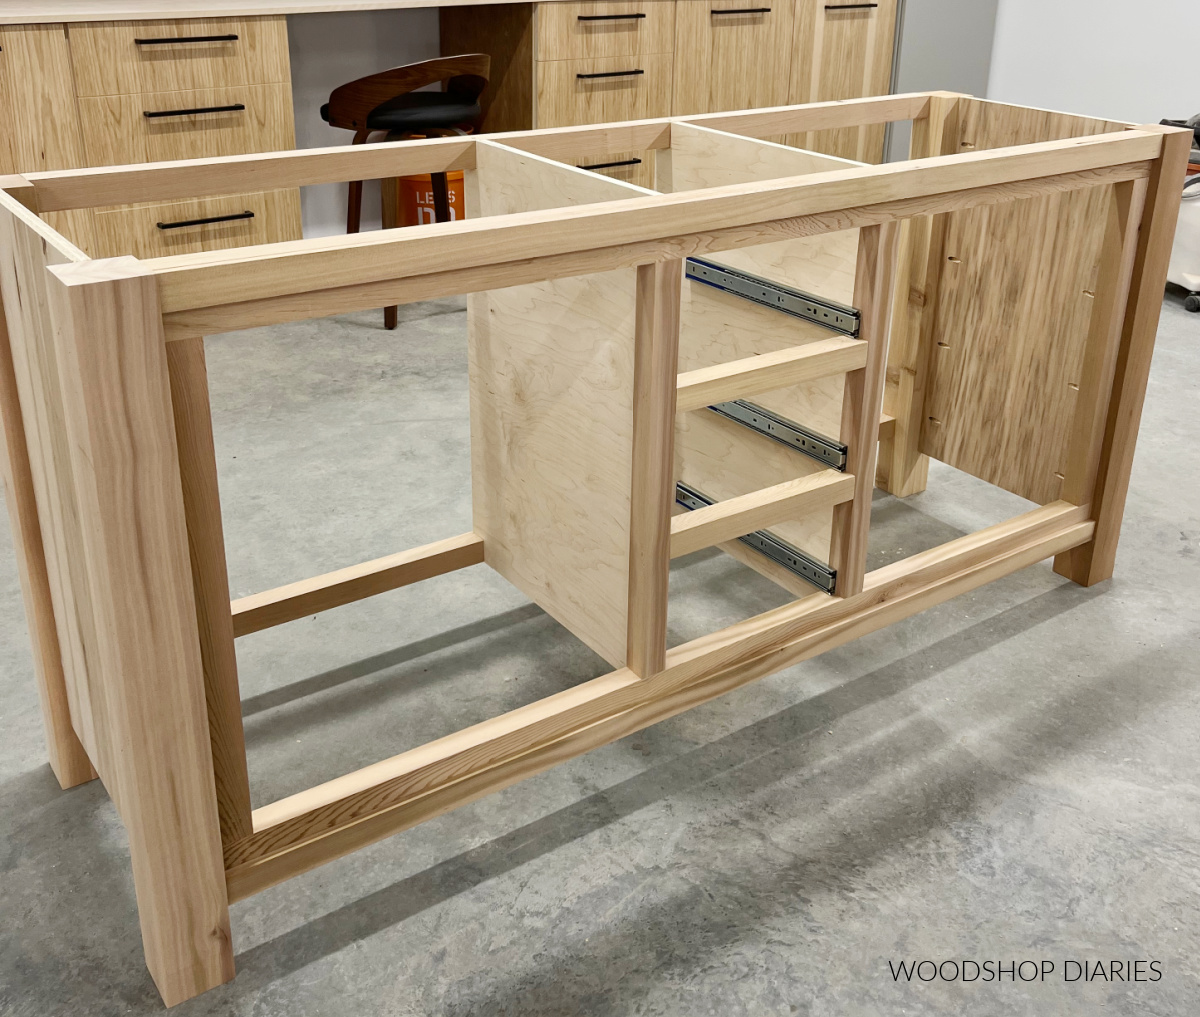
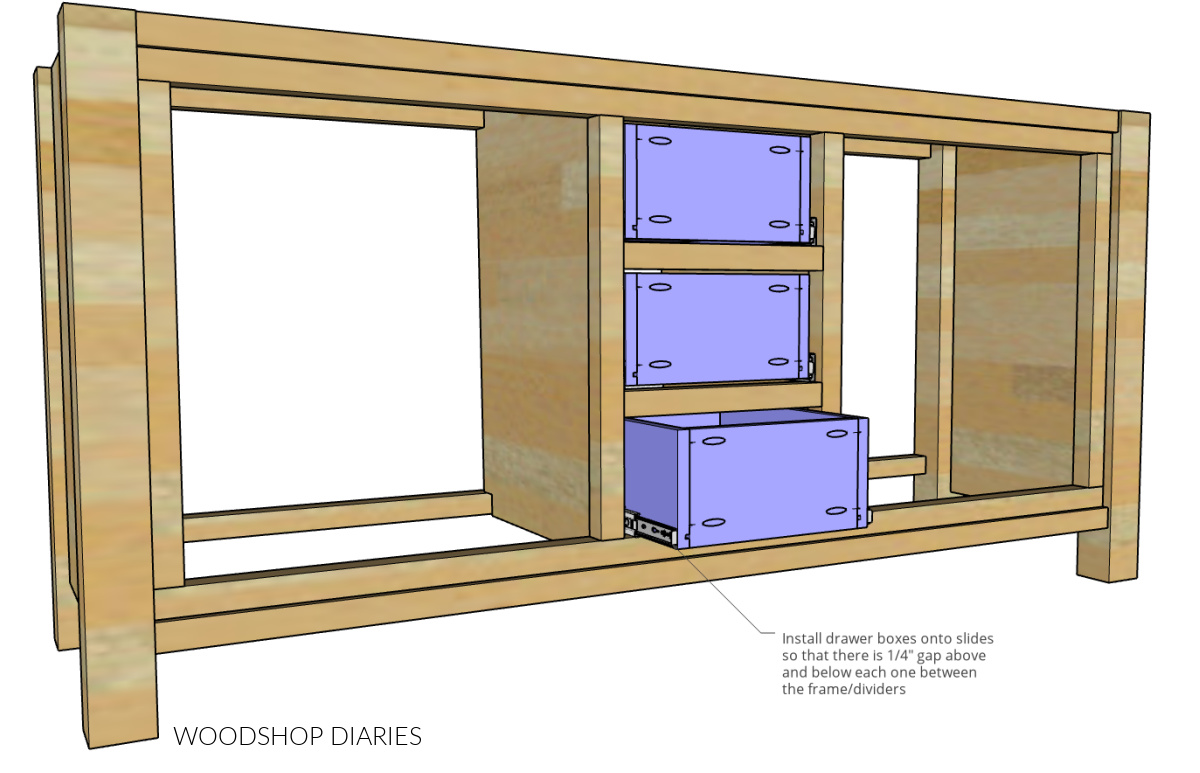
Step 4: Install Drawers in Bathroom Vanity
I installed 16″ ball bearing drawer slides into the vanity so they they were ¾″ inset to allow for inset drawer fronts later.
RELATED: Check out this post for more information on how to install drawer slides.
I assembled three identical drawer boxes to install into this vanity.
.
I made these from ¾″ plywood for the sides and ¼″ plywood for the bottom and I assembled them using pocket holes and screws.
RELATED: Check out this post for a detailed guide on how to measure and build drawer boxes.
.
Take note here that when drilling the pocket holes, they need to be drilled close to the edge so they’ll be covered by the trim later. You’ll see that in a minute 🙂
.
Once the drawers were made, I installed them into the vanity onto the slides so that they were ¾″ inset from the front edge.
Step 5: Build Vanity Cabinet Doors
I have a detailed guide here for how to measure for and build cabinet doors.
.
I used this same method for building these doors, but in this case, instead of cutting my own dadoes and routing my own edge, I used tongue and groove lumber since it basically already has a dado and chamfer cut for you.
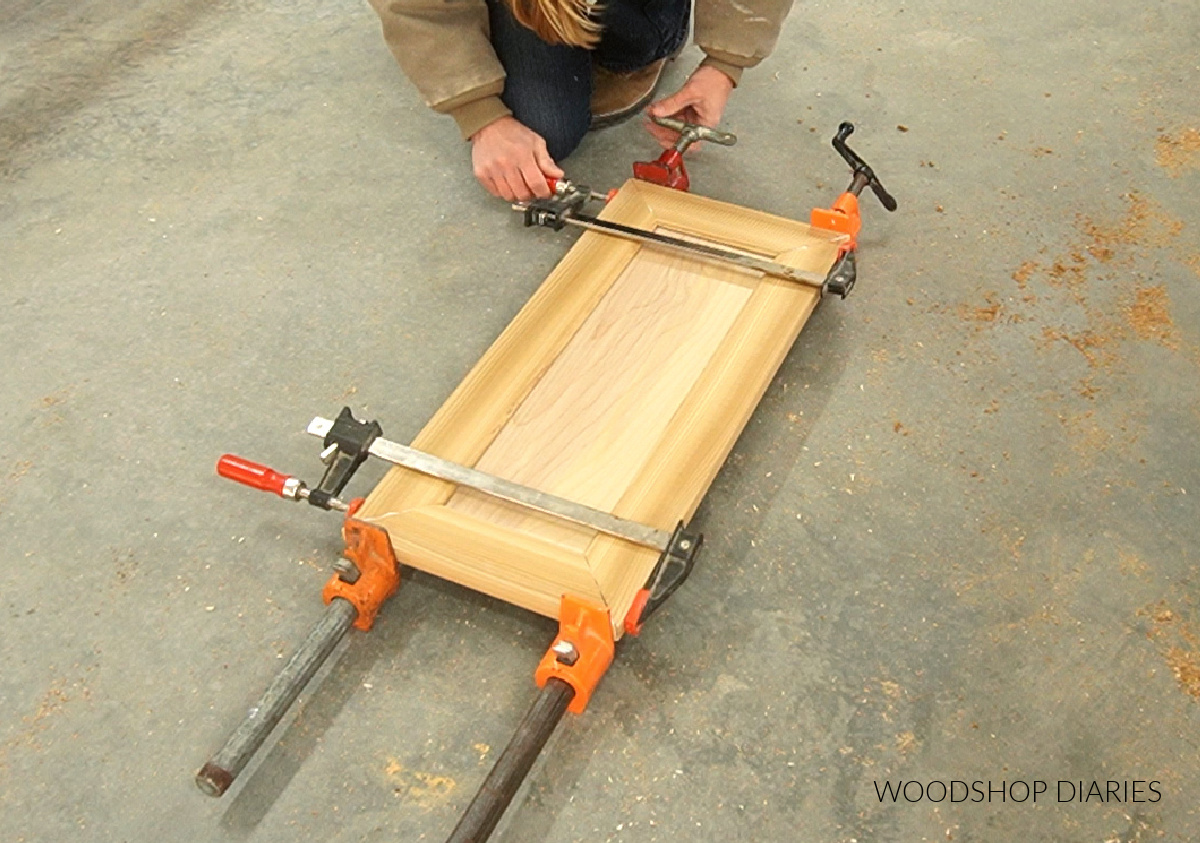
I ripped about 2 ½″ off the groove side of the T&G boards and used these for my door frames.
.
I mitered the ends 45 degrees and drilled ⅜″ dowel holes to assemble using wood glue and dowels.
RELATED: Check out this video for how to use a simple dowel jig.
.
Before adding the fourth side, I installed ¼″ birch plywood panels inside, then clamped together. I made four identical doors. The dimensions for all the pieces on this project can be found in the DIY bathroom vanity plans here.
I made a short 60 second video on this process that you might find helpful. Check out this clip for how I used tongue and groove lumber to make a cabinet door.
Step 6: Trim Out Drawer Boxes
The reason I showed making the doors first before finishing the drawers was because after ripping the 2 ½″ off the tongue and groove lumber for the door frames, I ripped the tongue off the remaining pieces and used this as the drawer front trim.
.
These pieces ended up being about 1 ½″ wide–so the equivalent of a 1×2.
.
I flipped the vanity on its back and applied wood glue around the edges on the drawer fronts.
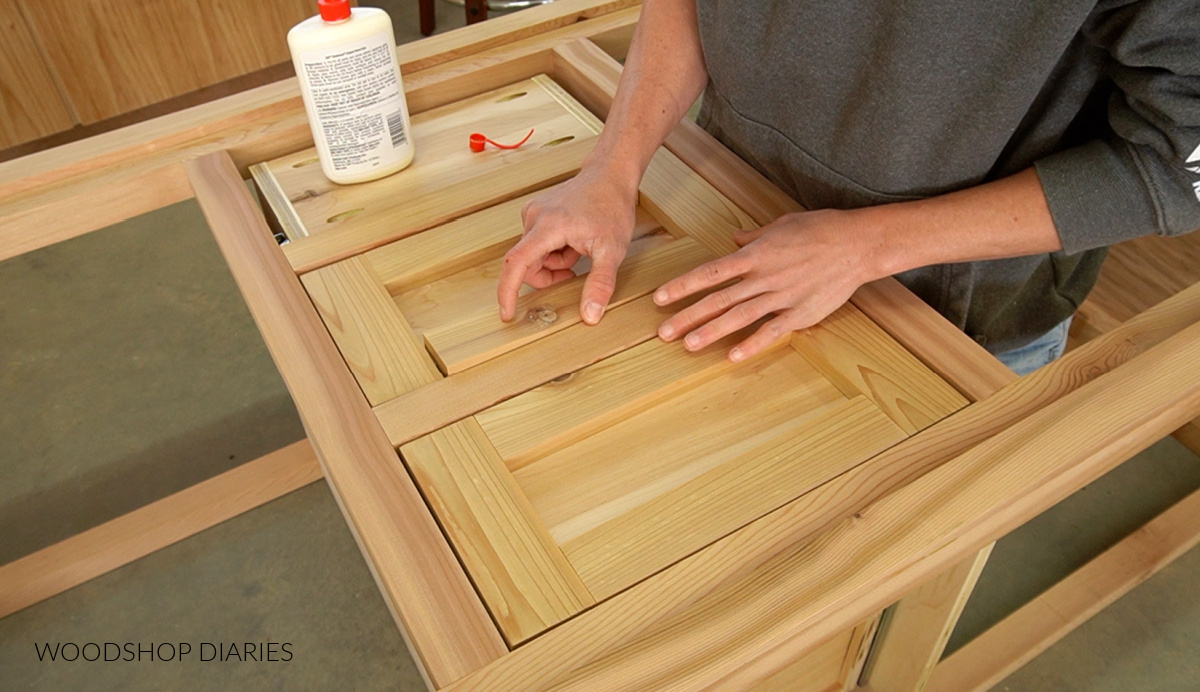
I cut these pieces to fit to allow ⅛″ gap on all sides, and positioned them where I wanted. They should cover the pocket holes when in place. Then, I stepped back and allowed them to dry so they’d stay put 🙂
Step 7: Install Bottom Panels
Now, I’m a little weird about things I build for myself. I have pet peeves that probably don’t bother most other people haha.
.
But…we clean out our p-traps quite often and when you do that, it’s usually pretty messy and some of that nasty p-trap water ends up on the bottom of the cabinet.
.
So, when I build vanities for myself, I like to install the bottom so that it’s removeable. That way, when we clean the p-traps, we can pop the bottom panel out, then replace it back when we are done.
.
Of course, you don’t have to do that. You can certainly install yours so it’s stationary.
.
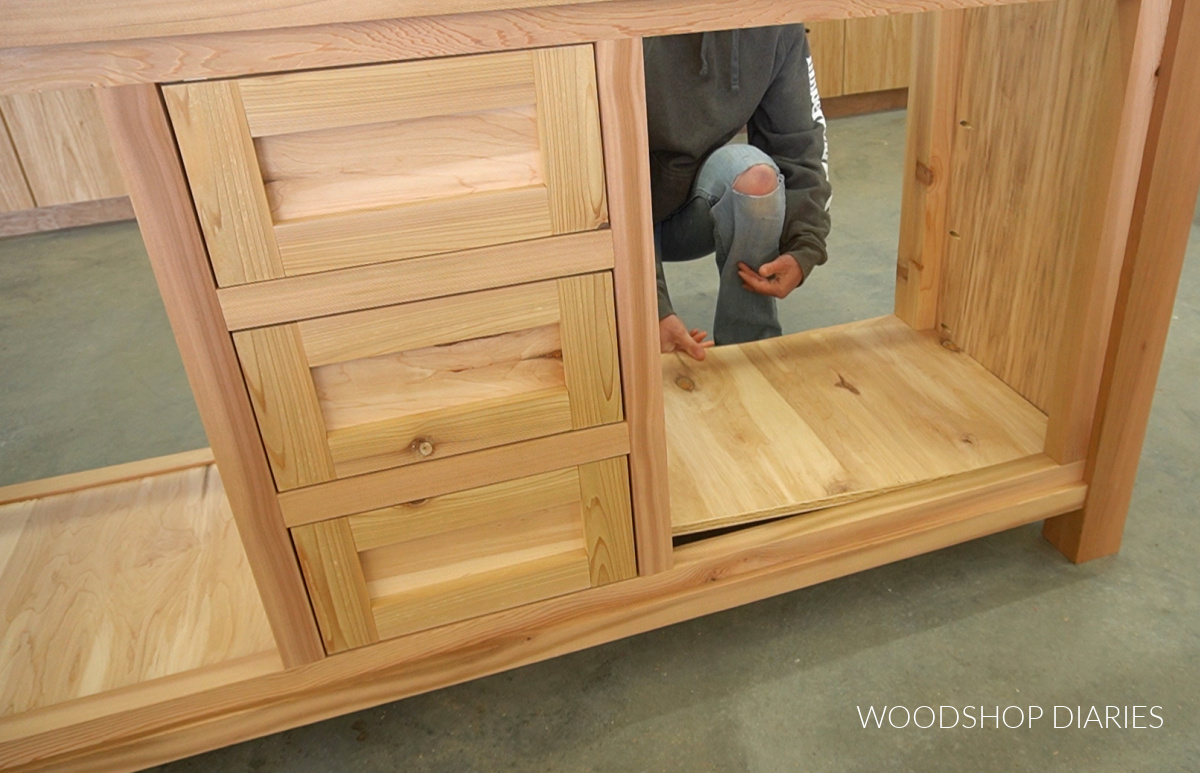
To make mine removeable, I cut some scrap wood–about ¾″ x ¾″–and just glued it onto the bottom frame pieces at the front and back. These will be the support pieces the bottom panels rest on.
Then, I cut two pieces of ¾″ plywood to fit inside these sections of the vanity.
.
I had to “cut to fit” the plywood panels and use a jig saw to notch out the corners so it would fit around the legs.
.
Then, I could just set them in place after the glue dried on the little support pieces.
Step 8: Install Bathroom Vanity Doors
The last part of the build is adding the doors.
.
I used a Kreg concealed hinge jig to drill out the cup holes to install concealed inset hinges for frameless cabinets onto each door I made in step 5.
.
Now, you may be asking–but this isn’t a frameless cabinet?
.
And, you’re right. But it’s also not a typical face frame cabinet, either. So they don’t really make hinges that fit this exact application.
.
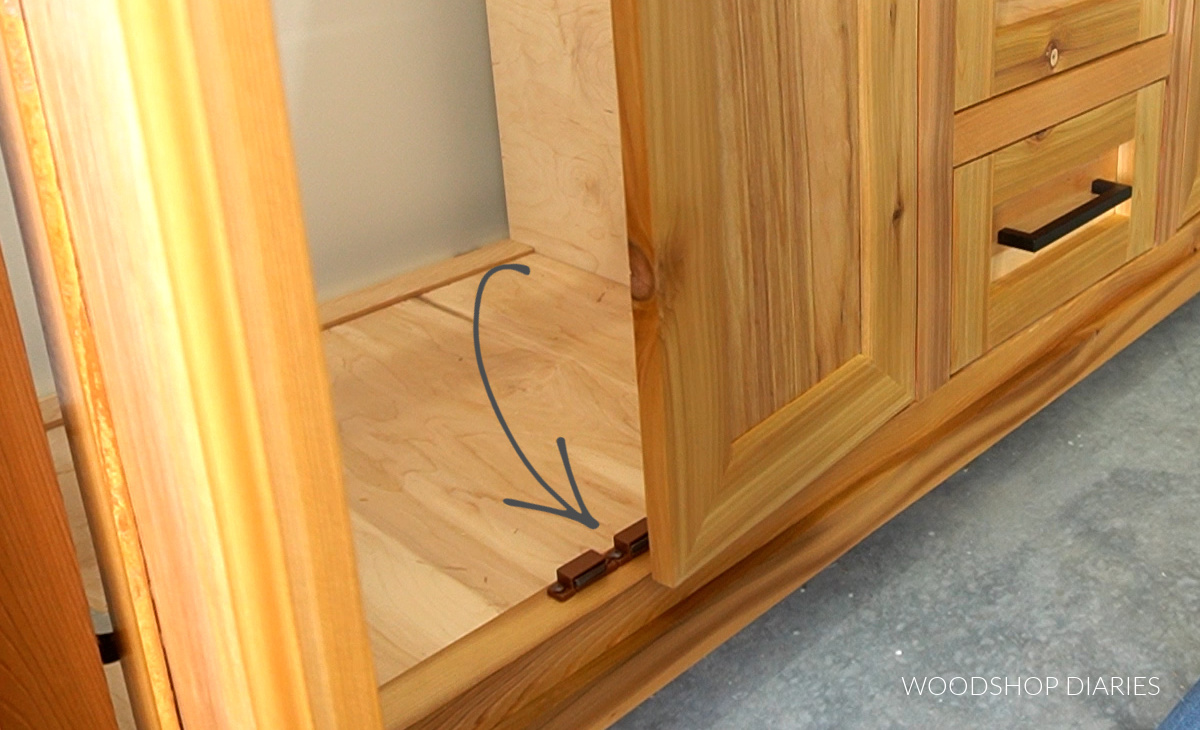
So, what I did was use frameless cabinet hinges and install spacer blocks behind them. You can see below how the hinge is installed on the door, but there’s nothing to screw it to.
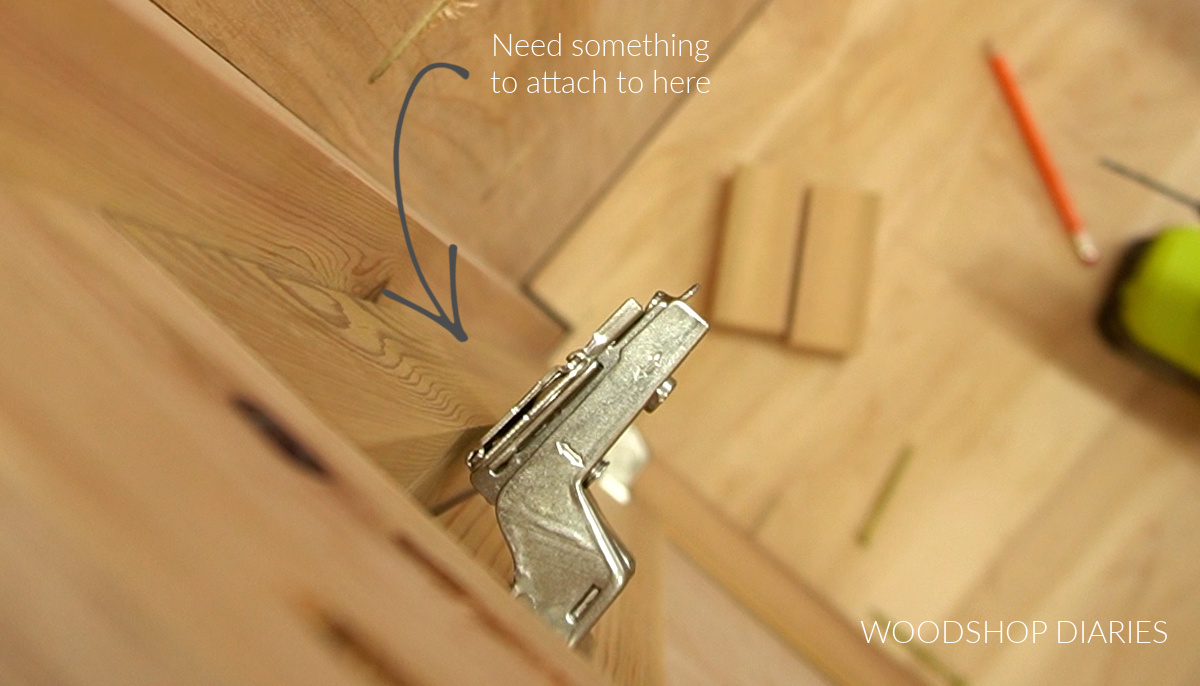
So I cut spacer blocks to fit behind the hinges for each door. The doors on the outside need a block about 1 ½″ x 1 ½″ (so, a 2×2), and the doors on the inside need a smaller block.
.
Those could use a ¾″ x 1 ½″ block (so a 1×2). You could run the block the whole way up and down, but I just cut small pieces for just behind the hinges.
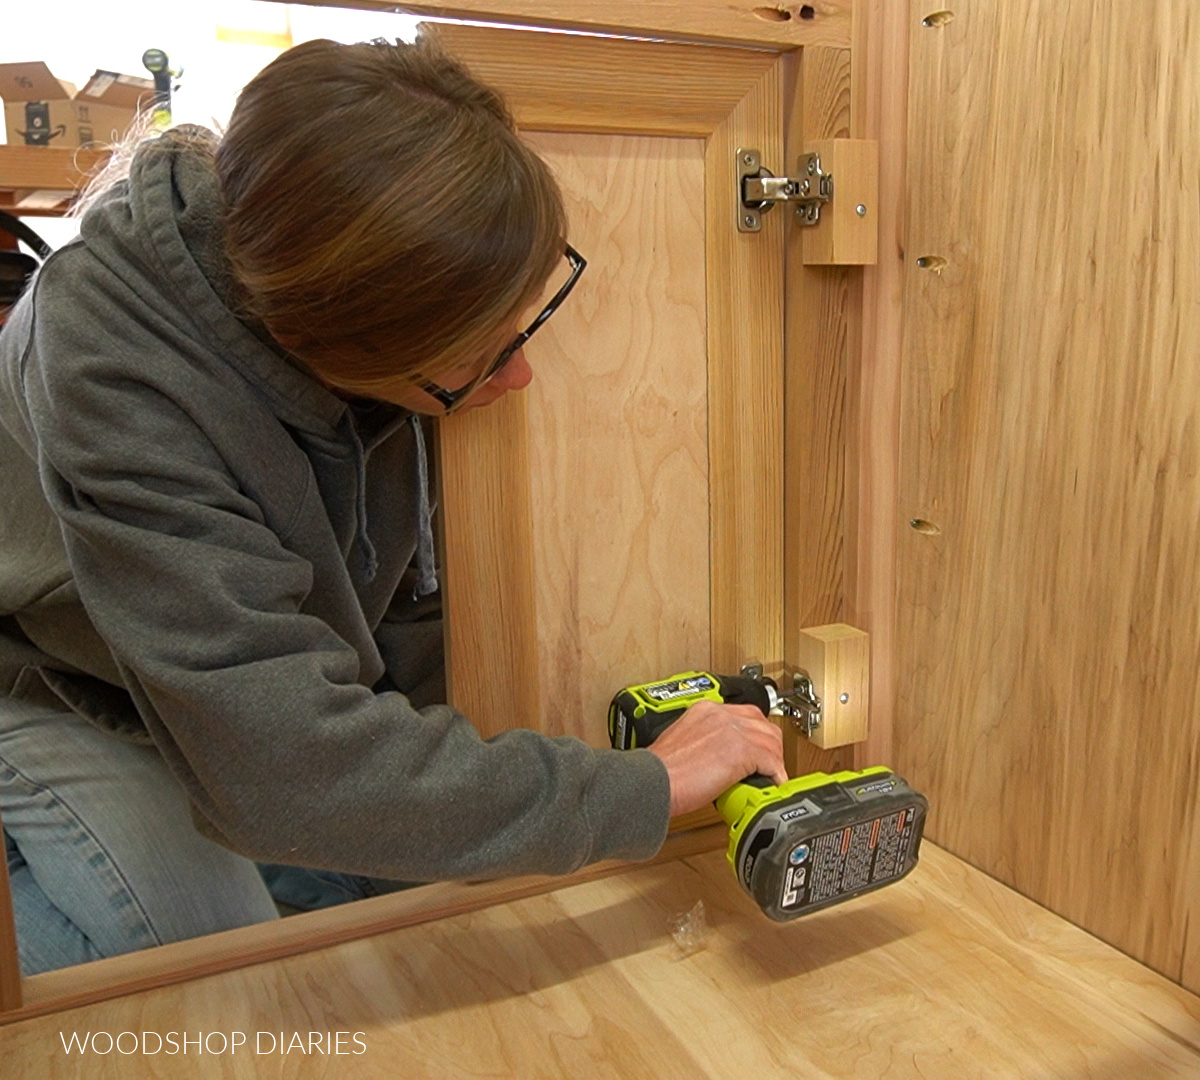
I screwed these blocks in place, then screwed the hinges to them.
.
One note here…the bottom block should be a couple inches off the bottom so that there is still room to lift up and remove the bottom panel (if you want it to be removeable, that is).
.
Once all the doors were on, I adjusted them as needed to get the gaps even.
RELATED: Check out how to install and adjust hinges in this post.
Step 9: Finish and Install Vanity Hardware
At this point, it’s ready to paint, stain, finish as desired.
.
I applied three coats of Minwax Polycrylic clear coat to seal and protect it, but keep the natural color.
RELATED: How to finish wood furniture without a sprayer
.
Then, I added knobs to the doors, and handles to the drawers. Inset hinges can sometimes allow the doors to “kick in” too far into the cabinet. To fix that, you can install some magnetic catches at the top or bottom of the doors.
If you find that the magnet is “too much,” you can remove the metal plate on the door and simply use it as a “stop” instead of a “catch.”
.
And now, all that’s left is installing it and adding a top!
I left the back open here because if I added one, I’d end up cutting out a lot of it when it’s installed to run the plumbing through. So feel free to add one if you’d like, but I skipped it.
.
To install it, we will just secure it to the wall studs through the back 2×2 frame. Then we can add our custom cut granite top once it’s finished.
.
I’m so excited with how this turned out and I really hope you enjoyed watching it come together. If you’d like to build your own, grab the printable DIY bathroom vanity plans here!
.
I can’t wait to share this again in its new space once we start the remodel! If you want to stay up to date on all the latest projects and plans, be sure to subscribe to the newsletter below!
And if you want to save this for later, be sure to pin it and/or share it to your favorite social platform!
Until next time, friends, happy building! 🙂