
I’m back with a building project–FINALLY after all this Christmas stuff. I’m sure some of you are glad that’s over with right? Joke’s on you, though, because I have one more Christmas post for the year to show you later. But it will be fun, so stick around. If you’ve been hating the Christmas thing (I figure there are always a few), bear with me. I’m back in the shop this week, so I have some fun things coming 🙂
.
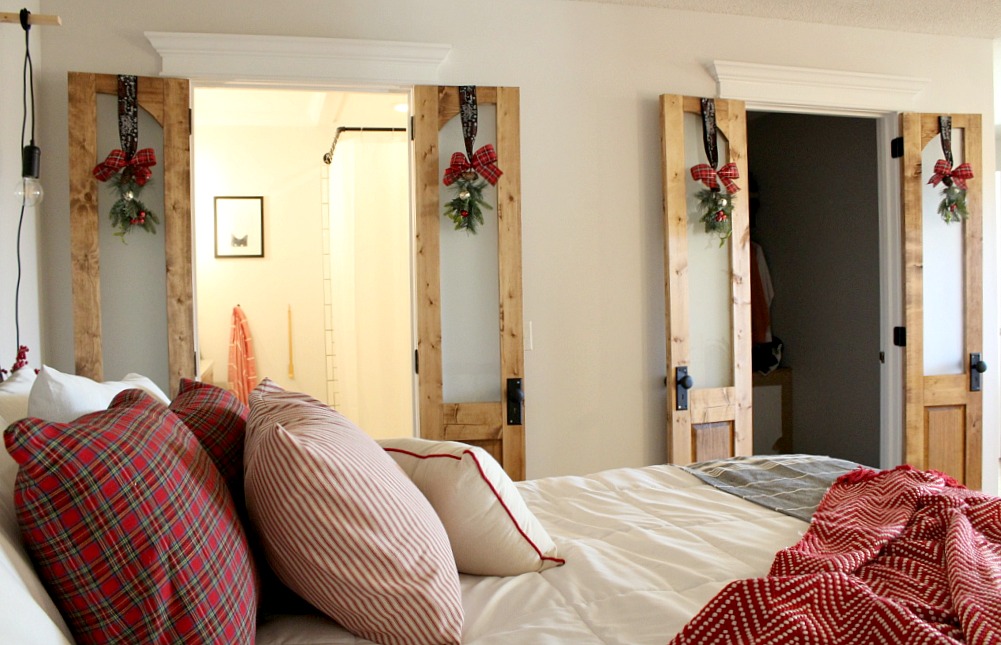
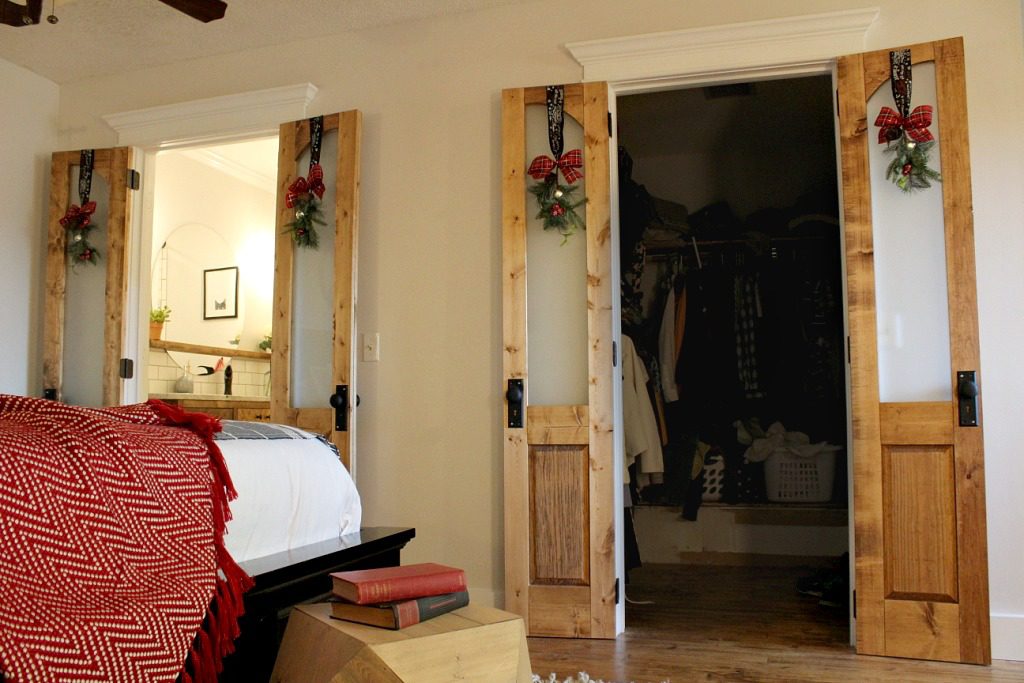
So remember when I told you all (I mean ALL) about our bathroom remodel? And remember a LOOOOOONG time ago, I told you about our closet remodel? Well remember last year when I made sliding doors how I told you about my hatred of interior doors…especially boring ones? Well if you put all those pieces together, it would make sense when I tell you that I removed the closet and bathroom door during remodels and they never got replaced.
.
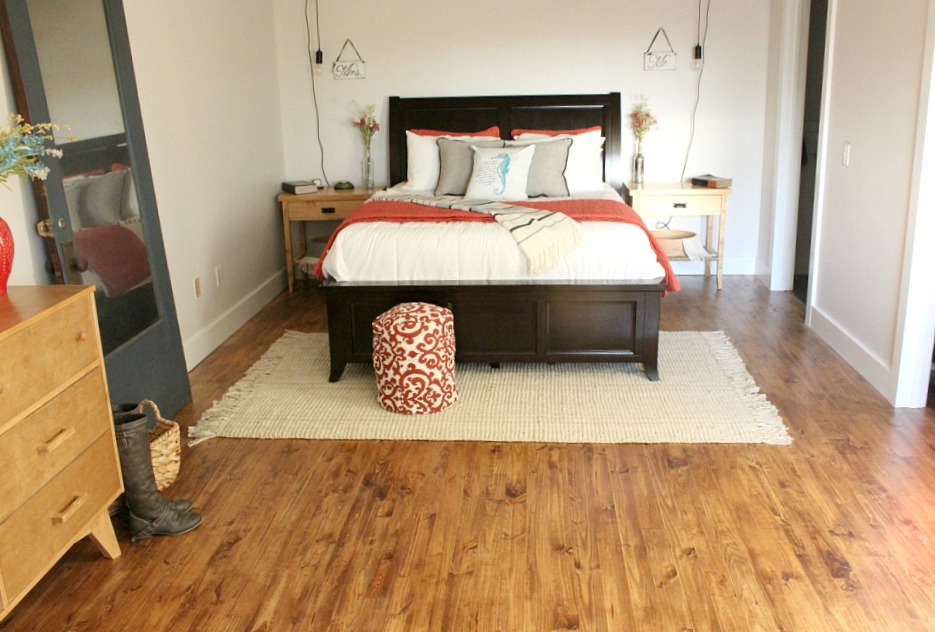
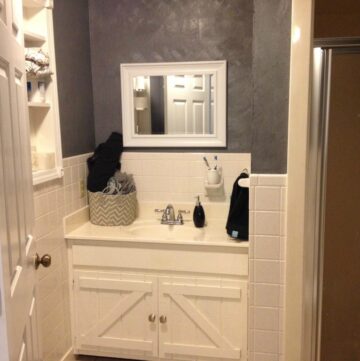
Since we don’t have kids, or inside pets, I really don’t see a problem with not having doors on the master bathroom or closet, but Danny SOMEONE thinks doors are a necessity. Here is what we had going on before. The opening in the back is the bathroom and the one towards the front is the closet. It’s really awful right now after the bathroom remodel chaos, so it’s on the to do list for next year.
Danny has a thing about sliding doors. And by “thing” I mean “hatred.” So sliding doors were out of the question for in here. But all these stupid doors take up so much space (for real I hate doors) when they open, so I didn’t want normal sized doors.
.
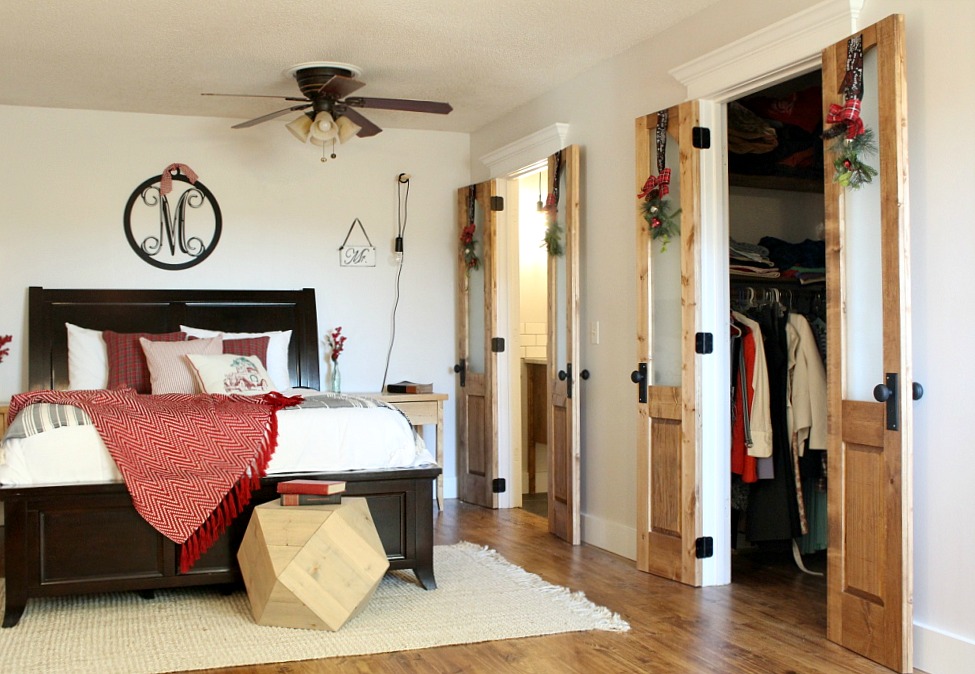
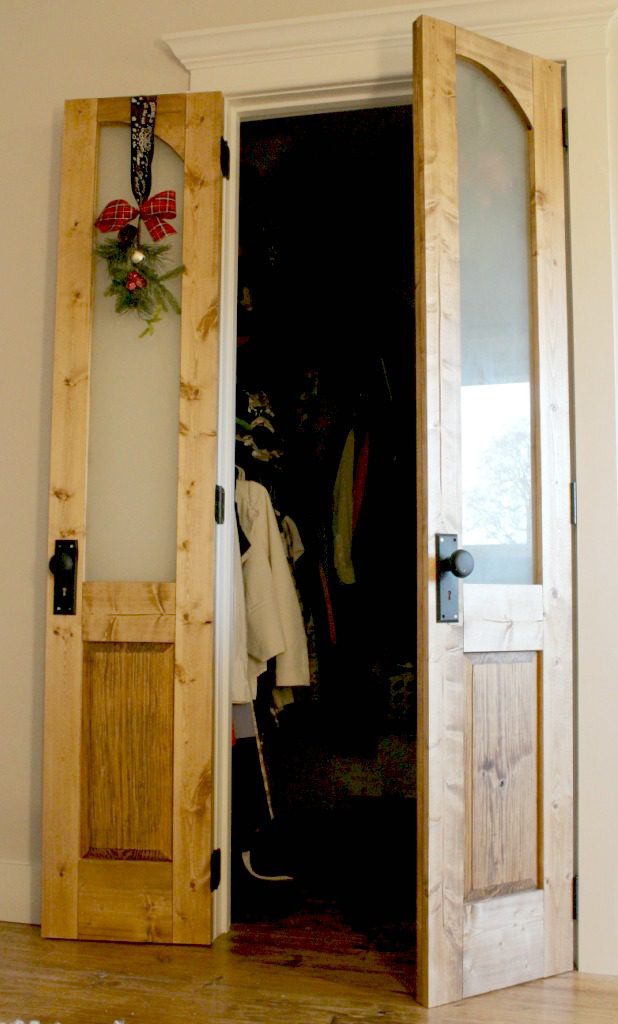
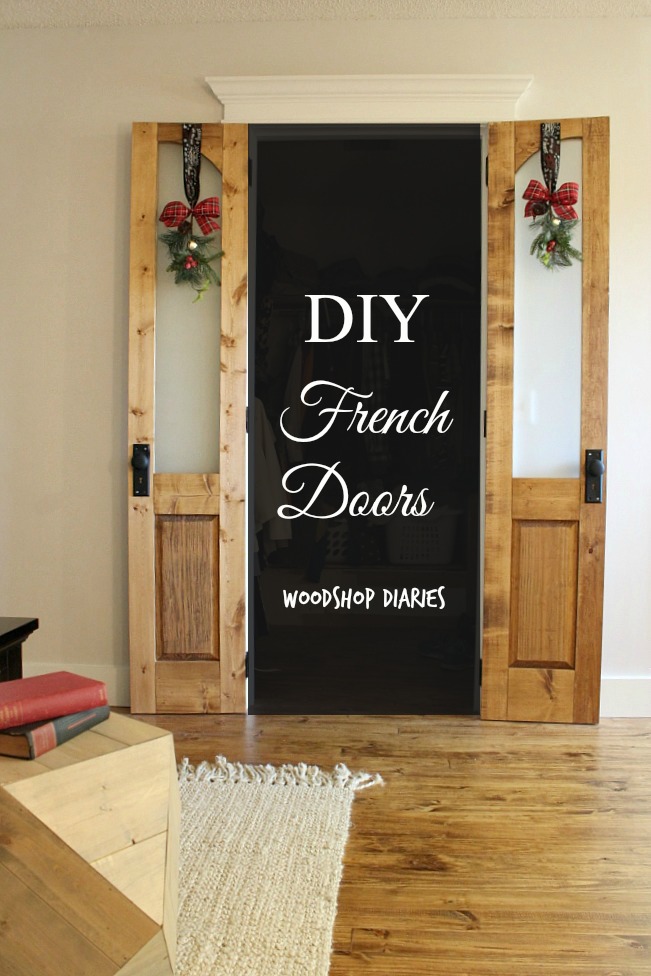
My solution was French doors that both opened INTO the bedroom instead of the closet and bathroom since they are both so small to begin with. I wanted “fancy looking” French doors, so I did raised panels on the bottom and arched frosted glass on the top.
.
Here’s a general overview of how I made them:
.
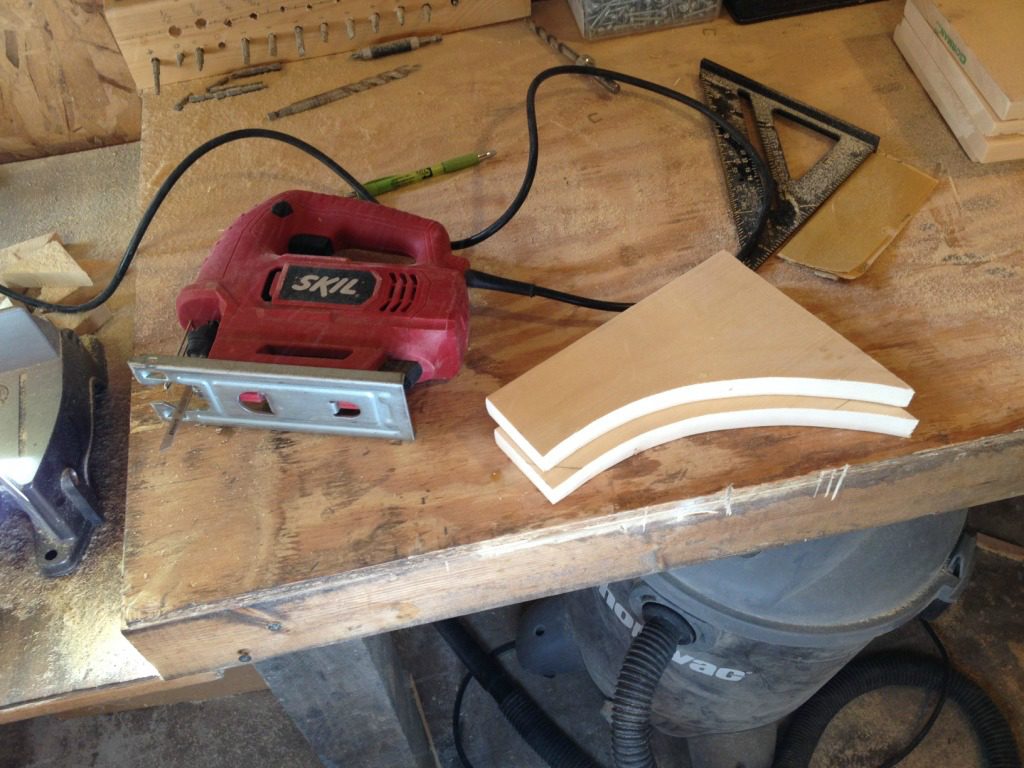
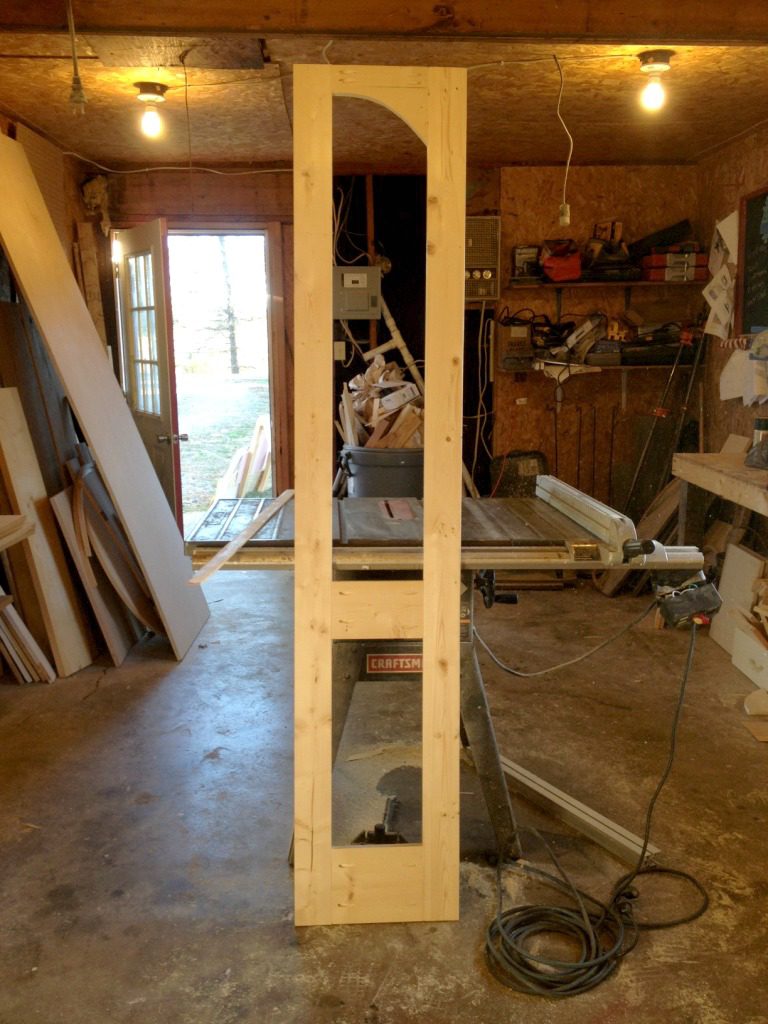
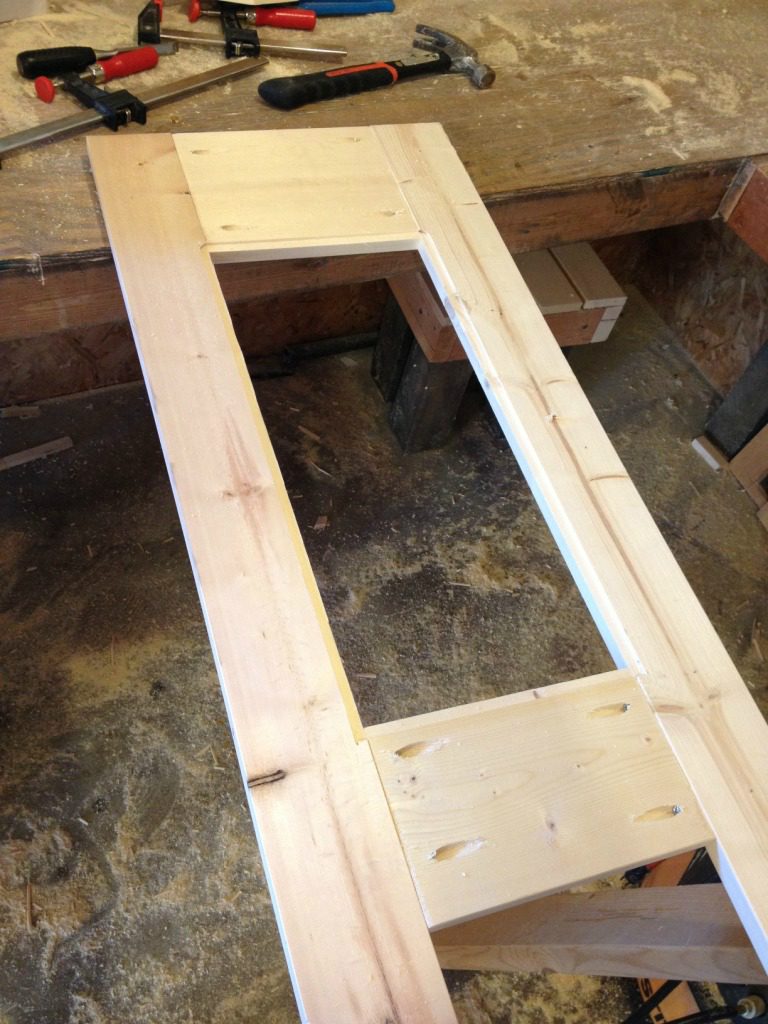
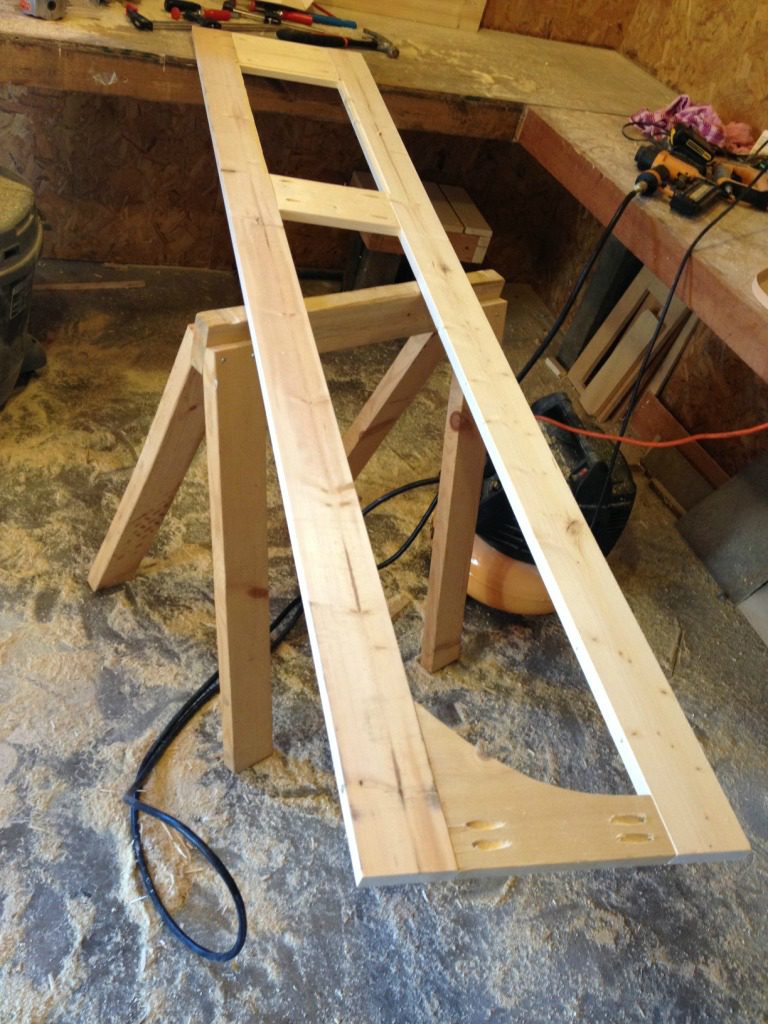
First, obviously, I determined the size my doors needed to be and I made a frame using 1x4s for the sides, 1x8s for the tops and bottoms and a 1×6 for the middle. I cut the pieces to size using my miter saw (affiliate link). I cut my tops with an arch using my jig saw (affiliate link) and an old metal bucket as a template.
I built the frame using my Kreg Jig (affiliate link) and pocket hole screws (affiliate link).
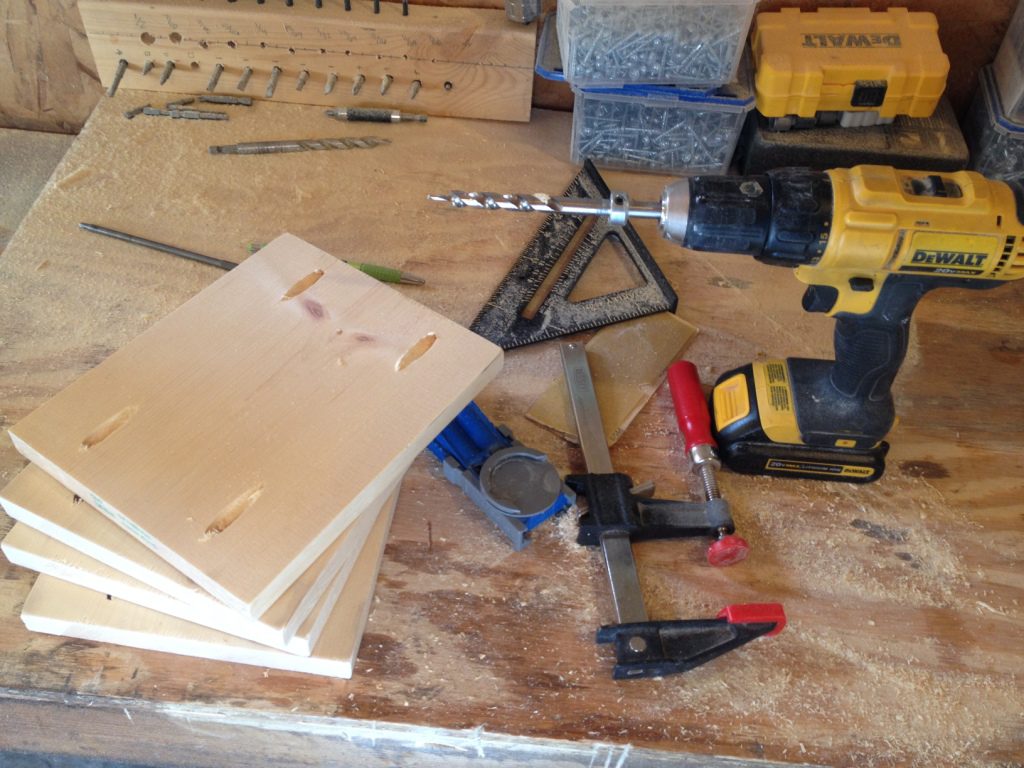
See my scrap/trash pile back there? When my sister quit having bon fires, my trash can started overflowing… #bringbackthebonfires #someoneemptymytrashcan
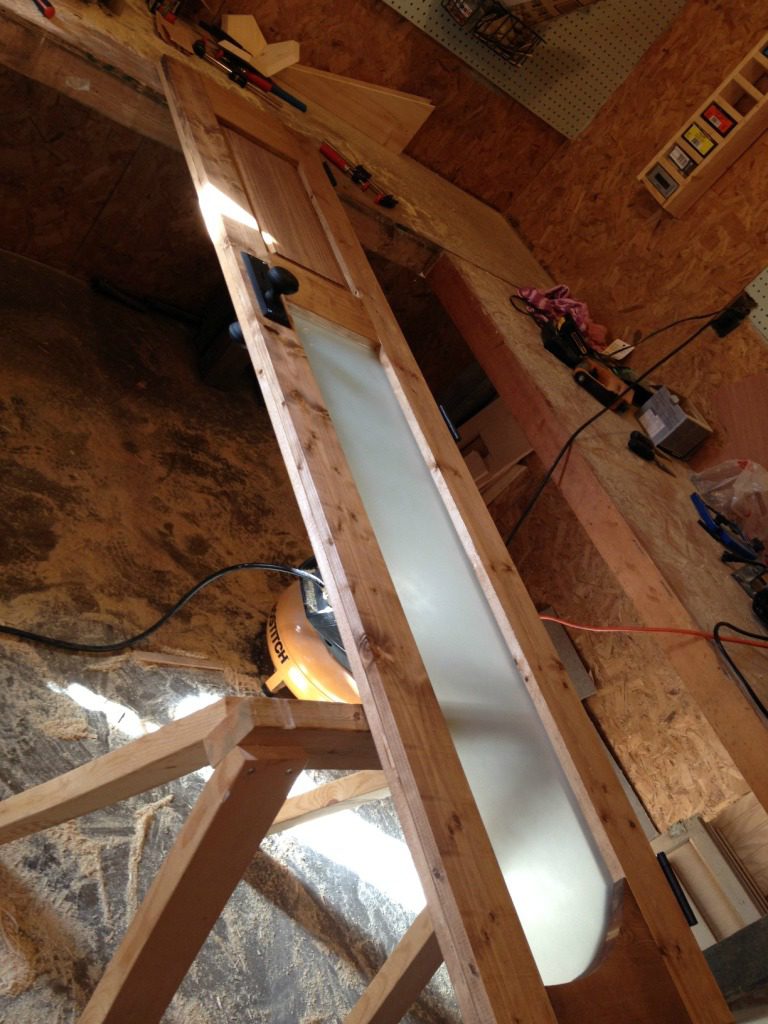
Then I used my router to cut ⅛″ deep and ¼″ wide groove around the opening where the glass will be.
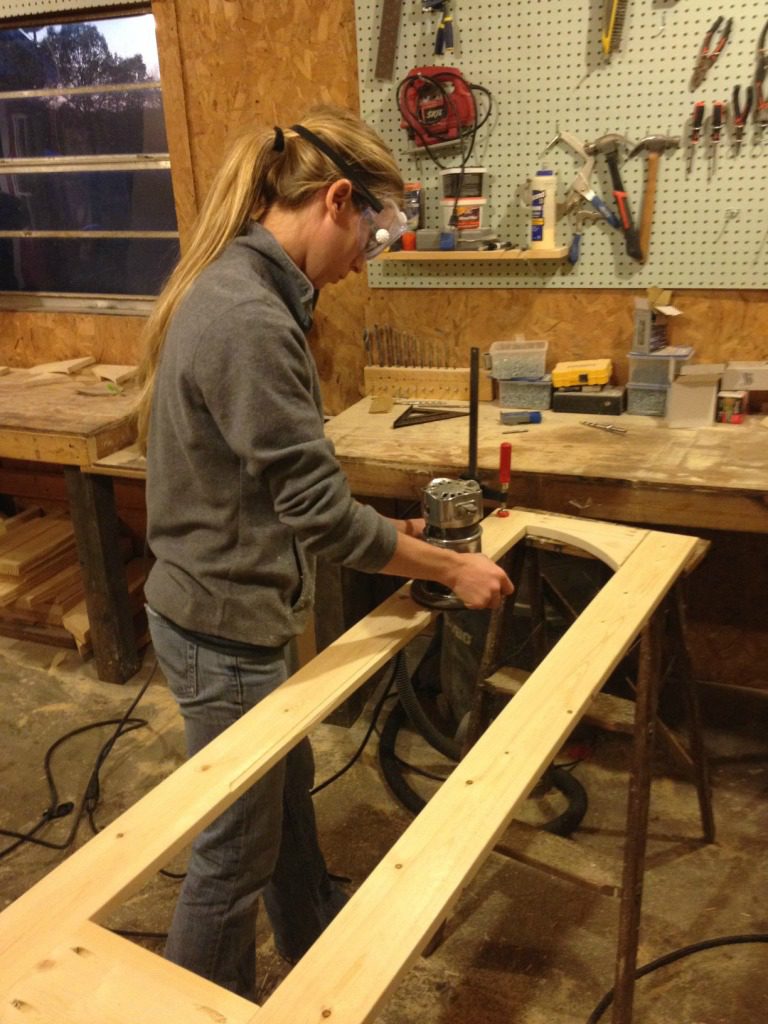
Ordering glass with an arch to fit in here perfectly would be expensive and it still probably wouldn’t fit right, so I used a straight bit on my router and adjusted it to ⅛″ deep and free handed it to cut out the rest of this rectangle.
.
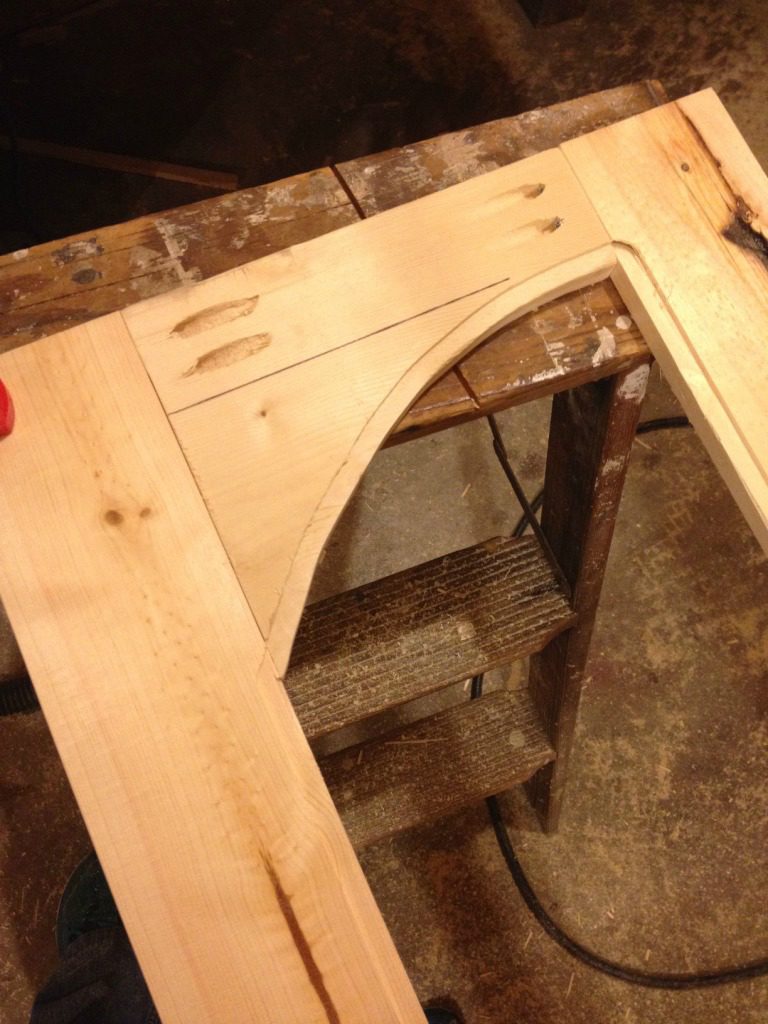
I just need to confess that this was the most therapeutic thing I’ve ever done. Freehand routing is where it’s at. It’s not pretty at all, but boy does the stress just fly away…probably along with all the sawdust… TRY. IT. (NOTE: The picture is of a different door because the arches are different direction.)
After I had all the doors cut like this, I measured carefully and ordered 4 glass panels (I was making 4 doors total) the same size that would fit in the openings. NOTE: It’s easier to cut first, THEN order the glass to fit than to order the glass and have to chisel here and there to get it to fit.
.
Once I made sure the glass panels fit well, I spray painted them with frosted glass spray paint (affiliate link).
.
In between coats, I worked on the bottom part of the doors. Just like the top, I used a router to cut out ⅛″ deep and ¼″ wide groove around the openings.
There are lots of tutorials out there on how to make raised panels. I’m not going to show you step by step because I forgot to take pictures in the process, but it’s very redundant…and plenty of people have already posted it before. Once you get it set up, you just do things OVER AND OVER AND OVER.
.
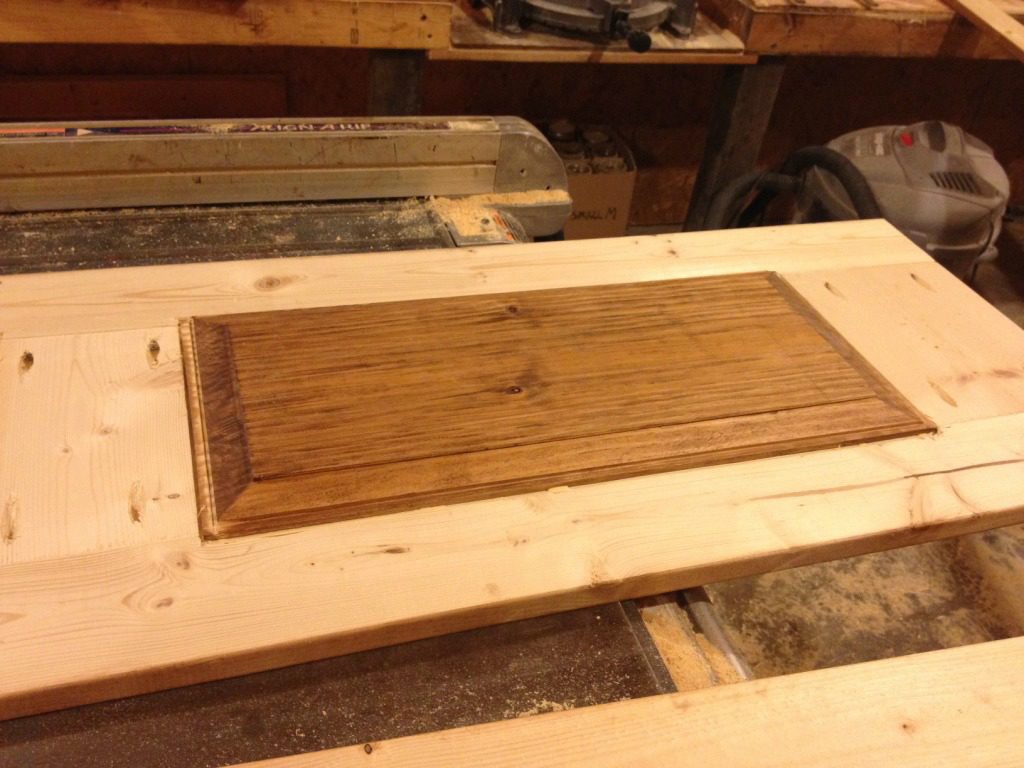
I used 2x10s for my panels and “raised” them on both sides. These panels were about ½″ wider and taller than the opening so that they fit inside the grooves I cut.
.
I set up a simple jig on my table saw to help me run my board through. I just needed something to clamp my panel to that would keep it upright and straight along the rip fence.
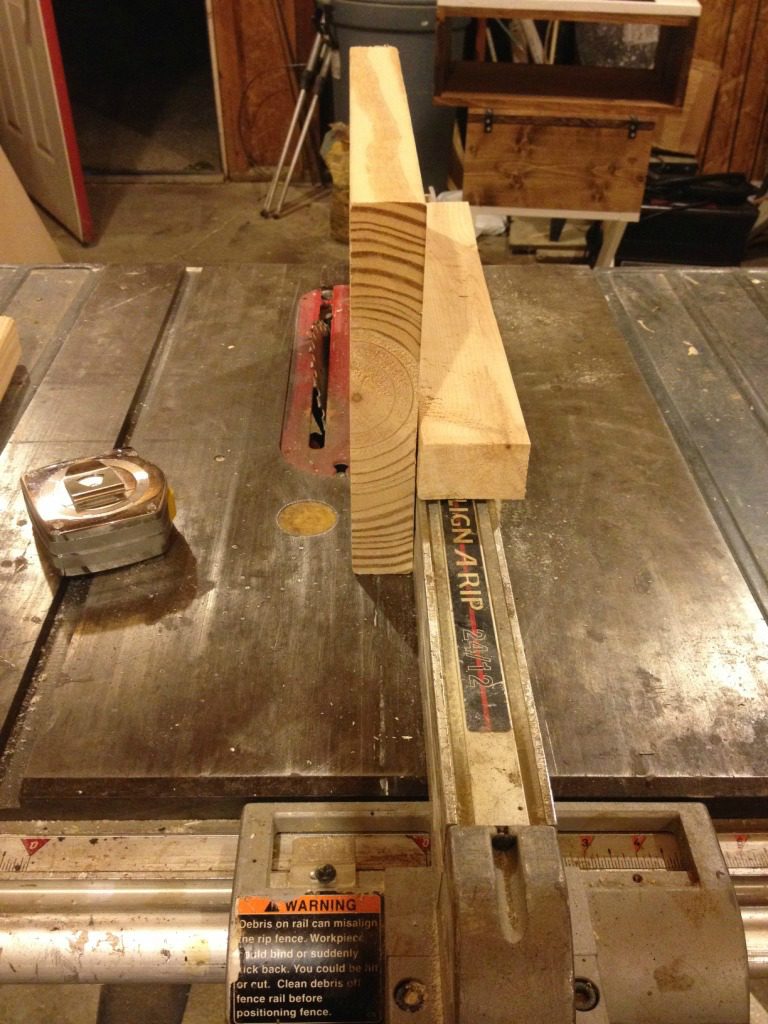
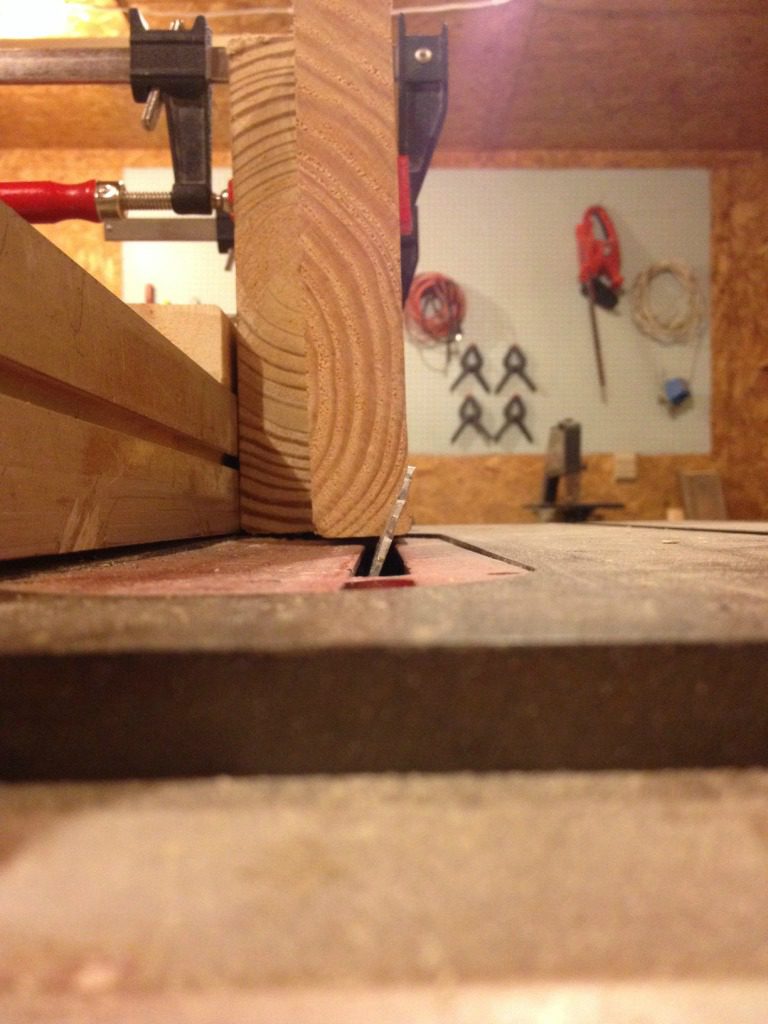
I tilted my table saw blade at 15 degrees and ran a few test pieces through until I had my rip fence to the location that I wanted. Keep in mind, I was beveling both sides of the 2×10. I wanted the bottom between the two bevels to be about ¼″ wide.
.
By the way, it helps to plane these 2x10s before running them through the saw. This will keep all the bevels the same because most 2x10s are going to have at least a little bow to them. When I had everything set up, I just clamped my 2×10 to the jig and ran it through. Then unclamp, turn it, clamp again, run it through. I did this on all four edges on both sides. I had four panels, so this was super repetitive.
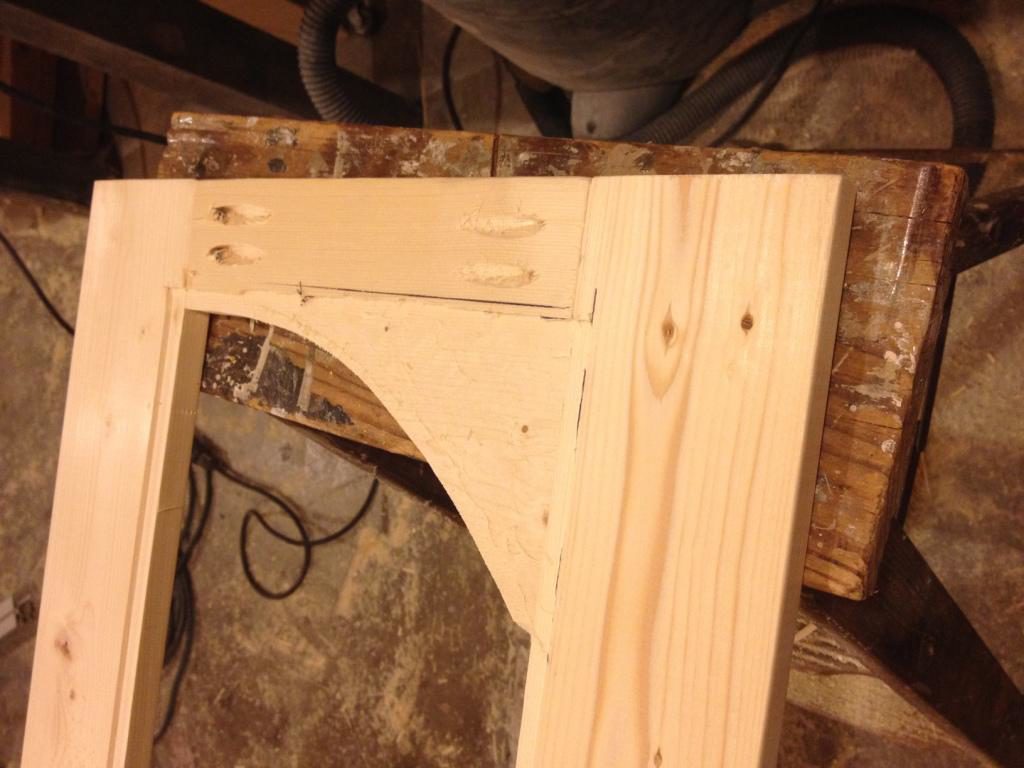
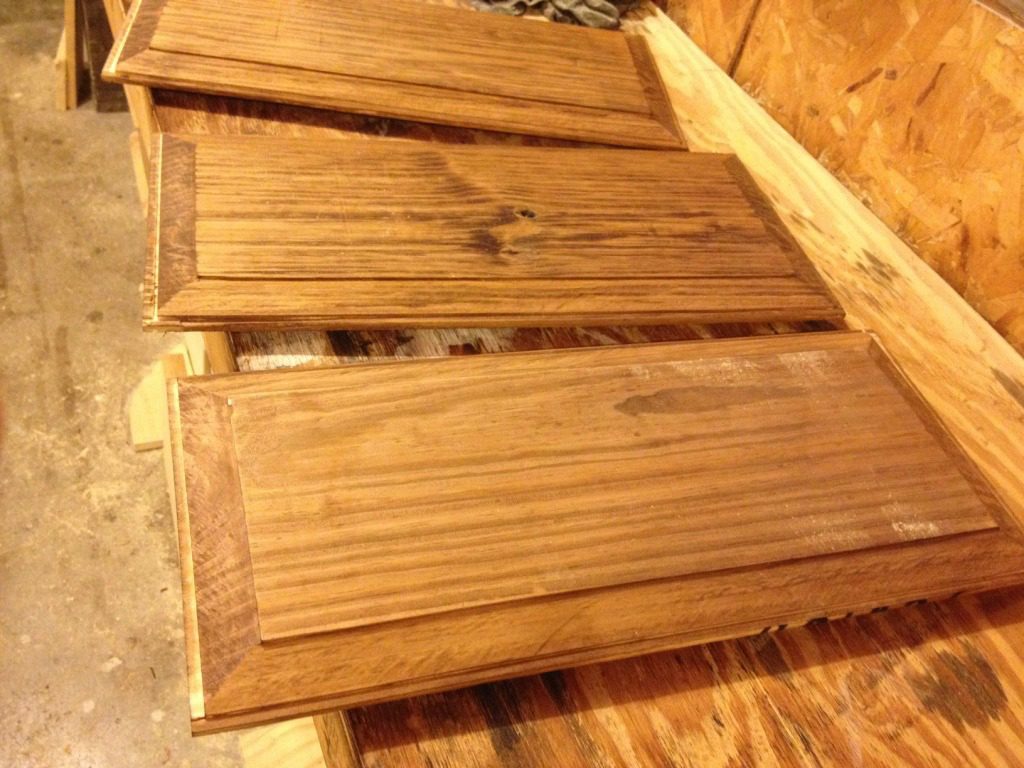
Once that was done, I used the router again (but you could use the table saw) to cut the outside edges flat so they would sit in the grooves of the frame. I had already stained them when I took this picture, but you can see where I routed them along the outside edges. I stained the frames and put some glue in the grooves I cut for these panels and placed them in.
While the glue was drying, I built frames again just like I did at the beginning…same measurements and everything. Only this time, the arches need to be mirrored because these frames will be glued on the back of the first ones. Once the frames were built, I routed out grooves on ONLY the bottom opening in the frame.
Then I stained these frames. Once the glue from the panels was dry and the stain on the second set of frames was dry, I laid them out and placed the glass in the grooves on the first set of frames. Then I glued the second frame on the back of the first one and added a few finish nails from my nail gun to keep them in place while the glue dried. Basically, you are sandwiching in the raised panel and the glass panel.
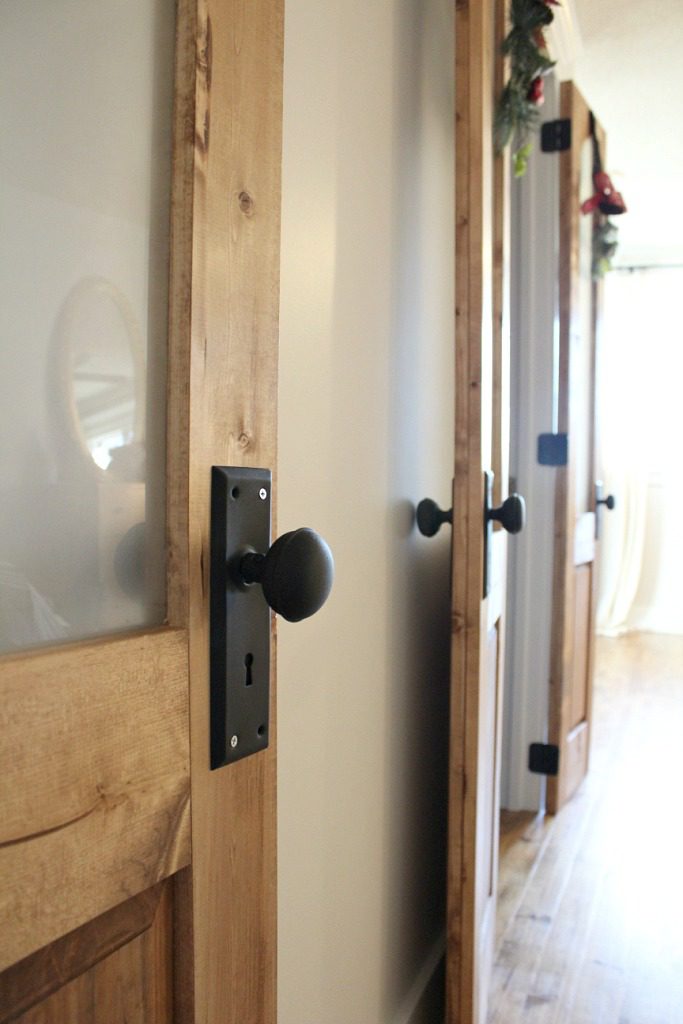
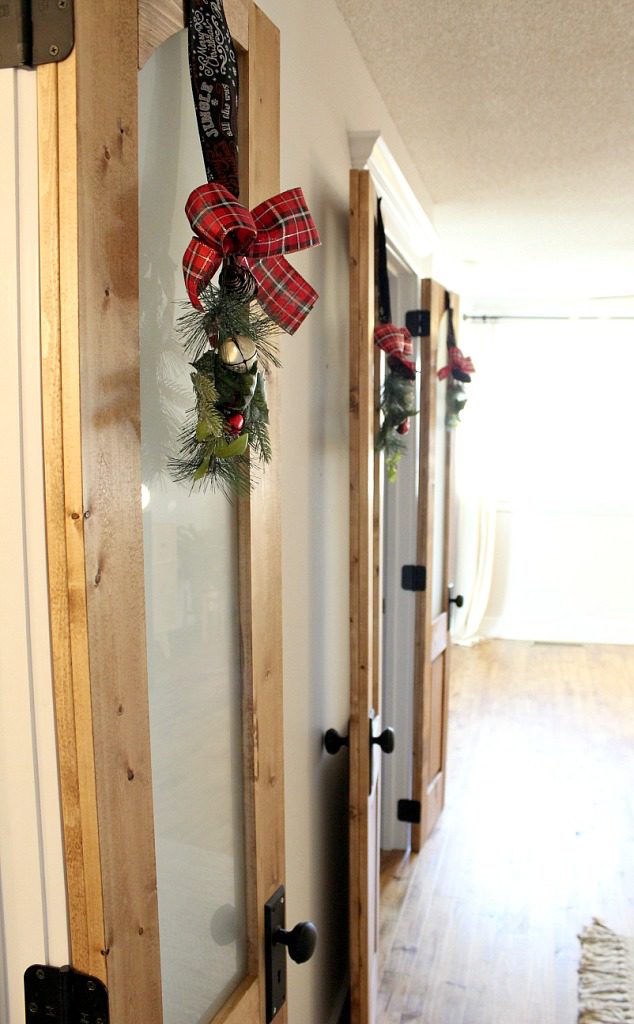
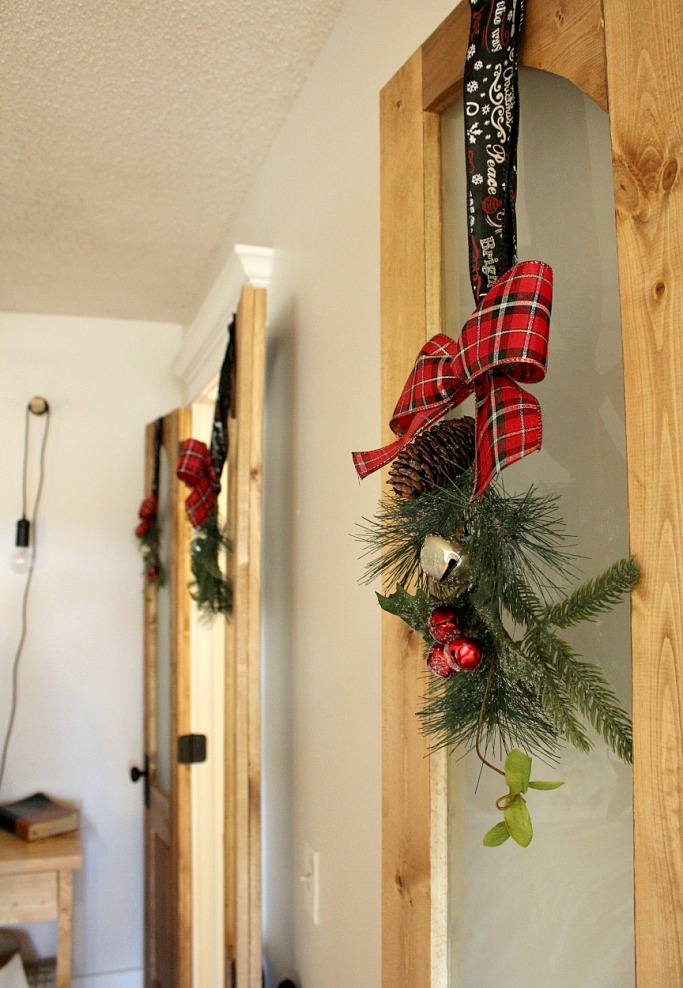
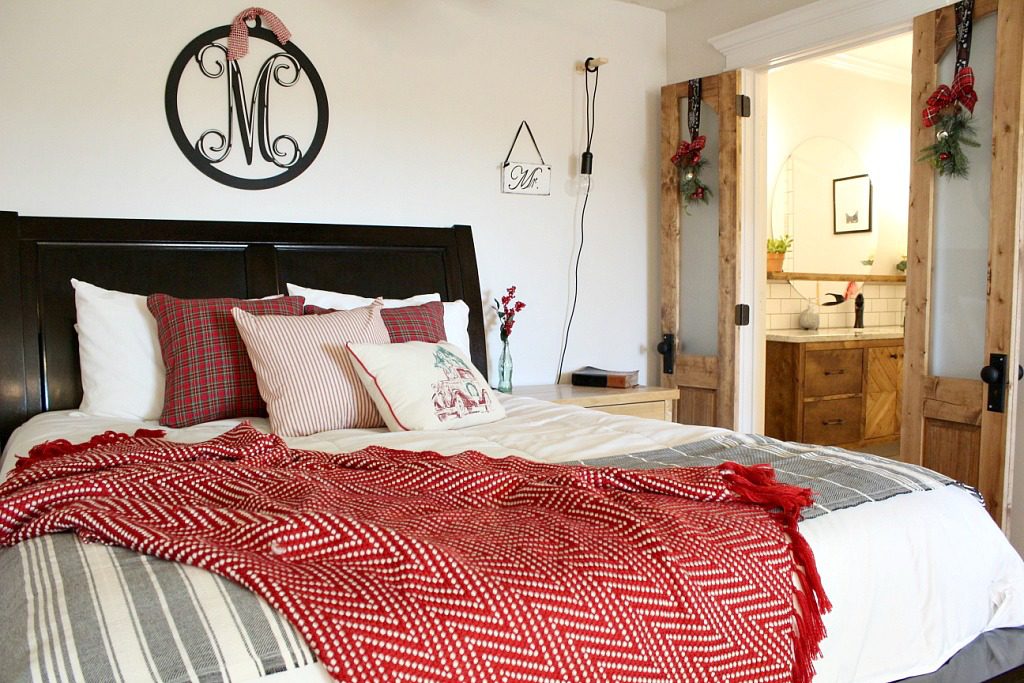
I attached hinges (affiliate link) and some antique door knobs that I found at the local “junk store.” and hung them in place. Oh and I was sure to hang some cute Christmas swags on them 🙂
I originally planned on mortising the hinges, but wanted to get them hung first just to see how they looked. Once they were hung, they fit well without mortising, so I decided not to mortise them. I may later, but for now, I’m just glad they are up and function.
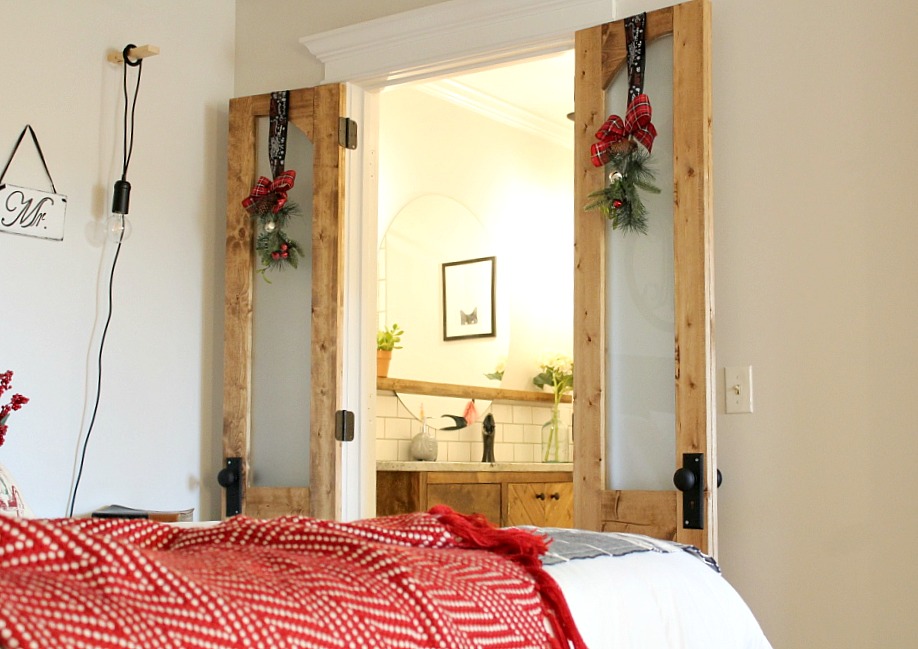
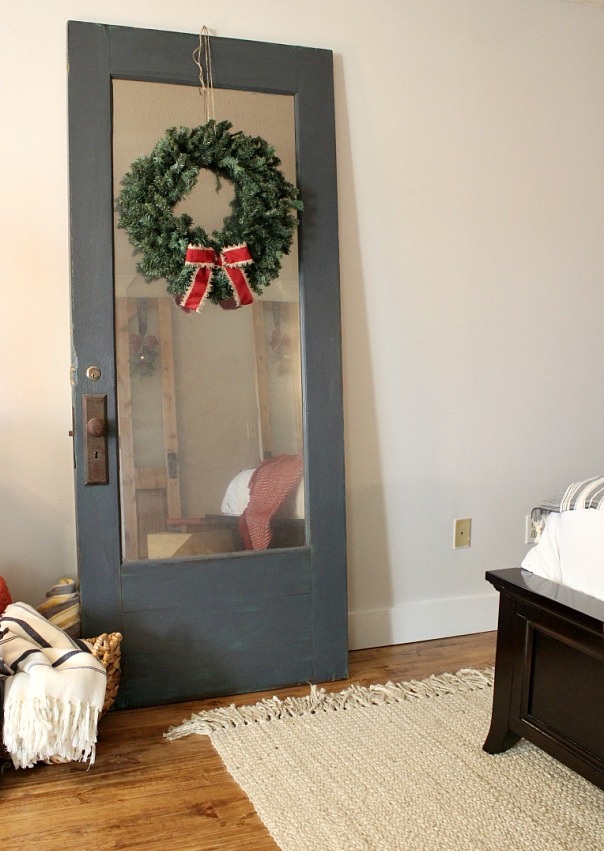
I liked how the reflection of the new doors looked in my “old door mirror” (tutorial coming soon) across the room.
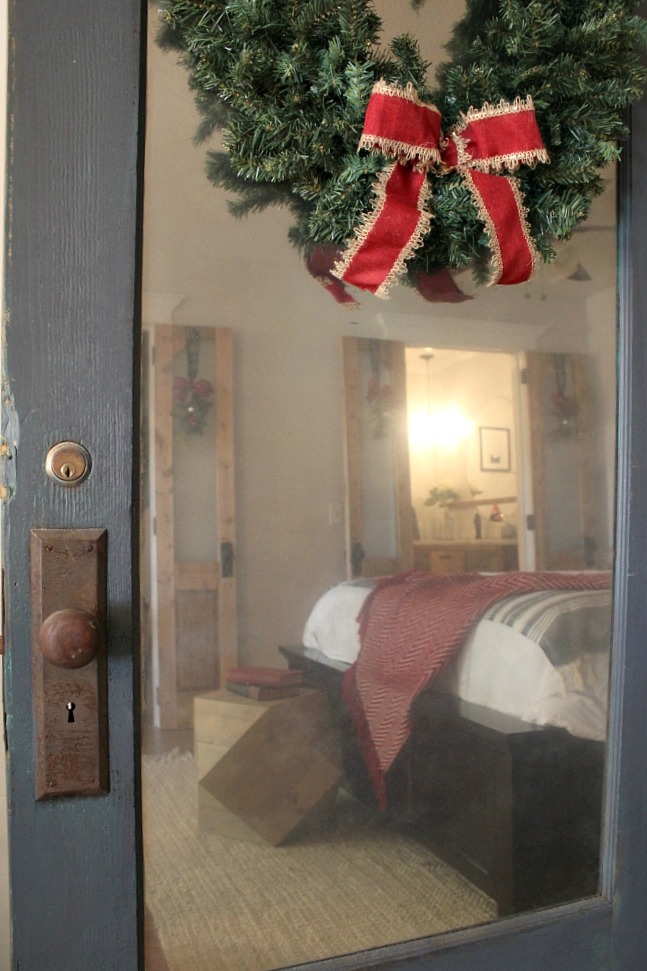
And again with the reflections 🙂
We literally NEVER close these doors, but I guess it’s nice to be able to if we wanted.
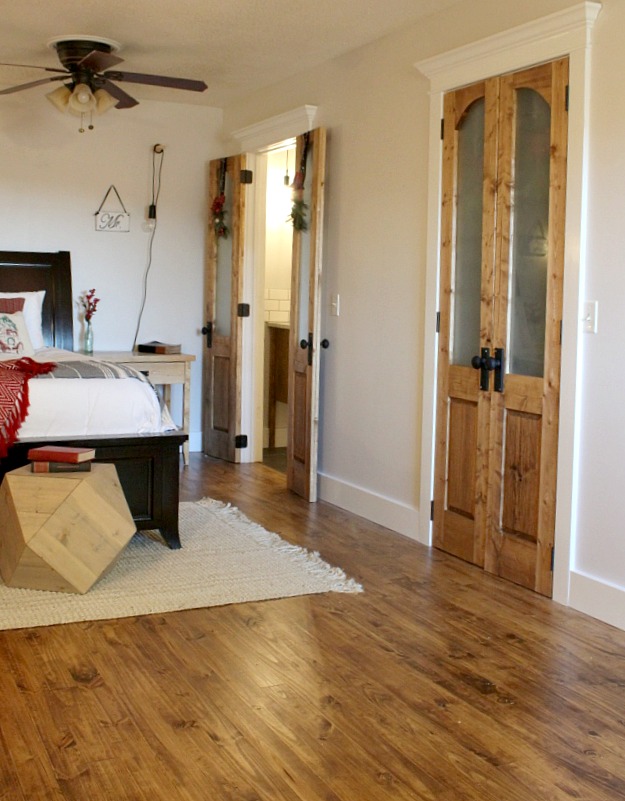
Don’t judge my ugly closet. It needs some TLC after that bathroom thing.
So what do you think of my new doors? Sometimes I LOVE them and sometimes I think they are “too much” for this room. What are your thoughts? I ALMOST painted them white, but I think I’m glad I didn’t.
.
Either way, Danny’s got his doors, and I’m glad they aren’t hollow core 🙂 So I guess for now they are staying.
Let me know what you think! And, if you guys have projects you would like to see in the new year, send me an email and let me know! I’m looking for some fun new projects to tackle 🙂
.
Until next time, happy DIYing!
Melanie says
I LOVE THESE!!! Can you please tell me color and brand of stain you used?
Shara, Woodshop Diaries says
Thank you! I used Minwax Provincial for these doors.
Mrs B says
Amazing! I have a two piece bifold door that I removed (tore off the wall) from a bedroom closet a few years ago. Saved the door, but previous home owners had put carpet in after the door so it was always a struggle to open. This is the perfect way for me to reuse the existing doors! Without cutting an opening for glass, maybe just put a mirror at the top of each door and frame over in an interesting shape instead of leaving rectangular. Thank you so much for the inspiration!!
Shara, Woodshop Diaries says
So glad you enjoyed the project!
Kelly says
Lovely!! Don’t paint- love the natural wood. So much character. Well done.
Shara, Woodshop Diaries says
Thank you so much!
Naomi says
Hi Shara! I’m a little late to the party, but this tutorial is exactly what I was looking for! Quick question for you. Did you install any kind of latches to keep the doors closed or do they ‘soft’ shut and not latch? We are wanting to install these as office doors so closing is a must for us and we can’t drill into the floor below or the transom window above.
Shara, Woodshop Diaries says
Hi! I did not install any latches. The doors are pretty heavy and usually stay put just fine. However, if you wanted, you could use a standard door handle and put the latch hole (forgive my terminology, I’m not sure the exact terms) on one door and the handle in the other. Just like how a standard interior door closes and latches into the door jamb. Does that make sense?
M. says
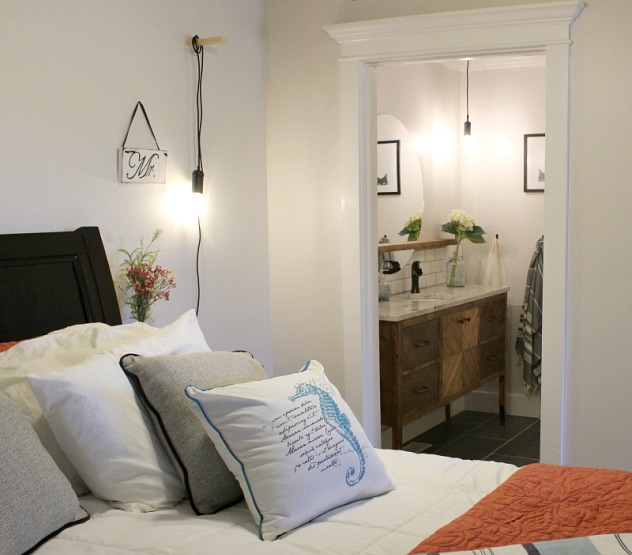
Hi! New to your blog,like it! A lot. Where did you purchase the M monagram over your bed? I love it! Website name ?
Shara, Woodshop Diaries says
Hi! Thank you! The monogram was actually a gift from our real estate agent when we bought the house. I’m not sure where she got it. I’m sorry I’m not much help! Have you checked local boutique shops? They usually have them.
Merralyn says
Awesome! Exactly what I want to do on my powder room! But I can’t figure out if there is a way to reverse the hinges that won’t require reframing the whole doorway. Can you explain how you did that and what did you do with the mortised space left by the original hinges? Thanks!
Shara, Woodshop Diaries says
I didn’t to anything to my door frames at all. I simply screwed the hinges onto the other side of the frame so they would open the other direction. I was afraid the doors may be too heavy, but they are working fine so far. And as for the mortised space, I just painted over it. I figured in the future, I will glue a thin piece of wood inside and putty around it, but for now, they don’t really bother me and you don’t really notice them too much.
Courtney @ Greywoodmama says
What a great idea! I love the concept of two smaller doors rather than one big one (you’re right it takes up so much space)! Nice work!
Courtney
Shara, Woodshop Diaries says
Thank you!!
Roberta Treichel says
B – E – A – U – TIFUL ! ! ! I’ve been reading the other comments and think there would be a great interest in learning the use of basic hand and power tools. Many women are afraid to use a circular saw for instance. I was, before I conquered that fear. (Aw heck…I was afraid to start a gas powered lawn mower also!) Now I love to create things with my hands. It is so satisfying. However, you take the minimal skill I have to a much greater level. You have the tools and know how to use them and I am sure there are women out there who would love to take a class or two from you. You could have very simple projects to choose from, like they do in high school, just to learn how to handle the different tools. Thank you so much for sharing!
Shara, Woodshop Diaries says
Thank you so much! I was so afraid to use the circular saw too! Now it’s one of my favorites…although I’m not sure I will ever NOT be afraid of the table saw haha. I appreciate the encouragement and I am in the process of trying to figure out how to organize a couple classes and see how it goes 🙂 Wish me luck!
Tom Clarke says
Love the doors and I’m glad you didn’t paint them. Seeing some of the pictures of your shop, have you ever thought of giving us a visual tour of it and where it is located relative to you house?
Shara, Woodshop Diaries says
Thank you! I have thought about doing a “tour” of the shop, but that would require cleaning it (HAHA) and it’s really not very impressive. But that is a good idea for a future post. I’ll try and work up the motivation to clean it up a little and see what happens 🙂
kristin howard says
Shara, you continue to amaze me! I, like Monica, would LOVE to do a workshop with you. Please plan one and share your wonderful ideas and inspirations in person.
Shara, Woodshop Diaries says
Thanks, Kristin!! That’s so sweet! I would really love to do a workshop!! I’ll be thinking of one I could do 🙂
Cathy says
I absolutely LOVE these! Our master bathroom doesn’t have a door and it’s difficult to try to sleep while hubby is getting ready (or vice versa). Ours is a wide opening and I really want a barn door, but an outlet on one side prevents that from being an option. Once framed in, this would be a great alternative!!! (And I would leave them just the way the are.) 🙂
Shara, Woodshop Diaries says
Thank you!! It sounds like French doors like these would be a great option! If you do them, I’d love to see!
Shantel says
I love the make over. I also love the stand up mirror and the octagon looking table in your room.
Shara, Woodshop Diaries says
Thank you! I’m actually posting a tutorial soon for the mirror and I have a post already (you can find it on the projects page) for the “octo” table if you want to check it out 🙂
John Murley says
Very cool!! Now I have an excuse to buy that Kreg jig I have been seeing advertised! Great job! I may try this one!
Shara, Woodshop Diaries says
Thanks! Yes, I use my Kreg Jig ALL. THE. TIME. Great, handy tool!
Kevin Syler says
Very Excellent Job!!!!
Shara, Woodshop Diaries says
Thank you!
Frances Batson says
Love the doors. They look great. I would love some for my bath and closet.
Shara, Woodshop Diaries says
Thank you!! They work great for our bath and closet…you should give them a shot!
Linda says
Gorgeous doors. Quality workman(woman)ship! I think I would paint them white, but they are wonderful as is. You are SO talented!!
Shara, Woodshop Diaries says
Thank you!! 🙂
Donna Boyd says
Very nice thoughtful solution to doors being in the way. Not a craftsman myself, but appreciate the work you put into doing your projects. & I’m like your husband, I like privacy of doors. Looks like a win/win all the way around.
Shara, Woodshop Diaries says
Thank you!!
Monica says
Oh, wow. You are my HERO!!!! Do you ever hold classes in person? I’d SO love to take a class from you!
Shara, Woodshop Diaries says
Aww thank you so much 🙂 You made my day! I have thought about doing classes, but I never can get organized enough to figure out how and what exactly I would teach. (I’m so scattered!!!) It is something I am still thinking about though. Are you local to west Kentucky?