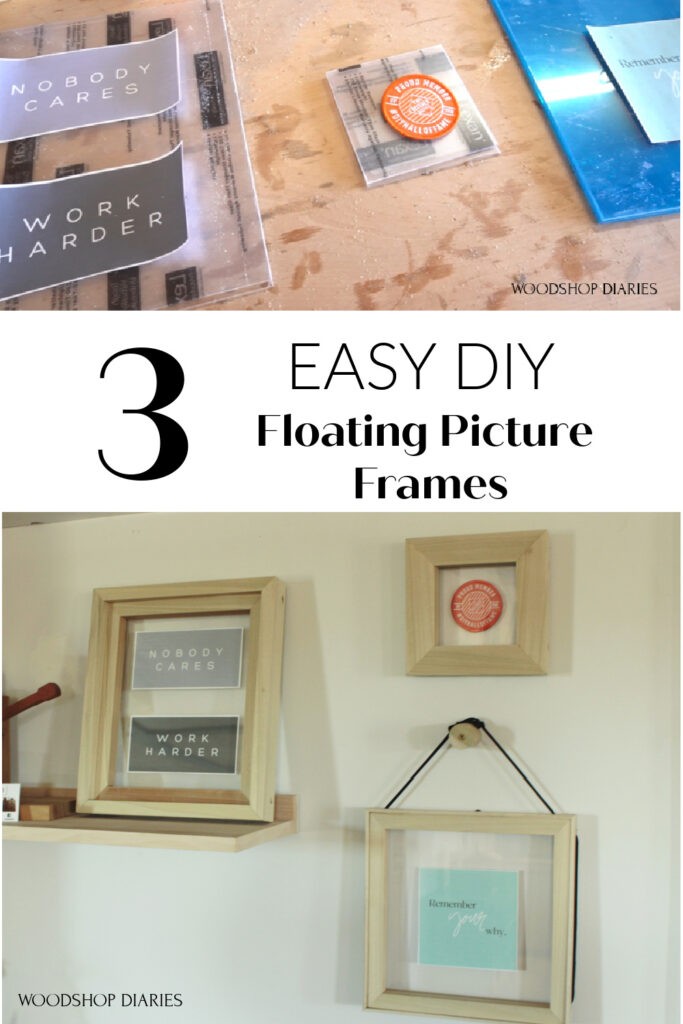
This post about how to make 3 EASY DIY Floating Picture Frames {And How to Cut Plexiglass} is sponsored by The Home Depot as part of the #THDProSpective Program. It also contains affiliate links. See policies.
Easy DIY picture frames are actually one of my most requested tutorials and oddly enough, until now, I didn’t have many to share!
.
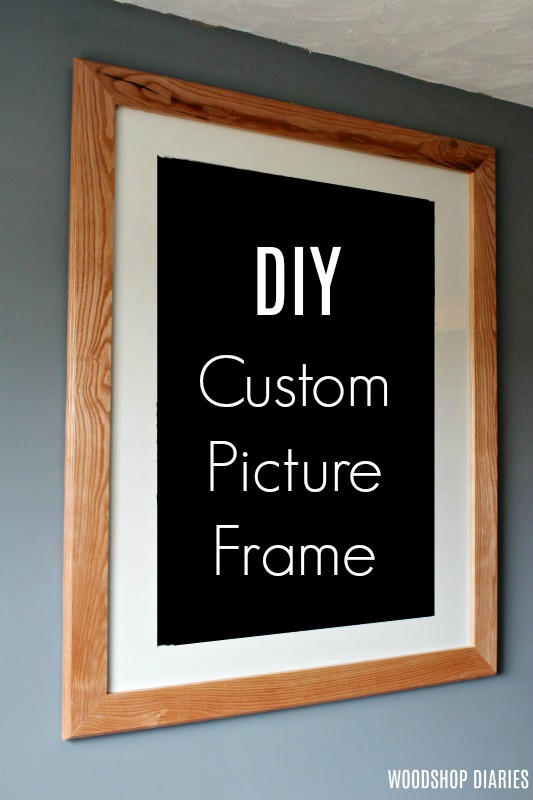
I actually built my dad a huge DIY custom picture frame as a Christmas gift a couple years ago and shared the tutorial for it here. But it used dowels, and a router, and it may have been a little more involved than most people are looking for.
So, in this post, I’m going to show you how I made 3 different style SUPER EASY DIY floating picture frames with just two basic tools. I’ll also show you how easy it is to cut plexiglass for them, too!
.
So if you’re ready to get building, let’s go! I’ve got the video tutorial here and the step by step below:
Tools and Materials:
- Miter saw (or any wood cutting saw is fine–doesn’t have to be a MITER saw)
- Nail Gun (optional, just makes things quicker)
- Wood Glue
- ¾″ square dowels
- 1×2 boards
- ¼″ x 1 ⅛″ lattice trim
- Thin Plexiglass Sheets
- Ryobi ONE+ HP Cut Off Tool (used to cut plexiglass)
- Clamps (also optional–if you don’t have clamps, you can use CA glue or painters tape in place of clamps to hold pieces while wood glue dries)
- Turn buttons
A Note About FLOATING Picture Frames:
I’m sharing how to make 3 different style FLOATING picture frames in this tutorial, but the first step to making any of them is cutting the plexiglass to the size you want.
.
If you don’t want to use plexiglass for your frames, you can skip this step. But since the graphics/images I framed are “floating” inside the frame, they’re basically sandwiched between two pieces of plexiglass. So plexiglass/acrylic is necessary to be able to “float” your picture.
.
To make things easy to change out in these frames, I also used these turn buttons—or I call them twisty tabs–on the back to hold the plexiglass in place.
How to Cut Plexiglass
Normally, I have my local glass shop cut my glass and plexiglass pieces for my projects. But since these plexiglass pieces will be small and various custom sizes, it would be much cheaper, quicker and easier to just cut them myself.
.
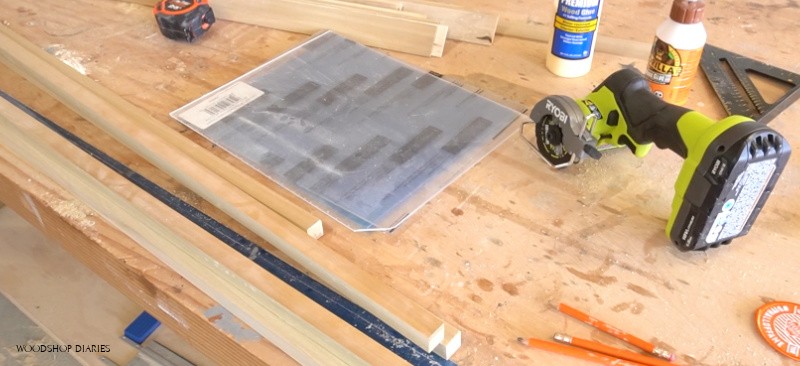
I used some (about) ⅛” acrylic sheets from Home Depot. They come in various sizes, all the way up to a 4×8 sheet. I just grabbed some 11x14s.
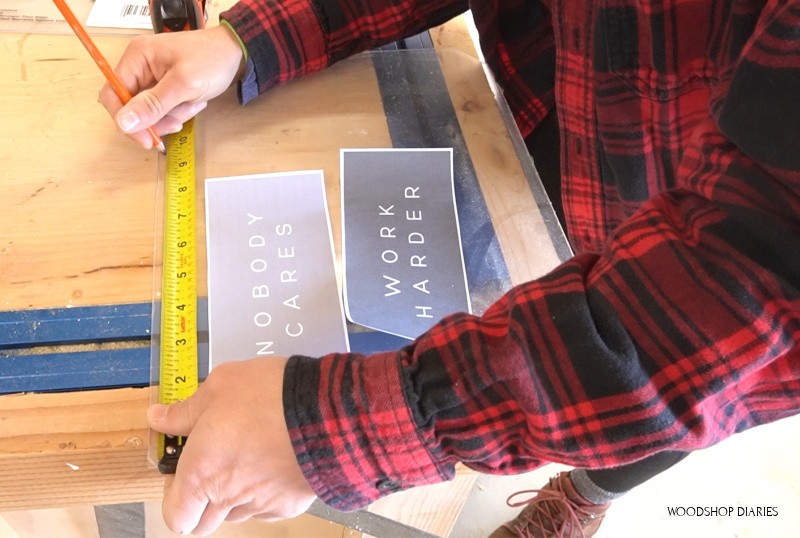
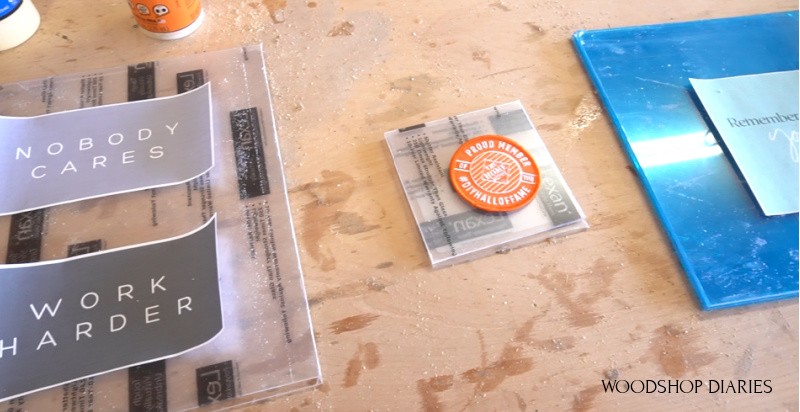
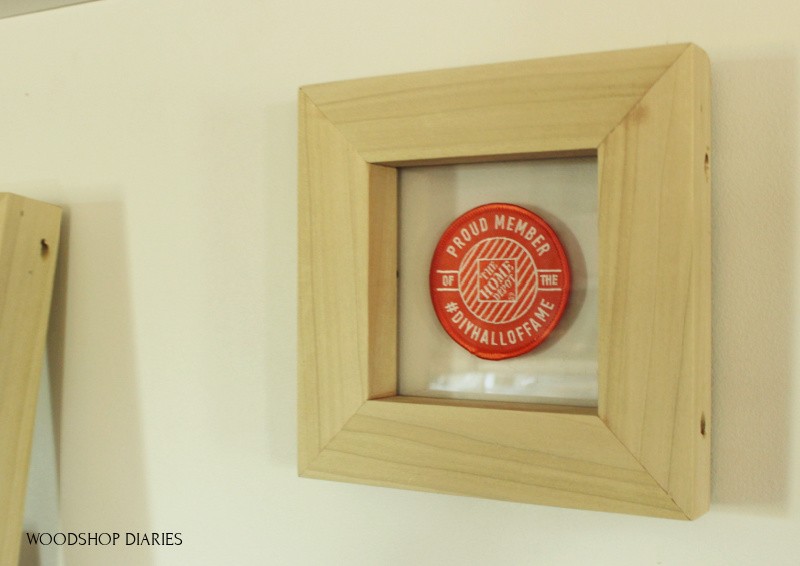
I designed some simple graphics on my computer (PicMonkey and Canva are great for this!) and also used a patch that I won a few years ago at a conference for these frames. You can use a photo, a poster, fabric, whatever you want to frame for this.
.
I laid them out on my sheet how I liked the spacing, then marked where I wanted to cut–no measurements here…just eyeballing how I thought the spacing around the image looked good.
Now, I’ve used the cheap little hand knife they claim will cut plexiglass before and it was a terrible experience with very poor results. I’ve also used a jig saw to cut plexiglass and it melts, gets stuck, then chips or cracks the sheet.
.
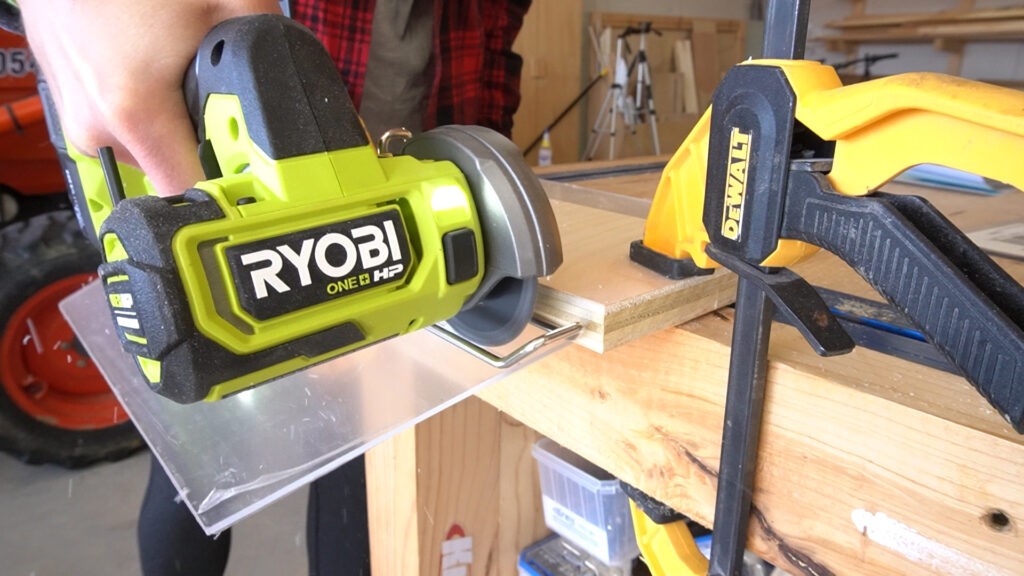
So THIS time, I tried this new Ryobi ONE+ HP Compact Cut Off Tool with a plastic cutting blade and was thoroughly impressed with how quick and clean the cuts were.
When I first saw this tool, I found it kind of strange looking. But after I used it, I understood the concept.
.
It’s basically a hybrid between a drill and an angle grinder. It cuts like an angle grinder, but it feels a drill with the head turned 90 degrees.
.
It’s compact and lightweight and it’s got a forward and reverse switch to turn the blade both directions. It’s also got a variable speed trigger—which is good for cutting plastic to help prevent melting.
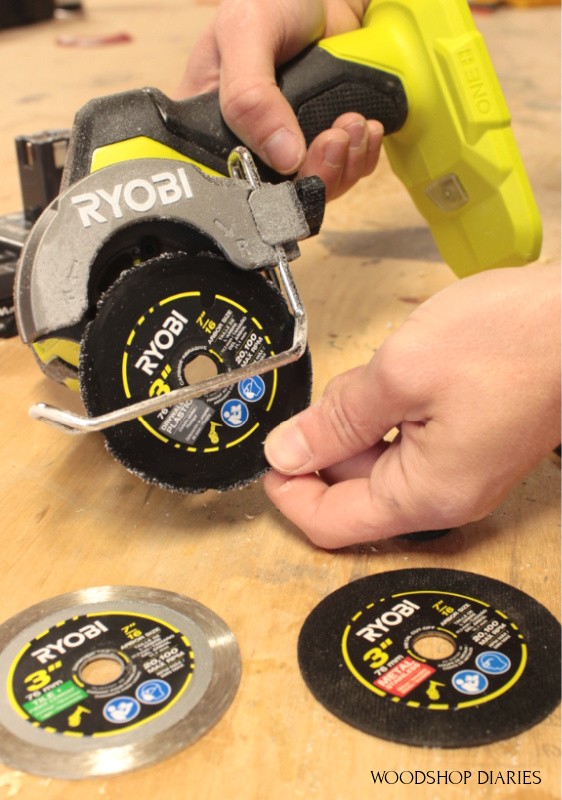
It comes with a plastic and drywall blade, a metal cut off wheel, and a diamond blade for cutting tile and cement board. You can learn more about the new Ryboi ONE+ HP cut off tool at the link here if you’re interested.
.
For cutting straight lines on the plexiglass, I just lined up a straight edge (scrap piece of wood), clamped and ran the metal blade guard against it to make the cut. You can skip the straight edge and freehand these cuts, too if you have a steady hand. (I don’t haha!)
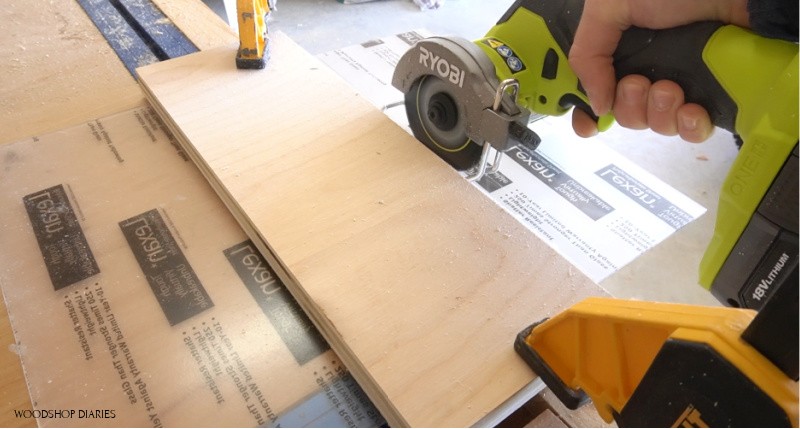
I did find it cut best in this case with the switch in reverse. It seemed to not melt that way.
.
I cut two pieces identical in size for each item I was framing. Then, I was ready to start making the actual floating picture frames.
Easy DIY Floating Picture Frame Style 1
Style 1 is my personal favorite, so I’ll start with it 😊
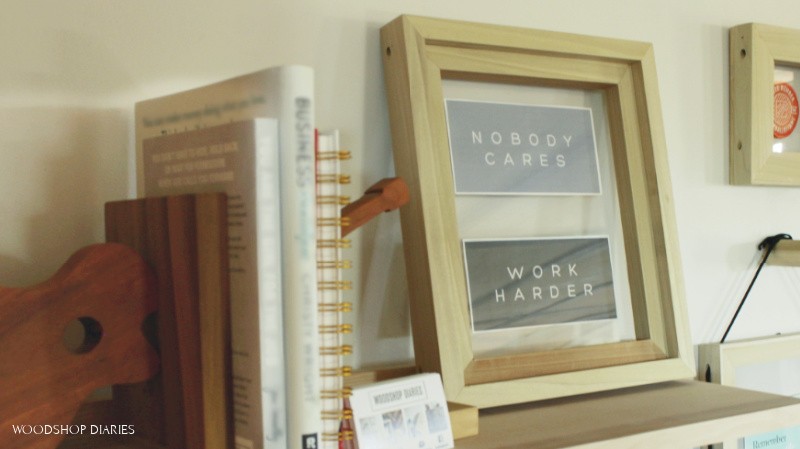
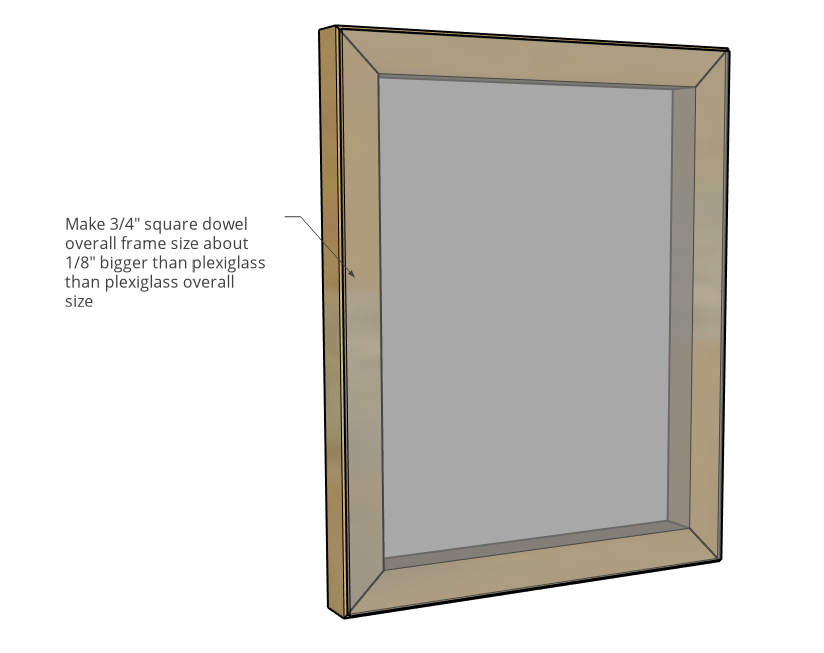
This particular floating picture frame design requires ¾″ square dowels and 1×2 board. It is basically just a 1×2 wrapped around a square dowel frame.
.
I used ¾” square dowels for this and set up my miter saw to cut 45 degrees. Now, you don’t have to miter these. You can leave it on 90 and make butt joints. You also don’t need a MITER saw for this. Any saw that you can cut fairly straight with will work fine.
.
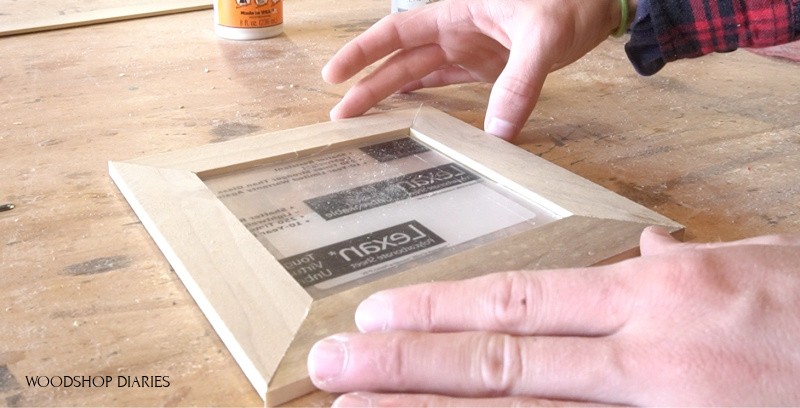
I basically trimmed four pieces of square dowel so that when fit together, they’d be just barely (like ⅛″) bigger than the plexiglass piece I was putting in it.
I applied wood glue to the corners and nailed them together with brad nails. If you are patient, and don’t have a nail gun, simply glue and clamp until dry.
.
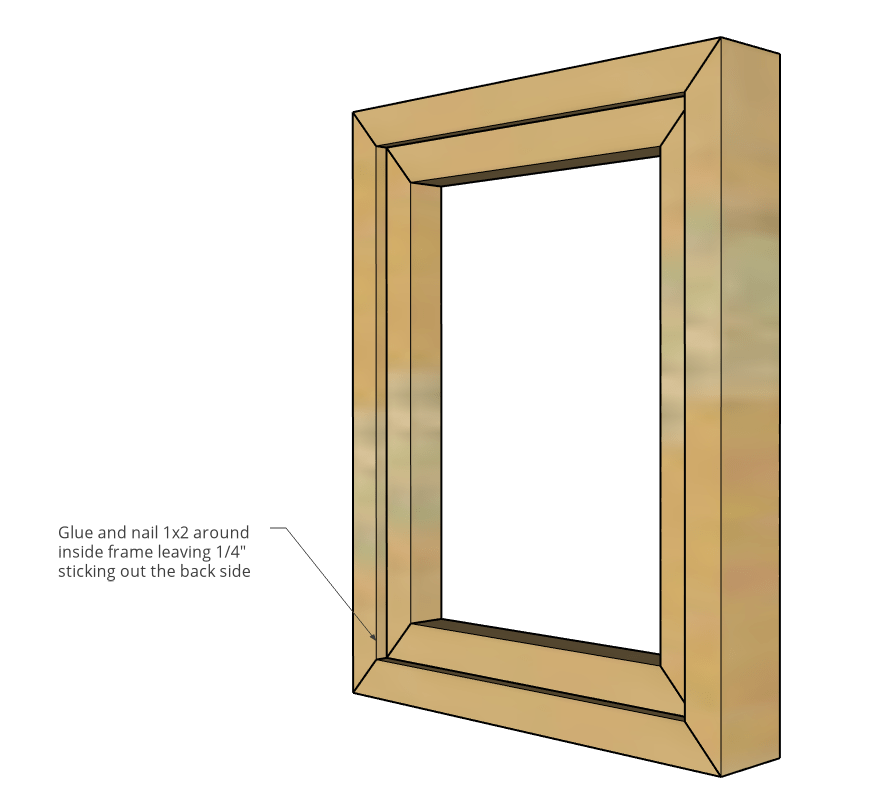
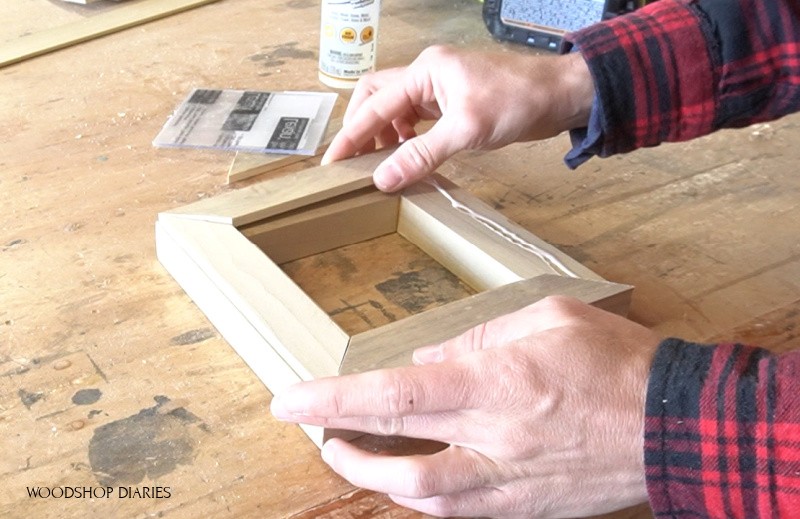
After the glue had dried, I cut to fit 1×2 pieces with 45 degree mitered corners around this frame. Again, butt joints are fine here if you want to skip the mitered corners.
.
I glued and nailed these 1x2s around the edges leaving about ¼” sticking out the back side of the plexiglass, so that when I install the two ⅛″ plexiglass pieces, it’ll be flush across the back side of the frame.
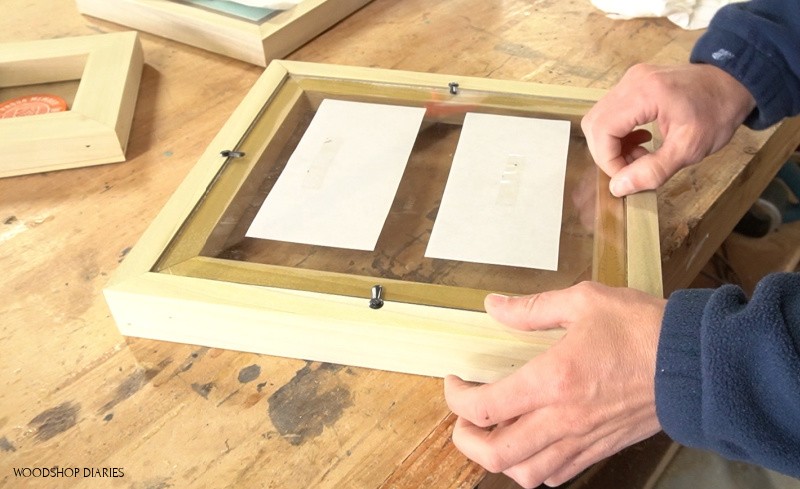
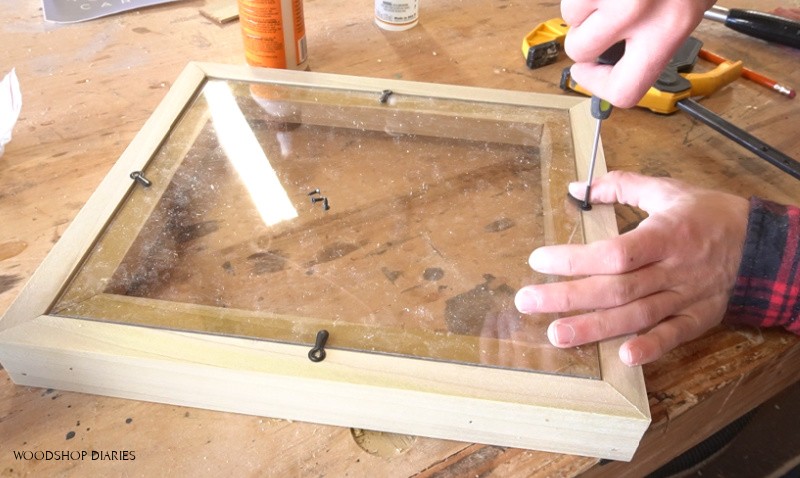
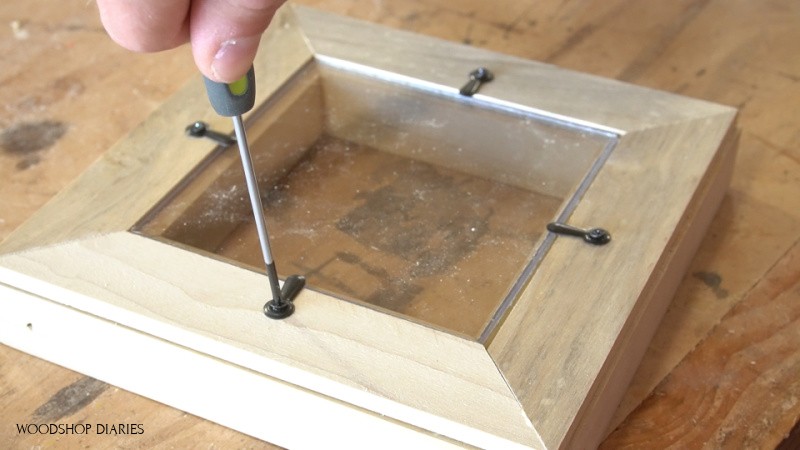
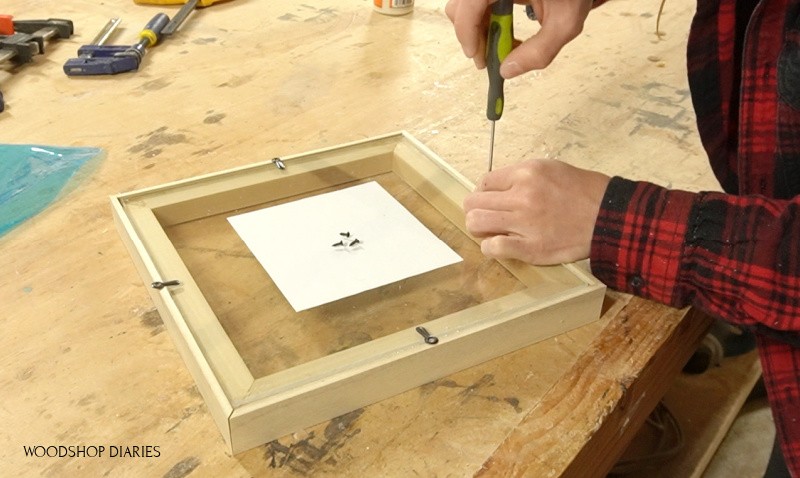
Then, I screwed these twisty tabs into the back sides of the frame to hold the plexiglass in place. I’ll go back and clean the sawdust off the plexiglass later, but for now, I set this off to the side to make the next frame.
Easy DIY Floating Picture Frames Style 2
Style 2 is a little simpler and is made of 1x2s and ¼” thick by 1 ⅛″ wide lattice trim.
I began by cutting down the lattice pieces so it would make a frame that the plexiglass would fit INSIDE. Again, just like before, the mitered corners are optional.
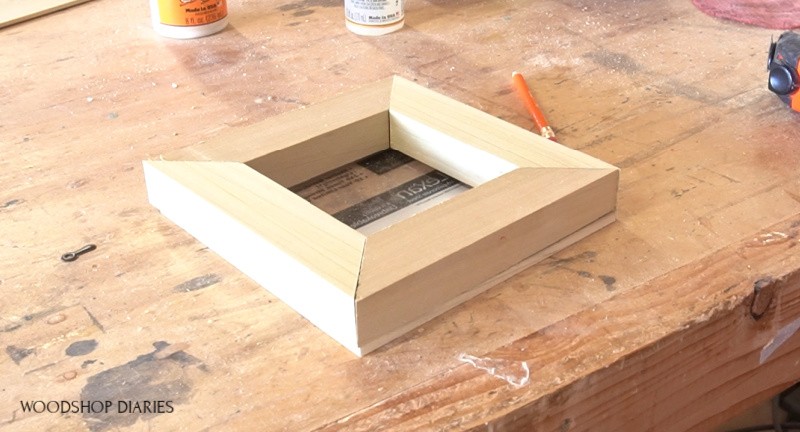
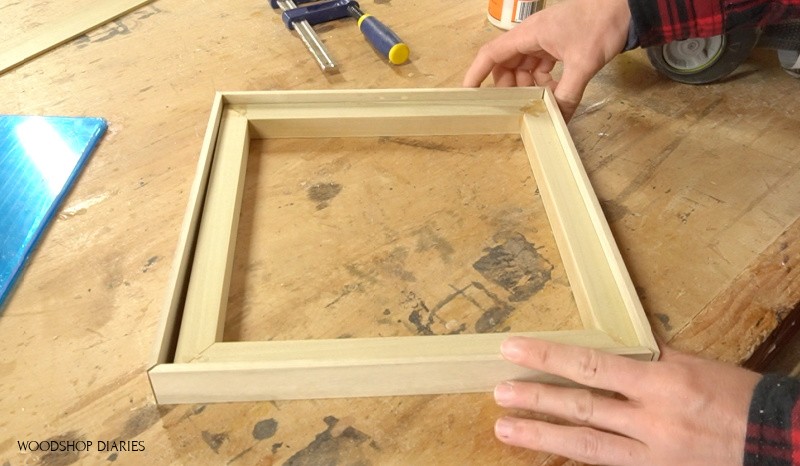
Once I had this lattice frame cut, I measured its overall size and cut 1×2 pieces to make a frame whose overall size matched that of the lattice frame. See below 1×2 frame laying on top of lattice frame–they’re the same size.
I glued and nailed the 1×2 frame together and clamped until dry. Again, you can use super glue or painters tape if you don’t have a nail gun or clamps 🙂
.
Then, I flipped it upside down and glued the lattice frame onto the back. I used a heavy object to hold it in place until it was dry, then, I screwed twisty tabs on the back to hold the plexiglass in place.
Since the lattice is ¼” thick, and the plexiglass is ⅛” thick, when the two plexiglass pieces are placed inside, everything should sit flush across the back just like the last frame.
Again, I’ll go back and clean the sawdust off later, but for now, I moved on to the last style frame.
Easy DIY Floating Picture Frame Style 3
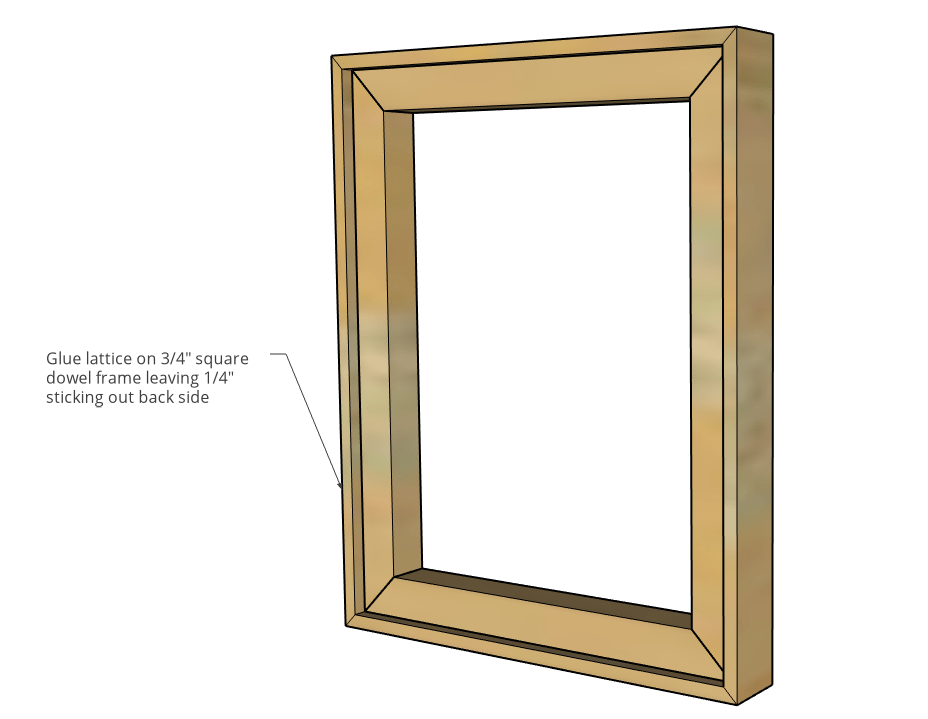
Style 3 is the same concept as style 1, but instead of using 1x2s, I used ¼″ x 1 ⅛″ lattice trim to keep the frame a little thinner and more minimalist looking.
So, I cut ¾” square dowels to make a frame the same size or slightly bigger than the plexiglass I was framing and glued and nailed it together.
Then, I cut lattice trim to wrap around that frame.
I glued the lattice trim on so that there was about ¼” sticking off the back side of the square dowel frame so that when the two pieces of ⅛” plexiglass are installed, it’ll all be flush across the back.
.
I didn’t have any brad nails short enough to nail this frame on, so I simply glued and clamped until it was dry.
If you don’t have clamps, you can use painters tape to kind of wrap around the pieces to hold until the glue dries OR simply use some super glue or CA glue to help hold pieces in place until the actual wood glue is cured.
.
Then, just like the last two frames, I installed twisty tabs to hold the plexiglass in place.
Floating Picture Frame Hanging Options
The final step is clean up and hanging. I used some glass cleaner to clean up all the saw dust, then used a piece of double sided tape on the back plexiglass piece to make sure the pictures stay in place, then put the frames back together.
.
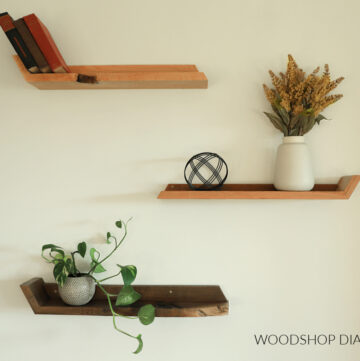
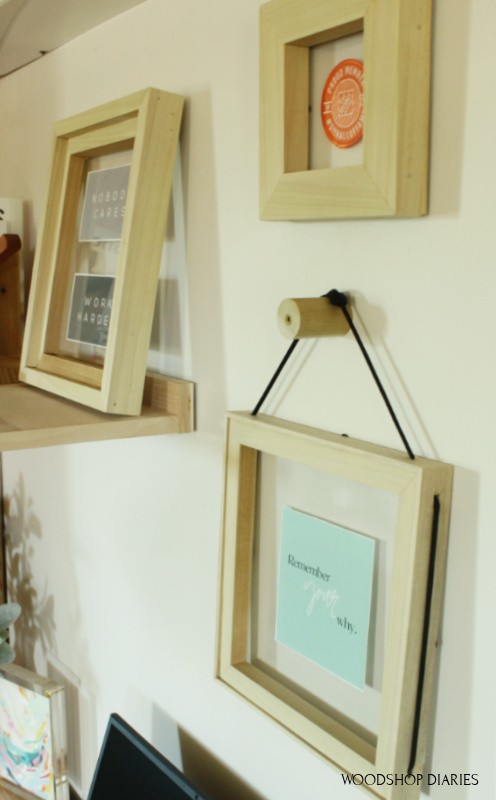
To hang, you can use your standard sawtooth hangers for this.

Or simply place it on a shelf.
.
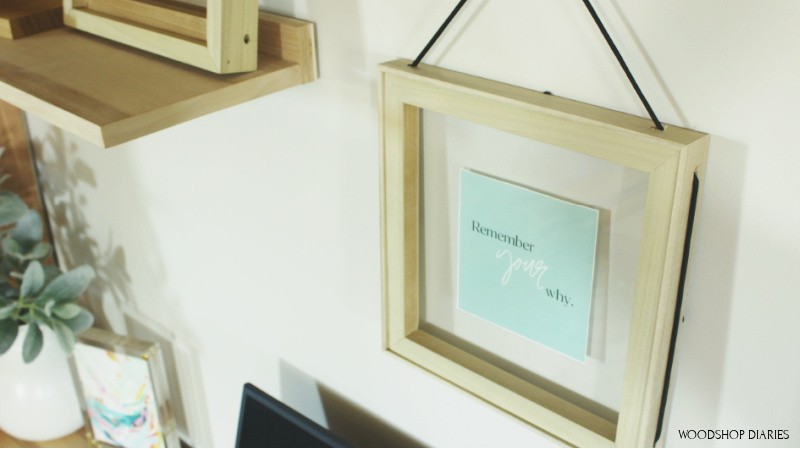
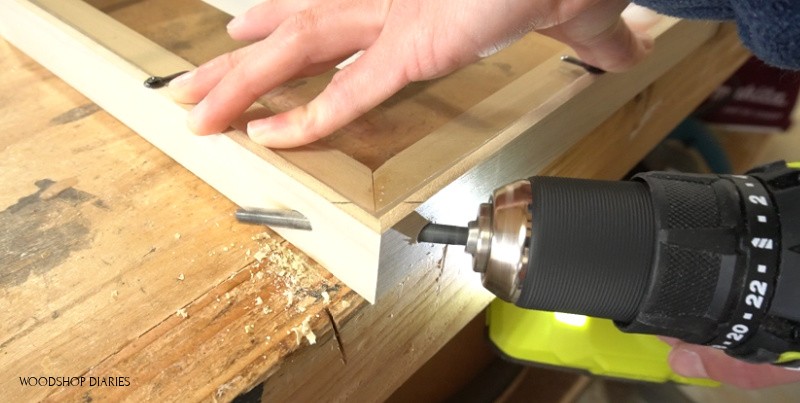
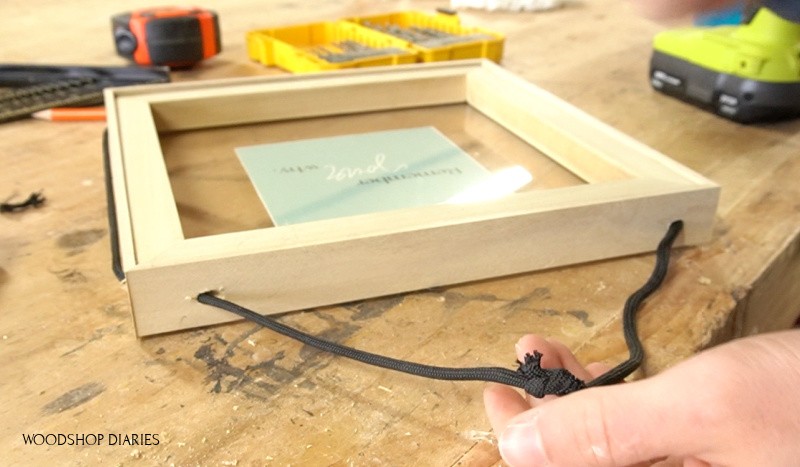
OR, use a drill to drill holes into the corners to run some paracord and hang it on a piece of wood dowel you screwed into the wall.
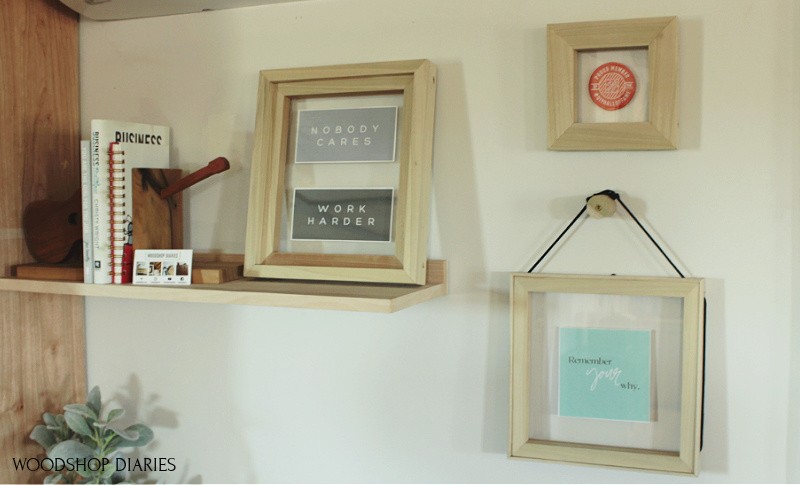
As you can see, making picture frames doesn’t have to be complicated. This is a great beginner project you can tackle with minimal tools and get as creative as you want.
.
I actually hung these graphics up in my desk area to help keep me motivated while working alone from home right now. So, now that my desk space is complete, I guess I should probably get back to work 😊
I hope you’ve enjoyed this little project. There are plenty more coming your way, so be sure to subscribe to my newsletter below so you don’t miss out on what’s coming next!
.
And don’t forget to pin this for later!
Until next time, happy building 😊