
I know, I know. It was never supposed to take this long. I was never supposed to write this many “update” posts before I finally show you the finished product.
.
And I was never supposed to be this burnt out. I apologize for the lack of “fun project” posts lately. I am dying from not being able to do fun fall projects and show you super cool builds I’ve been working on in the shop. Like it’s literally eating me alive! So please please please hang with me. I’ll be back in the shop soon. And seriously I’ll be ALL ABOUT these fall crafts soon too. Fall is calling my name!
.
But first, we have to finish this bathroom. And it’s really starting to wear me out. I. Am. Pooped.
.
With every last minute trip to the store to get that one thing we forgot the last time we were there, I’m getting more and more discouraged and we are getting further and further behind. So we just laugh. For real. We laugh when we sit down at 10:30 at night and eat supper when we are normally in bed by 10. We laugh when we are still at Lowe’s when they close and lock the doors at night. We laugh when we cut a tile too short because we are cutting them in the dark with a flashlight. And we laugh when it’s a million degrees in our house and we are wearing dust masks and our safety goggles fog up every ten seconds so we have to stop and wipe them off. Because if we don’t laugh at this point, we will just be crying.

We really are having fun. Remodels really are worth it. But there comes a point when you are ready to be done, but the list still has a lot of stuff on it to be done. Thankfully, we can see the light at the end of the tunnel and, you guys, I will be showing you the finished room SOON…like real soon. And then I can get back to normal life : )
.
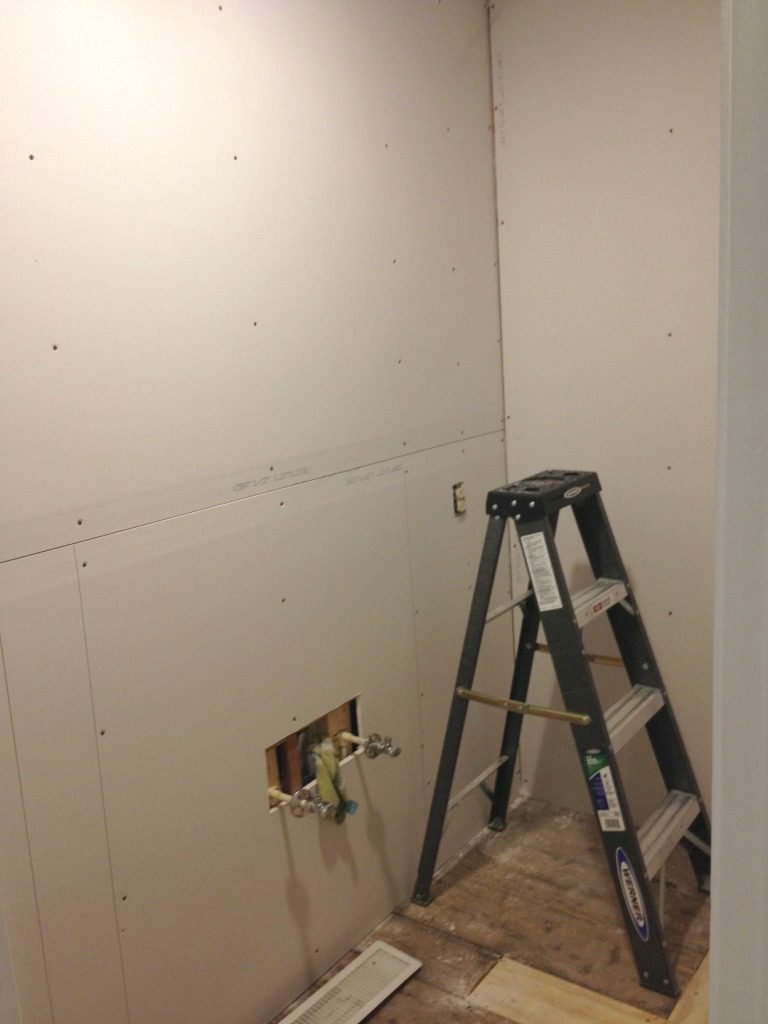
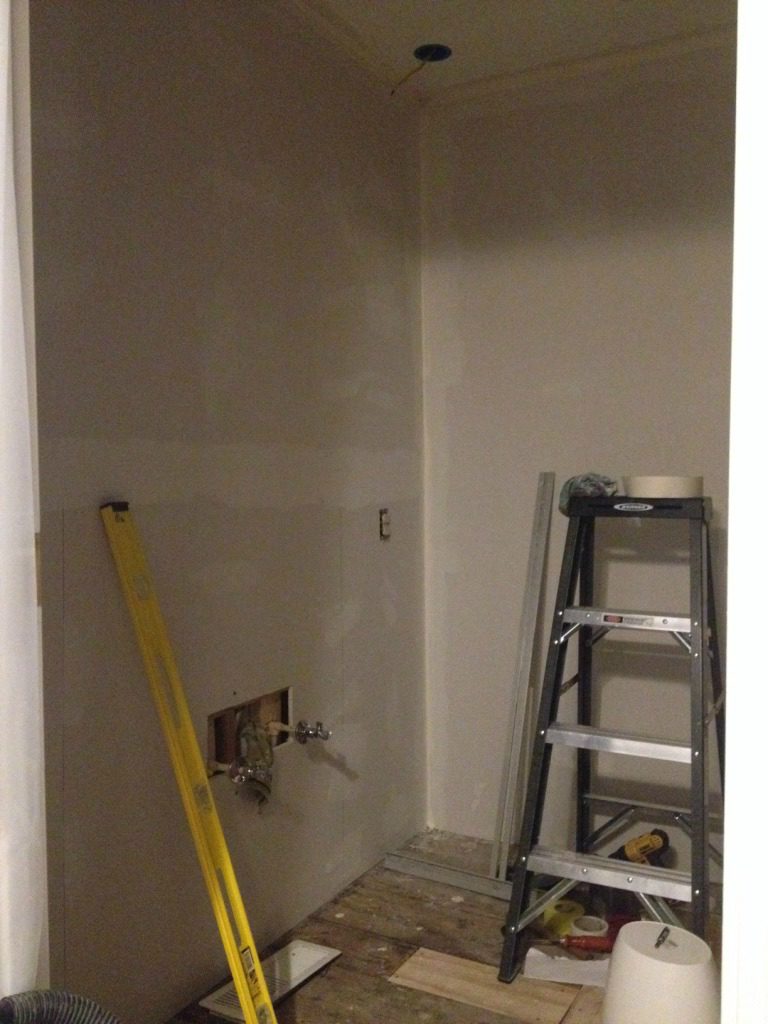
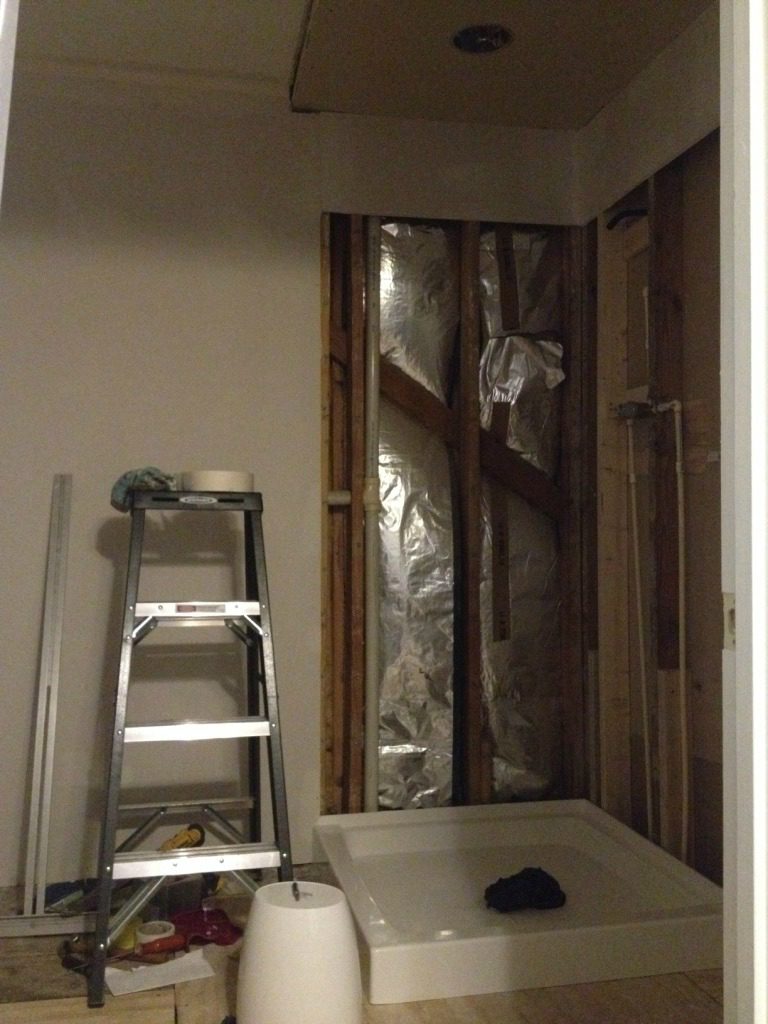
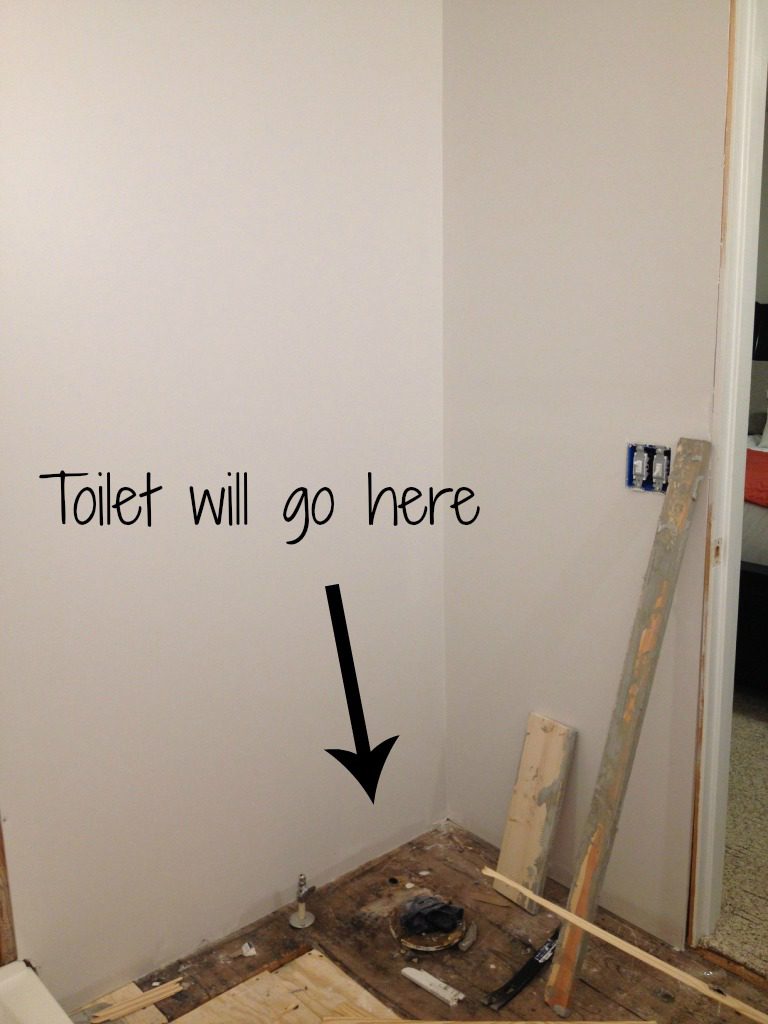
We last left off here. No drywall, no lights, no floor, no shower pan…pretty much we were still at the studs.
We’ve come a long way. First, we finished the plumbing under the house and we got the subfloor all back together. If you remember, we had to replace a large part of the subfloor. (FYI, the large piece of plywood was turned the other way before it was screwed. The grain of the subfloor should go perpendicular to the joists, so that is what we did.)
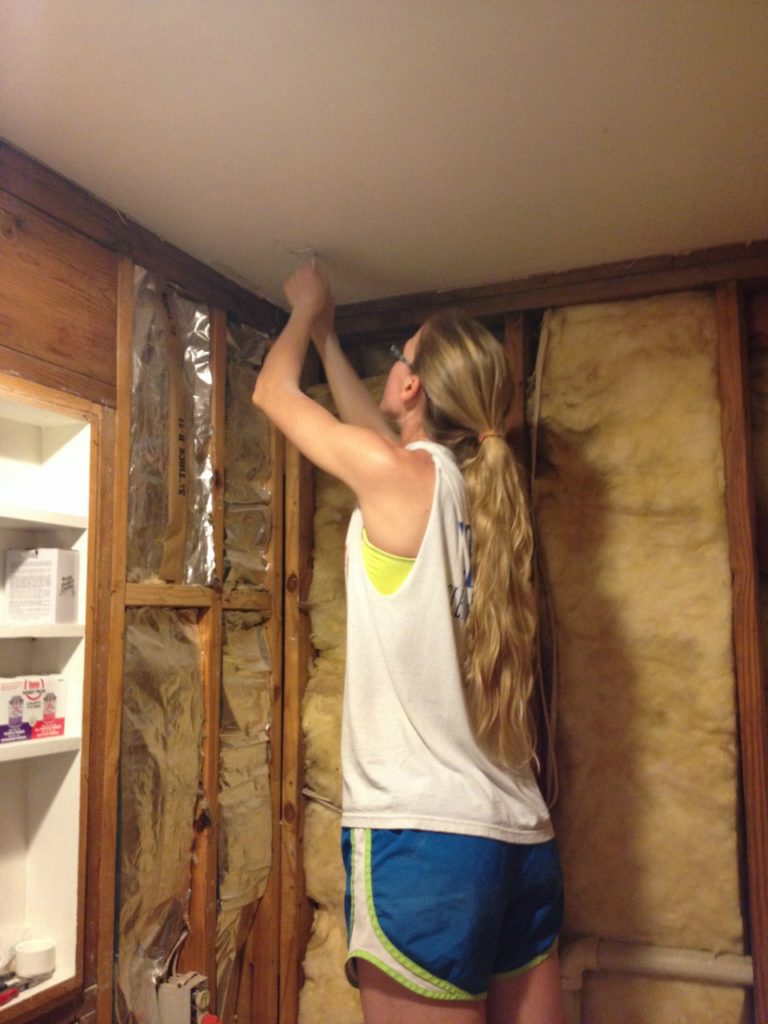
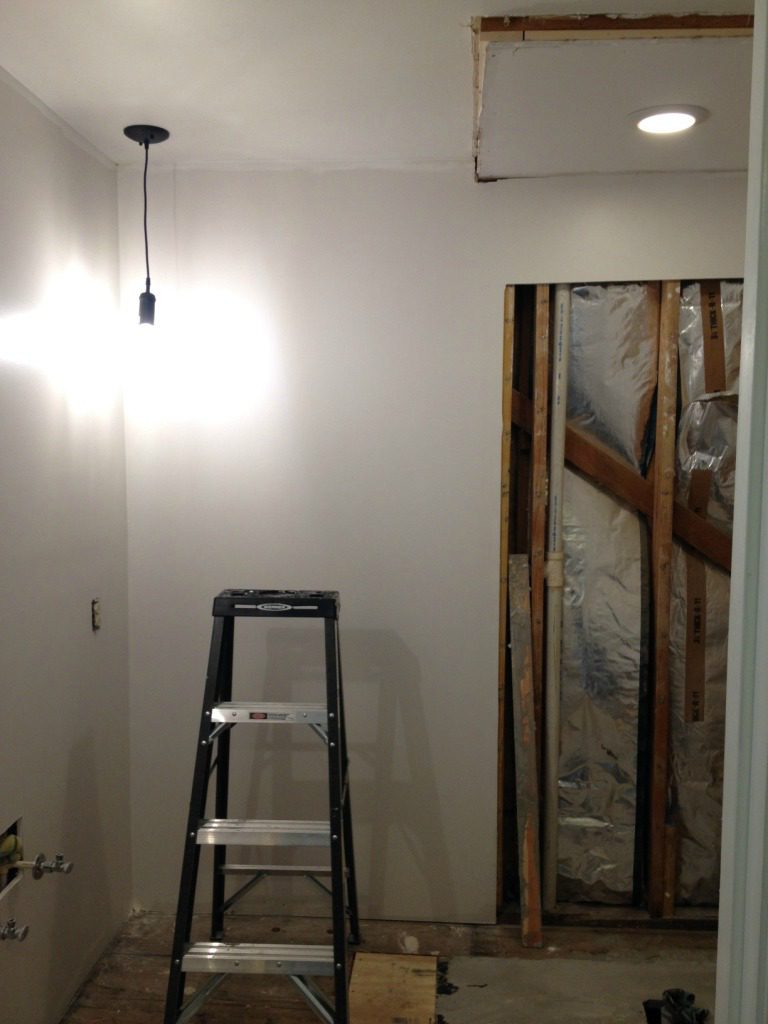
Then we took the little shelf in the wall out and put up the drywall, mudded it, and painted it.
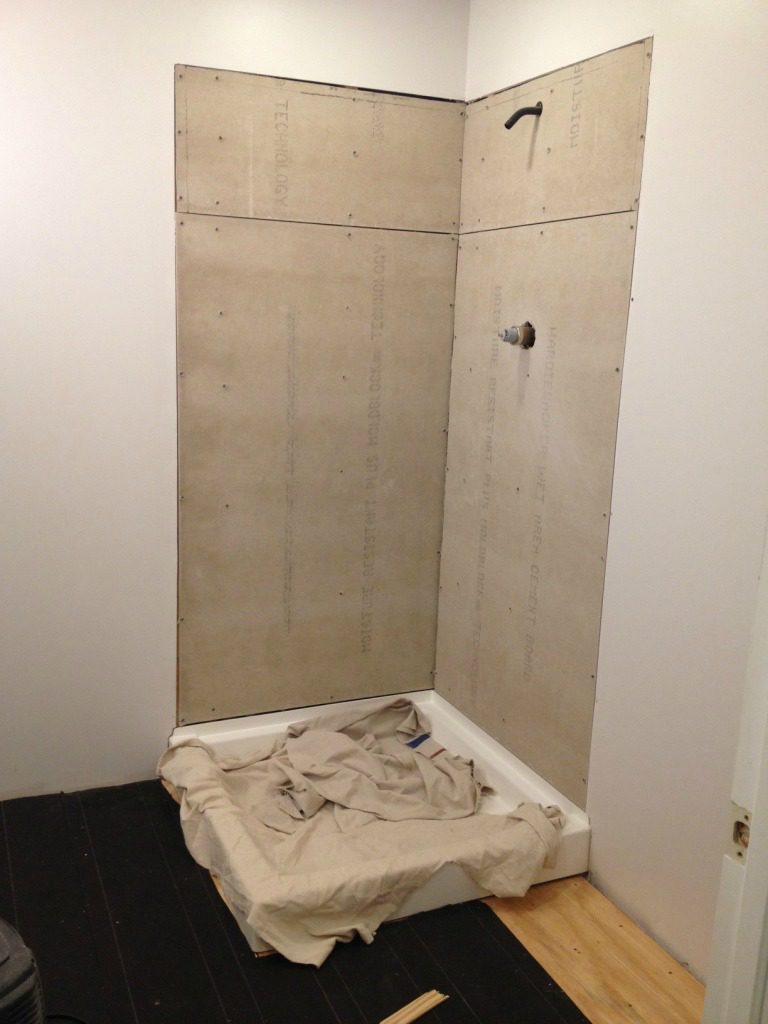
Based on the instructions with the shower pan, we were supposed to simply set it in place and it should be fine. HAHAHAHA yeah right. We couldn’t get the floor to be perfectly level, so we tried using mortar to level out the floor.
That basically just made a big mess. So we got some ½″ plywood and laid it down over the whole plank subfloor (which apparently we would have had to do anyway before we laid the Hardiboard but that’s another story) to level it out. We messed around with shimming the stupid thing for a few days and finally decided it was good enough and moved on.
.
I talked Danny into hanging the lights for me and I’m telling you…it’s a miracle! One of the main reasons (besides the fact the floor was going to cave in at any time) we I wanted to redo the bathroom was because of the lighting. These simple pendant lights and the recessed shower stall light are sooooooooo pretty. The light is soft, but it is PERFECT for in here. Sometimes I just go turn them on just to look at them.
I know…it’s hard to tell because I took a picture directly of them. Maybe this will help some.

My mom hates these lights. I’m loving them. They are so simple. What do you think?
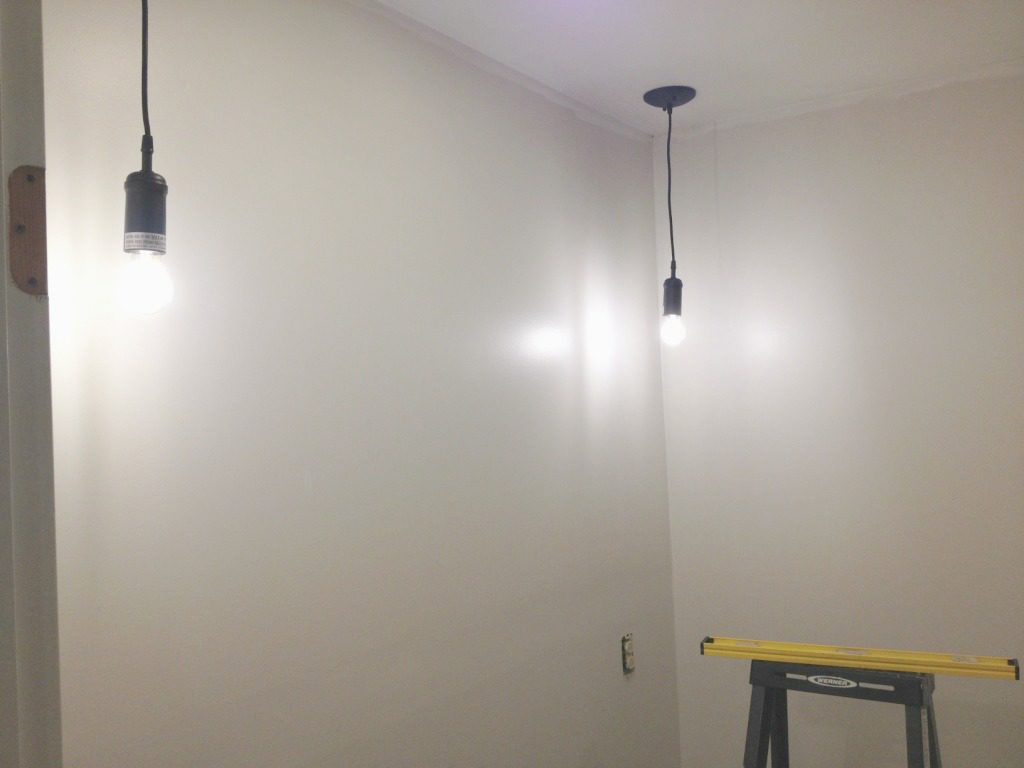
I’m also loving this paint color in here so far. It’s Sherwin Williams Eider White. I have it in my office and my laundry room, and now my bedroom too (since this weekend). By the way, the bedroom is next on the “redo” list after the bathroom. It just got painted, and will be getting new flooring shortly.
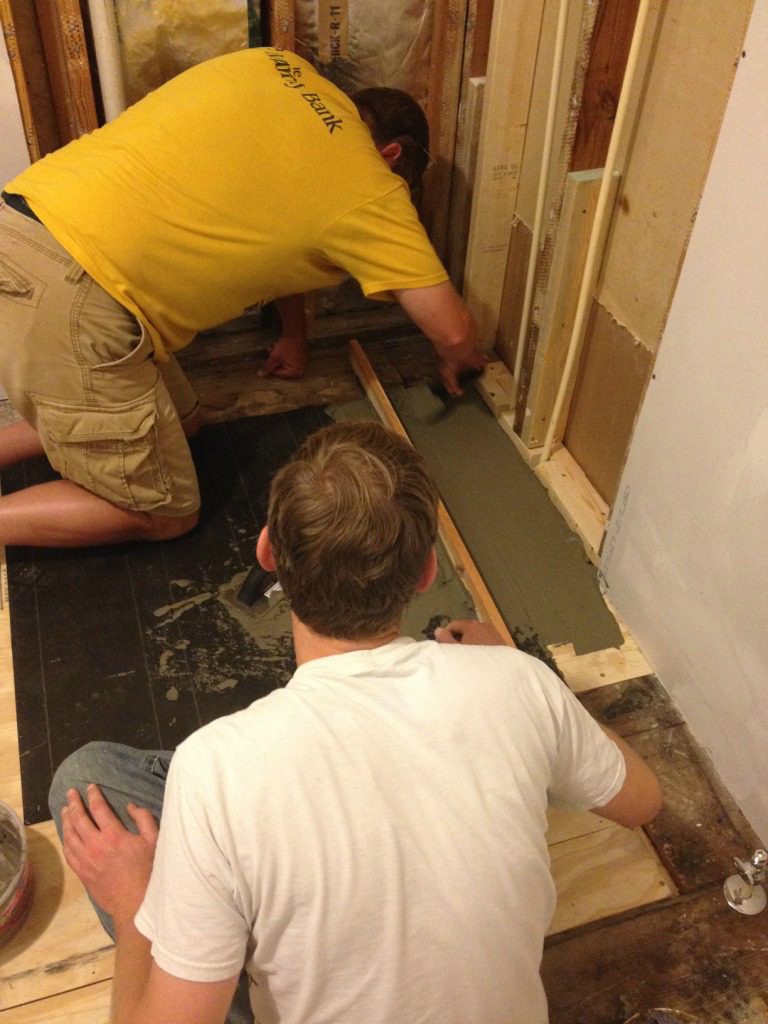
So after we laid the ½″ plywood on the floor over the subfloor planks, we started on the cement board (we used Hardiboard). Just a warning…½″ cement board is the devil. We bought ½″ for the shower walls and the floor and after we did the shower, we made a trip to Lowes to exchange it for ¼″ to use on the floor. You’re supposed to be able to score and snap it…we scored the ½″ for about 20 minutes and it never snapped. You have got to be kidding me. It took us a whole night to get the shower walls up. I had hoped to have the floor AND walls up in one night.
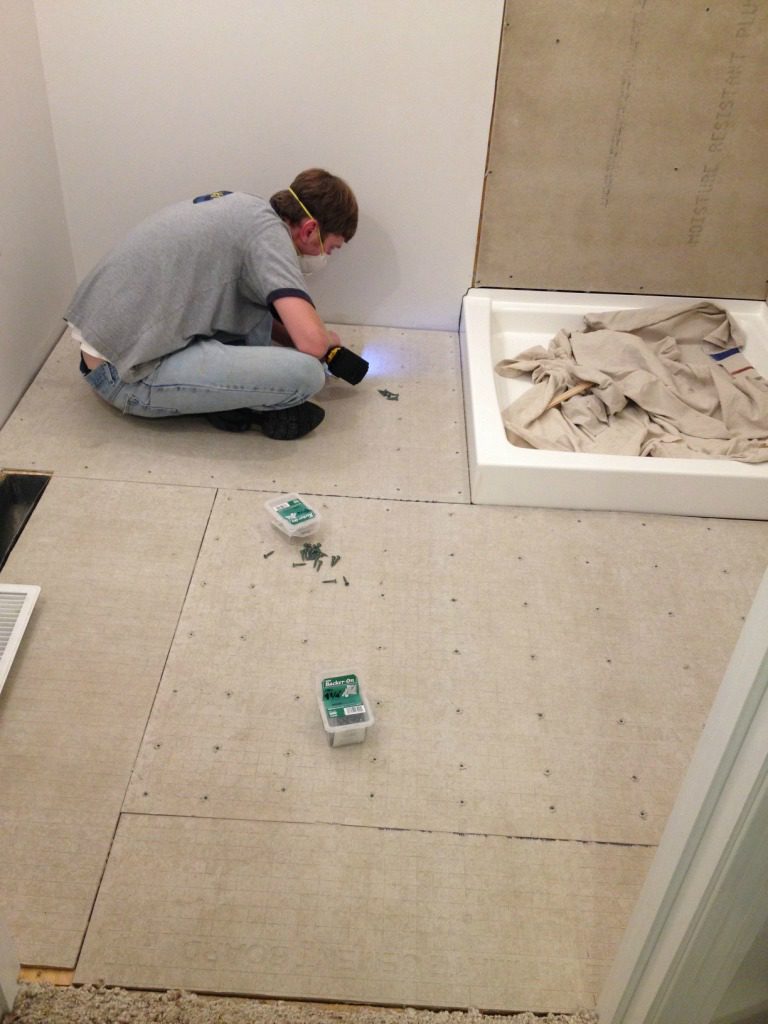
When we got the ¼″ board for the floor, things were A LOT easier. We got the cement board floor laid the next night. I Someone forgot to charge the drill batteries, so mine died and Danny and I had to take turns screwing in all the screws. I took pictures while he worked.
Can we just talk about the lighting in here again? I don’t even mind that I don’t have a window in here.
.
We used this stuff called Kerdi for the shower walls. Danny read up on it and wanted to use it. It’s a thin membrane that you put on under your tile. It’s supposed to make it totally waterproof. It took all day to get it on the shower walls. Again, I had planned to have that on the walls and the floor tiled in one day. See how we keep getting so far behind? Haha. That’s me laughing so I don’t cry about it.
.
So, Danny decided to take the rest of the weekend off. While he played with our barn cats, I decided to work on the crown molding. Don’t look too close at the joints. Do your best and caulk the rest, right?

This was actually an interesting solution to a problem we had during demo. Long story short, we couldn’t tear out the shower ceiling flush with the rest of the ceiling when we demoed. I didn’t want this random square protruding from the ceiling and I REALLY didn’t want to have to finish those drywall corners and make them look decent. So instead, I added some 1×4 wood to frame out the part that hung lower than the rest and attached crown molding to hide the drywall edges. I still have to paint the 1x4s and putty the molding, but I was pretty impressed with how good it turned out. I was afraid it would look weird and out of place, but surprisingly, it doesn’t look bad!
.
So finally, we were ready to start tiling the floor. Which, like everything else, seemed to take a lot longer than I expected it to.
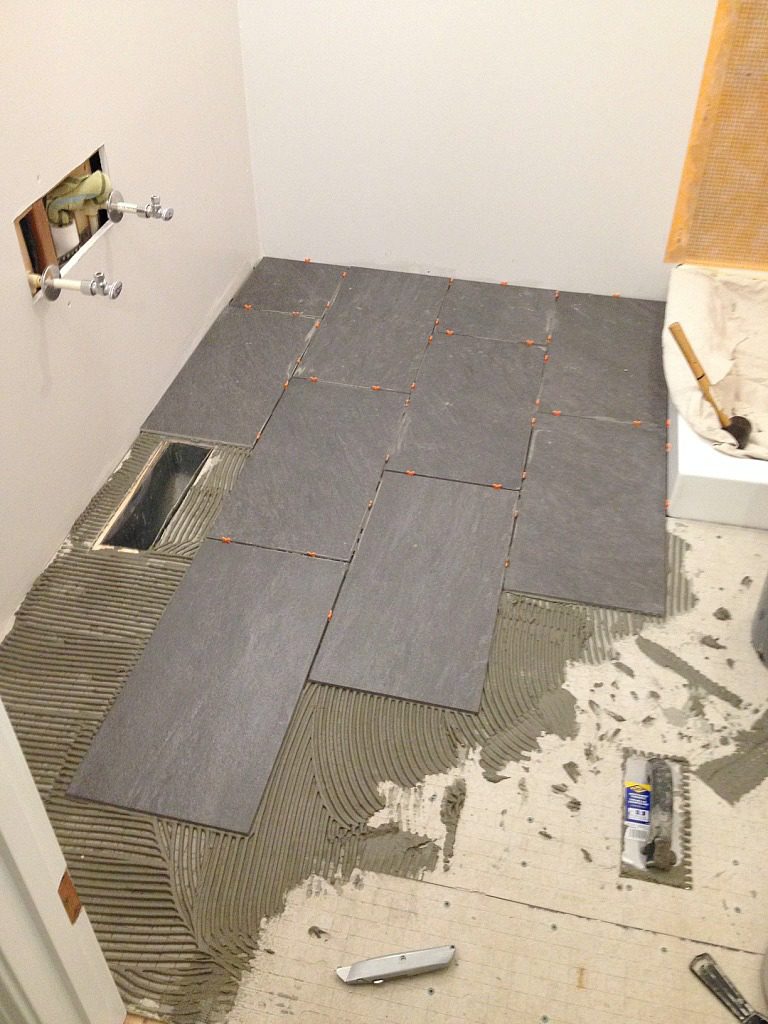
This was about the point I realized it wasn’t going to get done in one night haha.
.
We got to this point and quit for the night.
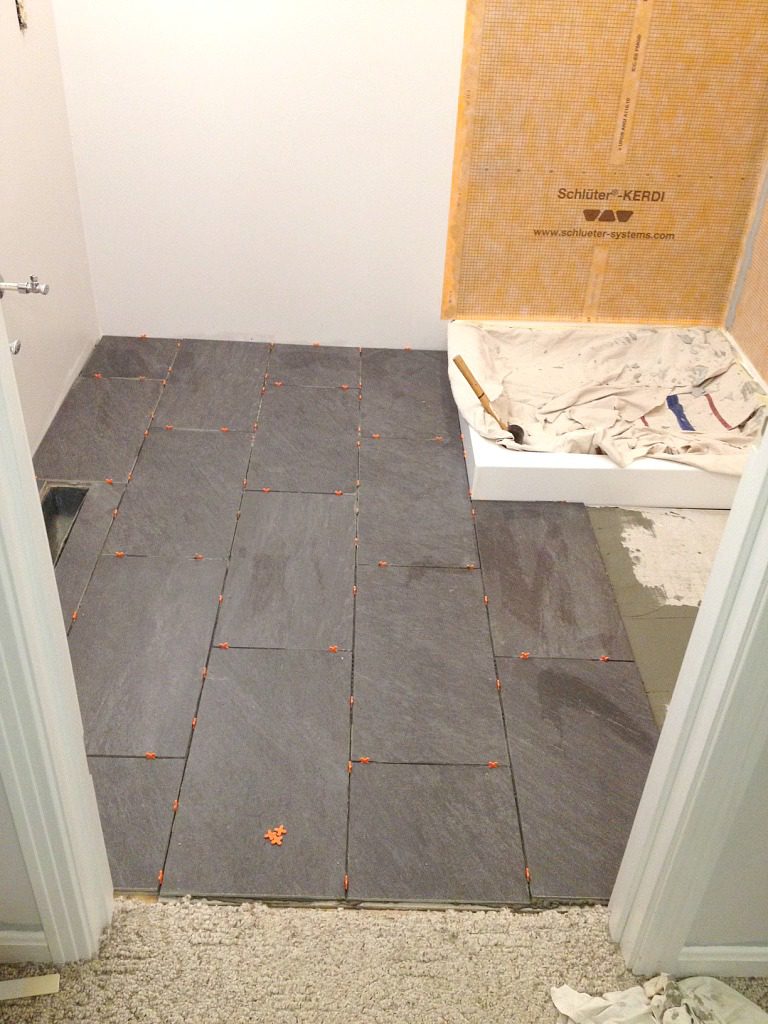
Four tiles left. FOUR. Wish us luck.
.
We’ve really come a lot way since my last update and we should hopefully be done pretty soon. There are lots of little things to finish up, but it’s really starting to look like a bathroom now. I’m working my hardest to be able to install the vanity this week and I CANNOT WAIT to take some pretty pictures of it and tell you all about it. I built it months ago and have been eagerly waiting for it to actually be in the bathroom instead of sitting randomly in my bedroom. Maybe this week will be the week!
.
This is the LAST update before the final reveal, so keep your eyes peeled because it’s ALMOST DONE!
.
Until next time, happy remodeling!

Jan says
Hang in there girl! We’re all waiting and rooting you on! You have a great mate to help you! Kootos to him!
Shara, Woodshop Diaries says
Thank you! Yes he is a great husband and a great help with these big projects! It is a lot of fun getting to work together on these things 🙂
Juanita says
Hang in there, soon it will one more jobs off the list. Remodeling never takes the time you expect to finish. Good job so far, actually I learned some important facts from blog, as my son is doing the same thing.
Shara, Woodshop Diaries says
Thank you! I’m excited to be getting close to finished! But, you are right…nothing ever seems to take as long as you first plan for it haha!