
I think I might be a “hippie.” In all honesty, I’m not sure what the exact definition of a hippie is. But, my sister has always said I was one. I have worn flare jeans for as long as I can remember. I like tie dye things. I have had long hair for pretty much my whole life (except for that one time in college when I cut it off and then I had a Ron Burgundy moment and I “immediately regretted my decision”). I play the guitar. I used to want a Volkswagen bug car. I like peace signs and boho type clothes…and colorful patchwork purses. My favorite pair of shoes are Rocket Dog sneakers with peace signs and smiley faces on the side and they have rainbow tie dye shoe strings…I mean, is that not normal?
So I’ve been trying to fit myself into this “farmhouse” thing that everyone is doing now since Chip and Joanna (you know…from Fixer Upper on HGTV) have taken over the internet and television. I’m a huge fan–I think they are AWESOME. I kept forcing myself to make my home fit the farmhouse style because farmhouse is totally in. However, farmhouse just isn’t my personal style. I was trying too hard to make it work. It wasn’t until recently I figured this out and have accepted it. But, I’ve been attempting to go this direction for a while. And I’ve finally decided I’m done. I think my office redo was kind of the start of going a different direction.
With that being said, I’m learning that I am drawn to what Danny calls “hippie stuff”–mid century, boho, minimalist, and eclectic styles. The “weirder” the better in my opinion. I love quirky, but simple. I love geometric patterns and objects, and abstract art. I am NOT a design expert by any means (that’s pretty obvious). But I’m figuring out what I like and TRYING to go with it in my own home whether it’s “the in thing” or not.
And that is the background story on this project. We are going back to the 60’s for this one in an attempt to start making my own style.
Have you seen those pictures from way back in the day when people had those super cool looking telephone benches? They would sit on the bench and the telephone would be on a little box and they would talk on it there. Well I think they are the neatest thing. So I decided to build one 🙂

So, I don’t normally take selfies, but I thought this was funny to send to my sister. She’s blonde like me and the whole “take a picture in the mirror” thing really threw her off because from the other pictures I sent her, she thought the box was on the other side hahahaha.
I just winged it by looking at a telephone bench I found on Pinterest. Mine isn’t an exact replica, but was close enough for me.
I made the back legs my screwing two 2x2s together to form an angle so the back would tilt some. I cut the bottom 2×2 at 7 degrees and the top at 10 degrees.
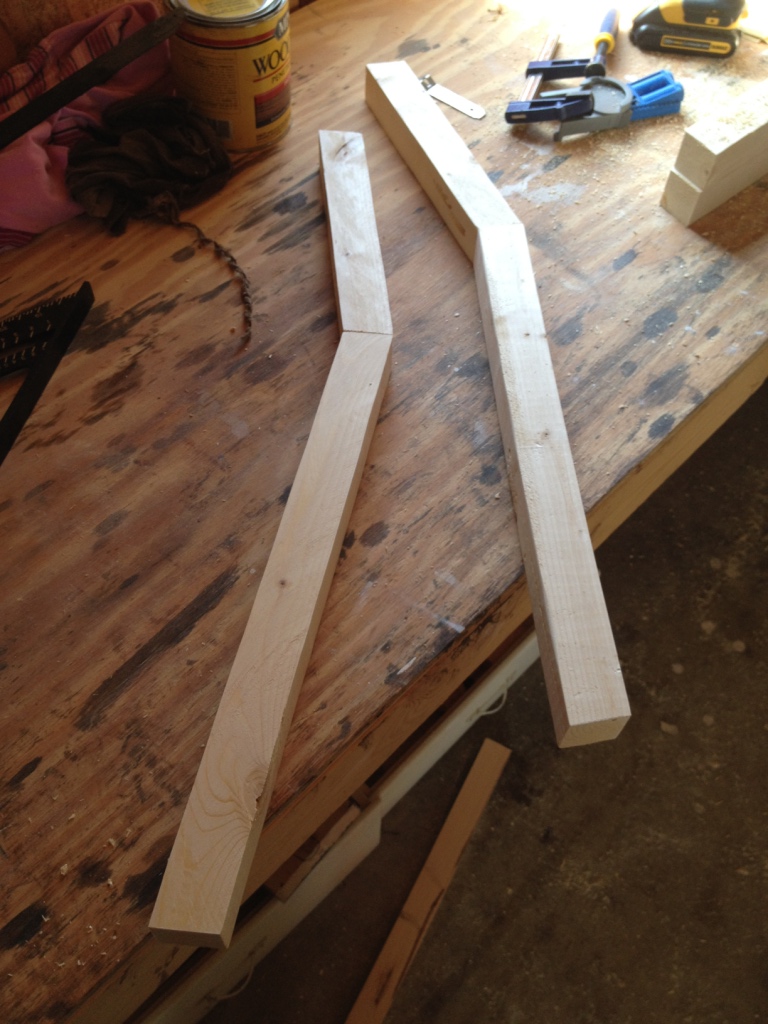
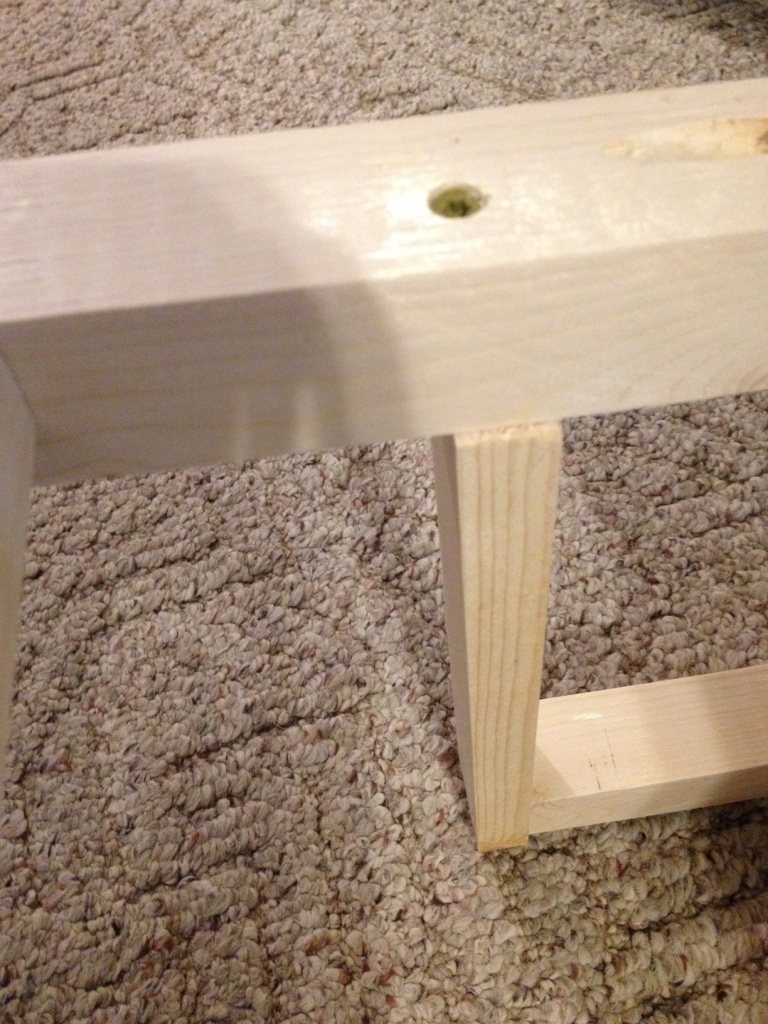
I only wanted an arm rest on one side, so I made one front leg as tall as the bench seat would be (about 17″) and for the other, I added 5 inches for the arm rest to come up. I cut them both with 7 degrees off the bottom end so the leg would tilt backward. I cut seven degrees off the short leg parallel to the bottom and I cut the taller leg three degrees NOT parallel to the bottom. This would make the arm rest slope toward the back. It’s easier to see in the pictures below. I attached the back legs to the fronts with a 1×3. I cut the ends of the 1×3 at 7 degrees (because the legs are cut at 7 degrees. I made them about 8″ long at the shortest point. This was just long enough that I could use a 1×12 for the seat.


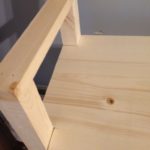
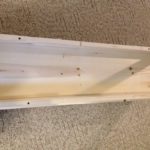
Then I attached 1x3s to the front and back for seat and back supports. The length will depend on how long you want your bench. You will attach one at the top of the back supports, and two for the seats. In the picture, I haven’t attached the back top piece yet.

I attached the arm rest. It’s a 1×2. I just glued and nailed it onto the front leg and screwed it in from the back.

I used a 1×12 for the seat. I notched out the three corners where the legs are and screwed the seat in from the bottom supports. I used 2 ½″ screws countersunk into the supports.
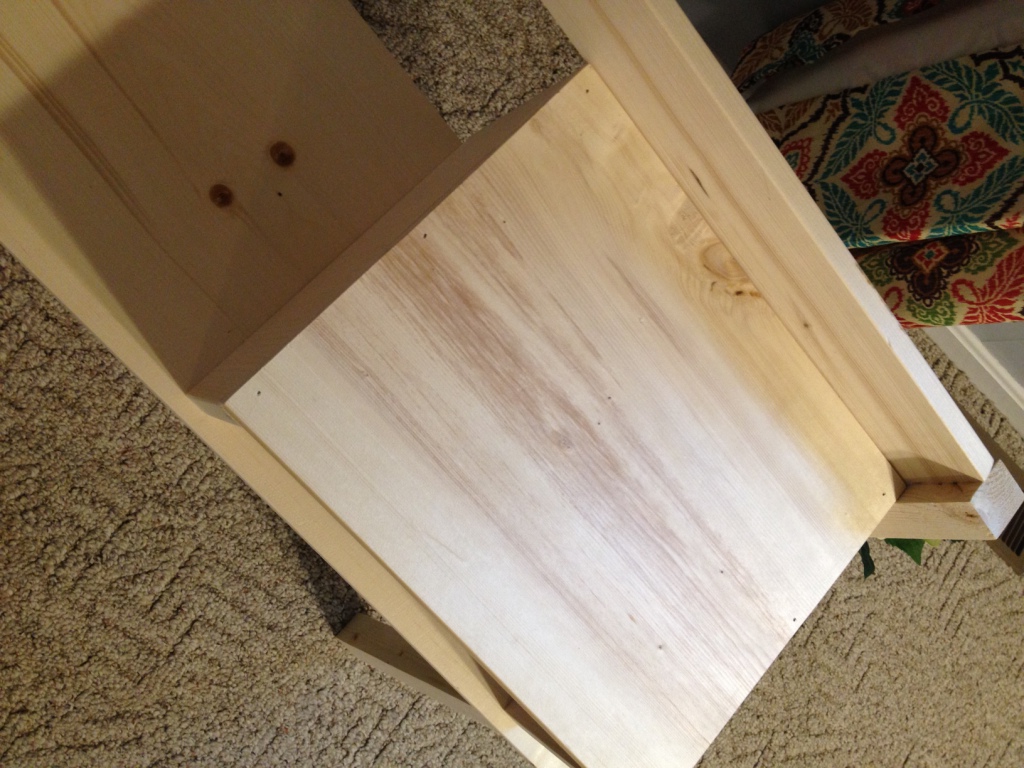
Then I took some more 1×12 boards and made a three sided box. The size is totally up to you. I made mine about 14″ wide and about 7″ tall. This will be the box on the side of the bench.
I just glued and nailed the pieces together for the box and screwed it in from the bottom.

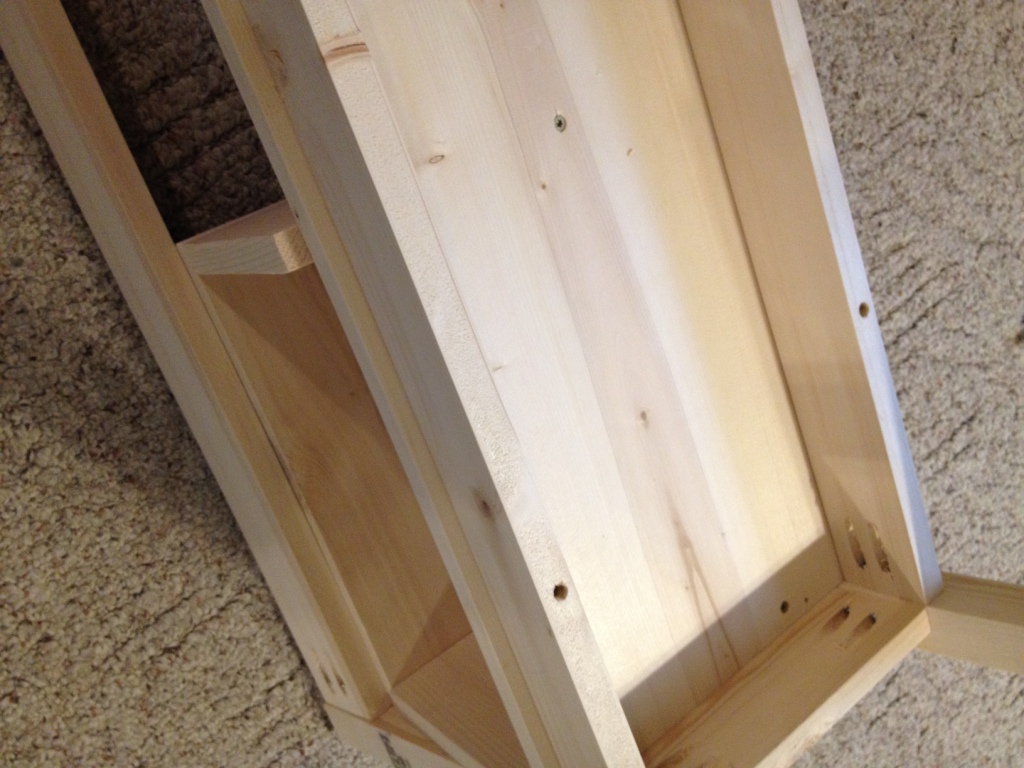
Then I just built a simple drawer with some 1×6 pieces and ¼″ plywood. I used a 1×8 trimmed down for the front so it would fit exactly in the box, but I could have used 1×6. And that’s it. Once it was done, Danny said “it looks tiny.”

It is kind of small. I may should have scaled it slightly bigger, but it’s going in a small space in our bedroom, so I didn’t want it too big. So I guess that worked out okay haha.
I kind of like it unfinished and without a drawer, but Danny talked me into staining it. I like that too, but I’m becoming a fan of the unfinished wood color.

Which do you like better?
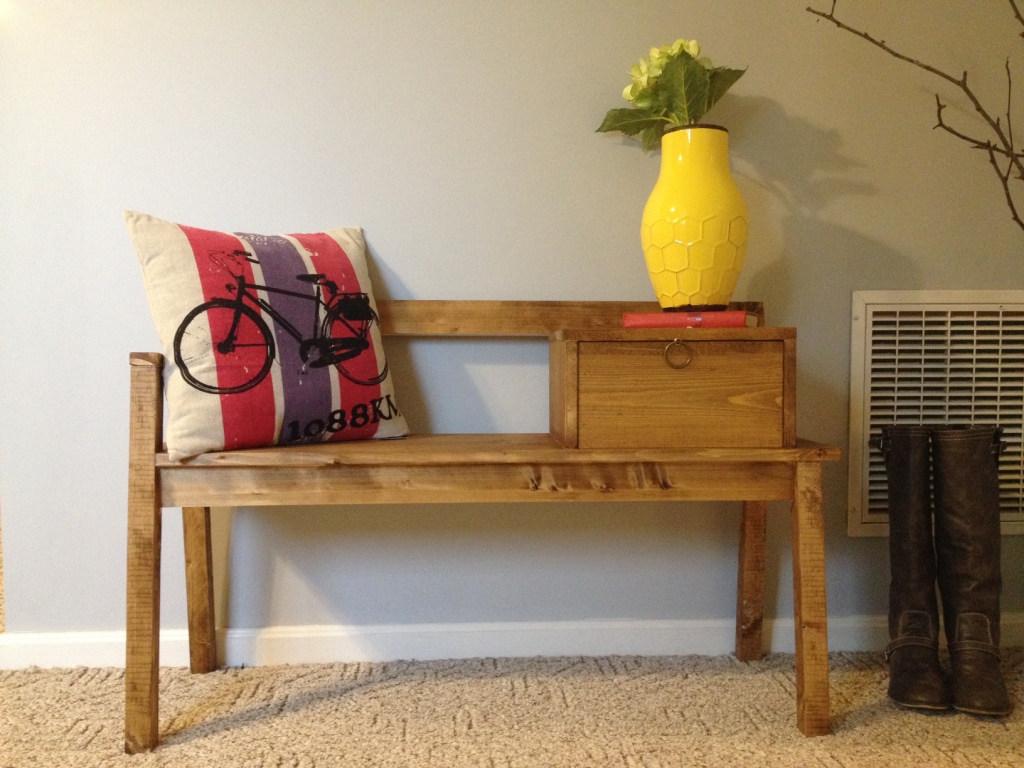


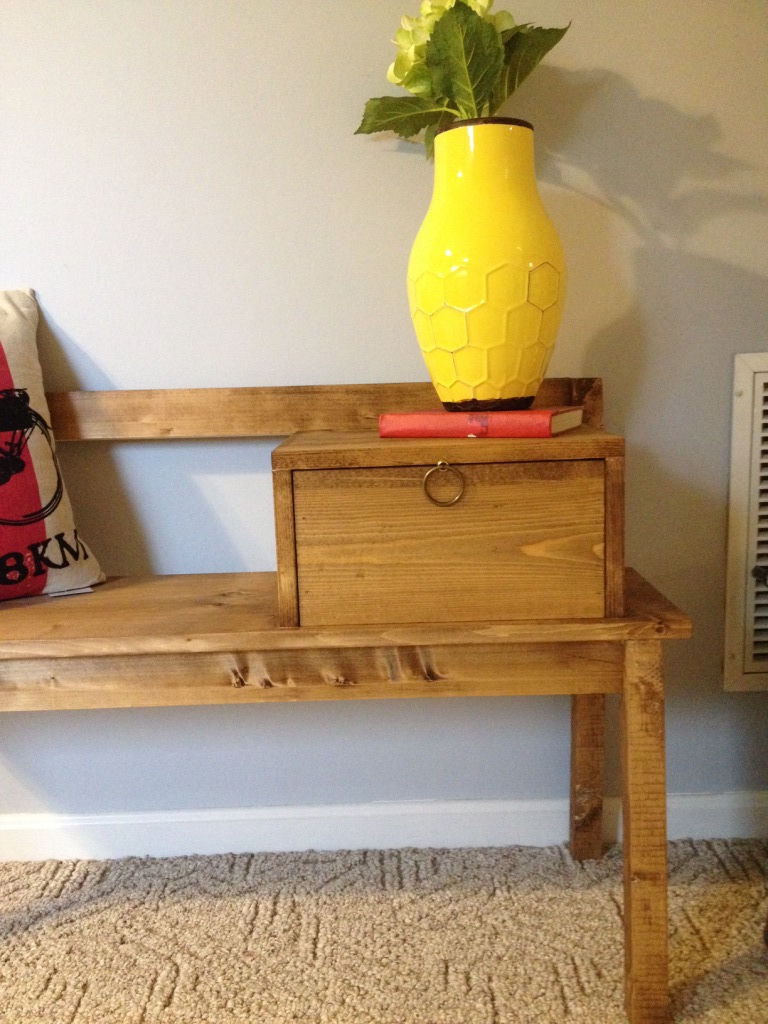

When I started building this, I had my doubts I was going to like it. I actually like it a lot better than I thought I would. It’s not authentic “vintage,” but it’s a little quirky and I think it’s going to fit well with the rest of our bedroom when I get done updating it soon 🙂
What do you think?
PS I’m sorry I’ve been absent with my posts lately. I have been building things for a few people and haven’t had any new projects to post. I’ve also been spending a lot of time on Pinterest trying to get some ideas for our upcoming bathroom and bedroom remodel. I’ve also been learning how to use my new sewing machine 🙂 🙂 🙂 For real…I’m really having fun with that. I’m back in building mode for a little bit, so I hope to stay back on my blogging game (like I’ve ever been on my blogging game to begin with hahahaha).
I’m hoping to bring you some super fun posts soon about our bathroom…I cannot wait to start ripping things out–demo is the best!
Until next post…happy building 🙂

Anthony says
Great job!
Shara, Chasing A Dream says
Thank you so much!
Wendy Johnson says
I liked it unfinished but the finished is nice. I am in awe when you talk about building like it were getting dressed in the morning.
Shara, Chasing A Dream says
I am afraid I kind of liked it better unfinished too, but the thought of stripping it back down does not sound pleasant haha! Thank you! I think maybe I should be a little more technical in my writing, but I don’t want to make building sound difficult…especially the builds I do, because I only do the easy ones 🙂
Tom Clarke says
Shara, I like the natural wood look because I hate finishing as I am terrible at it. I am going to make one and leave it unfinished but with the drawer. BTW, when do you get the Mrs. Meyer’s results?
Shara, Chasing A Dream says
I hate finishing too, but I like staining much better than painting haha! If you make one, I would love to see it! The Mrs. Meyer’s results will be announced on their website a little later this month.
Tom Clarke says
What was the wood you used – it looks like pine. I may want to use popular.
Shara, Chasing A Dream says
I used pine and spruce…all the 2xs are pine and all the 1xs are spruce. I don’t really know the difference haha. I just buy whatever the lumber yard has and around here, that’s about all the options I have without spending A LOT 🙂
Tom Clarke says
Actually I was thinking poplar as it is a very popular wood 🙂
chris aka monkey says
i so admire your wood working skills, this seat is lovely xx
Shara, Chasing A Dream says
Thank you so much! You are such an encouragement and I appreciate you following along 🙂