
Guess what time it is!! It’s time to show you how to make your own DIY wooden wall clock! So then you always know what time it is 🙂
.
I know, that was a super cheesy introduction. I apologize. That was worse than that pick up line about did it hurt when you fell from heaven? Have you heard that one before? Yeah, that never worked for anyone hahaha.
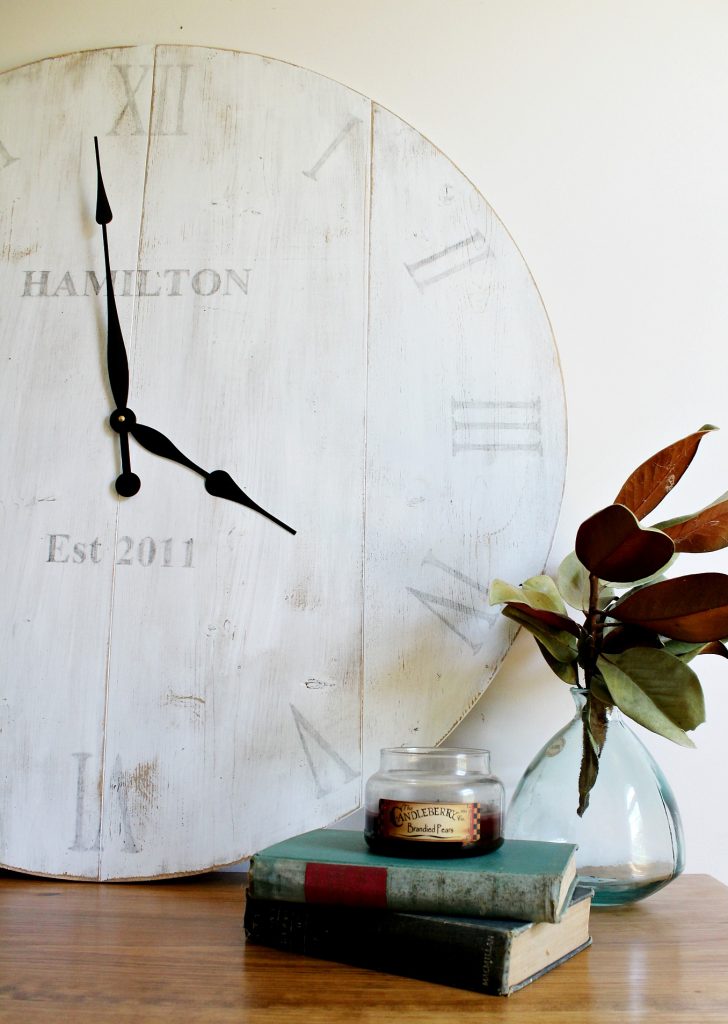
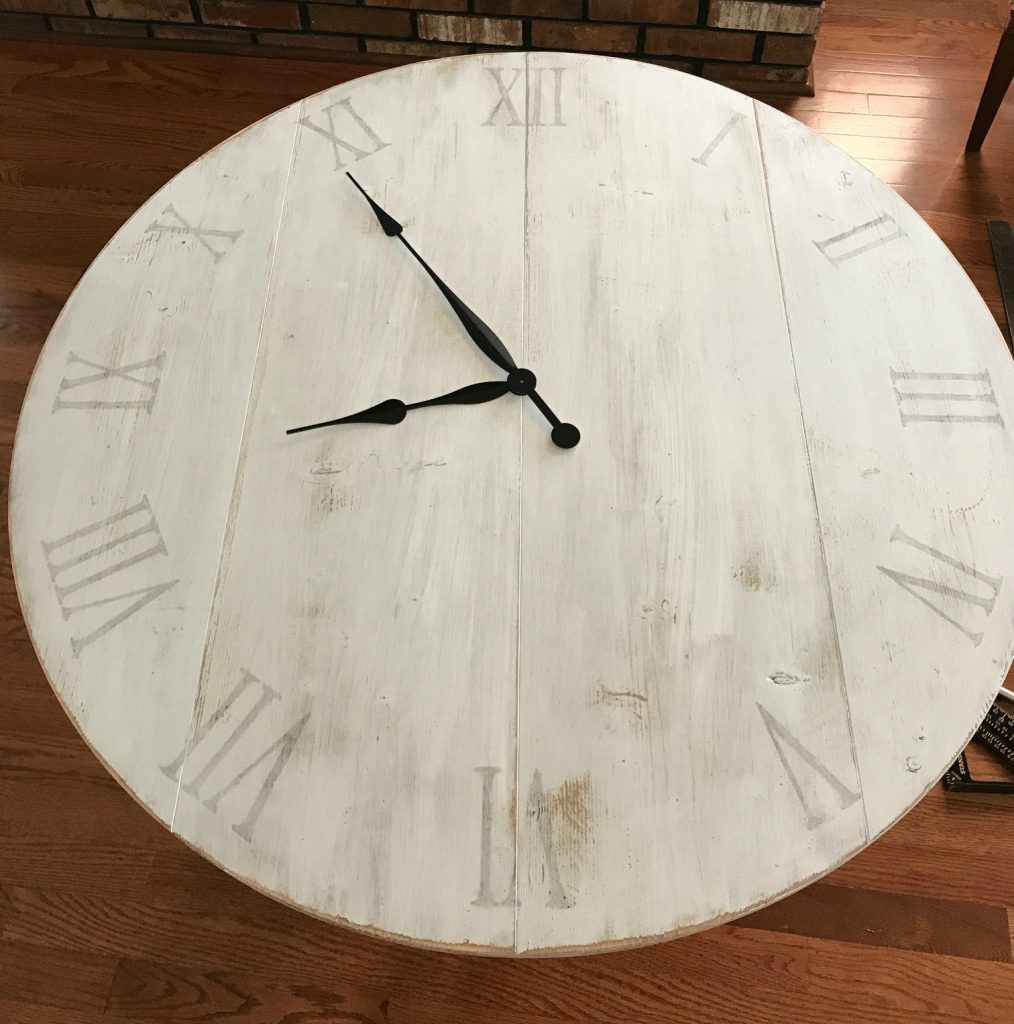
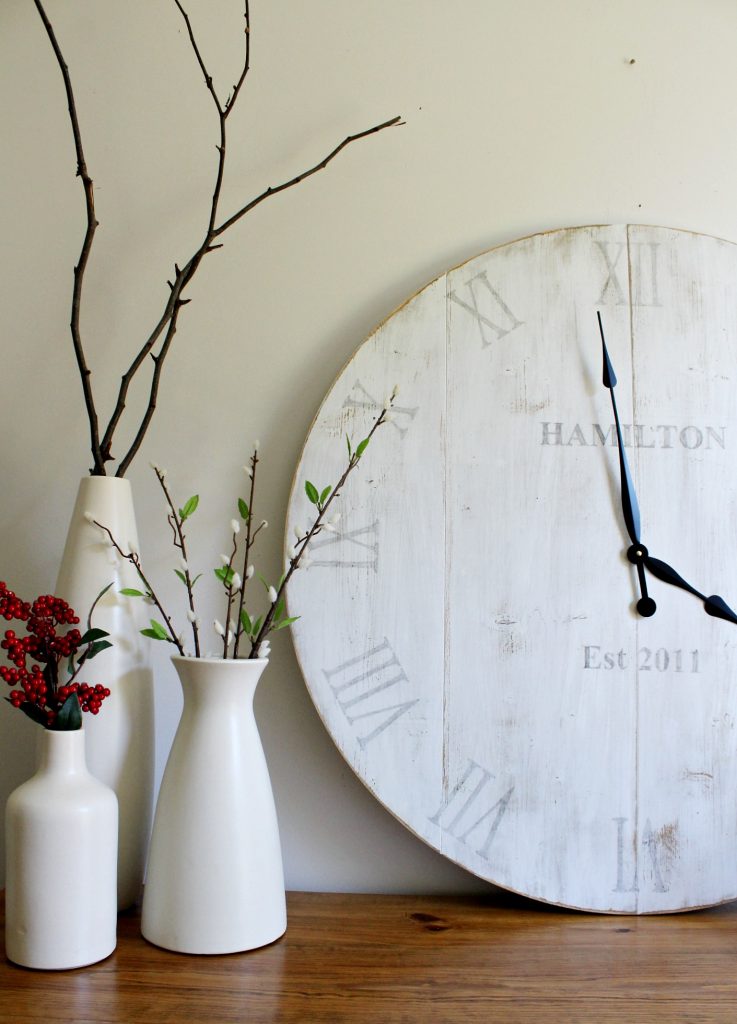
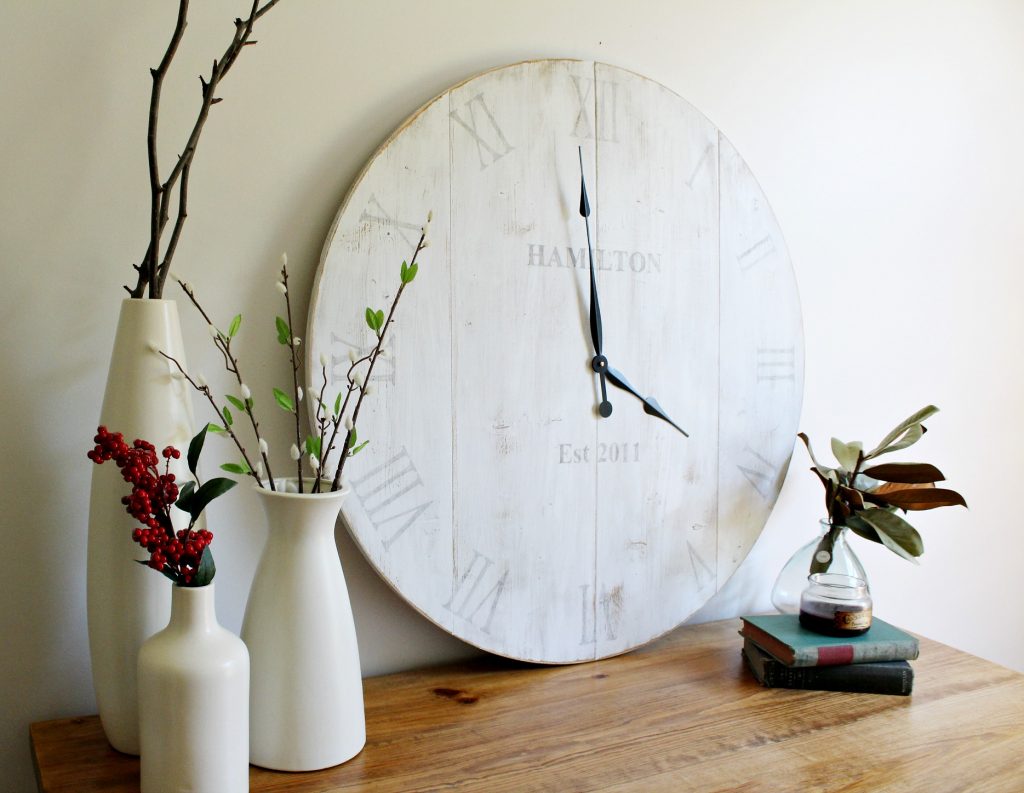
So anyway, isn’t this clock gorgeous?! I mean, I know I am a little biased, but I really wanted to keep it. Unfortunately, I made it for some friends and it had their name on it, so it just made sense to give it up haha.
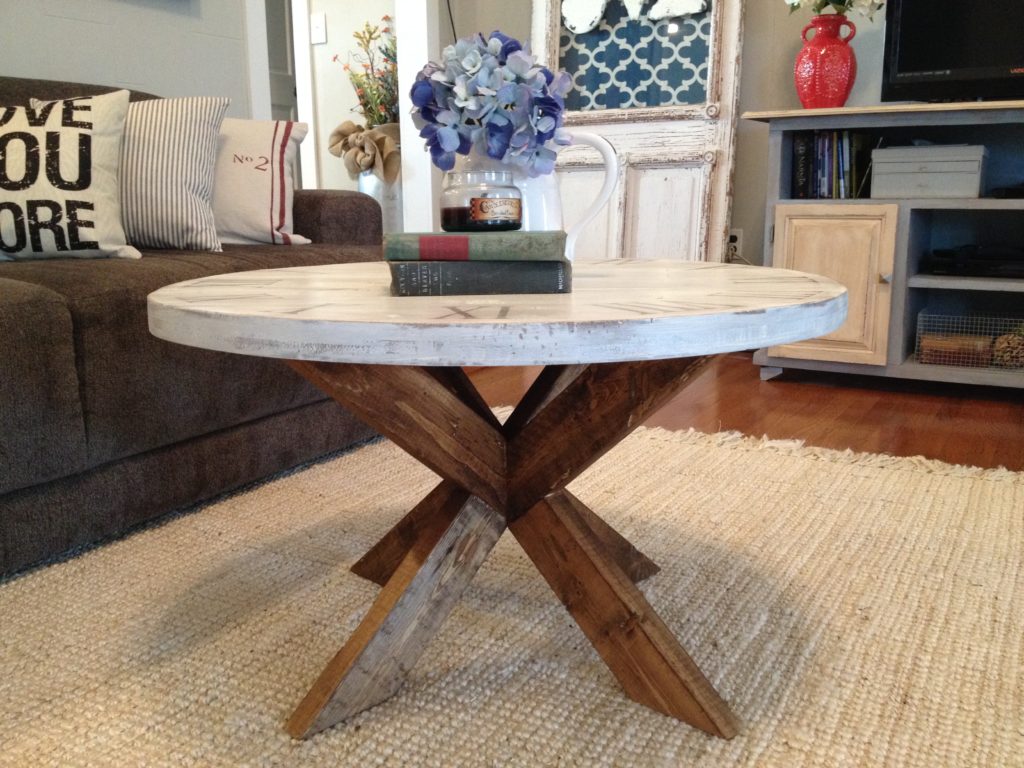
Does it look familiar, though? Does it remind you of my DIY clock coffee table?? It’s basically the same thing with different functions!
So, if you’re ready to get to making one, here’s what you need:
.
This post contains affiliate links for your convenience. If you purchase from these links, I may receive a small commission at no extra cost to you. This helps support this site and keeps the content free. Please see disclosure policy for details. Thank you for your support!
.
Tools and Materials:
.
(2) 1x10x8 boards
Kreg Jig for pocket holes (optional)
1 ¼″ pocket hole screws (optional)
Large Clamps (I use pipe clamps)
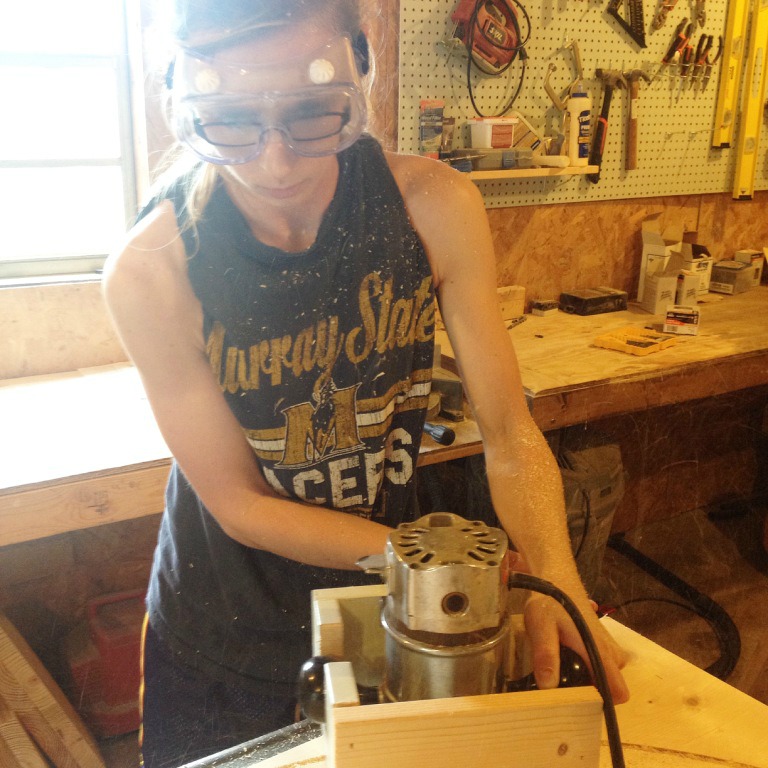
Router and straight bit
Paint
Sandpaper
.
Step 1: Assemble DIY Wooden Clock Dial
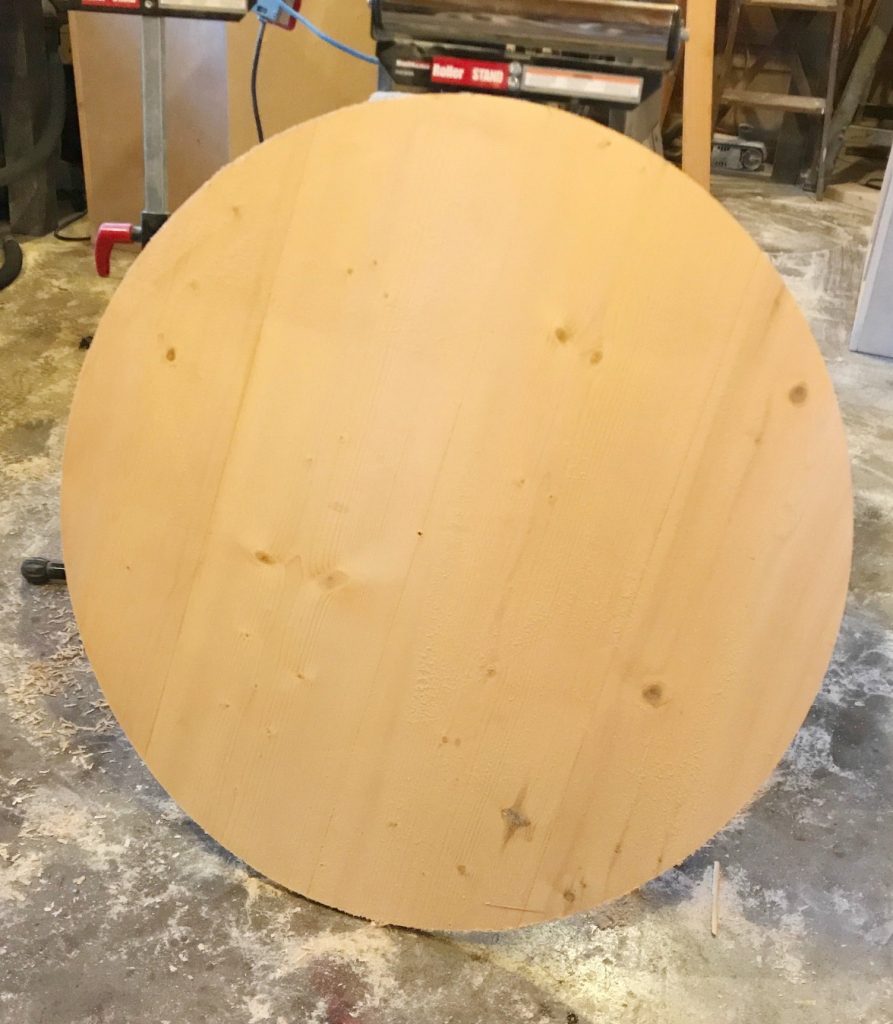
Cut four 1×10 boards a little longer than you want your clock diameter. I made my clock about 34″ diameter, so I cut pieces about 36″ long.
.
My clock boards are glued together. You could also use ¾″ pocket holes and 1 ¼″ pocket hole screws to attach the boards instead. This piece was actually left from when I attempted to make a round wooden mirror frame for our bathroom remodel, but instead went with the floating mirror shelf.
.
This was the middle piece leftover from this frame.
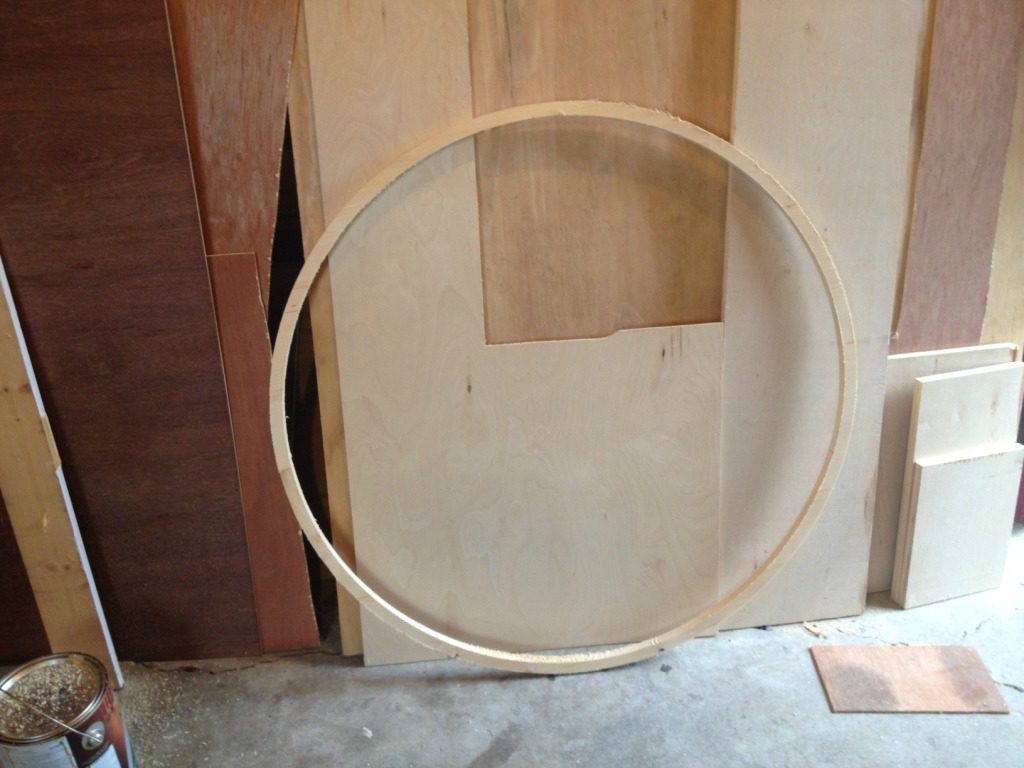
After gluing and clamping the boards together, I cut the middle out using a router and a circle jig. But it might actually be easier to just draw the circle and use a jig saw.
Either way you do it, just get the circle cut 🙂
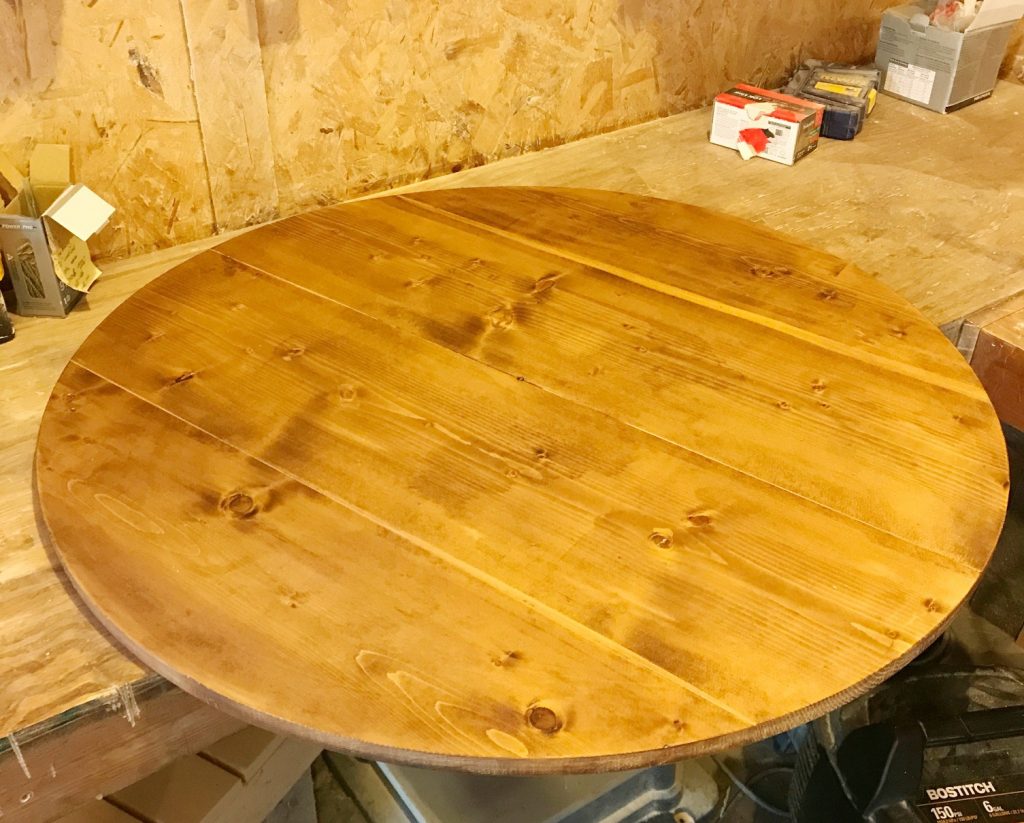
Step 2: Finish the DIY clock with paint or stain
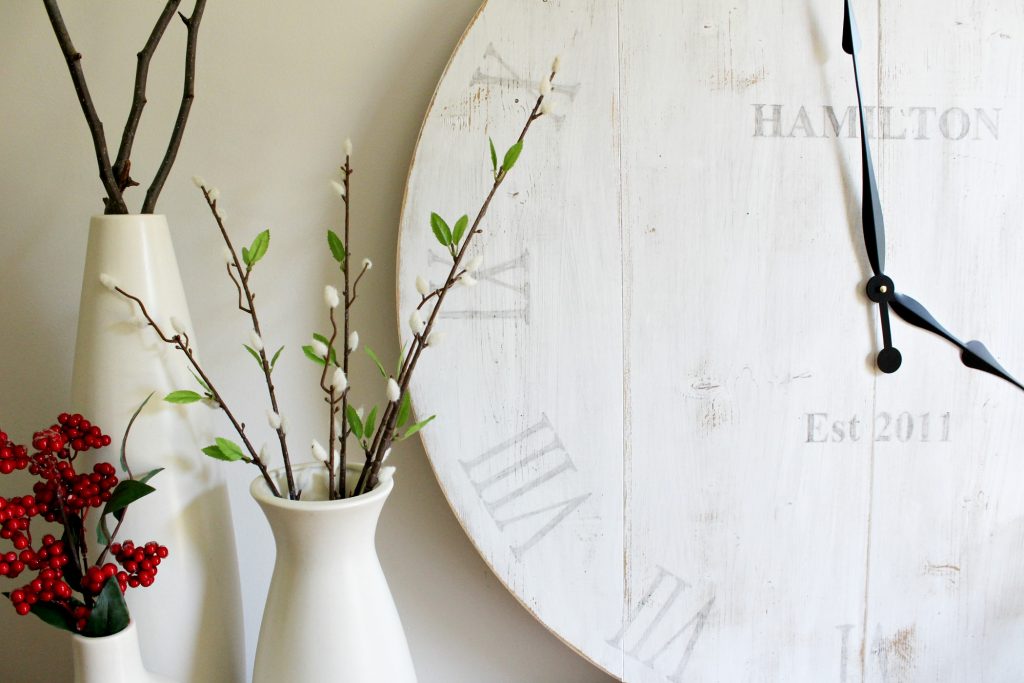
Sand the wood round and finish as desired. I stained mine in Minwax Provincial, then dry brushed on white paint and used sandpaper to distress some spots.
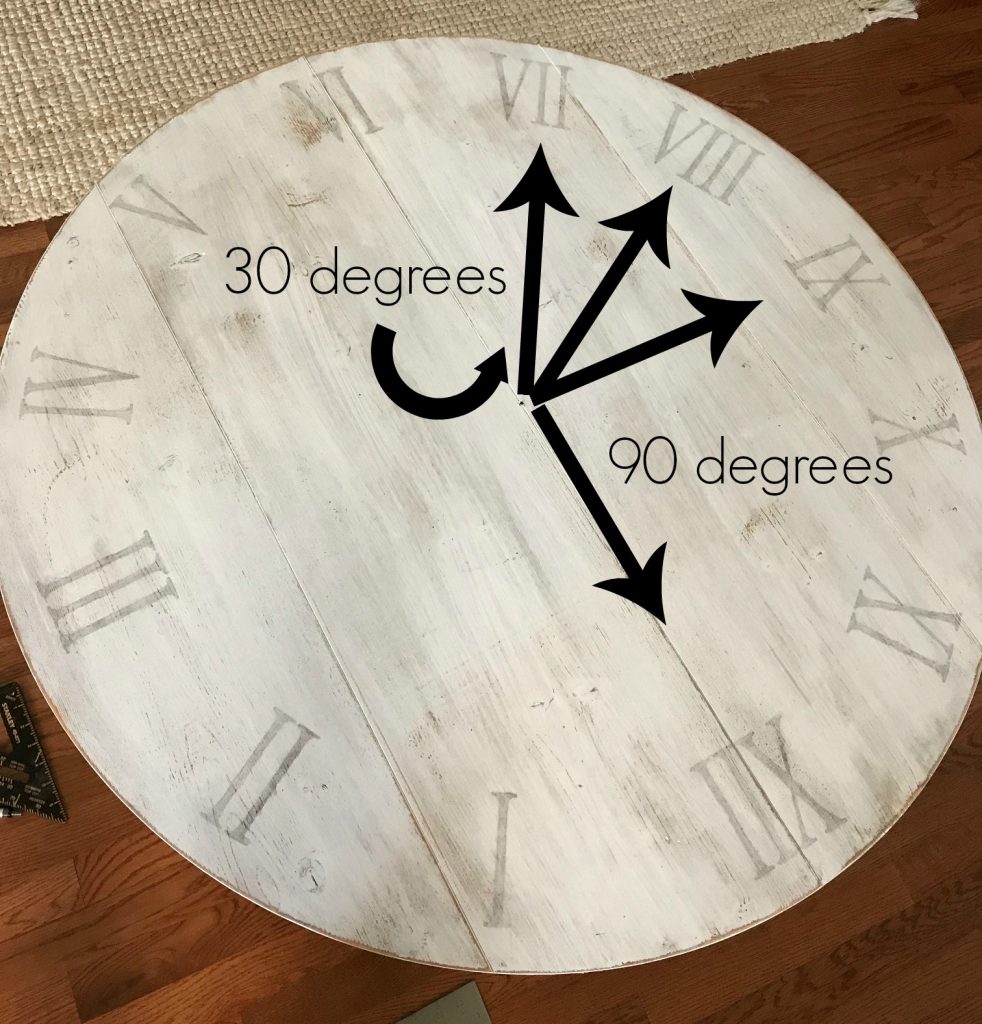
Step 3: Add Roman Numerals to the DIY Clock
I used this technique for applying the numbers to the clock. This is also how I did my letters on the clock coffee table. Just print out your numbers MIRRORED on an ink jet printer and follow this tutorial. I made my letters about 3″ tall.
.
To make sure your numbers are lined up correctly, use a speed square and a straight edge to line everything up so there are 30 degrees between all the numbers. Drill a small hole in the middle of the clock for reference then line up the straight edge of speed square with the joint in the middle of the clock and the center hole. Mark on the clock with a pencil the 30, 60, and 90 degree mark on the square. Then use a straight edge to line up the center hole and each mark and place the middle of your number along this line. Tape it in place using masking or painters tape.
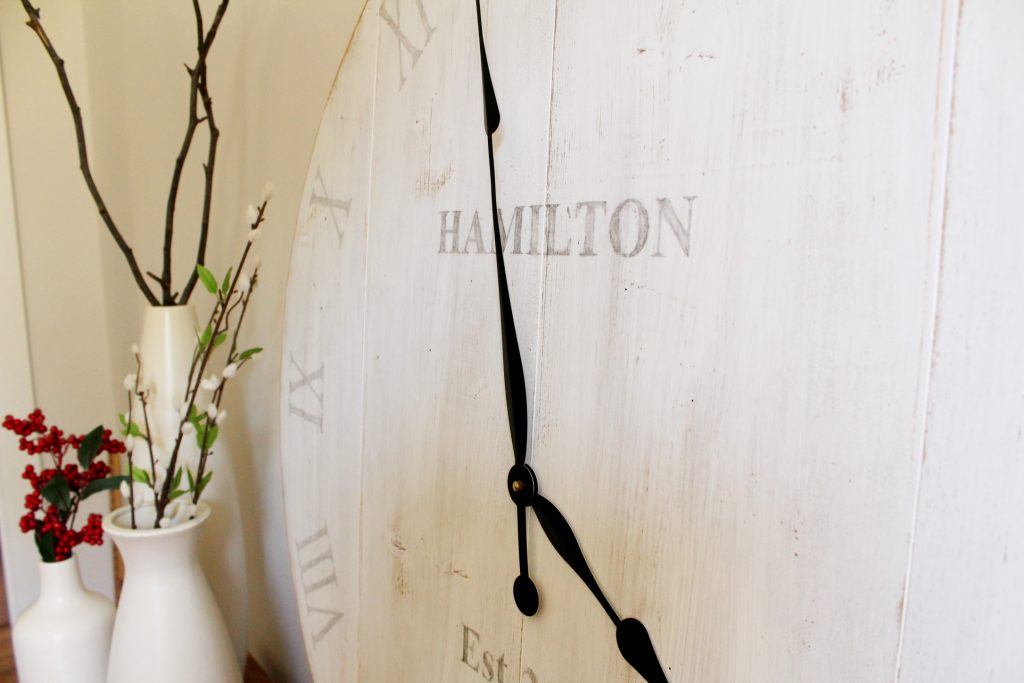
Once your numbers are on, you can add a personal touch by adding your name or some other wording using the same technique. This is your own personal preference.
Step 4: Route out hole for clock movement
Take the clock back out to the shop and flip it upside down. Drill a larger hole in the center that will accommodate the shaft in the clock movement.
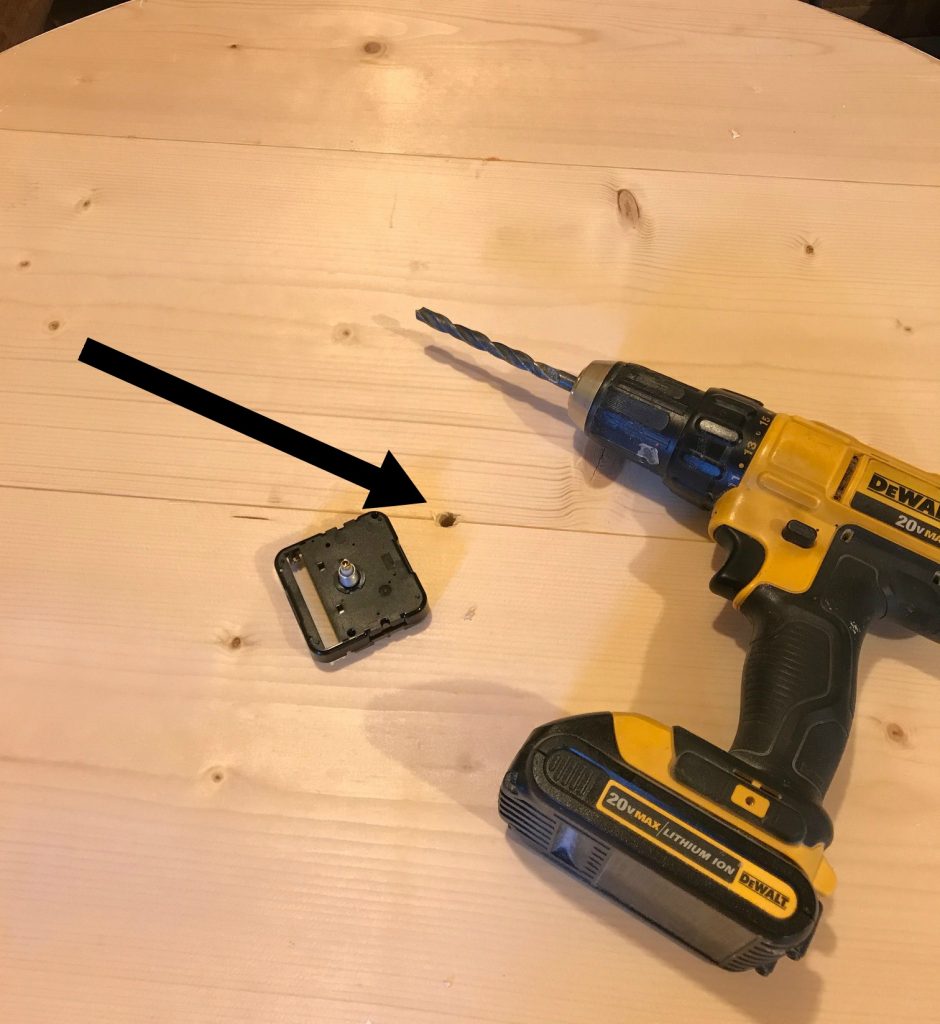
Place the shaft in the hole and trace around the movement.
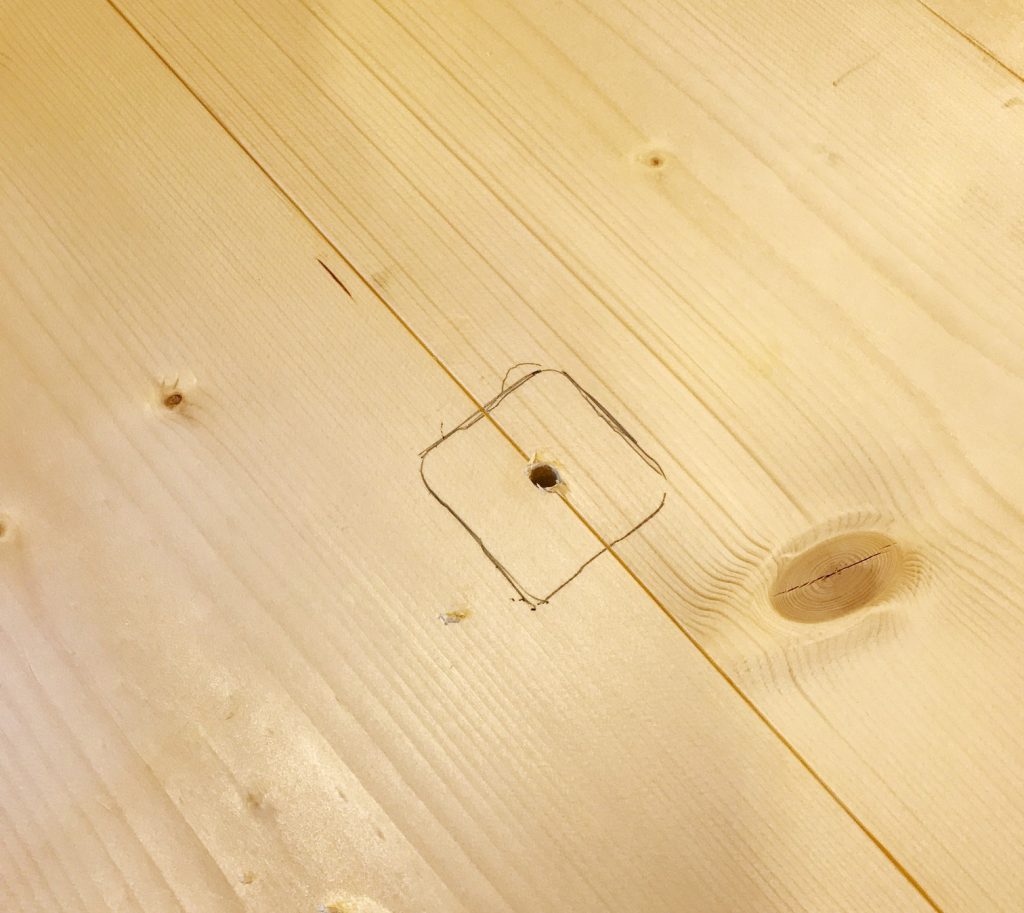
Put a straight bit in your router and set the depth to the thickness of the movement. It should be about ½″ thick. Route out the wood inside the traced shape.
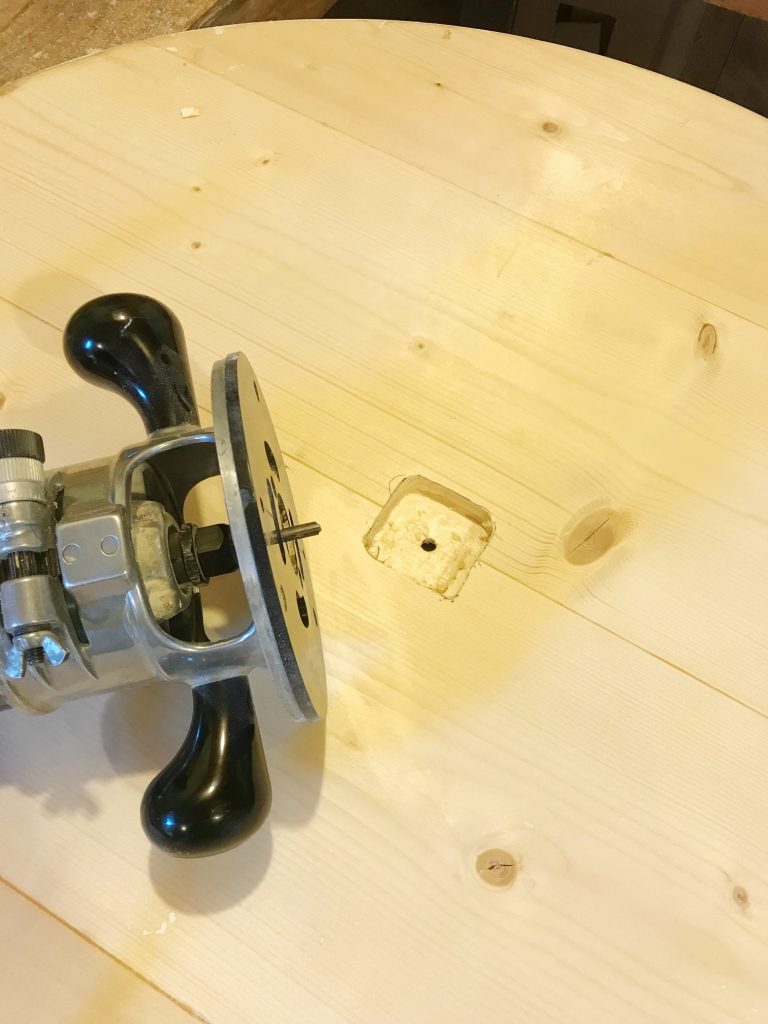
Place the clock movement in the hole and make sure it fits.
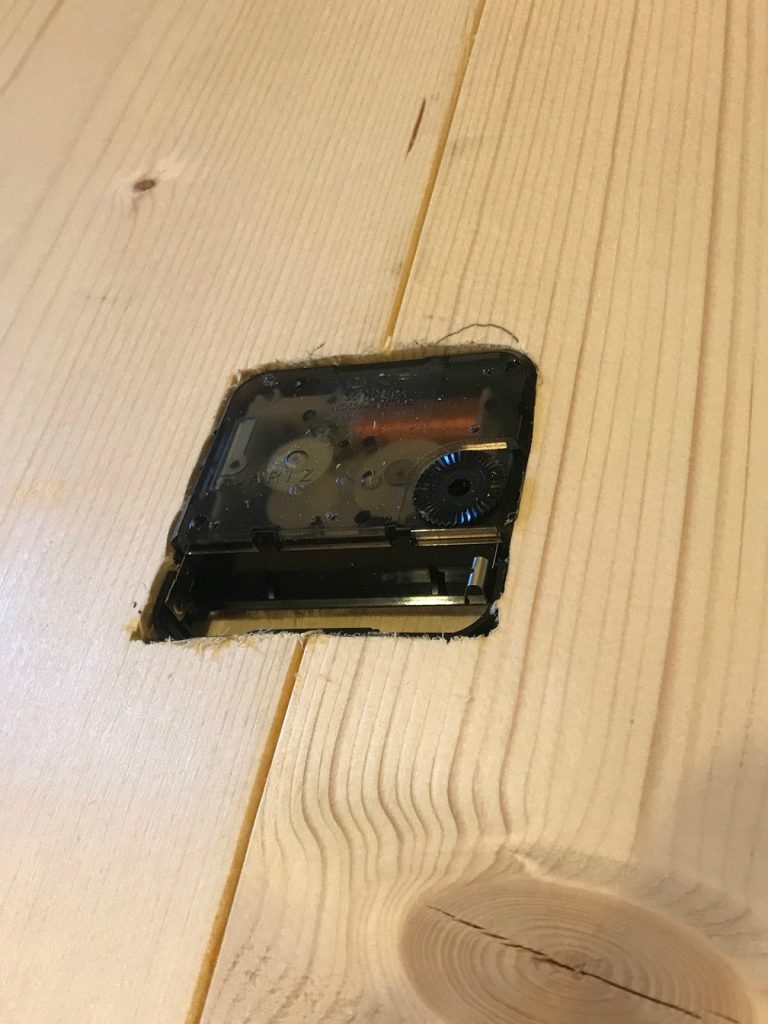
Step 5: Add clock hands
Follow the instructions with the clock movement to attach the clock hands onto the front of the wood clock.
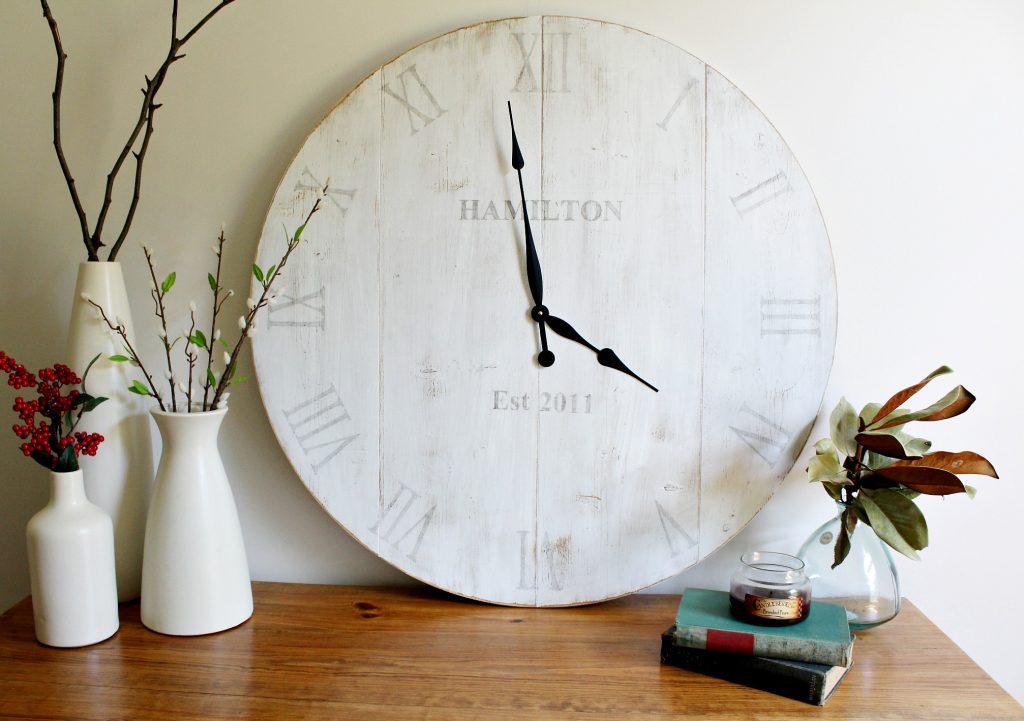
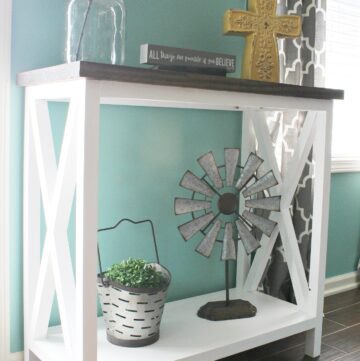
The movement itself has a hanger included to make hanging on the wall very easy. But, it also looks good just resting on a console table leaning against the wall. By the way, here’s a sneak peek at another project I will be posting soon 😉
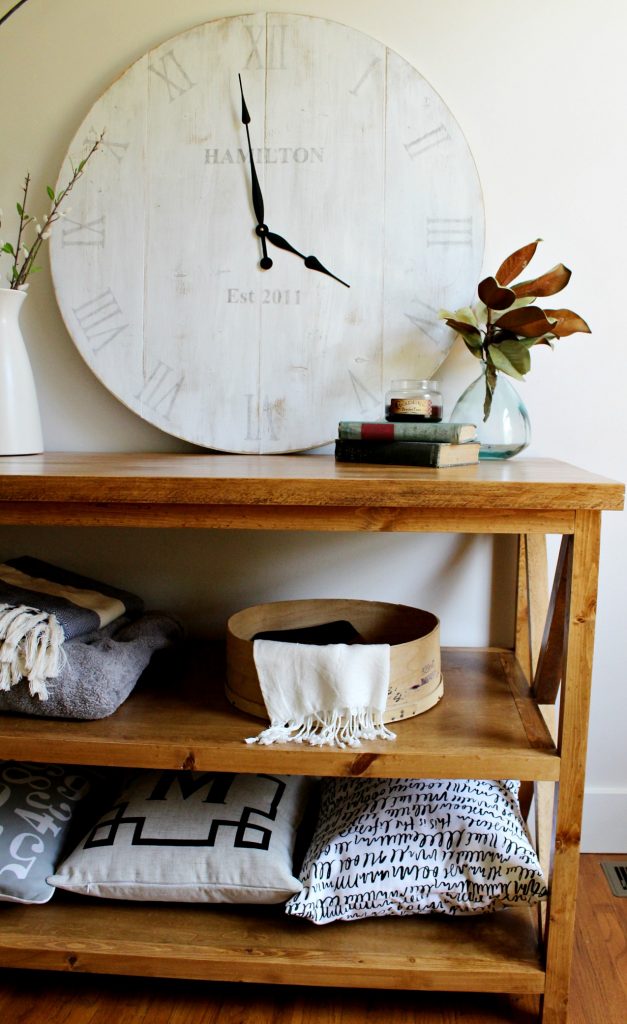
I love how the dark clock hands contrast against the distressed white clock and the numbers are somewhere in the middle with that grey touch 🙂
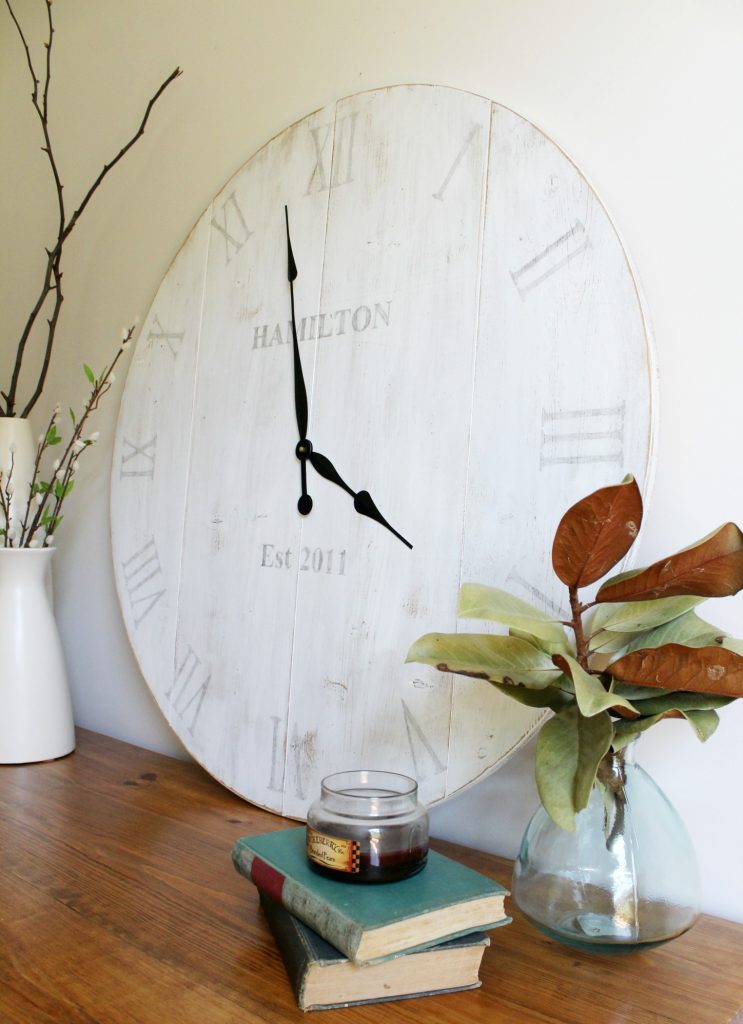
You could distress it more or less depending on your own preference. And you could add whatever words or letters you wanted on the body as well. I think it would be cool with a large monogram, too!
What do you guys think about this wall clock? How would you personalize yours?
.
Keep your eyes out for that console table post soon 😉 And before you go, I would love it if you’d pin this for later!!
Until next time, happy DIYing! 🙂

Ashlyn says
Love this so much!! Such a great idea and looks beautiful!
Shara, Woodshop Diaries says
Thank you so much!!!
Linda says
I dearly love this clock! Problem please don’t think I’m stupid), I don’t have access to a router. Is there another way to carve out the place for the clock works? I hope you don’t say a chisel! lol
Shara, Woodshop Diaries says
Thank you so much!!! And no, that’s not a stupid question! You don’t actually have to carve it out. You can mount it straight onto the back, it will just stick out from the wall a little bit when you hang it. But, if you want to carve it out and don’t have a router, you could also try a Dremel (although it might take a while), or a chisel. I know you didn’t want to hear that! But that’s probably your next best option if you don’t want to purchase any expensive tools. 🙂