People always ask me, “what’s the biggest thing you’ve ever built?” I’m not sure why everyone wants to know this, but I never really know how to answer.
.
Are we talking “big” as in the budget?? If so, then it’s the kitchen remodel…which I technically didn’t “build.”
.
Are we talking “big” as in the volume/cubic ft of the piece of furniture?? I haven’t measured exactly, but I guess it would be the farmhouse table.
.
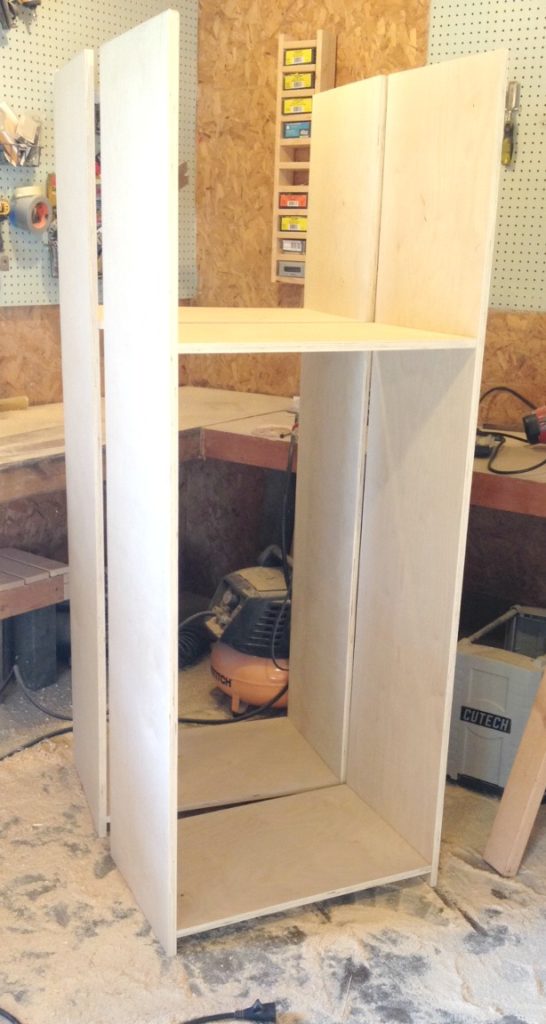
Or “big” as in the thing that took the most time?? Or the most material?? Maybe this pantry cabinet??
.
I give a different answer to everyone who asks.
.
Until now. Now I know for sure what the biggest thing I’ve ever built is. It’s so big I can’t even get it all in one picture…
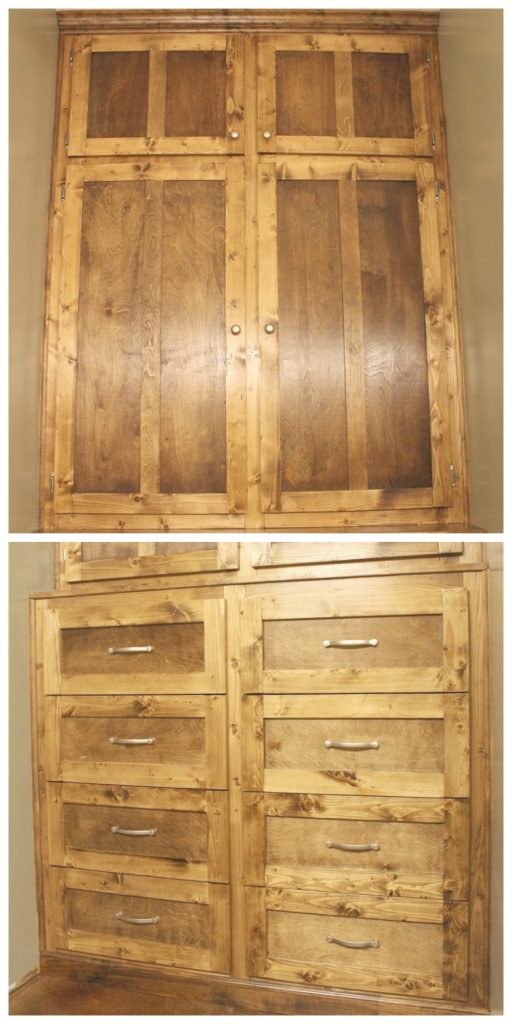
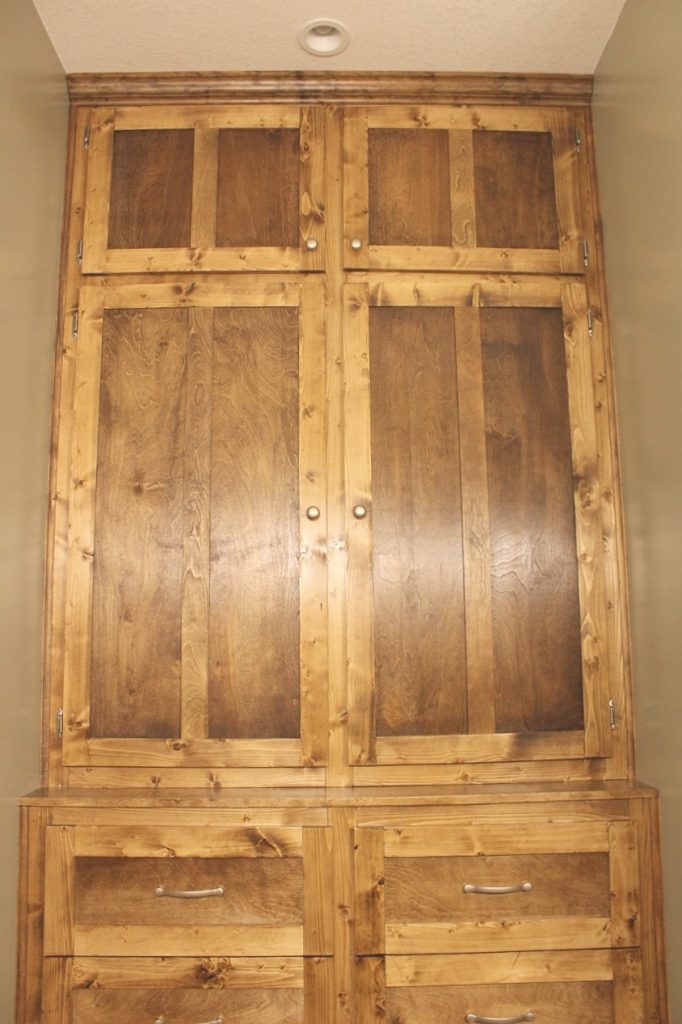
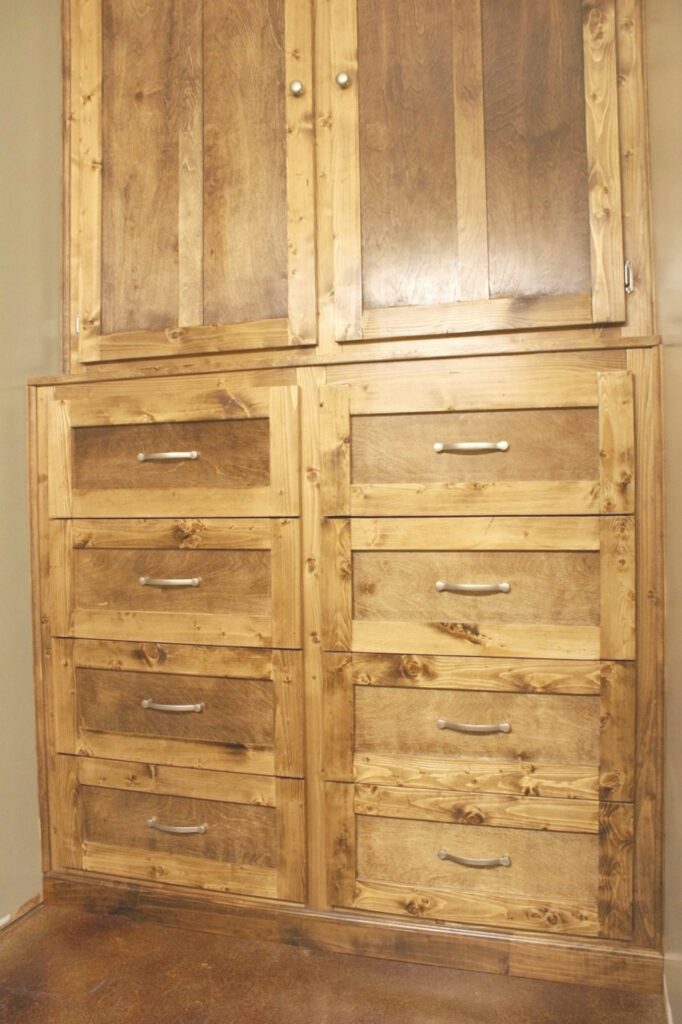
I built these huge 4 ½ ft wide and 10 ft tall built ins in a family friend’s bathroom recently and this is by far the biggest thing I’ve ever built. BUT, it wasn’t too difficult, and I’ll give you a break down of how I did it 🙂
.
Built ins are a bit tricky…every space will require different measurements. So I’ll give you an idea of the HOW I did it, but if you do something similar, you will have to figure out the measurements for your own space.
.
I wanted to build these built ins as much as possible in my own shop, not on site. It’s just easier for me to do things like that with my schedule.
.
So I measured the space to know what I needed. When in doubt, build slightly smaller and cover any gaps with trim.
.
The space was about 54 ¼” at the largest part and about 53 ¾” at the smallest. I measured in SEVERAL places in the front, back, top and bottom of the space. Walls are NEVER perfect, so you want to find where it’s smallest. It was slightly shorter than 10 ft at about 119″.
.
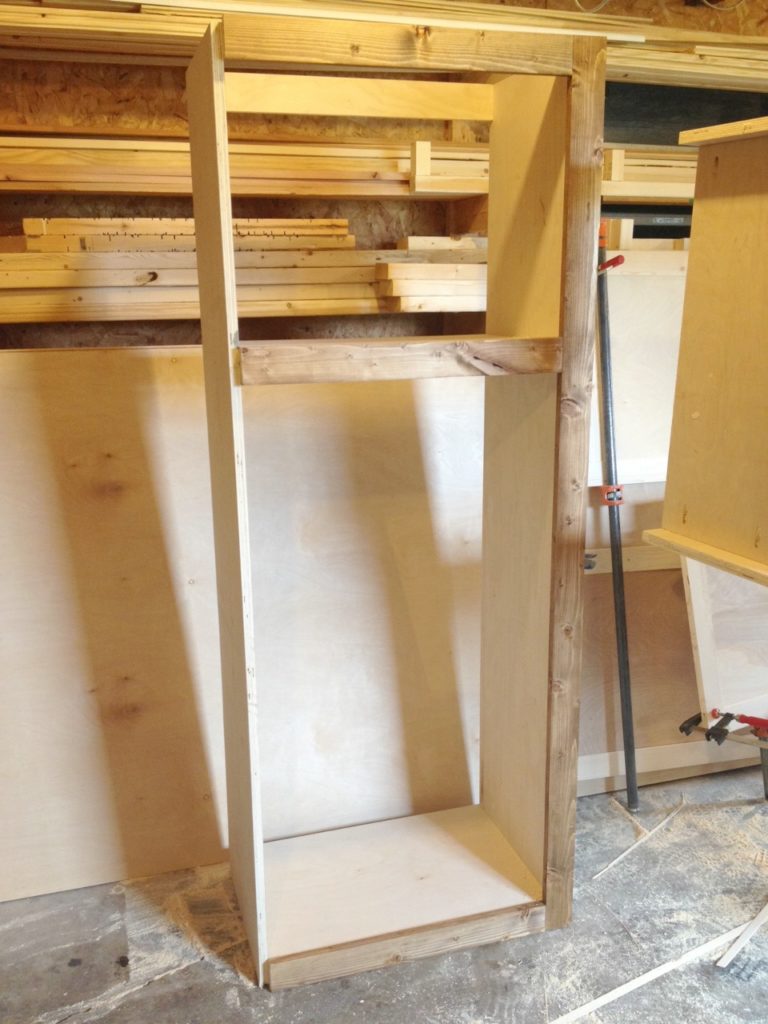
So, once you have your measurements, build cabinet carcasses to fit the space.
.
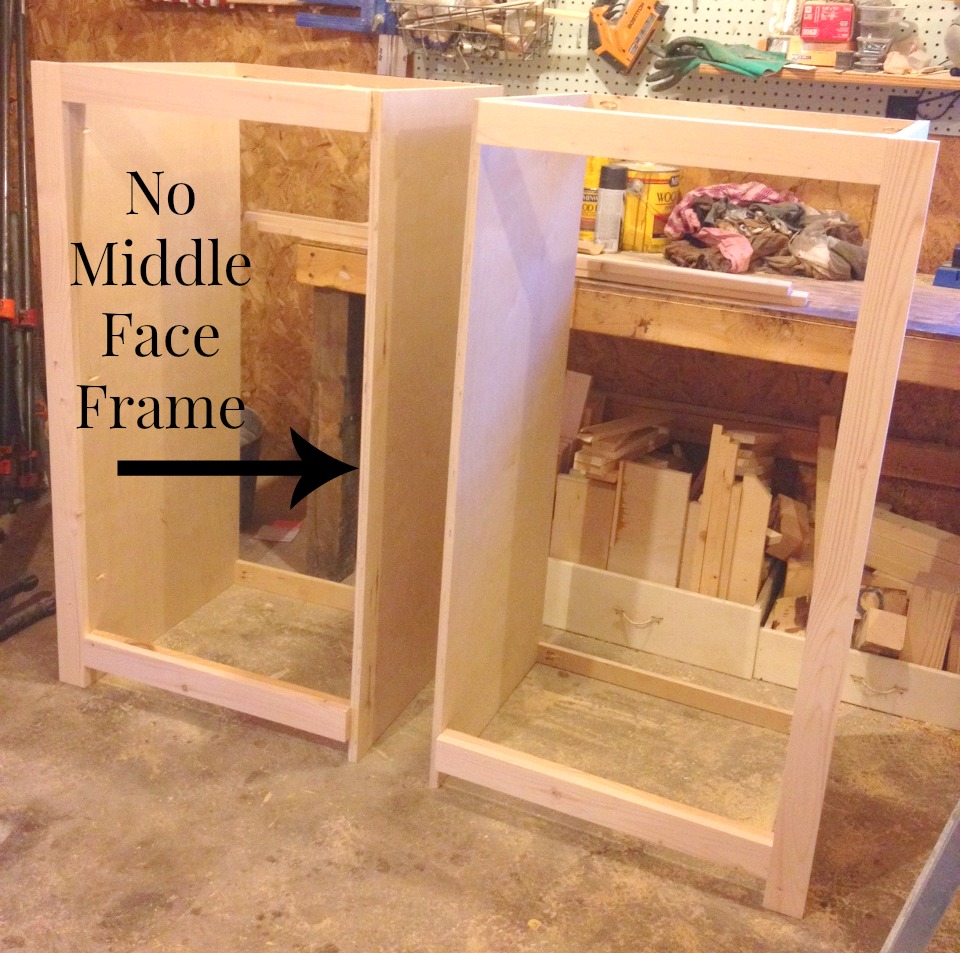
At this point, you have to consider the width of your face frames in this part. I used 1×3 face frames—one on each side and one in the middle. When all three face frames are attached, you want the total width to be the smallest measurement you took when you measured the space. That way, you know it should fit. So my actual cabinet is slightly smaller because the face frames stick out the sides a little. This is to make it easier to mount the drawer slides.
.
Once the carcasses are together, you can add the face frames EXCEPT the middle one. I didn’t attach the middle face frame until I was on site. Just in case I mis-measured and needed to trim it down a little for the cabinets to fit the space.
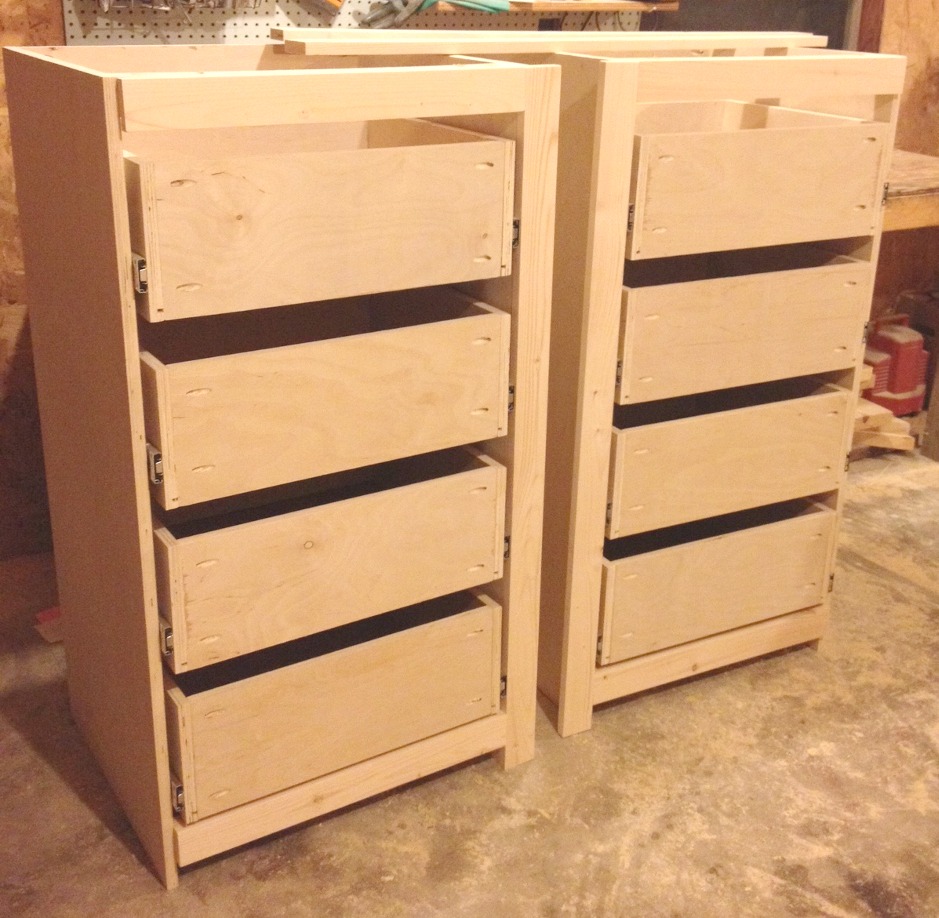
Once the carcasses are together, add drawer slides and drawers. You can see my post here on how I make drawers. I almost ALWAYS use the “cut the slit for the bottom” way now that I’m more comfortable using the table saw. This just makes the drawers nice and clean. By the way, these drawer cabinets were made about 4ft tall.
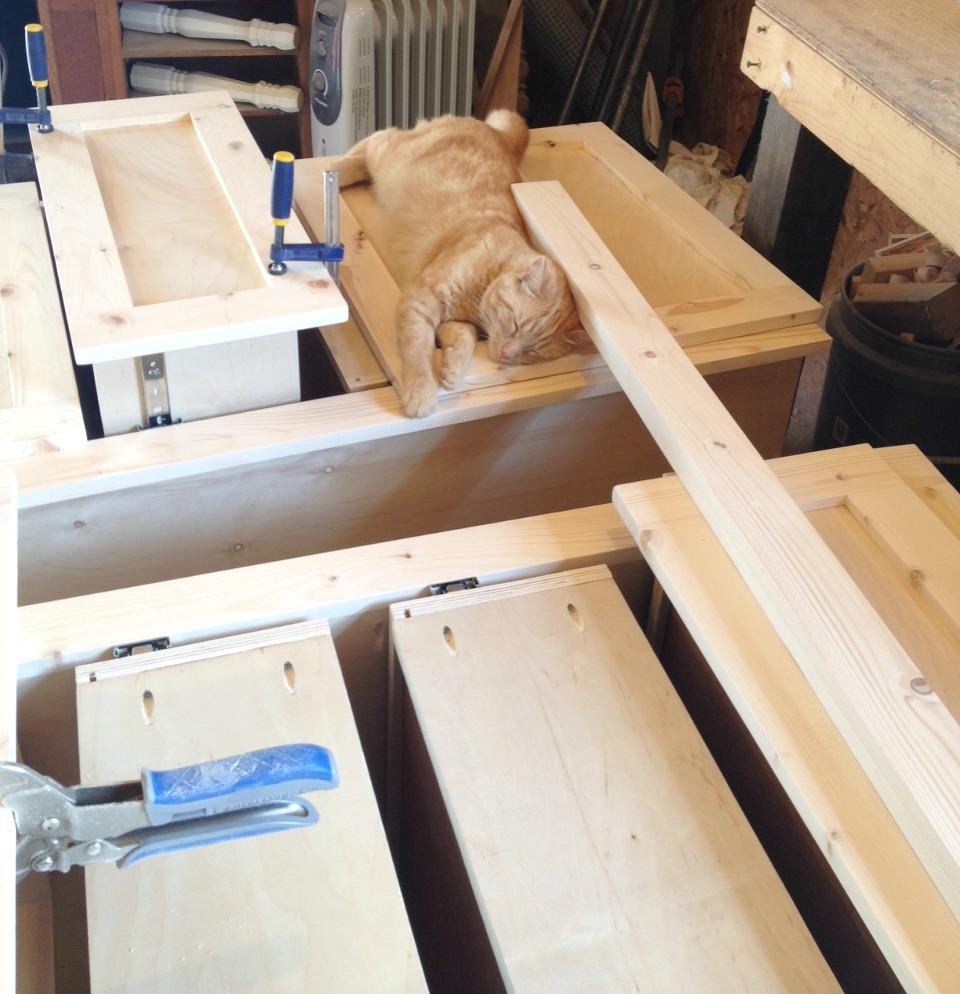
Drawers are fun, but a little time consuming. My cat got tired just watching me.

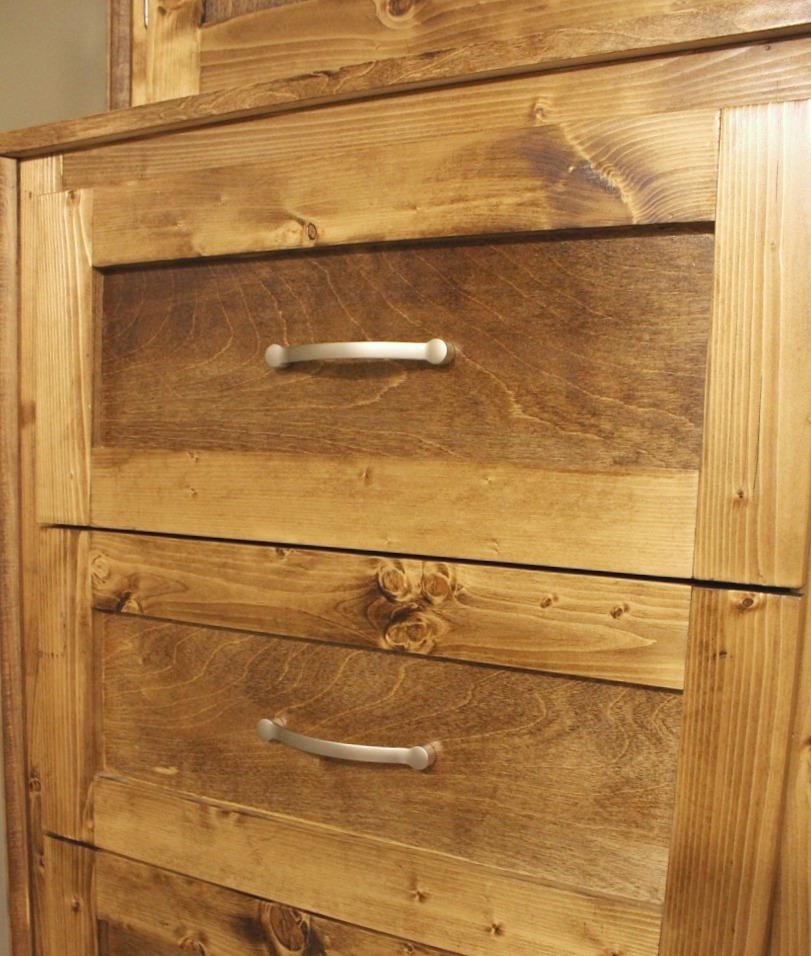
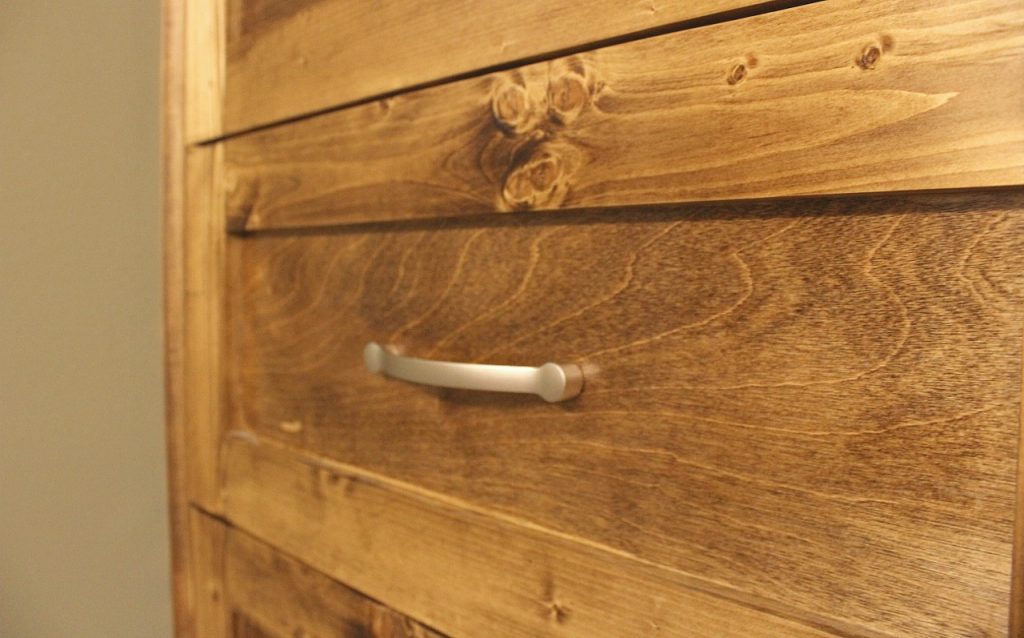
Then you can add drawer fronts. These can be decorative or plain…whichever fits your style. I added some shaker style drawer fronts. I glued 1x3s together for the frame (you could use pocket holes as well), then routed out the back (like I did when I made these doors…and these doors too), and glued and stapled a piece of ¼” plywood onto the back grooves. Then I glued the fronts onto the drawers. You want to make sure everything is lined up right before you clamp your drawer fronts because once the glue is dry, that sucker isn’t going to move. If you are using plain solid drawer fronts, you could glue and screw from the inside instead of gluing only.
.
The cat is apparently still tired from watching me.
The bottoms are pretty much done at this point except for finishing and install. So it’s time to move onto the top.
But first, cut a piece of plywood to go over the drawer cabinets if they are deeper than the tops. I made the drawer cabinets 22” deep and the top cabinets only 18” deep. So for the “countertop,” I cut a piece of plywood to fit over the cabinets and put some edge banding on the front. This may need to be trimmed some during install. Keep that in mind.
.
For the tops, you can do the same thing…build the carcass then attach face frames except for the middle one. For these I used pocket holes to add a shelf about ⅔ of the way up. You could do more than one shelf or no shelves if you wanted. I also built these so that (based on my space measurements) the top was about 1 ½” from the ceiling. If you plan to add crown, this will give you some wiggle room that you can cover up later.
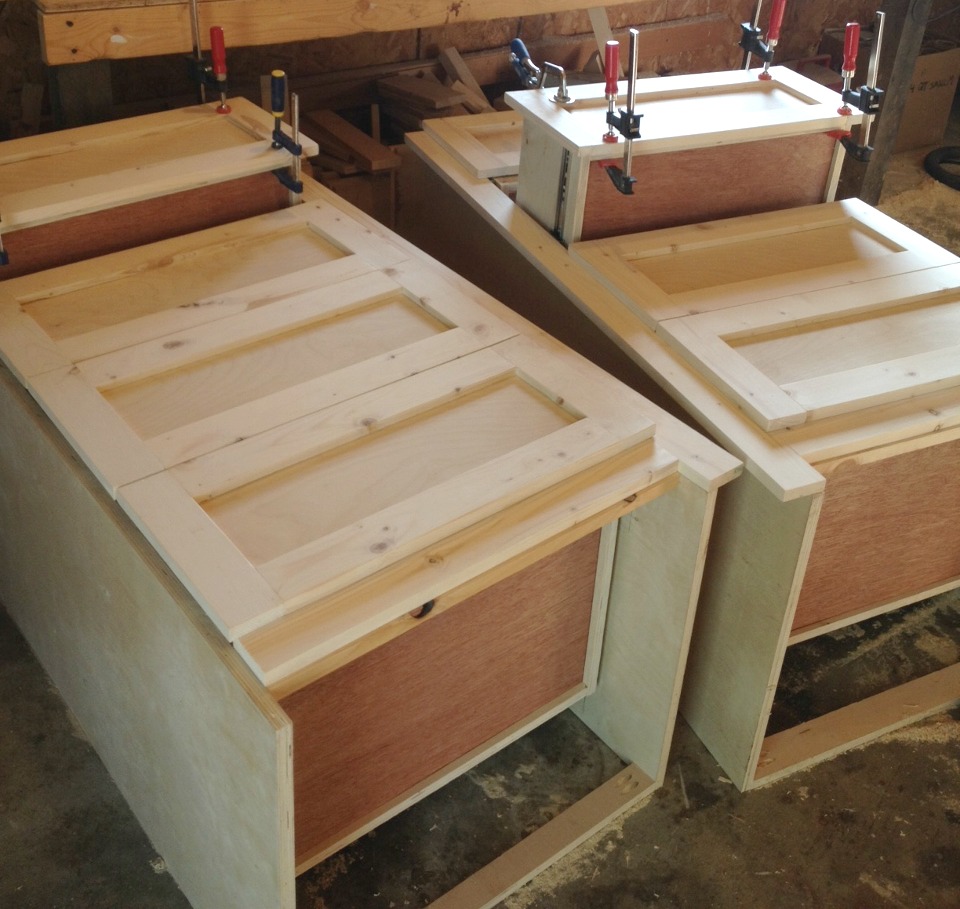
The tops were pretty simple. Once the carcass is built and the face frames added, you can build doors for the openings. You can see how I build shaker style doors in this post.
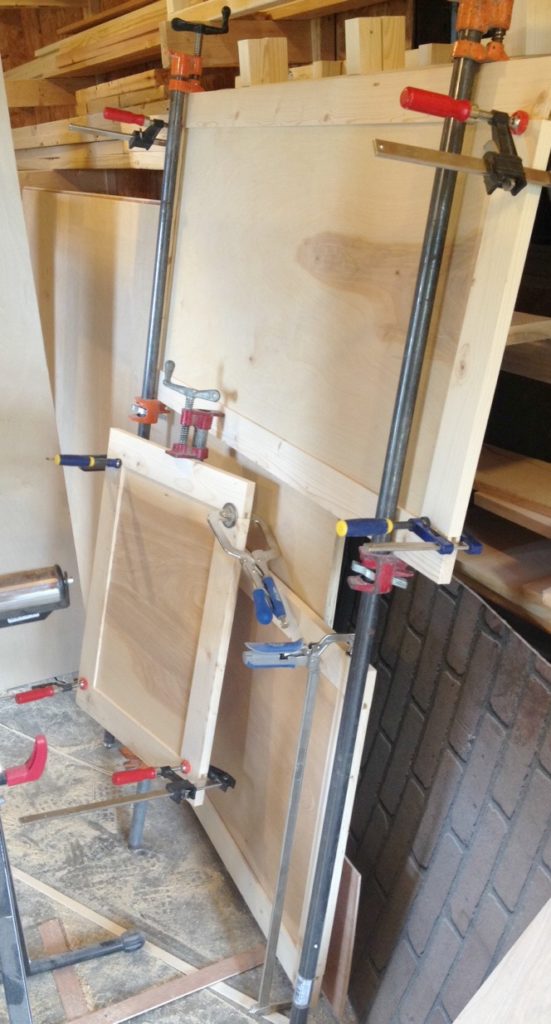
Because the doors on mine were so large, the design was pretty plain.
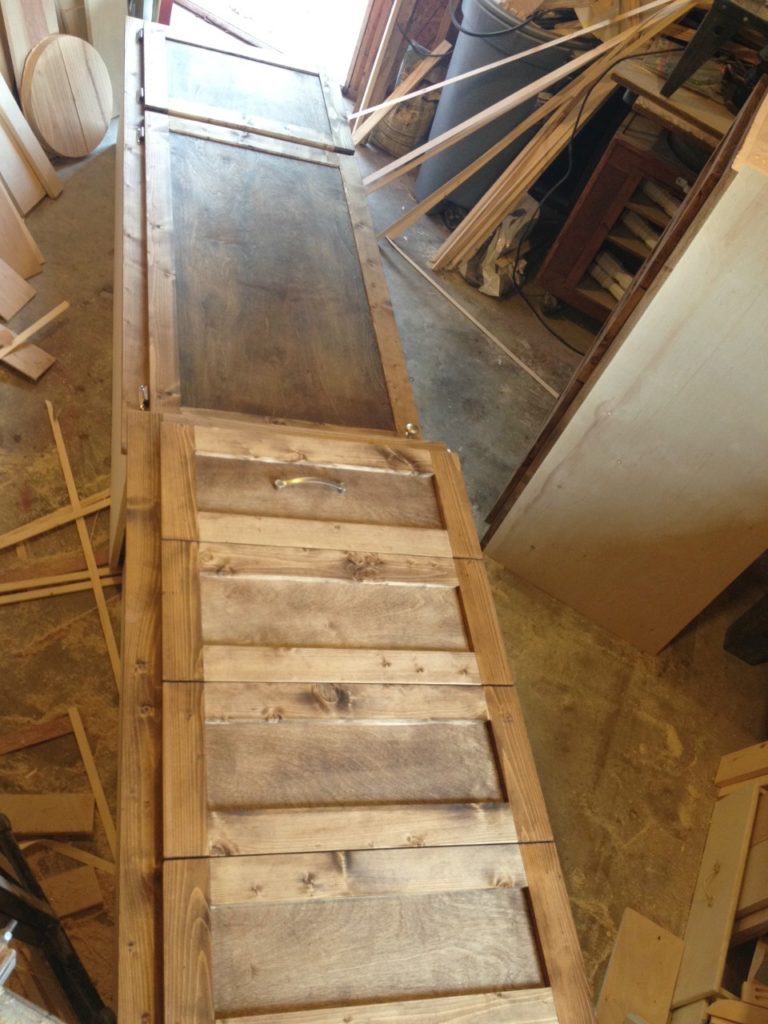
So I ripped some strips to glue onto the middle of the doors to break it up some. I had never made doors this large, so I didn’t think about the style looking strange with the doors so large. Here’s a picture of them installed where you can see the strip. Hindsight is always better.
While the doors were gluing, I used my Kreg shelf pin jig to drill holes for adjustable shelves. You could add stationary shelves if you wanted, but the Shelf Pin jig allows for adjustable shelves which is really cool. You will need to cut shelves to fit in the cabinet and then attach the doors after the glue is dry on them.
.
Then it’s time to finish!! I stained it with Minwax Provincial and polyed with Minwax Polycrylic.
.
I also cut a piece of clear crown, some strips of cove molding, and baseboard a little longer than I needed and stained it as well. I trimmed it all down during install to the exact length it needed to be.
.
Then it’s ready to deliver and install it. You will need to shim up the bottom cabinets and screw them into the wall. This is where you will attach the middle piece of the face front. Luckily mine fit perfect, but JUST IN CASE they are too big, you could always rip a little off one side of the 1×3 in order for it to fit. This was the easiest way I could think of to cut down on any on site work needed in order to install them.
.
Then add the “countertop” with glue and brad nails, and cut the baseboard to fit at the bottom. It was also attached with brad nails. Then put the top cabinets in place and shim them as well. Once they are screwed into the studs, you can add the middle face frame just like on the bottom. It can be ripped to fit as necessary. Once the face frame is attached (with brad nails), then cut the crown to fit and nail it on.
.
Finally, you can add some cove molding along the outside corners to cover any gaps between the built ins and the wall.
You may have a totally better way of doing all of that, but that’s exactly what we did haha.
.
A huge thanks to D Lawless Hardware for the drawer pulls and knobs for this project. They looked so good with this color.

I only had a few feet to step back and get the picture, so I had to take pictures of the top and bottom separately. Ten foot tall is no joke. This thing was huge!!
So what do you think?? Something you would try?? The homeowners wanted a more rustic look, but these would look great both painted or stained and could go in a bathroom, living room, or any spare nook you wanted to fill 🙂
.
If this looks like something you’d like to try, don’t forget to pin for later!!

Keep your eyes out for more fun DIY storage ideas coming soon (smaller scale projects!!) and some REALLY fun outdoor projects too 🙂
.
Until next time, happy building!