• Skip to primary navigation
  • Skip to main content
  • Skip to primary sidebar
Woodshop Diaries
  • About
    • Work With Me
  • DIY Projects
    • DIY Furniture Plans
      • DIY Bed Plans
      • DIY Dresser Plans
      • DIY Nightstand Plans
      • DIY Desk Plans
      • DIY TV Stand Plans
      • Coffee and Side Table Plans
      • Tables
      • Shelves and Bookcase Plans
      • DIY Storage Trunk Plans
      • DIY Bench Plans
      • DIY Storage Cabinet Plans
      • DIY Bathroom Vanity Plans
      • Kids Projects and Furniture
    • DIY Scrap Wood Projects
    • DIY Workshop Projects
    • DIY Home Decor Projects
  • Shop
  • Getting Started
    • Cabinet Building
    • Woodworking Basics
    • Furniture Finishing Tips
    • Tool Guides & Reviews
  • Blog
    • Facebook
    • Instagram
    • Pinterest
    • YouTube
menu icon
go to homepage
search icon
Homepage link
  • DIY Furniture Projects
  • Easy DIY Projects
  • Shop
  • Browse Projects by Category
  • Woodworking Tips
  • About
    • Facebook
    • Instagram
    • Pinterest
    • YouTube
  • ×

    Home » Furniture

    Hoosier cabinet part 1

    October 8, 2014 by Shara, Chasing A Dream

    About a month ago, my husband’s aunt asked if I’d be interested in an old hoosier cabinet they had been keeping in their basement. Of course I couldn’t turn it down. You kidding? So we brought it home.

    IMG_1564.PNG

    This thing has a story…some if which I know, some of which I’ll never know. They had gotten this cabinet when they got married (no telling how old it was when they got it) and had it stripped because they wanted to stain it (it had previously been painted white). But, when they saw the wood wasn’t a pretty wood that would look good stained, they never got around to refinishing it. It had been used as a craft station with their kids when hey were younger, but was now just in the way.

    So we brought it home (we really needed more stuff to move once we finally buy a house). At first glance, the cabinet was in good shape. But a closer look showed the plywood on all sides was peeling. I had two choices…paint the peeling plywood, I go ahead and replace it. The reason this thing is still a work in progress is because I chose the latter.

    This has been a nightmare. I’m VERY impatient. This cabinet has tried and tried my patience. If I didn’t love it and know it can be made beautiful, I would have given up already.

    IMG_1616.JPG

    IMG_1615.JPG

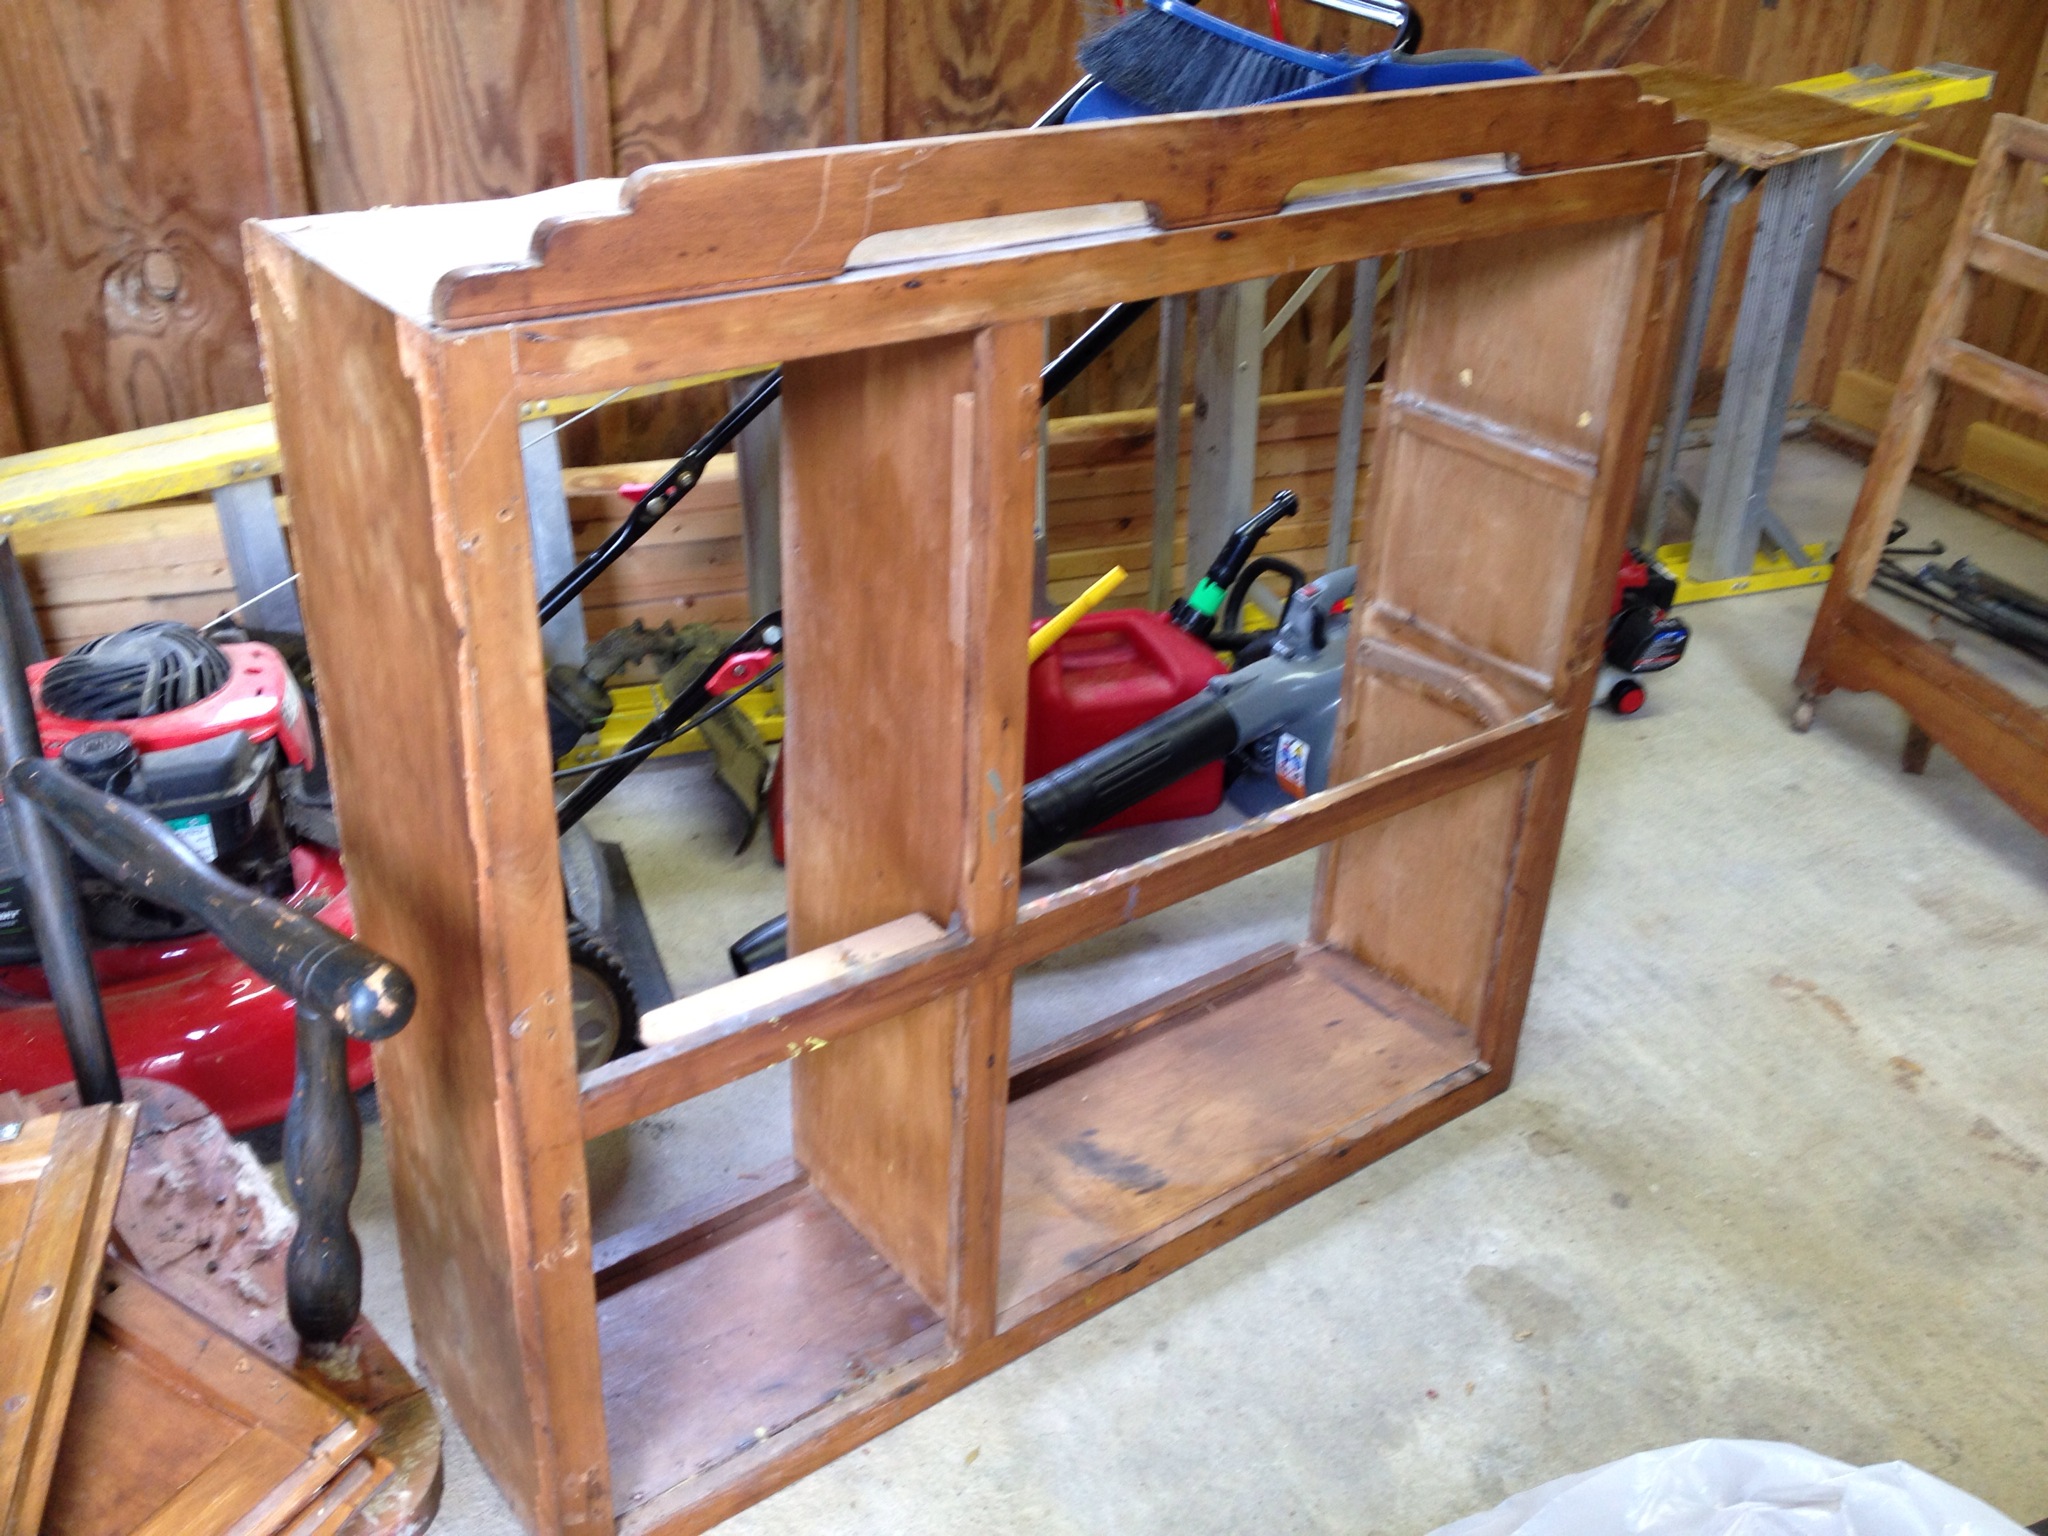
    The original piece was a mess of wood glue…EVERYWHERE. So when I pried the side panels off, most of it was still stuck where it had been glued. This caused the replacement plywood not to line up right. Screw that. If It won’t line up right anyway, then I’m using beadboard (even though it’s thicker than I need) because it’s pretty and I’ve been wanting to use it on something.

    Beadboard was about 0.3xx inches thick vs ¼ inch plywood. So now nothing’s lining up right (already stated) and you can see the edge of the beadboard (which is like plywood) and that’s ugly. I also had to put more wood on the top to cover up the peeling plywood there, too. I didn’t want you to see the plywood edge, so I put like five layers of wood putty over and over and over. That didn’t work. (This is the part where I get frustrated and cry…no big deal…it’s all part I the process haha.)

    Dad came to the rescue and we went shopping for moulding to cover up my mess. Good ole dad always saves the day. We added the moulding around the edges where the plywood was showing and I put a coat of paint on her.

    IMG_1673.JPG

    IMG_1670.JPG

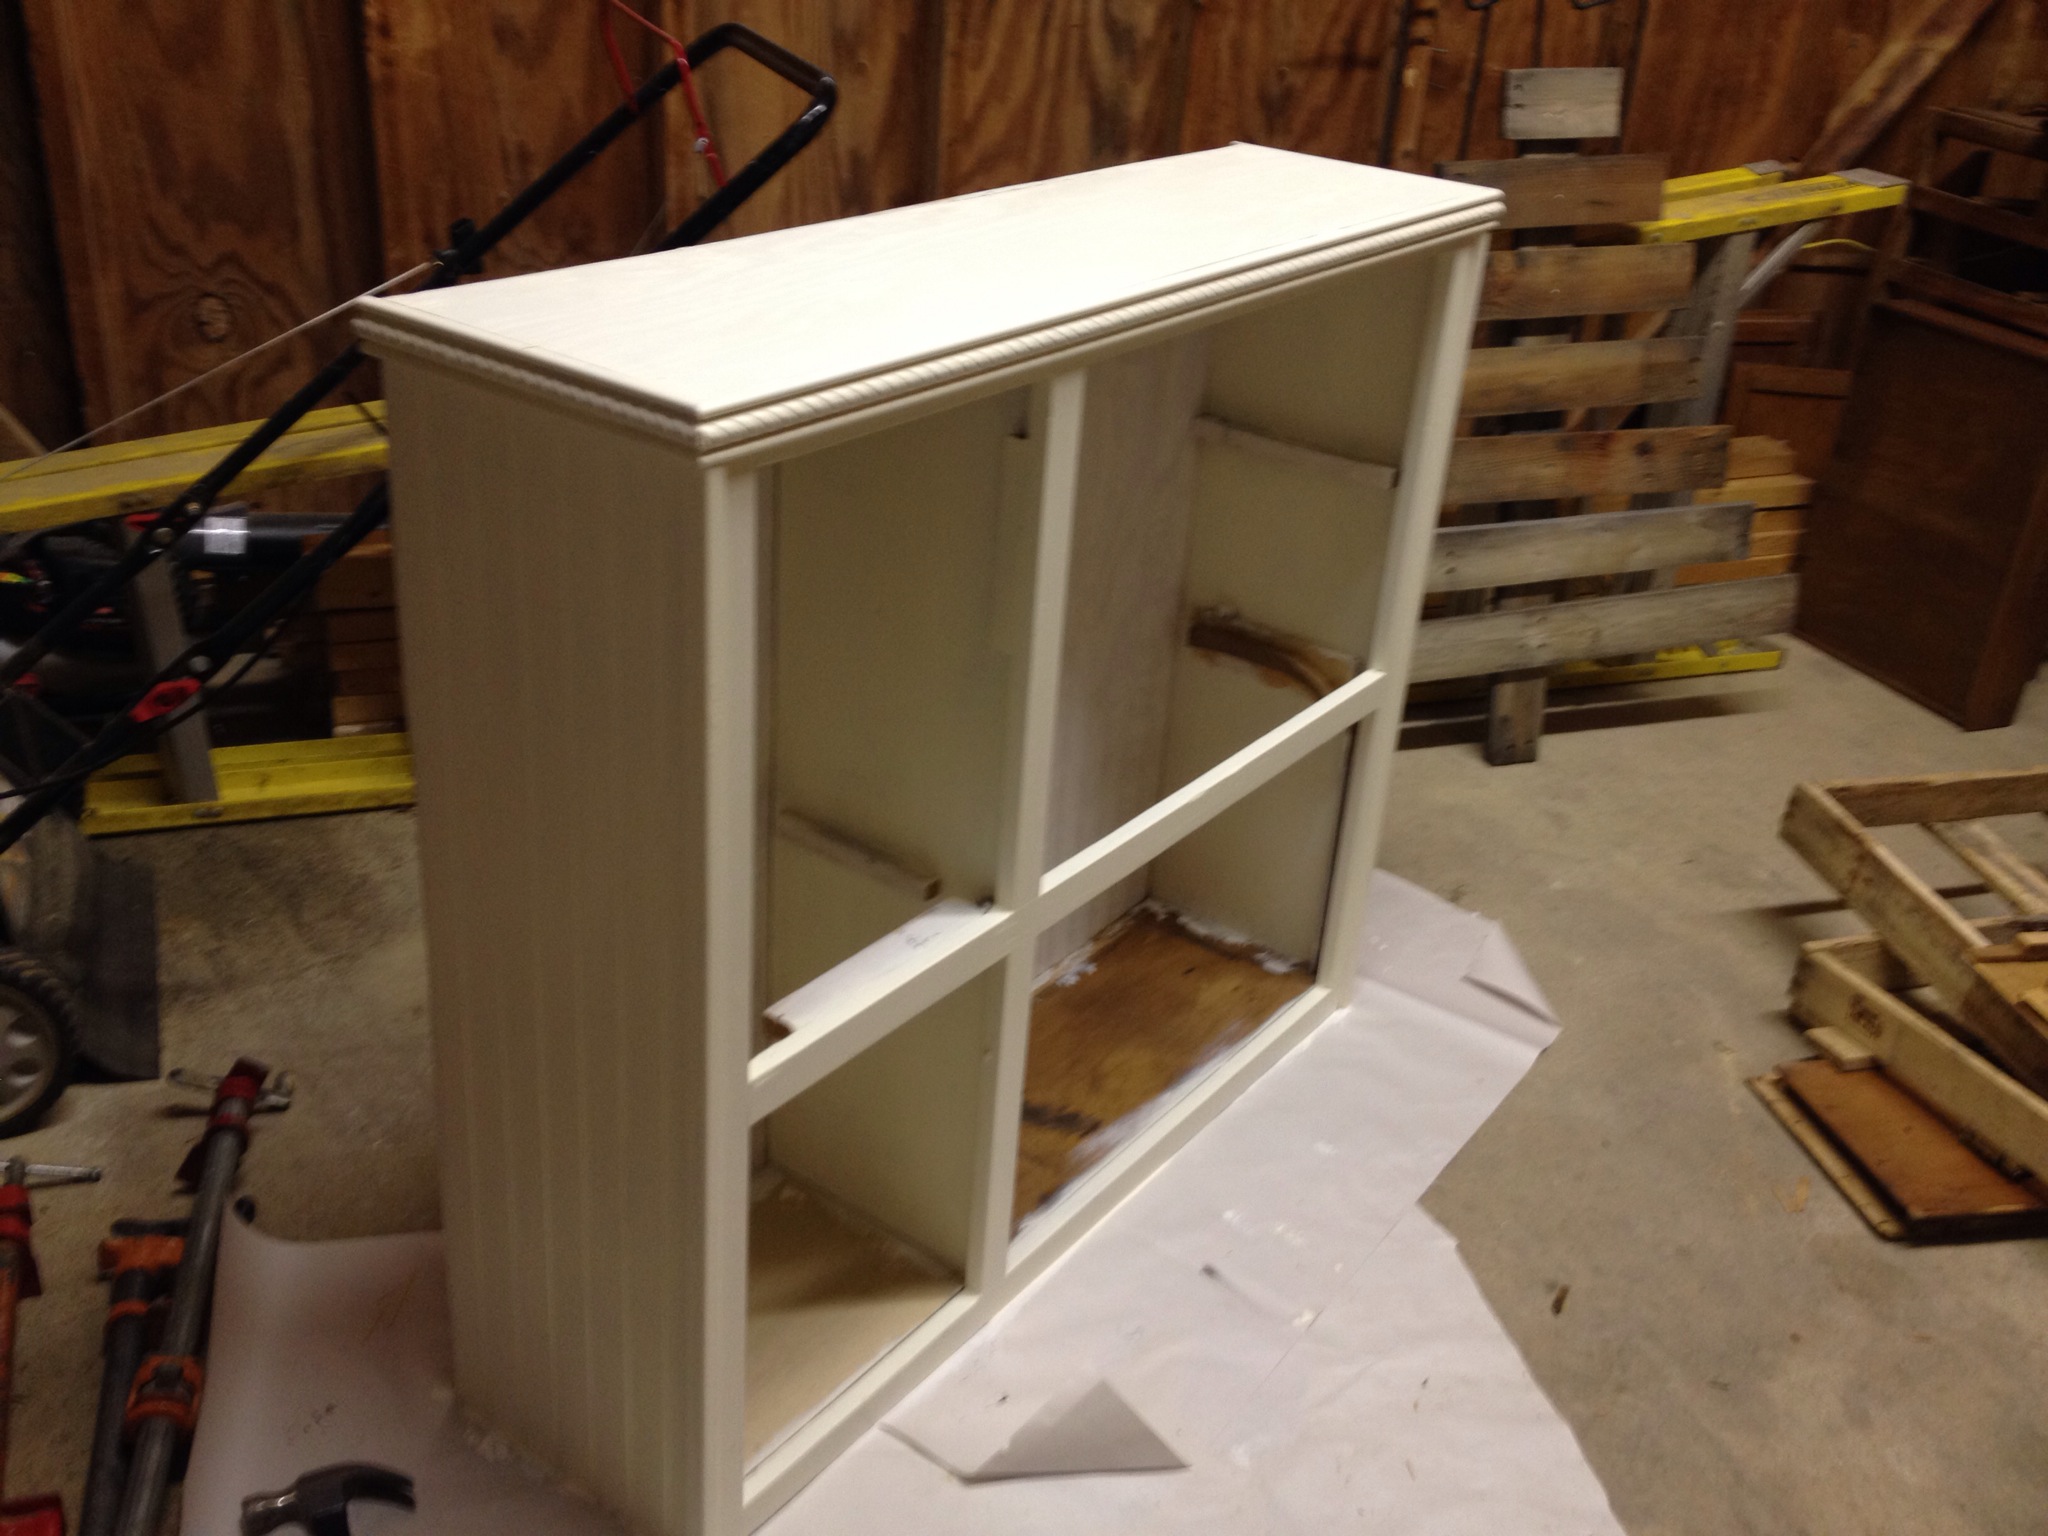
    And that’s as far as I’ve gotten in about a month. And that’s only the top half. That’s sad. I hope to make major progress this week and bring you part 2 of the project. We will see what happens. I’ve still got to make shelves for the top and reinstall the “garage door” looking thing (I don’t know the technical term…something about a bread box???)

    As for the bottom, it’s got a long way to go.

    IMG_1671.JPG

    I promise I will have part 2 for you soon! 🙂

    « Getting out of my box
    Hoosier cabinet part 2 »

    Related Posts

    DIY Mobile Workbench with Plans
    DIY Dog Crate End Table or Nightstand
    Black & Wood DIY Planter Box

    Primary Sidebar

    Hi! I'm Shara, the designer, maker, and videographer behind Woodshop Diaries. Let's get building, friends :)

    Learn more →

    Woodworking Tips & Guides

    • How to make simple Shaker style cabinet doors!!
      DIY Simple Shaker Cabinet Doors
    • 5 Tools To Get Started Woodworking
    • DIY Kitchen Cabinets–From Only Plywood
    • How to Square Board Edges and Make Your Own 2x2s

    Hi! I'm Shara, the designer, maker, and videographer behind Woodshop Diaries. Let's get building, friends :)

    Learn more →

    Woodworking Tips & Guides

    • DIY Storage Desk Plywood Drawers
      How to Build Drawers–EVERYTHING You Need to Know
    • How to Choose Plywood for Furniture and Cabinets
    • 4 Ways to Fill a Pocket Hole
    • How to Install Drawers with Side Mount Drawer Slides

    Footer

    ↑ back to top

    Tips to Take Your Projects to the Next Level

    --5 Secrets to Professional Looking DIY Furniture

    --How to Properly Finish Raw Wood Furniture {Without a Sprayer!}

    --How to EASILY Cover Plywood Edges

    --4 Ways to Fill a Pocket Hole

    --10 Must Have Tools for Furniture and Cabinet Building

    Printable Building Plans

    Check out our shop to browse printable PDF building plans!

    Website Policies

    This website is for entertainment purposes. Using any information provided is to be at your own risk.

    This site uses cookies to provide you with a better experience.

    All images and text on this site are property of Woodshop Diaries, LLC. Please be respectful and don't steal this content.

    See policies page on this site for more information.

    Want to get in touch? Contact Us Here

    Copyright © 2022