When I was in college, x years ago (x=more that I care to think about), I got a degree in math.
.
I’m convinced that if you are good at college math, you would probably also make a decent lawyer. College math classes are basically writing long explanations about how this random fact is somehow related to this random fact and that somehow proves this statement (they’re called “theorems”). SO. MUCH. FUN.
.
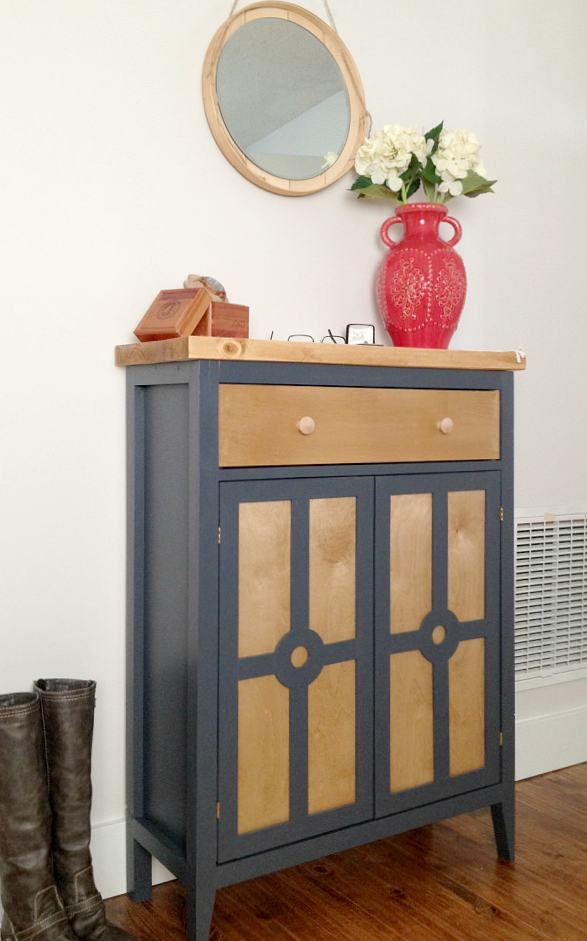
Anyway, I feel like that’s what’s going on today. I need to explain how getting a new watch meant I needed a new cabinet. I promise this all makes sense. Stay with me.
.
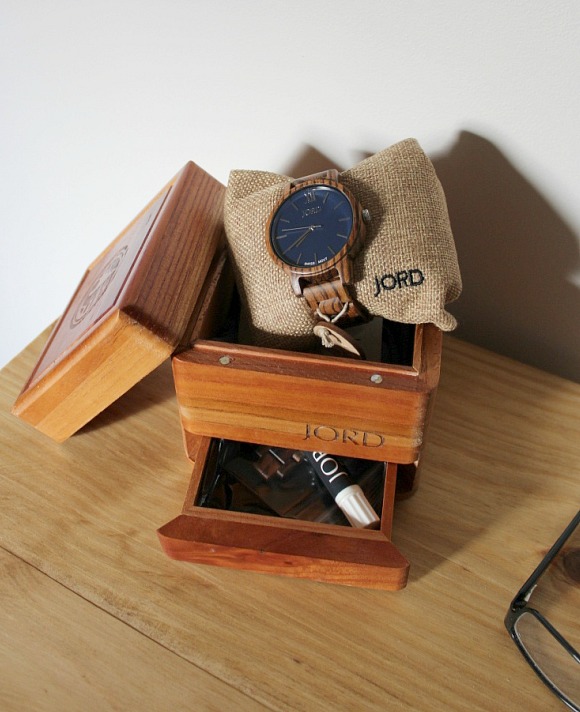
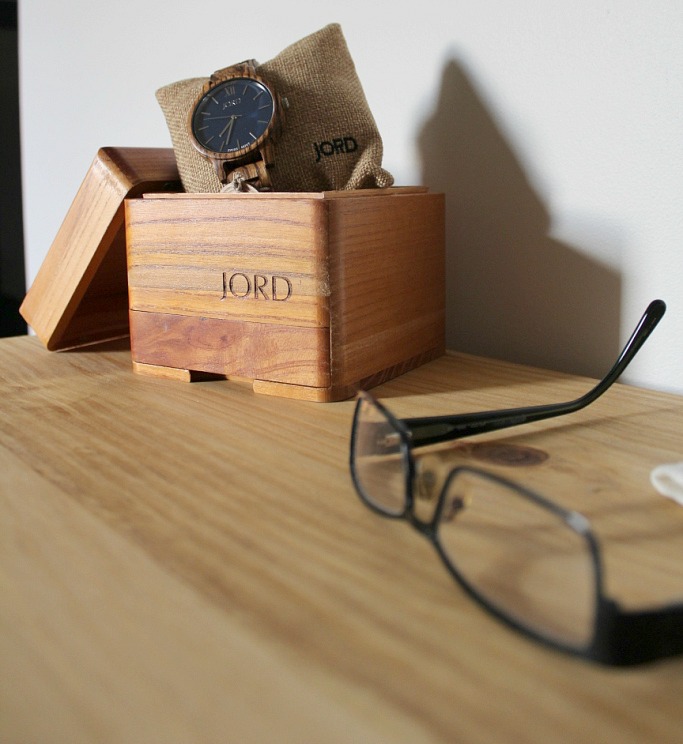
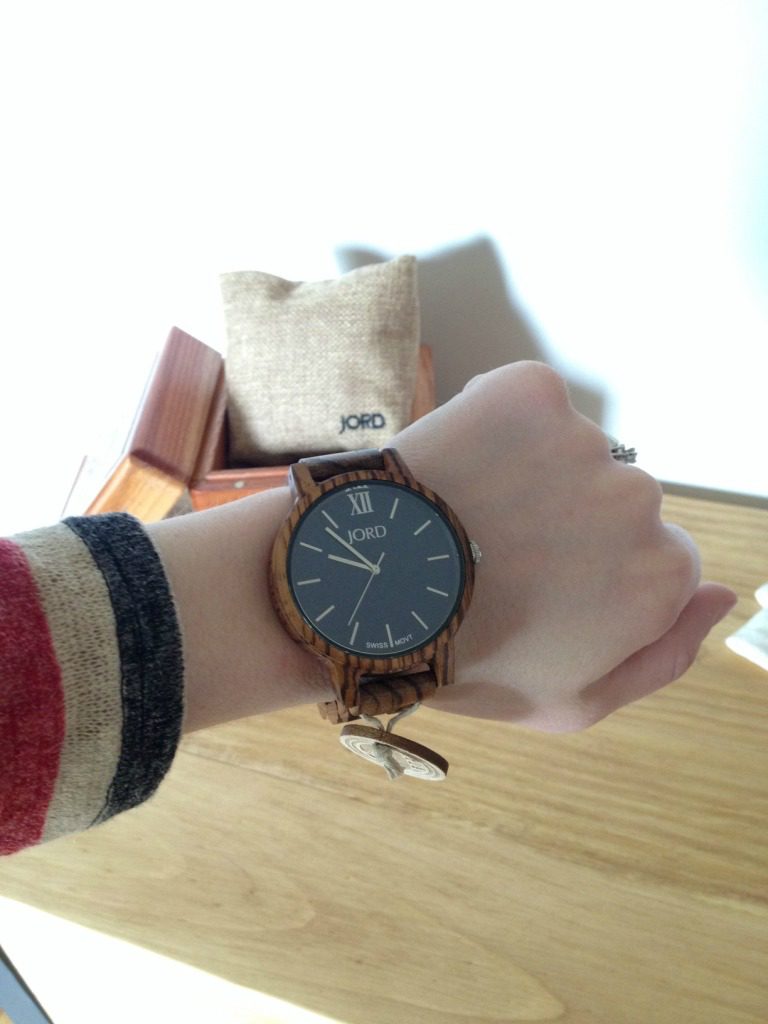
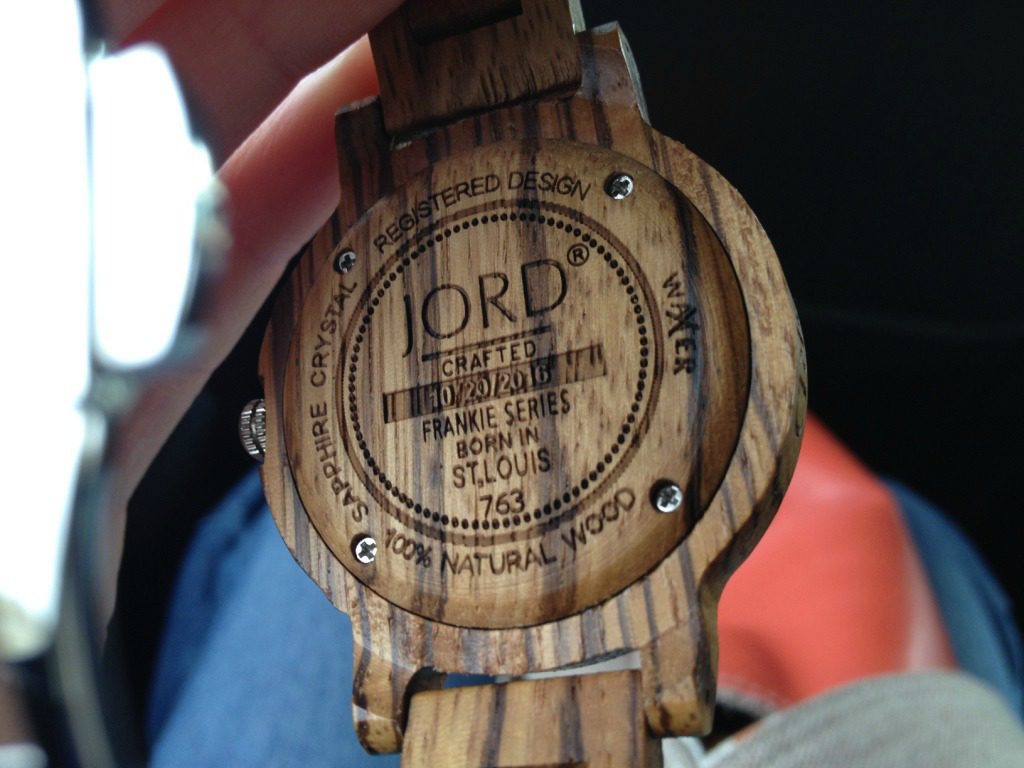
When Jord Wood Watches sent me this awesome new watch, I was ecstatic! I mean, what better watch for a woodworker than a WOOD WATCH?!

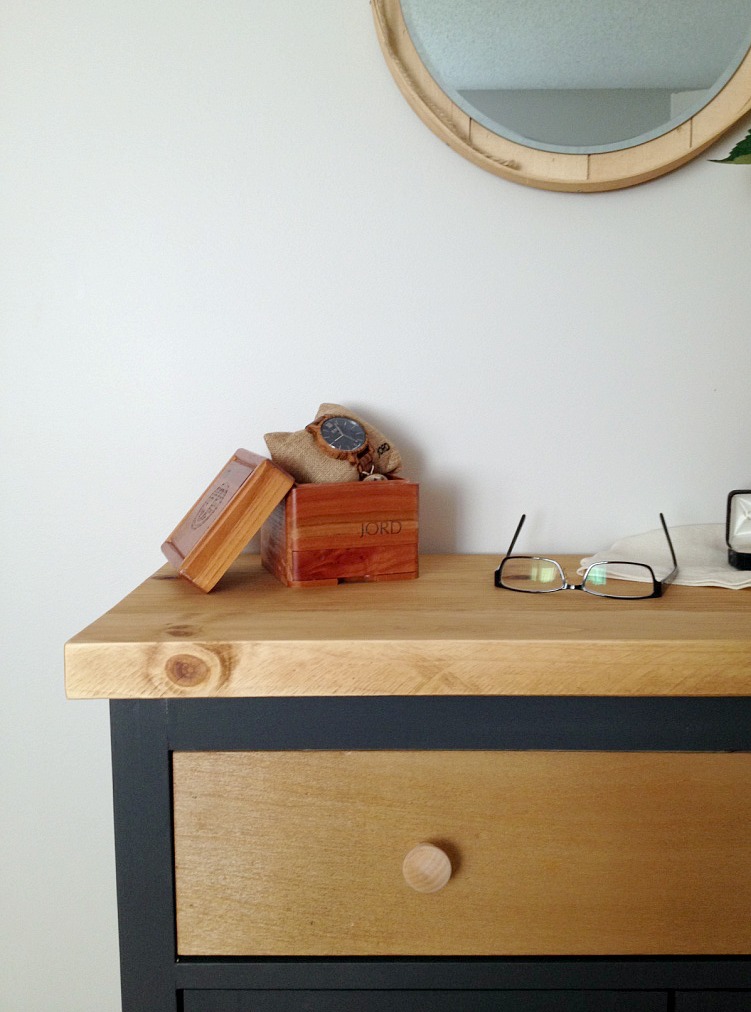
But, I’m not a big jewelry and accessories wearer. So I don’t have a big collection with a fancy storage box. I literally only have a wedding ring. And now a watch haha. Usually, my wedding ring stays on my nightstand in its original box, but when I put this pretty wood watch storage box (that comes with the watch!!) there too, it seemed way too crowded.
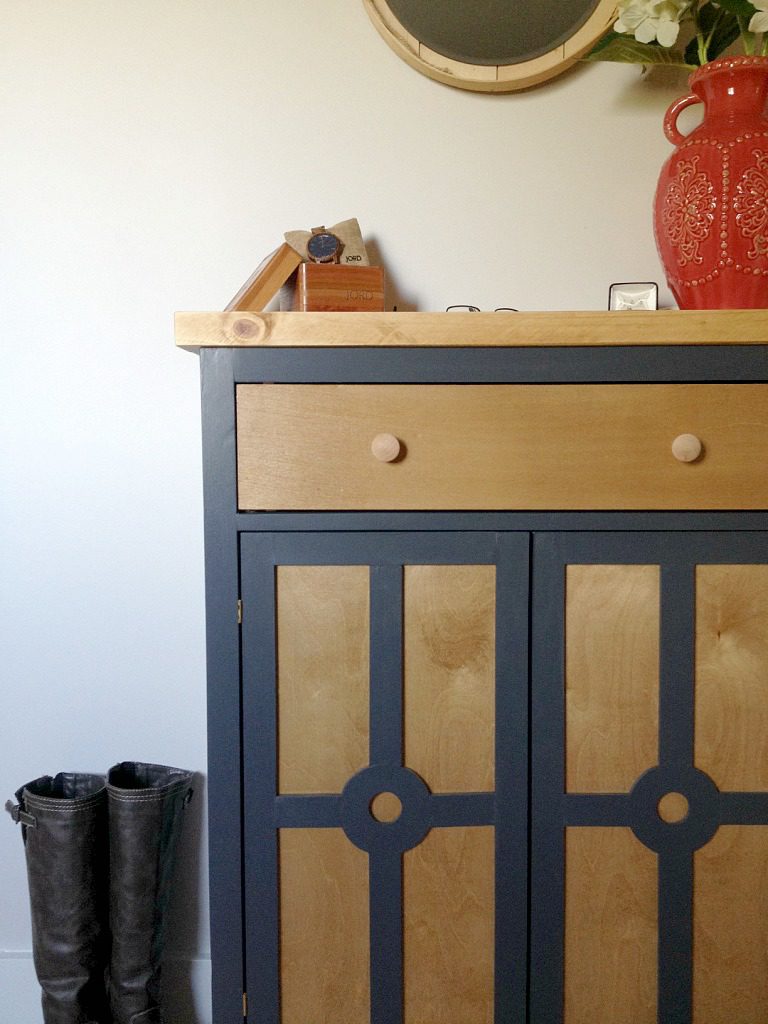
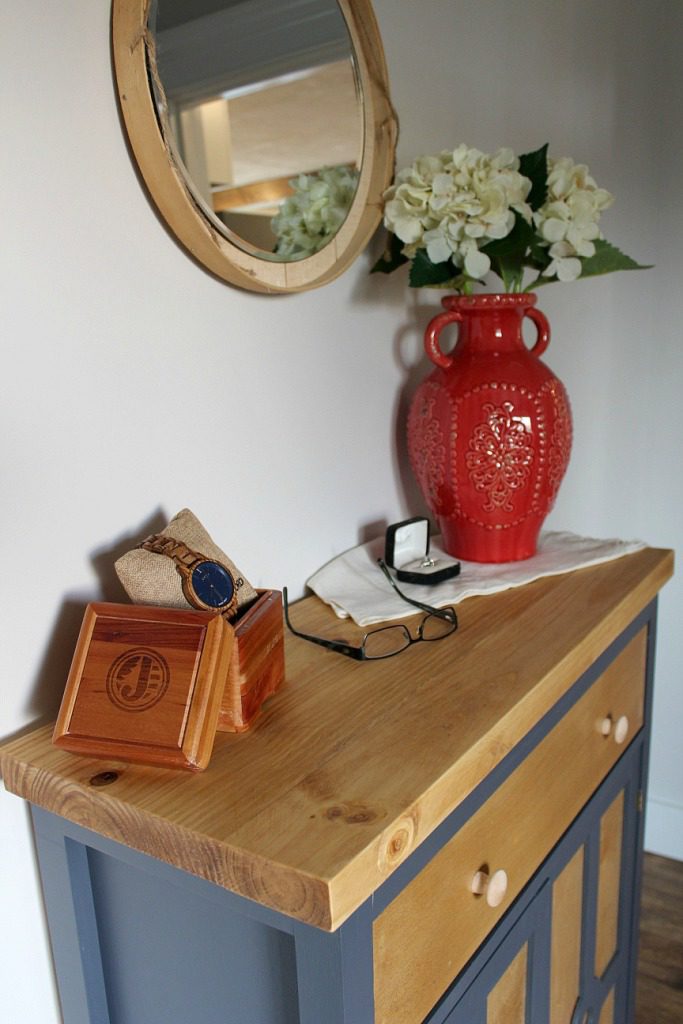
Luckily, I have this random space in my bedroom that’s almost like a “bedroom foyer” that was begging for SOMETHING pretty to cover that boring wall. Plus, it would be nice to have a designated spot (that wasn’t my crowded nightstand) for my glasses, ring, and watch.
.
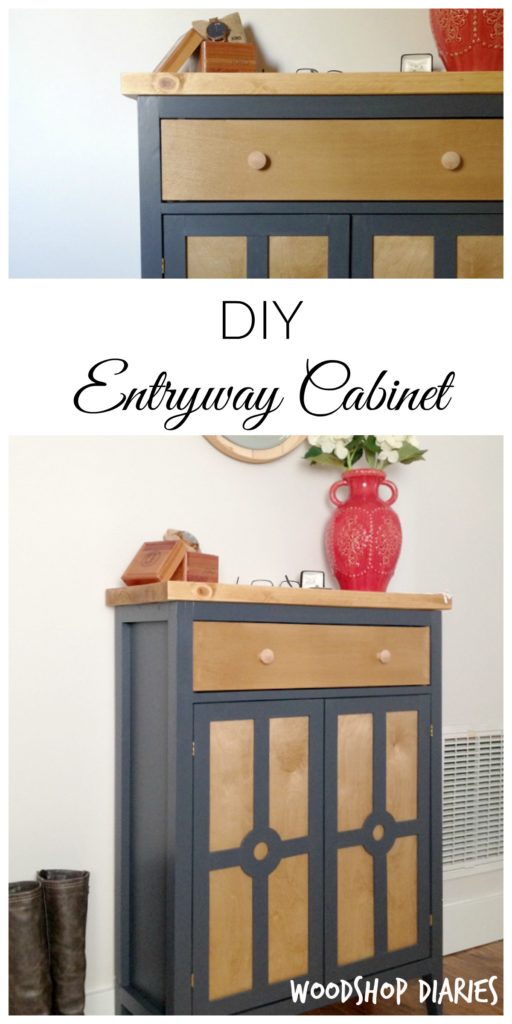
So that’s how getting a new watch inspired me to build this:
So if you need a cool place to put your awesome new watch (because I’ve partnered with Jord to host a giveaway at the bottom of this post!), I’ve got you covered with the how to 🙂
.
PS, about that giveaway…here’s the deets: You can enter the giveaway at the bottom of this post. Everyone who enters will receive a code for $25 towards the purchase of a new super awesome wood watch, but one lucky winner will get a $100 code! The giveaway ends at midnight on March 26th. All codes will expire May 31st.
.
Now, onto the building stuff!
.
This post contains affiliate links for your convenience. Please see disclosure policy for more details. Thanks for supporting this site and the brands that support this site!
Materials needed:
(3) 2x2x8
(2) 1x2x8
2x8x8
¾” plywood
¼” plywood or other backing material
4 small hinges
Knobs/pulls as desired
Wood glue
Wood putty
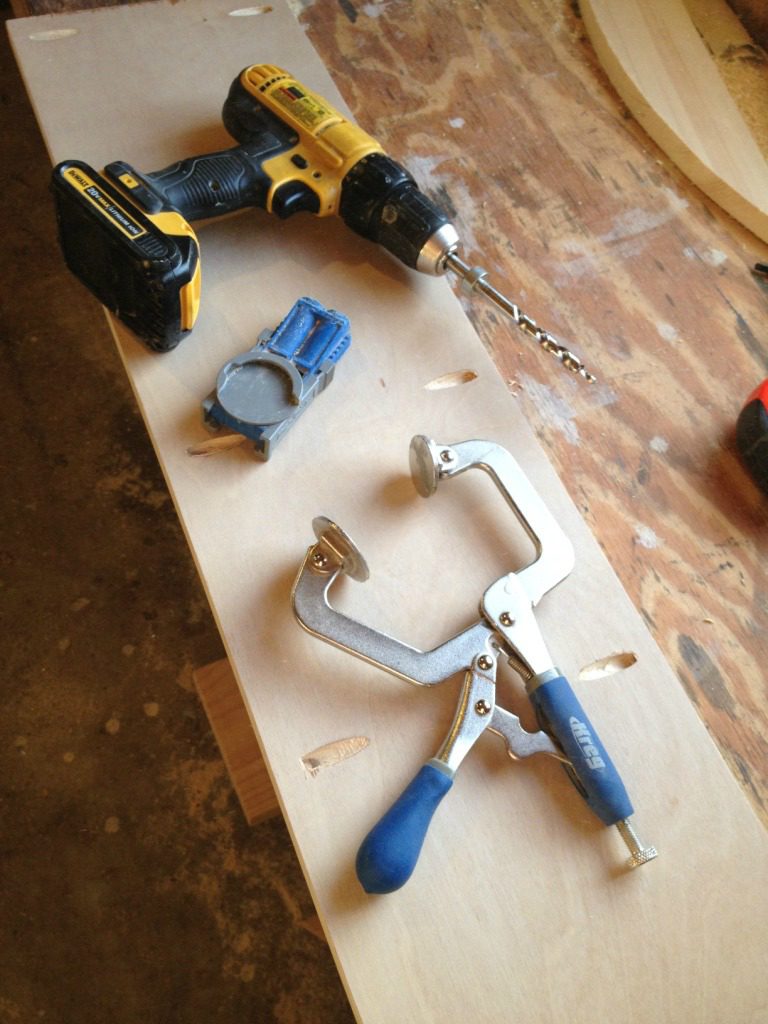
Tools needed:
Circular saw (or table saw) to cut down plywood
Scroll or jig saw (optional)
Staple gun
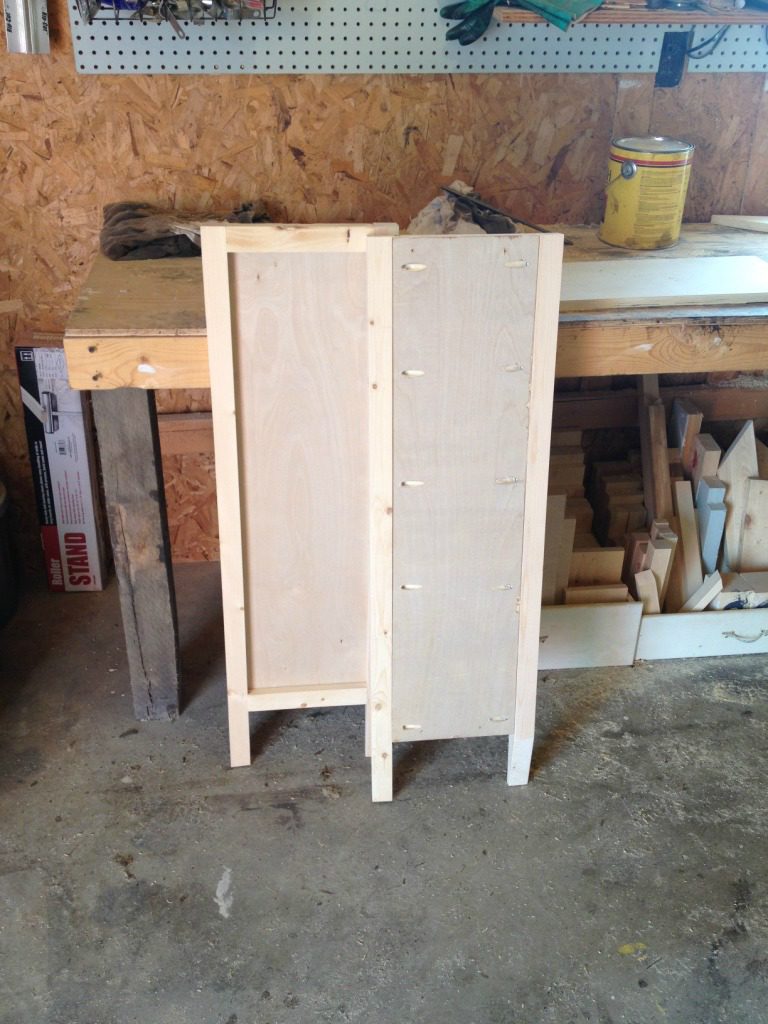
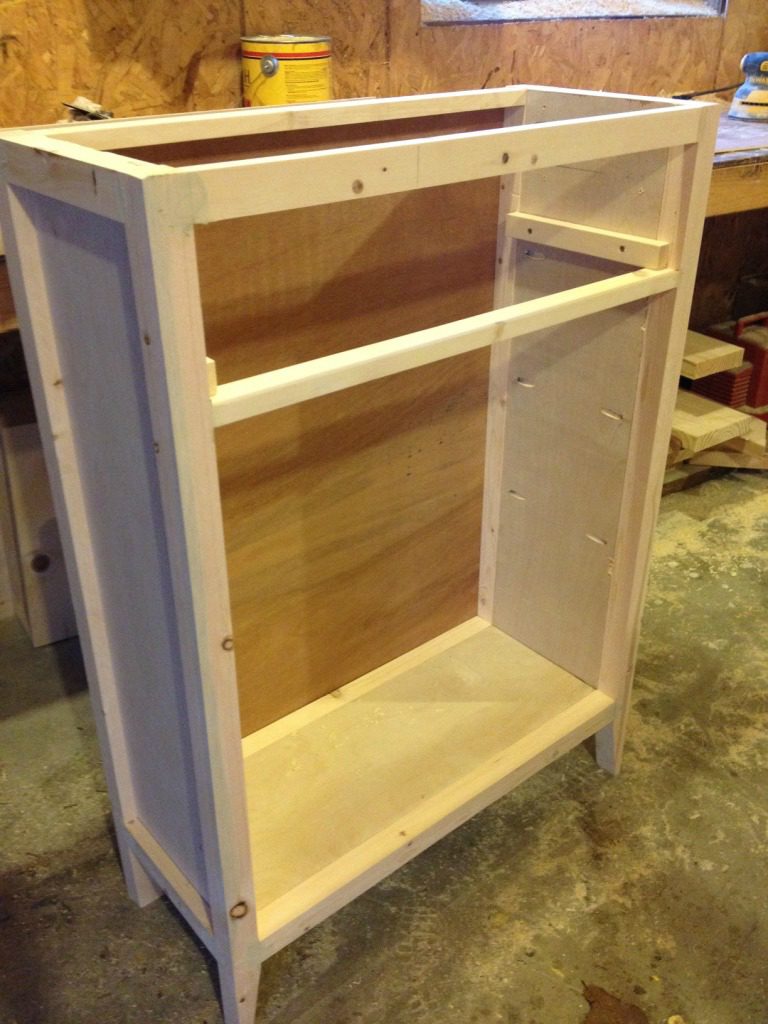
Step 1: Build the sides of the cabinet
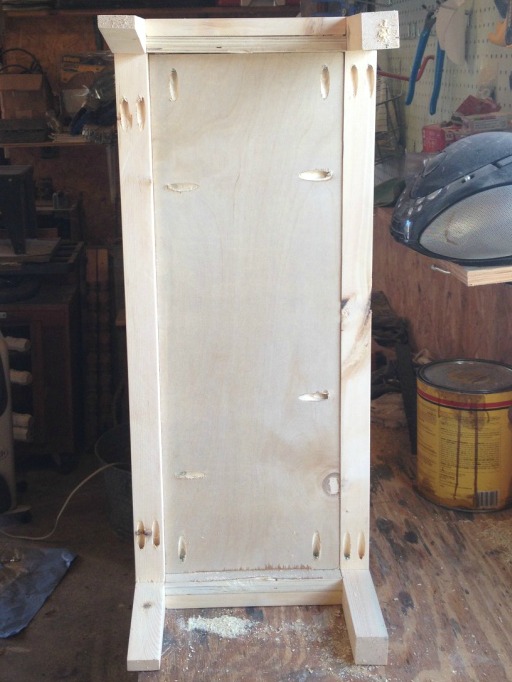
I cut 2×2 legs at 38 ½” long and tapered two of them using my miter saw. I also ripped ¾” plywood to a 9” wide strip and cut two pieces at 33” long.
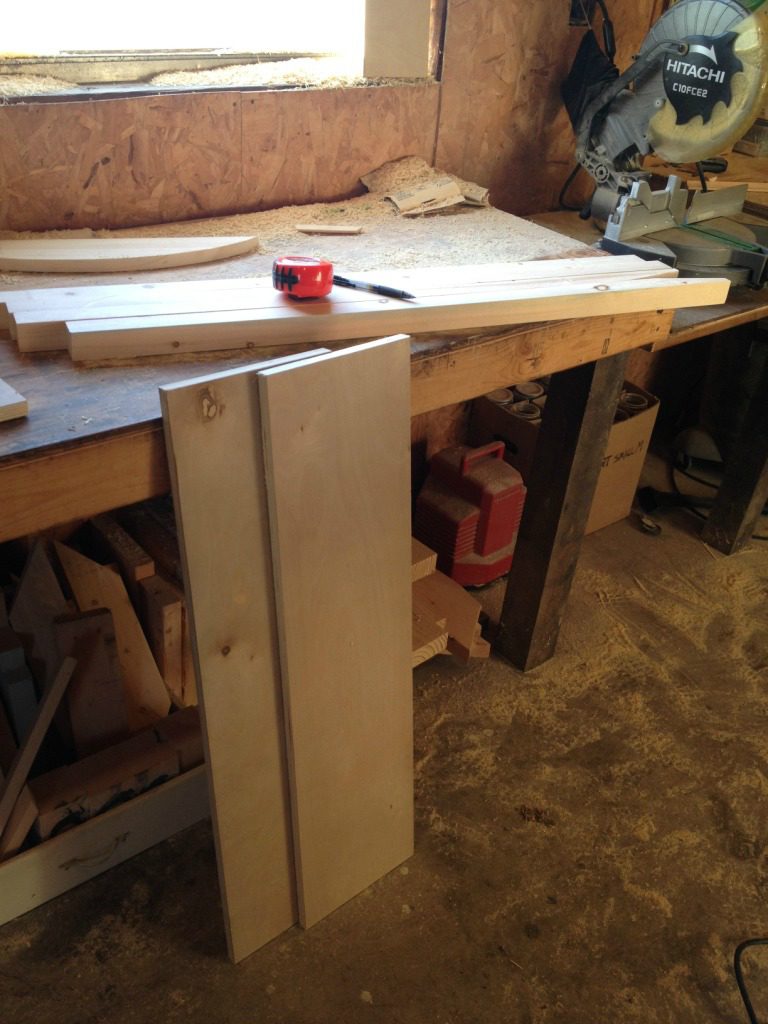
Then I cut four 1x2s at 9” long and drilled pocket holes into each and attached two legs together with them and 1 ¼” pocket hole screws like the picture below.
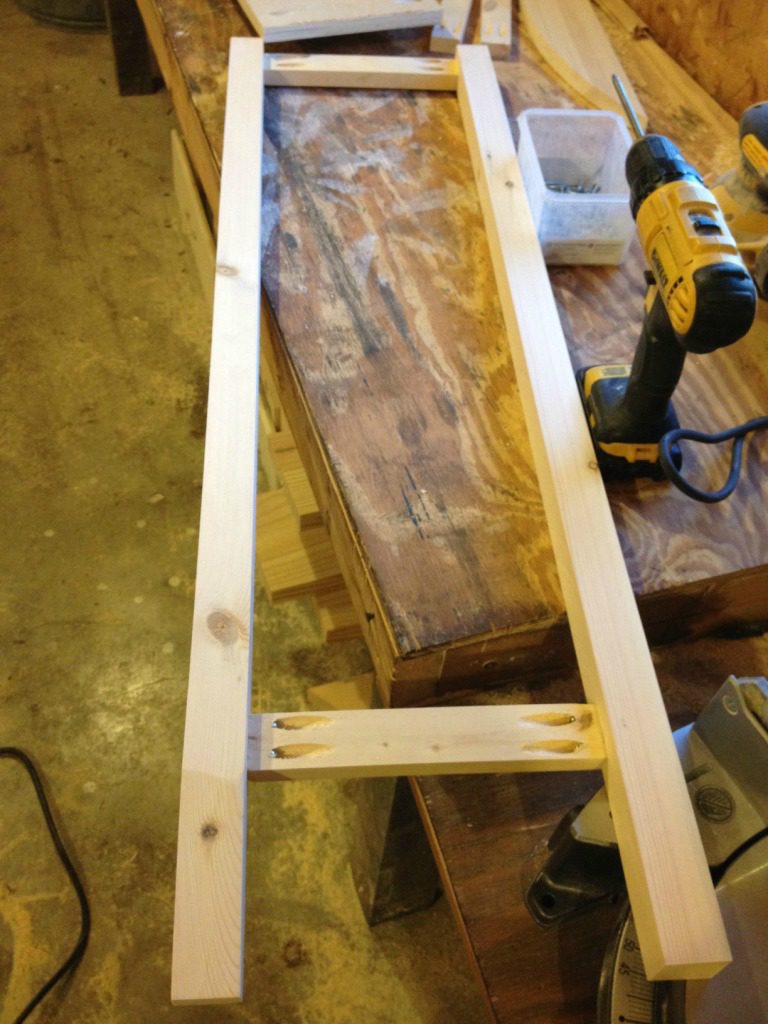
Then I drilled pocket holes on the sides of the ¾” plywood panels like shown below.
I placed these between the 2×2 legs and attached to the legs with 1 ¼” pocket hole screws.
Step 2: Attach the two sides of the cabinet
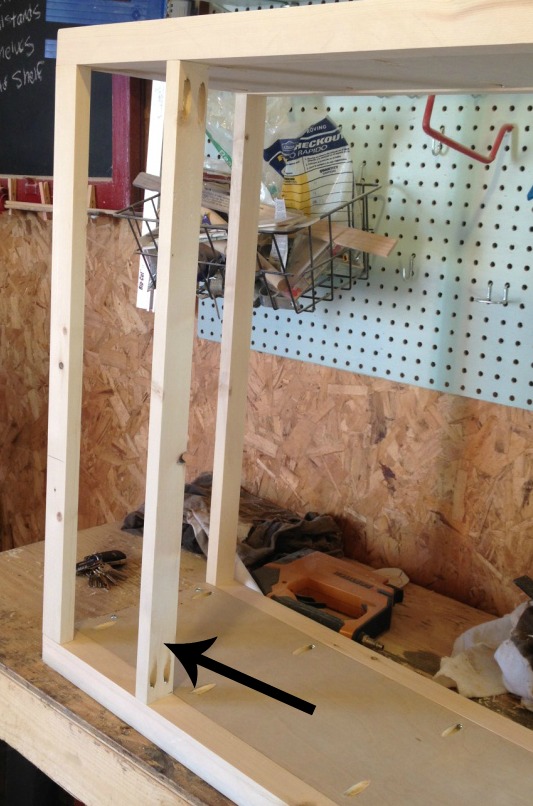
When I ripped the 9” strip of plywood from step one, and cut two pieces of 33” from it, it left me with a 30” piece. I drilled pocket holes in the ends of it and attached it ¾” from the bottom of the side panels.
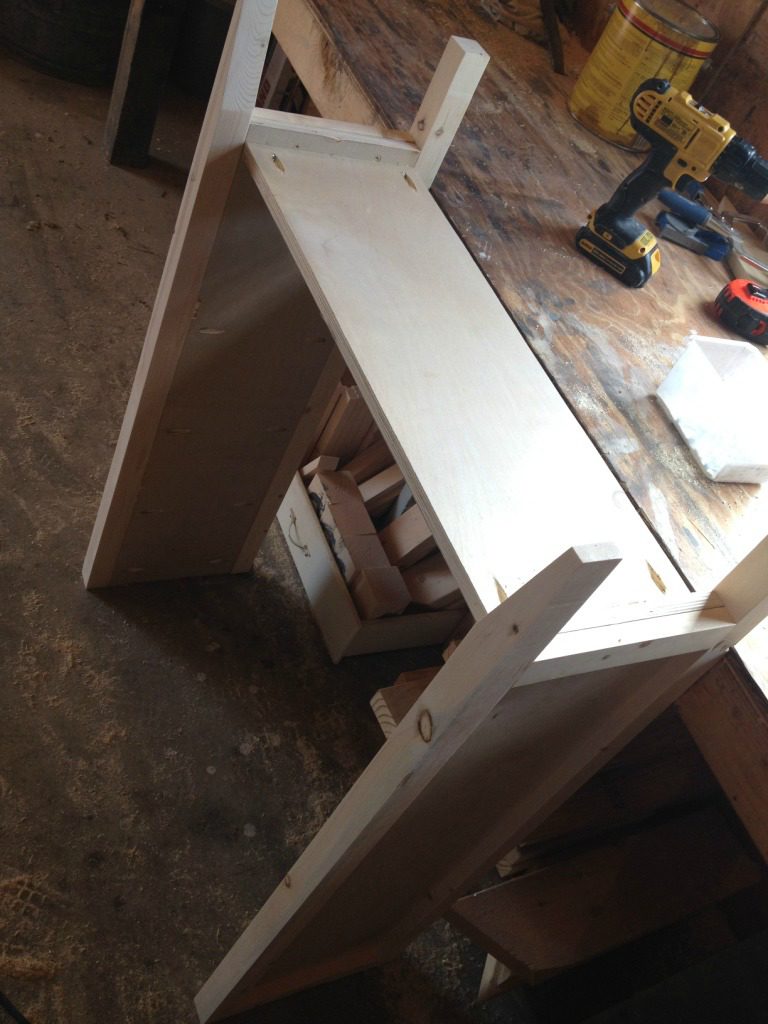
Then I cut 30” pieces of 1×2 and attached at the top front and back using pocket holes and screws.
I cut another 1×2 and attached at the bottom in the back using pocket holes and screws. And finally, added a 2×2 on the front at the bottom like the picture below.
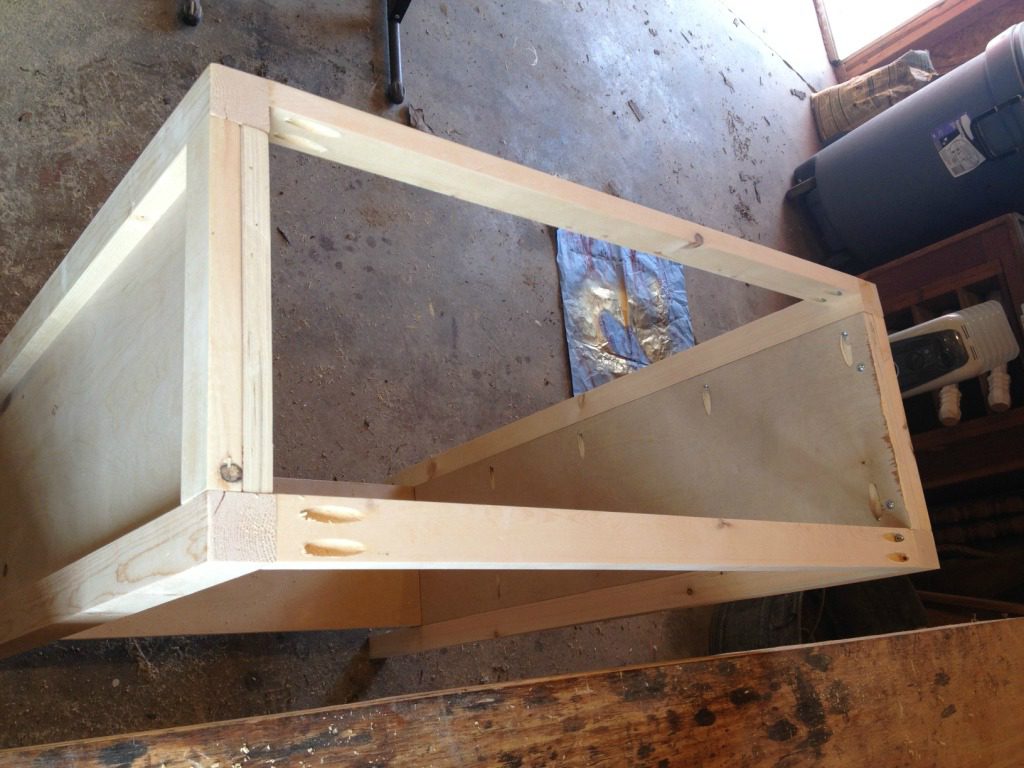
Step 3: Add the drawer
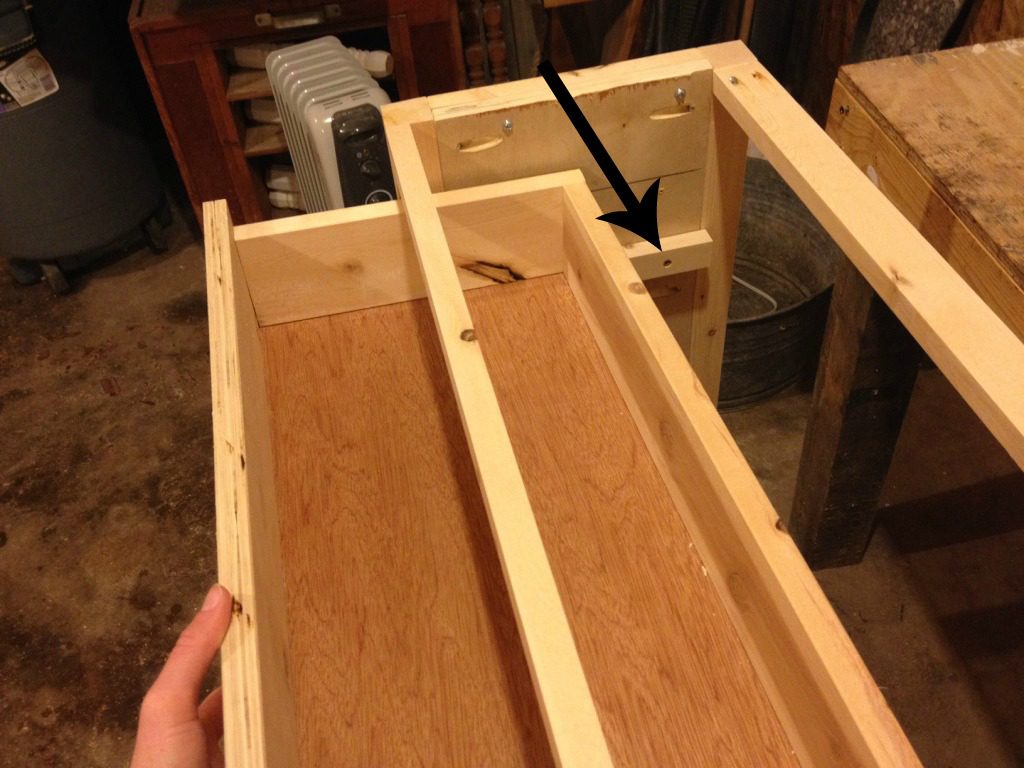
I cut one more piece of 1×2 and attached it between the two front legs using pocket holes and screws. You can make your drawer as deep or as shallow as you want. Just attach this about ¼” further down than you want your drawer height to be.
You can see my post here about how to make a drawer.
.
Because this cabinet is so narrow, I didn’t use metal drawer slides. I screwed some scrap 1x pieces into the sides for the drawer to slide on.
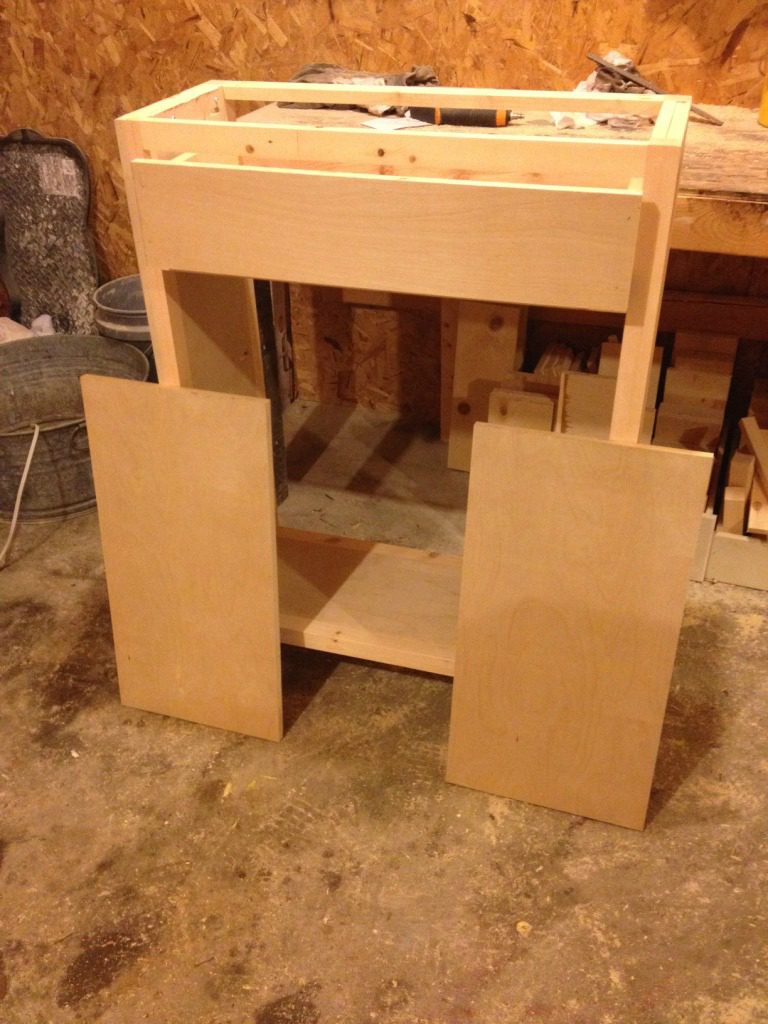
Step 4: Make doors
I wanted a little different design on these doors. I cut a piece of ¾″ plywood slightly smaller (¼” shorter and about ⅜” narrower) than the opening for the doors. Then I ripped it in half.
I used ¼” plywood and a scroll saw to cut out a ring for the middle of the design. Then I ripped ¼” pieces of 2x material. You could cut off a piece of the 2×8 you will use for the top and do this. In hindsight, you could also have ripped 1 ½” wide strips of the plywood as well.
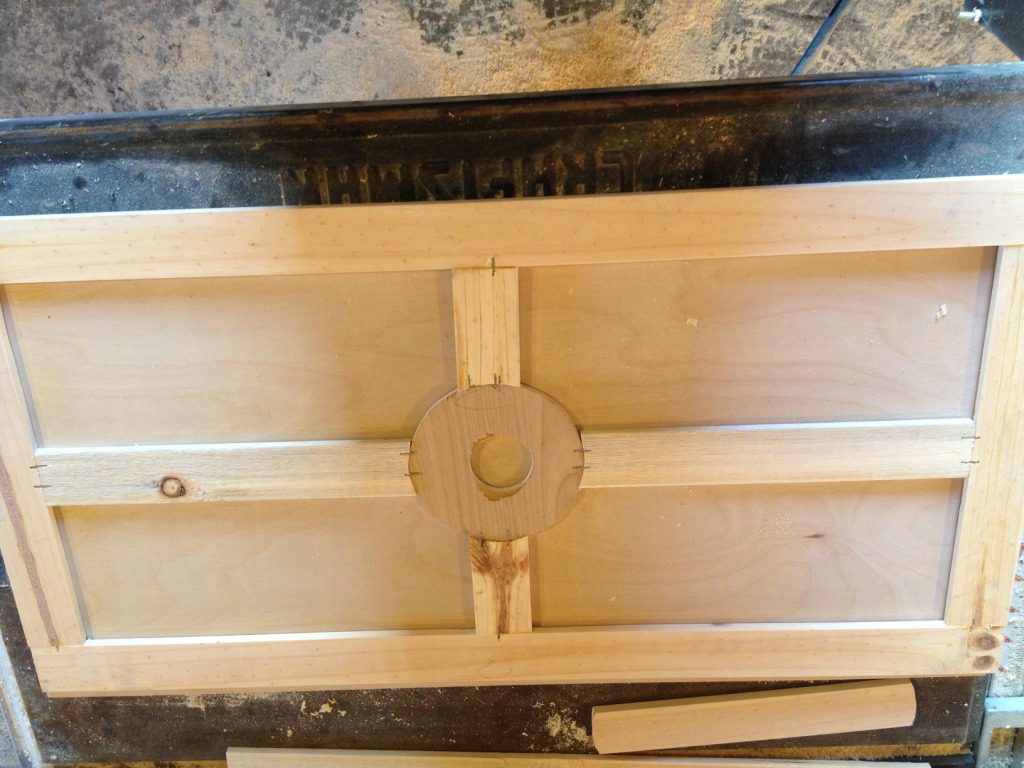
Then I laid it out on the door and pieced it all together and cut to fit on the door. DON’T ATTACH ANYTHING YET. I marked where I needed to trim the pieces that meet the circle and cut the curve on the scroll saw. Trust me, this won’t be perfect (that’s what putty is for), but I tried to get it to fit as best I could.
.
Once it was dry fitted together and fit the size of the door, I glued all the joints then stapled them (NOT TO THE DOOR YET). I clamped them, too, until the glue dried. Then I puttied the crap out of them and sanded.
.
Once the ¾″ plywood was stained and the design piece was painted (see step 7), I glued the two together and attached them to the cabinet with small brass hinges.
Step 5: Add a backing
This part is easy. Just cut a piece of ¼” plywood to fit on the back and staple it on.
Step 6: Make a top
I don’t have pictures of this (OOPS), but you can see how I make tops here.
.
I made my top 13×30. You can make this from two 30” pieces of 2×8 and trim it down to 13” wide. Once everything was finished, I attached the top by screwing 2 ½” screws through the front top 1×2 into the top and 1 ¼” screws through the back top 1×2 into the top.
Step 7: Finish
I stained the top, drawer front, and back of doors with Minwax Puritan Pine, and painted the cabinet and door design in SW Naval.
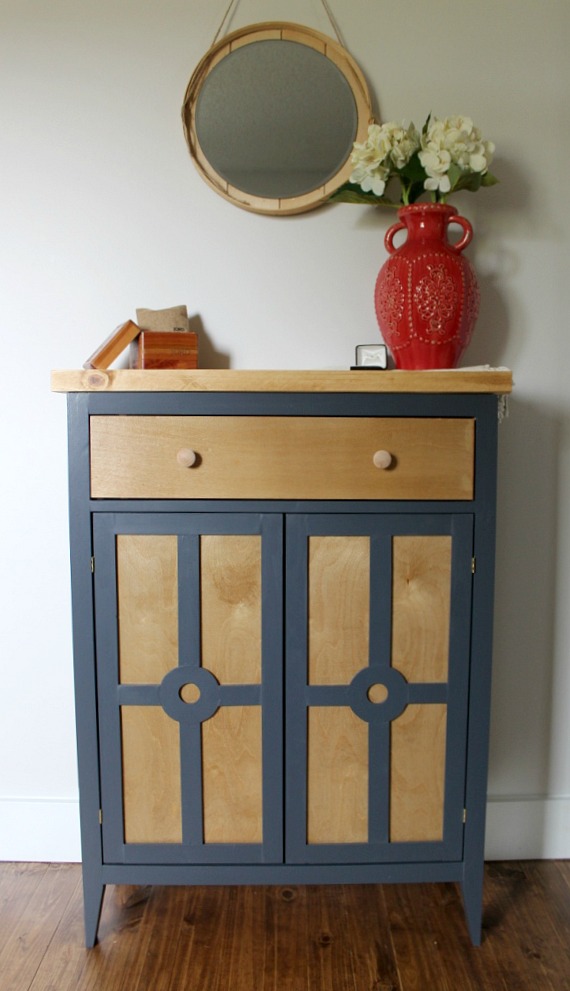
I really liked how my new watch matched the cabinet colors.
I’m super into navy and light toned wood. You can find the same color scheme in my latest bathroom vanity build and my office redo from last year.
So, it’s no surprise I wanted a navy and wood watch, right?
And, now I’ve got a super cute place to house it, too!
Hey, fun fact…when I got my watch, I saw that it was made ON MY BIRTHDAY!!!! WHAT?! Danny told me I was the only one that thought this was THE coolest thing ever. But, for reals…it is.
What do you guys think??
Don’t forget to enter the giveaway here ->>(GIVEAWAY!!)!! A huge thank you to Jord Wood Watches for providing me with my new watch and for hosting this awesome giveaway!! Don’t forget, either way, you get a $25 credit just for entering, so be sure to get in on that!
.
Until next time, happy building 🙂


Kraig Elliott
Love your work! Really impressed with your ideas and measurements. I was wondering since you mentioned it several times in your post, what type of putty do you use to fill crack, nail holes, etc.? I have tried wood filler, caulk and drywall caulk filler. Do you have a favorite brand? Thank you and keep up the wonderful work! You are a great inspiration.
Shara, Woodshop Diaries
Hi Kraig! Thank you! I don’t use one particular brand over the other when it comes to putty. I normally just use whatever I can find at the local big box store. Elmers paintable wood filler is cheaper, so I used it for a while and it worked fine, but when I started staining a lot of my projects, I got 3M brand stainable wood filler and really liked it. It’s what I’m currently using, but I’m almost out. I may switch it up again, who knows haha. Just a tip, the squeezable tubes of stainable wood filler are terrible to use. Get the tub. Also (I’m sorry, this is a lot of information) on projects I’m going to paint, I usually putty nail holes and large cracks, but then use acrylic/latex caulk (DAP brand) on corner joints and if there is anywhere the putty didn’t cover or sand well. I use caulk a lot around trim pieces too…like moldings, etc. Caulking just makes the paint job look a little better. I’ve heard of a lot of people using drywall filler, but I’ve never used it on wood. Seems like it would be brittle, but I don’t know.
joanna ling
I really like your projects especially you gave the dimention of the material and how many need .
I always want to be able to do some little projects like stool, cabinet…
I never operate electric tool before. Can you recommand me some basic tools that I might need to start a very basic project.
Shara, Woodshop Diaries
Thank you! You can check out my post here on what tools I recommend to get started:
http://www.woodshopdiaries.com/2016/07/18/5-tools-need-get-started-woodworking-less-500/
abby
This is amazing! I love that blue in the watch & the cabinet! How many coats did you put of the SW naval on the cabinet? It
Shara, Woodshop Diaries
Hi Abby! Thank you! I always prime raw wood before painting. Sometimes I do two coats of primer sometimes one…just depends on how well the first coat covers (and how big of a hurry I’m in haha). For this cabinet, I used one coat of primer and two coats of paint. Sherwin Williams paint has SUPER awesome coverage (and I don’t get paid to say that), so I rarely ever use more than two coats.
Mary @ The Cofran Home
OBSESSED with the cabinet and the watch! They are both SO gorgeous. Great job, Shara! xo
Shara, Woodshop Diaries
Thanks so much, Mary!!
Ashley
Absolutely love the cabinet! But that watch, its amazing! I bought one several years ago and have worn it every single day since and it still looks as good as the day I bought it. Great post Shara
Shara, Woodshop Diaries
Thanks Ashley!! Yes, I’m obsessed with this watch!! How cool is it that it’s made with wood?! Thanks again for checking out the post 🙂