
**This post is sponsored by The Home Depot.
.
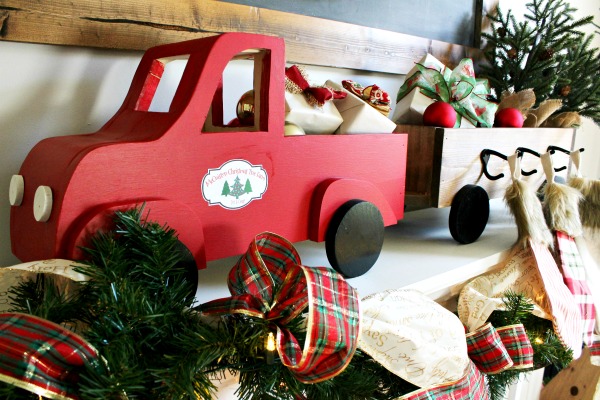
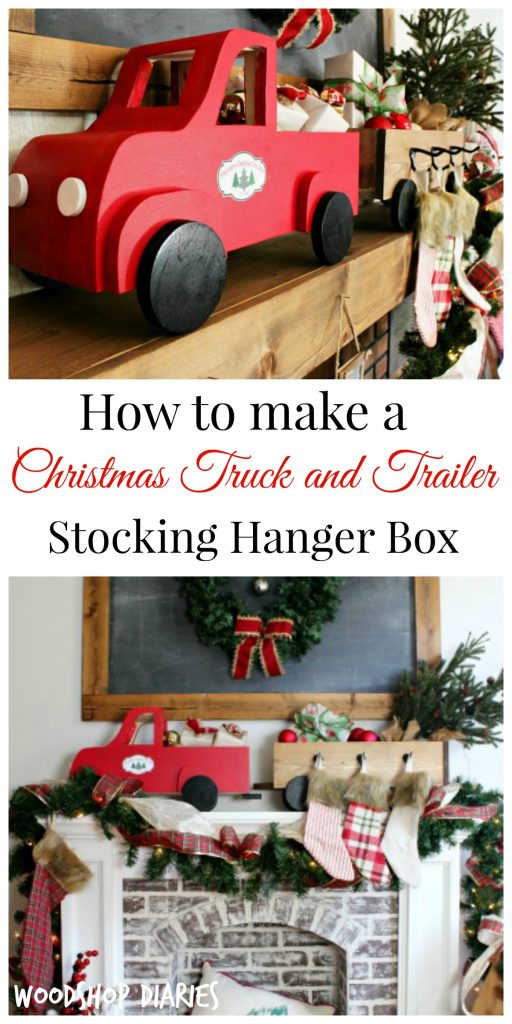
Remember last week when I told you how excited I was about the upcoming DIH Stocking Holder Box Workshop at your local Home Depot? And how I told you I couldn’t wait to show you my version of the project?? Well, the time is here and here it is!
PS In the spirit of transparency, I totally drug out my Christmas decorations the weekend before Halloween just to take these pictures…then put them all back up because the hubs couldn’t stomach Christmas decorations out before Halloween haha! But….isn’t it pretty?!? I LOVE Christmas.

AND, what’s even better is that you don’t have to have a fireplace mantle to have a stocking holder box. You can build your own fake brick fireplace just like this one with these free plans here 🙂
.
But anyway, on Thursday, November 16 at 6:30pm, your local Home Depot will be offering an in store DIH (Do It Herself–although, it is NOT limited to only ladies ? men can join in on the fun, too!) workshop showing how to make your own stocking hanger box!! You definitely won’t want to miss out on that, so be sure to get registered at the link below! ?
.
CLICK HERE TO REGISTER FOR THE DIH STOCKING HANGER BOX WORKSHOP AT YOUR LOCAL HOME DEPOT.

And if you need some inspiration on how to customize your own DIY stocking hanger box, be sure to check out the links at the bottom of this post to several other super talented bloggers’ versions of this project.
.
But, first, let me show you how to created my own truck and Christmas tree trailer version 🙂
.
For this DIY Stocking Hanger Box, you will need:
(2) 1x6x8 boards
(1) 2×2 piece of ¾″ plywood
Jig Saw
Miter Saw
Nail Gun
Sander
Wood Glue
Wood Filler/Putty
Drill
Speed Square
.
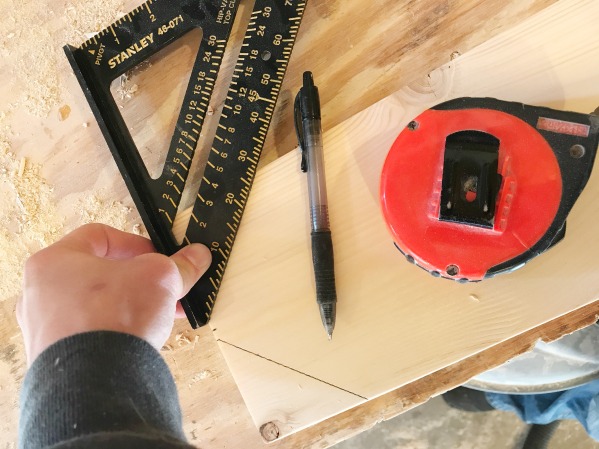
Step 1: Cut Pieces For Trailer Stocking Hanger Box
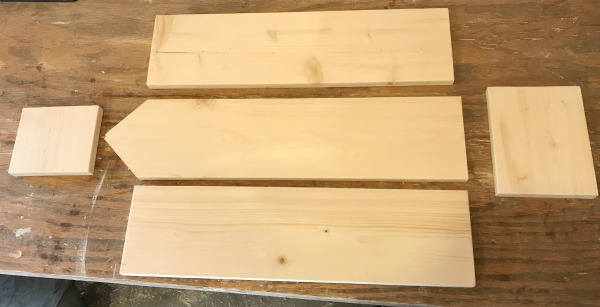
Cut a piece of 1×6 board as long as you want your trailer to be. (I used about 22″.) Using a speed square, mark the center of the board and draw 45 degree angles out from the center like shown. Using a miter or jig saw, cut along these lines.
Then, cut pieces of 1×6 like shown to make the rest of the box.
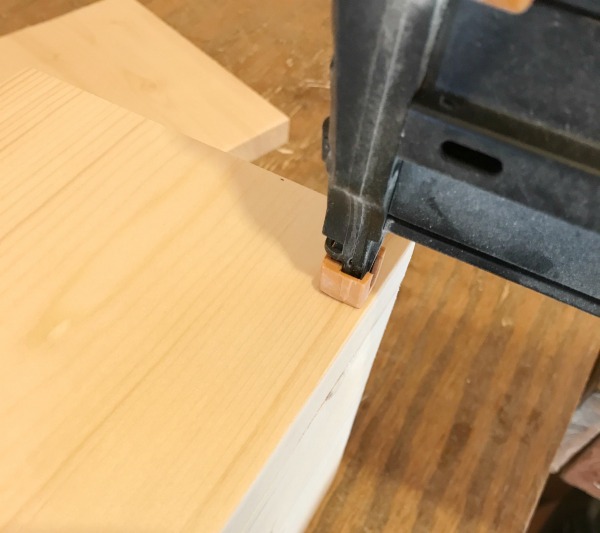
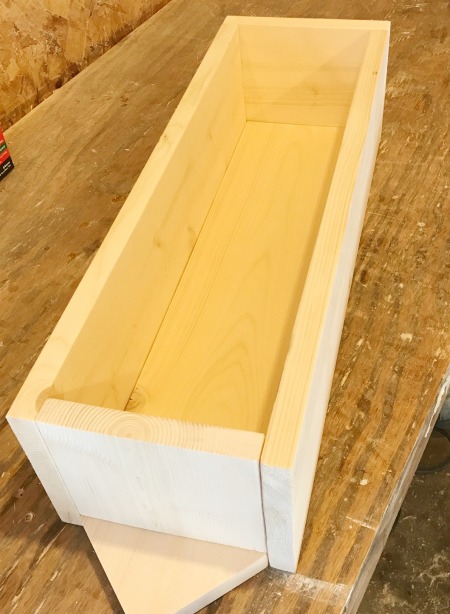
Step 2: Assemble Trailer Stocking Hanger Box
Using a nail gun, assemble the pieces to form a box.
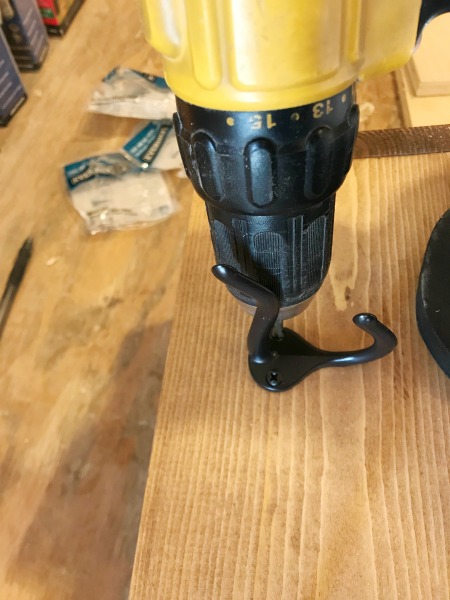
Step 3: Finish the Stocking Hanger Box
Paint or stain as desired, then attach some hooks for hanging your stockings on. I stained my box in Minwax Special Walnut. We will add wheels later.
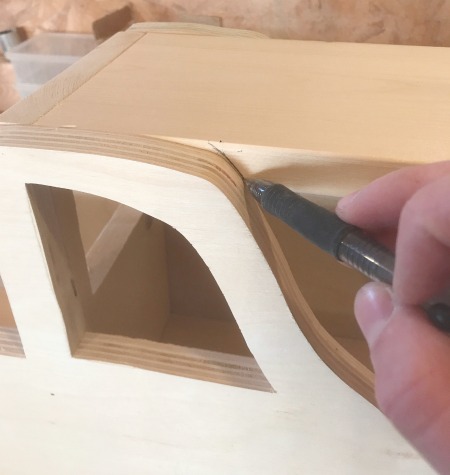
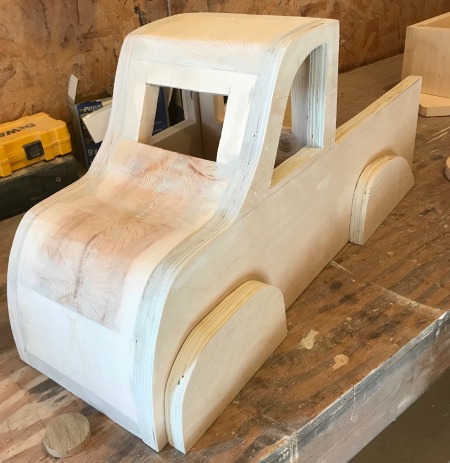
Step 4: Cut Out Wooden Truck Profile
I don’t have a template for this, so you can freehand it however you want. But, cut two truck shapes from your plywood using a jig saw. Use a drill and large bit to drill a hole in the window to get your jig saw blade in to cut out the window. For size, I made mine about 22″ long and about 10″ tall, but you can change that up if you want.
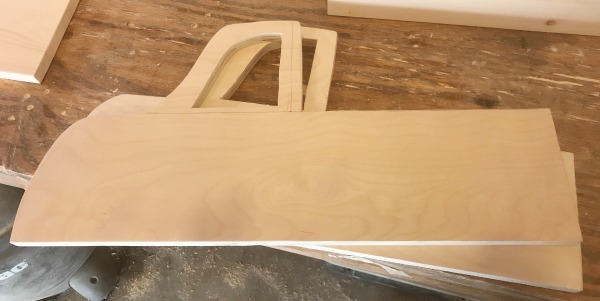
NOTE: The next steps will be MUCH easier if you make your truck shape less “curvy” and more “boxy” with straight edges instead of curved ones. I found this out the hard way. However, if you’re up for a challenge and a whole lot of sanding, make it curvy 😉
Step 5: Assemble Truck Pieces
First, cut a piece of 1×6 the same length as your truck pieces. This will be the bottom of your truck. Use a nail gun to nail the truck shapes to each side of the 1×6. Then, cut to fit a piece of 1×6 to run up the back side of the truck cab. Use a drill and jig saw to cut out a window like shown.
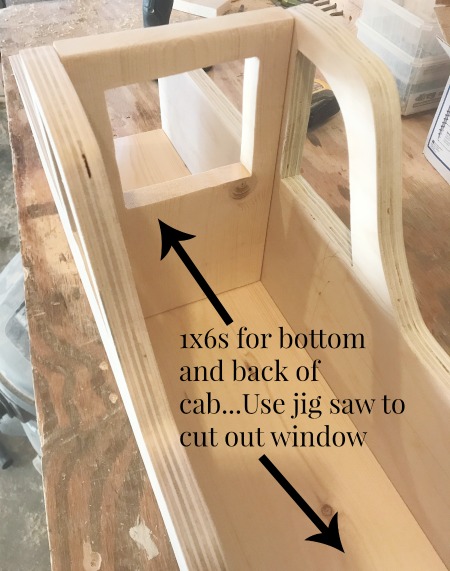
Work your way around the truck, cutting to fit pieces of 1×6 as you go. Don’t worry about an exact fit…you can sand it down later. Mark and miter where you can.
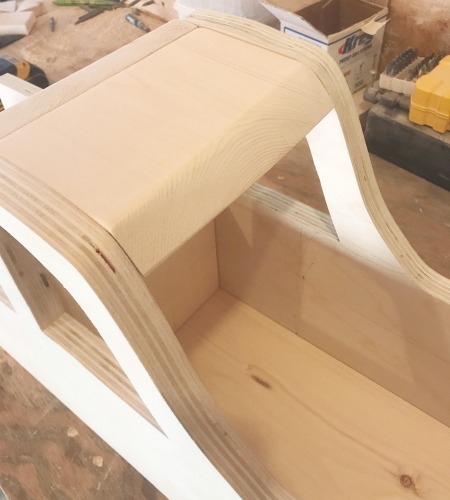
For the really curvy part of the hood, I used a scrap piece of 2×6 and cut it on a band saw. It would have also worked to cut smaller pieces of 1×6 and sand down to get the curve. This is why I say it would be easier to make it more boxy.
.
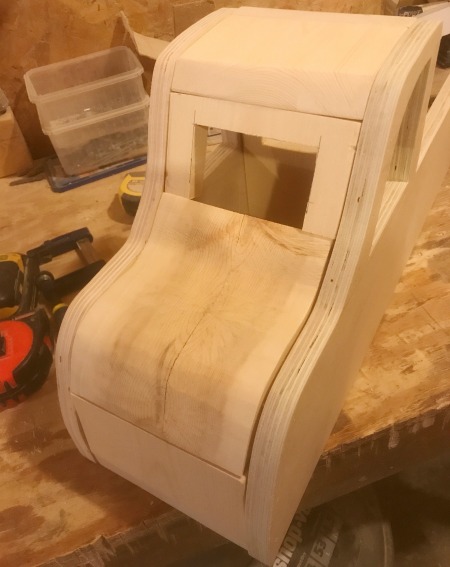
As you cut to fit, go ahead and nail and/or glue the pieces in place.
.
Don’t forget to add a tailgate, too!
.
Once it’s all assembled, putty that thing up and sand it down 🙂 Putty is your friend here. And so is a belt sander. A belt sander will help you smooth out those curves, but an orbital sander and lots of patience will work too.
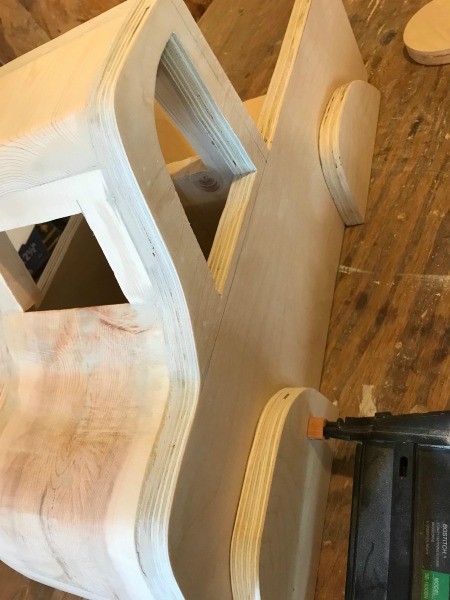
Step 6: Add Fenders
From your remaining plywood and 1×6 boards, cut out some fender shapes and nail them on.
Step 7: Add Wheels and Headlights to DIY Christmas Truck and Trailer
I used a stain can to trace out wheel shapes on my leftover pieces of plywood and 1×6 boards. Cut out 8 circles using your jig saw. While you’re at it, cut out two small circles for the headlights too. OR, if you have a scrap dowel rod, cut some slices…that works too. Before attaching, it’s easiest to go ahead and paint/stain your truck and wheels and lights separately. Then, once everything is dry, nail on the wheels and lights.
.
One note about placement of the wheels–attach your trailer wheels slightly higher or lower (whichever you prefer) than you do your truck. Then, you can add a little “hitch” from scrap wood to your truck and your trailer will sit above or below it…like a real truck and trailer does.
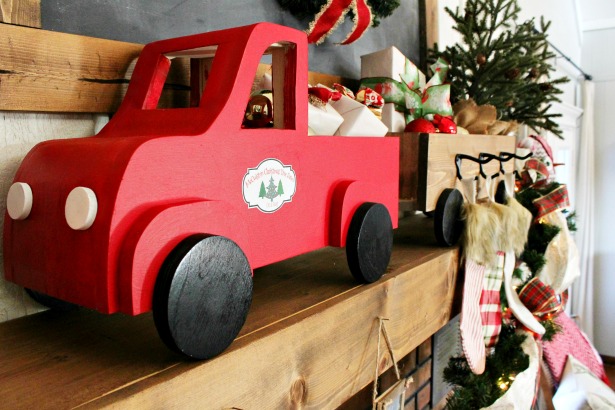
Step 8: Add Decal to Truck
I designed a little decal to add to my truck using PicMonkey. Then, I printed out the design and glued it onto the truck using Modge Podge.
.
And that’s it! Fancy up your fireplace with some garland, stockings, and these super cute red and white lanterns that I found at The Home Depot, add your truck and stocking hanger box and tada! Christmas ready!

And if you like the wooden lantern, I have a tutorial for it here 🙂
.
But seriously, how cute is this little truck and trailer stocking hanger box?? Danny and I dream of owning a Christmas tree farm one day, so it was a fun way of making our dream feel a little bit closer with the little McCuiston Christmas Tree Farm decal on the side 🙂


So if you are ready to make your own stocking hanger box, be sure to register for the DIH Stocking Hanger Box Workshop at your local Home Depot store. You can register at the link below.
.
CLICK HERE TO REGISTER FOR THE DIH STOCKING HANGER BOX WORKSHOP AT YOUR LOCAL HOME DEPOT.
.
Be sure to pin this for later 🙂 Then check out the links to the other talented bloggers who are sharing their own versions of the stocking hanger box today, too!
.
Check out other awesome versions of the project by:
.
By the way, if you are wanting more information about these workshops, The Home Depot offers several in store workshops throughout the year for people of all ages and experience levels including Do-It-Yourself Workshops, Do-It-Herself Workshops, and Kids’ Workshops! They offer step by step instructions and demonstrations for how to make decor projects, home repairs, and how to operate tools. You can learn more about the workshops offered at The Home Depot at this link here.
.
Also, if you have previously attended any workshop at The Home Depot and would like to provide feedback, please use this form. Your response helps The Home Depot make improvements for a better future experience.
.
Until next time, happy building!! 🙂
.
*I acknowledge that The Home Depot is Partnering with me to participate in this Workshops Program. As a part of the program, I am receiving compensation in the form of products and services, for the purpose of promoting The Home Depot. All expressed opinions and experiences are my own words. My post complies with the Word Of Mouth Marketing Association (WOMMA) Ethics Code and applicable Federal Trade Commission Guidelines.
.


Ashley @ Simply Designing says
The truck is soooo cute!
Shara, Woodshop Diaries says
Thank you soooo much! 🙂
Jaime Costiglio says
Shara I need that truck in my life!!!! So darn cute.
Shara, Woodshop Diaries says
Thank you so much Jamie!!