
Let’s play a friendly game of “Never Have I Ever.” You’ve played that before, right?
.
You hold up your fingers and go around the circle saying things you’ve never done and whoever has done them has to lower a finger. The last person with any fingers still up wins.
.
We will make it a quick game and just use one finger and one question. Are you ready?
.
Okay, never have I ever….changed a diaper. Like, ever.
.
Anyone still have a finger up? DID I WIN?!
.
Of course I won. Anyone with a finger still up wins…because, you guys, we’ve never changed a diaper. And that, my friends, is #winning.
.
Okay, okay, enough with the funny business…I’m just making jokes. But in all seriousness, a friend of mine has an adorable newborn. And he obviously requires a diaper change on occasion. Now, I know nothing about changing diapers, but I know that they come in a big box, and you typically require a few other accessories like wipes and cream…I think??
.
And those things are usually not something you want to use as home décor. So my friend (who blogs over at Fun Home Things–and you need to check her out!) asked for my help to hide them so they would still be conveniently located, but you didn’t have to actually see them.
.
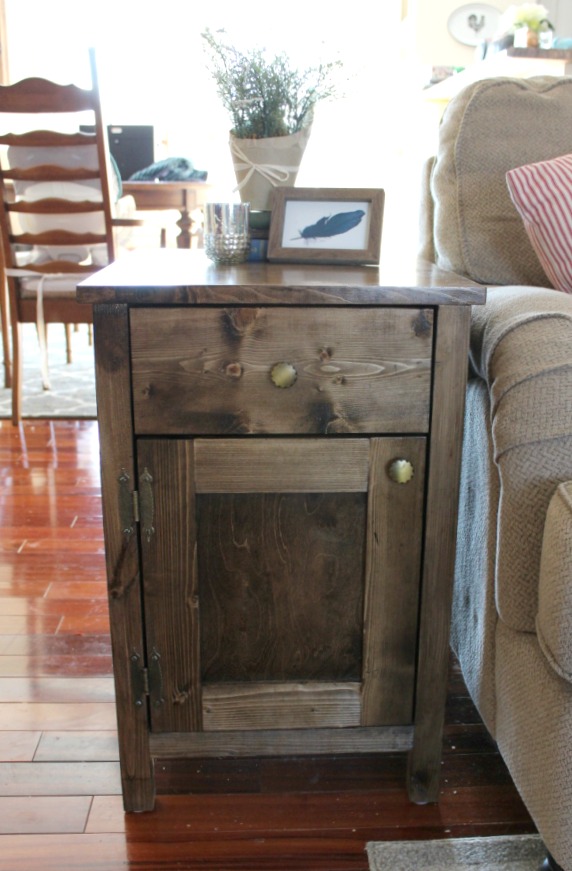
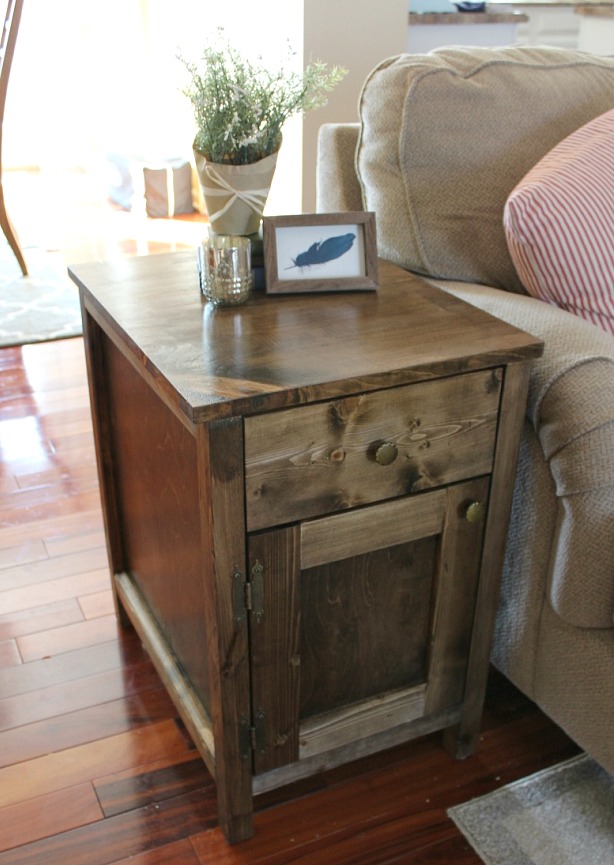
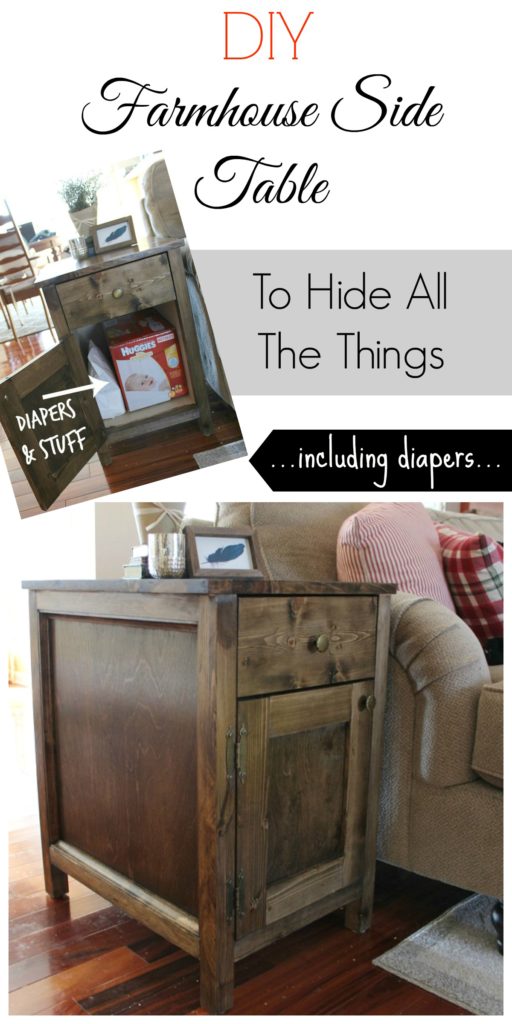
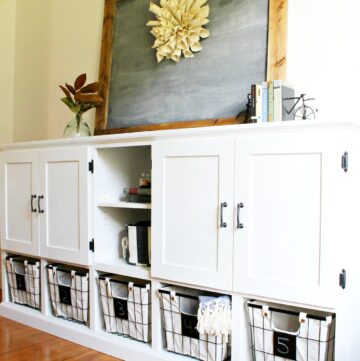
So I made her a “diaper hiding side table” that she could put next to the couch.
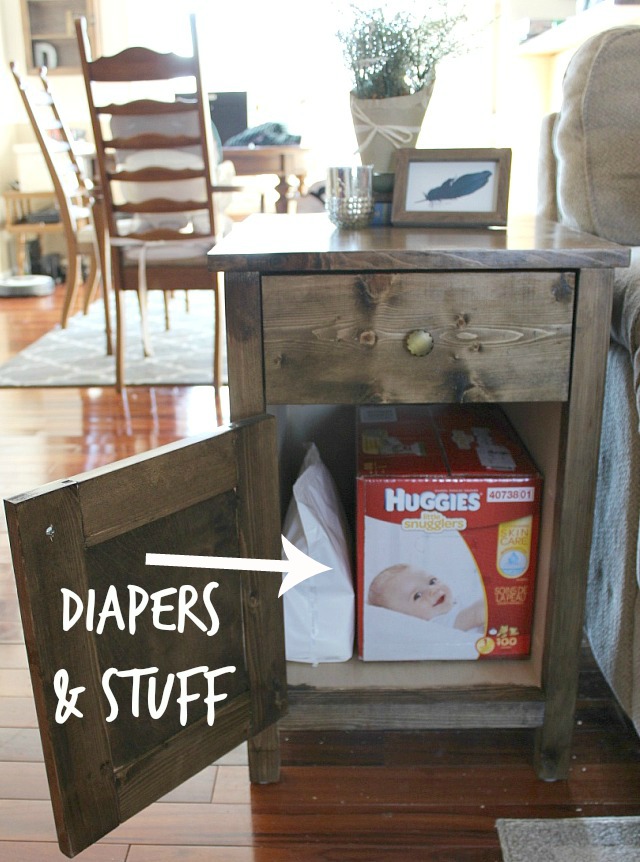
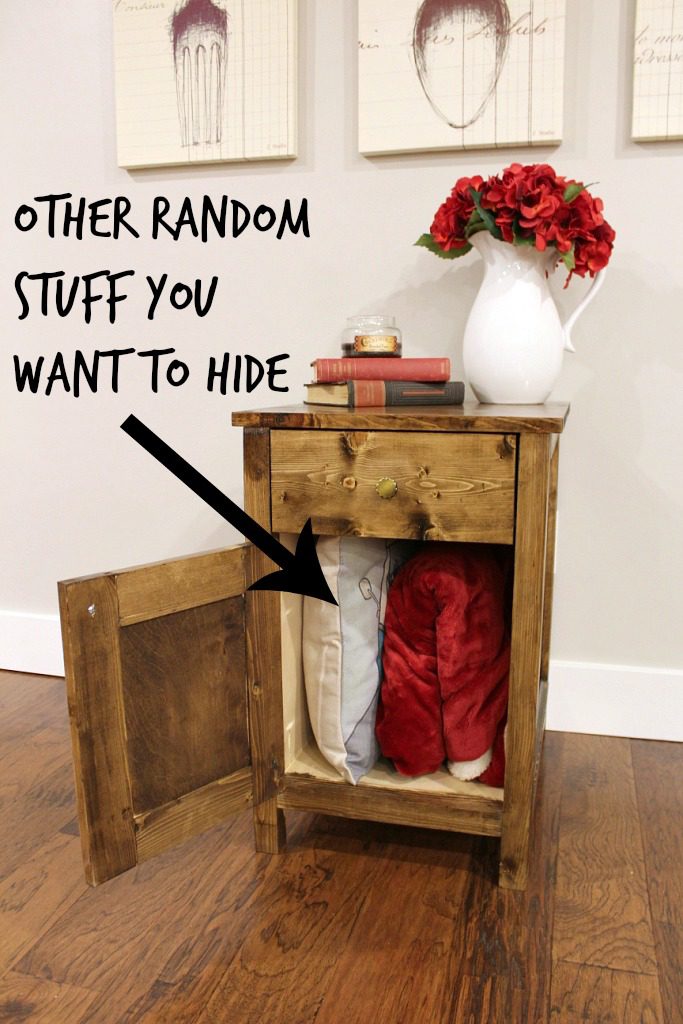
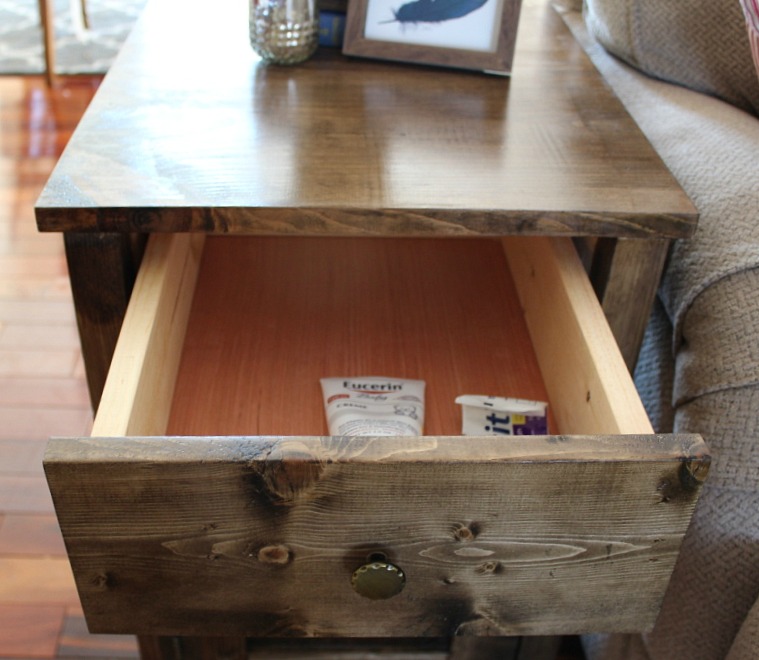
But, good news for those of us who don’t need to hide diapers…it functions perfectly fine as a “other random stuff you want to hide side table,” too! It’s just got measurements suited to store a typical diaper box.
.
Side story: that pillow in the table was a gift from my sister. She thought it was funny because it’s got six cats driving a Volkswagon van and if you know anything about me, that just screams “SHARA!!!!!” in all caps and with five exclamation points. However, I find it somewhat embarrassing, so she jokes with me that I hide it. It’s a 1200% coincidence that it ended up in this picture, but still kind of funny. Sissy, I am not trying to hide the pillow, I’m just staging….I promise.
So anyway…ready for the how to? Great 🙂
.
This post contains affiliate links. If you purchase from one of these links, I may receive a small commission at no extra cost to you. Thank you for supporting this site so I can continue to provide free content. Please see disclosure policy for more details.
.
Materials needed:
¾” plywood (1 sheet is plenty)
1×12 board (optional for the top..can use plywood instead)
2x2s (2 8ft sticks or can rip one 2×4 in half)
1×6 board (for the drawer)
¼” plywood (¼ sheet)
Cove molding (optional–3 8ft sticks)
Tools needed:
Circular saw or table saw (to cut plywood)
.
The overall size of the table was 22” deep, 17” wide, and 26” tall.
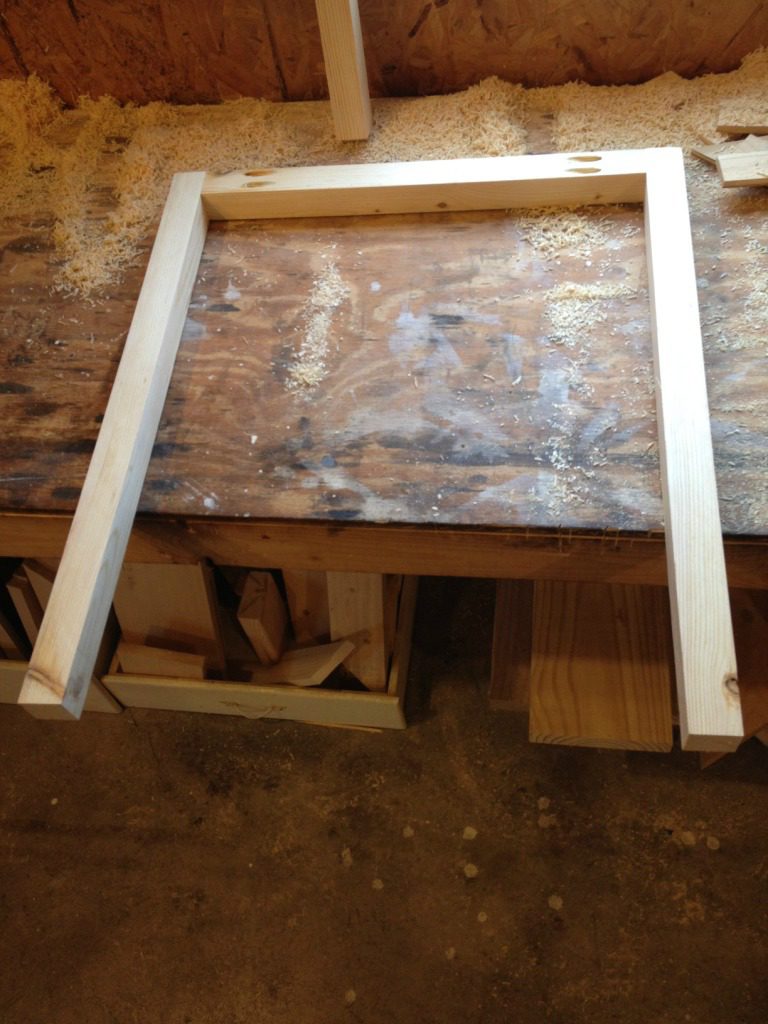
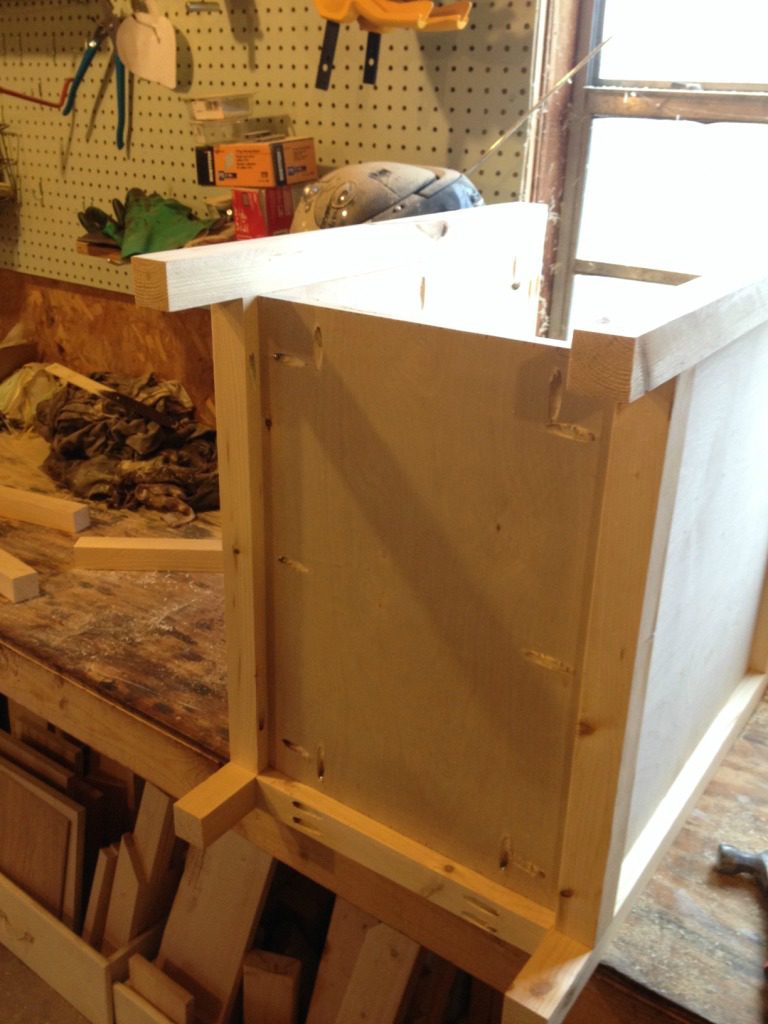
1. Build side frames
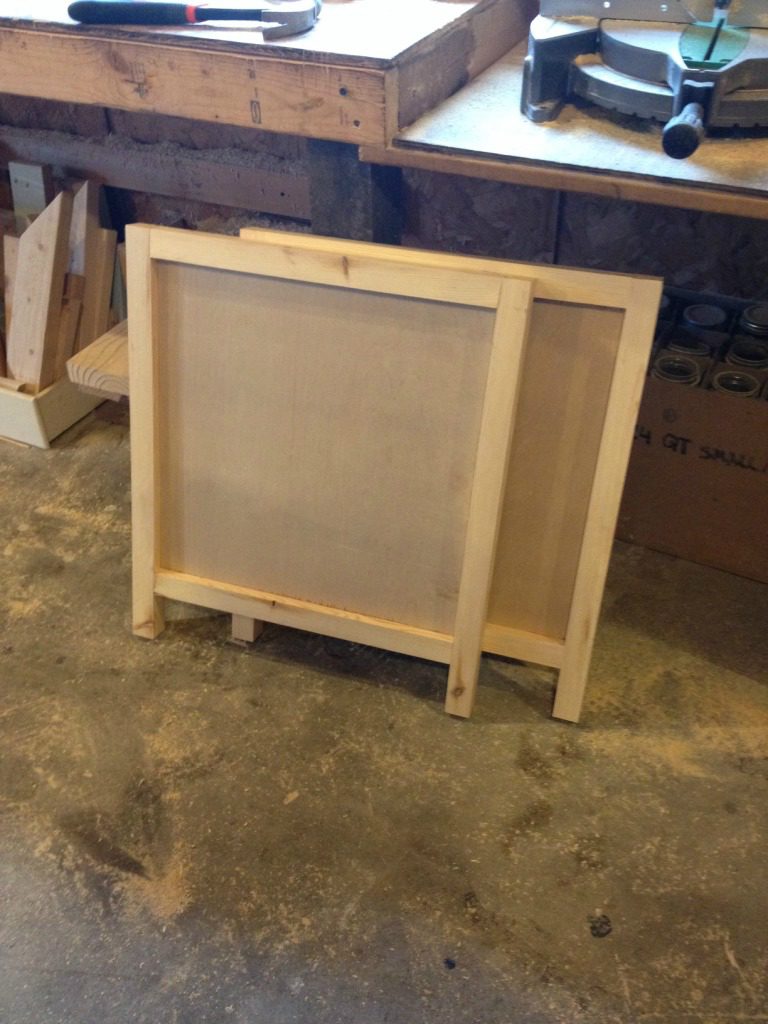
I cut the four legs from 2x2s at 25 ¼” long. Then I cut 2 more 2x2s at 19” long. I attached the 19” piece between the tops of the legs using 1 ½” pocket holes and 2 ½” pocket hole screws like the picture shows. I made two of these:
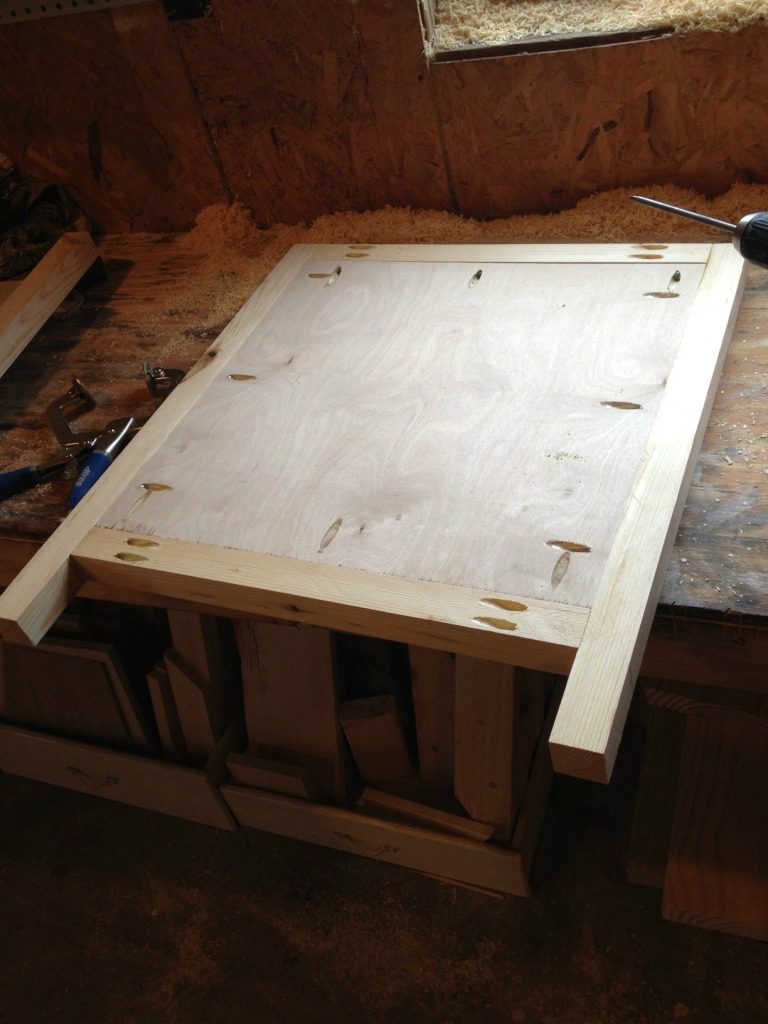
Then I cut two pieces of plywood at 19” square and drilled ¾” pocket holes like the pictures shows.
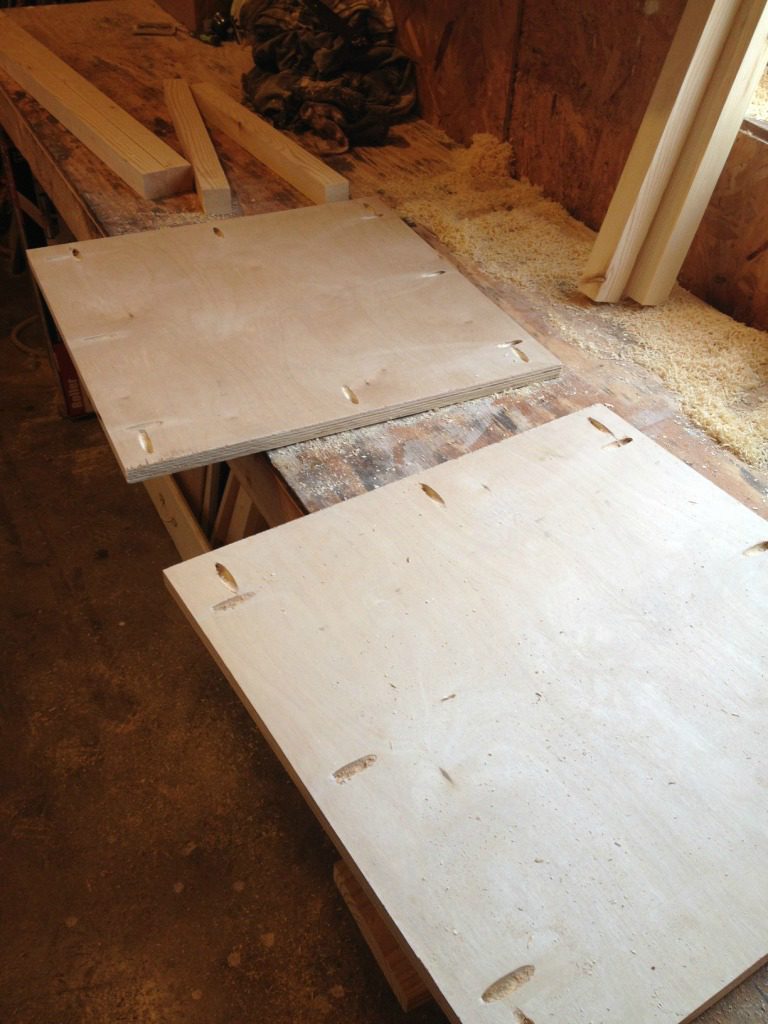
I placed the plywood pieces between the two sets of legs and attached using 1 ¼” pocket hole screws so that the plywood was flush to the INSIDE of the piece.

Then, I cut another two pieces of 19” 2×2 and attached under the plywood on each side of legs like the picture shows. I used 1 ½” pocket holes and 2 ½” screws. Once it was attached to each leg, I screwed the plywood to this piece as well using 1 ¼” pocket hole screws.
That makes the two sides of the table.
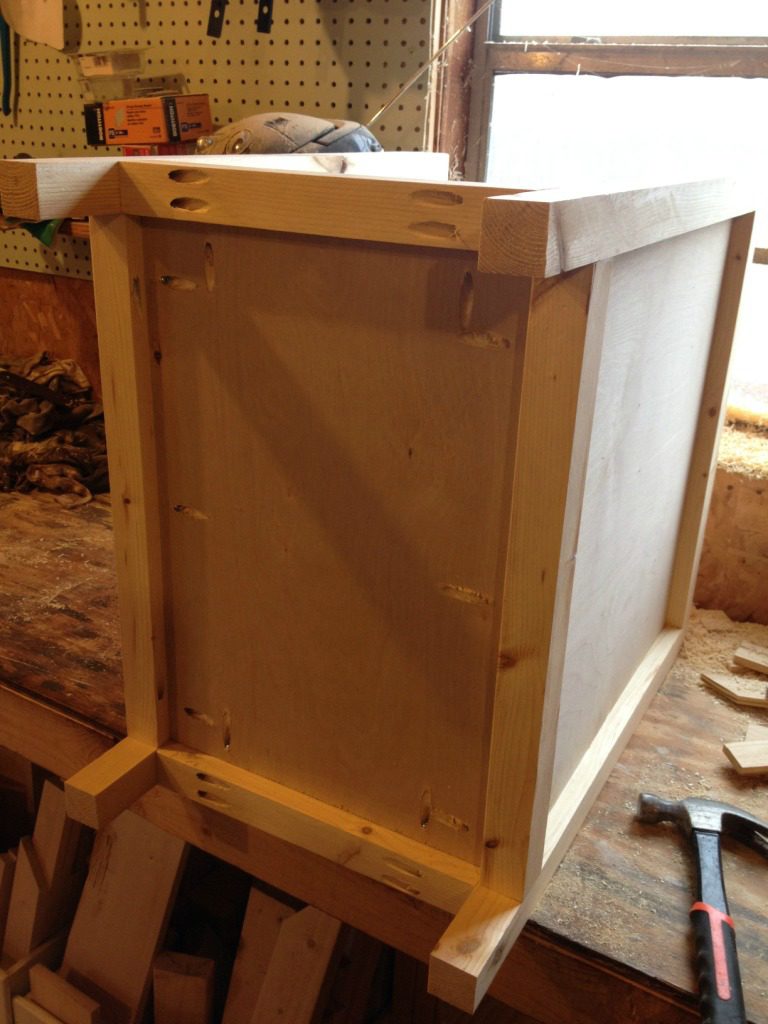
2. Attach the back piece
Now, just to be clear, I knew this particular table’s back would be exposed where it would be sitting in the living room. If you know the back will not be exposed, you could skip this step and after you attach the bottom, just nail on a ¼” backing. That’s what most people would do. But since the back will be showing, I wanted to make it look pretty.
.
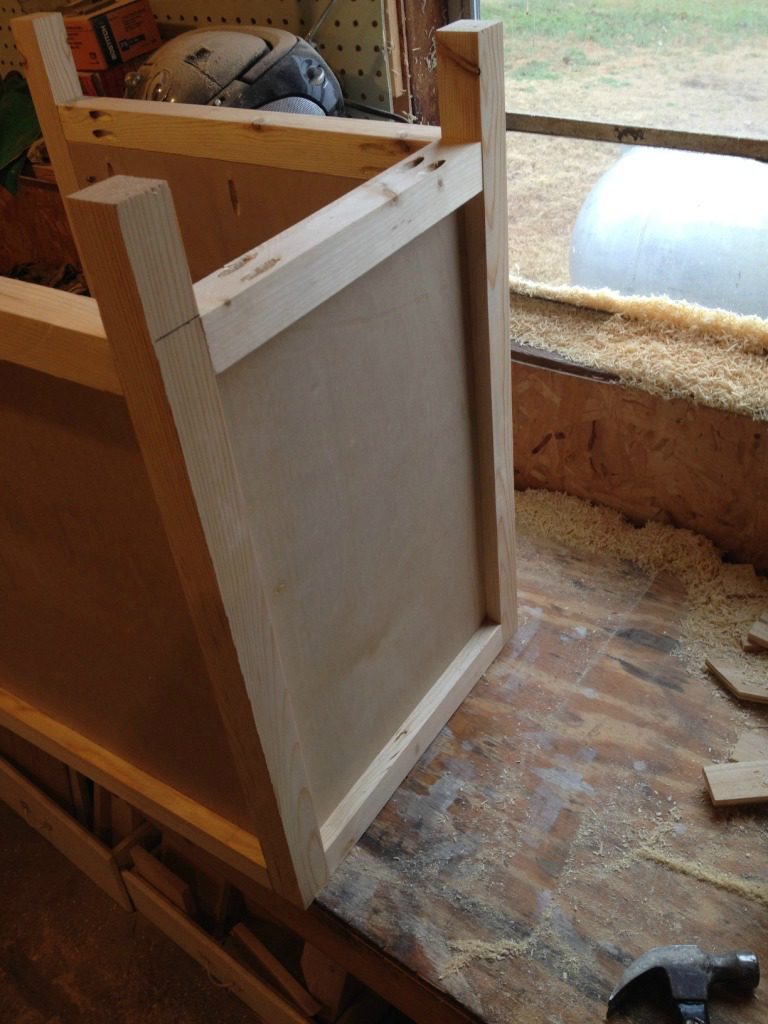
I cut a piece of 2×2 at 13” and attached at the top between the two side panels using 1 ½” pocket holes and 2 ½” pocket hole screws. Then I cut a piece of plywood at 13×19” and attached just like the side panels with ¾″ pocket holes and 1 ¼″ pocket hole screws. It’s a tight squeeze to drill these screws in. In hindsight, I should have done the back first, THEN the side panels, but using a shorter drill bit for the pocket hole screws worked fine.
.
NOTE: This picture is of the table upside down. The pocket holes on the 2×2 are on the top side (so you can’t see them here).
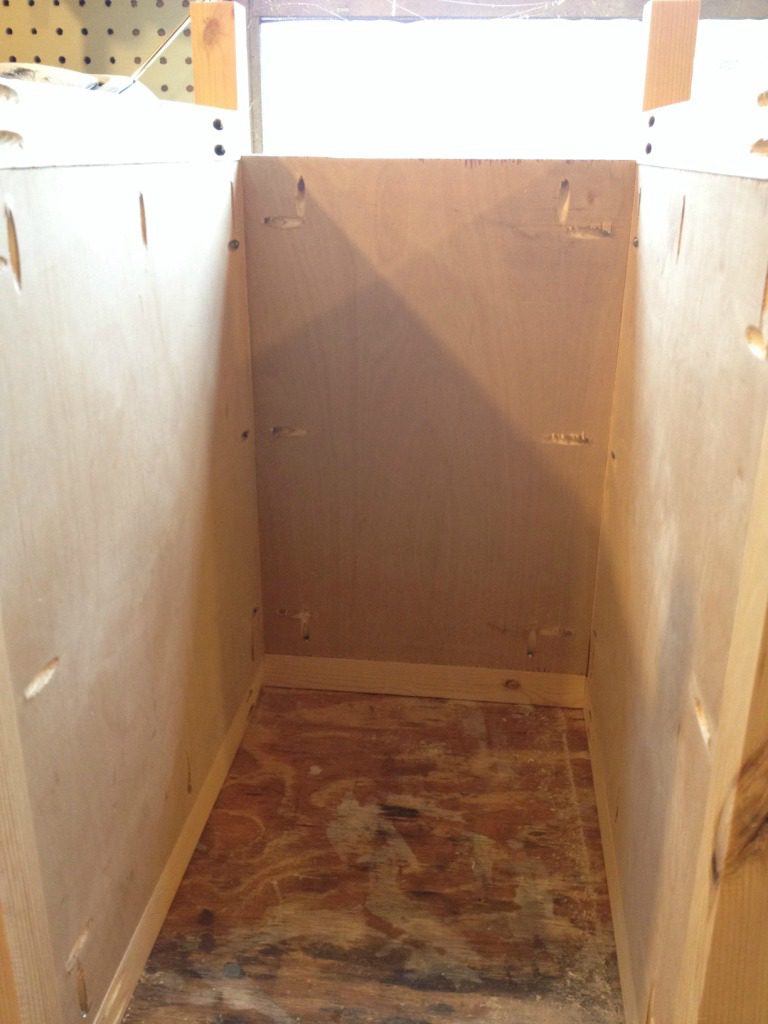
Once the plywood was attached, I added another 13” 2×2 on the bottom just like I did with the side panels. Again, this picture is of the table upside down.
3. Attach the bottom
I cut another piece of 13×19” plywood and attached again using ¾” pocket holes and 1 ¼” screws just like with the side and back panels.
Once the plywood was attached, I attached another 2×2 cut at 13” (just like every step before) on the front and screwed it in.
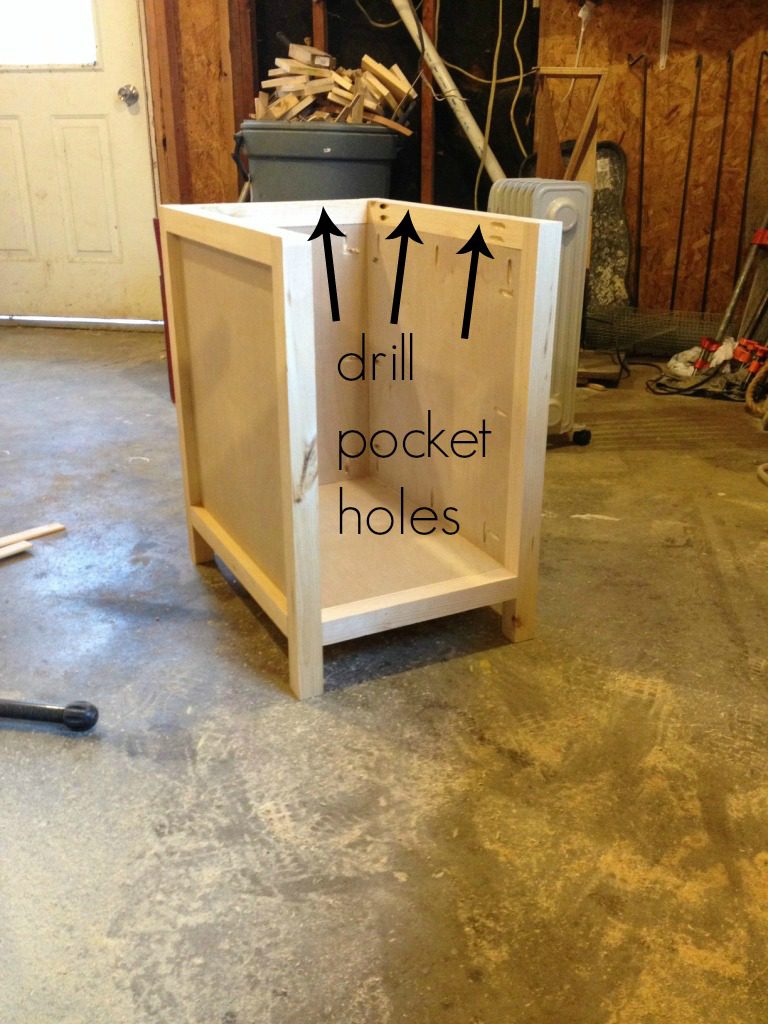
4. Add top
I apologize, I totally forgot to take a picture of this step, but it’s simple. I drilled ¾” pocket holes (toward the top) along the top 2x2s on all three sides.
I made a top by gluing some scrap 1x12s that I had lying around together, but you could definitely use plywood instead and just finish the edges with edge banding.
.
My top was 22”x17”. This allowed for no overhang on the front and back (my friend wanted it as shallow as possible so it would fit beside the couch), and 1” over hang on each side (width wise). If you want 1” overhang all around, make the top 24×17.
.
Once I had my top, I centered it and made sure everything was square, then screwed it on using the pocket holes I drilled along the top 2x2s and 1 ¼” pocket hole screws.
5. Add drawer and doors
I’m the worst and I also forgot to take pictures of this too, but I have two other posts to tell you all about how to make a drawer and a door that should help.
.
I made my drawer from a 1×6. I ripped the sides on the table saw so they wouldn’t be as tall as the face front, but this is just personal preference. It’s not necessary.
.
I made my door from 1x3s and inserted a piece of ¼” plywood inside. You can see how it’s done in this post.
6. Add Cove Molding (Optional)
I cut and nailed on cove molding around the sides and back, but this step is totally optional. Cove molding adds a little something something and is pretty cheap, so I figured why not?
7. Finish
I stained the finished piece in Minwax Dark Walnut and Polycrylic. I added brass hardware for the hinges and drawer/door pulls. And that’s it!
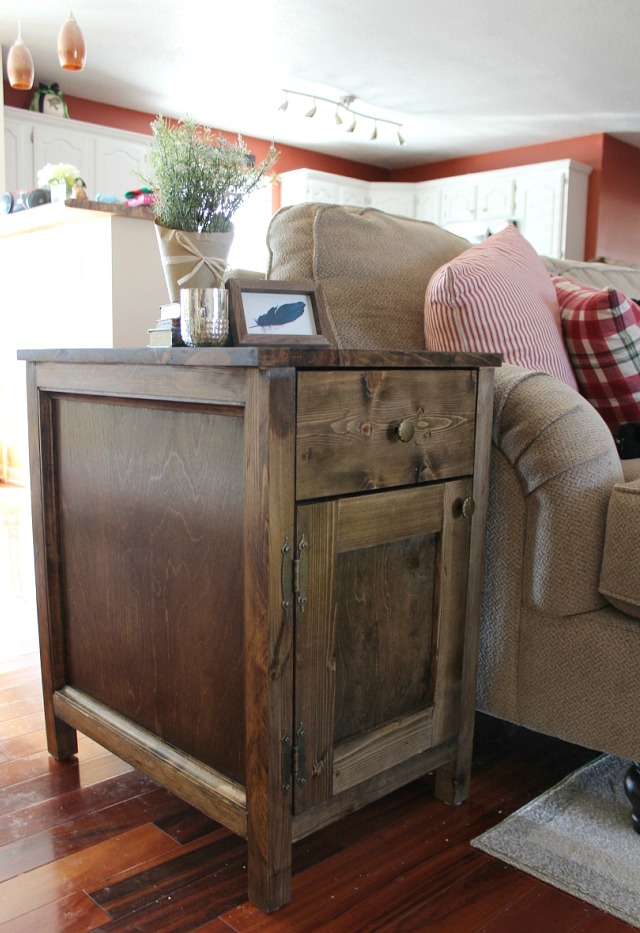
For those needing a place to hide diapers and such, it works great as you can see.
And for those of us just wanting a cute farmhouse style side table, it works just fine for that too.
So what do you think? Do you need somewhere to store your diapers? Or, uh, other random stuff? Of course you do…who doesn’t need more pretty storage?
.
Get building 🙂
You guys, I have a super, super-dy duper fun exciting project I’m working on RIGHT NOW that I cannot wait to show you (as long as it turns out like I hope it will–cross your fingers for me!), so be sure to stay tuned. For sneak peeks and other random shenanigans going on in the shop be sure to follow along on Instagram!
.
Until next time, happy building!

Sylvia says
After reading, I am confident I can now repair an antique wardrobe. It has 2 drawers, one fell apart and could be larger, as the inside of the cabinet is larger. So, instead of hiring someone to do this, as I have all the tools, I will be making both drawers over!
Thank you, for your directions and pictures.
Courtney says
This is beautiful! My husband made one very similar, but we use it as a side table in the extra bedroom. Thanks for sharing!
Courtney
http://www.greywoodmama.com
Kathlene Tuengel says
I love this. I do not have anymore children wearing diapers, but i love the looks of this side table. it is gorgeous. i am going to try my hand at making one you have nice projects. thanks for sharing.
Kathlene
Shara, Woodshop Diaries says
Thank you so much! Good luck making your own!! You got this!