
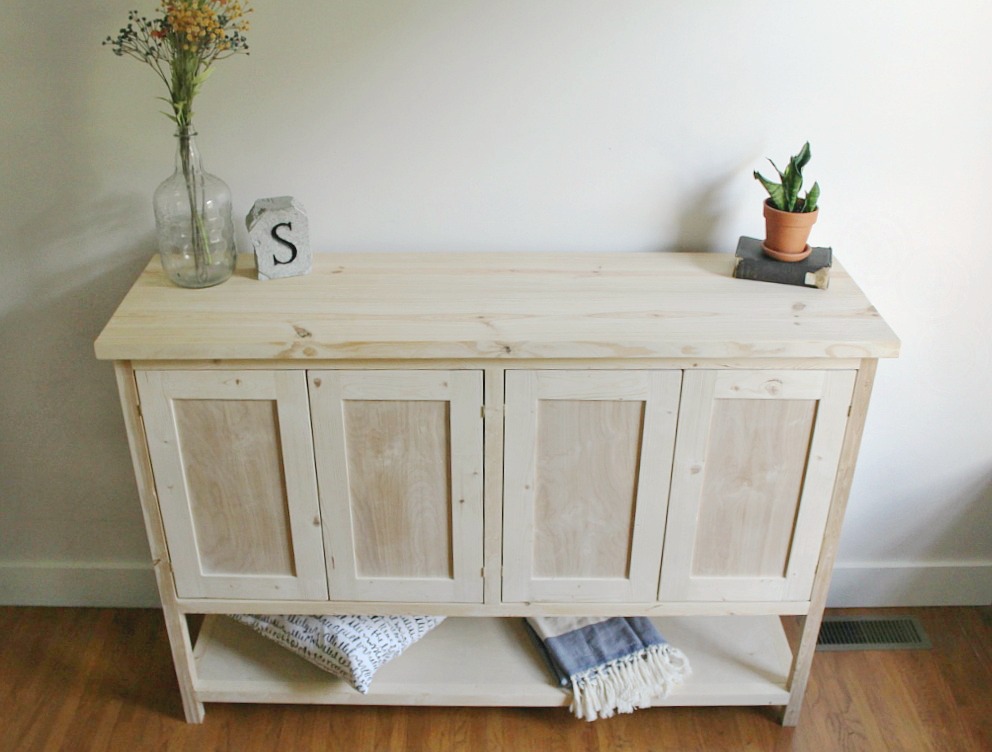
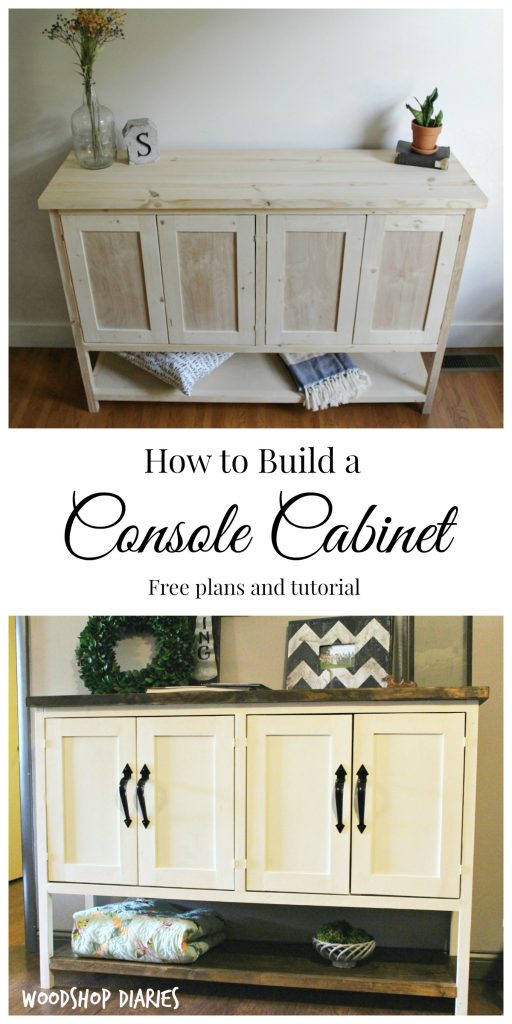
In a world where chalk paint is the queen of Pinterest and furniture makeovers are the hottest trend, I’m over here ABSOLUTELY LOVING the fact that the friend who asked for my latest build asked for it UNFINISHED.
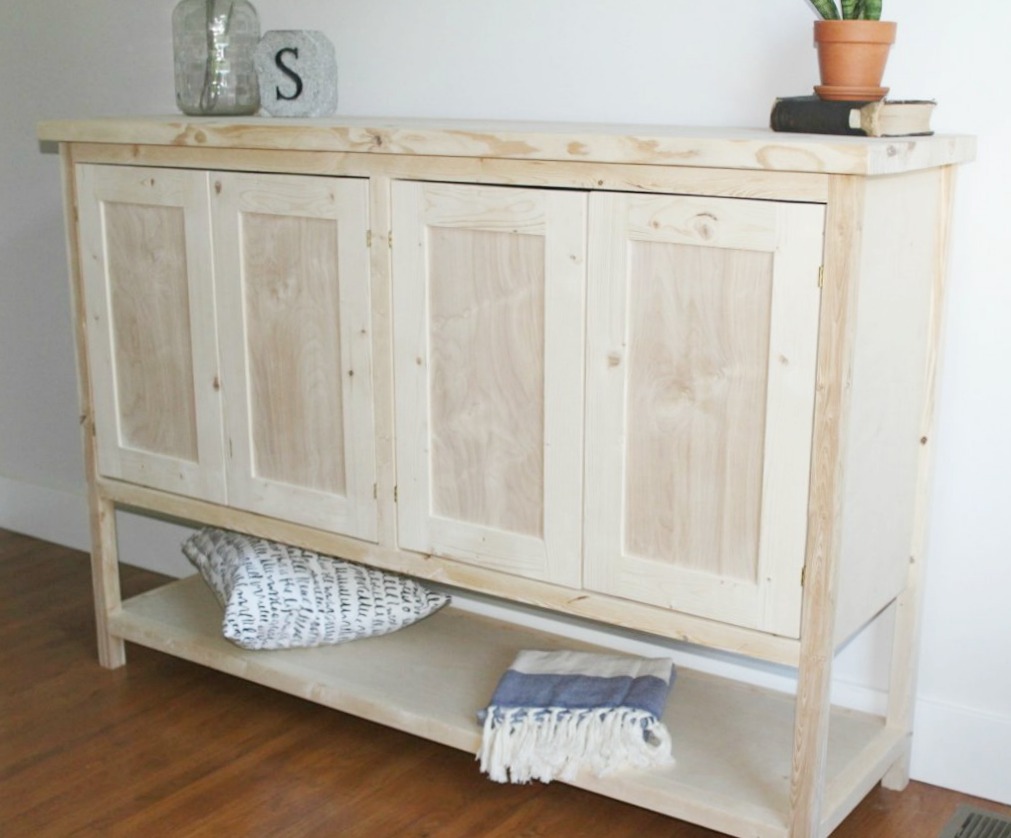
HALLELUJAH…once the sanding was done, I was DONE. No staining, no painting, no polying. Best client EVER. In case you can’t tell, I HATE finishing…but mainly painting…I’d rather pluck all my leg hairs out one by one than have to paint furniture. NO. JOKE.
.
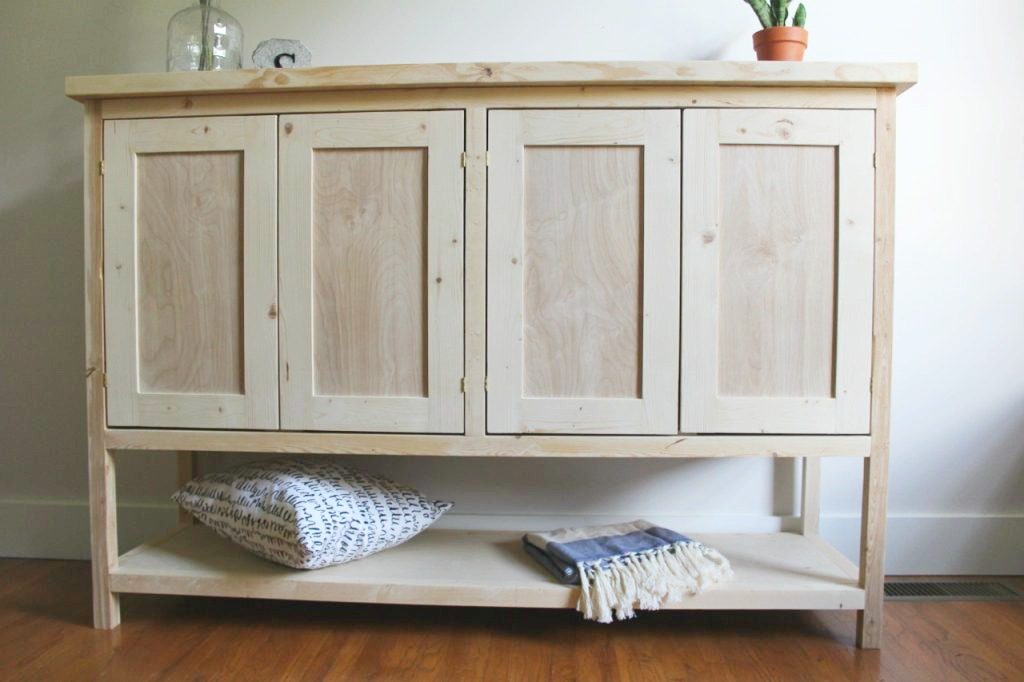
I actually kind of like what it looked like unfinished. Sometimes I think the furniture I build looks the best “naked.” But I think I’m in the minority there.
.
I do have to add, though, that after thorough testing (not really), it has been discovered that my “naked furniture” pictures on Instagram get more likes than my finished and styled ones do. That’s for real, so maybe I’m onto something here…
.
Anyway, for all of you who love a good build, I’ve got you covered with the how to AND some “naked furniture” pictures. For those of you who like a good furniture painting project, I got some pictures of it after she worked her magic on it, to.
.
What do you know…it’s a project that suits everyone 🙂
.
Alright, so let’s get to the how to.
.
This post contains affiliate links. If you purchase through one of these links, I may receive a small commission at no extra cost to you. This helps keep the content free. Thank you for supporting this site!
Materials Needed:
1 sheet ¾” plywood
1 sheet ¼” plywood
(2) 2x10x8 boards
(11) 2x2x8 boards
(3) 1x3x8 boards
4 sets hinges
Staples longer than ¼” or brad nails
Wood glue
Tools Needed:
Kreg Rip Cut (optional, but helpful)
Table Saw
Router and rabbet bit (optional)
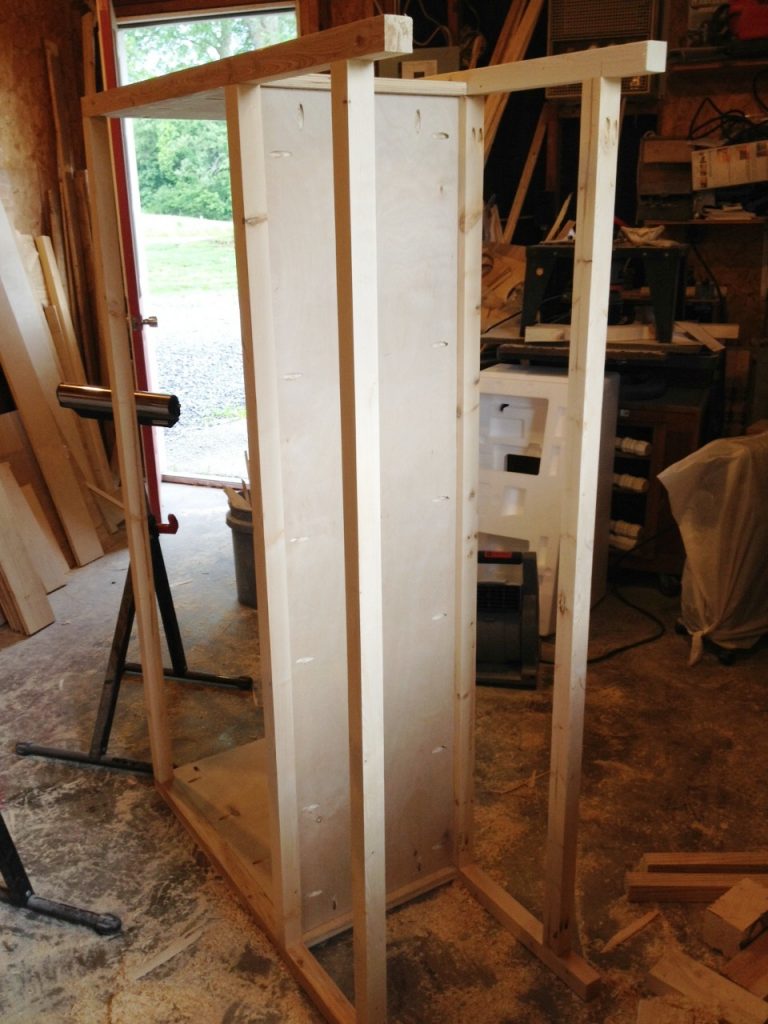
Step 1: Assemble the sides
First, I cut four 2×2 legs at 40” long. Then I ripped two plywood strips from my sheet 14” wide using my circular saw and rip cut. You could use a table saw for this, but it’s easier with the circular saw and rip cut…especially when you are scrawny like me haha.
.
Then I cut a 26” long piece off EACH 14” strip. Don’t cut them both from the same strip, or you’ll have to cut another strip for the next part of the build.
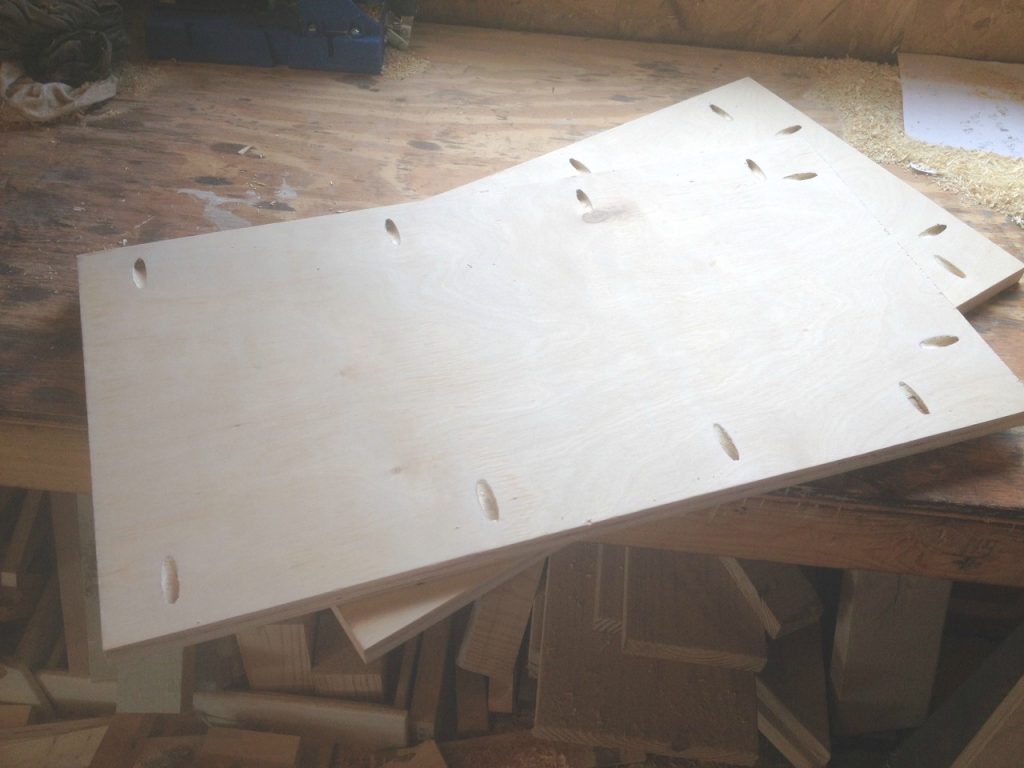
Using ¾″ pocket holes and 1 ¼″ pocket hole screws, I attached two legs to each piece of plywood making two side panels like the picture below. Notice the pocket holes on the top…that’s to attach the top later.
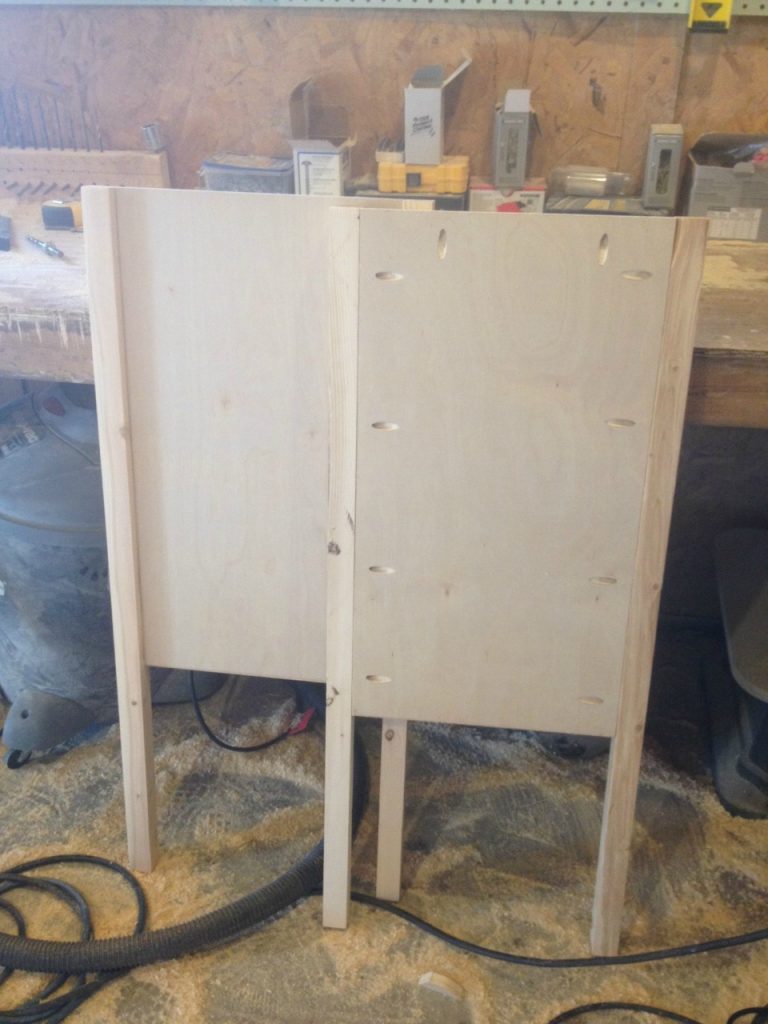
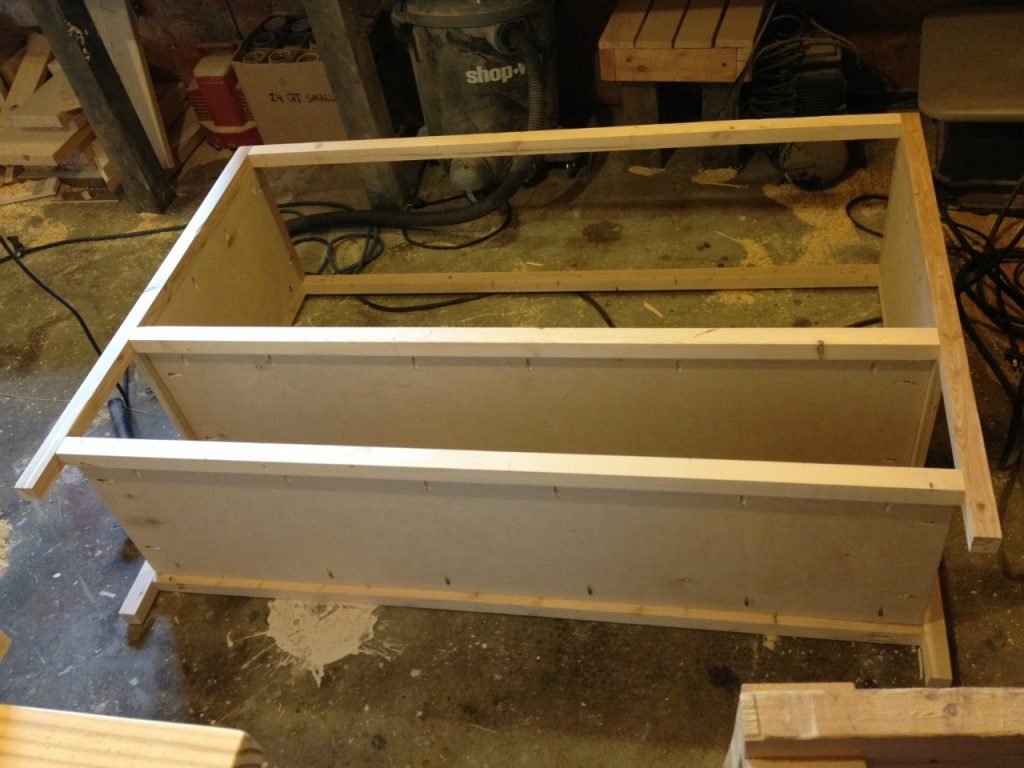
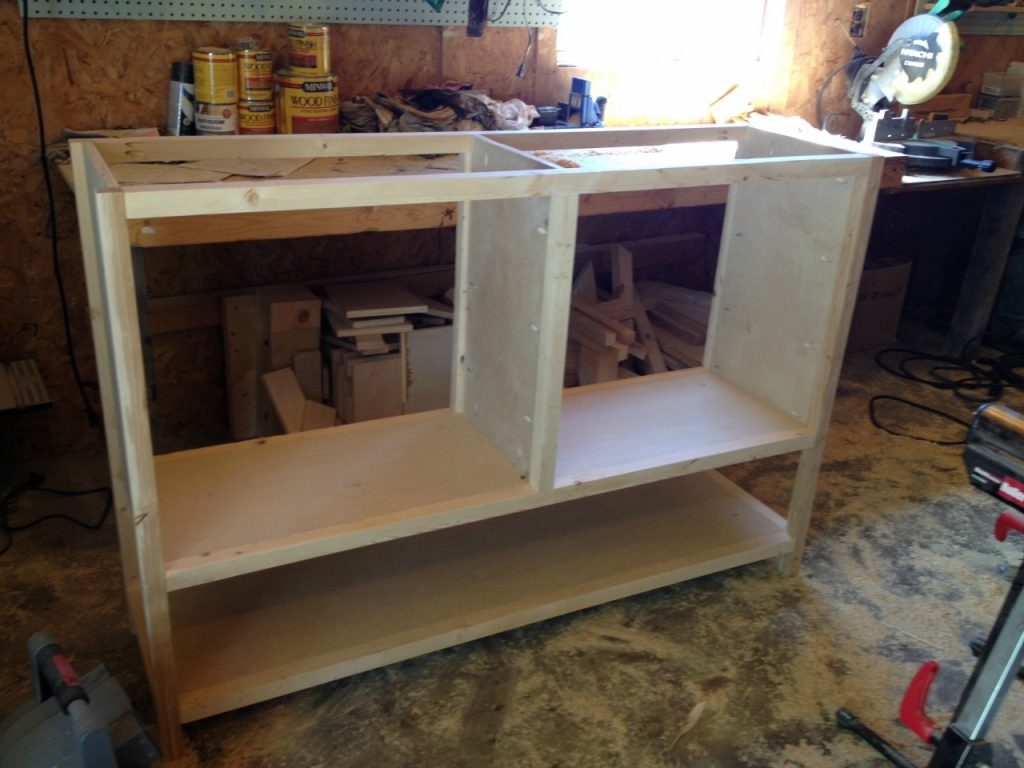
Step 2: Assemble the carcass
I love using the word “carcass.” I think I’ve told you that before??
.
I cut 6 pieces of 2×2 at 60” long and used them to attach the sides together using 1 ½″ pocket holes and 2 ½″ pocket hole screws like shown.
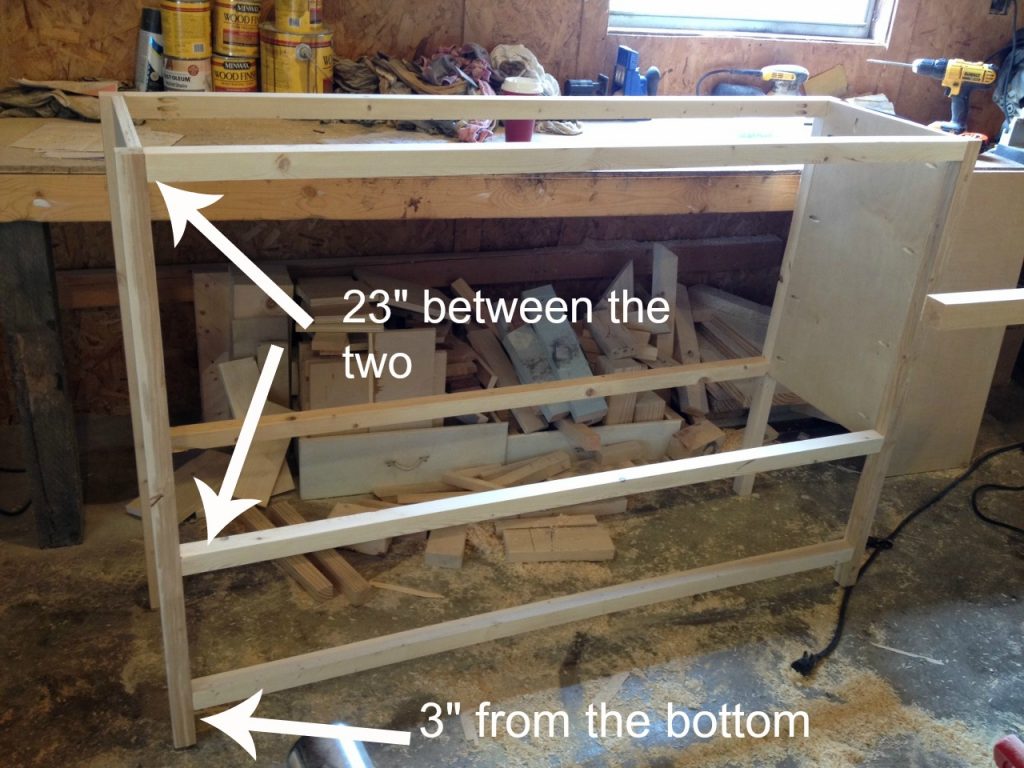
The bottom 2x2s were attached 3” from the bottom of the legs and the middle 2x2s were attached so that the bottom of the 2×2 was 26” from the top of the legs.
.
The picture doesn’t show, because I didn’t add this until later (long story…I had to cut some more 2x2s), but you could also add 14” long 2x2s at the bottom along the sides (front to back) at this point. Or later…whichever.
Step 3: Add the bottom and shelf
The remaining pieces of plywood from step 1 should both be 60” long. Perfect fit for the shelf on the bottom and the cabinet bottom. See what I did there?
.
I drilled ¾″ pocket holes along the edges of both pieces and screwed them into the 2x2s and the sides like shown using 1 ¼″ pocket hole screws. This picture was taken looking from the bottom view.
And here, I still haven’t added the bottom side 2x2s…but I will, I promise!
Step 4: Add middle divider
I cut two pieces of 2×2 at 23” and attached using 1 ½″ pocket holes and 2 ½″ pocket hole screws in the middle of the piece on the front and back. Be sure to measure for the exact center.

Then, I cut a piece of plywood at 14” wide and 24 ½” long and attached using ¾″ pocket holes and 1 ¼″ pocket hole screws like shown.
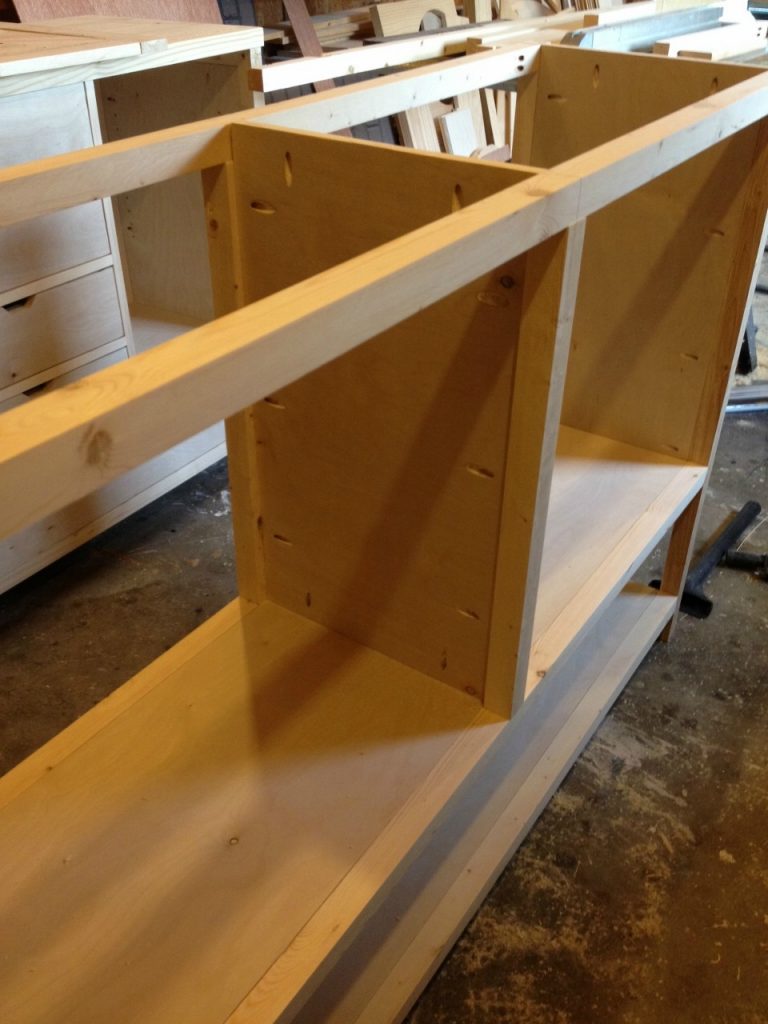
PS see that other cabinet in the background?? It’s this dresser!
Step 5: Add back
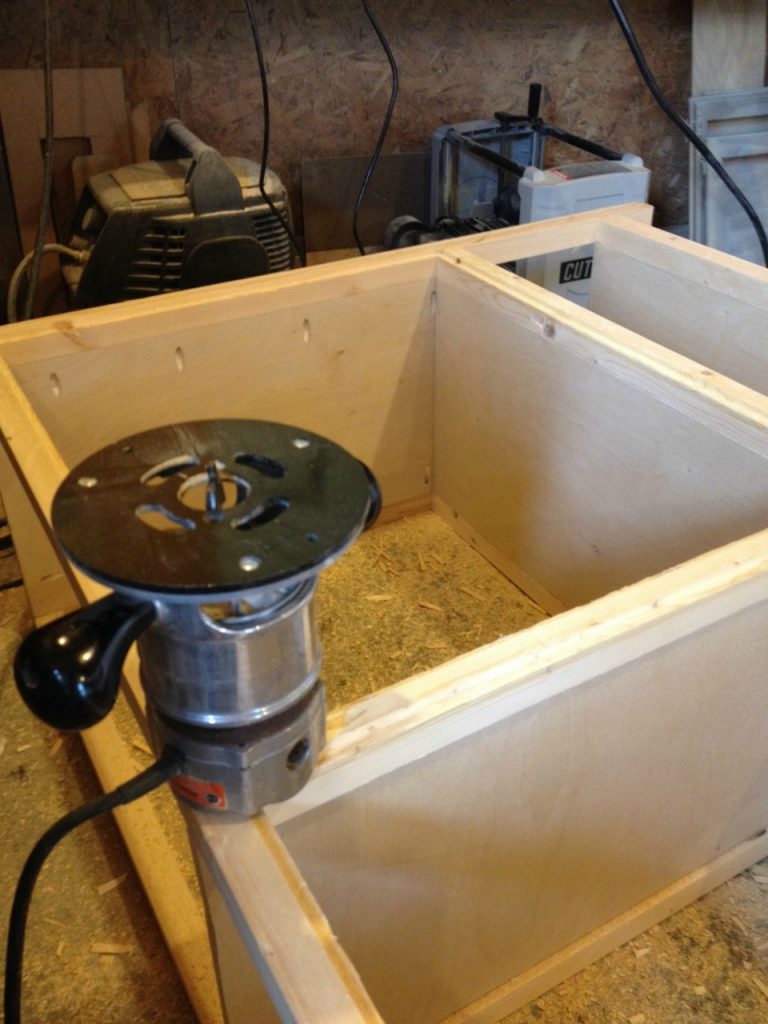
I tried a new way of adding a back using my router. You could do this or simple staple the back on. Either way works just fine. I used a ⅜” rabbet bit in my router to make a ¼” deep groove around the back openings and stapled in the ¼” plywood for the back in so that it sits flush. Or you could just cut ¼” plywood to fit over the holes in the back and staple. It’s just an extra step to use the router. Either way, just get a back on that thing 😉
Step 6: Add those 2x2s on the bottom sides if you haven’t already
Talking to myself here…See?? I told you I was going to add them. If you haven’t already, add these things!

Now we are here…almost done.
Step 7: Build the top
Click over to my post here to see how I make table tops. I made this top 65” long and 18” deep. I used my 2x10s here.
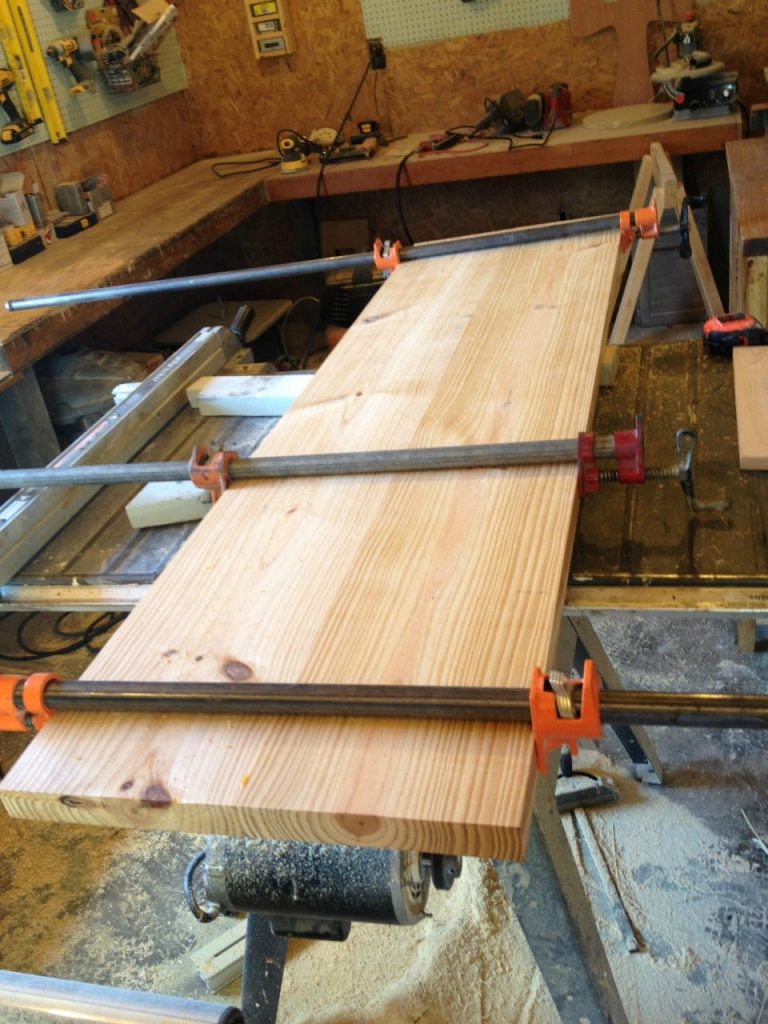
Once the glue is dry, I screwed the top in through the top front and back 2x2s using 2 ½” screws and then used 1 ¼″ pocket hole screws to attach on the side and middle divider panels.
Step 8: Build the doors
Check out my post here on how to build these simple shaker style cabinet doors. I built 4 of them taking into account the width of the butt hinges and leaving a small gap between the doors. Because things can sometimes get a little “off,” it’s best to measure the exact size for these before you make them instead of me telling you. I usually leave ⅛” gap along all the edges for doors. You can do the math 🙂
.
Once the doors were made, I simply attached using small brass butt hinges.
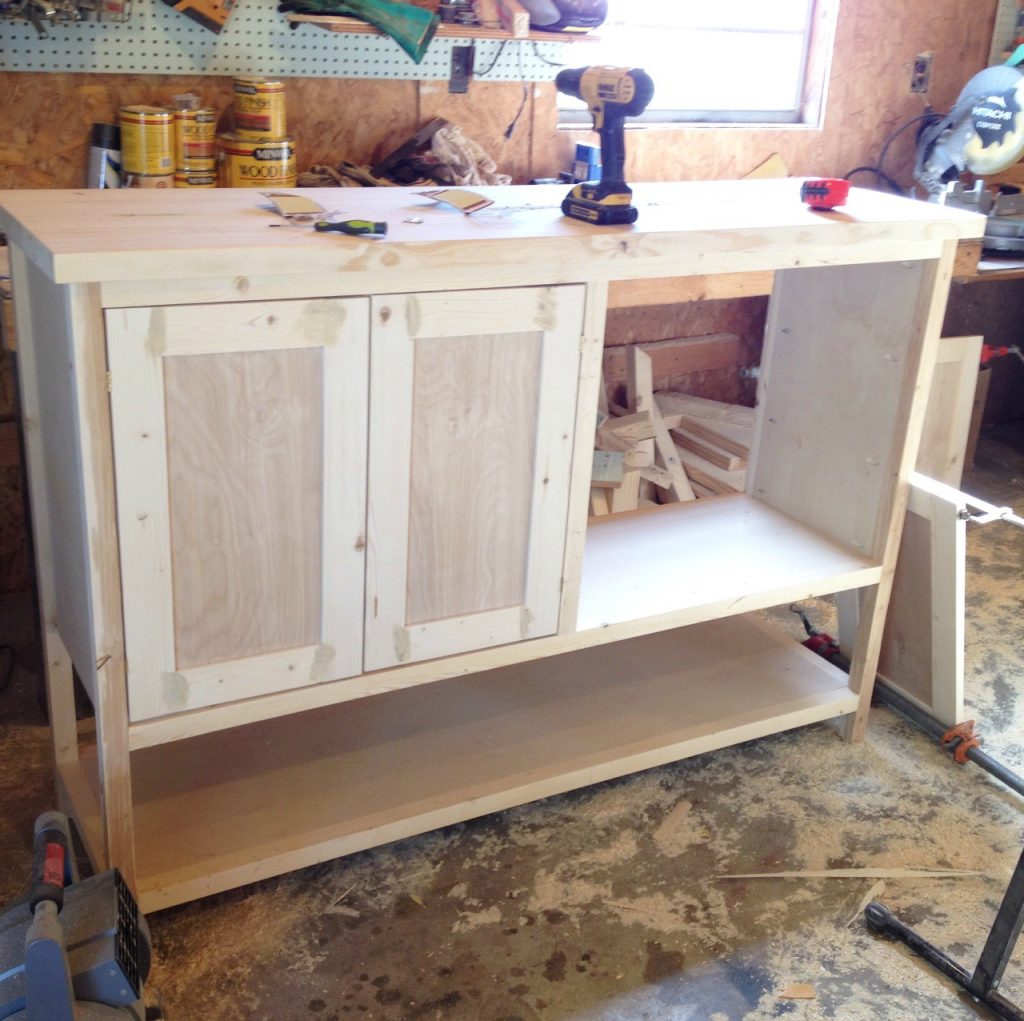
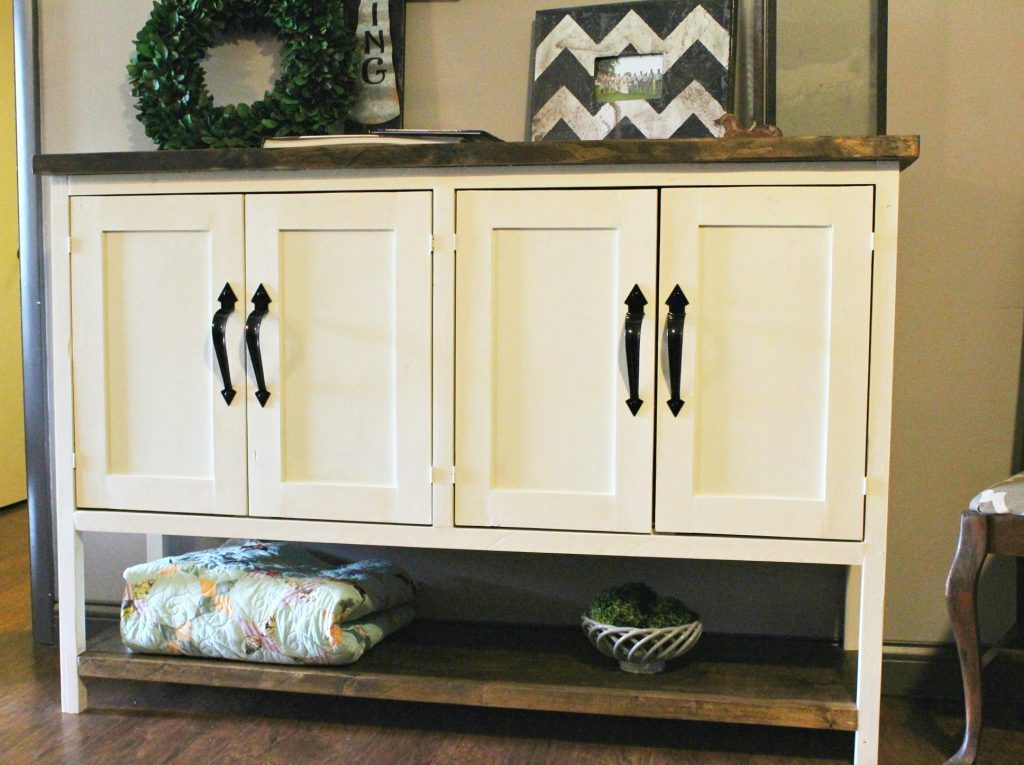
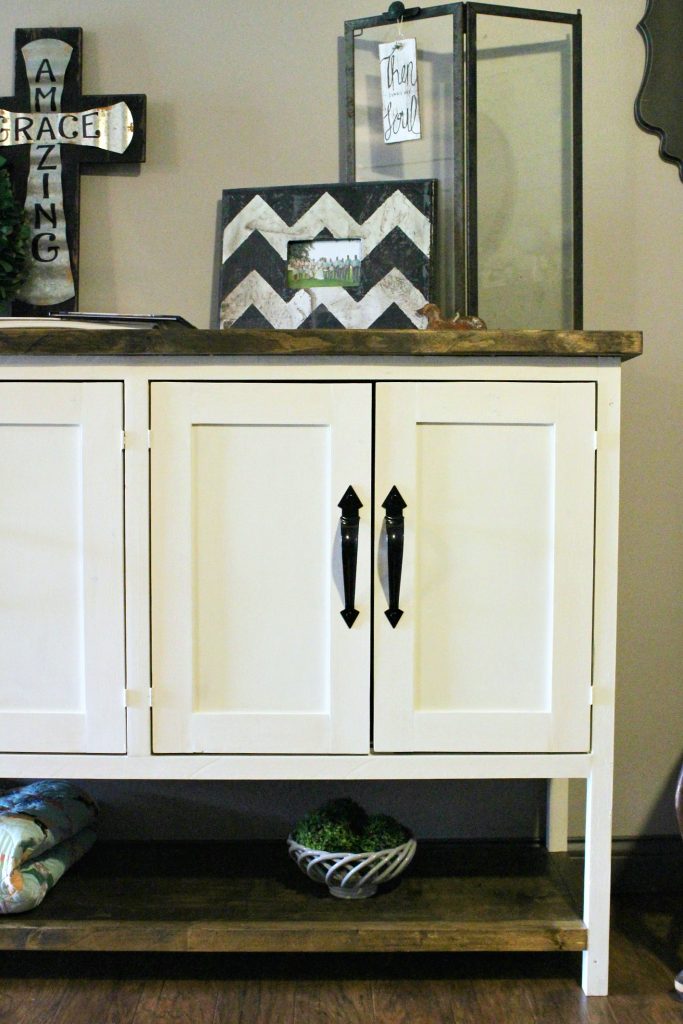
I used double magnetic catches to hold the doors in place. My friend installed her own hardware after she finished it, so at this point, my work was done 🙂
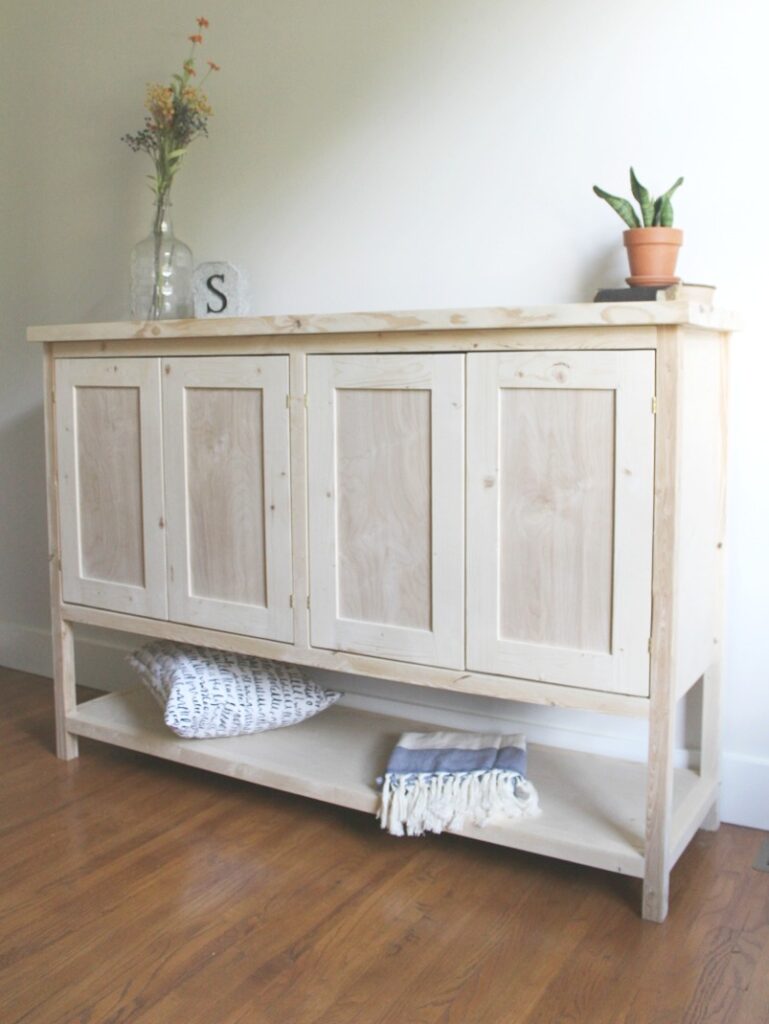
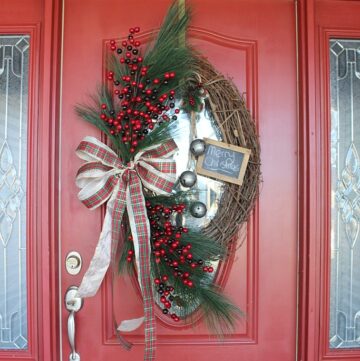
I seriously love it just plain and natural. But in case you like a more finished look, check this out!
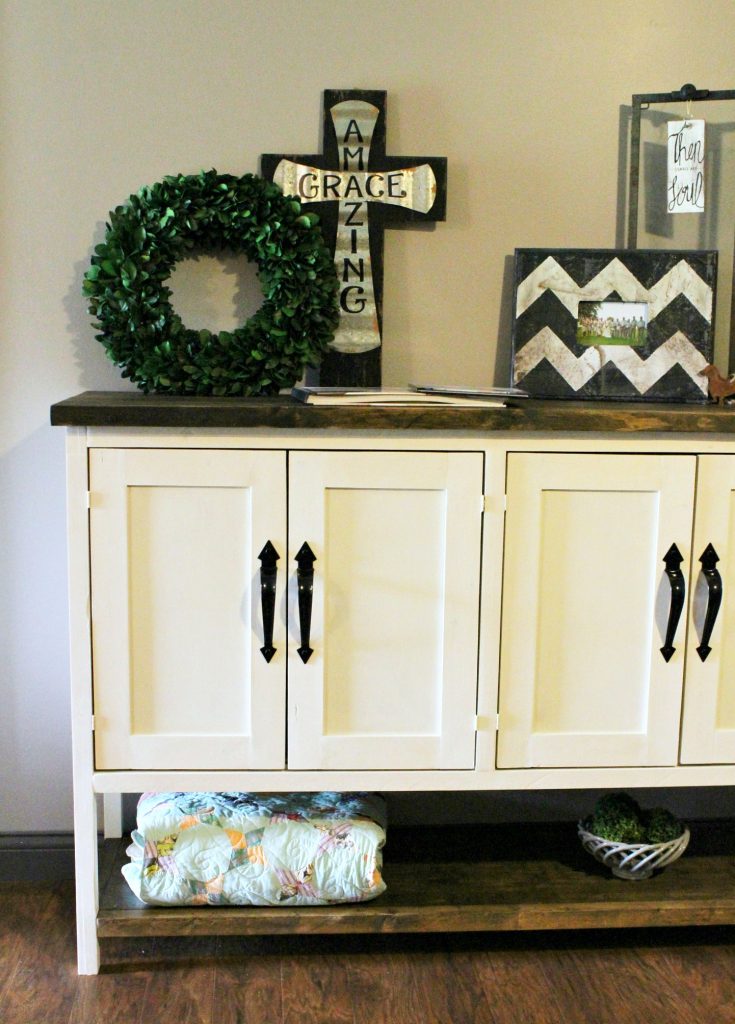
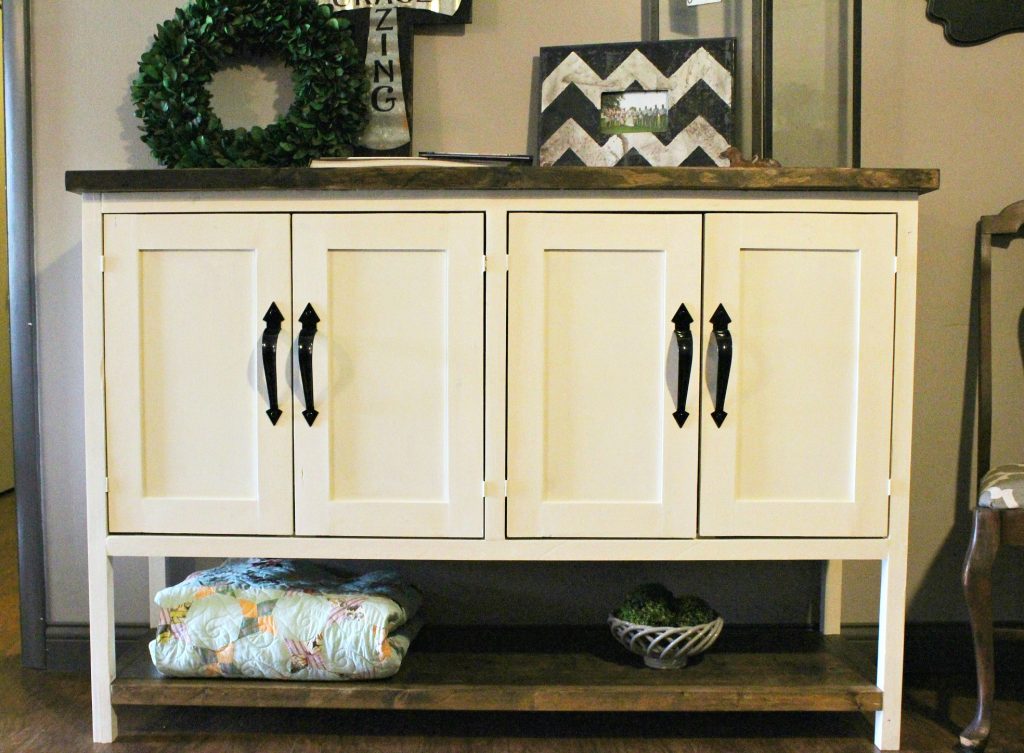
So what do you guys think?? Ready to build one of your own??
.
If so, I’d love it if you would pin this for later 🙂
Until next time, happy building!!
Alina says
How much did this cost to build? Supple wise?
Shara, Woodshop Diaries says
I would estimate about $75-100
Amanda L Schulz says
Is there a link that Im missing to a pdf or something to print the instructions?
Shara, Woodshop Diaries says
This post is the instructions. I do not have pdf plans, but this tutorial should provide all the measurements and instructions you need 🙂
Renee Smith says
This is gorgeous! What are the dimensions for the finished product? I would love to build this but my area for a console is less than 42″ wide. Could it be modified to be smaller?
Shara, Woodshop Diaries says
Thank you! The finished table is 18″ deep, 41 1/2″ tall, and 65″ wide. You could definitely modify it to be narrower if you needed! It’s fairly simple to modify that direction.