
Good morning! And welcome to our second installment of What’s Up Wednesday! I know, right? I woke up this morning like “UGH it’s only Tuesday…”
Then when I went to pick out a shirt to wear to work, I was like “I’ve already worn the red shirt and the blue shirt this week, so today is the grey shirt day…which means it’s WEDNESDAY!!!” I don’t want to wish my life away or anything, but for real, aren’t we all counting down to the weekend?? Wednesday is TOTALLY better than Tuesday 🙂 And, yes, I do wear the same shirts to work in the same order by color…
So anyway, a few random things for this What’s Up Wednesday…
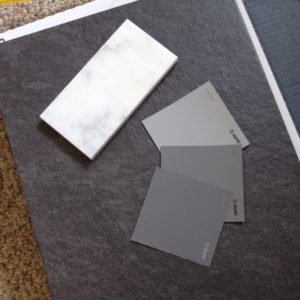
Thing #1: The bathroom remodel I’ve been talking about for weeks is still on schedule to start end of July to August. I’ve been buying stuff for it and picking out colors. AND YOU GUYS….I AM SOOOOOO EXCITED. I got the pendant lights in the mail this week and I picked out tile and grout colors last week! PS I’m still figuring this out…but I know the pictures below are a little blurry 🙁 sad day

Thing #2: Our favorite orange kitty has been sick all weekend and we put him back outside (his natural habitat) on Monday after work and he was loving it. I got this ADORABLE picture that Danny is going to kill me for putting on here, but I have to show you 🙂 AREN’T THEY THE CUTEST!!??

Thing #3: I migrated all my followers last night to the new site. You all should be receiving emails of new posts now. If you notice any glitches in the site or are not getting the emails, please let me know.
Okay, enough of the randomness, I have a SUPER simple DIY for you guys that you are going to LOVE…at least I hope so. This was seriously one of my first ever projects and people seem to love them.
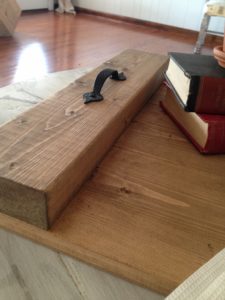
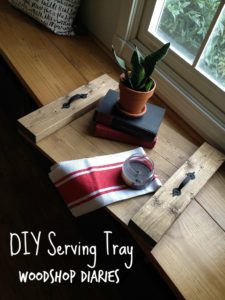
It’s a serving tray!
This is super easy to customize, but I’ll show you how I did mine.
You will need:
Saw of some sort (miter saw is good, but when I made my first one, I used a little cheapo jigsaw)
Hammer and 1 ⅜″ or longer nails (or nail gun if you have one)
6′ 1×6 board (or could use 1×4 for a narrower tray)
3′ 2×4 board (or could use 1×4)
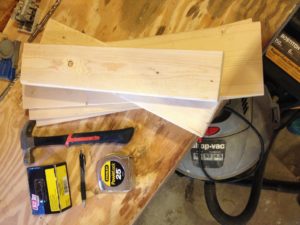
That’s it!
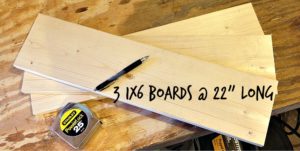
So, first, you want to cut your “stretcher” boards. These will be the 1x6s (or 1x4s if you chose to use those instead). Cut three (or more if you choose) the length you want your tray to be. Mine was 22″.
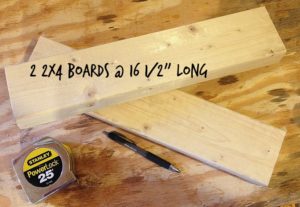
Then you want to lay the boards out side by side and measure the distance across them. If you use 3 1×6 boards like I did, it will be 16 ½″ wide. Cut two 2×4 boards (or 1×4 if you choose) this length.
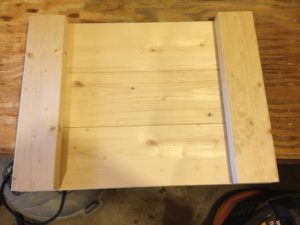
Lay them out on the work surface like the picture below with the 2x4s and the 1x6s facing DOWN.
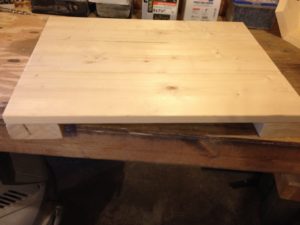
Make sure everything lines up and is square, then nail (using EITHER hammer and nails, or a nail gun) at least two nails in each 1×6 board from the bottom into the 2x4s. Be sure to nail from the bottom so you don’t see the nails when you flip it over.
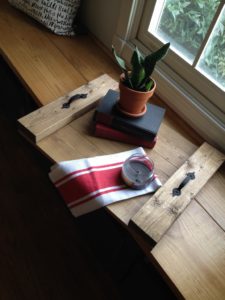
And that’s it! Sand, stain/paint, and add handles if you want and it’s good to go 🙂
If you liked the project, please pin the image below for future reference 🙂
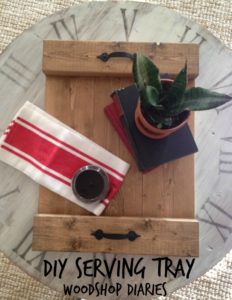
I stained mine in Minwax Weathered Oak, but didn’t like how light the color was, so then I mixed some Minwax Provincial in with the Weathered Oak and stained it again, but it was still too light, so then I just went over it again with plain Provincial and I liked the final result.
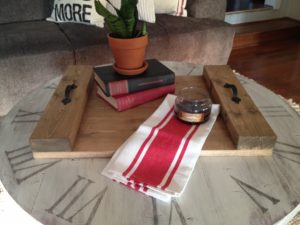
If you like the coffee table, you can check it out here.
Brooke has some pretty pictures of a tray I made in her post here as well. If you aren’t following Brooke, you should be. She is super talented! I made Brooke’s tray out of an old pallet, so the wood is a little more beat up than mine.
I literally made this one last night specifically to post for this. It took me maybe ten minutes–minus all the time I took trying to decide if I liked the stain colors haha.
So what are you waiting for? Go make one or two…or seven. It’s whatev.
Until next time, happy building!! 🙂

[…] they had dried after just a couple of coats…I brought them back inside to my tray. I liked the random display that I had going on previously, so I pretty much laid them out the same […]