
Welcome back to the chaos that is our kitchen renovation!
.
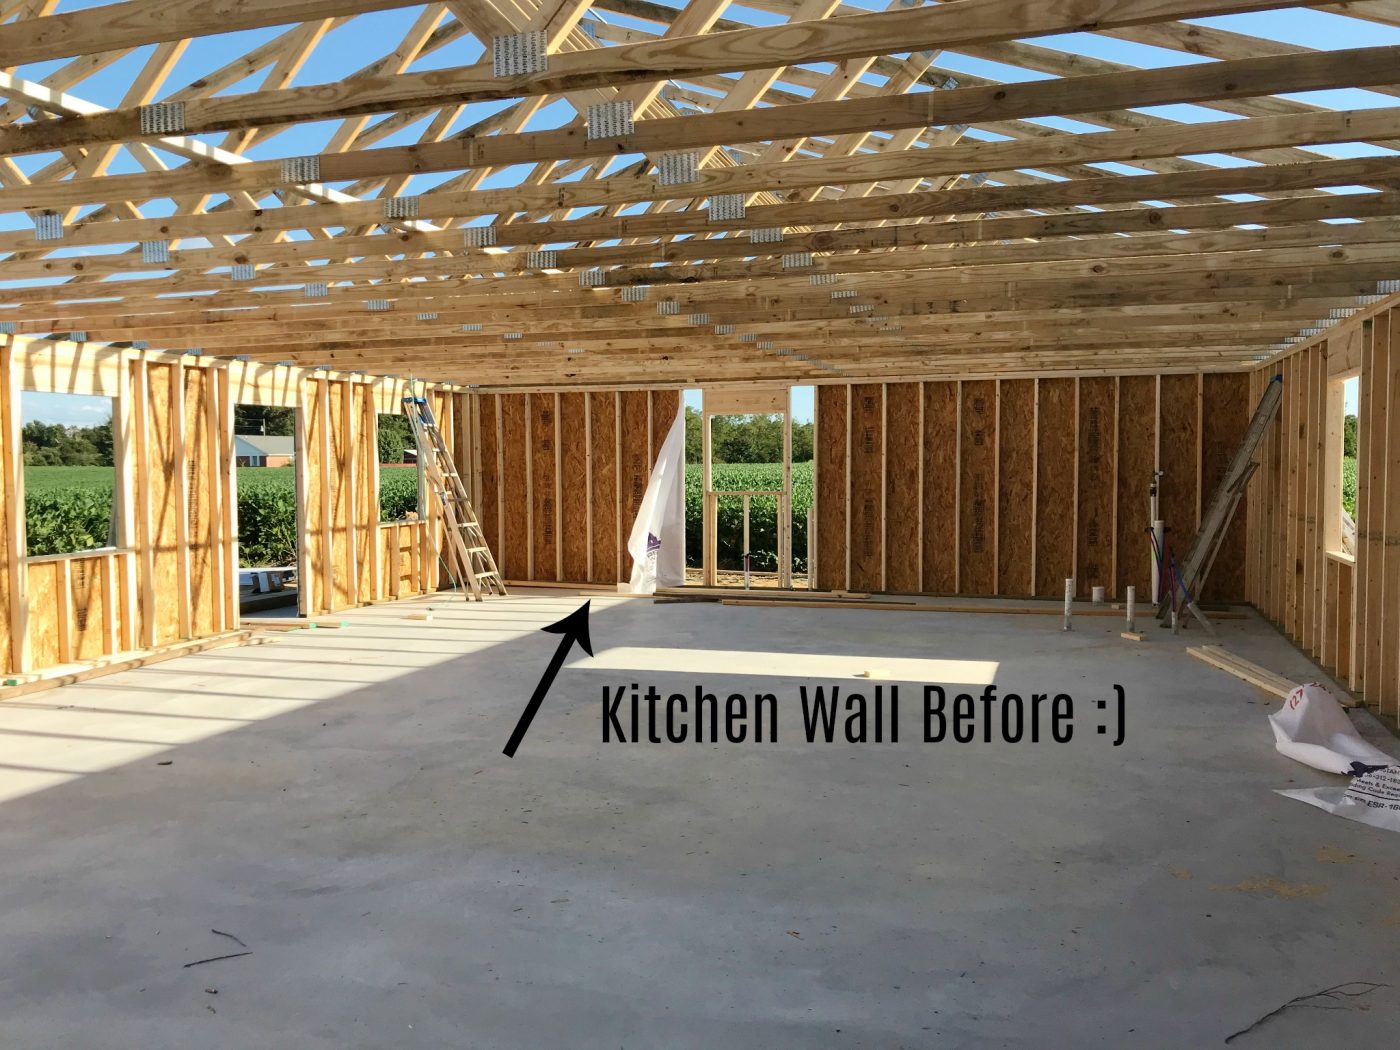
If you are returning from week 1 where I showed you the before of our space, thank you 🙂 After seeing what we started with, I wasn’t sure if anyone would venture back here for the rest of the story haha!
.
But if you’re new here and have no idea what’s going on, let me get you up to speed.
.
In this blog post, I shared how we sold our old home and decided to build a small garage apartment. We hired someone to put up the actual building, but we are finishing everything out on the inside ourselves. Last week, I shared the before photos and the plans for our new kitchen.
I’m so excited to be partnering with Jeffrey Court to bring you weekly updates on our kitchen renovation! This week was the first week we actually started the work. So let’s go over what’s been done this past week, what’s left to do, and the things we didn’t know we would be doing…like trying to find a bathroom in a field of soybeans…in the rain.
.
But, first, let’s take a look at that to do list from the before blog post:
Install divider wall to separate kitchen and bathroom
Get electricity to the space
Wire light fixtures, outlets, switches
Finish plumbing
Insulation
Drywall
Paint
Build cabinets
Finish (paint and poly) cabinets
Install cabinets
Install appliances
Install countertops
Trim out window
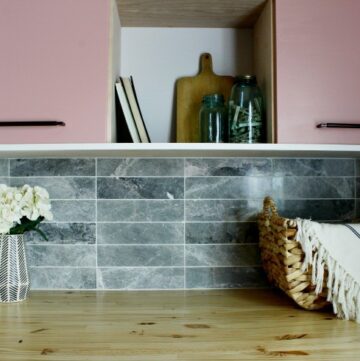
Install tile backsplash
Build dining table
Move in
.
The last one is the big one I’m shooting for 😉 But all the ones before it have to be done first, so we are trying to knock them out as quick as we can.
.
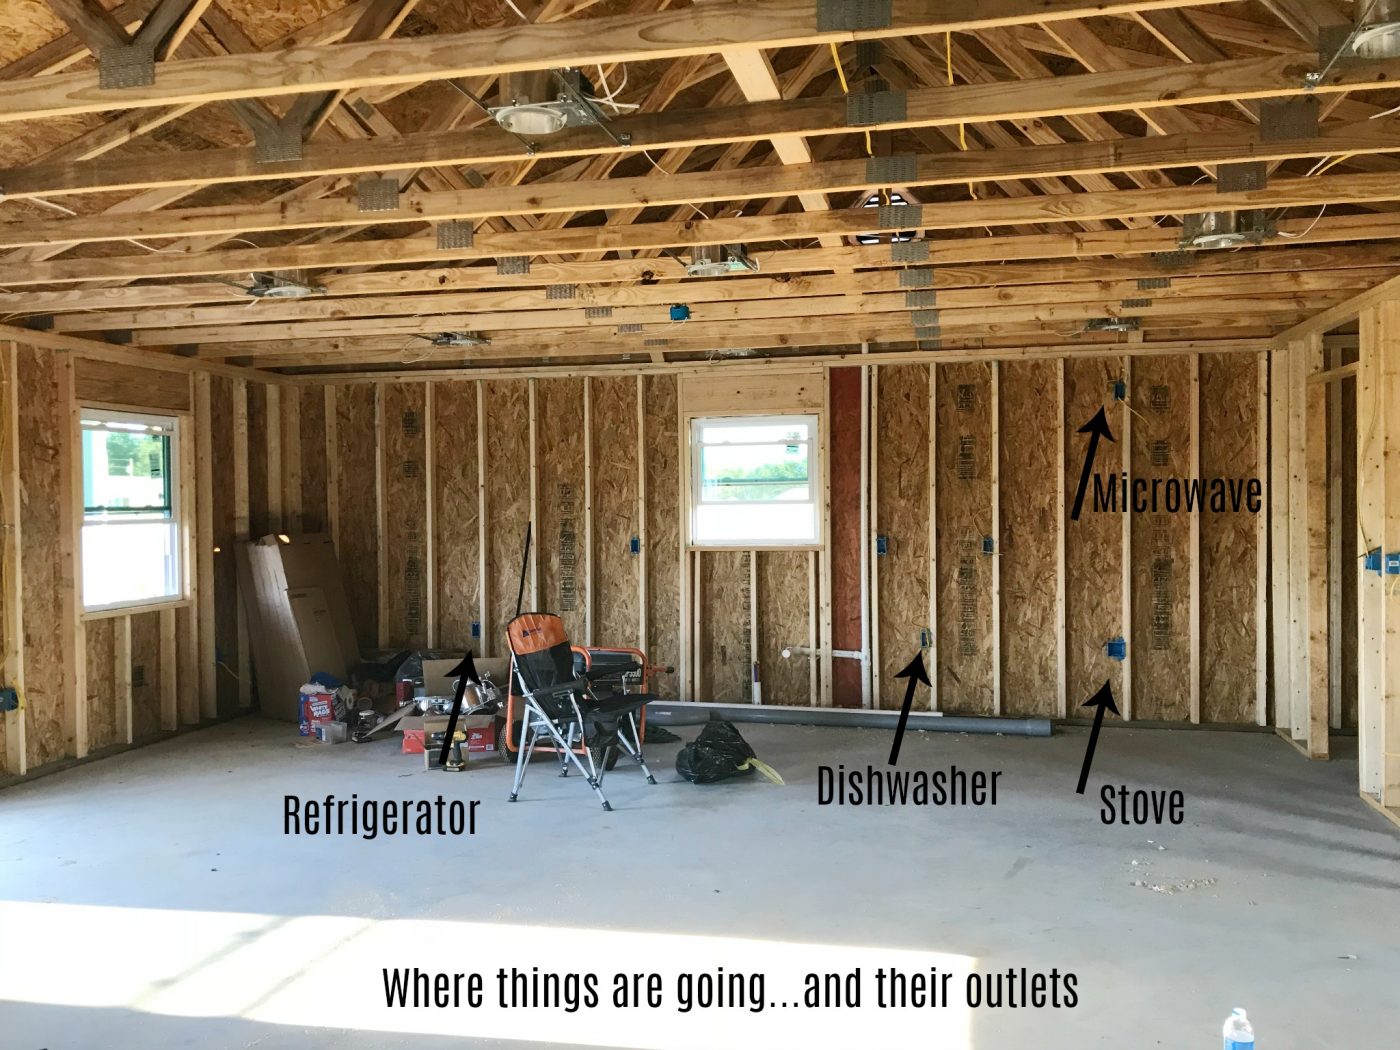
Let’s start with the first thing on the list–the walls. Now, the kitchen itself is wide open to the rest of the space–remember, it’s studio style. BUT, to save money and make things simple, we put all of our plumbing along one wall and on the back corner closest to the septic tank. This means the kitchen is right next to the bathroom.
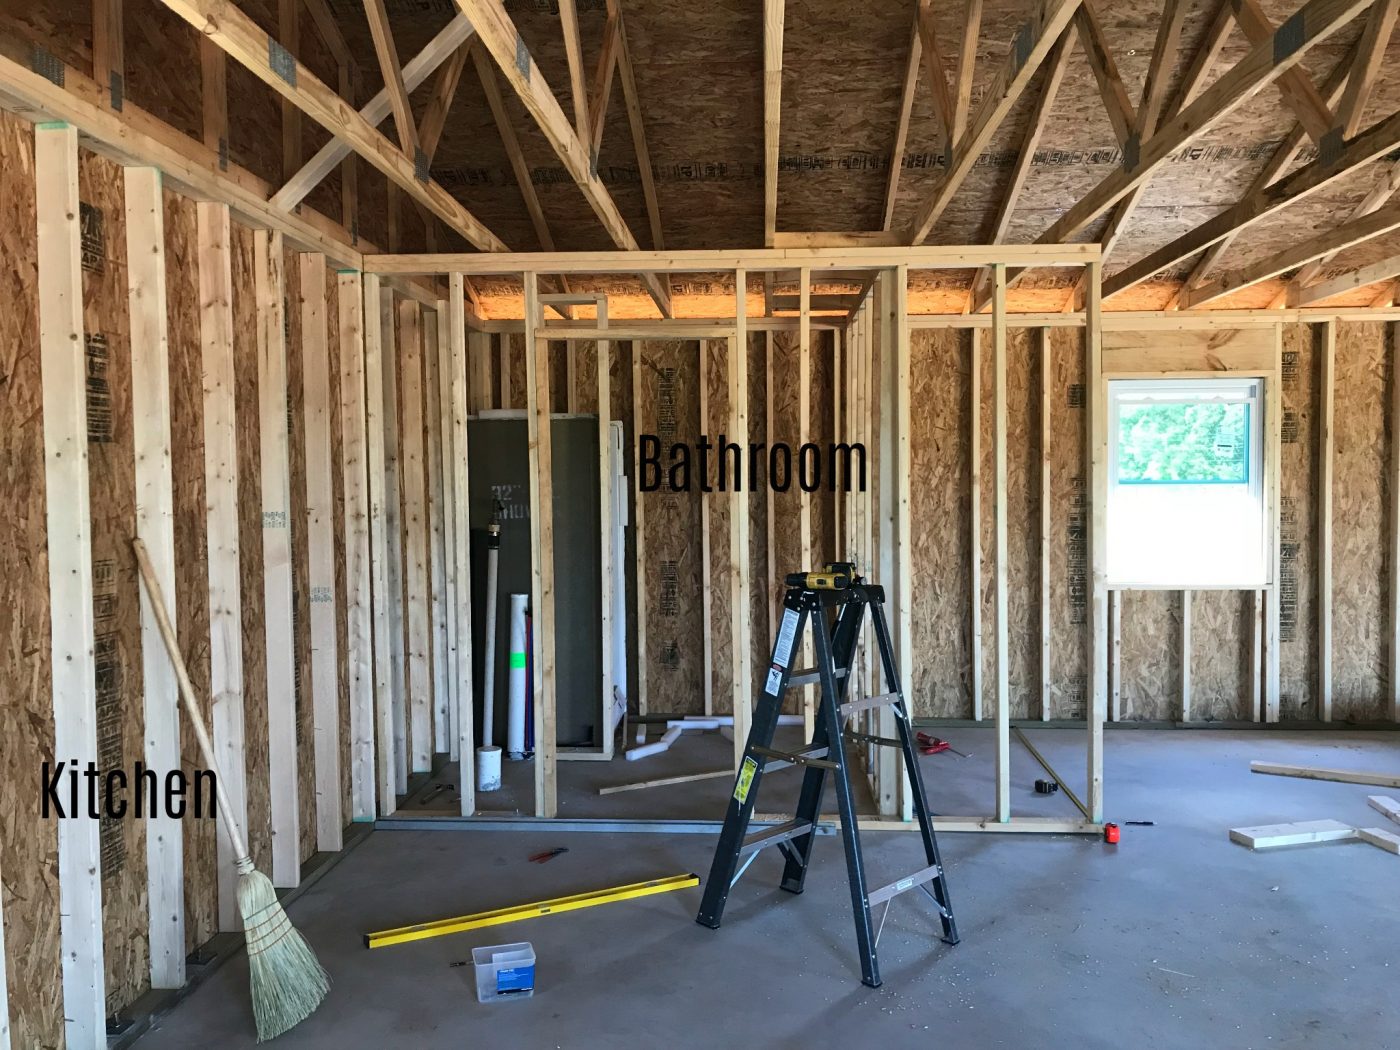
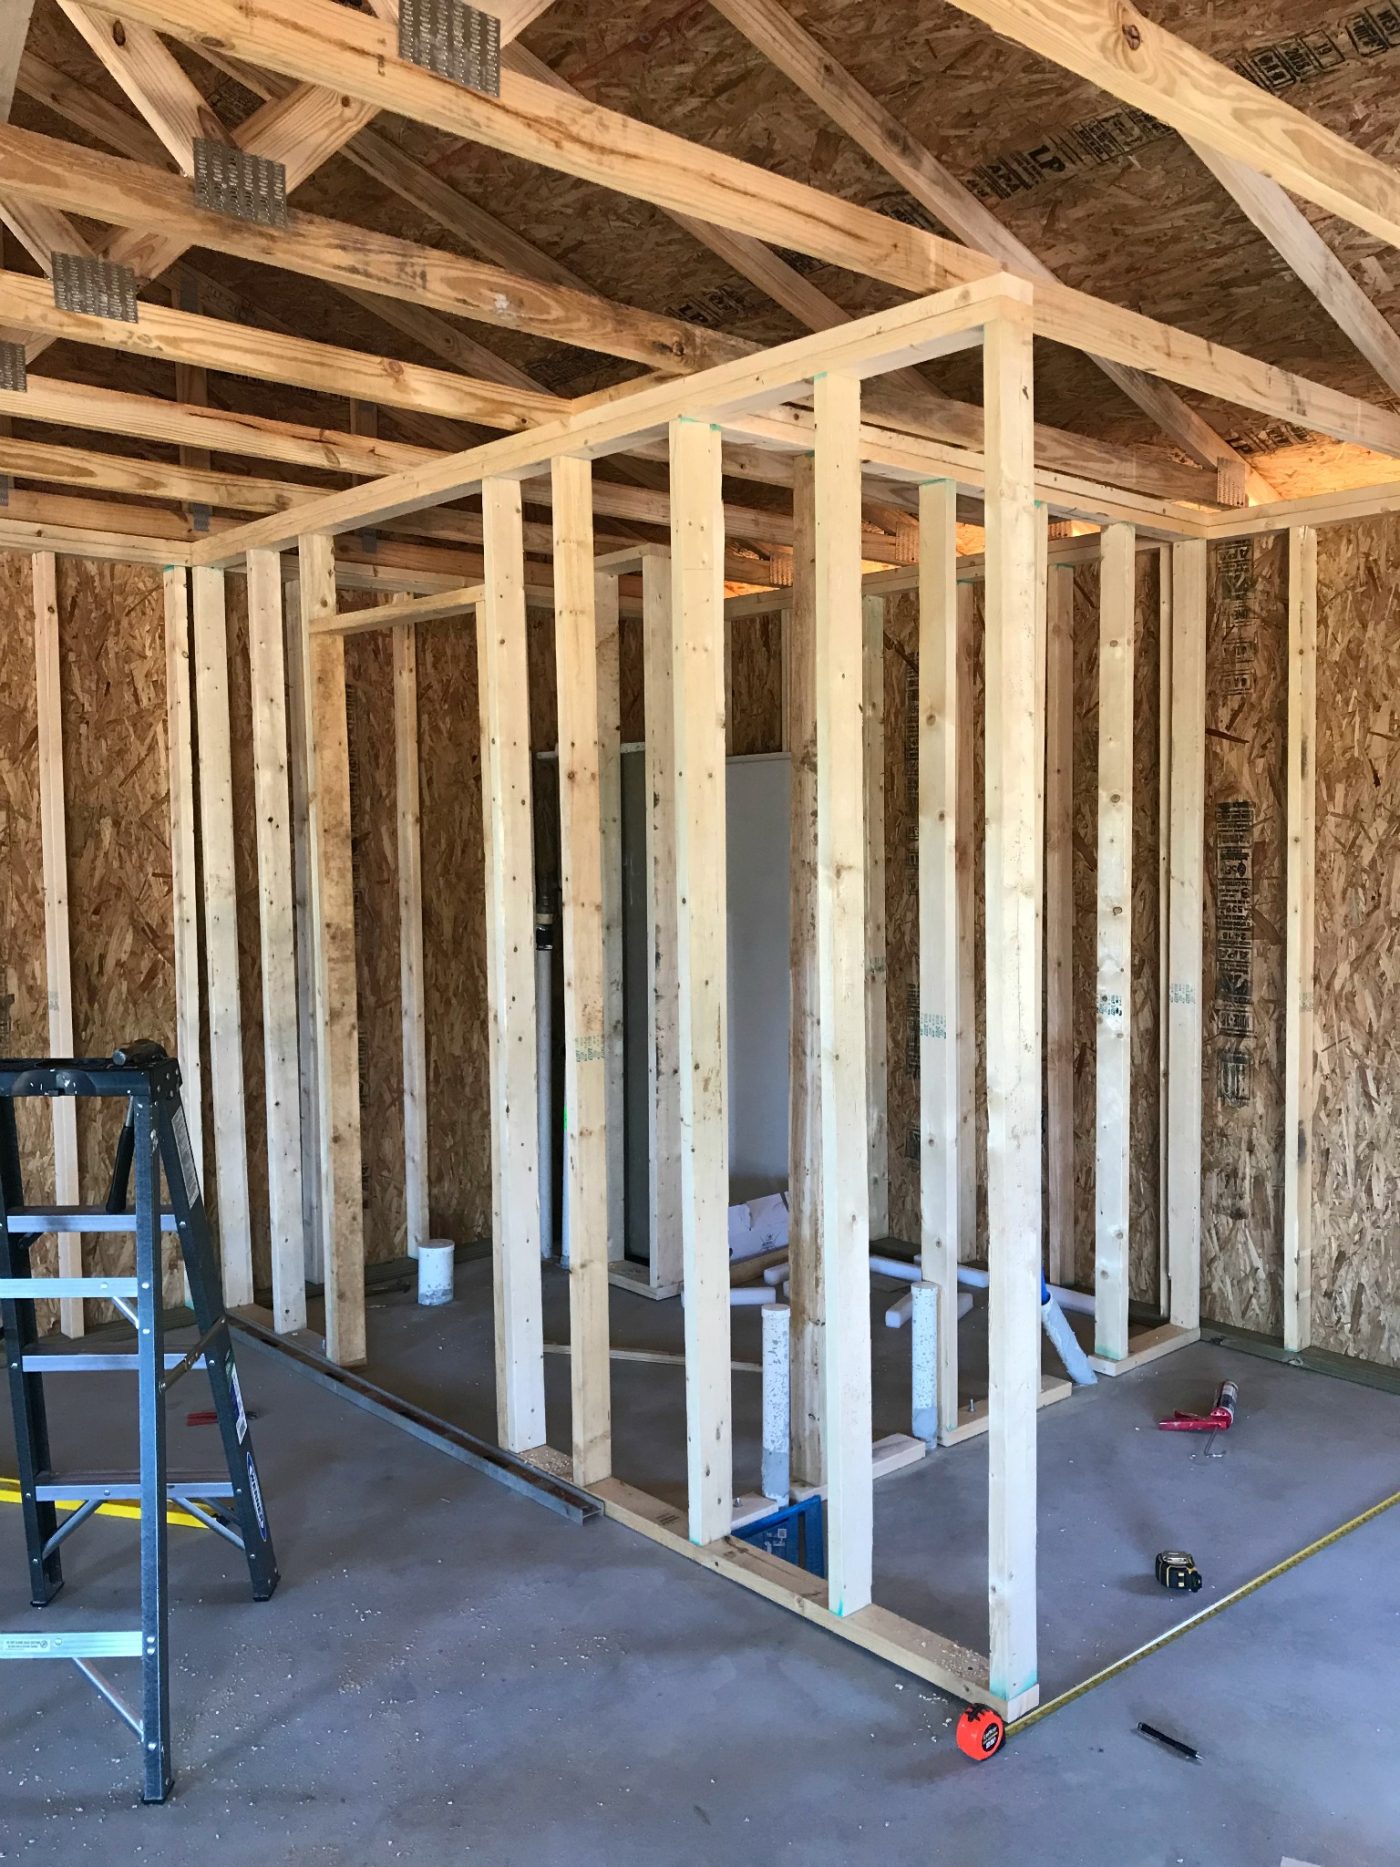
Obviously the bathroom isn’t going to be open to the rest of the space, so we did have to build a couple walls to block it off from the kitchen. We also had to build a divider wall to separate the garage and the living space…but that’s another story for another day.
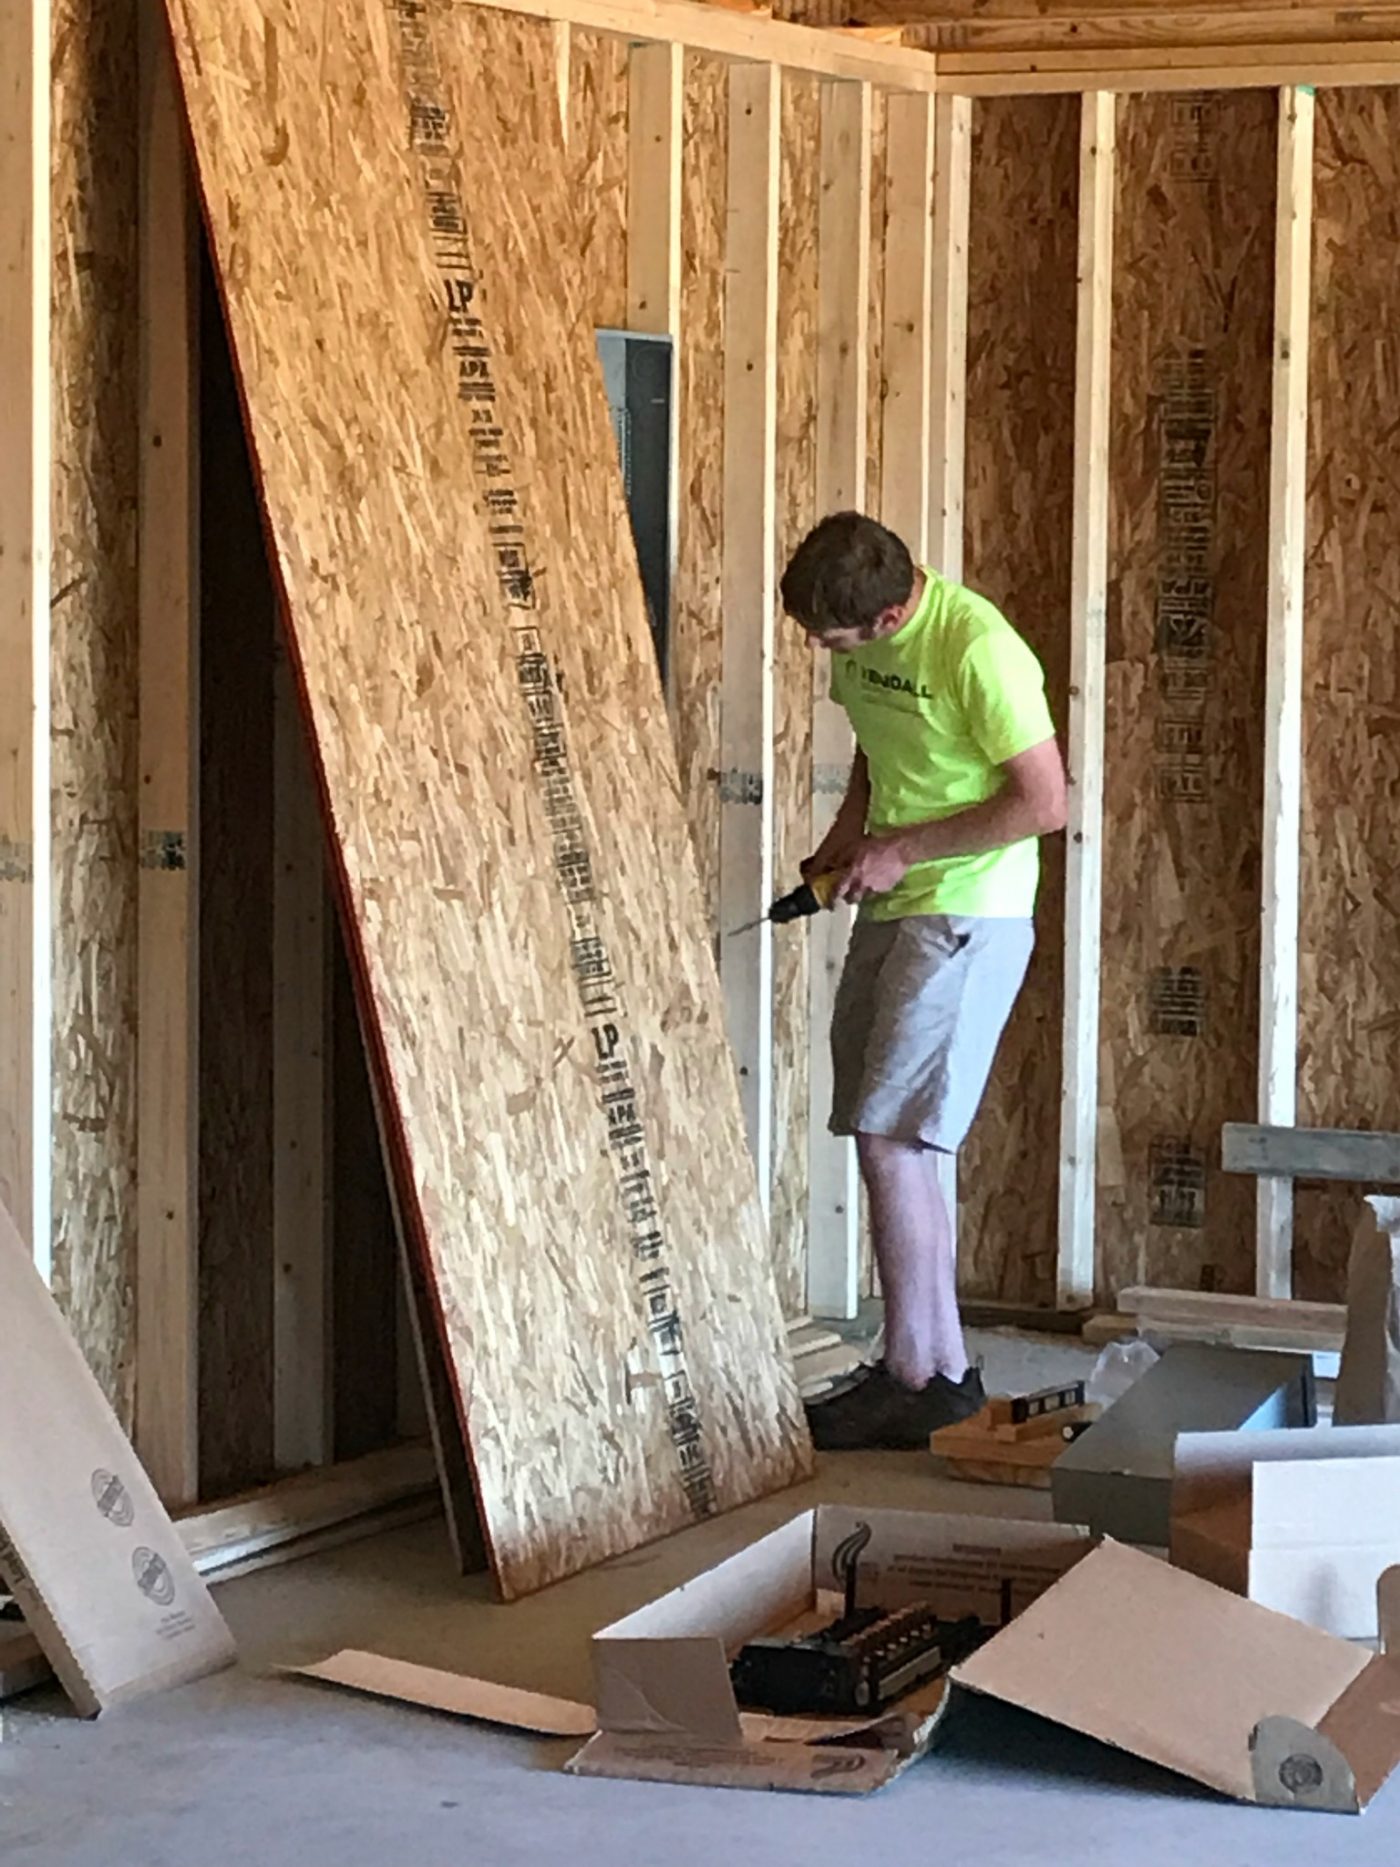
I used some leftover 2x4s from building the garage and framed out the bathroom walls and the bathroom door pretty quick, easy and painless. Honestly, I was surprised nothing major went wrong since I’d never built a wall before…so that was a nice confidence builder.
 .
.
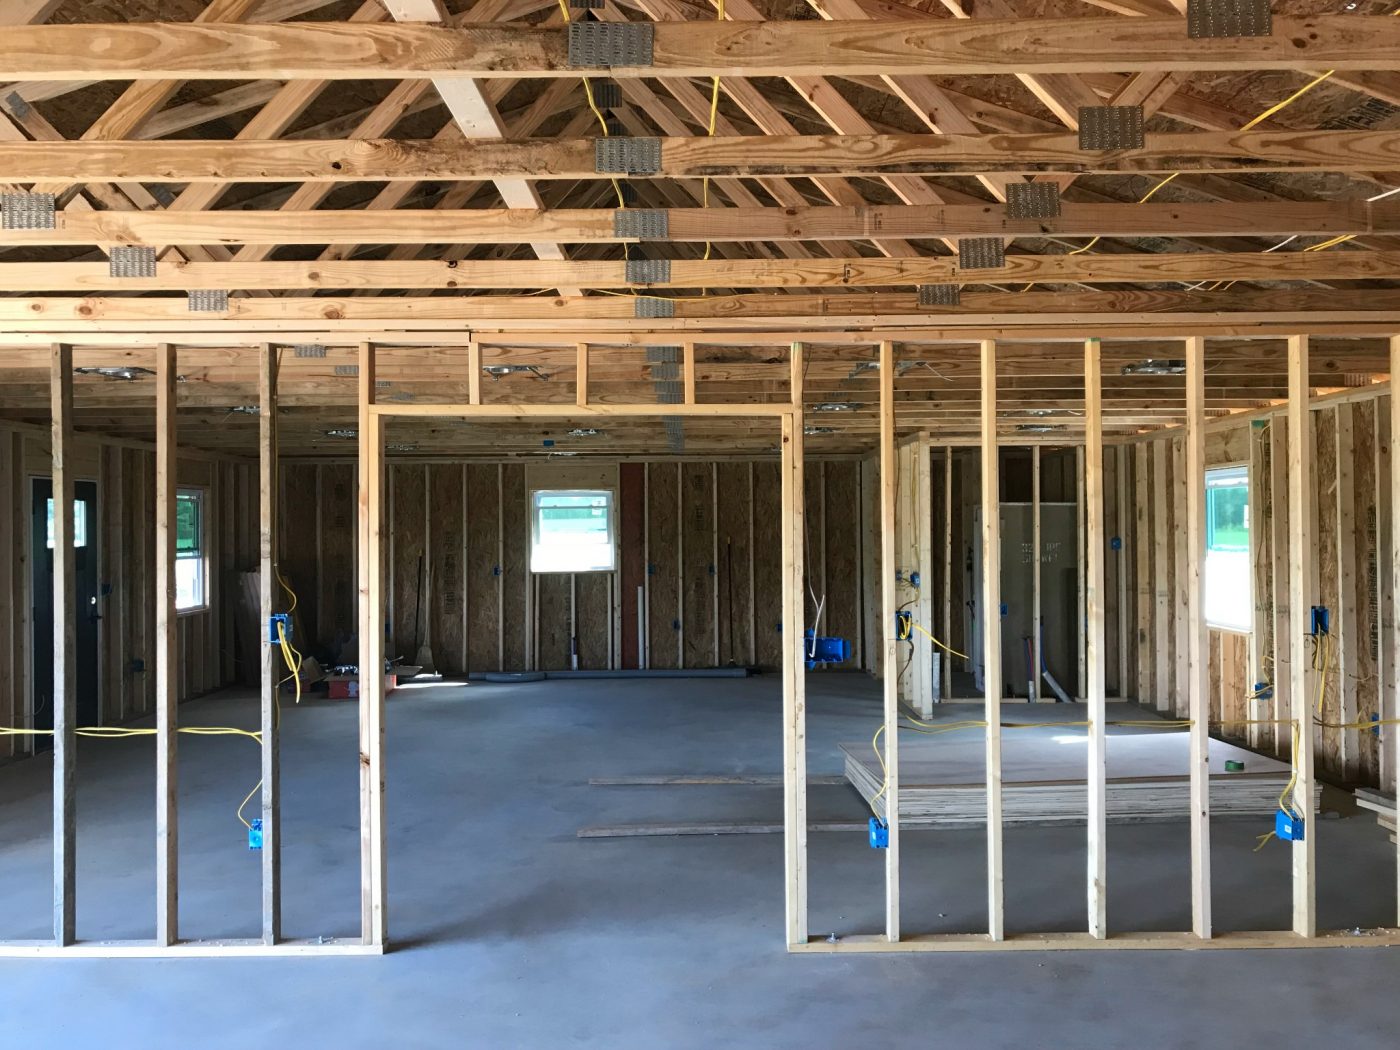
So now that we were filled with pride and momentum and the thought that we can totally do this and it will be easy and awesome and everything else will go quick like the walls, we headed straight into the electrical part of the project. BUT, we quickly realized that wasn’t going to be anywhere close to “easy and awesome and go quick like the walls.” It took 12,735 trips to the hardware store, approximately $1.34 million, and well over a week to get all the wires run, and the meter and breaker boxes mounted.
Okay, so I may be exaggerating, but not by much. Seriously…wire is CRAZY expensive (the wire for the stove alone was over $200) and basically everything in a kitchen has to be on it’s own circuit. That means the wire has to be run from each individual outlet in the room all the way back to the breaker box on the other side of the garage…above all the trusses…in 100 degree weather…with no air flow. HA.
.
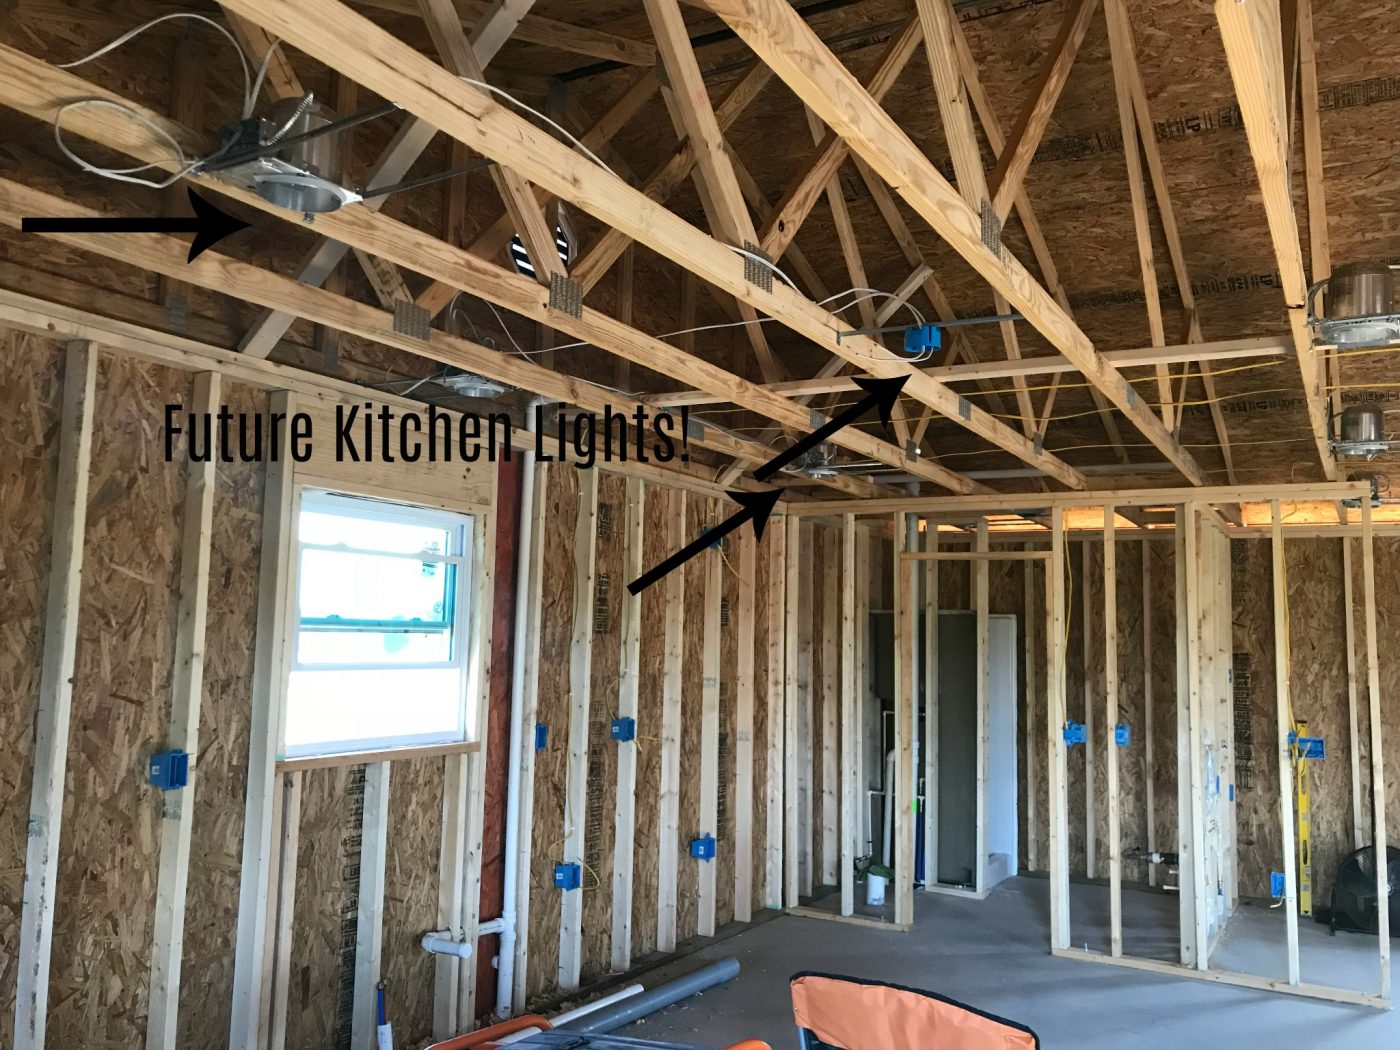
But, you gotta do what you gotta do and we had to get the outlet boxes mounted, the can lights hung and run the wires and we had to get it all done ASAP so that we could 1. get inspected to get power to the house and 2. get inspected so we can move on to hanging the drywall. (You can’t cover up the wiring until it’s been inspected.) We spent the rest of our week running wires and mounting our new breaker box. Not exactly exciting work, but definitely necessary. I promise next week will get a little more exciting. But when we are finishing our apartment out all by ourselves, sometimes it’s slow going.
While Danny mounted the outlet and light switch boxes, I hung the can lights and the dining room light boxes. Now that I’m typing this out, it really doesn’t seem like we did much work, but I swear, we did. While I’m only sharing about the kitchen here, do keep in mind that we are actually working on the entire house at the same time. SOOOOO don’t think we are slacking too bad :).
So that brings us to the end of week one. So far, our updated to do list has two things marked off:
Install divider wall to separate kitchen and bathroom
Wire light fixtures, outlets, switches
.
Because our to do list still seems long and overwhelming, and after a week we’ve only gotten two things marked off, I decided to add a few things to the list that I wasn’t expecting I would have to do just so that I could mark them off. These things included:
Drink +25 bottles of water and Gatorade in three days (it’s HOT out there you guys)
Find a spot to use the bathroom in a soy bean field in the rain because we have no functional bathroom yet (just…don’t ask. Also, see the previous item listed above haha)
Find (and wear continuously) a tool belt that fits my kid sized waist
Mis measure all the can lights (multiple times) then decide to just leave them in the wrong locations
Climb a ladder 26,128 times
Bust my finger with a hammer
Burn my leg with a hot concrete drill bit
Break out the emergency stress chocolate (twice)
.
It seems like a much more productive list when you look at it now 🙂
.
Next week will be more exciting and will at least look a lot different than it does now. Next week, we will get an electrical inspection, a new well dug, insulation and drywall! That is…if everything goes as planned 🙂
.
Stay tuned! Until next time, happy renovating 🙂

sweetfe says
Go Girl! Did you remember the electric for the garbage disposal? Are you getting a tankless water heater? Or considering a point of use water heater? Will you have a laundry room or will you put your washer and dryer in the bathroom? If so…that is another run (or 4). I am very impressed with all your accomplishments. I *think* electricians normally figure out how many runs (individual wires) will be needed ….and then tape them together and pull the whole bunch once. I am pretty sure my timing for this info is pretty late…but food for thought for next time. I really am in awe of your project and all you have accomplished!
Shara, Woodshop Diaries says
Thank you so much! We have an electric water heater in the corner of our bathroom and we didn’t opt to install a garbage disposal. Our “laundry” is just a little nook area on the opposite side of the bathroom wall. We ran all our wire runs individually from the panel to the outlets/lights. It was a short distance and we didn’t have multiple spools of wire to tape together to pull. Since it’s just a small space, it wasn’t a huge deal. Thanks for following along! I’ll have all the details of the house and a tour coming out as soon I I get everything finished up in the rest of the house 🙂