This DIY Trash Can Cover post is sponsored by Build Something. This post contains affiliate links. See policies.
I don’t know about the weather where you guys live, but I think the two years since we built out garage house have been the windiest two years I can ever remember. Everyday seems to be like 40 mph winds around here.
.
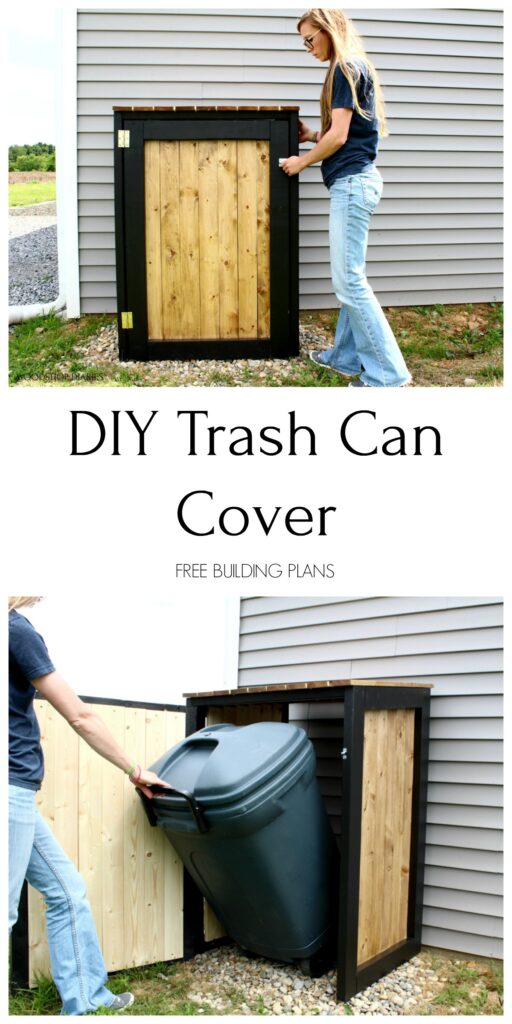
Luckily, we don’t have a lot of things outside that can blow around…EXCEPT our trash can. It’s been somewhat of a battle trying to keep it upright and in our own yard.
.
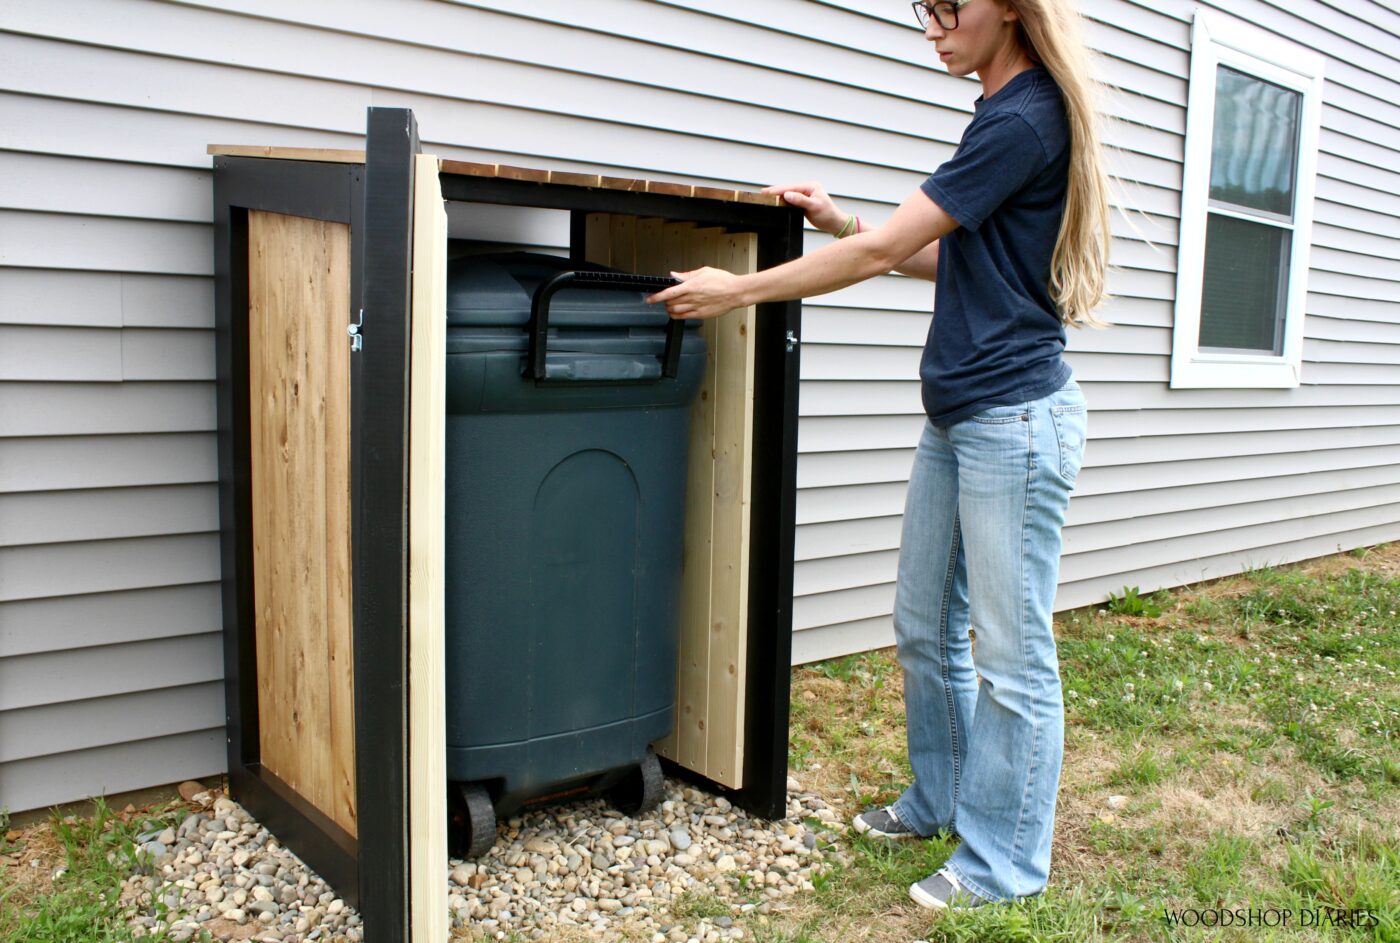
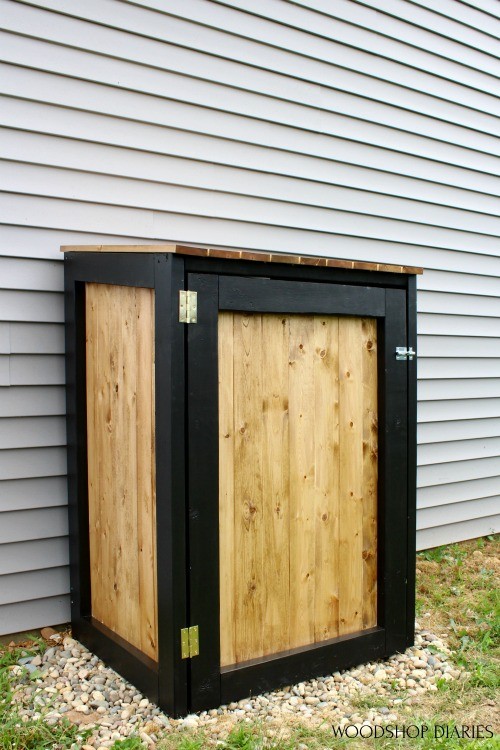
So I built a simple wooden trash can cover box to keep it stored away in next to the house. Besides keeping it contained, it is a lot nicer to look at than our old, ugly plastic can…I really don’t know why I waited so long to build this.
.
I’ve partnered with my friends at Build Something to bring you the free printable plans for this project and I’ve got the video and details below:
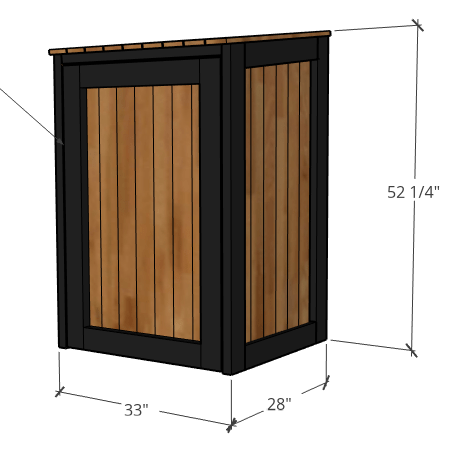
Okay, let’s get building 😊 This project accommodates trash cans about 44″ tall, 24″ deep, and 28″ wide. Overall finished trash can cover dimensions are seen here:
For this Trash Can Cover, You Will Need:
- (5) 2x4x8
- (13) 1x4x8
- Miter Saw
- Drill
- Pocket Hole Jig
- 2 ½″ Blue Kote Kreg Pocket Hole Screws
- 1 ¼″ exterior wood screws
- Hinges and Latch
- Exterior Finish As Desired
NOTE: If you want this to last practically forever, I’d recommend using treated wood or cedar, but our current home is a temporary living situation and we probably won’t need it for too long, so I used regular untreated lumber. I did finish it with outdoor sealers and paint, though, so it should still last us at least a couple years, especially if I reapply finish each year.
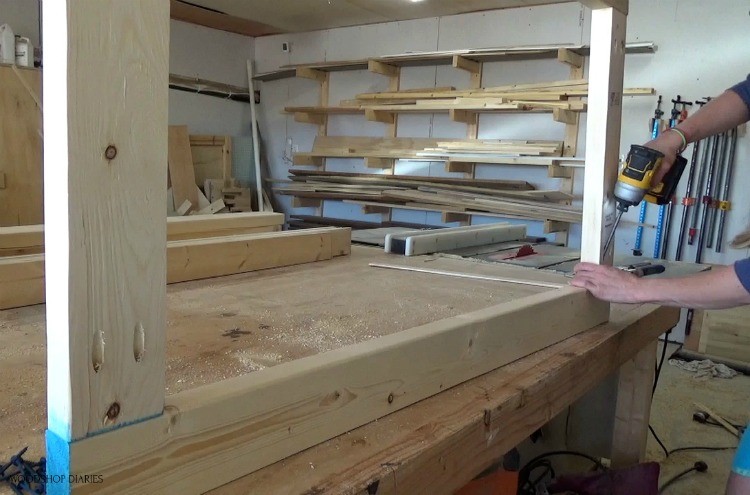
Step 1: Assemble Side Frames
To get started, I began cutting down my 2x4s to create two frames for the sides. I wanted the top to slant slightly toward the front, so I cut the top pieces with a 7 degree angle on the miter saw. All of the dimensions and details are in the plans found here on Build Something.
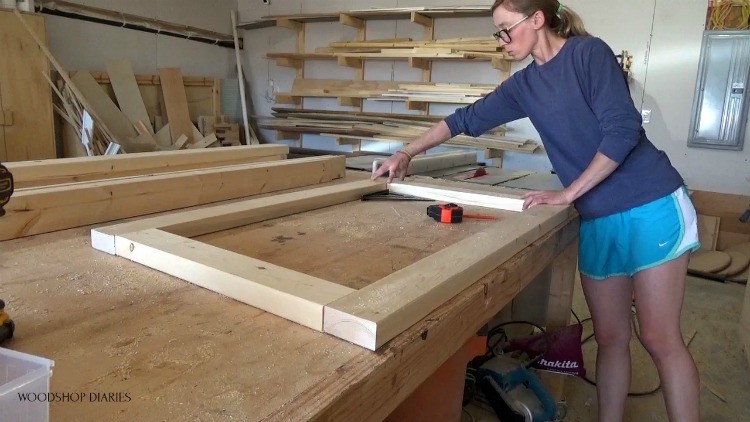
Once I had my pieces cut for the side frames, I used my Kreg Jig to drill 1 ½” pocket holes into the ends of the top and bottom piece, then attached the frame together with 2 ½” pocket hole screws. By the way, I used the Kreg Blue Kote outdoor screws for this to help prevent them from rusting since it’ll be outdoors.
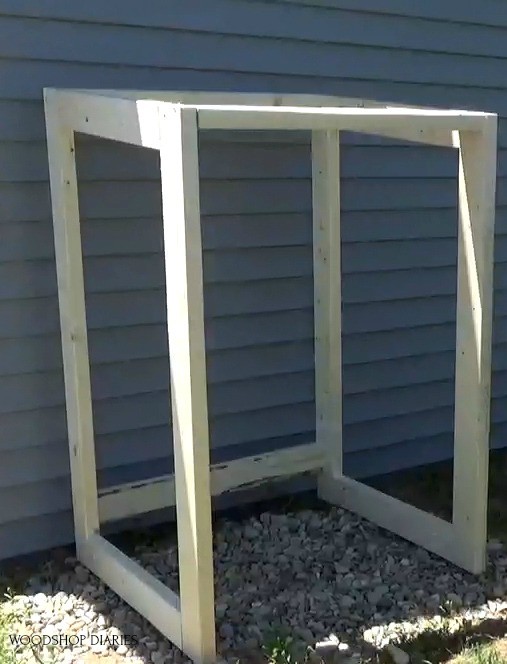
Step 2: Assemble Trash Can Cover Frame
After both frames were assembled, I cut three more 2x4s to put the two frames together.
.
I simply screwed these in place using 3” decking screws. You could also use pocket holes here if you didn’t want to see the screw heads–that’s what’s shown in the plans. But I was running low on Blue Kote screws and my order for new ones hadn’t arrived yet. I would have preferred pocket holes here, but it is what it is.
I installed two of these 2x4s at the top and one on the back edge towards the bottom. I didn’t install this all the way at the bottom, so the board wouldn’t be sitting on the ground…just to help protect it from moisture.
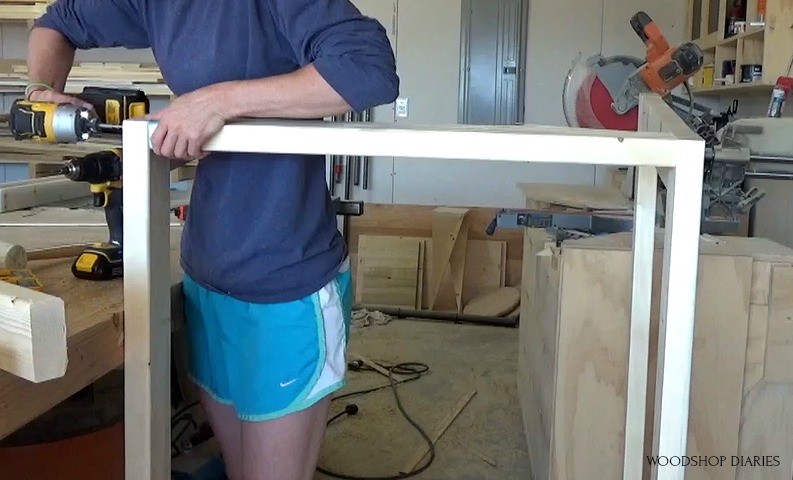
Step 3: Assemble Door Frame
Again, just like the side frame, I built the door frame from 2x4s and used pocket holes and pocket hole screws to assemble.

Step 4: Finish Trash Can Cover Parts Separately
Once the box frame and the door frame were together, I applied a couple coats of exterior grade primer and paint. It’s a lot easier to paint now than later after I add the slats.
.
If you plan to stain or paint the slats as well, I suggest doing that now as well…I didn’t and it made it much harder later on.
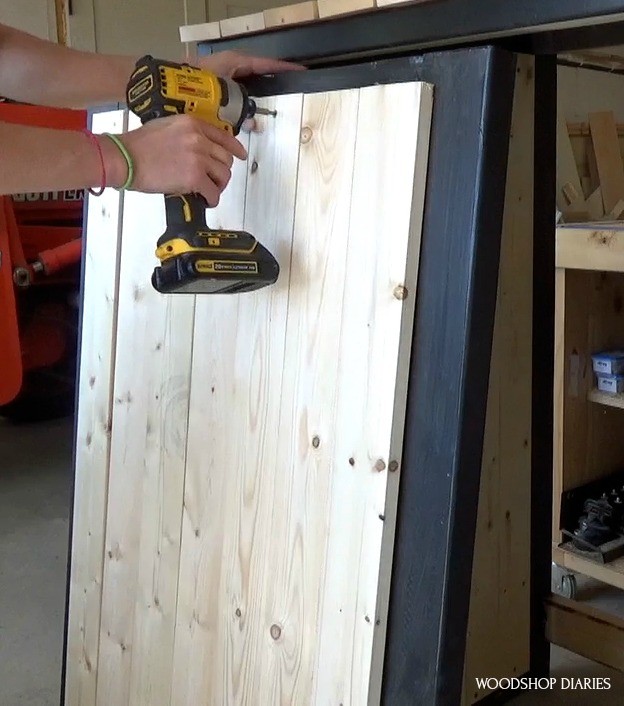
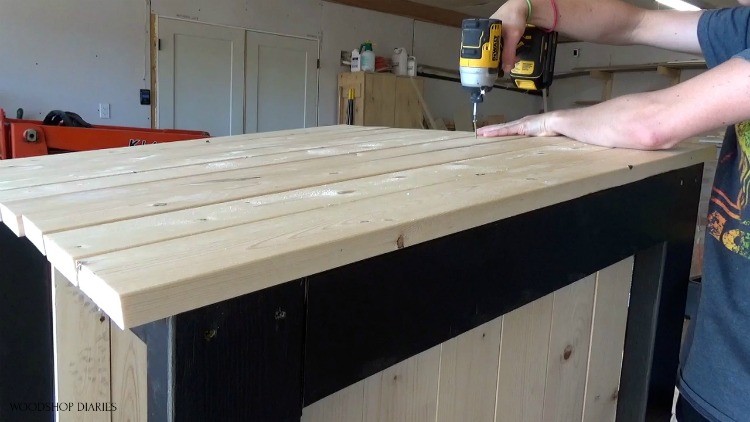
Step 5: Install Side Panel, Door & Roof Slats
Once the paint was dry, I cut and installed 1×4 slats across the side panels. I installed these with 1 ¼” decking screws at the top and bottom. Since the sides were slanted, I cut each consecutive slat ½″ longer as I worked toward the back.
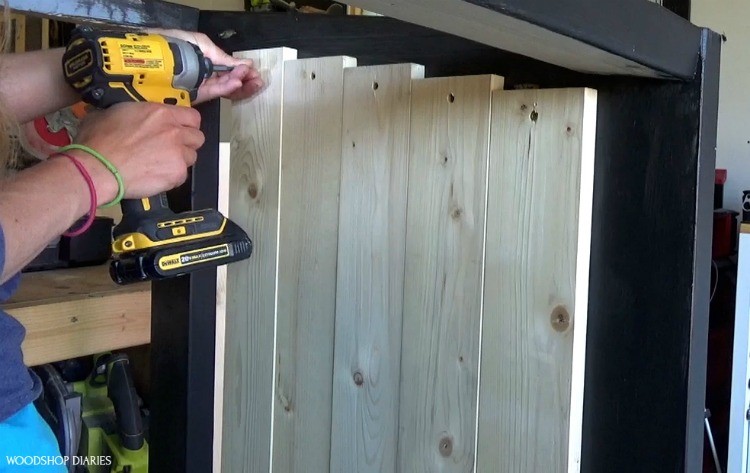
Then, I did the same for the door. I centered these boards over the opening and screwed in place.
Finally, I added the roof slats the same way. I left about 3/16″-¼” gaps between the roof slats to help with water drainage, although most of the water should run off since I slanted the top.
I should have stained these before I installed them, but I couldn’t decide if I liked them better with just a clear coat or if I wanted to stain them. After thinking way too long about it, I finally decided I thought it would look better stained. So I stained the top boards and the door and side slats with Minwax Early American.
.
Then I brushed on some Minwax Helmsman clear coat over all of the unpainted wood—both inside and outside. I clear coated everything to protect it from moisture. Again, I know this will eventually rot, but if protected well, it will last as long as we probably need it to while we live here.
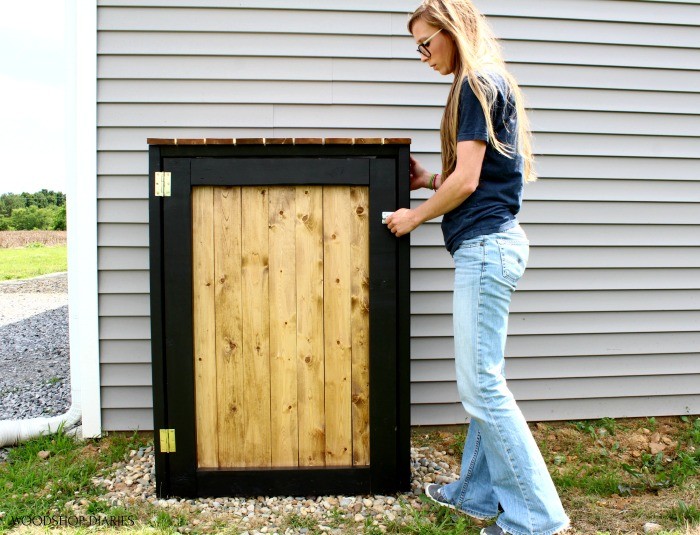
Step 6: Install Door Onto Trash Can Cover
Once all the finish was dry, I brought it outside and set it in place. We had some leftover landscape rock that we set it on. It think this will help drain the water underneath it, and it also helped level this little area out some. I attached the hinges on the door and added a little latch to keep the door shut. And it was finished.
I’m glad to be able to hide the trash can, but I’m more glad I don’t have to be chasing it down in the windstorms anymore haha.
If you wanted, you could definitely make the top as one piece with hinges so it opened up, but I opted to just have a door. I didn’t think we would use the lid much…mostly because I would have to rest it on my head or against the siding while I used both hands to open the trash can and toss the bag inside. And I didn’t want to ruin my hair or my siding haha.
.
So if you’d like to build your own, be sure to head over to Build Something for the free plans! And if you want to save this for later, be sure to pin it!
Until next time, happy building! 😊