
Fall is my favorite. Tobacco barn smells, pumpkin spice EVERYTHING (except keurig coffee because I tried that once and it was NOT good…), colorful leaves, corn mazes, chili, and hoodies. Plus fall is my birthday season. Yes, I celebrate my birthday for an entire season….not just one day or one month, but the whole season! Just kidding! I’ll be 26 this year in October and once you get that old, your idea of a good birthday is eating leftover chili and a pumpkin pie blizzard from Dairy Queen while watching Charlie Brown and the Great Pumpkin on DVD and going to bed early. And who could do that for an entire season? Well, actually, I probably could….
Anyway, speaking of pumpkins, my husband and I went shopping this weekend to get out of the house and ran across this cute little thing at Kirklands.

And it could’ve been all mine for the low price of…..$50. Ugh. Nowadays, since I work to live (and not live to work….trust me, there is a difference), I think of prices in terms of hours at work. So in order to buy this wagon, I would have to work how many hours to pay for it? Ugh too many….
So I did what any normal person would do, and I took some pictures and went home and made my own. For free! Well, I mean the wood costs some, but I had scraps and paint already on hand.
So here’s what I did:
I grabbed some 1×4 scraps (about 8″ long) and laid them on my work bench side by side and traced out a “pumpkin” on them with a pencil. Then I used the jig saw to cut each board on the markings. I got in a hurry and already cut one piece when I remembered to take a picture. Note: this image is upside down.


Once all pieces were cut out, I sanded the edges smooth. Then, I cut a scrap piece of 1×6 a little longer than the width of the pumpkin, so about 16″. I used a nail gun to nail the bottom of the each piece of the pumpkin to the 1×6. I took two more pieces of 1×6 scrap about 6″ long and nailed it on the sides as shown below.


I did the same steps for tracing and cutting out the pumpkin again and nailed them on the other side the same way.
Then I took three 1x4s about 7″ long (a little shorter than the pumpkin that is nailed on) and traced out the middle part of the pumpkin. I basically made two “crescent moon” shapes (one for each side) and cut curves on both sides of the middle piece so it looks like this:

I traced these shapes onto another set of three 1×4 about 7″ long for the other side and cut them out. Then I used wood glue and glued and clamped the pieces on each side and waited for the glue to dry (basically I went to church, then came home and resumed haha).

I realized at this point that I didn’t have anywhere to put the wheels, so I took some small scraps and nailed them on the bottom so they stuck out a little from the sides.

Then I took some more scraps about 1×1″ and nailed them on for the handle. It doesn’t swivel obviously, but it’s just for decoration, so I wasn’t concerned.

For the stem, I cut two small pieces of scrap 1x and glued them on the top.

I used a compass (seriously from like fifth grade) to draw out small circles in some scrap plywood and cut them with a jigsaw.
Before I attached the wheels, I painted it in the living room while watching Last Comic Standing….the only show I make a point to watch. Last season was my fav. Rodman was hilarious!
Anyway, I mixed orange acrylic paint with a little brown for the pumpkin, and painted the bottom and the wheels black. The stems I painted with green acrylic paint mixed with a drop of brown as well. I didn’t paint I perfect…just kind of brushed it around. It’s not supposed to look perfect. That’s my favorite kind of project haha.

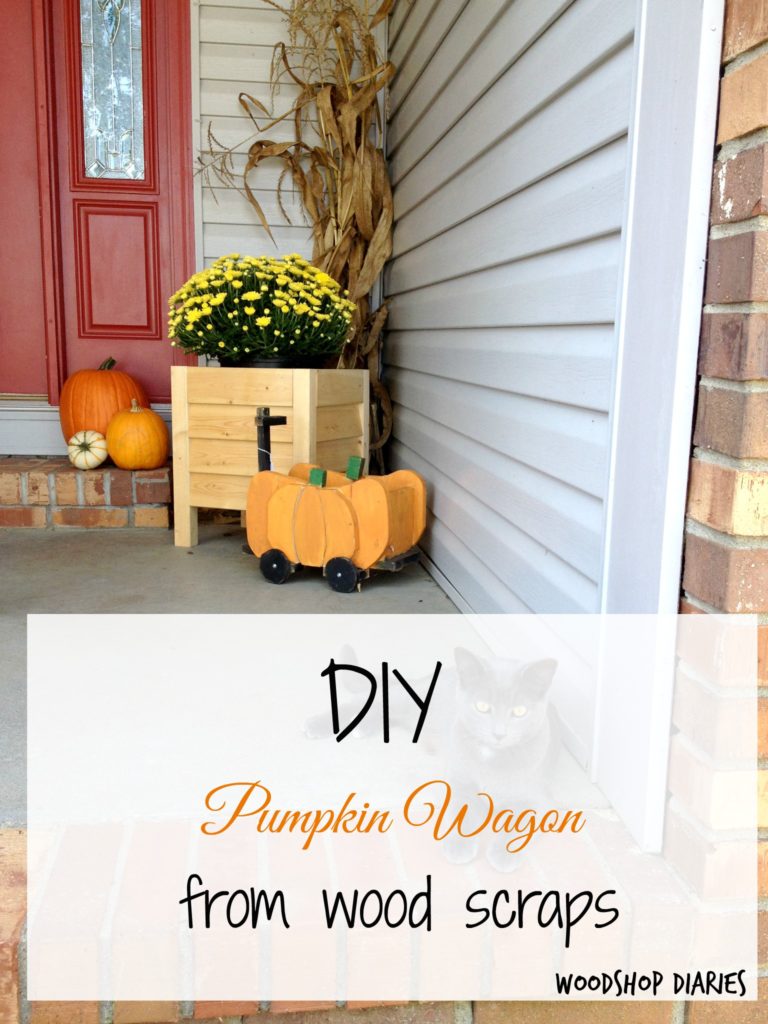
During commercial break, I took it to the shop and screwed on the wheels and ta da! Pumpkin wagon 🙂


So it may not be a 100% match to Kirklands’ version, but for a few bucks worth of scrap wood that I needed to find use for anyway, I’d say it’s pretty cute.
If I can build it, so can you. Now it’s your turn! Happy fall building and decorating! I’m going to put on my hoodie and pretend we are already there! 🙂

Jim v says
Nice! Thanks for the info can’t wait to build one
Shara, Woodshop Diaries says
Glad you enjoyed! Have fun making your own!
Ashley says
Aww, this pumpkin wagon is super cute! I love it!
Shara says
Thank you! I had a lot of fun putting it together!
Re-Fabbed says
You kill me with how talented you are!!! This is AWESOME!!!
Shara says
Thank you! I love to figure out “how’d they build that?” Haha