Want to see how I built this DIY entertainment center for my parents? You’ve come to the right place 🙂
My parents built their house about 20 years ago and while Dad is indifferent, mom is having a “20 year house crisis” and everything must be repainted and remodeled and restyled. *rolls eyes…*
.
So you can imagine that I keep getting roped into it (just like with this dining table). But this time, it was a fun project I didn’t mind tackling for mom and dad’s living room.
.
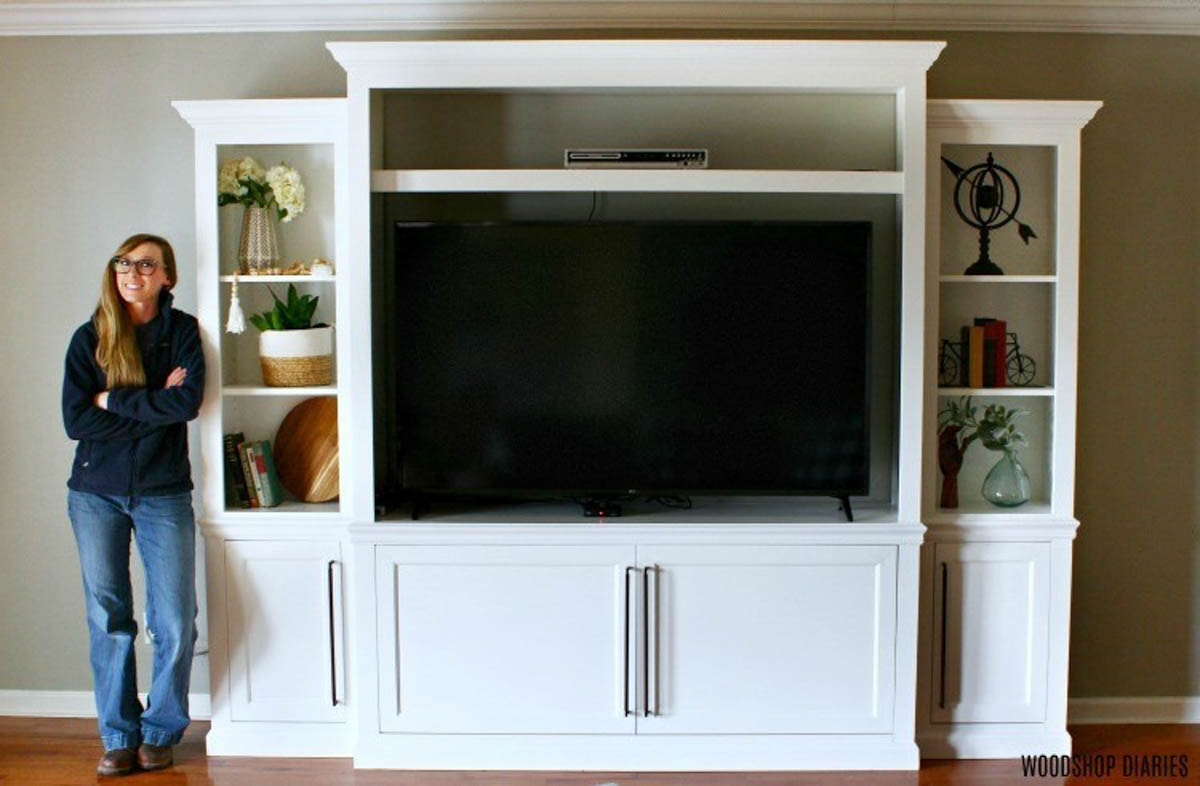
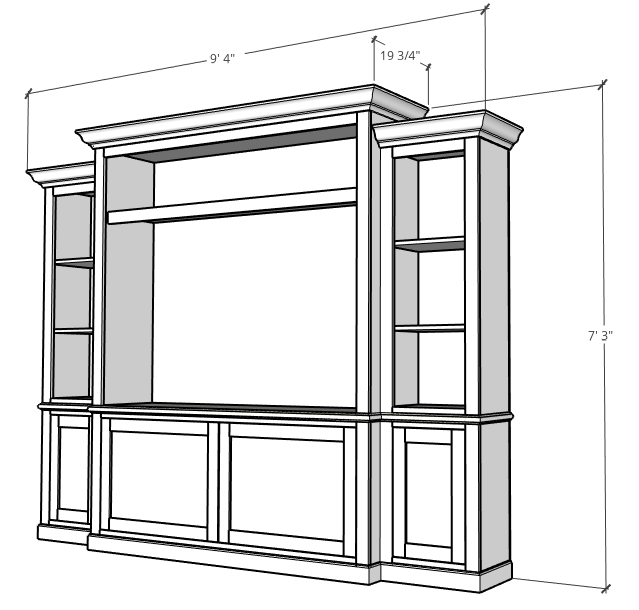
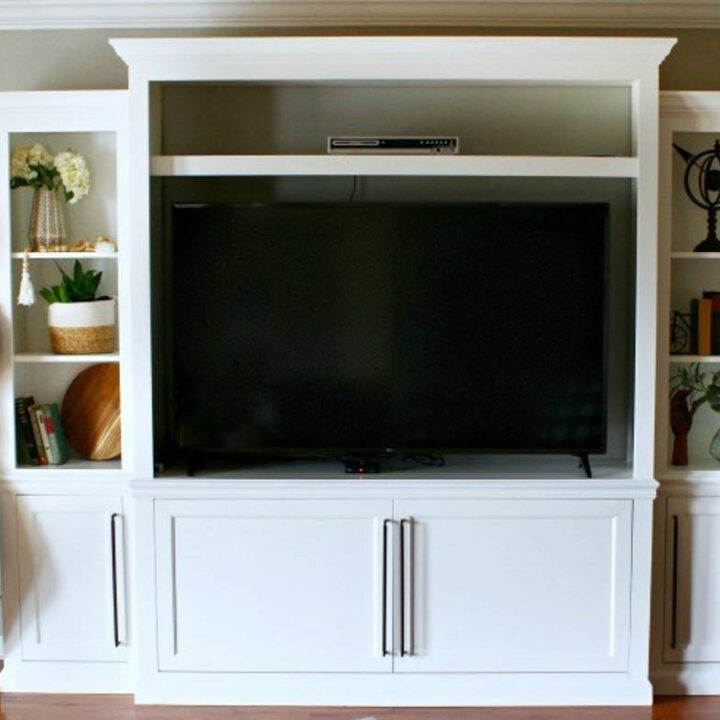
I built this DIY entertainment center with some extra storage and some shelves to make it look a little more substantial in their large space vs the little antiqued red dresser cabinet they used to have for a TV stand.
.
Dad’s got a big TV…Mom’s got a big entertainment center. I got a big project to build. It’s a win for everyone 🙂
.
I’m sharing the tutorial below, the video next, and the downloadable entertainment center plans here.
.
.
This post contains affiliate links. See policies page.
.
How to Build a DIY Entertainment Center
For this DIY Entertainment Center, you will need:
Materials:
- (3 ½) Sheets ¾” Plywood (Cuts for full sheets shown in plans)
- (2) Sheets ¼” plywood
- Crown Molding, chair rail molding (2 ½” wide), 3 ¼” baseboard molding (16’ of each)
- (12) 1x3x8 boards
- (2) 1x4x8 boards
- 1 ¼” Kreg Pocket Hole Screws
- Brad nails
- Wood Glue
- (4) pair concealed hinges (for inset doors on frameless cabinets)
- Door Pulls
Tools:
- Circular Saw
- Kreg Rip Cut or Saw Guide
- Miter Saw
- Drill
- Kreg Pocket Hole Jig
- Nail Gun
- Table Saw or Router (to cut dadoes for doors)
- Kreg Shelf Pin Jig
- Kreg Concealed Hinge Jig
.
Step 1: Assemble Side Cabinet Carcass Boxes of Entertainment Center
.
This project used 3 ½” sheets of ¾” plywood. So the first thing I did was cut these down to manageable pieces so I could more quickly assemble everything. You can find a plywood cut diagram in the plans here.
.

.
And if you want to know how to cut down plywood sheets, I’ve got a great plywood cutting guide here.
.
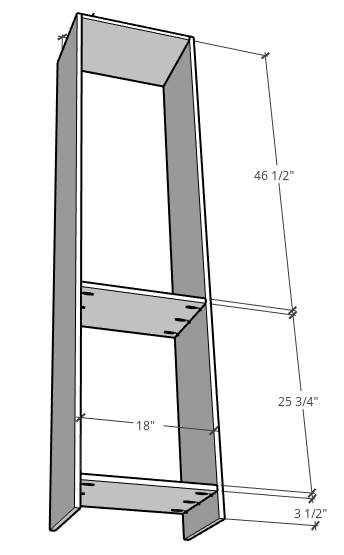
Once I had my plywood ripped down, I trimmed pieces to length to start assembling the two tall skinny side cabinets of this center.
.
In order to move it and get it from my shop to my parents’ house, I built this in three sections…two smaller side cabinets and one large center cabinet.
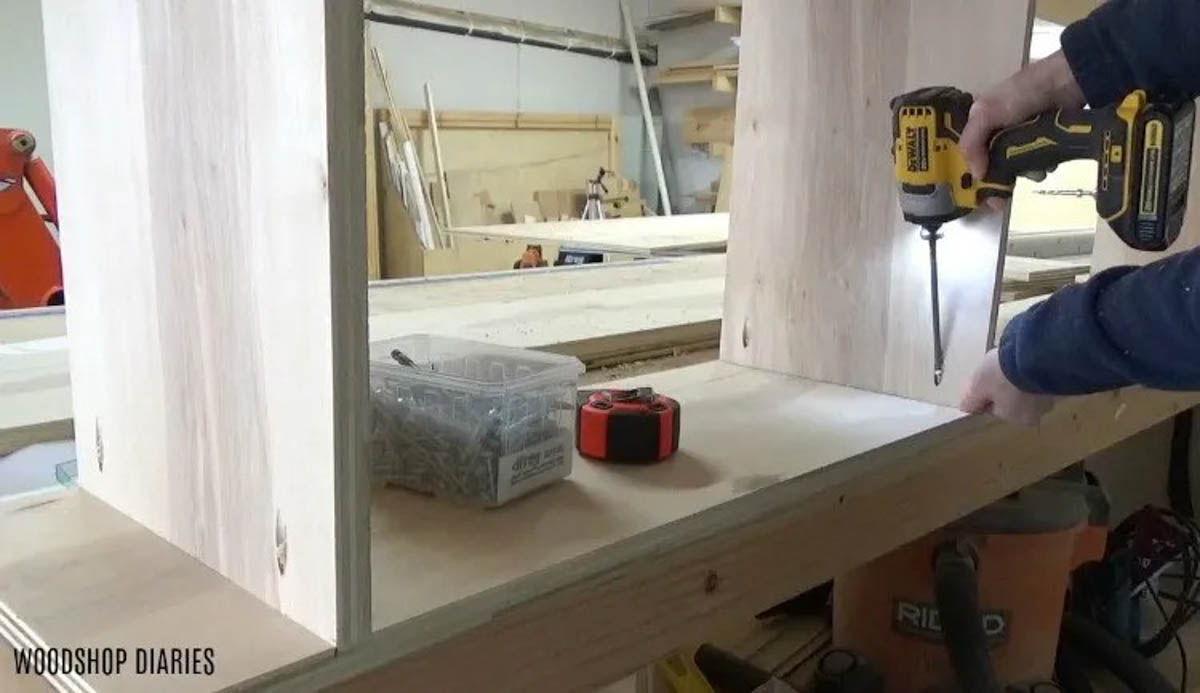
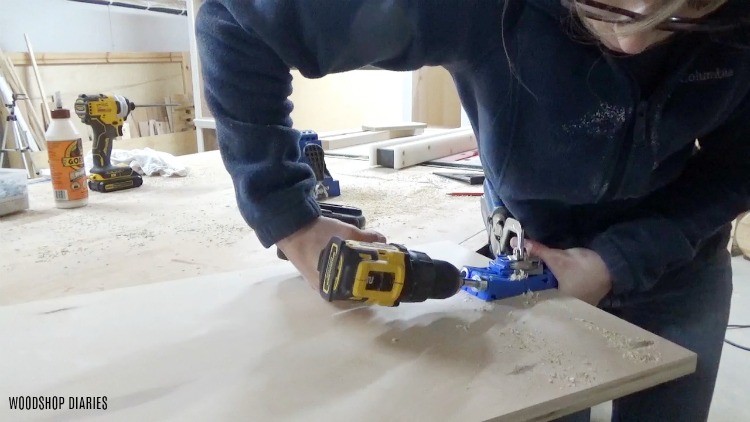
I assembled the small side cabinet carcasses identically using ¾” pocket holes and 1 ¼” pocket hole screws.
.
.
Step 2: Add Back Panel to Side Cabinets
.
Once the two carcasses were together, I cut ¼” plywood backings to staple onto the back sides. I purchased underlayment plywood for this because it was cheaper, but it was much rougher than ¼” birch plywood.
.

So just a helpful hint—splurge for the birch. It’ll look nicer once it’s painted.
.
Step 3: Attach Face Frame to Side Cabinets of DIY Entertainment Center
.
Now that the cabinets had a back, I began trimming 1×3 and 1×4 boards to put the face frame together. I used pocket holes and screws again to assemble the face frames for these cabinets.
.
.
I attached the face frames to the cabinets using wood glue and brad nailed them in place. If you wanted, you could also use ¾” pocket holes and screws to attach this from the inside of the cabinet OR simply screw them in from the front and putty the holes if you plan to paint.
.
.
Step 4: Add Trim and Molding to Side Cabinets
.
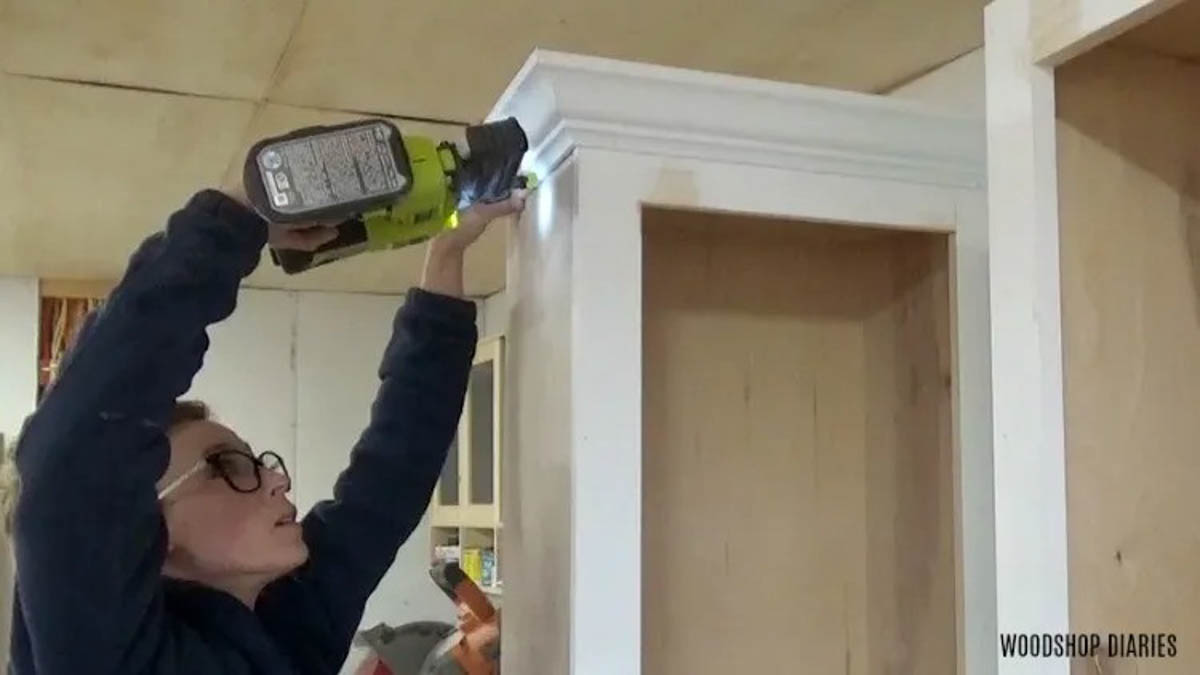
Now it was time to decorate them up with some fancy moldings.
.
.
I attached some crown molding on the tops, some baseboard around the bottom and some chair rail molding along the middle.
.
Since these cabinets will butt up against the middle cabinet sides, I only wrapped the molding around the front outside corners of each cabinet and I left the chair rail and baseboard ends where it will meet the middle beveled at 45 degrees.
.
(This isn’t necessary for the crown…just the chair rail and baseboard.) See what I mean?
.
.
I also wanted the chair rail molding to match up between all three pieces of this project, so I made sure to measure from the floor and line up the molding on each piece to make sure they will all be on the same level.
.
.
Step 5: Build Middle Cabinet Carcass Box
.
At this point in the plans, it’s time to add shelves and a door, BUT I did things out of order and moved onto the middle cabinet and just made all the doors and shelves at the same time later in the project.
.
.
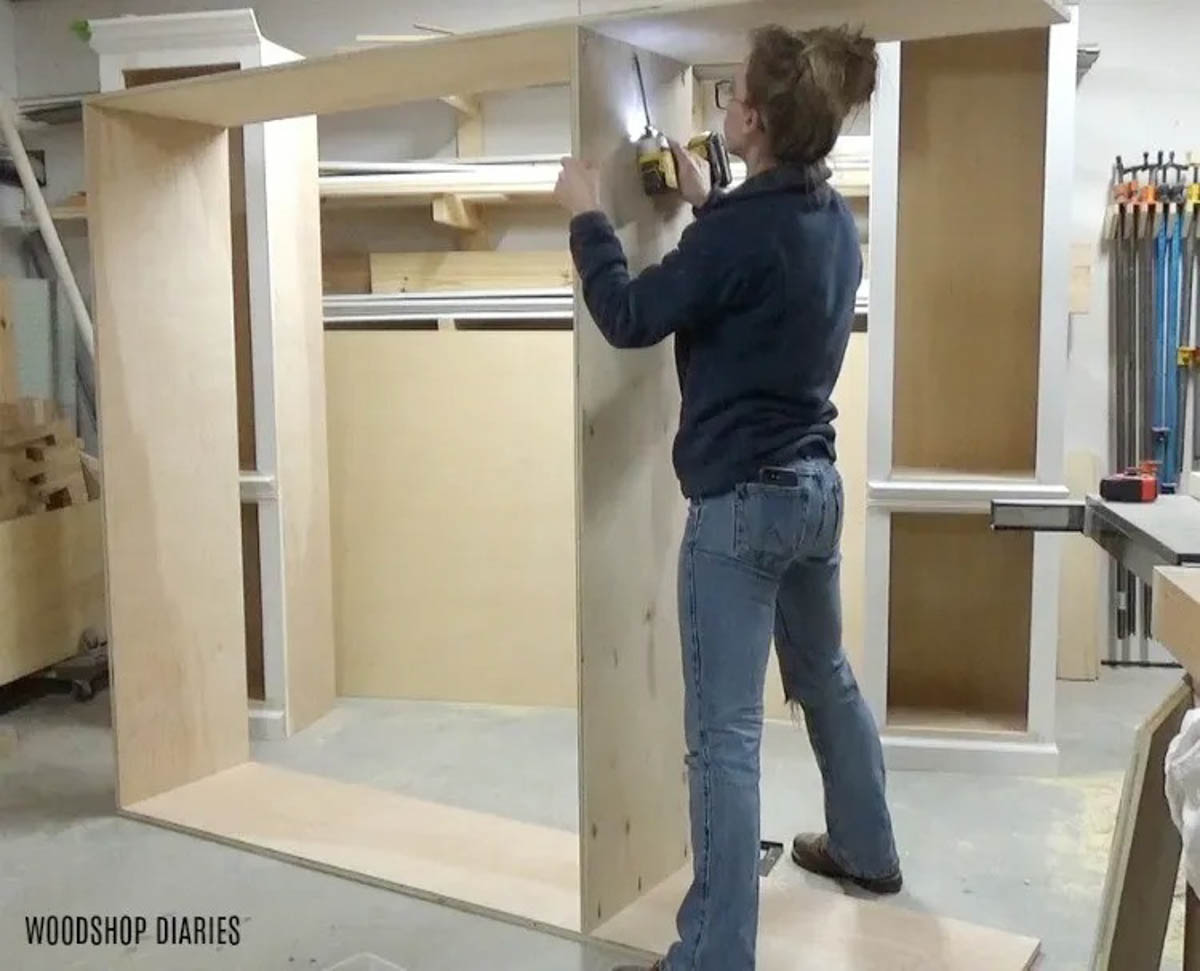
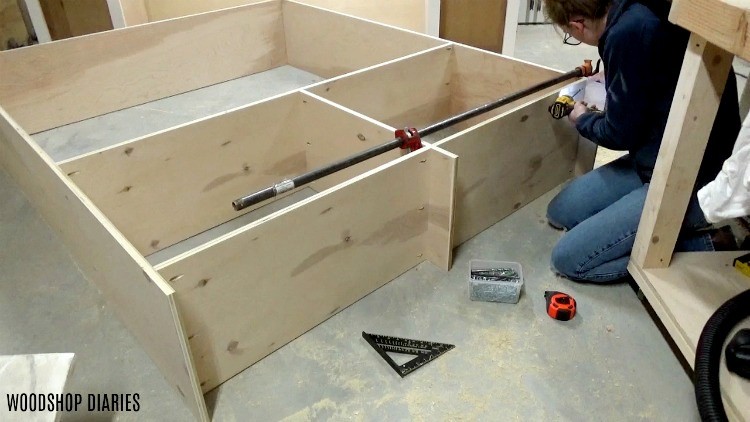
This thing was HUGE, so I couldn’t fit it in my K5 pocket hole jig because it hit the ceiling. So, I used my 320 jig instead. I drilled pocket holes as needed in order to assemble the middle entertainment center carcass.
.
This cabinet was composed of two side panels, a middle stationary shelf that the TV sill sit on, a divider panel, and two bottom panels. All dimensions and details can be found in the printable plans.
.
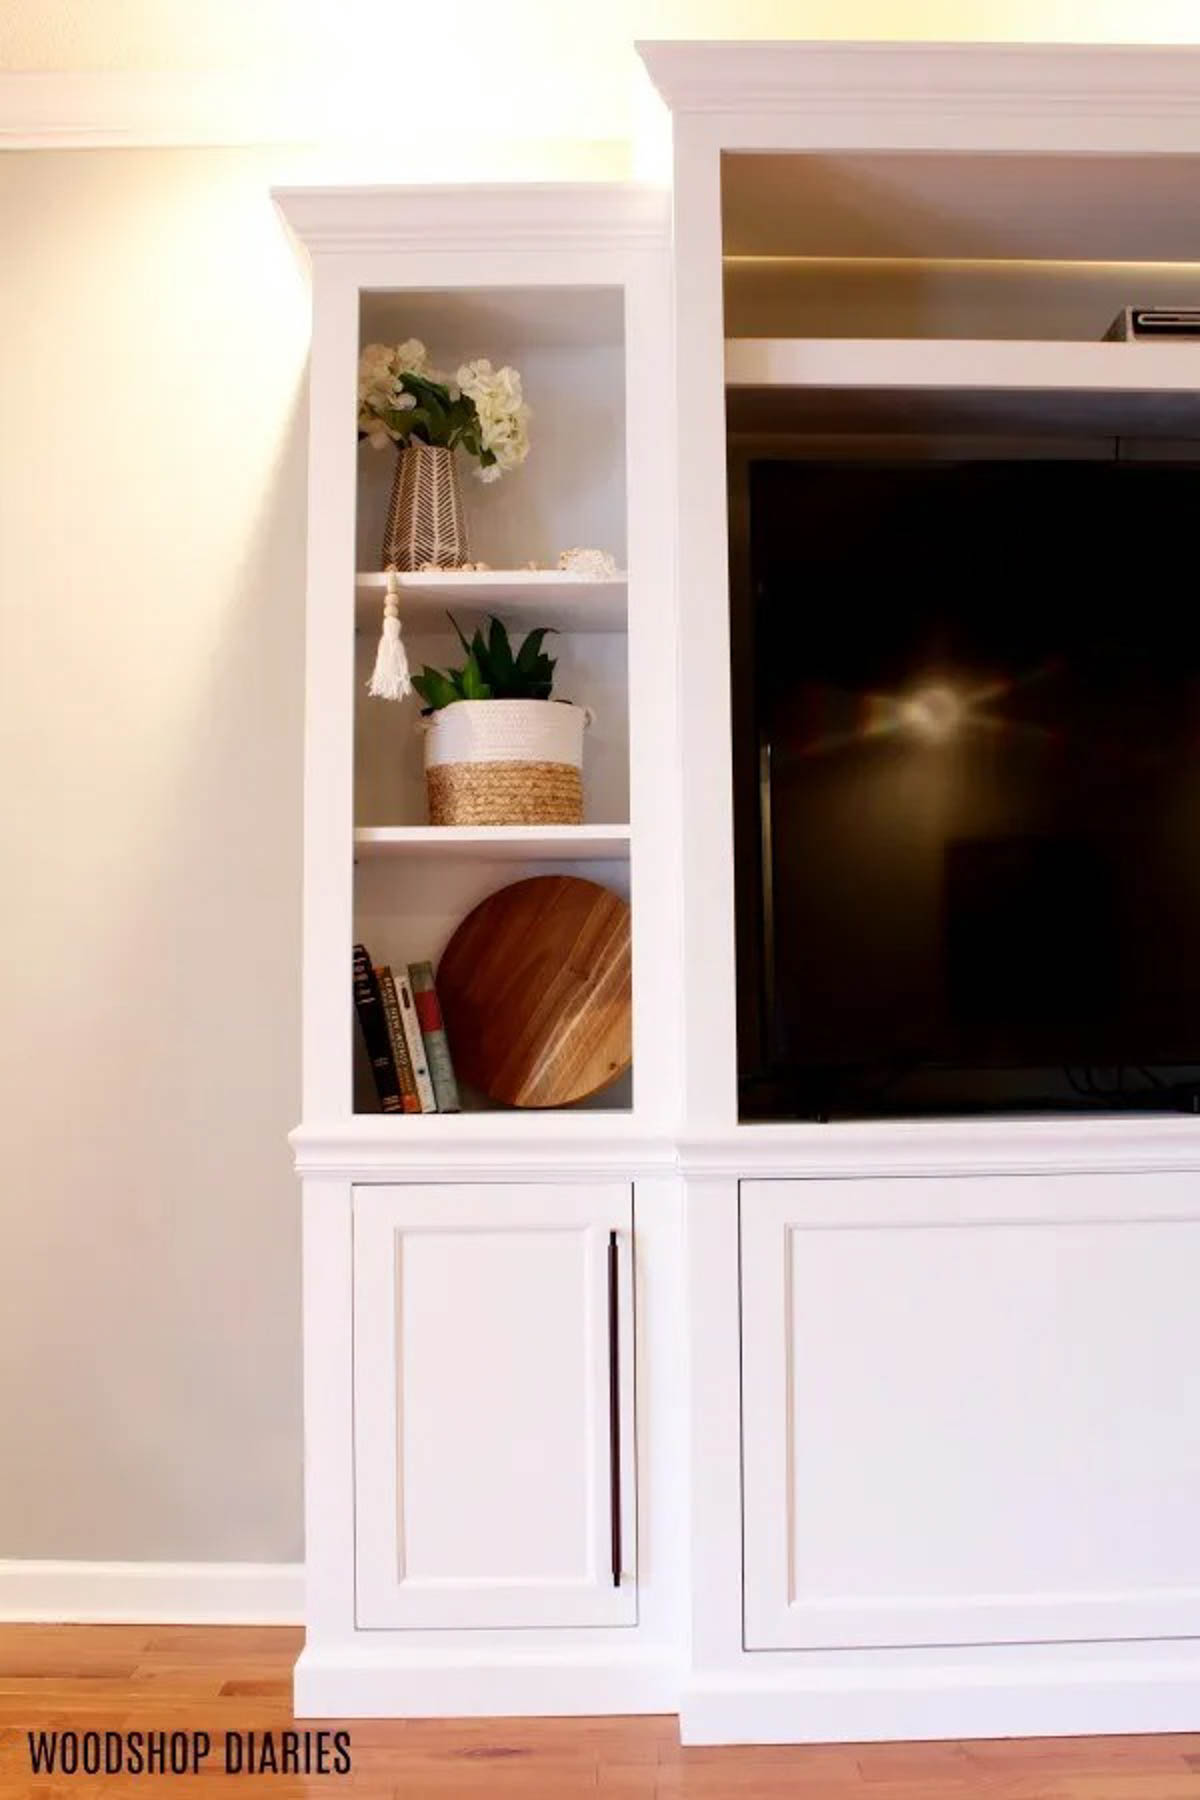
Also notice in the finished project that this middle section is deeper than the side cabinets.
.
.
Since this cabinet was so huge, I had to assemble it on the floor and maneuver it around between the tractor and my workbench. Clearly I need a bigger shop haha.
.
Step 6: Add Backing to Middle Entertainment Center Cabinet
.
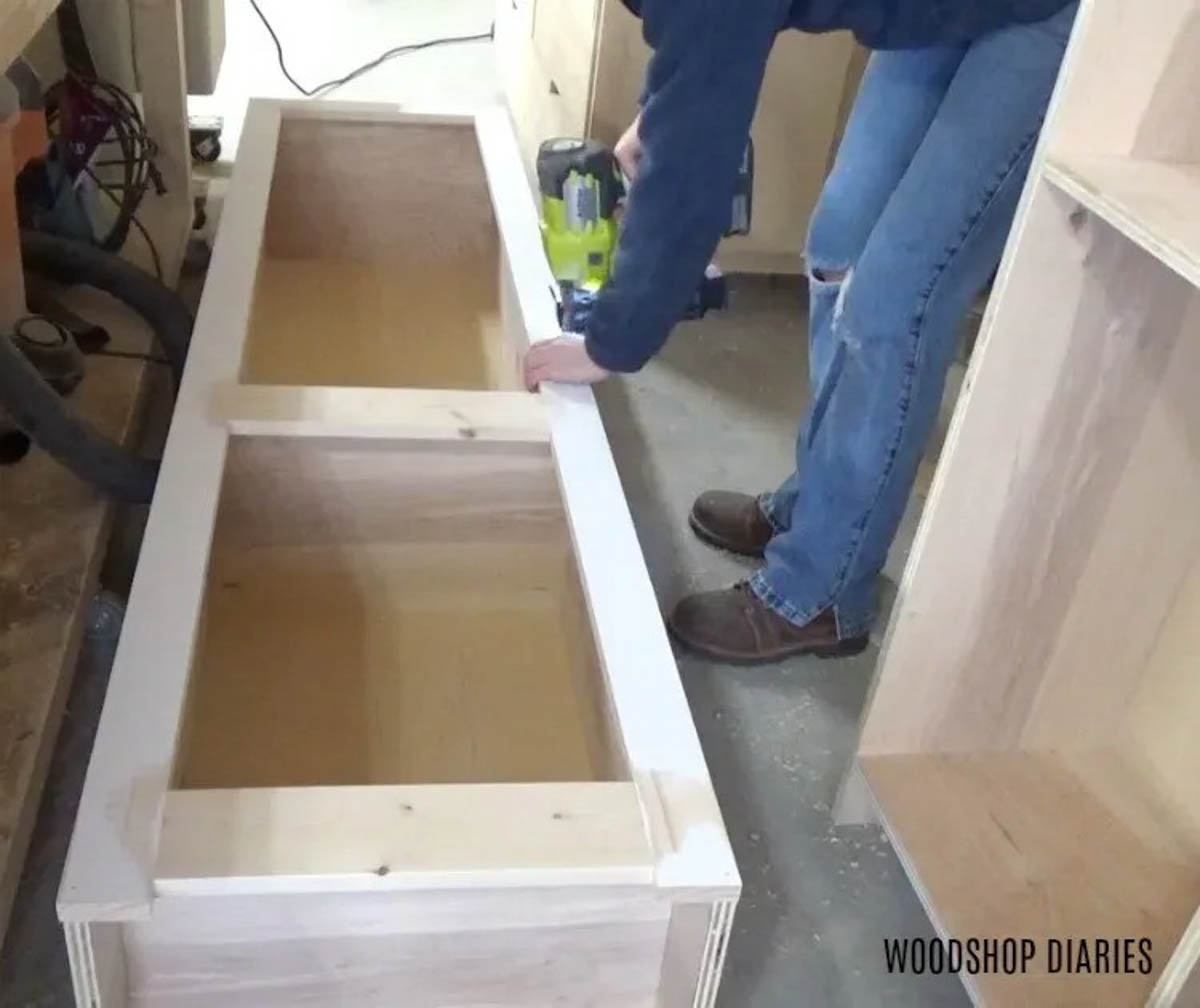
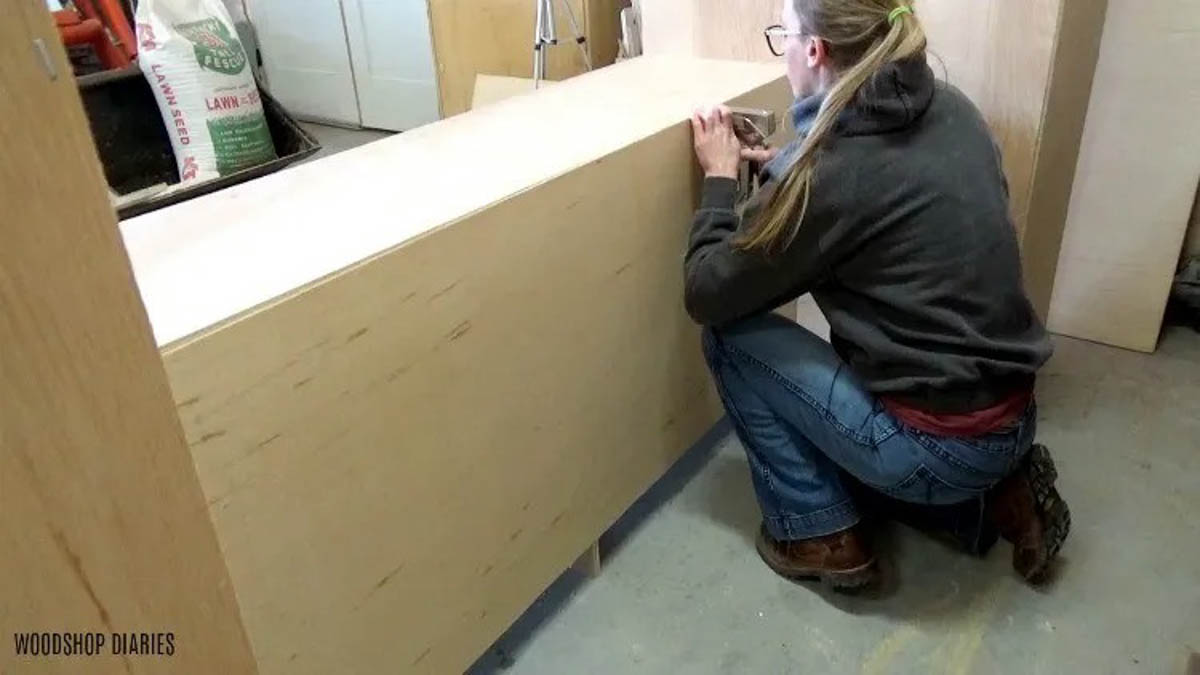
Once the middle cabinet carcass was assembled, I stapled a ¼″ plywood back onto the bottom cabinet portion of the piece. If I put a back on the entire piece, there would be a seam and I didn’t want to deal with a seam, so I only put a back in the lower portion.
.
Once we got it in place in their living room, I don’t think it’s noticeable. But, if you wanted to put a backer on the whole thing, feel free.
.
.
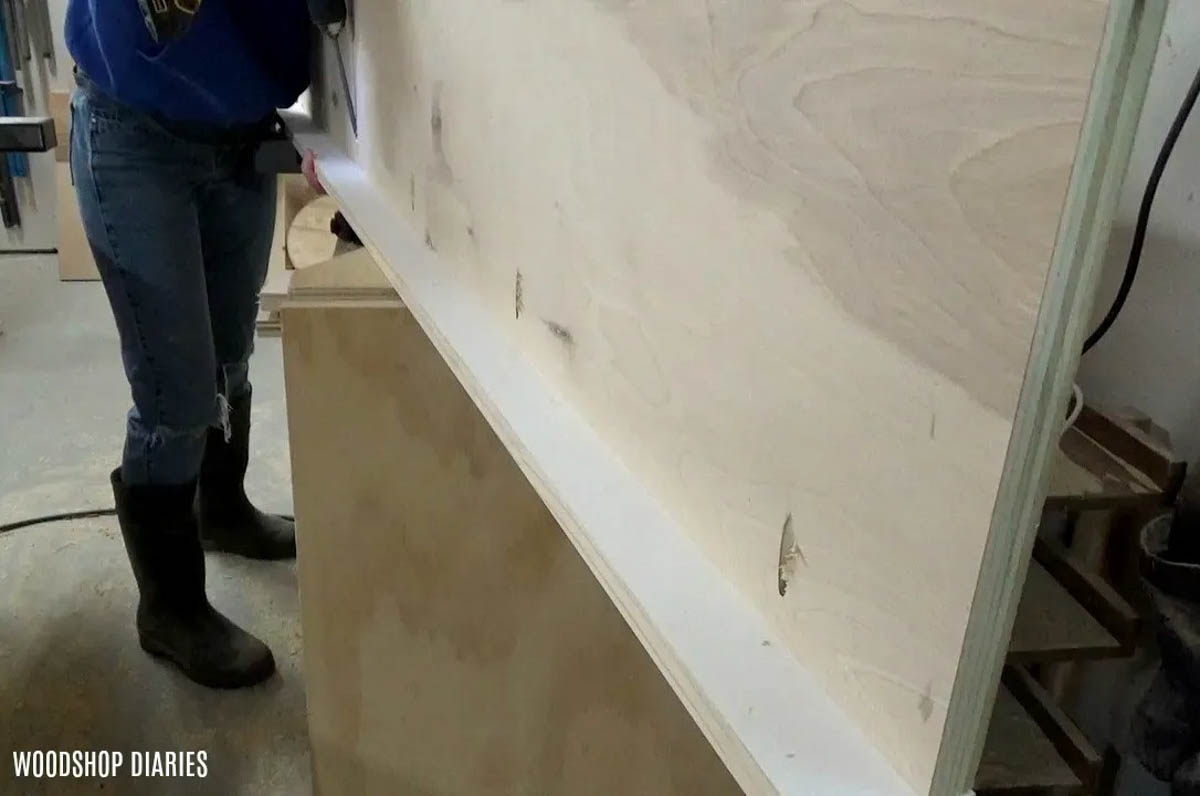
Step 7: Add Face Frame and Trim on Middle Cabinet
.
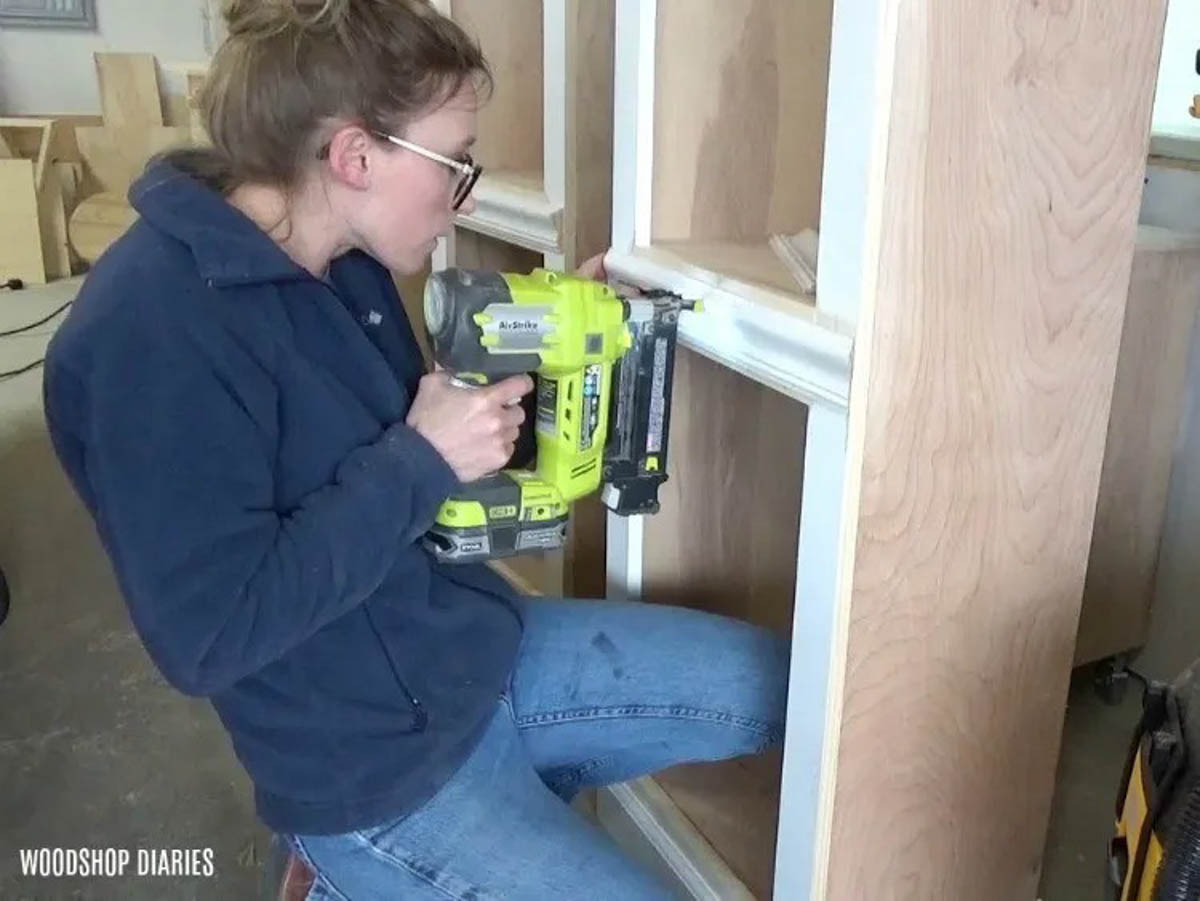
Now, just like with the side cabinets, I assembled a face frame next and attached using wood glue and brad nails.
.
This wasn’t so bad except, again, I had to do it in the floor. So now I know that when I get a new shop, I need more floor space and taller ceilings haha. Maybe one day.
.

.
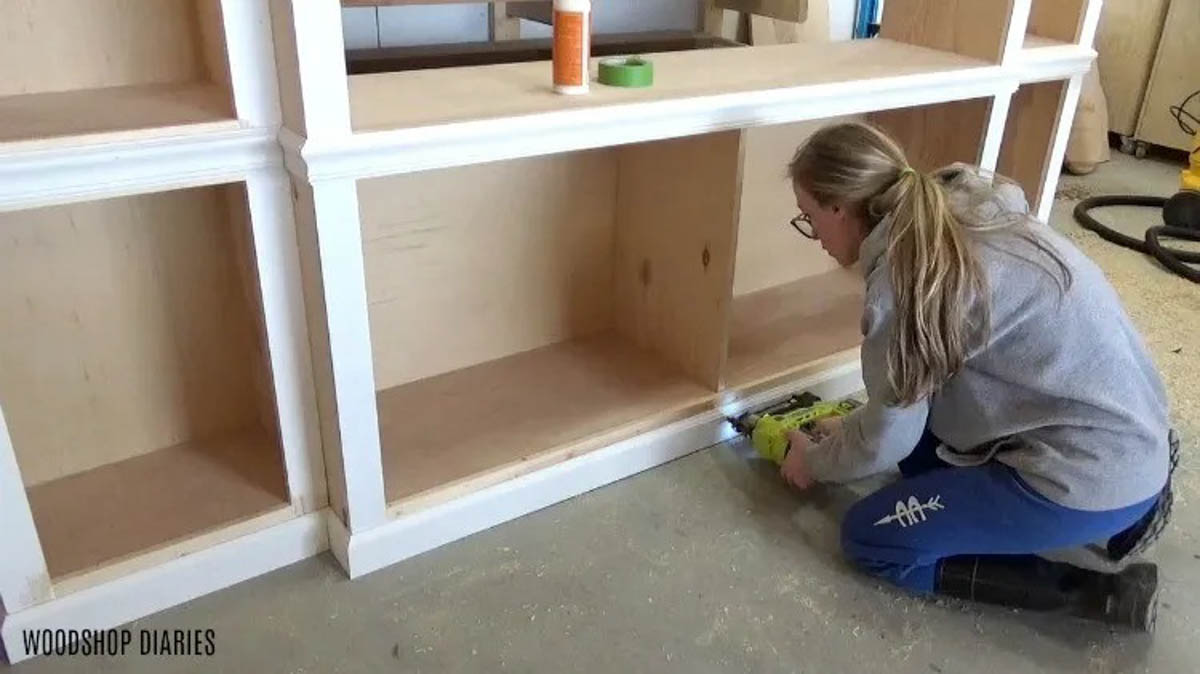
Once the face frame was attached, next was trim. I attached crown molding along the top of this cabinet on the front and down both sides, then attached baseboard and chair rail molding.
.
.
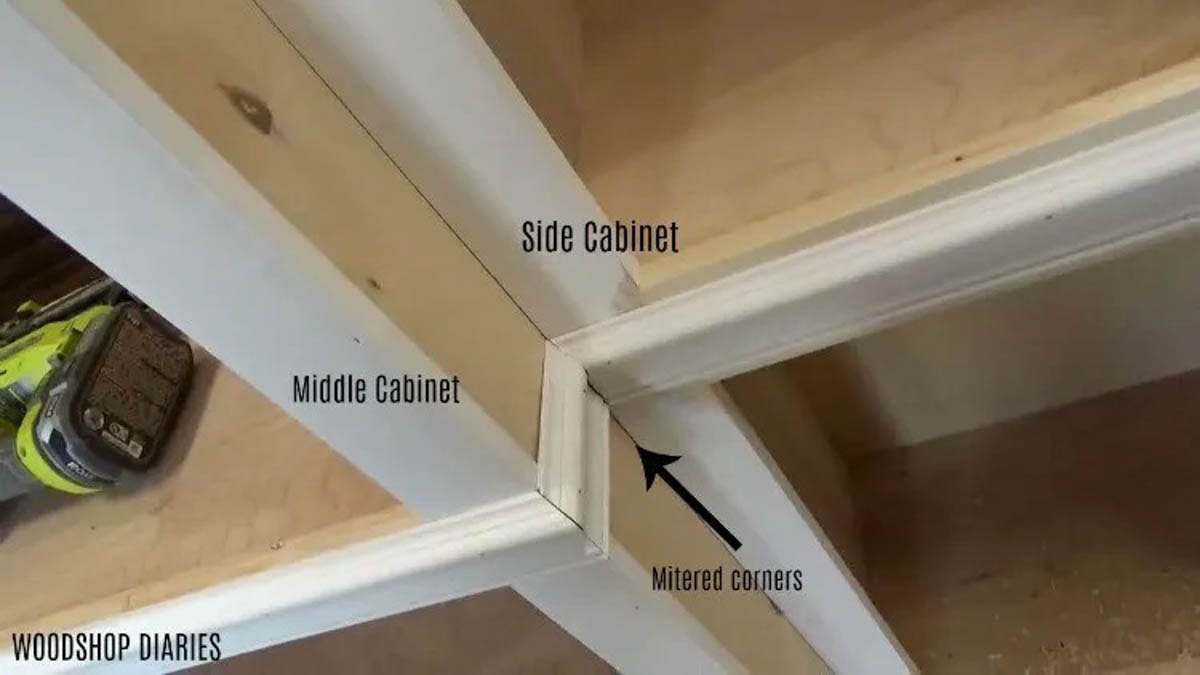
Because I wanted the baseboard and trim to meet together on the three cabinets, before I trimmed it out, I situated the cabinets together like they will be once they get to my parents’ house. That way I could line up all the trim accurately.
.
.
Notice how the ends where the cabinets meet were left at 45 degrees, so that they fit snuggly together when the entire piece is in place. The crown didn’t need that since the cabinets are different heights so they don’t meet at the top.
.
Step 8: Make Doors and Shelves for Entertainment Center Cabinets
.
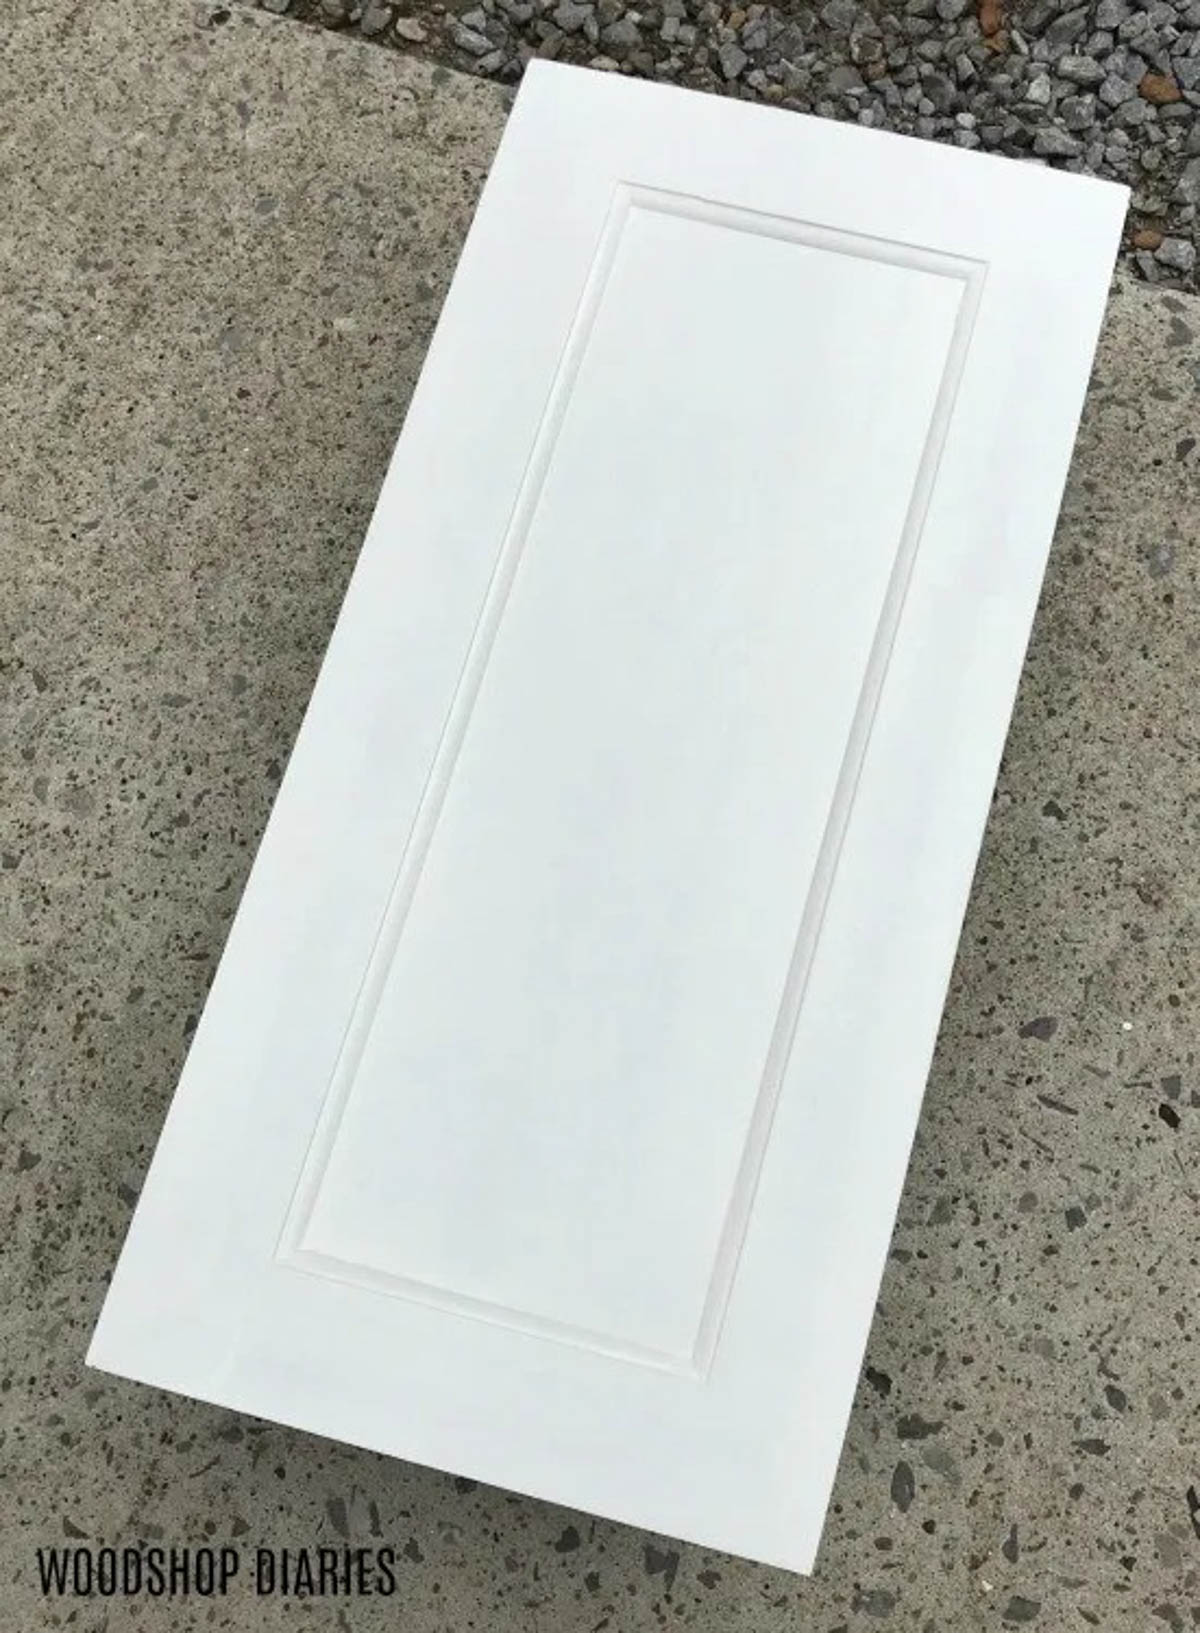
Now that all three entertainment center cabinets were built and trimmed out, I moved on to making the doors.
.
I won’t go through the entire process of door making since I’ve got a separate post on that, but I assembled the doors just like I did for my sisters kitchen cabinets with 1x3s, ¼” plywood, dowels, mitered corners and a roundover on the inside of the frame.
.
.
While the glue dried on the doors, I cut the shelves for the cabinets and prepared to paint. The shelves for the small cabinet were just ¾” plywood pieces cut to fit.
.
But the shelf that will go above the TV was really long. So, I gave it a little extra support to keep it from bowing in the middle, and used pocket holes and screws to attach a piece of 1×3 to the front of the plywood.
.
.
Step 9: Paint & Finish Entertainment Center
.
Then I painted. It was awful…terrible…I HATE PAINTING. But I did it for my mother haha.
.
People always ask how I paint. Literally, it’s this simple: I used a small ⅜″ nap roller (and a brush where needed) to apply one coat of Kilz 2 latex primer to the cabinets, doors, and shelves.
.
Then, I sanded lightly with 220 grit sandpaper by hand and applied 2-3 coats of regular latex paint (Sherwin Williams Emerald paint in Alabaster). That’s it. Painting sucks…don’t make it harder than it needs to be 🙂
.
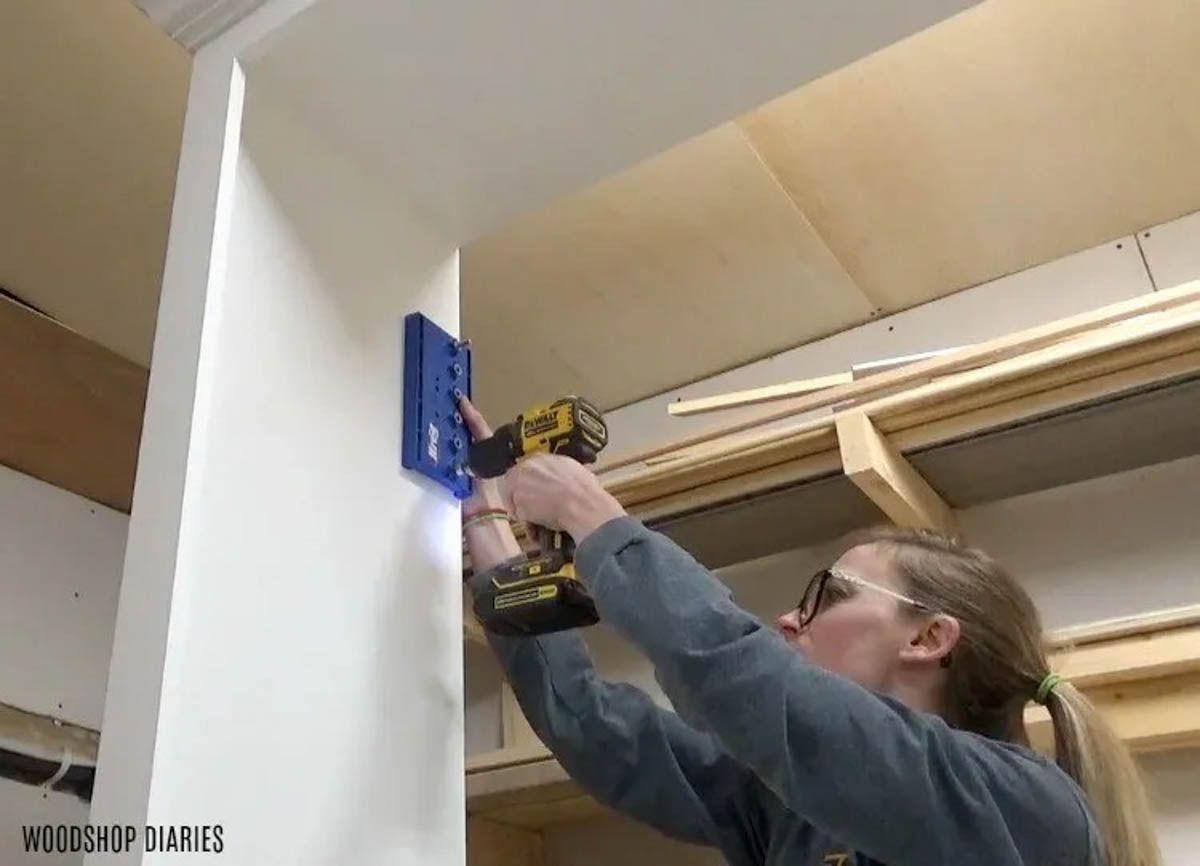
Step 10: Drill Shelf Pin Holes
.
Once that insanity was finished, I drilled the shelf pin holes using my Kreg Shelf Pin Jig to place the shelves inside the cabinets. Don’t forget that you can find all the details in the downloadable plans.
.
.
You could totally drill these before painting, but I think it’s cleaner to do it after because then paint doesn’t get into the holes after you drilled them.
.
Step 11: Attach Doors
.
Lastly was adding the doors. I used a Kreg concealed hinge jig to drill the holes into the doors to screw in the hinges.
.
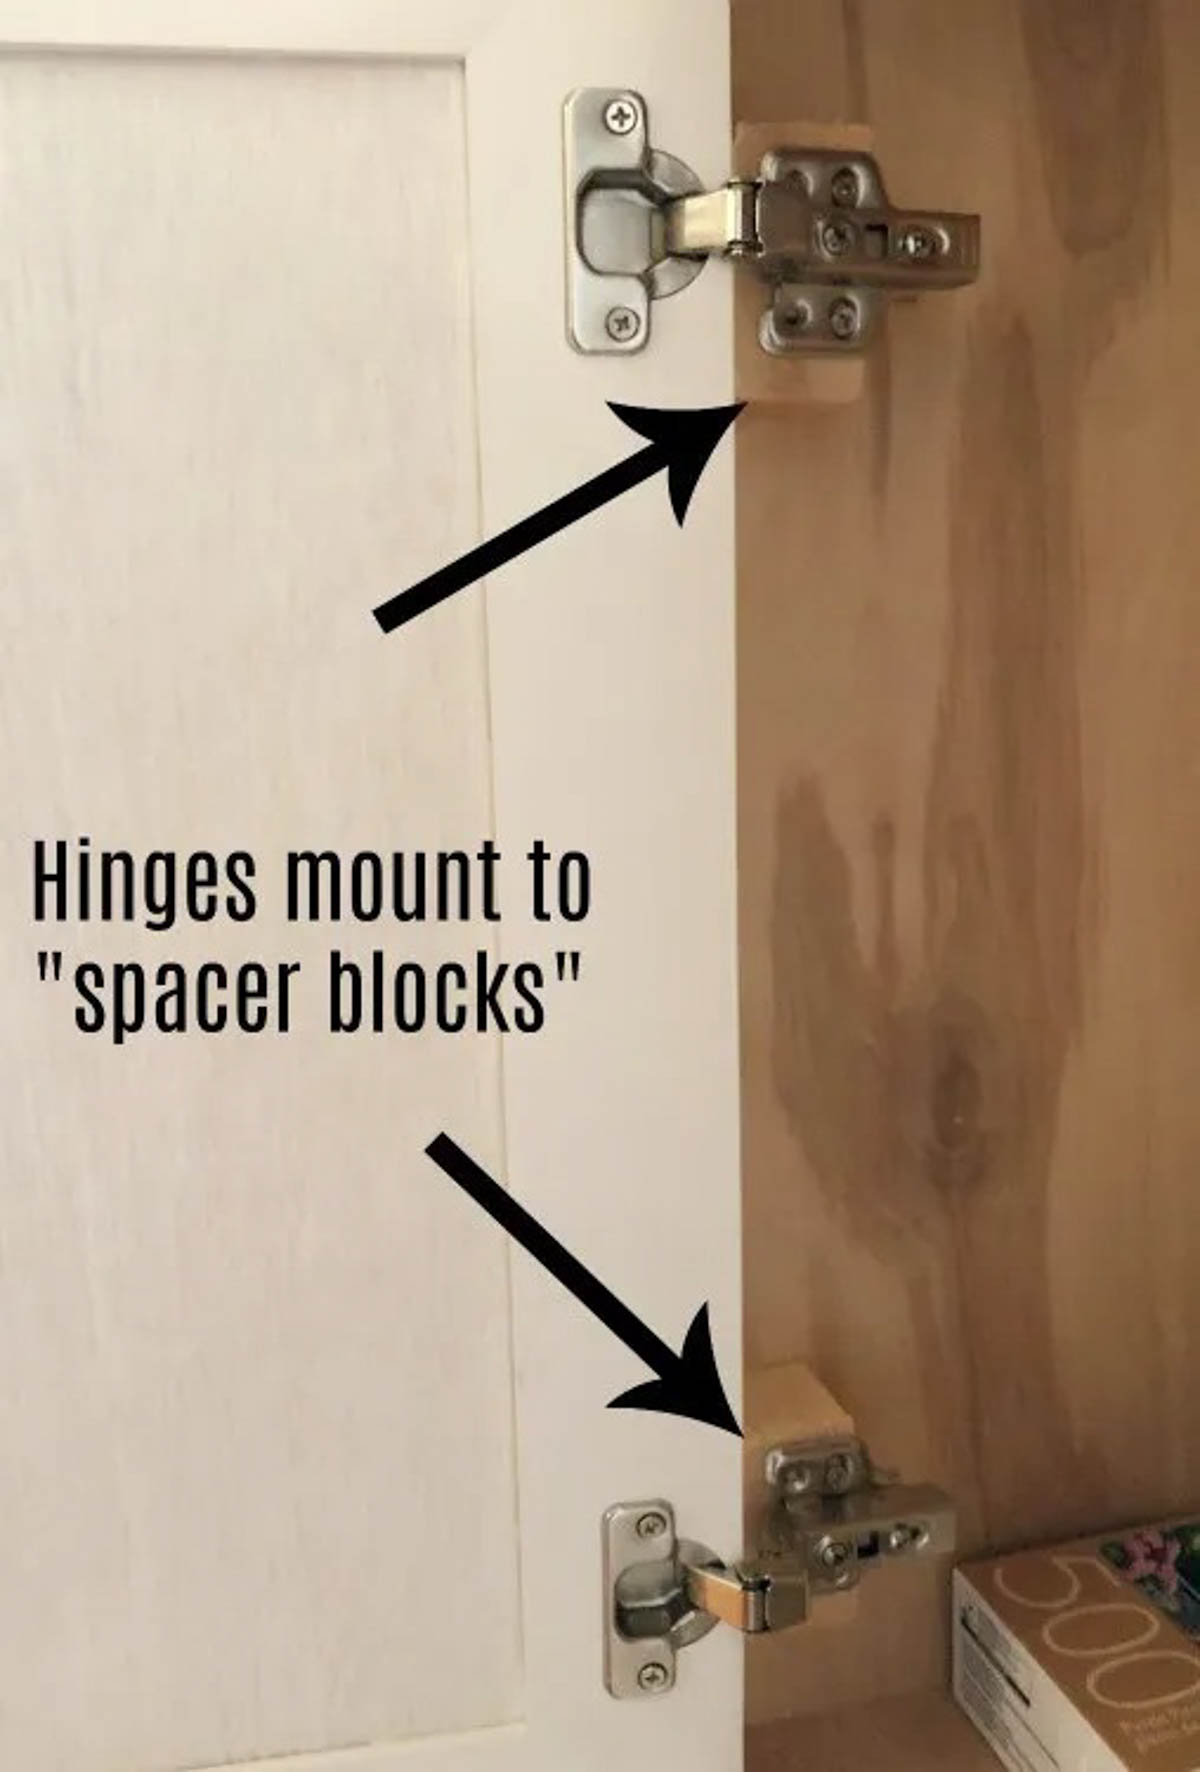
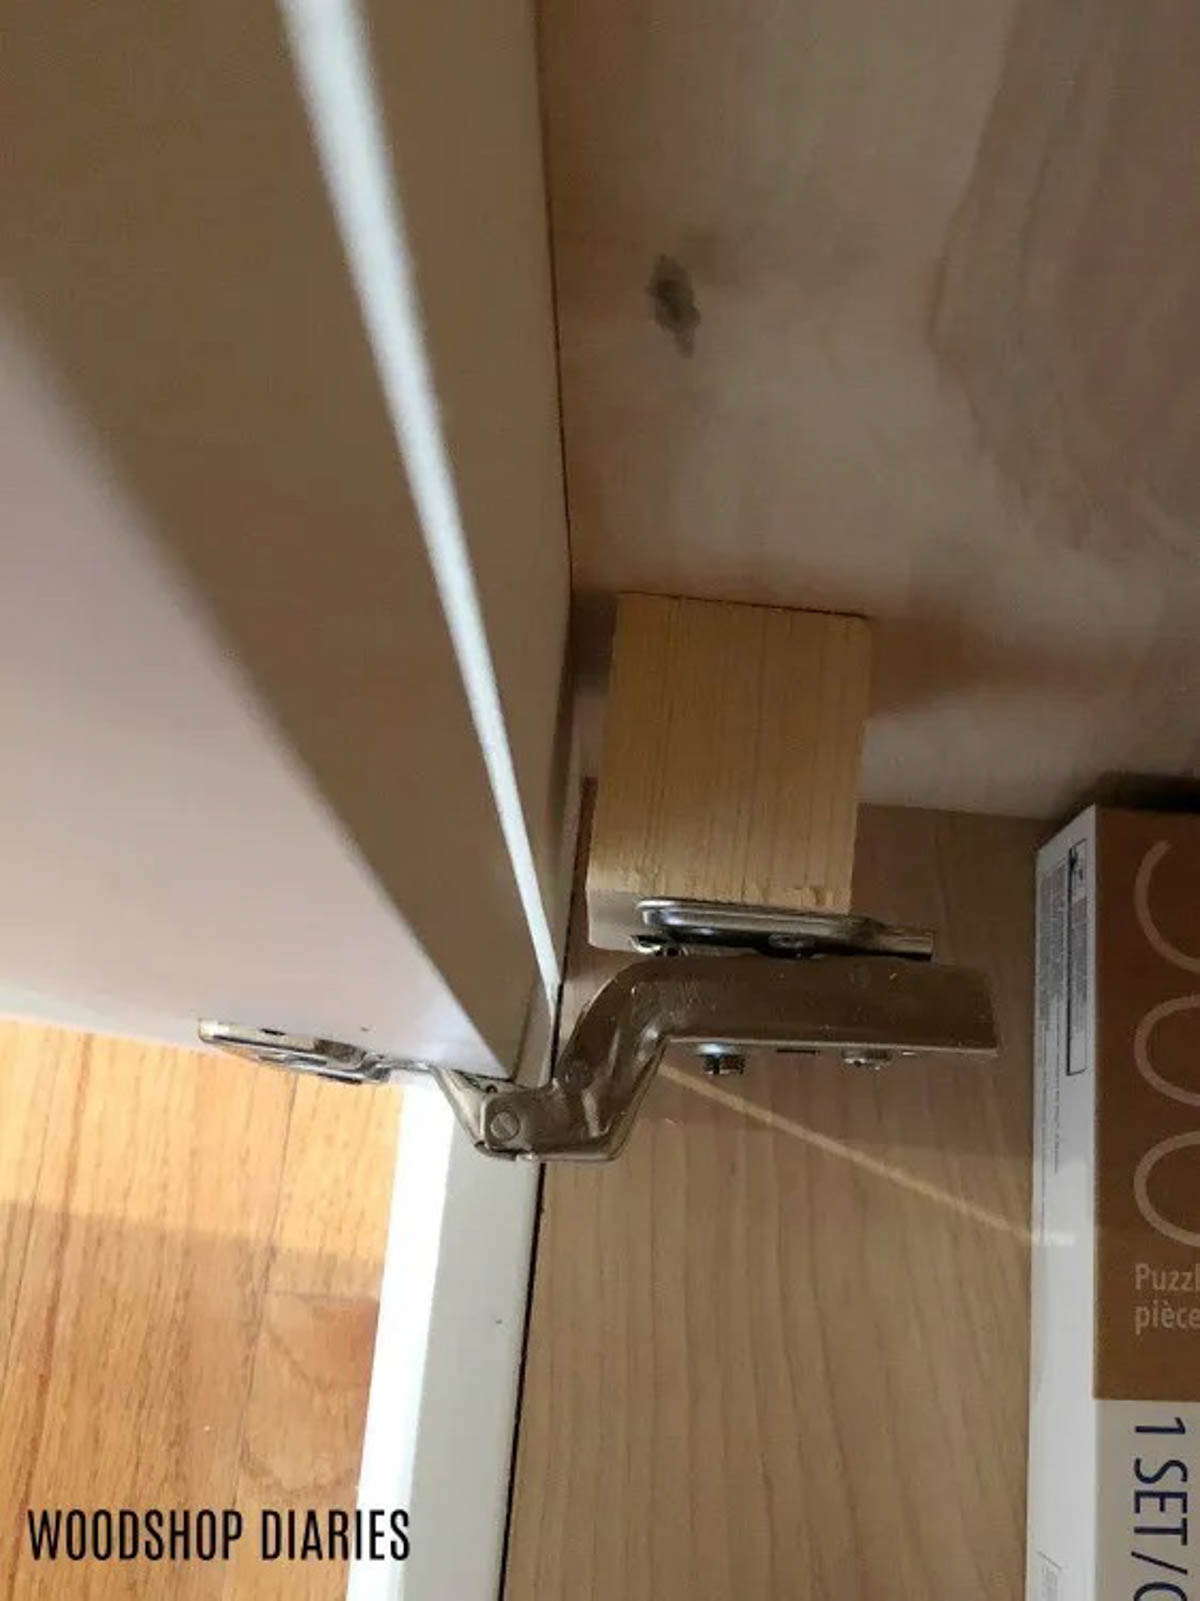
Now, these doors were designed to be inset. But inset concealed hinges for face frames are hard to find and expensive. So I cheated a little and I used inset hinges for frameless cabinets and used a spacer block inside the cabinets.
.
It’s not pretty, but I didn’t realize these hinges would be so hard to find until after I already made the doors and the cabinet.
.
.
I cut pieces of 2×4 to 1 ¾″ long and used wood glue and 2″ wood screws to screw these into the cabinet where the hinges needed to be mounted. I screwed these blocks in place so that I could mount the doors to these instead of the face frame.
.
It works, but in hindsight, I should have just made these doors overlay instead. Live and learn.
.
.
I’ve got a post showing how to install and adjust doors using concealed hinges here. Lastly, I added some scrap wood stop blocks to the bottom of the cabinet to keep the door from folding into the cabinet too far.
.
Step 12: Install Into Parent’s (or your own) Living Room
.
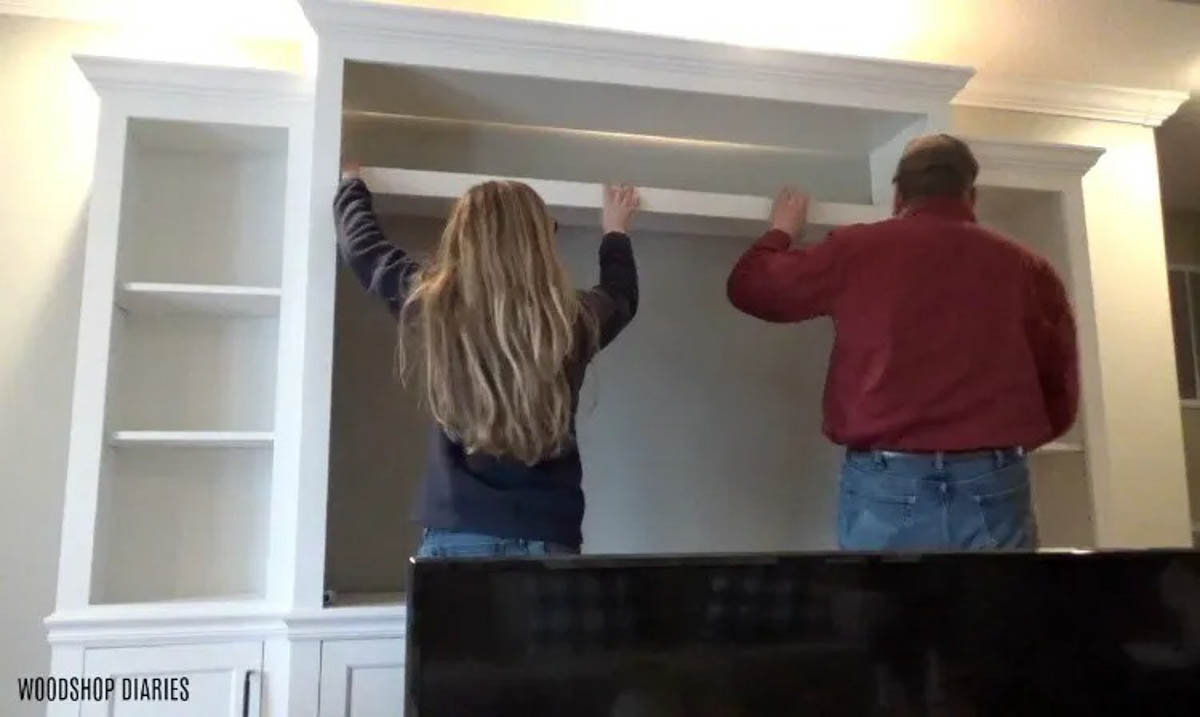
Once it was finished, Dad came over and we loaded it up and took it to their house. We got it set in place, and I screwed the three pieces together in a couple places to keep them tight.
.
Then we added the shelf pins and shelves where Mom wanted them.
.
.
And once the TV was hooked back up, Dad was happy, too haha.
.
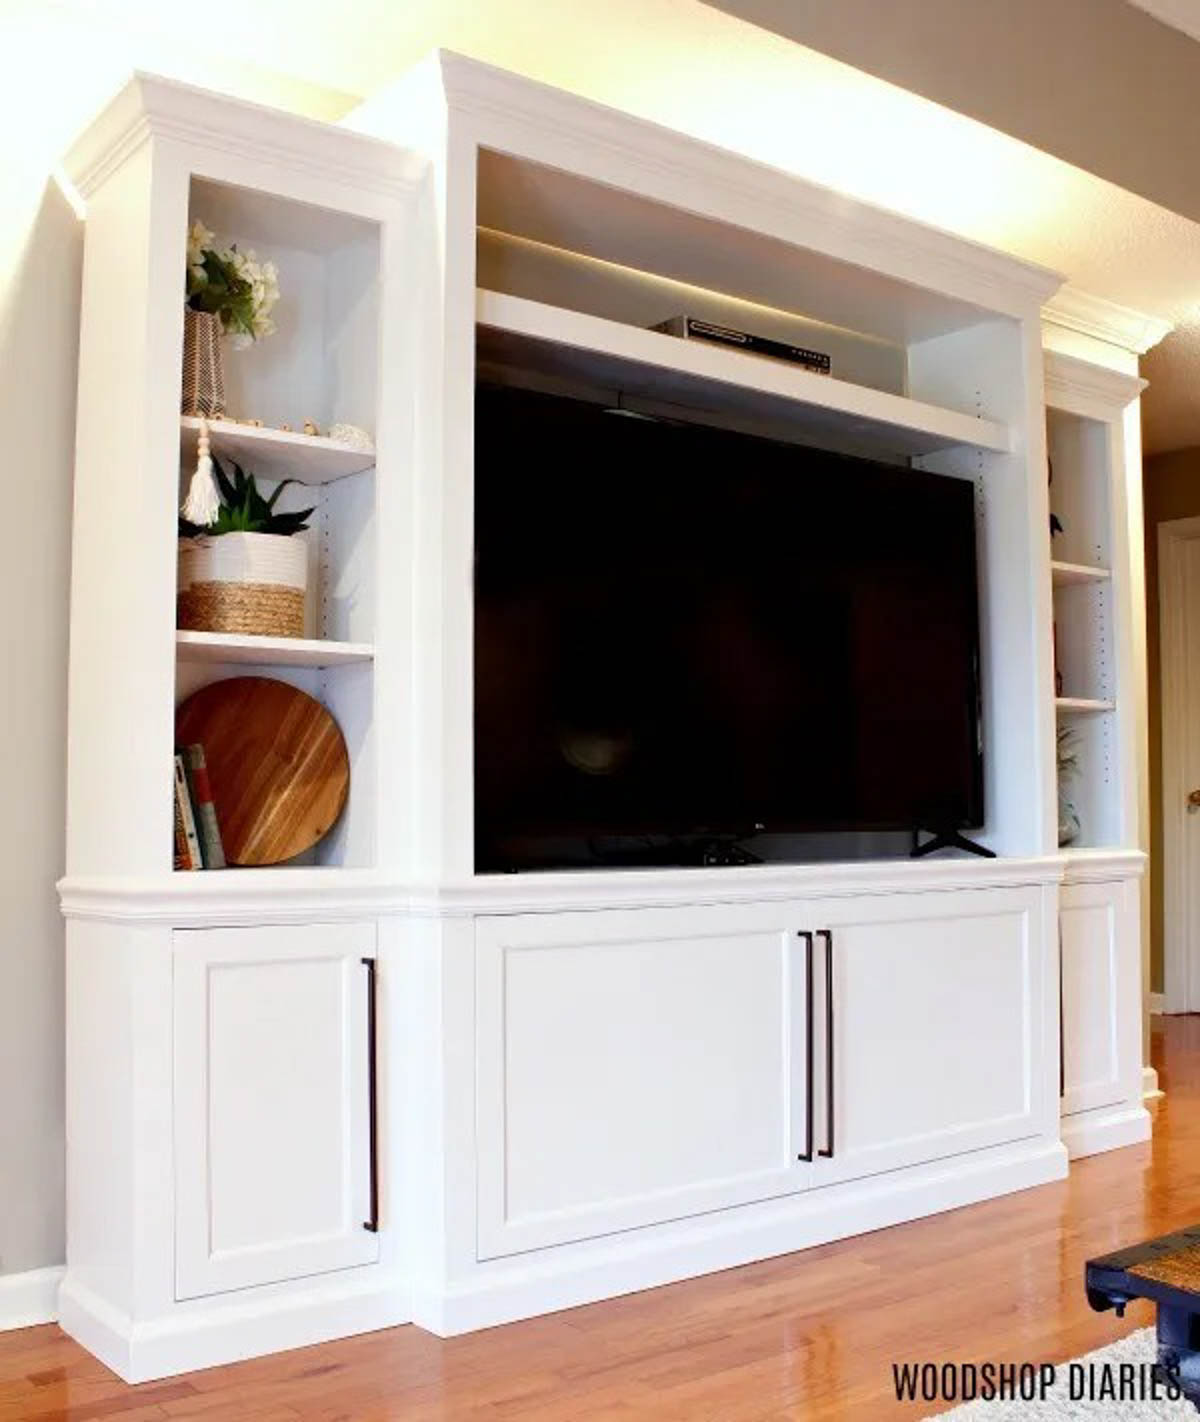
This was a huge project, but it was really fun to put together. Nothing too complicated…just large in size. I think it looks great in mom and dad’s living room—much better than the tiny old cabinet they used to have.
.
.
Plus it gives them plenty of storage for books, DVD’s, whatever, and mom has more surface area to display her décor.
.
.
Ready to build your own? Be sure to check out the video tutorial and the downloadable plans as well.
.
.
I hope you’ve enjoyed this project and if you aren’t already subscribed over on YouTube, be sure to subscribe so you don’t miss out on what’s coming next. Oh, and don’t forget to pin this to save it for later 🙂
.

Until next time, happy building! 😊
DIY Entertainment Center
How to build your own DIY entertainment center for your family room or living room.
Materials
- (3 ½) Sheets ¾” Plywood
- (2) Sheets ¼” plywood
- Crown Molding, chair rail molding (2 ½” wide), 3 ¼” baseboard molding (16’ of each)
- (12) 1x3x8 boards
- (2) 1x4x8 boards
- 1 ¼” Kreg Pocket Hole Screws
- Brad nails
- Wood Glue
- (4) pair concealed hinges
- Door Pulls
Tools
- Circular Saw
- Kreg Rip Cut
- Miter Saw
- Drill
- Kreg Pocket Hole Jig
- Nail Gun
- Table Saw or Router (to cut dadoes for doors)
- Kreg Shelf Pin Jig
- Kreg Concealed Hinge Jig
Instructions
- Make all the cuts per the plans.
- Assemble side cabinet carcass boxes of entertainment center.
- Add back panel to side cabinets.
- Attach face frame to side cabinets.
- Add trim and molding to side cabinets.
- Build middle cabinet carcass box.
- Add backing to middle entertainment center cabinet.
- Add face frame and trim on middle cabinet.
- Make doors and shelves for entertainment center cabinets.
- Paint and finish.
- Drill shelf pin holes.
- Attach doors.
- Install in your living space!