I hate hardware. It’s one of those necessary evils. I avoid drawers and doors in almost every project possible just so I don’t have to buy hinges, pulls, knobs, and hardware. I have to admit, it does make everything look and function much better. But I always forget to factor the hardware into the build budget, then $100 later, I’m like “HOW DID I MISS THAT?!” So, basically, it all boils down to the $$$. Hardware is expensive.
And of course, it is never a coincidence that when you know exactly the kind of hardware that you want, you 1.) can never find it or 2.) will pay a fortune for it. Until now…dun dun dun! DIY drawer/door pulls!! FOR CHEAP! Like, WHAT?!

Yup…AND they cost less than $1 each!! Which leaves more money to spend on cool things like new cans of stain you don’t really need, another pair of wool socks, cat food, Cadbury eggs. You know…whatever floats your boat…or whatever ends up on your grocery list…
So, I have to preface this with: THIS IS NOT MY ORIGINAL IDEA. I first saw this idea here. This version used brass rings and cotter pins… Both of which are kind of expensive. So here is my SUPER cheap girl’s version.
NOTE: This post contains affiliate links for your convenience. Please see disclosure policy for more details.
You will need curtain rod rings–the kind with the clips–in the color of your choice. I found mine at Hobby Lobby in an aged brass color. And they were half off! Cheapest curtain rings around…trust me. But, if you don’t want to make a trip or don’t have a Hobby Lobby close by, you can find similar ones on Amazon here ![]() and here
and here ![]() .
.
You will also need some finish washers![]() and some plain cheapo zinc washers
and some plain cheapo zinc washers![]() . (I have provided links to these washers online. But, you can also find these in smaller packages at the local hardware store.) And, finally, you will need some bobby pins
. (I have provided links to these washers online. But, you can also find these in smaller packages at the local hardware store.) And, finally, you will need some bobby pins![]() .
.
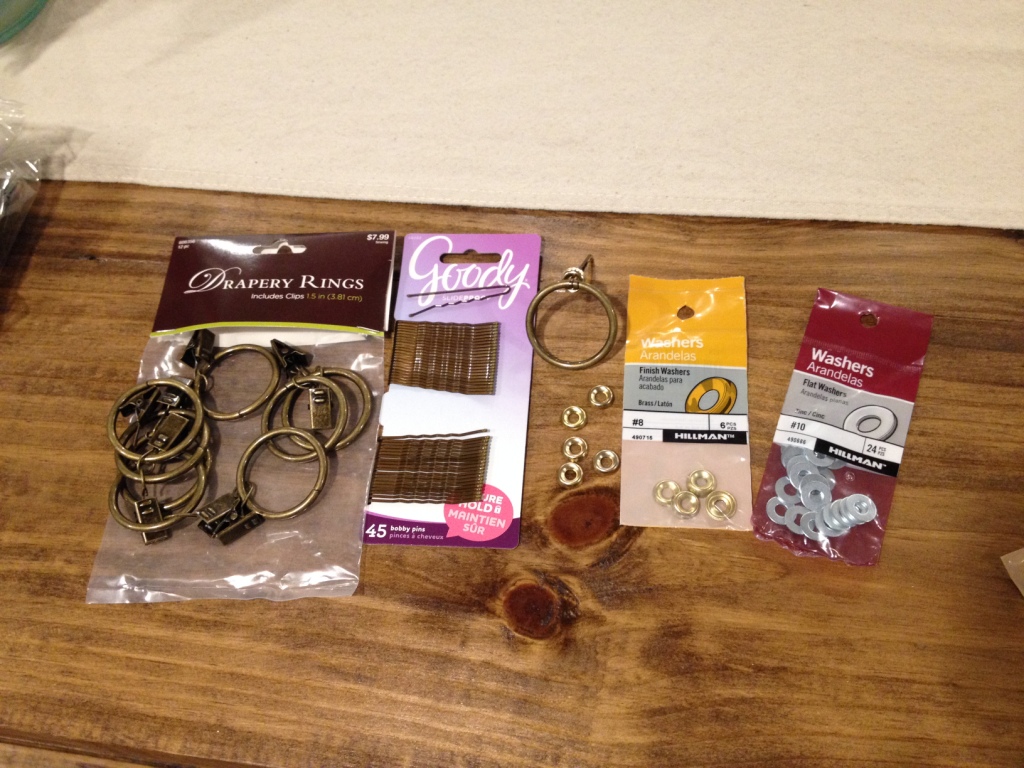
I wanted “gold” pulls, so I chose rings, bobby pins, and finish washers that were all brass, or a gold color. The zinc washers will be hidden, so color wont matter.
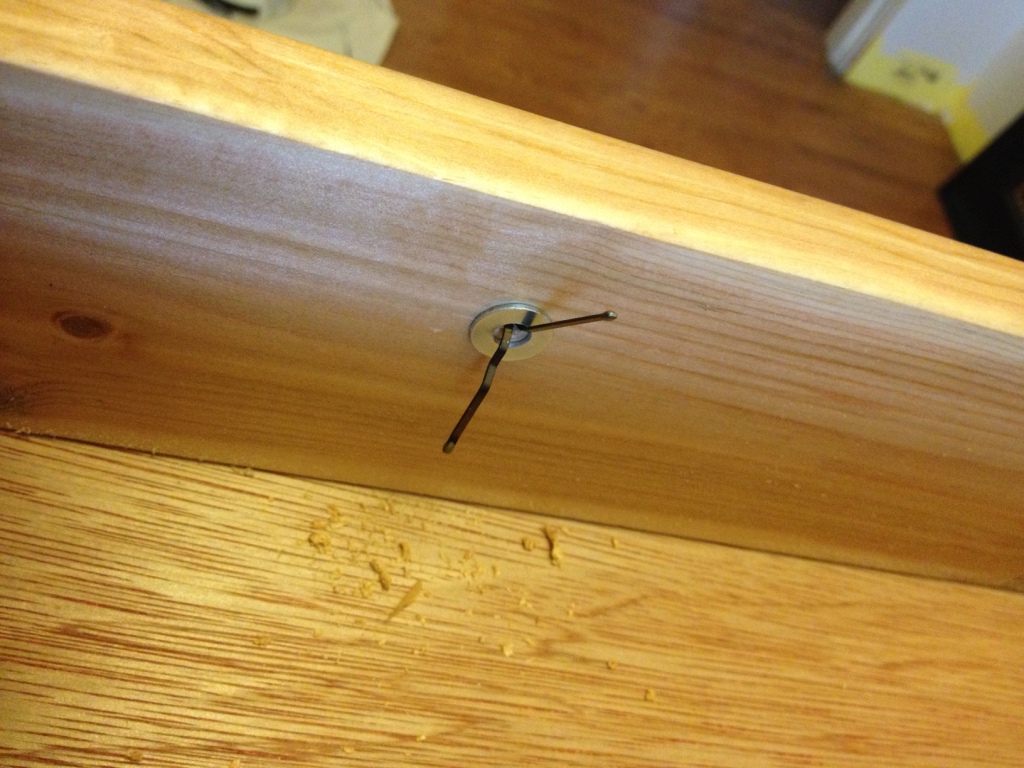
First, take the clip off the curtain ring. Then slide a bobby onto the ring.

Slide the two ends of the bobby pin into the hole on a finishing washer.
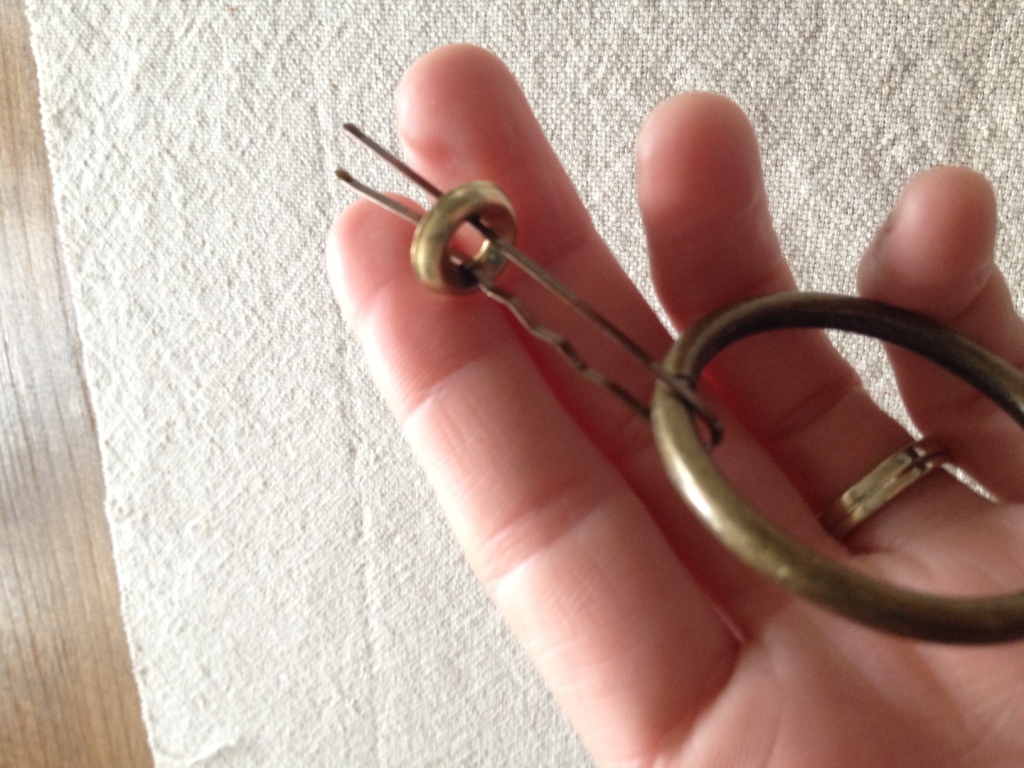
Push the washer as tight as you can towards the ring.
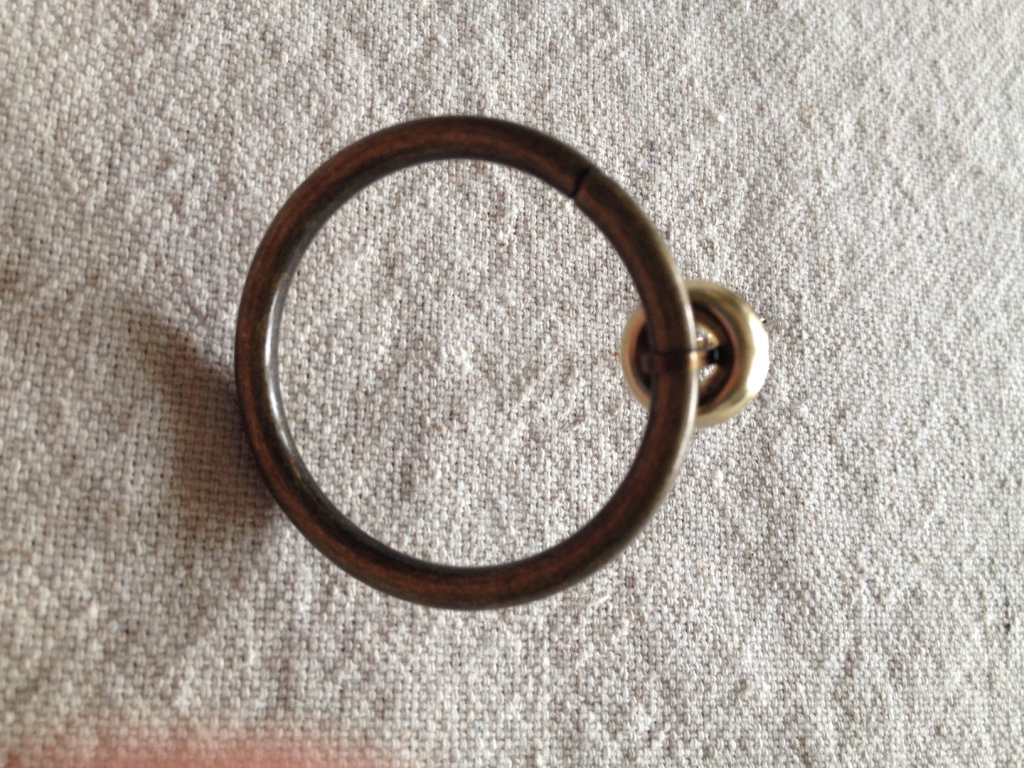

Then drill a hole in the door or drawer where you want to put the new pull. Make the hole just big enough for the bobby pin to slide through. Slide a zinc washer onto the bobby pin “legs” and “fold” the legs over.
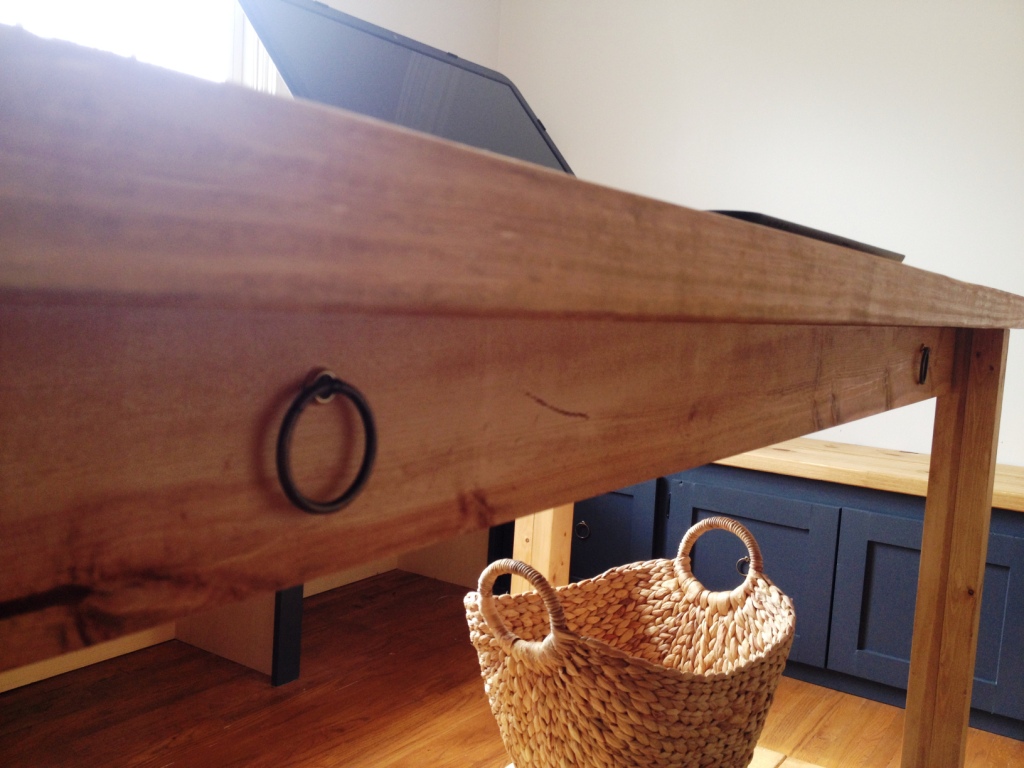
And there you have it! If you have a staple gun, you can staple these ends tight into place on the back side for a tighter hold. I’ve played around with these and the bobby pins hold pretty well. This was a cheaper alternative to using a cotter pin, but I will say, it is definitely not as strong. If you will be pulling very hard on these, I suggest stapling these backs or using a cotter pin, but be prepared to pay for them–especially the brass ones. Or you could use multiple bobby pins as well.
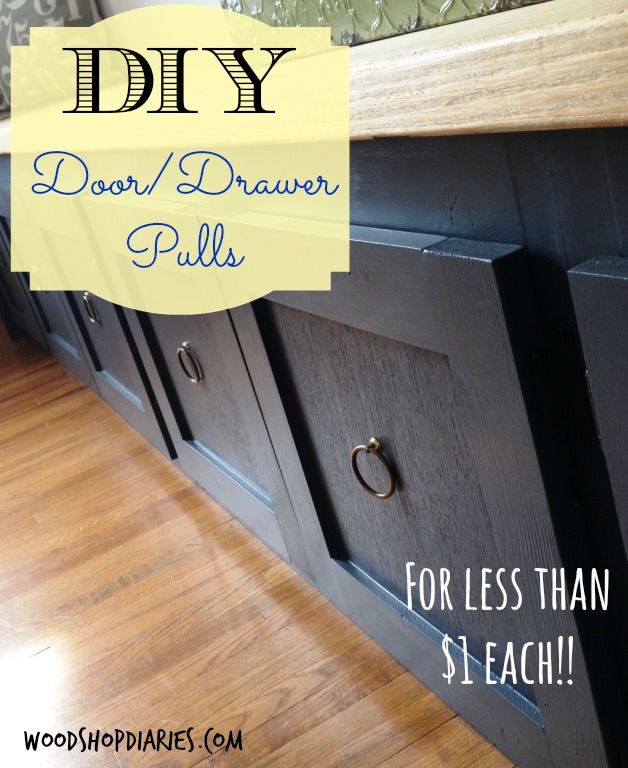
Seriously, aren’t these awesome for less than $1 each?!! For real.
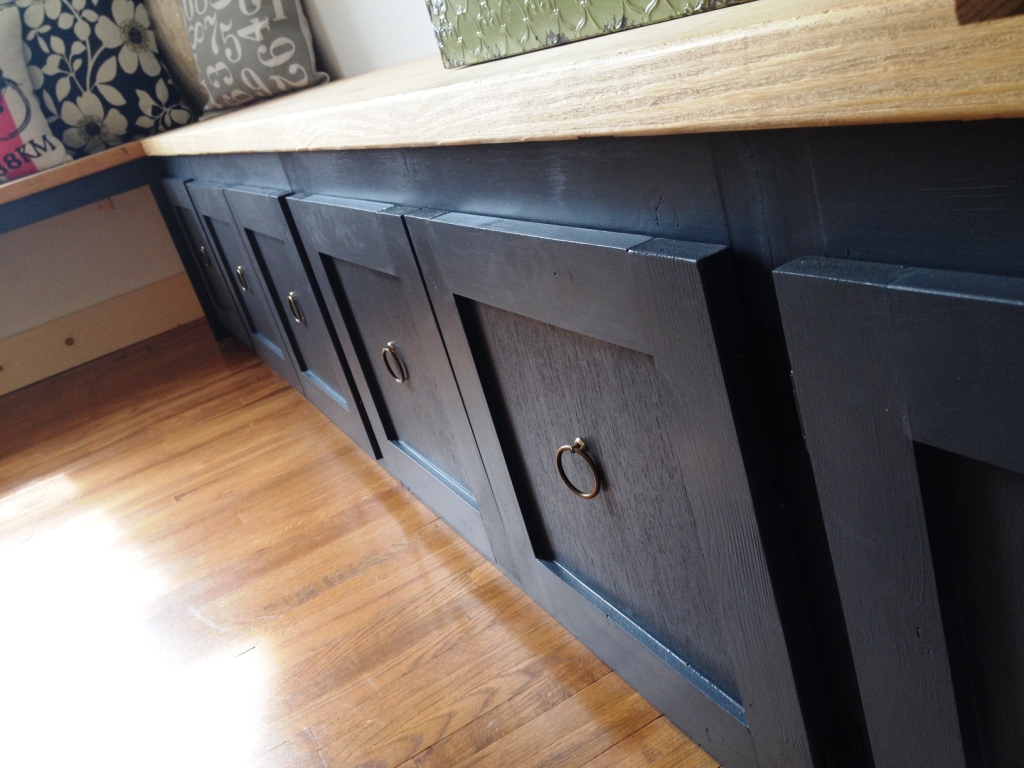
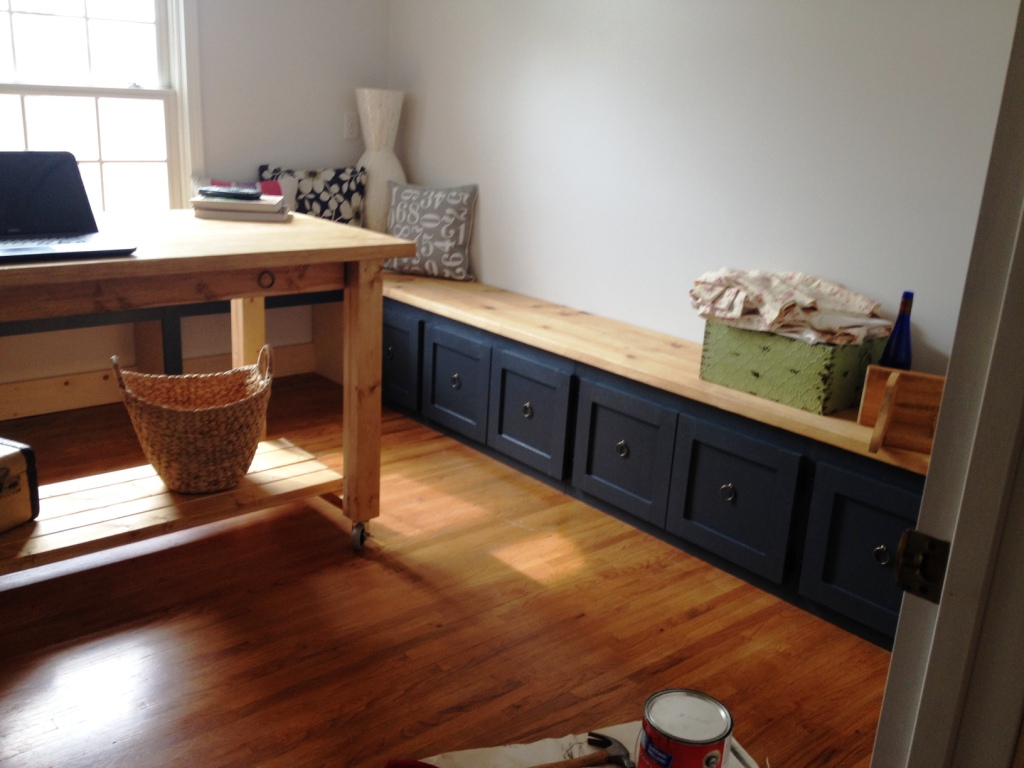
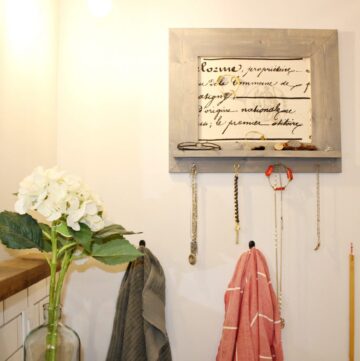
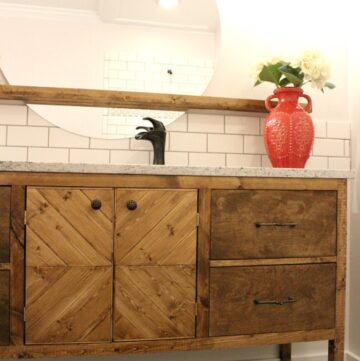
I am in the middle of redoing my office (actually, it’s done now, so check it out here), so I don’t want to give too much away, but I have to show you some more of these pulls. These are on my cabinet doors. Don’t they look so good against the navy?

Keep your eyes open because I’m going to tell you all about my new desk soon, too!
Okay, okay, that’s enough. I’ve practically already spilled all the beans and shown you my whole office already and I’m just talking about door pulls here!!! Just pretend like you are surprised when I show you the finished room, okay?
Now if only I can figure out how to make hinges so cheap! 🙂 I’m still thinking on that one… So, until the next project, happy DIYing!! Get out there and make something!
Wow Shara, i just came across your blog on hometalk and i love it !! These rings/door pulls are perfect and such an easy diy project to get it. I’m stoked and can’t wait to find a used for the 24 I have stashed away in my basement from drapes at our old home. I’m definitely Pinning and signed up for your newsletter so I can’t wait to see what else you can come up with. Thanks !
Thank you so much Diena!! So glad you enjoy the blog and liked the ring pull project 🙂 I hope you enjoy all my other projects too! I’d love to see how you use your drape pulls 🙂
Genius! Hardware IS expensive. And why is it that the ones that catch my eye are always the most expensive?? These are great, I’m pinning this!
Thank you! 🙂
What kind of wood did u use for the top? I’m assuming that it’s one solid piece.
You can read about how I built the desk in my latest post, but I used three 2×12 pieces of pine wood