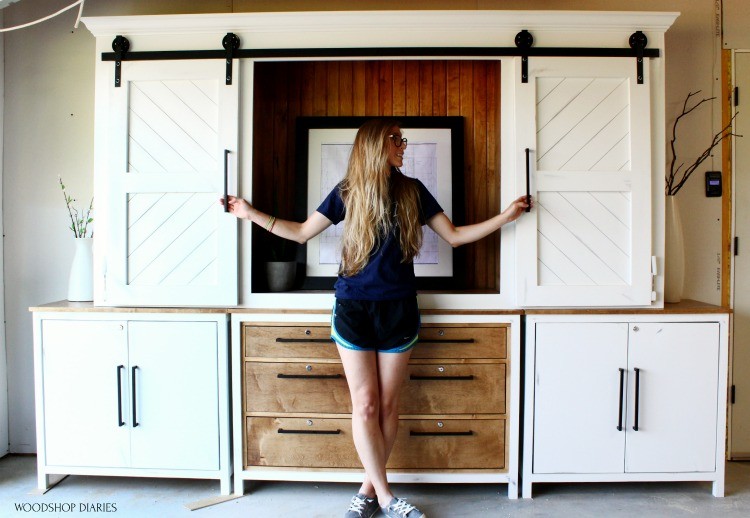
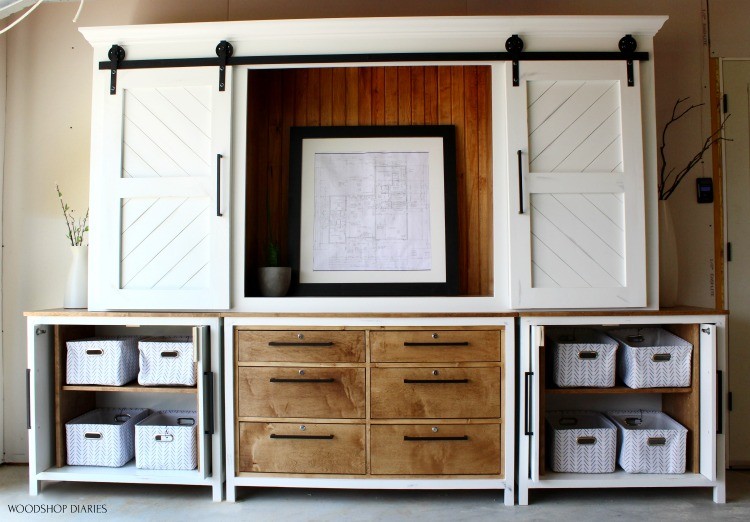
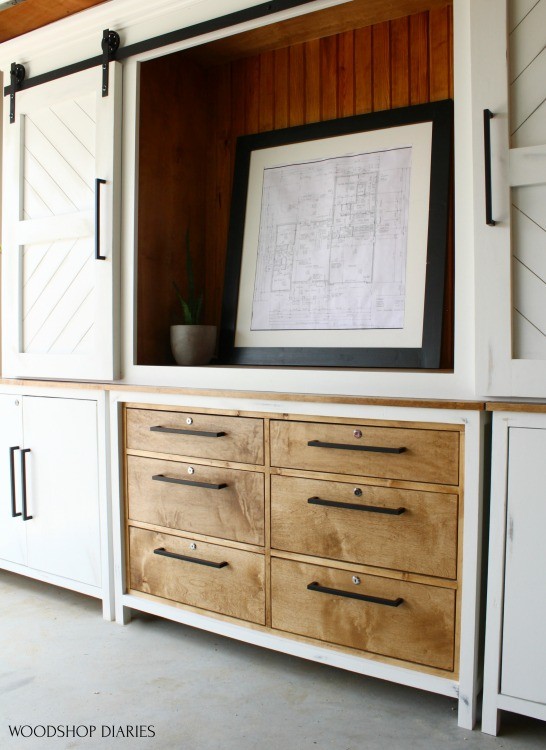
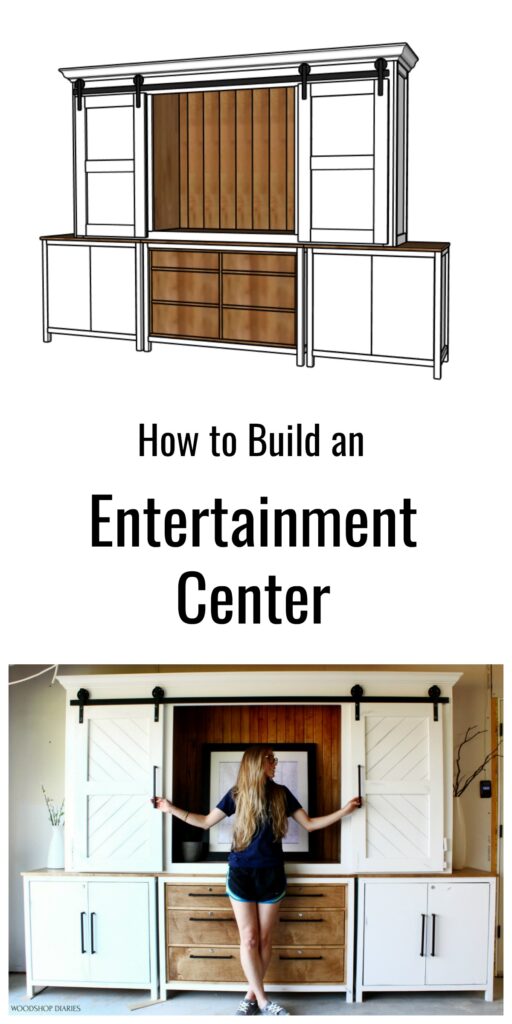
It’s finally the grand finale of the Sliding Door Entertainment Center Series!! I built this enormous project in four pieces and I shared them each individually. Today I’m sharing the final piece of the puzzle–the top sliding door cabinet.
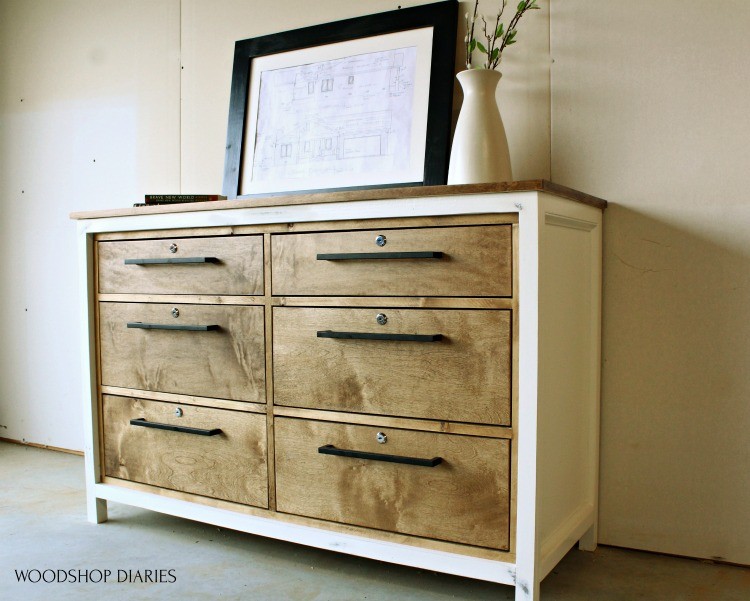
Two weeks ago, I shared how I built this bottom dresser piece.
RELATED: DIY 6 Drawer Dresser
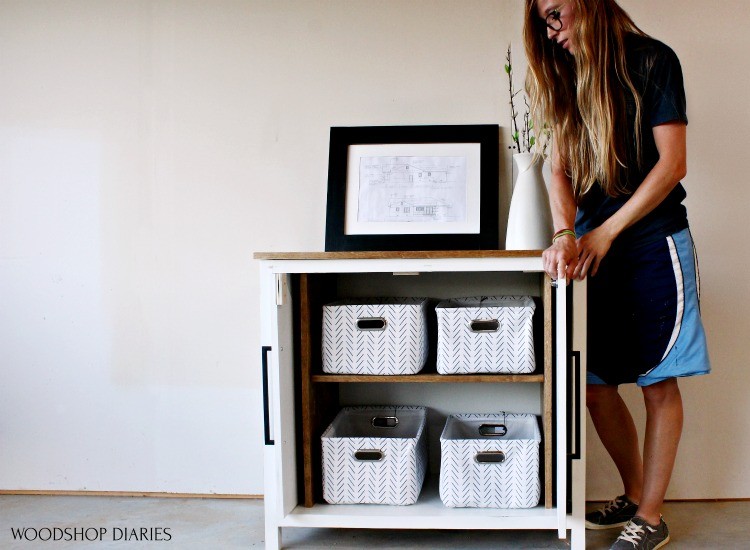
And last week, I shared these two pocket door side cabinets.
RELATED: DIY Pocket Door Cabinet
But, today, I’m tying everything together and finishing off this entertainment center series by showing you how I built this top sliding door cabinet.

I’ve got the free plans for this entire entertainment center in this blog post, and the two before it, but if you want a printable version of all three combined, I’ve provided a link to them below.
So, if you’re ready to get building, let’s go. The video is right here and the plans are following.
This post contains affiliate links. See policies for details.
For this Sliding Door Entertainment Center Top Cabinet, You Will Need:
- (2 ½) sheets ¾″ plywood
- (4) 1x3x8
- (1) 1x6x8
- (2) 1x2x8
- (2) 8′ sticks crown molding
- (9) tongue and groove 1×6 pine boards
- (4) 1x4x8
- 1 ¼″ pocket hole screws
- 1 ¼″ wood screws
- Wood Glue
- Miter saw
- Circular Saw
- Drill
- Pocket Hole Jig
- Nail Gun
- Shelf Pin Jig
And if making your own Sliding Door Hardware, you’ll also need:
- ⅛″ x 1 ½″ x 96″ steel flat stock
- (4) ⅛″ x 1″ x 9″ steel flat stock
- (4) garage door pulleys
- (5) ¼″ x 3″ lag bolts and nuts
- SEVERAL washers
- (8) 1 ¼″ long lag screws
And of course, you need the plans 🙂

Step 1: Assemble Entertainment Center Cabinet Carcass
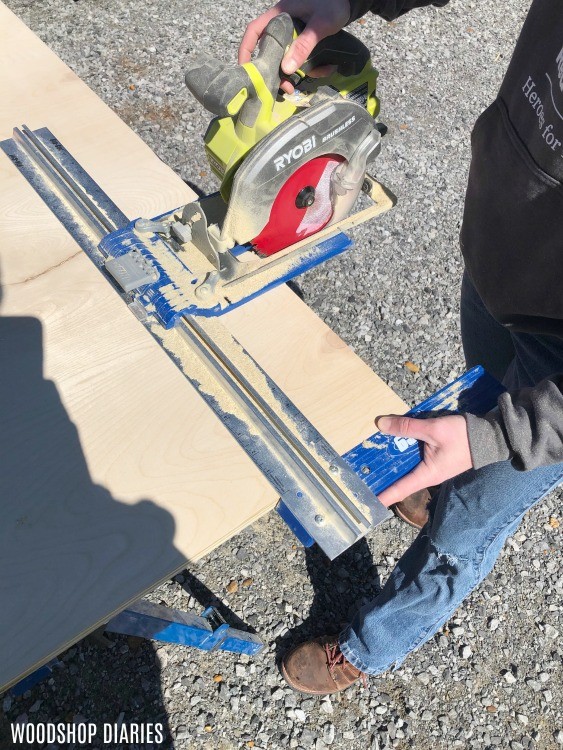
This sliding door cabinet was actually the easiest, but also the largest part of this project to build. It’s basically just a big box with some trim and so I started out by cutting down the plywood I would use for the main carcass.
.
If you’re interested in how I cut down my plywood sheets, I have a post and video on it here.
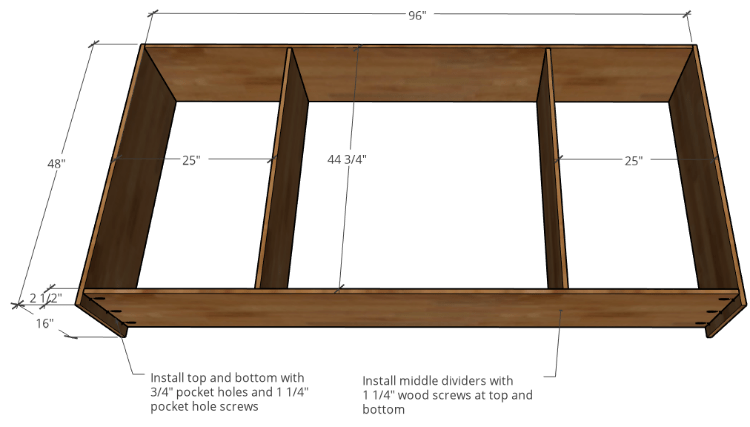
I drilled pocket holes into the ends of the top and bottom strips, and assembled the main box like shown here. I used pocket holes for the top and bottom panels and just used 1 ¼″ wood screws to attach the middle divider panels.
Then I went ahead and stained the inside with Minwax Early American because it’s much easier to do now than to come back and do later.
Step 2: Add Back to Entertainment Center Cabinet
The original piece that we roughly based this design on had kind of a beadboard type back on it.
.
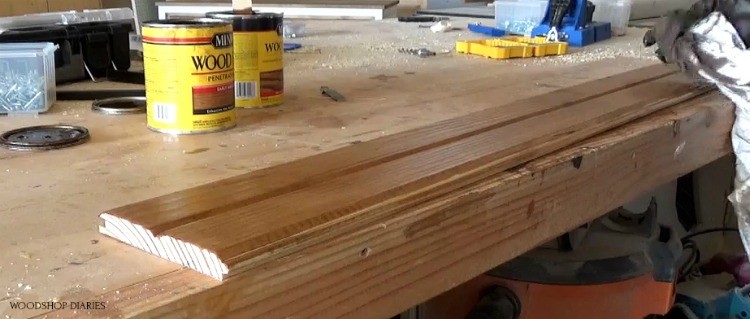
To give this that same look without looking like cheap beadboard, I used tongue and groove pine. In my local area, they call these rail car boards. I guess they used to use this in railroad cars as flooring.
.
Anyway, it’s basically tongue and groove 1x6s that are flat on one side and have a v cut in the middle on the other side. You could definitely use regular 1x6s or any 1x boards for this if you’d rather.
.
I cut these down and put the V cut sides on the inside of the cabinet. I went ahead and stained these boards individually before installing them to make things easier.
Then, starting at the center, I began attaching these boards to the carcass using 1 ¼″ wood screws. Once I got to the end, I measured and cut to fit two pieces to go on each end.
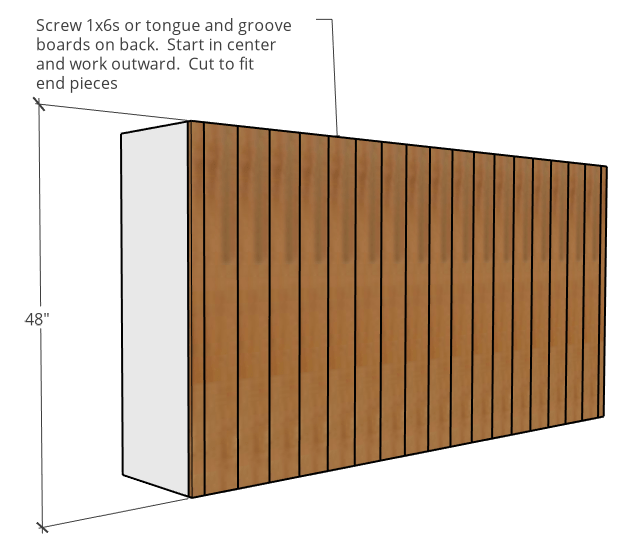
I just ripped these down on the table saw, but you could also use a circular saw if you don’t have a table saw.
Step 3: Build and Attach Face Frame to Cabinet
I was installing sliding doors onto this frame and since the rail and the wheels would need about 5” of space, I used a 1×6 at the top, but used 1x3s everywhere else on the face frame. I screwed this together to cover the front using pocket holes and screws plus some glue.
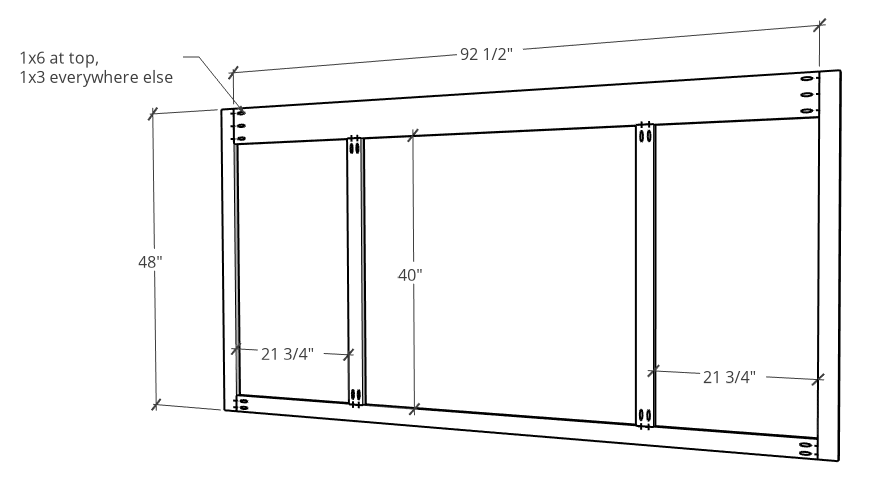
And once the entire face frame was assembled, I applied some wood glue to the cabinet and nailed the face frame in place.

Step 4: Trim Out Sliding Door Entertainment Center
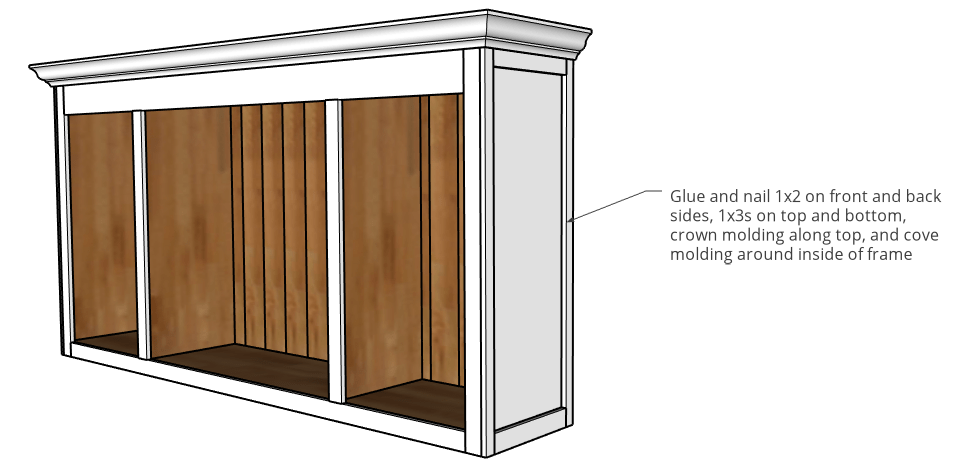
Then, I trimmed out the sides to match the bottom part of the entertainment center by gluing and nailing 1x2s on the sides, 1x3s at the top and bottom, then lining it with cove molding.
.
Finally, I added some crown molding along the top and painted everything that wasn’t already stained white.
Step 5: Build and Install Sliding Doors
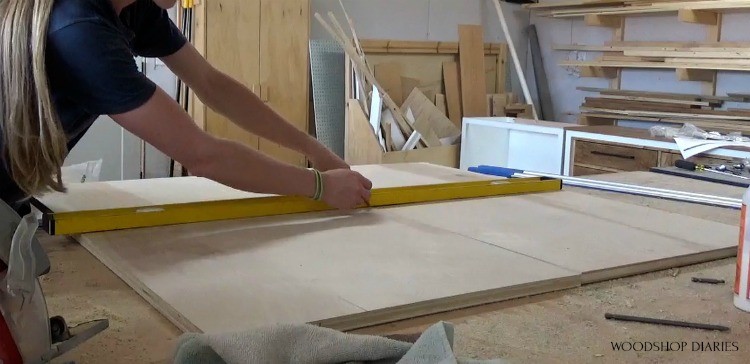
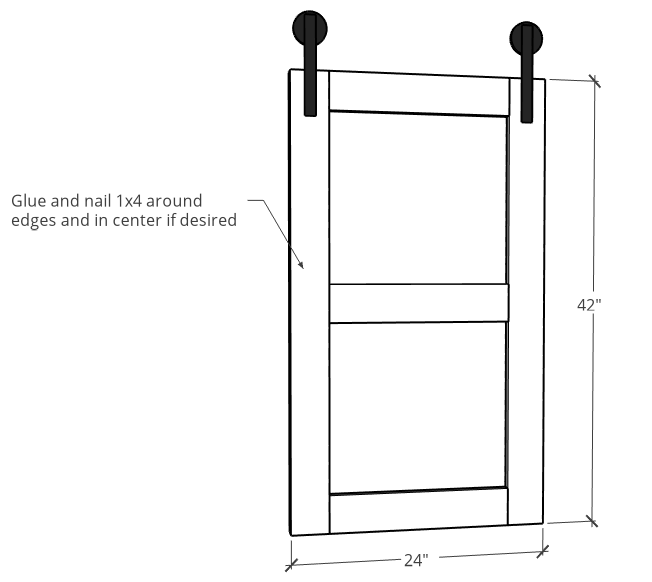
I built the doors using ¾” plywood. So, I cut two identical doors large enough that when put together, it would cover the middle section of the cabinet and when opened up, they would cover the outside sections.
Once the plywood was trimmed to size, I decided it would be cool to cut some grooves in it to give it some extra character. So I placed the doors side by side and drew a straight line across the middle of them.
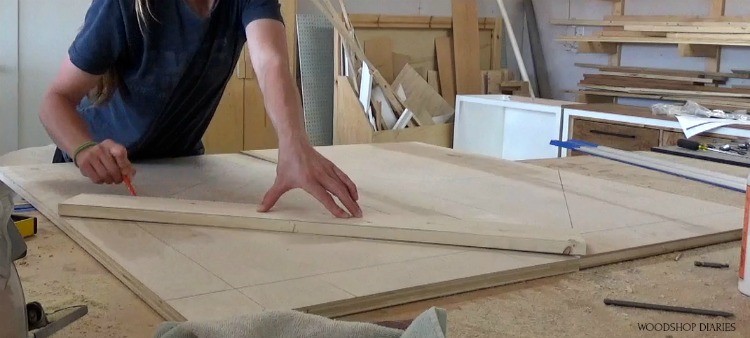
Then, I drew diagonal lines from this center line to the corners of the door. I used a scrap 1×4 to draw parallel lines out from these diagonals.
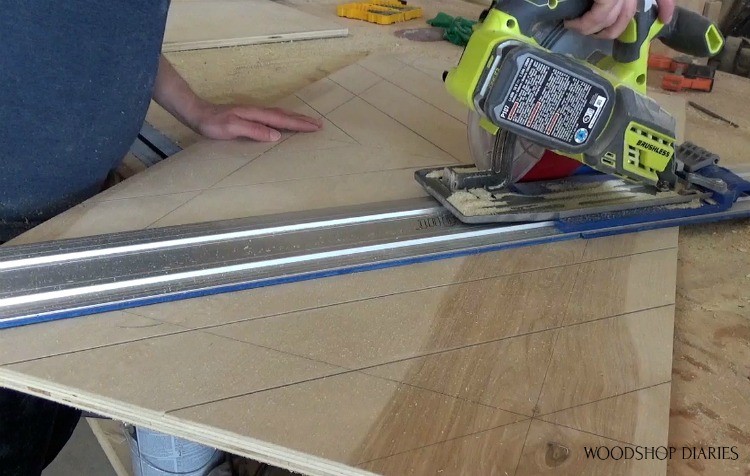
Now, I needed to cut along all these lines. So I adjusted my circular saw to only cut about ¼” deep and used my Kreg AccuCut track to run it along. You could simply use a straight edge, but this worked super fast.
Once the grooves were cut, I glued and nailed some 1x4s along the edges and one in the middle to finish up the doors.
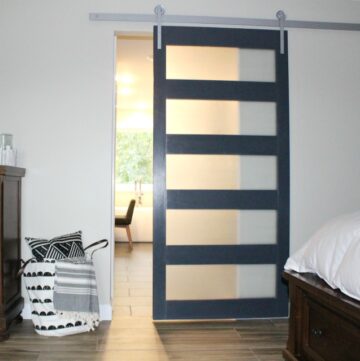
Step 6: Install Sliding Door Hardware onto Cabinet
You could buy a kit for the sliding doors, but I chose to save a ton of money by building my own.
.
You can check out my DIY Sliding Door Tutorial to see another instance where I did this same thing.
.
I purchased an ⅛″ x 1 ½″ x 96″ long piece of steel flat stock for the rail and four ⅛″ x 1″ x 9″ pieces for the doors. I got these from my local metal shop.
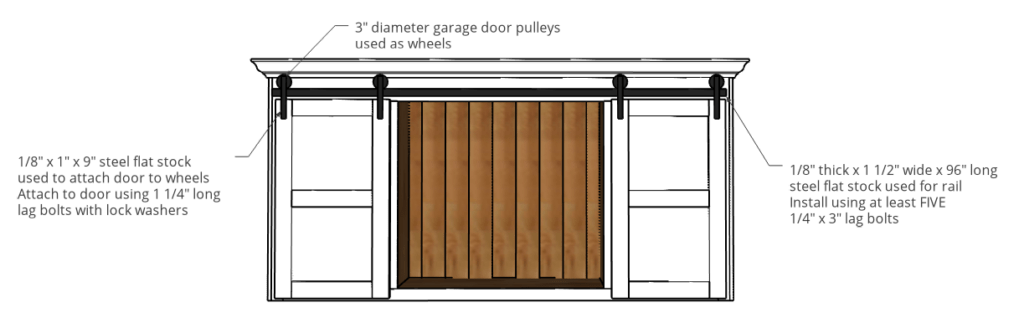
I drilled a hole in the center of the rail, and two more equally spaced on each side (5 holes total), and centered this on the cabinet top about ¼″-½″ from the bottom of the face frame 1×6 board. Then I drilled through the holes into the face frame.

I used (5) ¼″ x 3″ lag bolts to attach the rail. I placed SEVERAL washers between the rail and the face frame (enough so the door doesn’t rub) and tightened a nut on the inside of the cabinet to hold it all in place. See video for details.
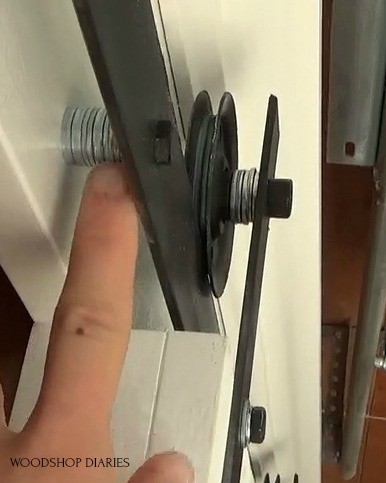
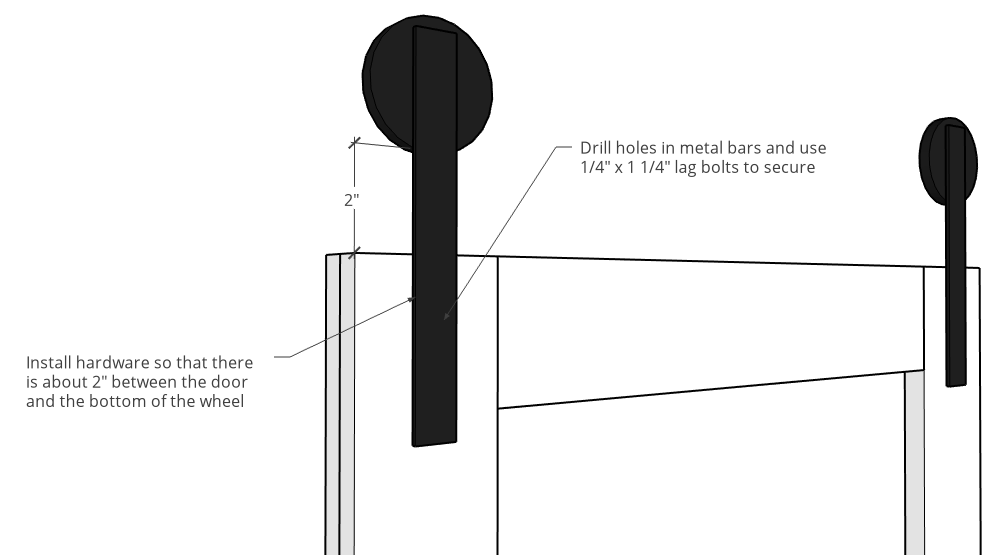
Then, I drilled holes in the 9″ long pieces–one at the top and two towards the bottom. The two at the bottom will be used to attach to the door and the one at the top is to install the garage door pulley which will be used as the wheels.
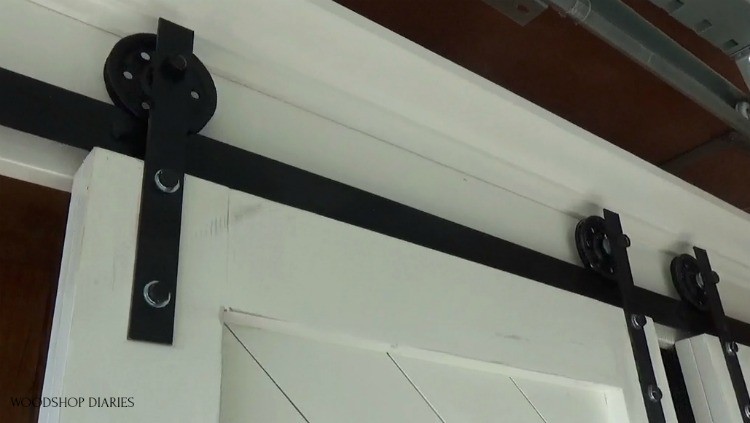
I attached these bars to the door so that there was about 2″ between the wheel and the top of the door. I used 1 ¼″ lag screws.
Check out the video for details, but I used some L brackets to prevent the doors from sliding off the rail at the ends.
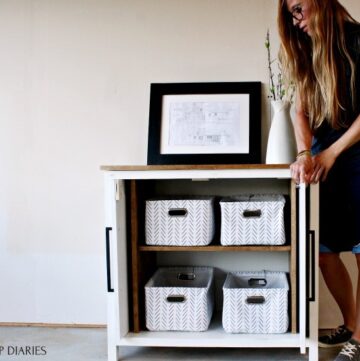
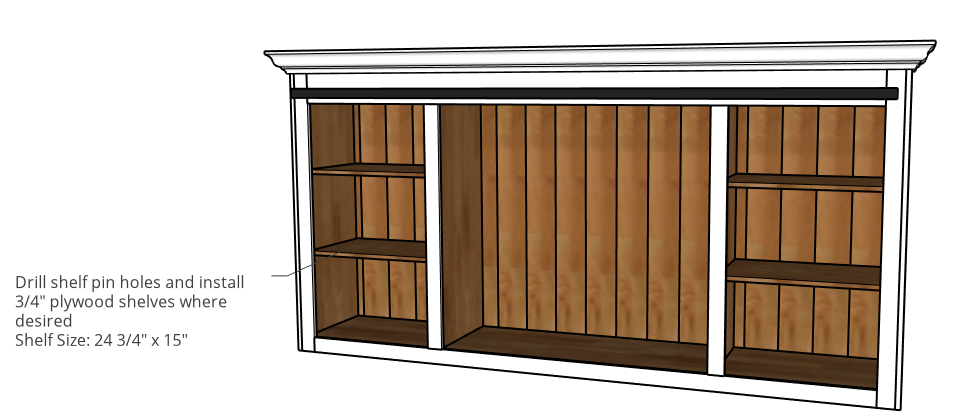
Step 7: Add Shelves to Entertainment Center
The final step to the build is to add the shelves to the side cabinets. I used my shelf pin jig to drill shelf pin holes and installed a few shelves using ¾″ plywood and some shelf pins where I wanted.
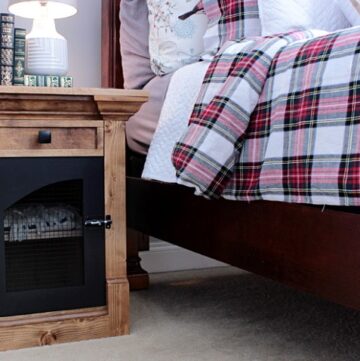
Step 8: Install Door Locks (OPTIONAL)
If you remember from the last two projects, the library requested that all the doors and drawers on this piece lock. Because these doors slid instead of opened, it was a little challenging to find a lock that would work well for this.
.
But I found these locks that I could mount onto the doors. When you lower the lever, a metal rod drops down into a hole I drilled on the dresser below it. Once locked, the lever won’t raise back up. But once it’s unlocked, you can lift the lever, which lifts the rod, and allows the door to slide again.
.
Likely, you won’t be adding locks onto your build, but just in case, here’s the ones I used. Oh, and here are the door pulls I used as well.
.
And that completes the sliding door entertainment center build. It’s been a long one, friends. Thanks for sticking with me haha.
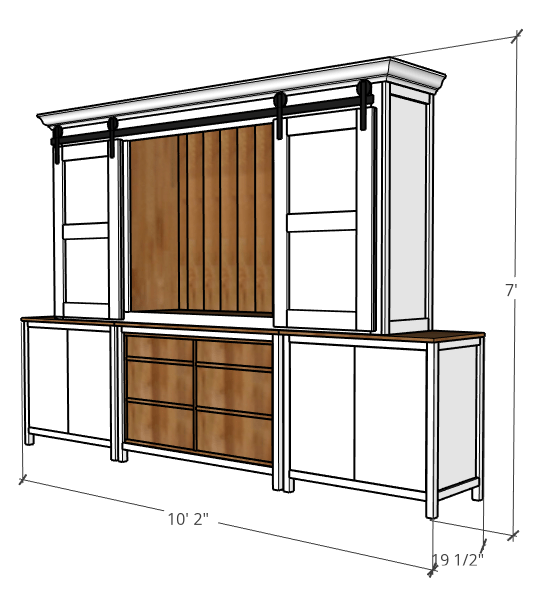
What I really love about this design is that it is broken down into separate pieces so if you didn’t want to build the ENTIRE thing, you can still build each section as a stand alone piece. That also makes it easier to transport and move haha.
.
But if you’d like the whole thing, don’t forget to grab the full plans here.
If you’ve missed the other two parts of the series, be sure to check those out as well. And if you want to save this for later or share with a friend, I’d love if you’d pin this!
Until next time, happy building 😊