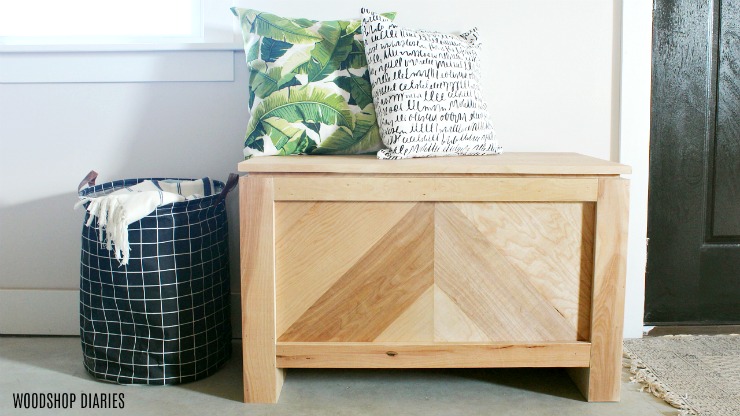
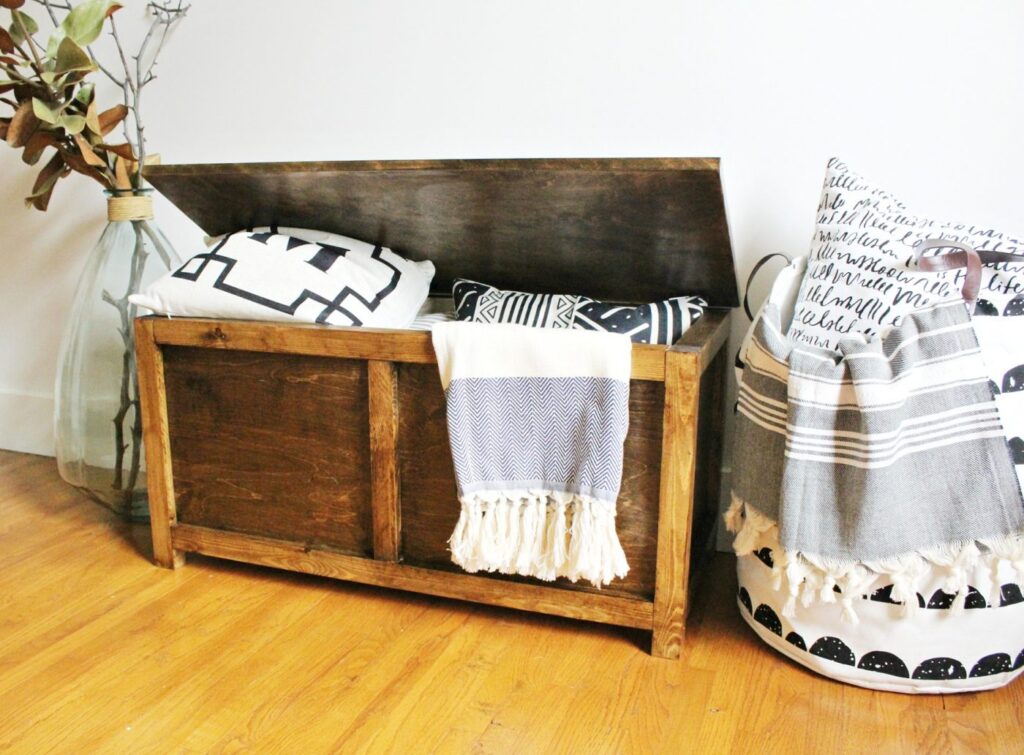
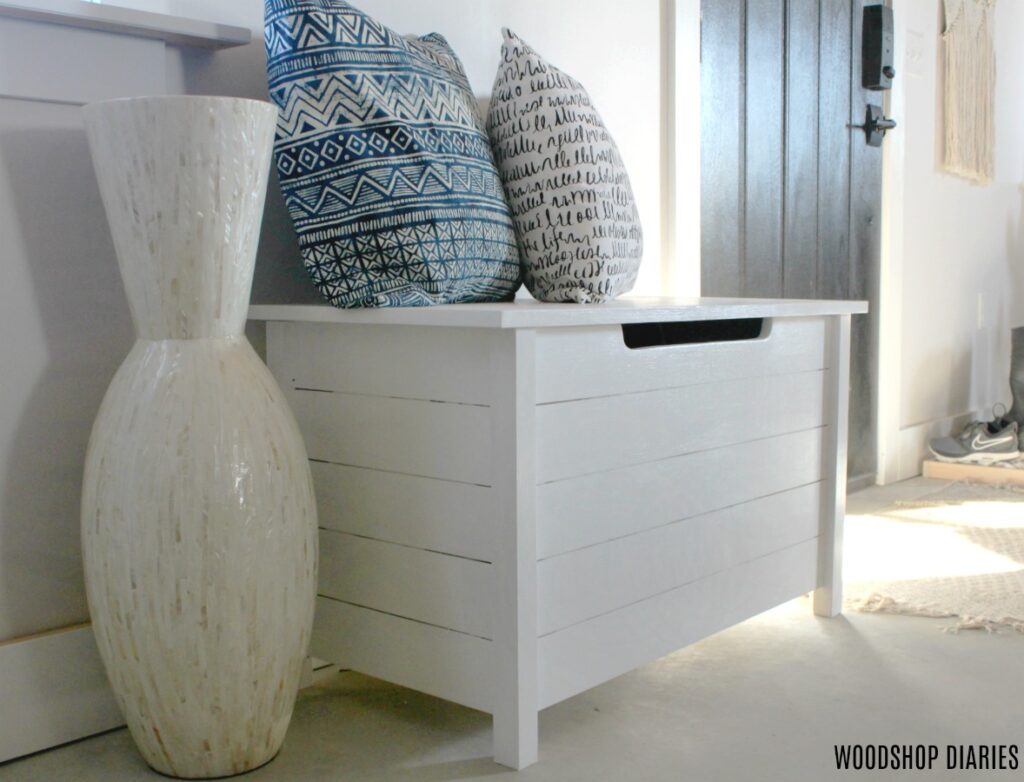
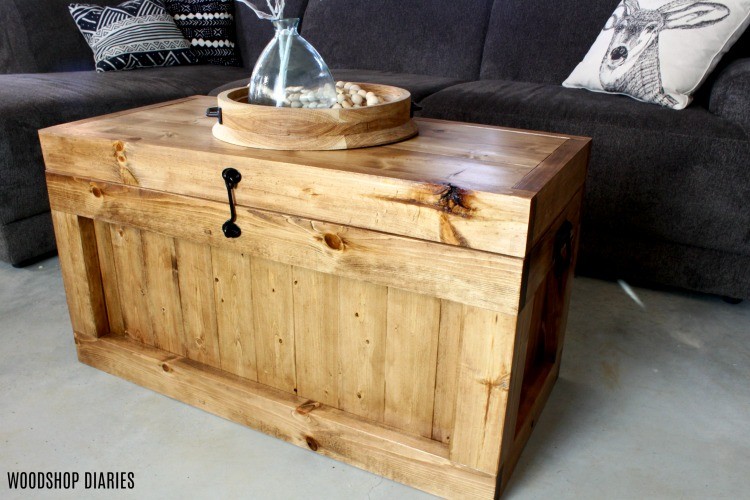
In this post, I’m sharing how to build this DIY wooden storage trunk/hope chest!
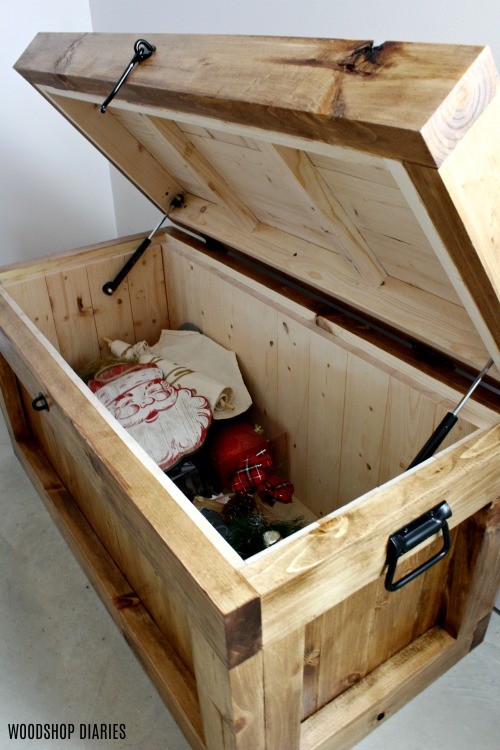
You can also check it out here as a Christmas Tree Skirt Box!
.
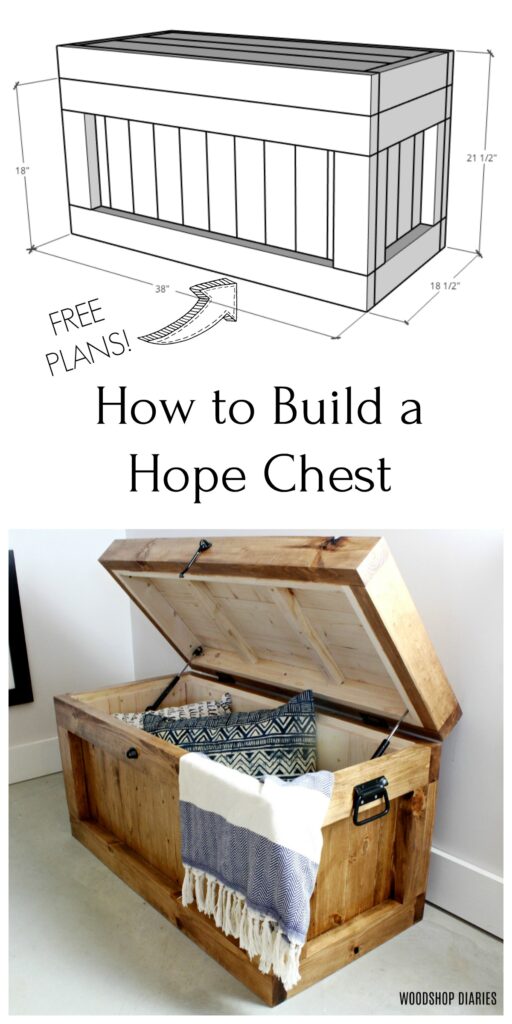
It’s a versatile piece of furniture that looks great in any room. Build it in just 5 steps!
.
This post is sponsored by my friends at Kreg Tool and contains affiliate links. See policies for details.

So, okay, let’s be real. This DIY Wooden Storage Trunk is actually just a simple storage trunk. No hidden compartments, no fancy add ons. Just your standard DIY wooden storage chest that makes a great hope chest.
.
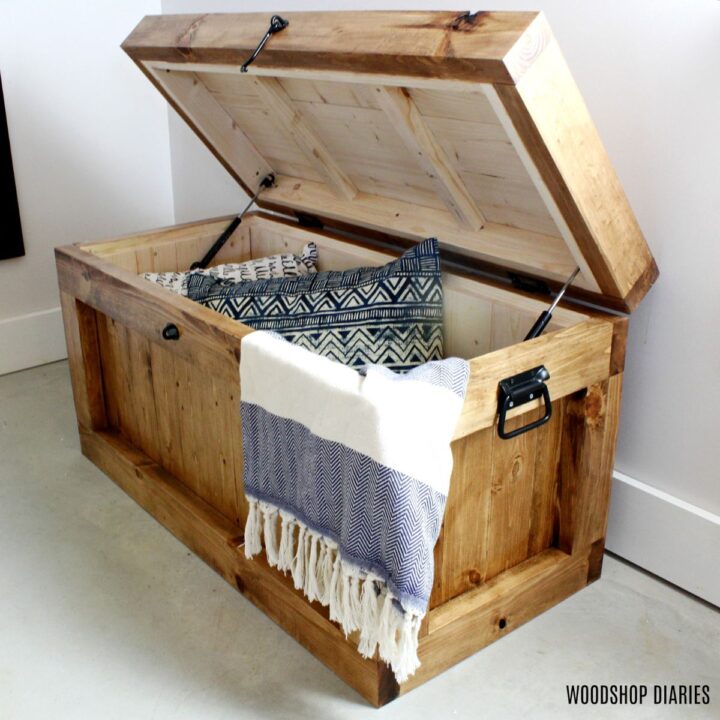
Except, that it has a soft-close hinged lid. No more trying to hold it up with one hand while you dig through the stuff inside to find what you’re looking for.
.I
It can also be used as extra seating. You know…because I live in a tiny garage apartment and multi-purpose furniture is always a plus in small spaces.
.
Traditionally a hope chest was used by young women to collect and store items to be used once they got married. In this day and age that tradition is a bit outdated and we use them for storing all kinds of stuff.
.
I could use it to store all the various holiday and seasonal decorations that are currently in my workshop because they are getting covered in sawdust…and that’s just not a good look haha.
.
Hey, by the way, if you are looking for more storage chest ideas, check out one of these:

So if you want to build your own DIY wooden storage trunk, I’m sharing the how-to video below along with the tutorial and you can find the printable plans here.
You can check out the full length YouTube video here.
How to Build a DIY Wooden Storage Trunk
For this wooden storage trunk build, you will need:
Tools:
- Miter Saw
- Drill
- Table Saw (optional)
- Pocket Hole Jig
Materials:
- ¼ sheet ¾″ Plywood
- (1) 1x3x10
- (1) 1x2x8
- (5) 2x4x8
- (5) 1x4x8
- (1) 1x6x10
- Wood Glue
- 1 ¼″ pocket hole screws
- 1 ¼″ wood screws
- 2 ½″ pocket hole screws
- Lid Hinges
- Soft close mechanisms
- Chest Handles and Chest Latch
NOTE: Before getting started, I squared off the rounded edges of all my 2x material to make for cleaner joints. This is optional, but I think it makes the piece look cleaner when finished.
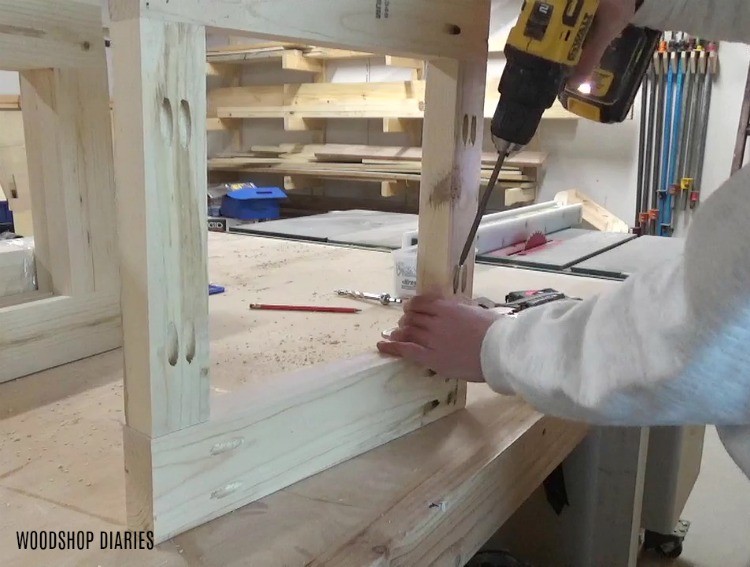
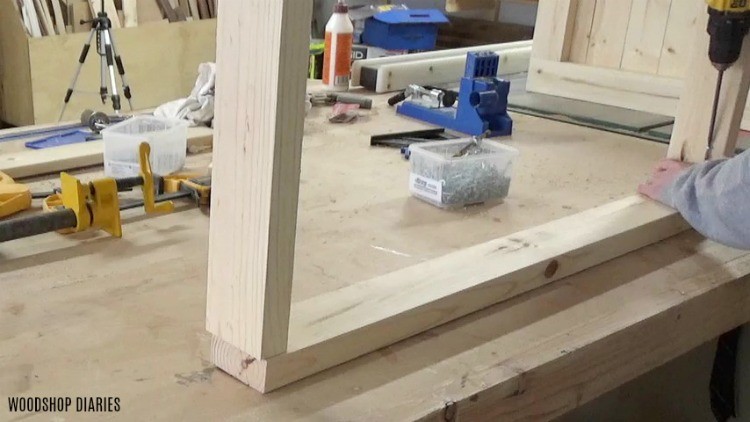
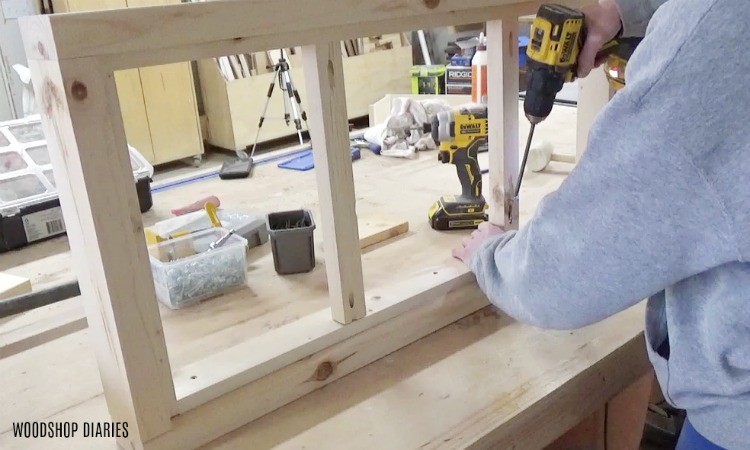
Step 1: Assemble the Wooden Trunk Frame
You can download the free printable plans from Build Something, with exact dimensions, but for this project, the first thing I did was assemble the frames for the side of the chest.
.
The entire frame was made from 2x4s and was assembled with 1 ½″ pocket holes and 2 ½″ pocket hole screws.
RELATED: Check out this post to learn how to set up and use a pocket hole jig!
Because I will be butting up another 2×4 to the side of these panels, for purely aesthetic purposes, I ripped the side pieces shown above to 2″ wide so that when the 2×4 is butted up to it, the width of this will match the full width of a regular 2×4.

Once the small side frames were assembled, I assembled two larger frames for the front and back.
.
Once all four frames were together, I screwed them into a box like shown using 1 ½″ pocket holes and 2 ½″ pocket hole screws. Don’t worry about all the pocket holes in this project. They will all be covered up later.

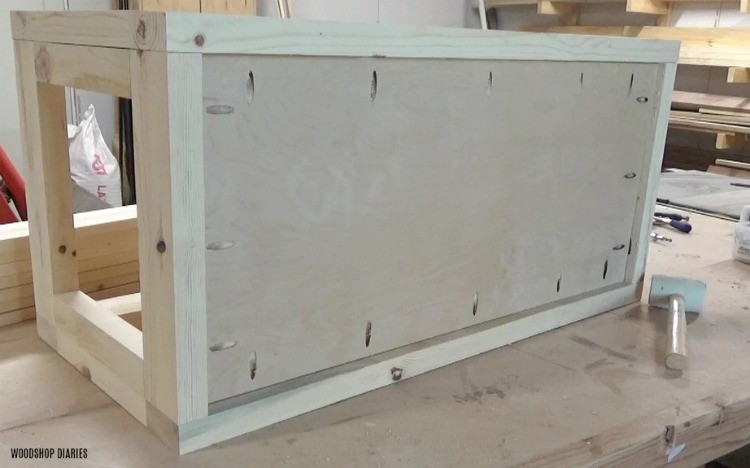
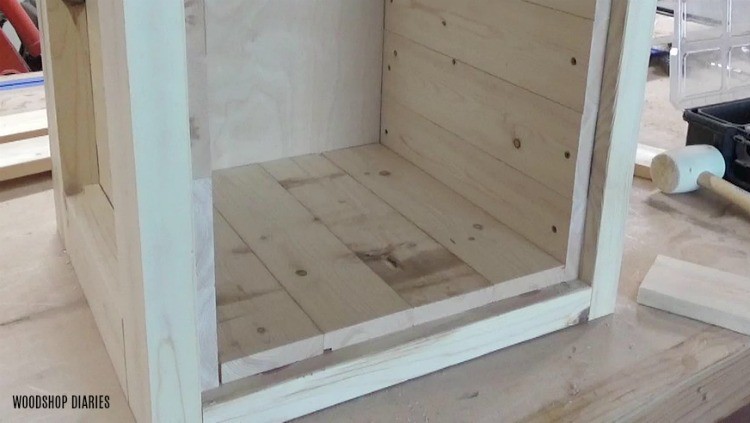
Step 2: Install bottom of wooden storage trunk
To make installing the bottom easy, I trimmed down a ¼ sheet of ¾″ plywood to fit into the frame. You could also use wood slats for this, but it’s easier to work with a single piece of plywood vs several boards, so I opted for the plywood.
.
I drilled ¾″ pocket holes around the edges and installed into the bottom of the frame from step 1 using 1 ¼″ pocket hole screws.
Step 3: Install Slats into sides of Wooden Trunk
The slats on the sides are made from 1×4 boards. I trimmed several 1×4 pieces to line the sides of the chest like shown. You could use other sizes besides 1x4s if you wanted.
.
Starting with the long sides first, I just applied wood glue along the inside of the frame, placed these 1x4s in and used 1 ¼″ wood screws to secure into the top and bottom.
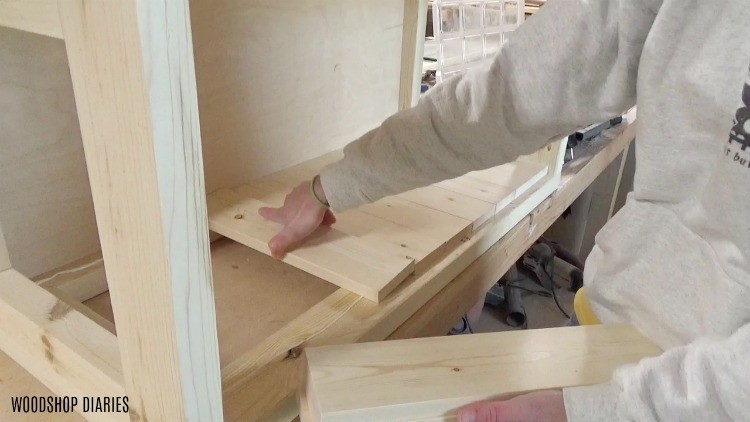
Once both long sides have slats, I installed the short sides the same way. You’ll notice I left a ¾″ lip along the top of the slats here. That’s optional.
.
I was going to use that as part of the design of the lid, but changed my mind, so it’s not a necessary part of the project.
Step 4: Build Trunk Lid Frame
I built the trunk lid frame using 2x4s as well. So, I used 1 ½″ pocket holes and 2 ½″ pocket hole screws to assemble a frame like shown that would fit exactly over the trunk body.
Once the frame was together, I lined the inside with 1×3 boards like shown–I used 1 ¼″ wood screws to secure. The goal here was to install these ¾″ DOWN from the top of the frame.
.
I’ll be placing slats onto these ledges and want them to be flush across the top.
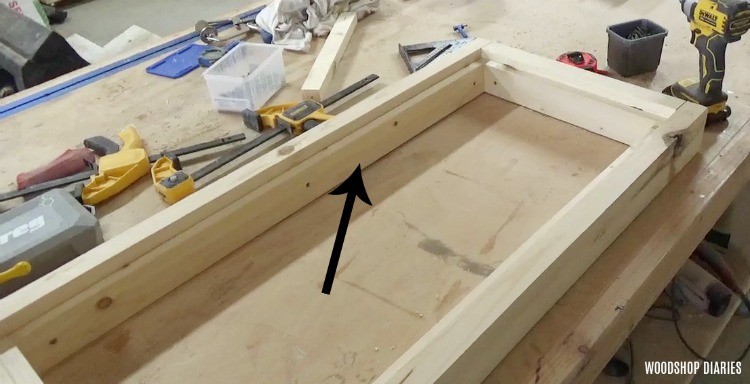
To give a little more support to the lid slats, I cut and installed two 1x2s as shown into the lid frame keeping them flush to the top of the 1x3s.
Finally, it was ready for the top slats. So I applied wood glue along the “1×3 liners” and the middle supports and placed 1×6 slats down into the frame. You can, again, use whatever size boards you wish.
.
In this case, I used 1x6s, but I had to trim the middle 1×6 to fit because the frame wasn’t wide enough to accommodate three of them side by side.
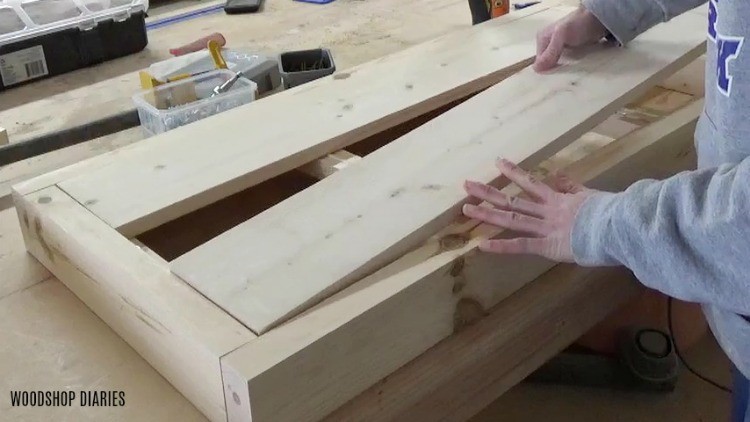
Once the slats were in place, I flipped it over and secured them through the 1x2s using 1 ¼″ wood screws. I flipped it back over and clamped the slats down around the edges until the glue dried.
Step 5: Finish and Install Trunk Lid
It’s easier to finish the lid and chest separately, so I went ahead and stained it with Minwax Early American stain.
.
Then, I used a pair of non mortise hinges and attached the lid to the chest.

In addition, I also added these soft close mechanisms to prevent any smashed fingers. These are a little tricky to install–the included instructions aren’t super helpful and I always end up installing and adjusting a little bit until it works right.
.
I’m sorry, I don’t have super helpful advice here…I’ve installed several of these and they are still frustrating to install. But, they work really well once you get them set.
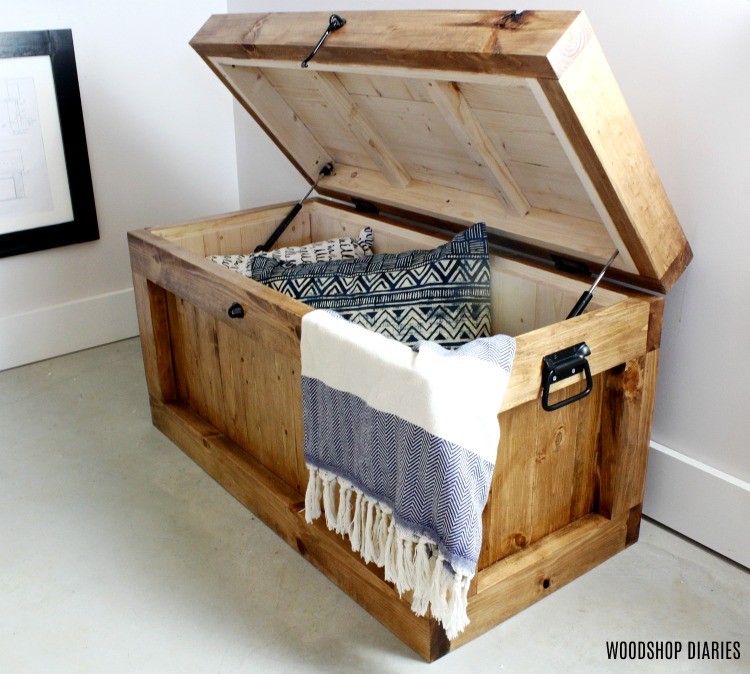
One note about the soft close mechanisms …they don’t allow the lid to open up all the way back. No worries. These soft close mechanisms install with two “knobby” looking parts for each end into the chest and the soft close cylinder simply snaps onto them.
.
If I want to open it all the way, I take a screwdriver and simply pop one end off the knob and when I’m ready to put it back on, I simply pop it back in place.
As far as the other hardware on the chest, I added a latch, and handles to give it a little more visual interest. Also, I finished this with a couple coats of Helmsman Poly after the stain…just in case you were curious 🙂
.
I’ve built several storage chests and this one is BY FAR my favorite design. So simple, but so eye catching. Who knew 2x4s and 1x4s could look so nice? PS, if you need a storage coffee table, this also works nicely *wink wink*
So if you loved this project as much as I did, I’d love if you’d pin this for later and don’t forget to check out the video tutorial!
Until next time, friends, happy building 🙂

DIY Wooden Storage Trunk/Hope Chest
How to build a DIY wooden storage trunk/hope chest in just five steps!
Materials
- ¼ sheet ¾" Plywood
- (1) 1x3x10
- (1) 1x2x8
- (5) 2x4x8
- (5) 1x4x8
- (1) 1x6x10
- Miter Saw
- Drill
- Table Saw (optional)
- Pocket Hole Jig
- Wood Glue
- 1 ¼" pocket hole screws
- 1 ¼" wood screws
- 2 ½" pocket hole screws
- Lid Hinges
- Soft close mechanisms
- Chest Handles
- Chest Latch
Instructions
- Assemble the wooden trunk frame using pocket hole screws.
- Install the bottom of the wooden storage trunk using pocket hole joinery.
- Install slats into the side of the wooden trunk.
- Build trunk lid frame.
- Finish and install trunk lid using non-mortise hinges and soft-close mechanisms.