Raise your hand if you love fake stuff?? I’m guessing most people aren’t huge fans of “fake.” I can smell fake from a mile away…fake wood, fake people, fake sugar…and I don’t like it. Even still, today I’m bringing you a faux drawer dresser build. I know…FAKE! But I promise, it’s for a really good reason…
.
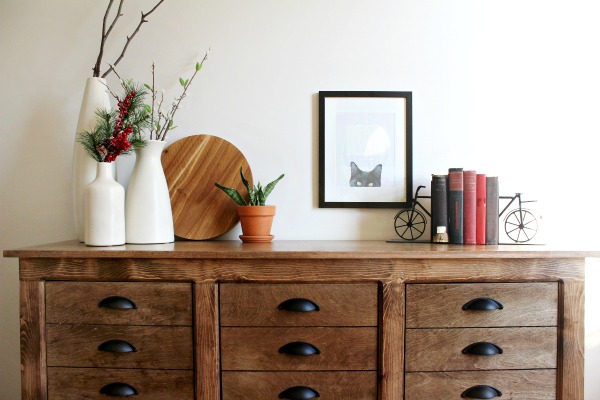
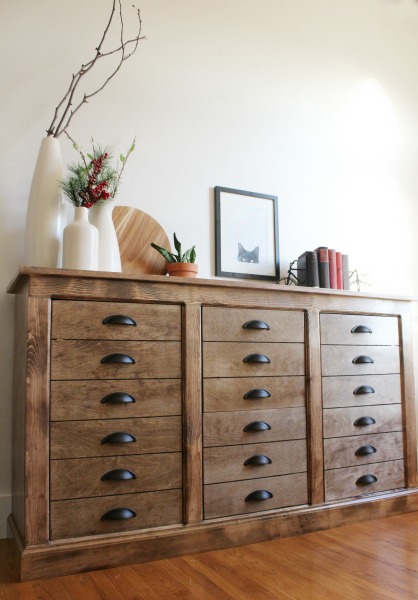
Because sometimes, fake is actually REALLY STINKIN’ PRETTY!
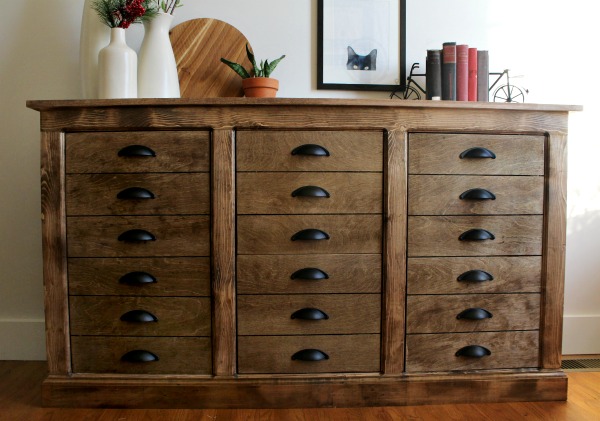
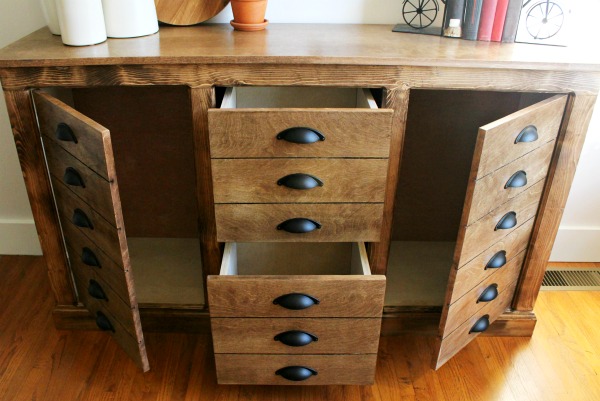
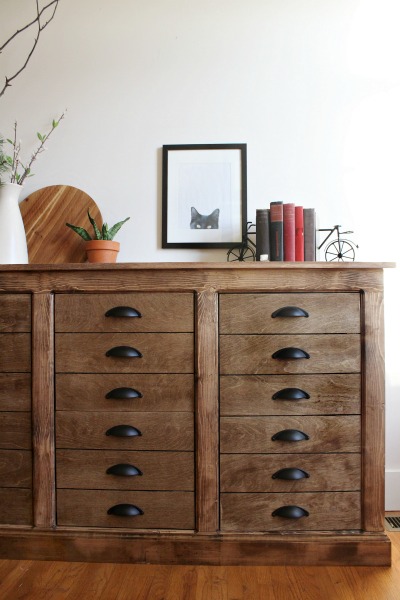
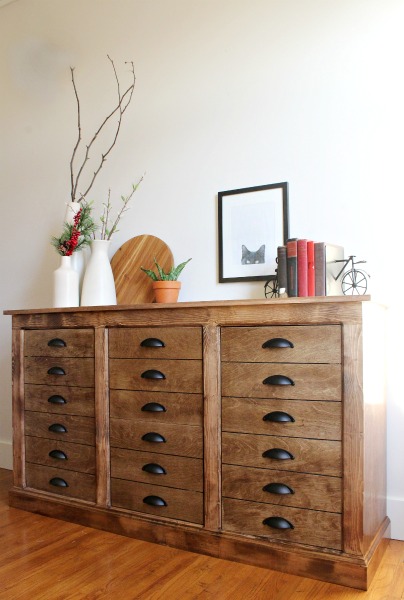
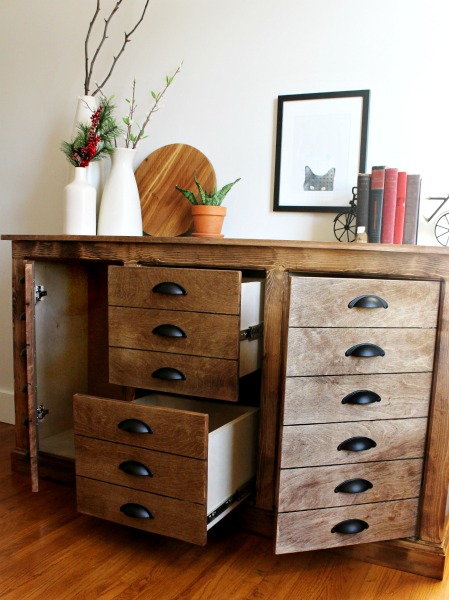
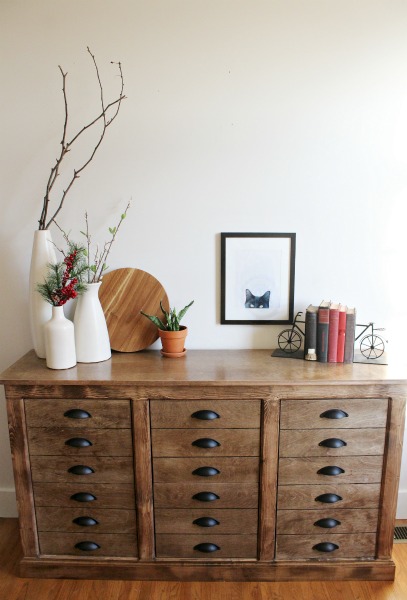
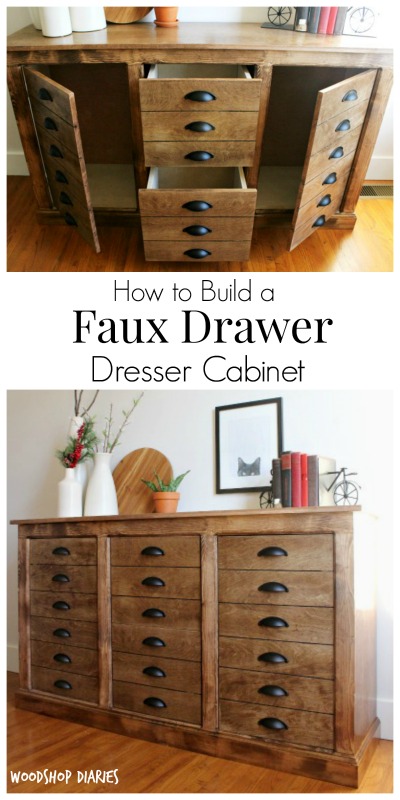
Can you believe these “drawers” in this dresser are totally 100% fake?! Well, ACTUALLY, I lie. There are drawers in here, but it’s not exactly how it appears. See what I mean?
PS, if you’re into really pretty fake things, check out this fake storage fireplace, and this fake brick fireplace 😉
.
Storage pieces with a million drawers are so pretty! But, seriously, who wants to make a million drawers?? Plus, drawer slides aren’t the cheapest things in the world…and we all know, I’m cheap haha.
.
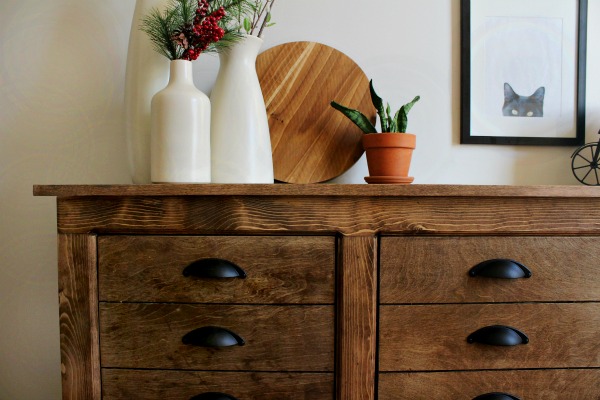
So, this fake drawer dresser cabinet simplifies (and saves some $$ on) this build, but doesn’t take away the beauty or the storage space 🙂 Plus, it makes lining up your “drawers” a piece of cake haha. Side note: see that cute kitty art?? You can make your own personalized pet art from your own pictures with this tutorial 🙂
This post was sponsored by Build Something, Kreg Tool‘s site for free DIY building plans for everything from small decor pieces to dressers, cabinets, and beds. This post also contains affiliate links. Thank you for supporting this site and the brands that support this site. Please see disclosure policy for details.
.
You can click on over to Build Something to grab the free plans for this faux drawer dresser cabinet, BUT first, let me give you some tips and recommendations 🙂
.
For this build, I used a few specific tools and products that I will highly recommend for this project AND that will be HIGHLY useful in future projects:
.
D Lawless Country Store Drawer Cup Pulls
.
One of my favorite tools I used on this build was the Kreg AccuCut. This is like a track saw that you can use with your circular saw. It made cutting the little slots in the doors and drawer fronts a breeze. The AccuCut has a rubber backing that stays in place without clamps, so you just slap it down where you want to cut, and run your saw along it.
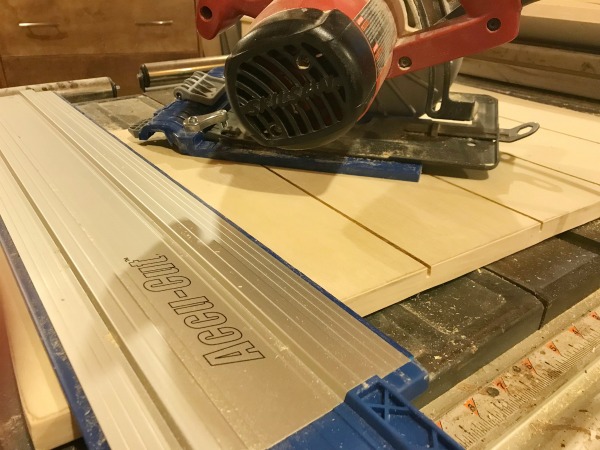
When I made my fake drawer cabinet doors and drawer fronts, I measured down each side of the door where I wanted my slots, then set my circular saw in the track of the AccuCut, and set my blade depth to about ¼″. Then, I lined up the AccuCut with my marks and ran my saw through it. Then, just moved it to the next set of marks, and repeated. This was much faster than having to line up and clamp straight edges, or having to adjust rip fences on my table saw for each mark.
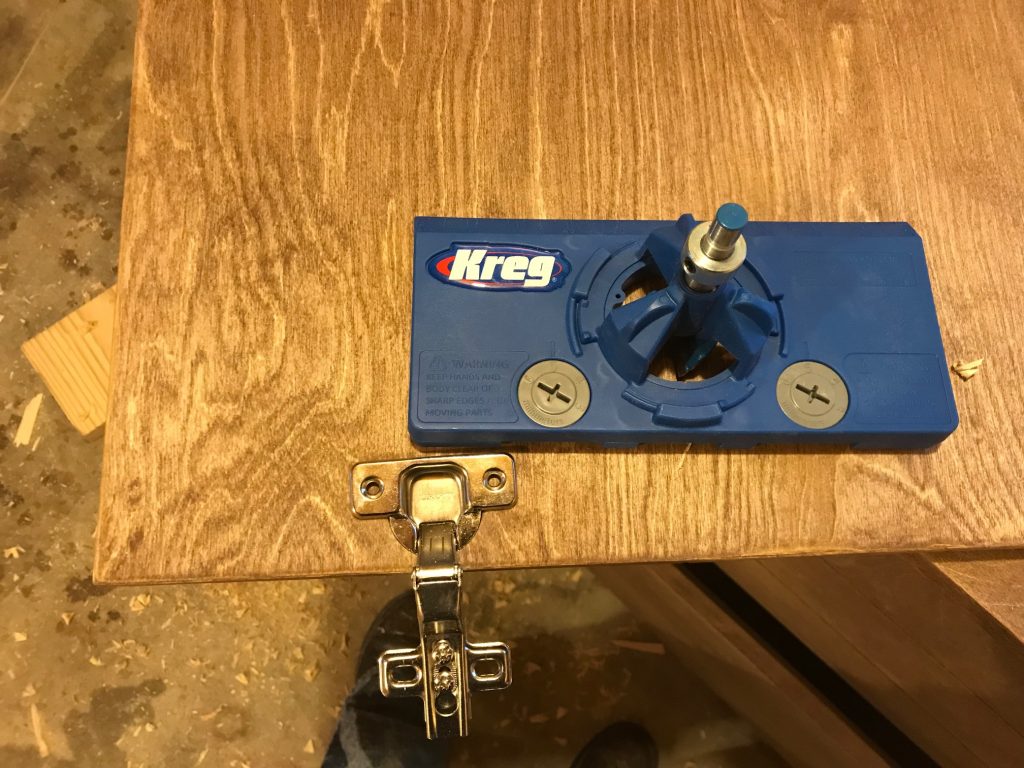
The Kreg Concealed Hinge Jig was SUPER helpful with this build as well. I’ve never used concealed hinges before. Normally, when I want inset doors and don’t want you to see the hinges, I’ll use little butt hinges. They are really small, so you don’t notice them too bad, but you can still see them and they are really hard to adjust if everything isn’t lined up perfect.
.
So, since I really wanted this cabinet to look like it had a bunch of for real, legit drawers, I didn’t want to use the butt hinges. I needed concealed hinges. Concealed hinges are 100% concealed (so you won’t see any part of them), and they have endless adjustment options to get your door to sit perfectly in the opening, BUT they also have this “cup” that sits in the door. This requires you to drill out this hole in the door for the cup. Always pros and cons…
But, the concealed hinge jig makes this SO easy. It was my first time ever using this type of hinge and this jig and I had my doors installed in about 15 minutes. With butt hinges, it usually takes me three times that long! I highly recommend using concealed hinges (I don’t think I’ll ever go back to butt hinges now!), and if you don’t have a fancy drill press, this jig is a must have.
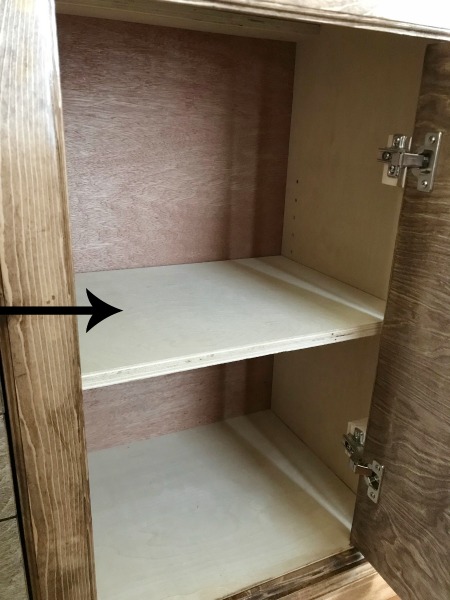
Okay, so now let’s talk about the Kreg Shelf Pin Jig. Stationary shelves are great, but adjustable shelves are usually better. Indecisive people (like me) have a hard time deciding where they want their shelves, so giving them the option of adjusting when they change their mind a million times is a great idea 🙂
.
This jig makes it easy to drill evenly spaced holes for shelf pins without having to have a drill press and make a million measurements. I use it all the time! Just place your shelf pins in the holes you want and slide your shelf in place. Then take it back out, move your pins, and repeat a thousand times when you change your mind 😉 haha
The pocket hole jig and the rip cut are two of my favorite (and most used) tools because it makes assembling and cutting down huge pieces of plywood so much easier on this scrawny builder. You will see these tools used in almost all my projects 🙂
.
One more detail in this build that you might have noticed is the routed detail around the doors and drawers.
It’s not a huge feature, but I think it really adds a nice detailed touch to the cabinet. I recently got this router bit set for my birthday and have really enjoyed putting it to use lately. I gave the Roman Ogee bit a run on the door and drawer openings on this piece and really loved the added detail. It only took a few minutes to do.
If you are looking for a good beginner router bit set, I love this one and highly recommend it. Once you add a decorative edge to one thing, you’ll want to do it to everything…like this DIY Christmas Lantern Post!
.
Finally, let’s talk about these GORGEOUS cup pulls.
All the heart eyes, amiright?? I love D. Lawless Hardware–they have a million options and the prices are outstanding. I’ve never been disappointed with any of the door or drawer pulls I’ve gotten from them and these pulls are no exception. These country store cup pulls are excellent quality. They are heavy and very easy to install. And since you’ll have to buy 18 for this build, it’s also nice that the price is less than $2 each. Not. Even. Kidding.
.
So, if you are ready to get building, click over to Build Something for the free plans and don’t forget to pin this for later 🙂
Until next time, happy building 🙂
Shara:
Damn, girl. When are going to get rid of that pesky day job and totally just make furniture? And hold workshops so idiots like myself have “hands-on” training from you.
Kristin
Haha “pesky day job!” I would if I could, but the bills keep coming every month and furniture isn’t paying all of them ha 😉 Thanks so much for your comments and for following. I always love seeing what you think about my new projects 🙂
But what is the purpose of the far left cabinet without any shelving? Is it space for a mini fridge? You could put a rod in it and have it be a small closet, but other than that, I dont know what you would used a giant hole for
Both the side cabinets have adjustable shelves (I added them after I took the “final” pictures). But, you can use the space for whatever you wanted. It’s just a cabinet. That’s the beauty of DIYing…you can do whatever you want.