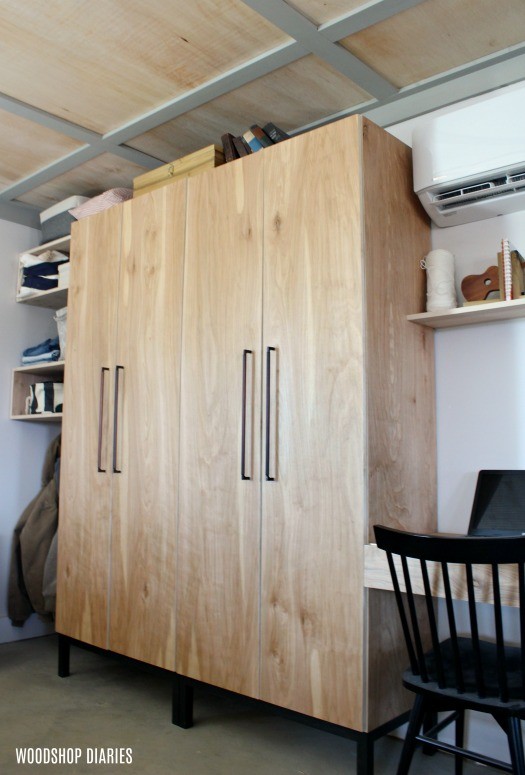
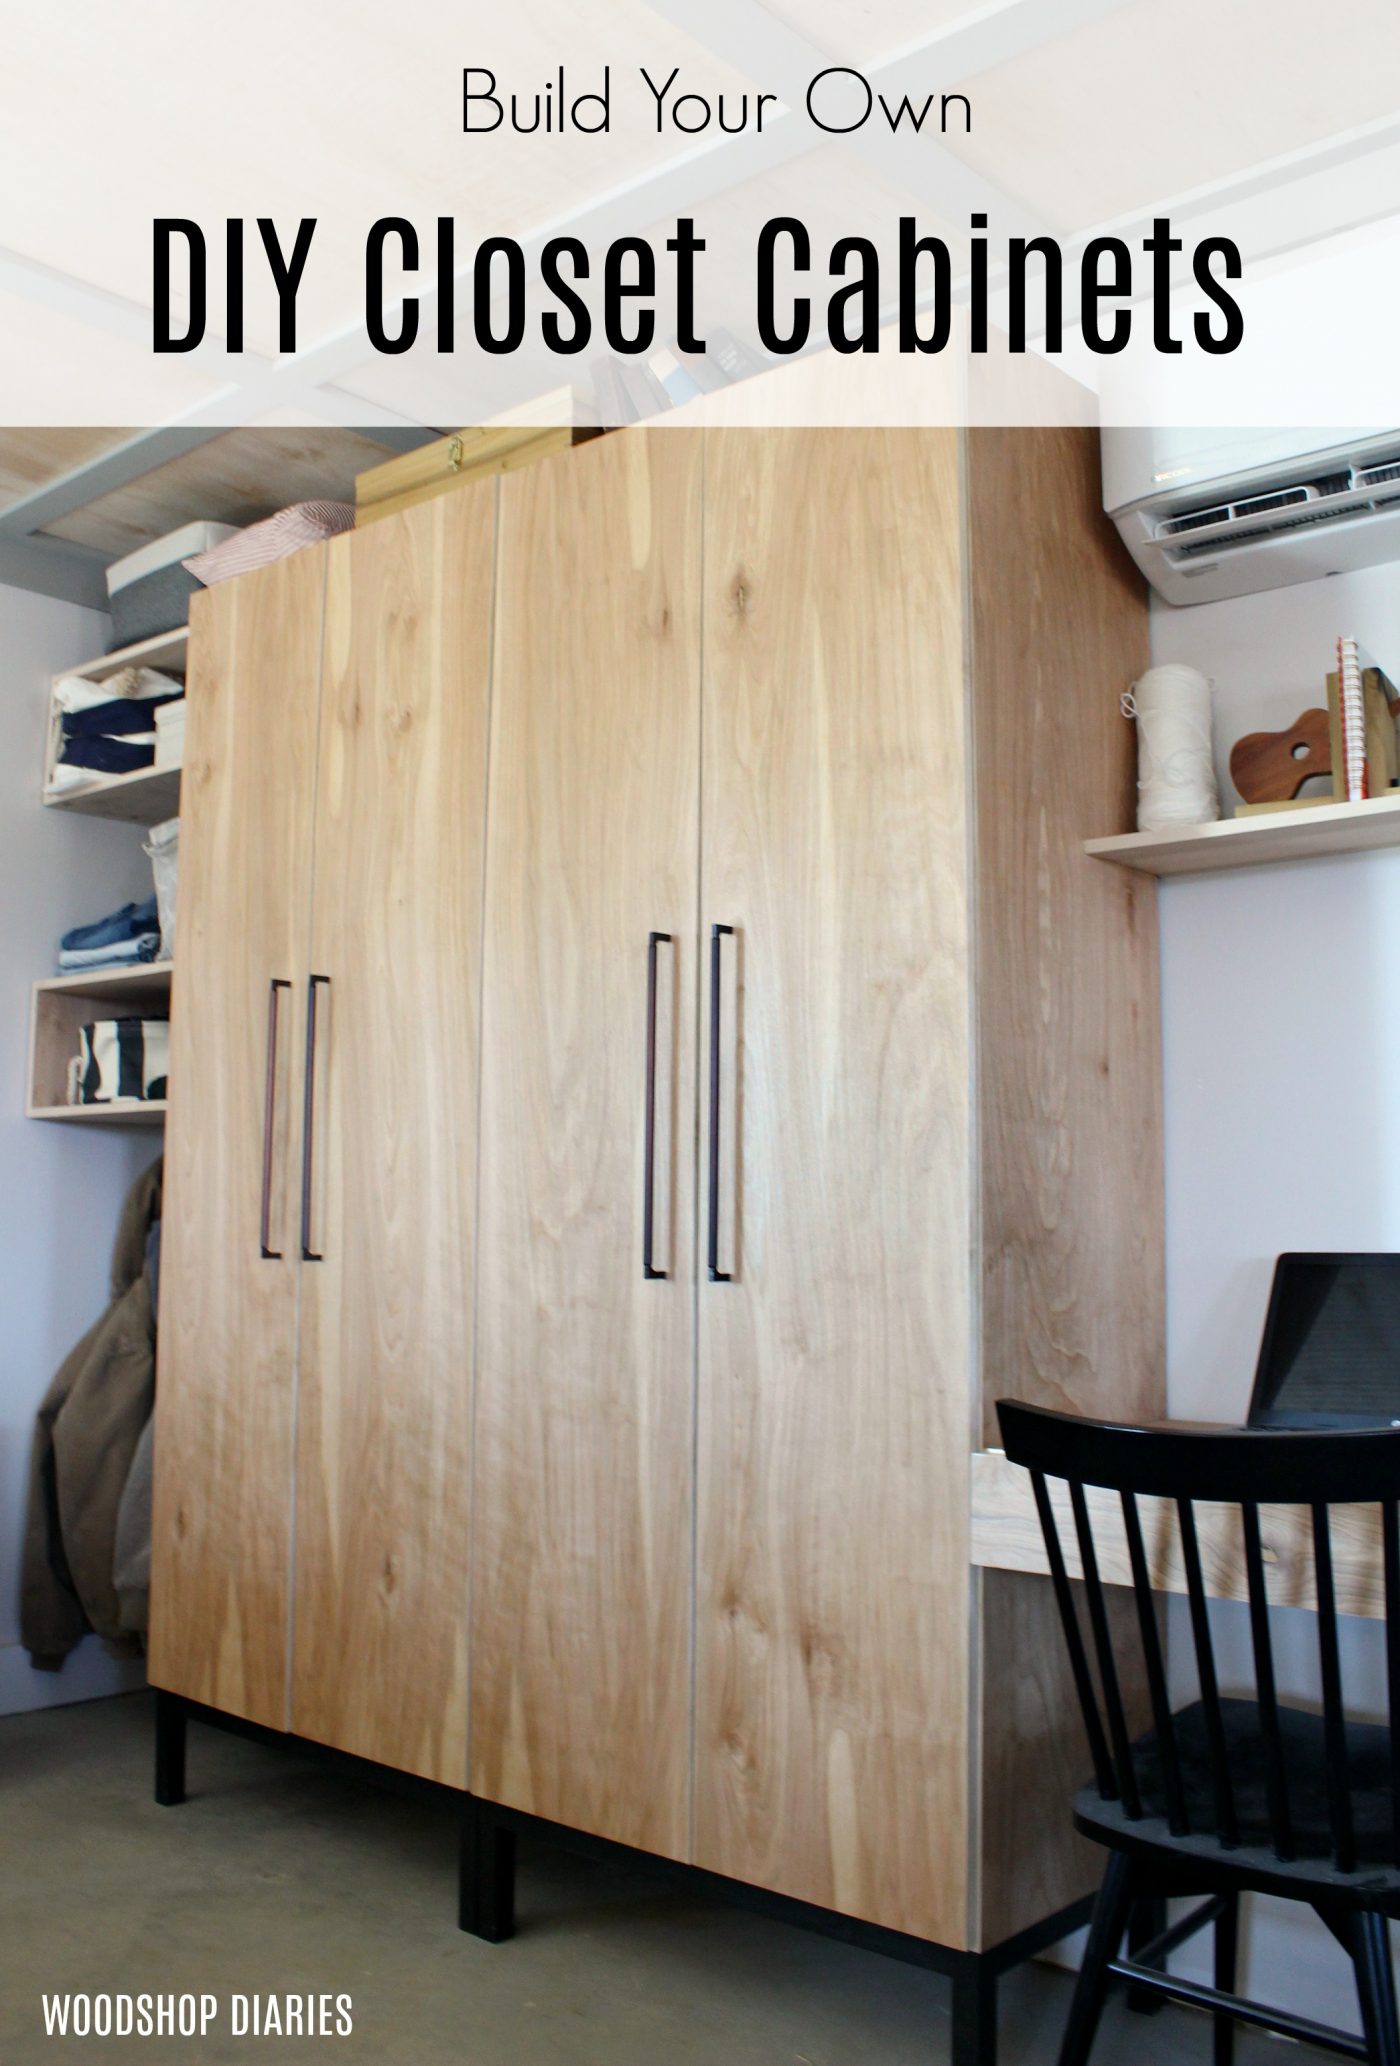
Need a some extra closet storage? Check out this post for how to build this stand alone DIY closet cabinet!
When we built our garage apartment house a few years ago, our plan was that eventually, when we built our forever house next door, this would become my shop space.
.
So we wanted it to be as open as possible for later when I had workbenches and tool carts in here. But that means we didn’t want to build out a closet.
.
I thought living here for a year, or two without a closet wouldn’t be a big deal. But, one week in and we were both already sick of the mess.
.
So, I decided to do something about it and built these fun modern DIY closet cabinets to organize and hide all our clothes and shoes.
If you’re living in a home with little to no closet space…or maybe you just have more clothes than you know what to do with, I’ll show you how to add some closet space with these easy DIY cabinets.
.
I’ve got the downloadable PDF plans available here and I’ll walk you through the process below.
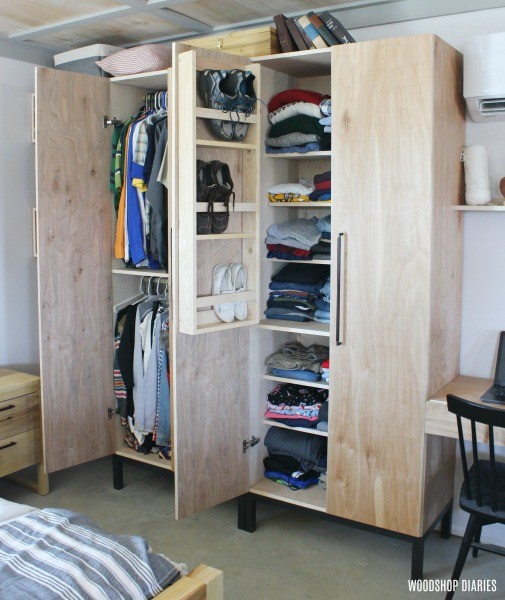
NOTE ABOUT THE BUILD: One of these cabinets was built with rods for hanging clothes and the other was built with adjustable shelves and a shoe rack. The cabinets are the same size, the only difference is on the inside.
.
I’ve included details on both in the plans. And I’ve also got a tutorial and video for you below.
This post contains affiliate links. Please see policies page.
.
What You’ll Need to Build These Closet Cabinets:
- (4 ½) sheets ¾″ PureBond plywood (builds two cabinets like shown)
- (2) sheets ¼″ plywood
- (3) 2x2x8 boards
- (2) 1x4x8 boards
- (2) 1x2x8 boards
- (1) 1 ½″ diameter dowel rod 6′ long
- (8) concealed hinges
- (4) door pulls
- Circular Saw
- Kreg Rip Cut
- Kreg AccuCut
- Miter Saw
- Kreg Pocket Hole Jig
- Drill
- Nail Gun (optional)
- Kreg Concealed Hinge Jig
- Kreg Shelf Pin Jig
- Shelf Pins
- Wood Glue
- 1 ¼″ Pocket Hole Screws
- 2 ½″ wood screws
.
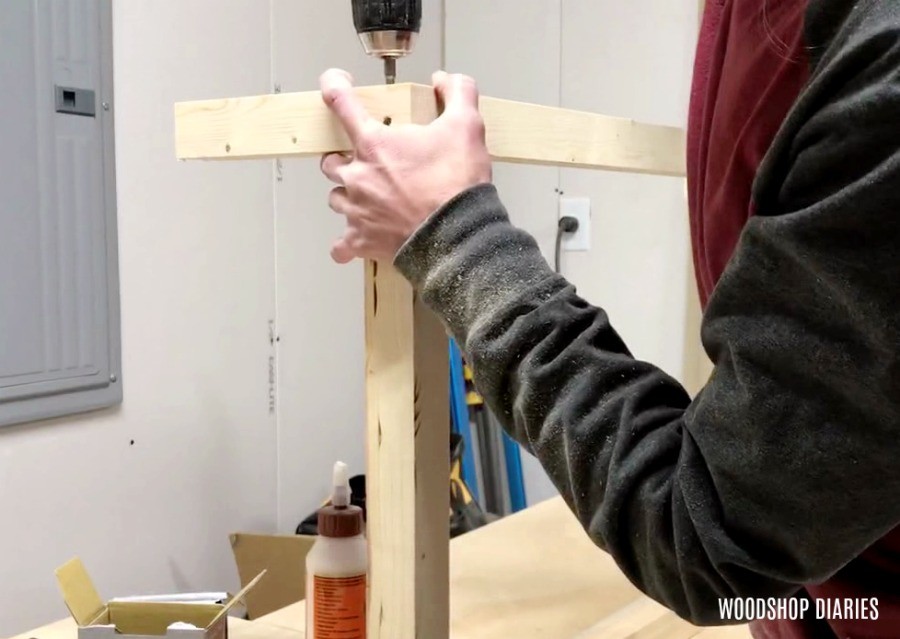
Step 1: Build Closet Cabinet Base
The first thing I did with this DIY closet cabinet build was start with the base. The base isn’t necessary for this project, but I liked the idea of the cabinet being off the floor and being able to vacuum underneath.
.
The base is very simple and made from 2×2 material. I simply glued and screwed the frame together with 2 ½″ wood screws. I built it 33 ½″ wide, 18″ deep, and 8″ tall overall. Since I was painting, I just puttied the holes and sanded.
.
However, if you were going to stain these, I recommend using pocket holes or dowels so you don’t see the screws from the outside.
You can download the PDF building plans here.
.
Once the base was assembled, I puttied and sanded and painted it black. While the paint was drying, I moved onto the actual cabinet.
Step 2: Build the Closet Cabinet
As mentioned earlier, I built two different types of cabinets, but they were both the same size.
.
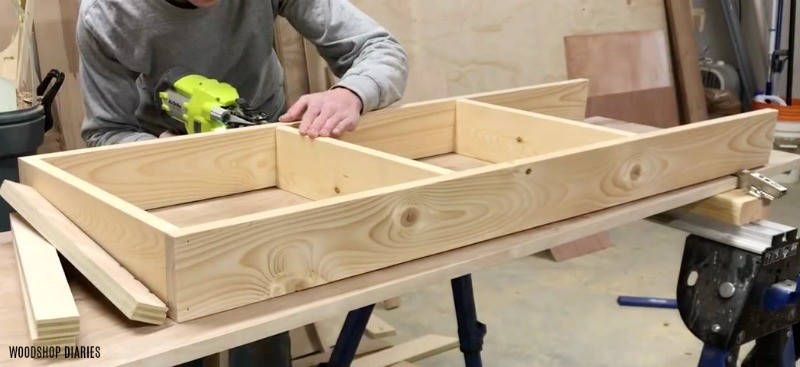
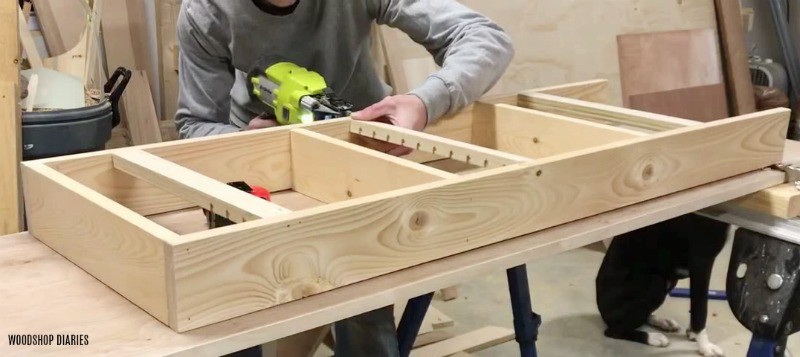
So, I cut down the plywood and assembled two carcasses using ¾″ pocket holes and 1 ¼″ pocket hole screws like shown here. I always recommend using PureBond plywood for building cabinets and furniture of any kind.
RELATED: Check out this guide for how to cut down your plywood sheets!
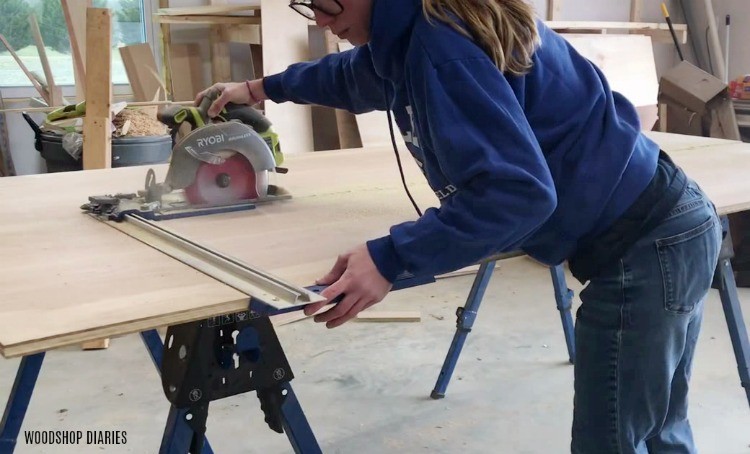
I built these cabinets 18″ deep (because that was about as deep as it needed to be for my clothes hangers to fit and still be able to close the doors). You can make them as tall as you wish.
.
I assembled them together using ¾″ pocket holes and 1 ¼″ pocket hole screws.
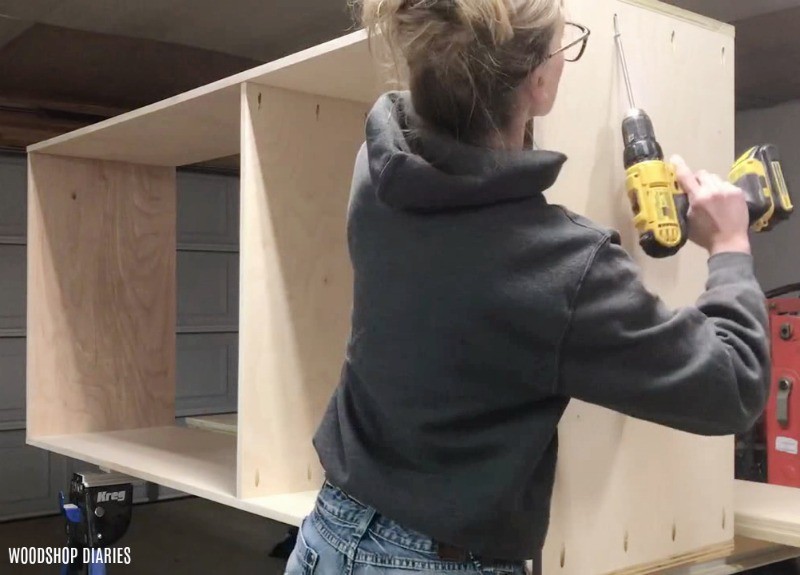
But when it came time to add the middle shelf in the cabinets, for the hanging clothes cabinet, I put it in the middle and for the adjustable shelf cabinet, I installed it slightly off center making the top section a little larger than the bottom.
.
The middle shelf isn’t 100% necessary, but it helps keep the sides from bowing out and helps sturdy up the cabinet.
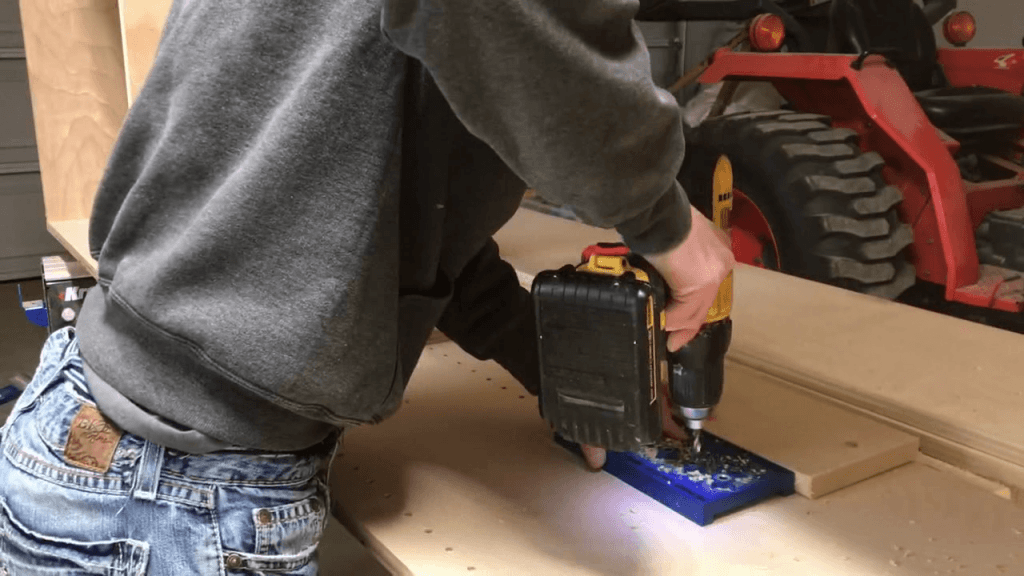
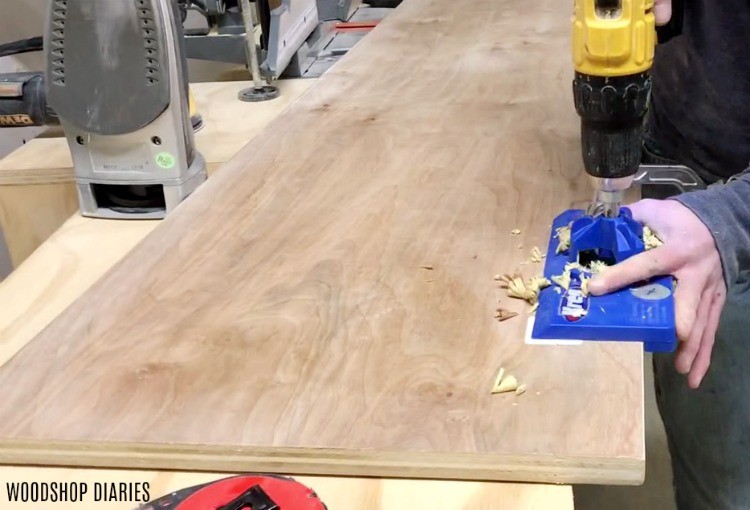
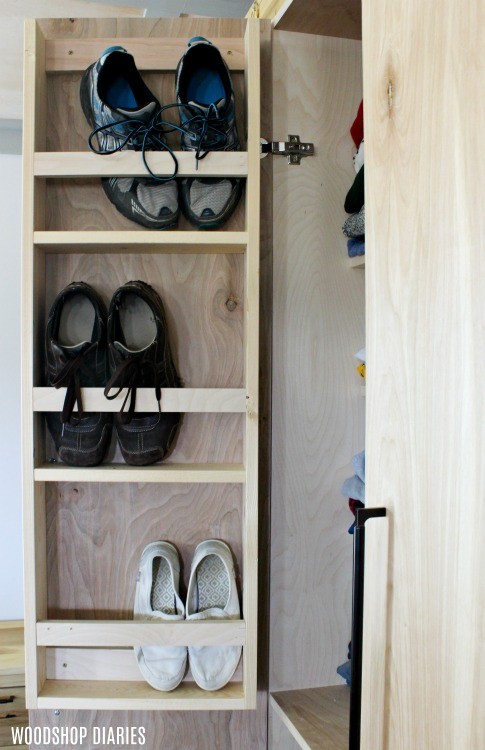
One other difference between the two types of cabinets besides the placement of the middle shelf is the shelf pin holes. For the cabinet with adjustable shelves, I added shelf pin holes using my Kreg shelf pin jig.
Of course, you can do stationary shelves instead, but adjustable shelves are really nice so you can place them wherever you want in the cabinet.
.
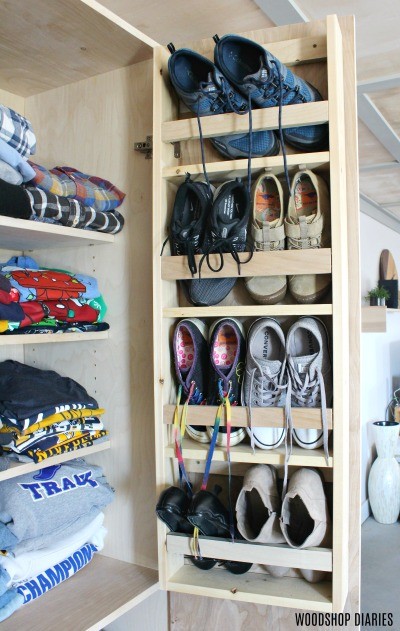
When I drilled these, I made sure that they were no more than 11″ from the back side of the cabinet. You don’t want the shelves too deep, so you leave room for the shoe rack on the back of the doors.
.
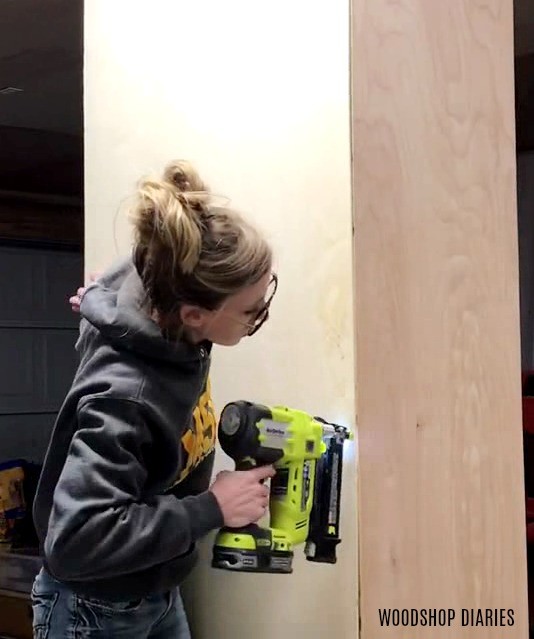
One thing to note here is that I didn’t think about it until after I had already built these is that because these may have a tendency to be top heavy, it’s recommended that you attach them to the studs in the wall to prevent them from tipping over.
.
In order to do this, you will need to have a board running between the sides at the top of the two cabinet sides. You can see this in the plans, but you can use a scrap piece of ¾″ plywood and secure between the cabinet sides at the top using pocket holes and screws or simply 1 ¼″ wood screws through the cabinet sides.
.
Then screw through this piece into the wall studs when they are in their final place.
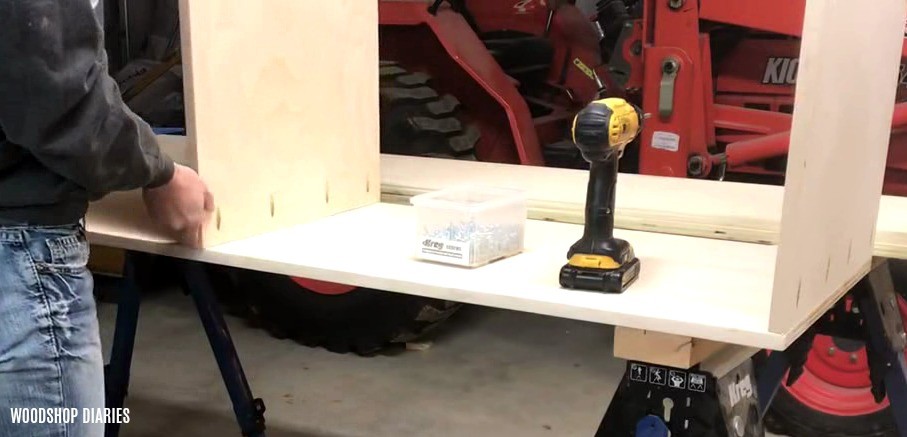
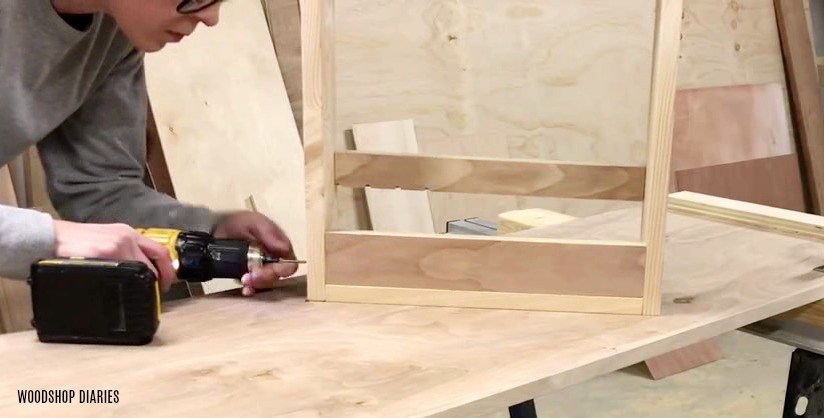
Step 3: Attach Cabinet Carcasses to Base
Once the cabinets were assembled, the paint was finally dry on the bases, so I attached the cabinets to be bases using 1 ¼″ wood screws like shown.
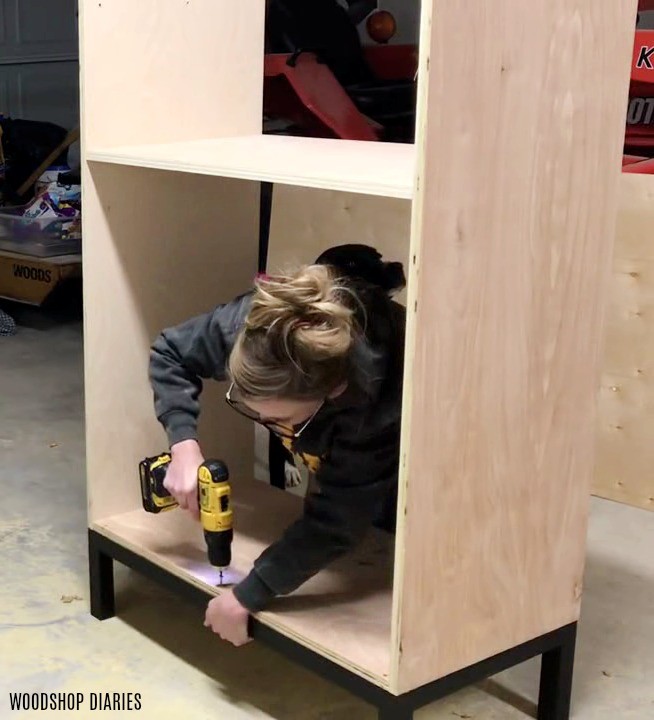
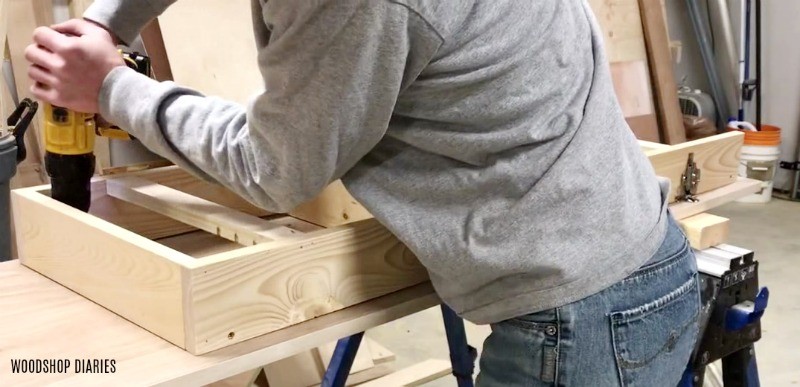
Step 4: Attach Backer to Cabinet Carcasses
Then, I cut a piece of ¼″ plywood to use as a backer and attached using my nail gun and brad nails. If you don’t have a nail gun, finish nails and a hammer work just fine or a hand stapler 🙂
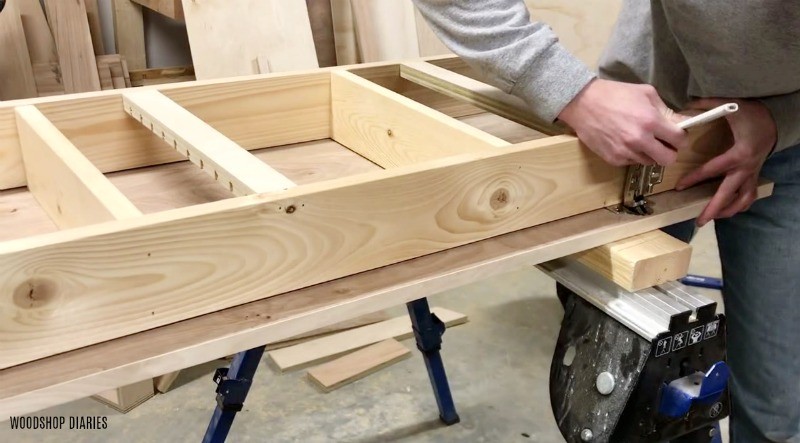
Step 5: Add Doors to the Closet Cabinets
Next up are the doors. I cut down two doors from ¾″ plywood and added some edge banding.
.
Check out how to install edge banding in this post.
.
I made these as full overlay doors, so they would cover up the cabinet sides. My cabinets were 33 ½″ wide, so I cut my doors 16 ½″ wide to allow ⅛″ on each outside and ¼″ gap in between.
.
Then I added full overlay concealed hinges from Liberty Hardware onto each door using my Kreg concealed hinge jig. I have a helpful guide for installing concealed hinges here.
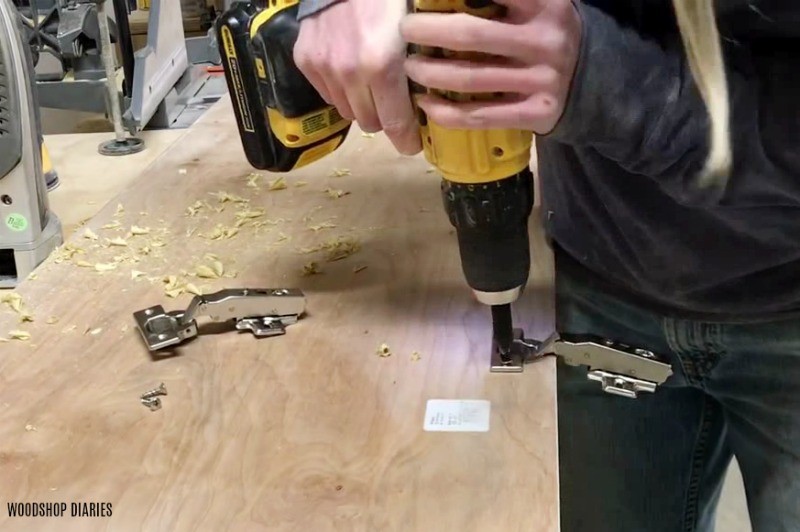
Once the hinges were in place, I went ahead and hung the doors on the hanging clothes cabinet and all that was left to do was add the closet rods.
Step 6: Customize Closet Cabinet Details
I cut 1 ½″ dowel rods 32″ long to fit inside the cabinets and secured from the cabinet sides into the rod with 2 ½″ wood screws. However, you could also use closet rod hanging hardware. Screws are cheaper, though…just saying 😉
.
Make sure when you install these, you test fit your hangers to make sure the rod is located where the hangers will hang freely and fit.
.
But, for the cabinet with adjustable shelves, there was still work to do. I used 1x4s and 1x2s to build a quick little shoe shelf like shown below. This should be about 15 ¾″ wide and slightly shorter than the top section of the cabinet carcass.
.
There were just three shelves, but I spaced them about 14″ apart. If your shoes are smaller than that and you want to add move shelves, you can. You just have to make sure that you don’t lengthen the height of your overall shelf. It has to fit above the middle divider shelf in the cabinet.
I used wood glue and brad nails to attach the shelves, but on the top and bottom of the back side, I used screws to attach two 1×2 boards. You can see this below.
.
These are how you attach the shelf to the door. Since they will be holding all the weight, I went with screws.
One thing to note here is that the shelf was so wide that I had to trace and cut out a little on this shelf so it would fit around the concealed hinge in order to close the door on the closet cabinet.
.
I set the shelf at the height I wanted it on the door (1″ down from the top) and traced around the hinge, then cut it out using my jig saw.

Then, I screwed the shelf in place onto the door.
You can find all the dimensions and details in the downloadable PDF plans here.
.
Once the shoe shelves were attached to the doors, I installed the doors onto the adjustable shelf cabinet.
.
And finally, the last thing to do was cut a few shelves and add those in with shelf pins. You can add as many shelves here as you want, but make sure the ones at the top are only about 11 ¼″ deep or the doors with the shoe shelves won’t be able to close.
.
Also note: once the cabinets are in place, be sure to securely attach to the studs in the wall.
.
Then fill those things with ALL THE CLOTHES!
And all the shoes!
It may not be a typical closet or enough clothes storage for everyone, but for our tiny garage apartment and the few clothes we have, it’s perfect. And it matches our simple, modern style, too, just like the kitchen in our garage apartment 🙂
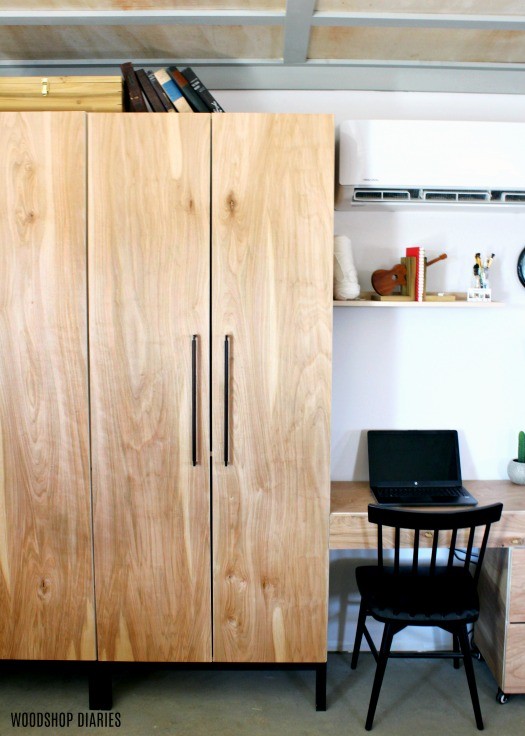
For a little extra storage and to give me a place to do my work, I added this simple little desk and mobile drawer box. But that’s another story for another day haha.
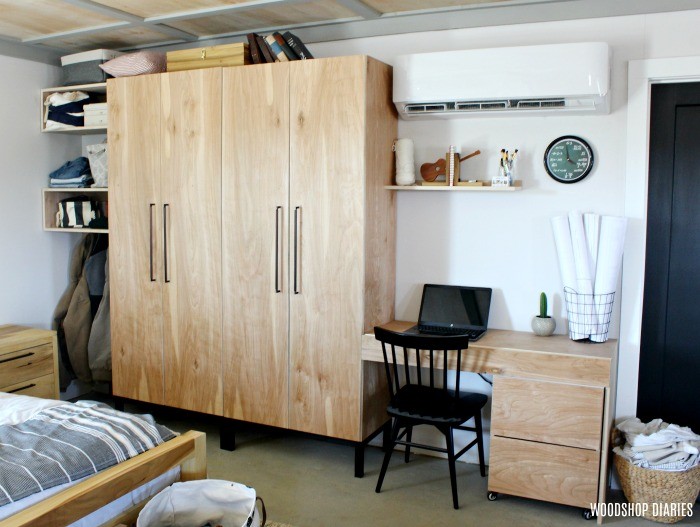
I really love that when we build our forever home next door to this garage apartment, I can simply move this DIY closet cabinet to our new closet and build onto it. So, if you’re ready to get building, be sure to check out the plans available for download here.
.
And be sure to pin this for later 🙂
If you would like some more organization ideas from several other super talented friends of mine, check out these ideas below. We joined together to share some of our latest ideas and DIY projects to help keep you organized 🙂
.
Until next time, happy building 🙂

These are fantastic! I love the shoe holders on the doors – very smart. Great project!
Thank you! I love being able to have my shoes hidden away!
I love these closets!! Such a great design!
Thank you!!
Shara you sure know how to make plywood look gorgeous! And the shoe rack on the interior – genius!!
I love me some plywood! Thank you so much Jaime!!
Good grief those closet/cabinets are gorgeous! If I had a place for one I would definitely take a shot at building it. Perfect .
Thank you so much!
You’re a rockstar! Love these!
Thanks Sheri!!
whoa! what a great idea for portable closet storage you can take with you when you’re ready. I really like the shoe storage.
pinning!
gail
Thank you so much!!! <3
Another amazing build, Shara! And those shoe racks are genius! Thanks for joining in on the fun!
Thank you so much, Jen!!
Shara! I am in LOVE! Lol! Seriously though, I didn’t realize the doors had shoe storage! That was brilliant! I need this…and a clone of myself to get stuff built! Lol!
Thanks Cara!! I wish we lived closer! I’d come help you build…but I bet we would be laughing so much, nothing would get done haha!