In this post, I’m showing you how to quickly, easily and accurately cut down a plywood sheet without a table saw!
Plywood is a common material for DIY projects, cabinets, built-ins, storage projects and more. But, it can sometimes be challenging to work with because of it’s size and weight.
A full sheet of ¾″ plywood can easily weigh over 80 lbs, making it quite difficult to run through a table saw by yourself. And sometimes, that full 4’x8′ sheet is too big to maneuver around the shop even if it wasn’t that heavy.
Since I use A LOT of plywood in my projects, I’ve had to figure out the easiest, most efficient way to cut down a plywood sheet by myself and without a table saw.
So in this post, I’m sharing how I use a basic circular saw and a couple inexpensive cutting guides to break down a full plywood sheet in just a few minutes.
*This post contains affiliate links. See policies page.
What to know before cutting plywood
Plywood is made with layers of thin wood veneer glued together into a sheet. The layers are called “plies,” hence the name plywood.
These thin layers are prone to tear out, but it’s preventable with a few extra precautions. I’ll discuss this below.
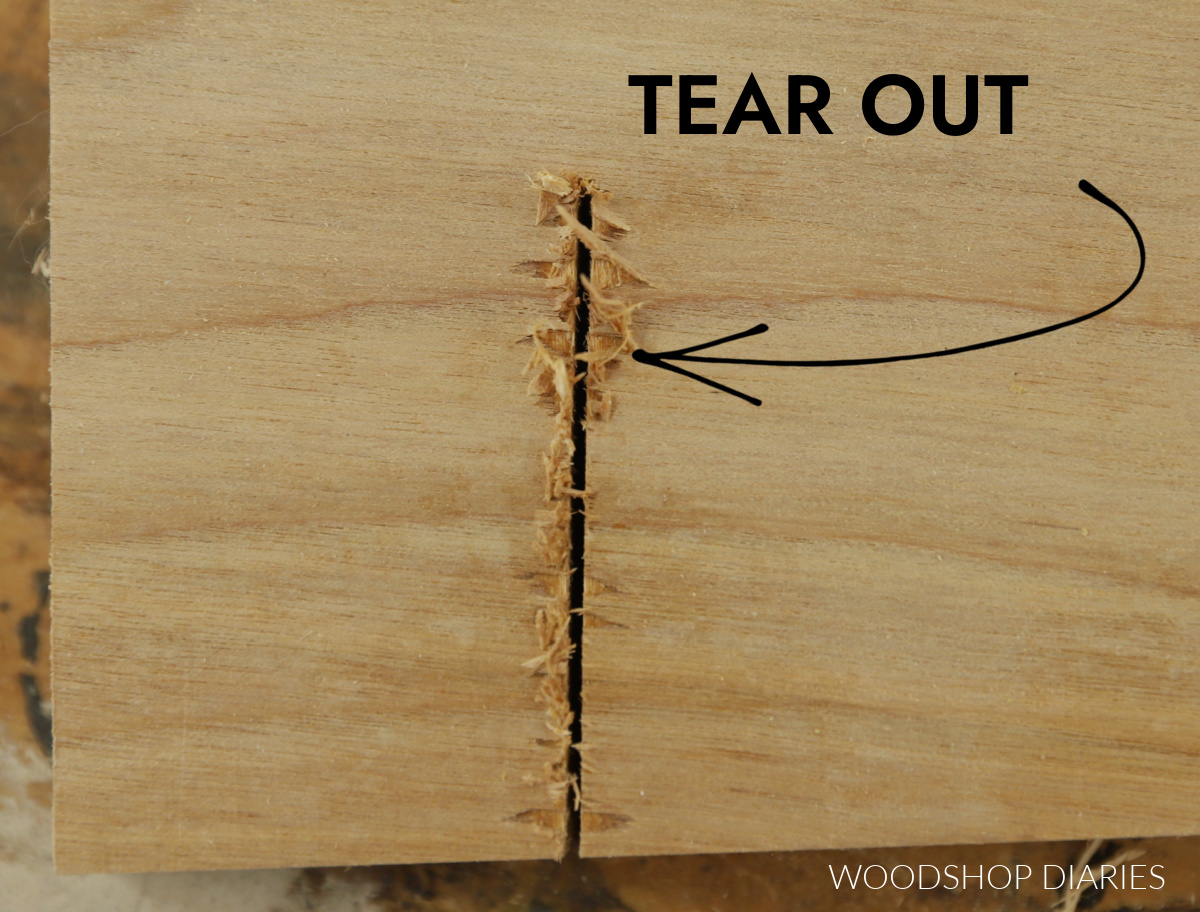
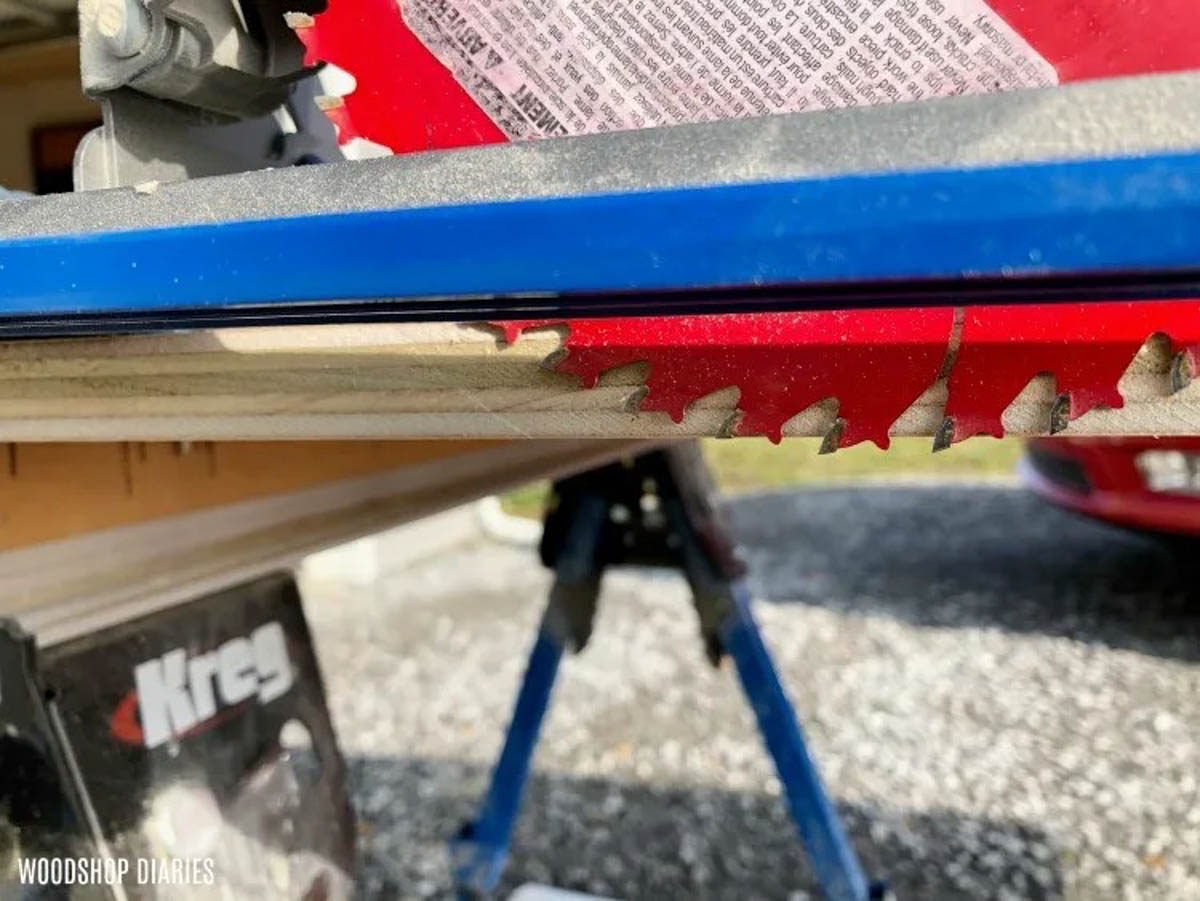
NOTE: Tear out is basically when the saw blade tears the wood fibers instead of cuts them. So the cut ends look rough and “shredded.” See above.
Rip Cut vs Cross Cut
Plywood comes in sheets 4’x8′ in size. Sometimes you can purchase a partial sheet, depending on where you’re shopping.
You can buy hundreds of types of plywood in various thicknesses. See this post to learn more about choosing the right plywood for your project.
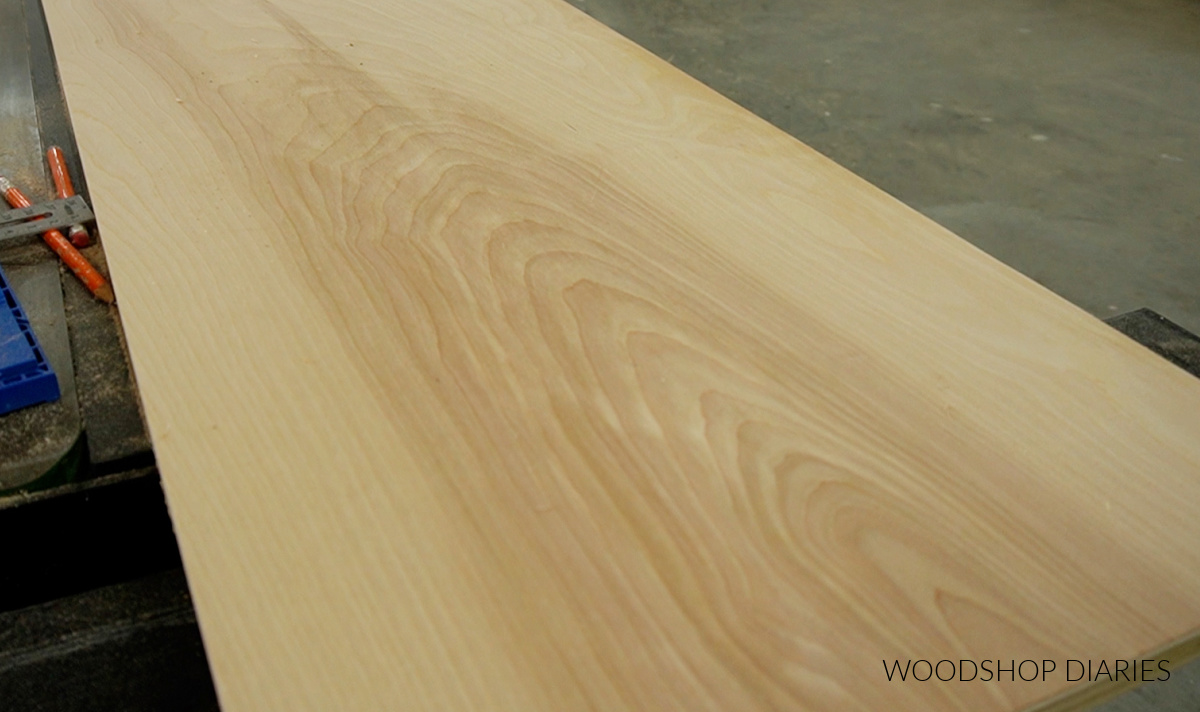
The grain on the face of the sheet runs along the 8′ span like shown below.
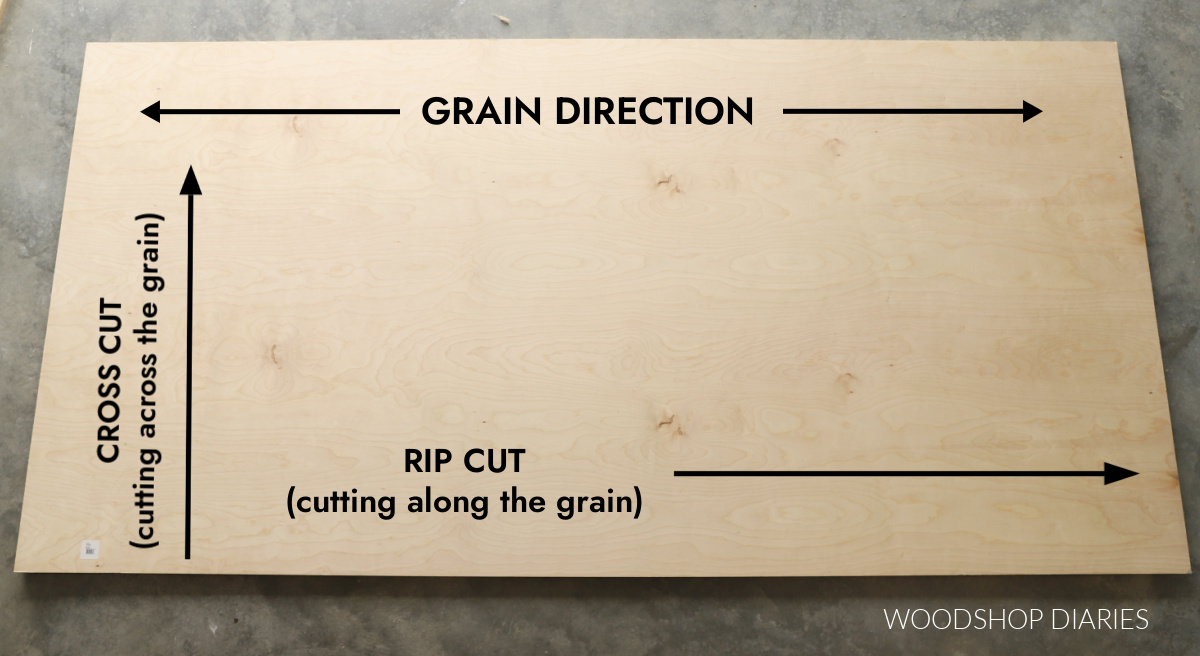
A rip cut is a cut that is made parallel to the grain–so it’s a cut along the length of the sheet. A cross cut is a cut that is made across the grain–so it’s a cut along the width of the sheet.
Cross cuts are FAR more likely to have tear out issues than rip cuts. So be most careful on these.
Types of Blades to Use with Plywood
The best way to prevent tear out with plywood is to use a good quality plywood blade–no matter what type of saw you’re using.
Make sure your saw blade says “plywood,” “finish,” or “fine finish.” This is the blade I use with my circular saw.
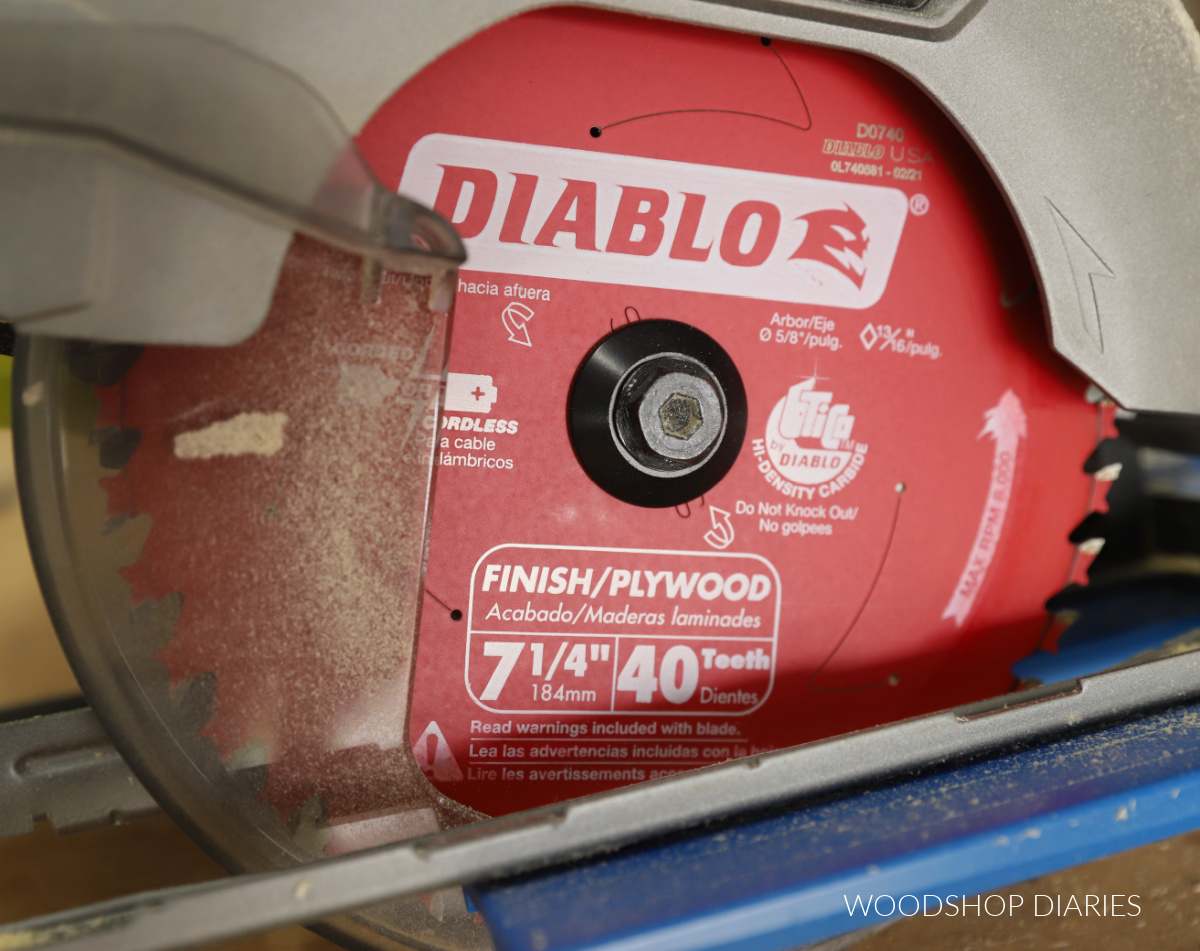
These types of blade have a high tooth count, so they cut the wood much cleaner vs tearing it.
Additional Tips to Prevent Tear Out
When cutting with a circular saw, the blade rotates so that the teeth cut up, so the top side of the sheet is more prone to tear out than the bottom side.
If you flip your plywood sheet upside down so that the “good” side (the side you want to be seen) is on the bottom, then when you cut, any tear out that does occur will happen on the “bad” side.
So, for example, if you’re building a dresser, you can put this “bad side” facing the inside of the dresser, so the tear out will be hidden in the finished project.
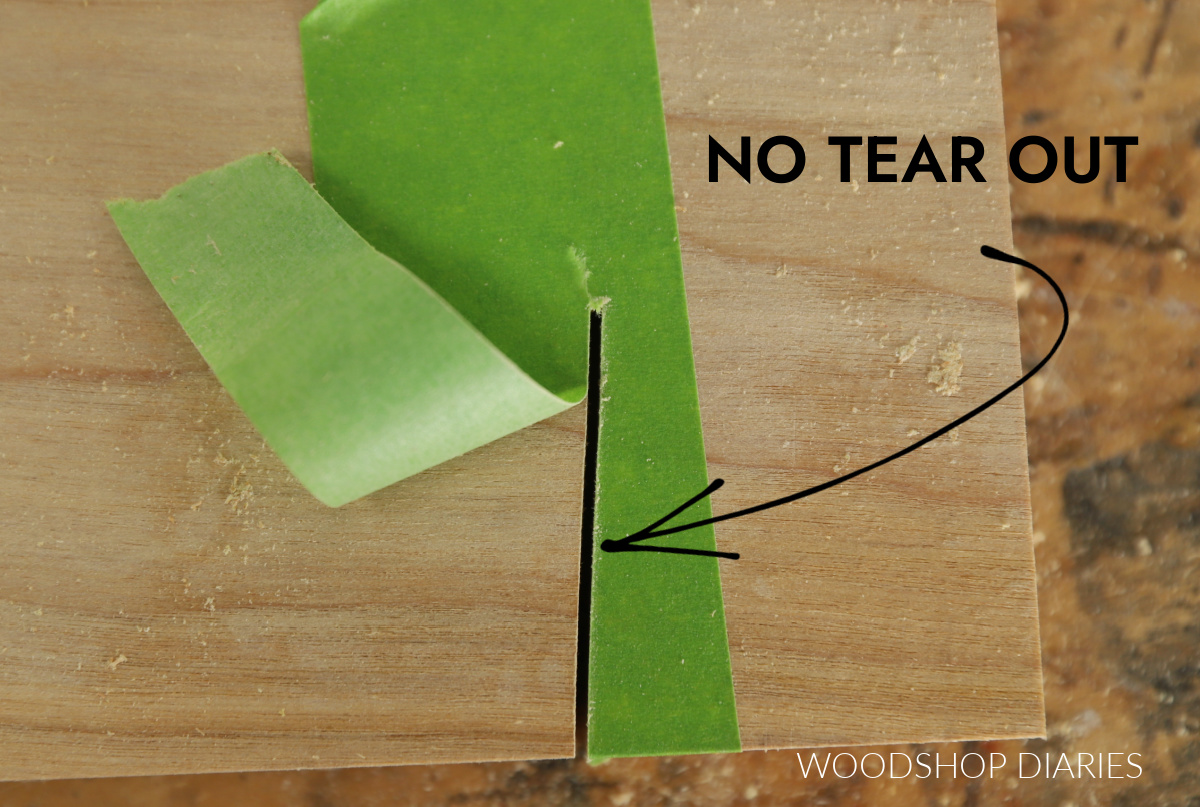
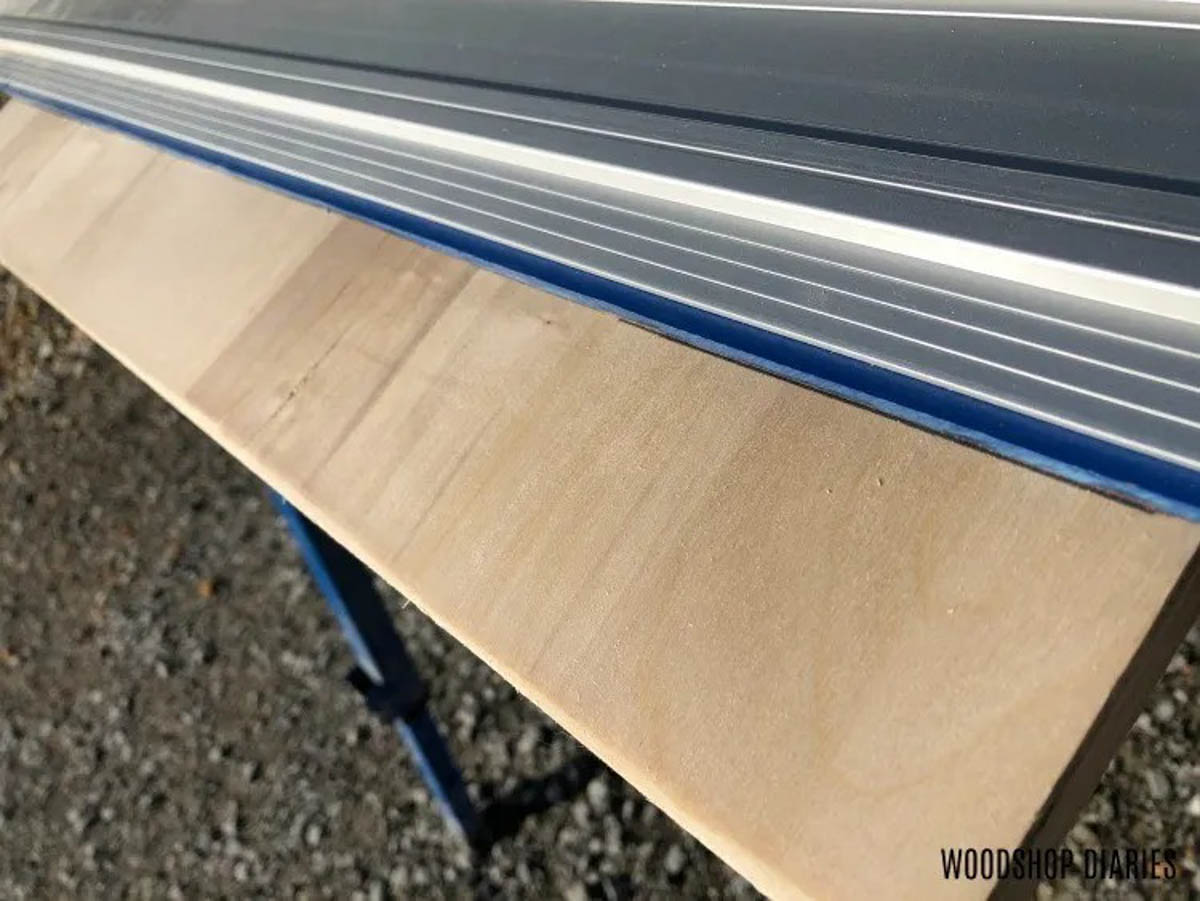
Another tip to preventing tear out is to place painters tape across the cut line before cutting. Tape can help hold the wood fibers down as the saw cuts through it to prevent them from tearing (shone above).
Tools Needed for Cutting Plywood Sheets
I use these three tools for cutting down my plywood:
The Rip Cut and AccuCut are simple cutting guides that attach to your circular saw base plate. They not NECESSARY, but they are what I personally use for quick and accurate cuts.
You can use a long straight edge and some clamps instead, but each cut will require significantly more set up time.
Rip Cut vs Accu-Cut Guides
A common question I hear about these guides is: what’s the difference and do I need both? And that depends.
Both of these guides come with a universal sled that attaches to your saw’s base plate with set screws. Once this sled is attached to the saw, it can be used with either guide interchangeably.
This sled slides onto the rail of the Rip Cut and clamps in place. Then, you simply guide the straight edge along the edge of the plywood to make a cut parallel to the edge whatever width you need (up to 24″ wide).
The Rip Cut is great for ripping plywood sheets into smaller strips, but since it can only make cuts up to 24″ wide, it is limited. That’s where the Accu-Cut comes in.
The Accu-Cut is basically a track saw that comes in 2′ track sections so you can make it longer or shorter as needed. (The basic Accu-Cut guide comes with 2 tracks for 4′ length, but you can purchase additional tracks to extend it up to 8′.)
This allows you to cut across a sheet of plywood at whatever length you need (so you’re not limited to only 24″ long cuts).
Personally, I use the Rip Cut when ripping plywood and the Accu-Cut when cross cutting plywood. So, if possible, I recommend having both.
How to Cut Down Plywood Sheets
I’ve got a video here, step by step below:
Step 1: Setting Up Plywood Cutting “Station”
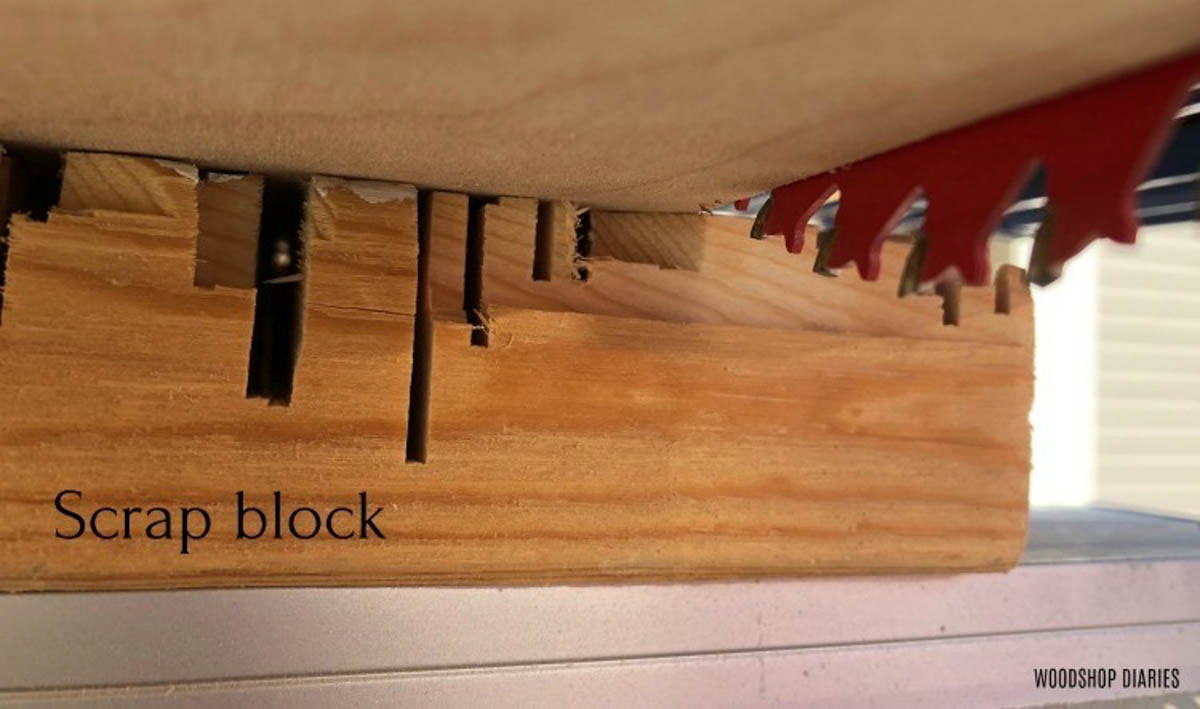
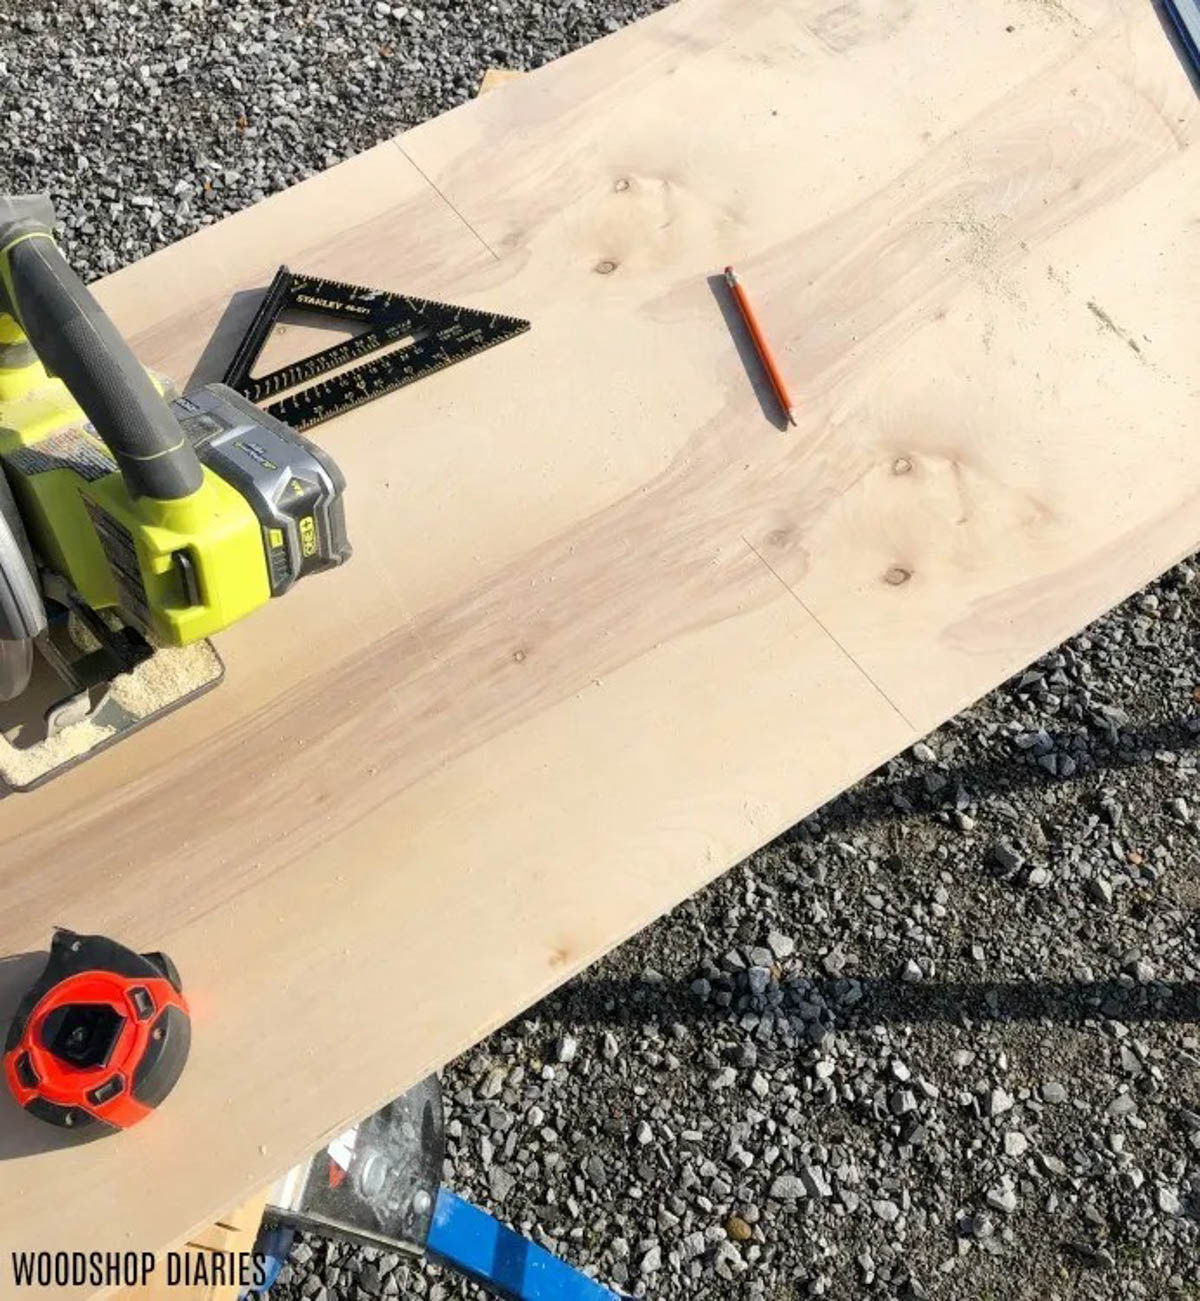
In order to cut down plywood, it needs to be set up on something–like a workbench or saw horses. Or if you prefer to cut on the ground, that works, too. BUT, no matter where you choose to cut down your sheets, it needs to be sitting on some sacrificial scrap blocks.
.
This allows you to lower the blade of your circular saw so that it will cut THROUGH the plywood, but you won’t cut your workbench, sawhorses, or anything important.
.
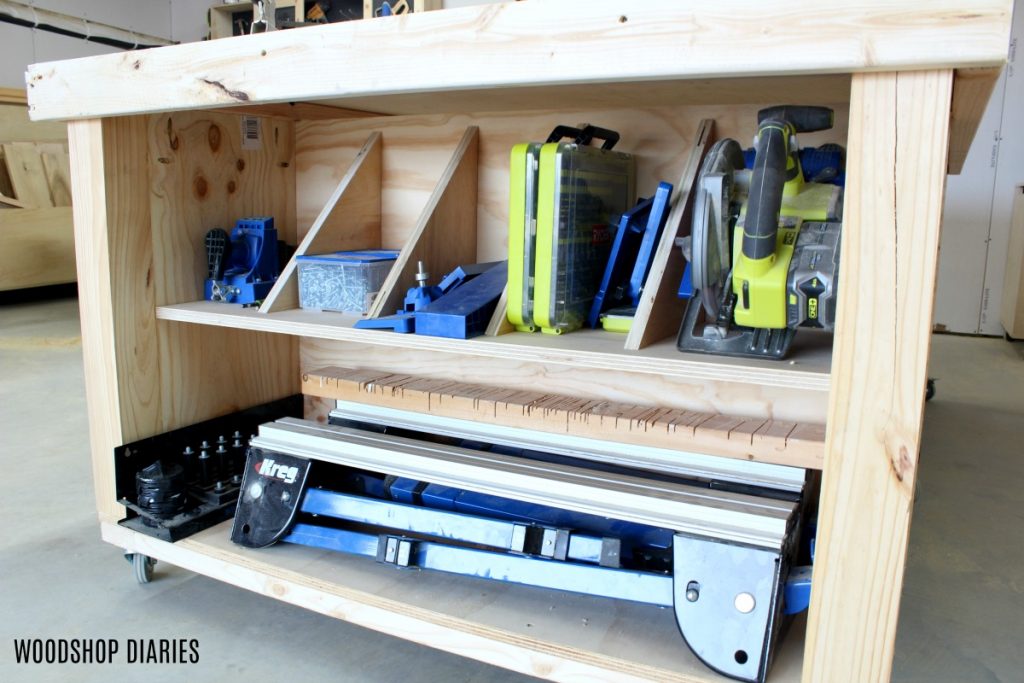
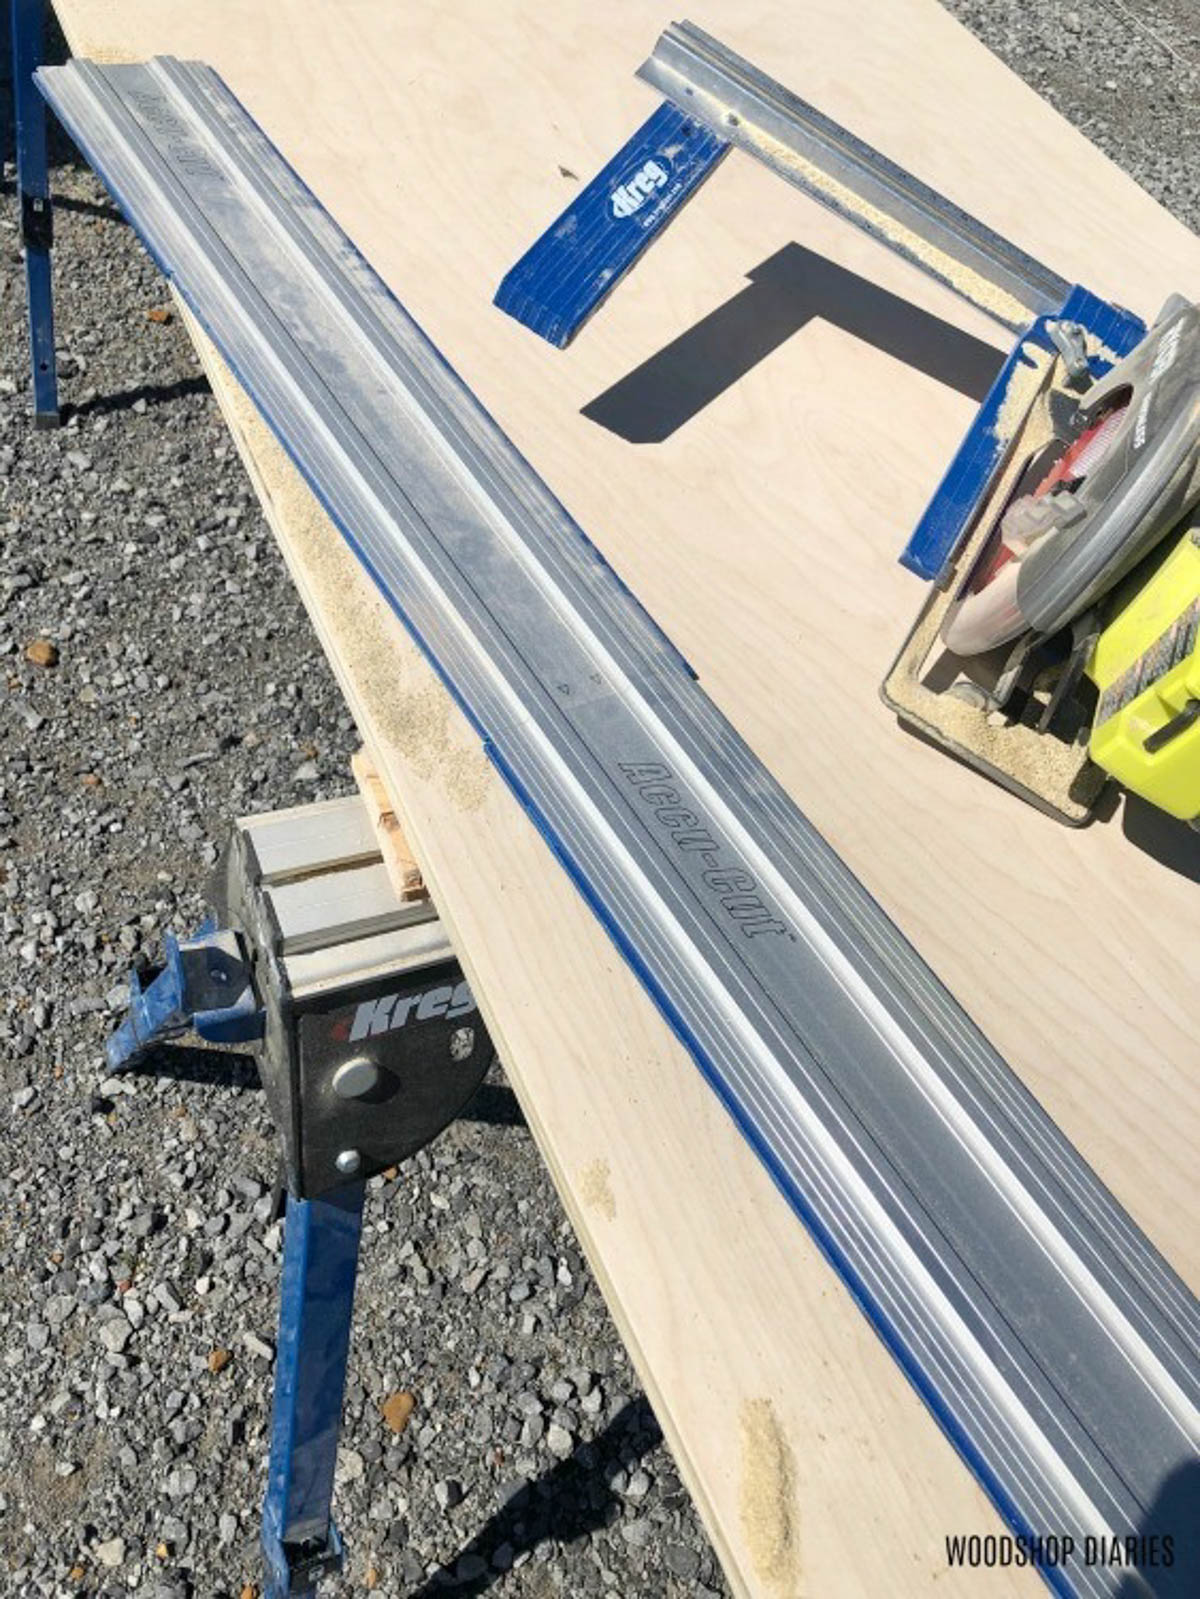
Now, personally, I prefer to set up my Kreg Trak Horses to cut my plywood on. You can use any brand saw horse or even homemade saw horses. I just like these because they are easy to set up when I need them, and they fold away when I don’t.
.

.
I set my scrap 2×4 blocks on the top of my Trak Horses and set my plywood sheet in place.
.
.
Step 2: Setting Up Circular Saw
.
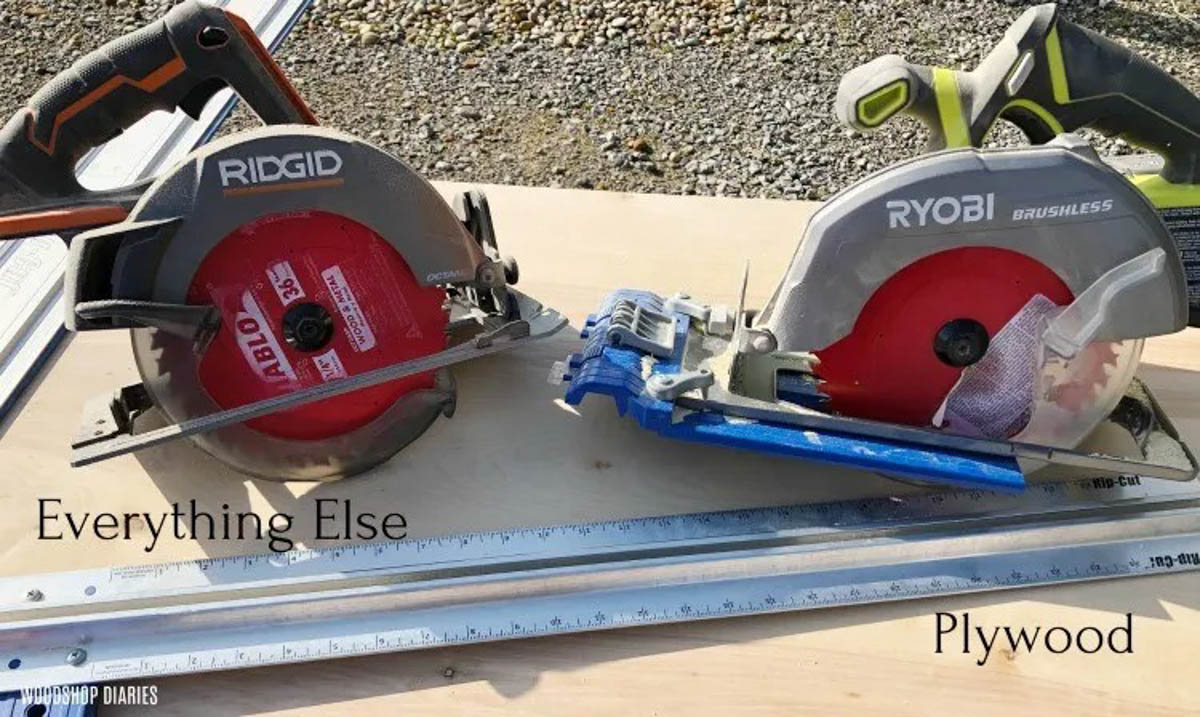
I keep two circular saws handy in my shop. I know that isn’t feasible for everyone, but it’s really cut down on change over time in my shop. So it’s something to consider for your own shop, especially if you cut a lot of plywood.
.
I keep one for general purpose use, and I keep the other set up specifically for cutting plywood.
.
.
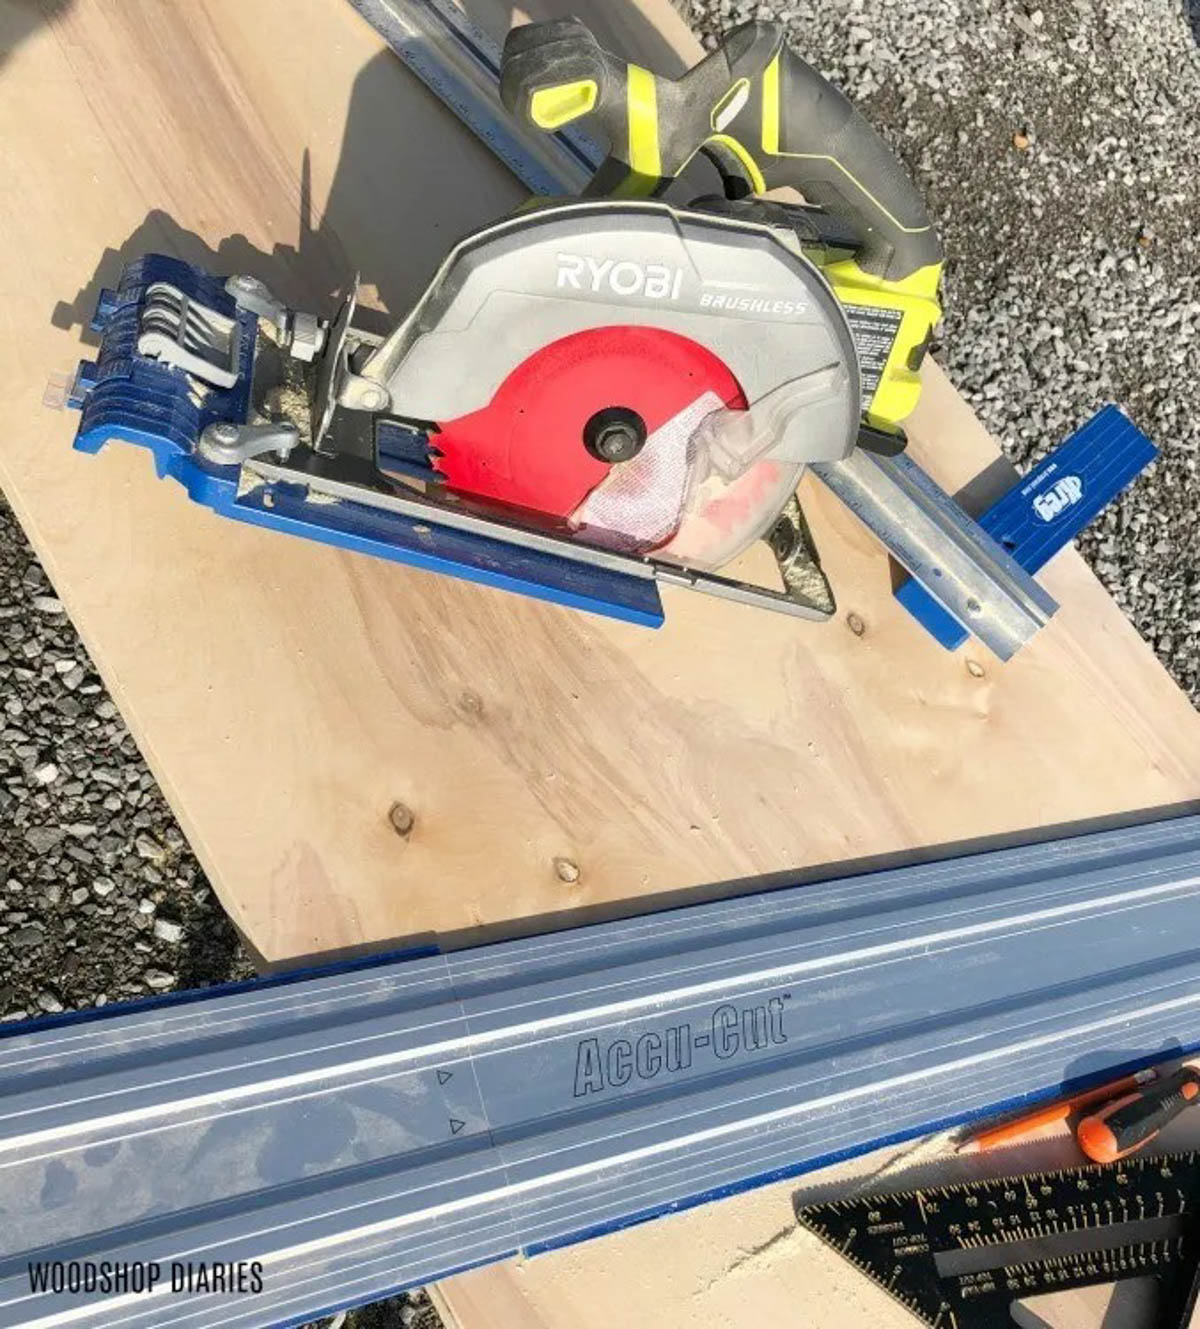
I use a Kreg Rip Cut and a Kreg Accu-Cut to cut down my plywood sheets. This blue Kreg sled attaches to the circular saw to allow you to use it with these guides.
.
.
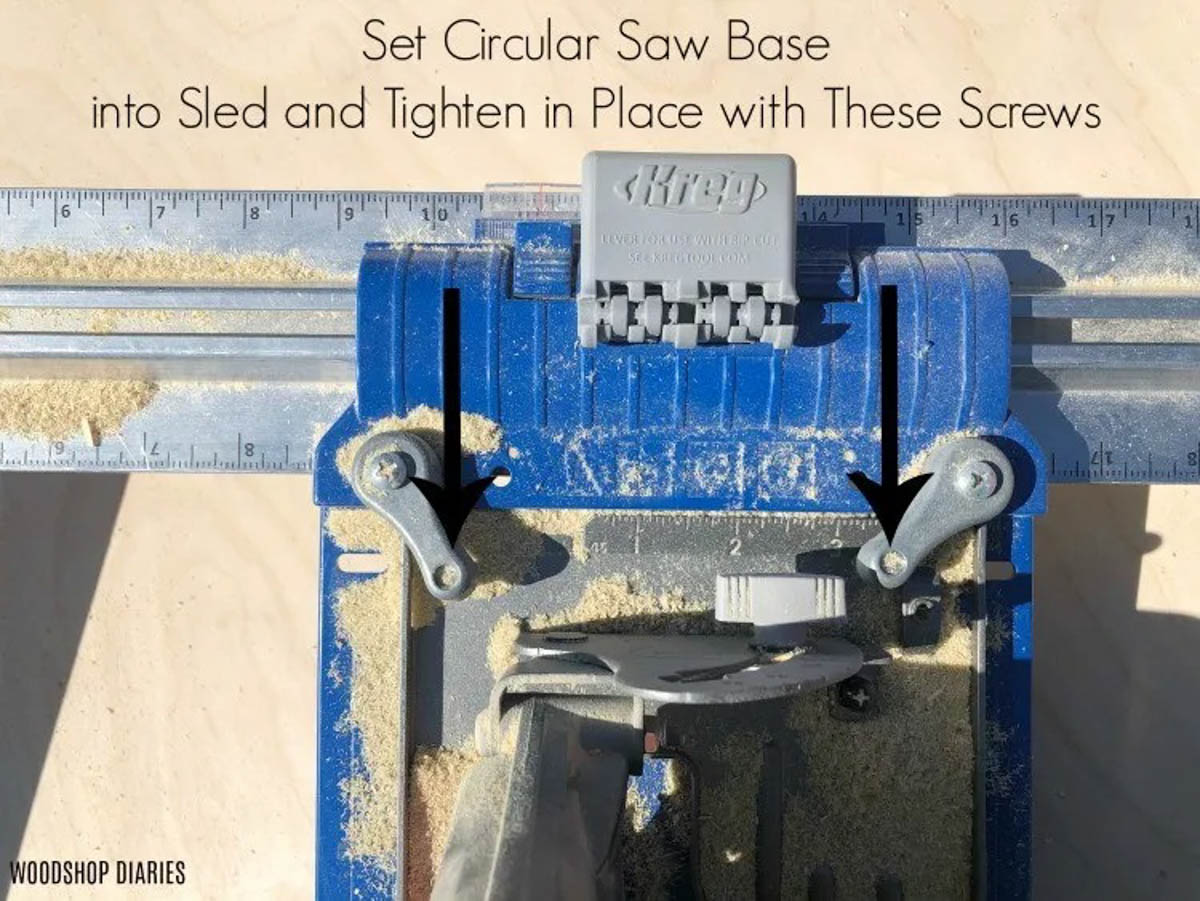
That said, attach the sled to the circular saw base according to the instructions and based on your particular style saw. The sled attaches using these two set screws. It’s important to make sure the sled is attached square on the saw base, and not crooked.
.
.
NOTE: It takes a few practice cuts and adjustments to get the sled set up with the Accu-Cut and Rip Cut the first time. I recommend setting the sled up with the Accu-Cut first, then the Rip Cut.
.
I set mine up so that I don’t have to adjust the sled when swapping between the two to keep things quick and accurate. That’s another reason I use one saw specifically for plywood…I never have to remove the sled once I got it dialed in and making accurate cuts.
.
Step 3: Ripping Plywood Sheets to Desired Widths
.
I know this is STEP 3, but you can cut down plywood in whatever order you wish. Typically, it’s easiest to rip the sheet lengthwise into the widths you want before cross cutting the lengths you want.
.
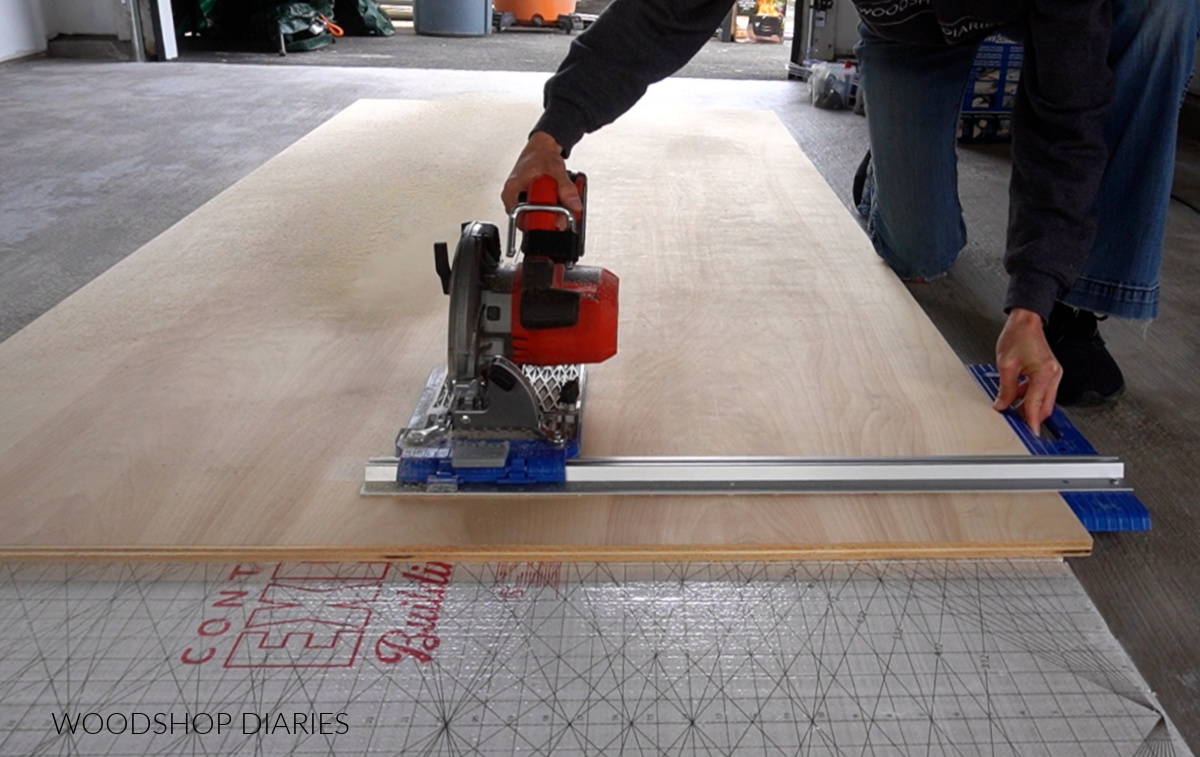
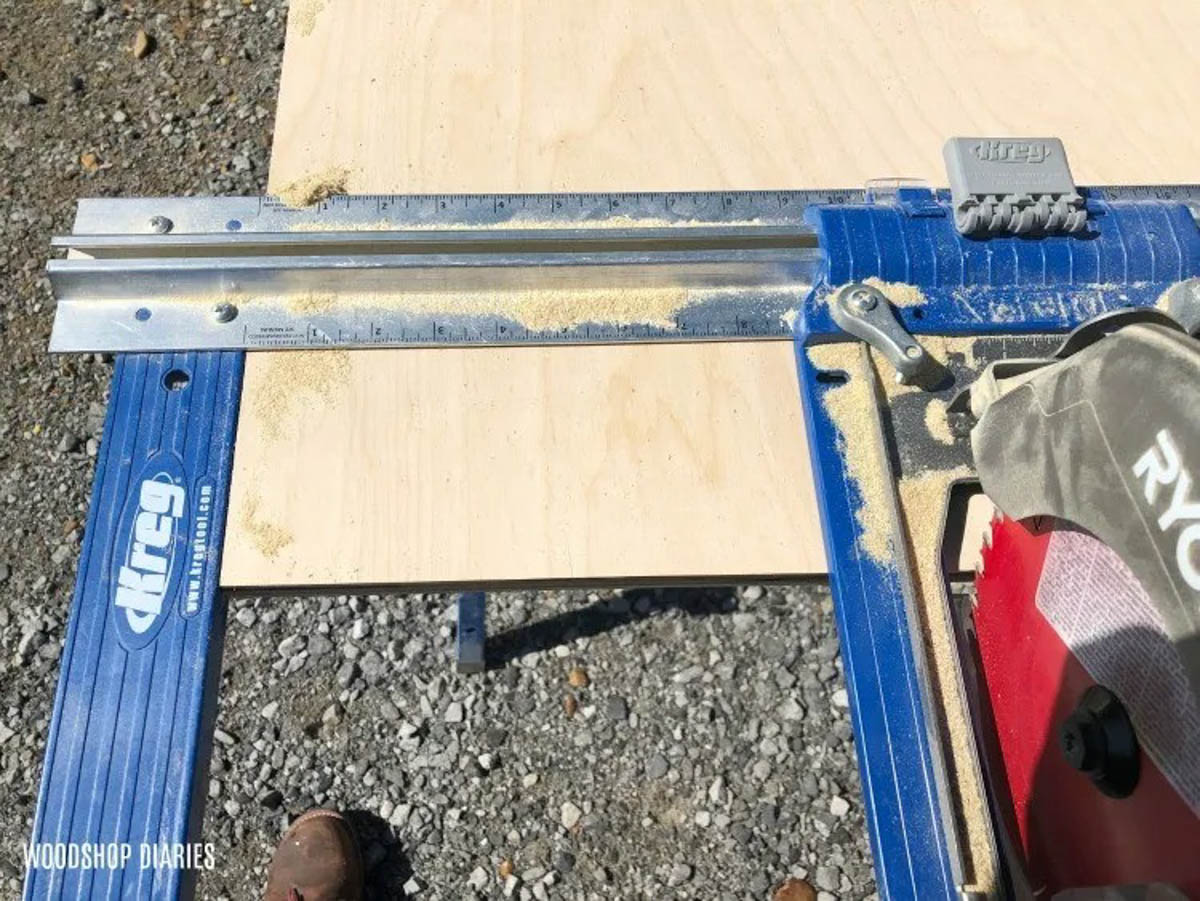
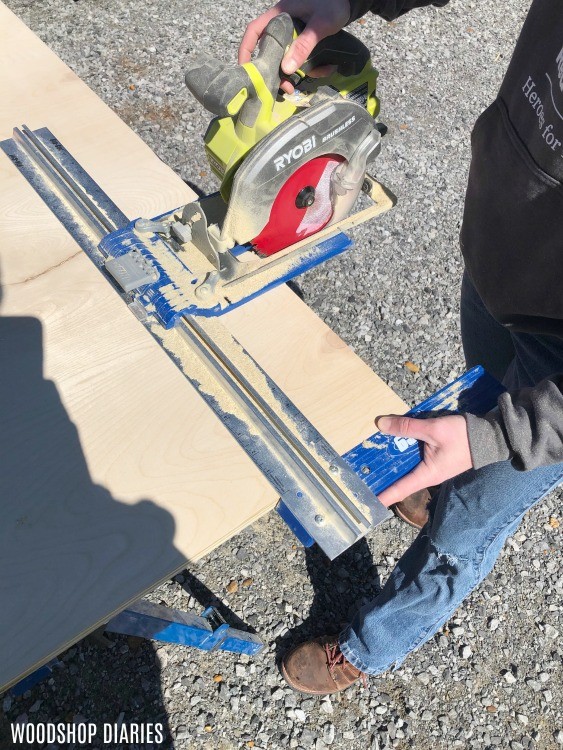
For ripping plywood sheets, I use my circular saw with my Kreg Rip Cut guide. This guide is designed to rip plywood into strips by running the straight edge along the edge of the plywood while the circular saw cuts a certain distance away.
.
.
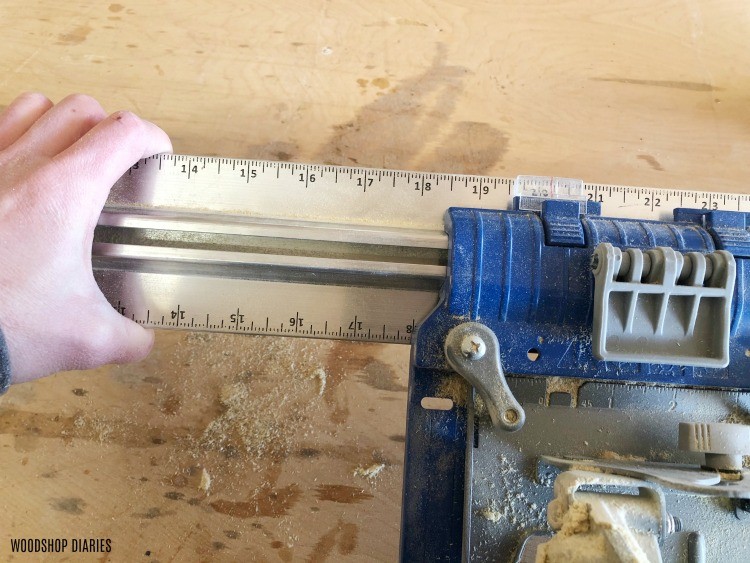
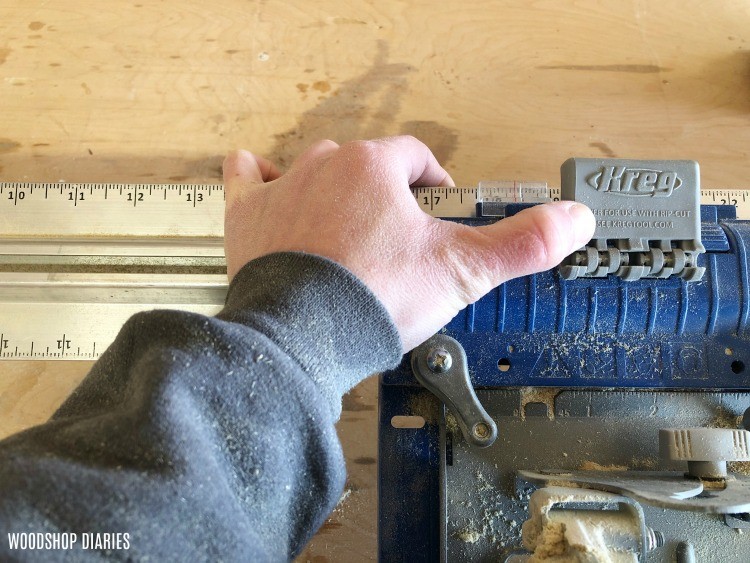
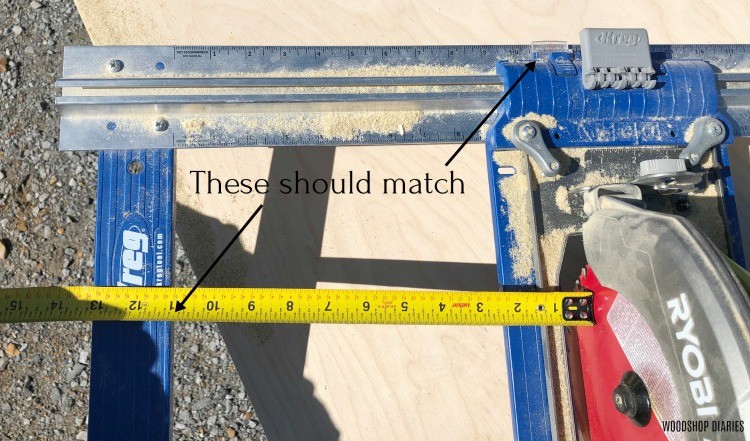
I slide my circular saw with sled attached onto the guide and set the desired width, then flip the tab to clamp in place. Double check with a tape measure that the distance from the BLADE to the guide matches the width you want.
.
Also keep in mind that the blade CUT (or kerf), should be on the WASTE side of the piece.
.
.
Before cutting, I make sure my blade depth is set to cut SLIGHTLY (1/16 – ⅛″) deeper than my plywood sheet.
.
.
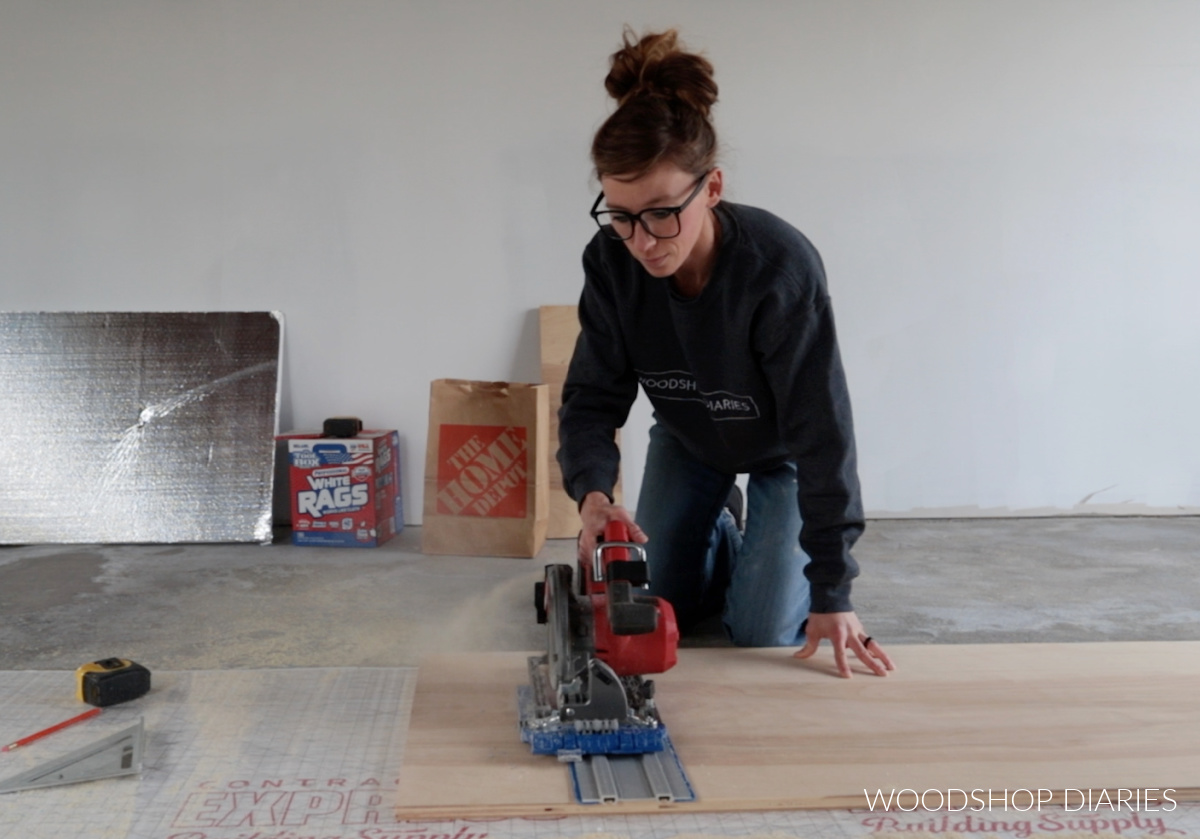
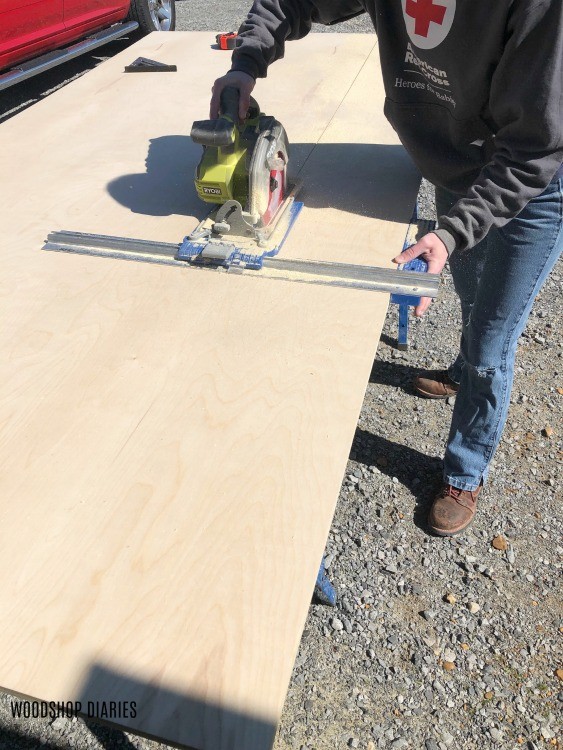
Then, I cut from one end of the sheet to the other keeping the straight edge nice and tight along the plywood edge. It’s important to keep it tight, but also square so that the blade cuts square. This should give you a plywood strip your desired width.
.
.
NOTE: If your plywood is moving while you are cutting, clamp it onto your saw horses where it won’t be in the way of your cutting.
Step 4: Cross Cutting Plywood Sheets to Desired Length
.
My miter saw can cut up to 16″ wide boards at a time. If my plywood strips are smaller than 16″ wide, I like to use my miter saw (again, with a fine tooth blade, or it may cause a lot of tear out), to cut my pieces to the desired length.
.
BUT, if my pieces are wider than 16″, I use my Accu-Cut. This has been a really handy guide to have not just for cutting plywood, but for several other applications as well.
.
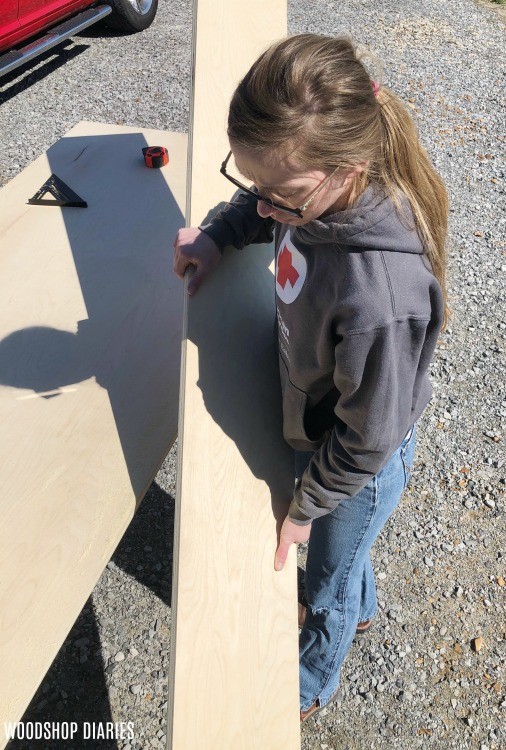
So I measure and mark the desired length I want to cut my plywood, and use a square to make a mark on each side like shown below.
.
Now, it’s important to make sure you have a support underneath where this cut will be made. If you only support the ends, the piece will sag at the cut and pinch the blade.
.
This could be dangerous and cause kickback. I position my saw horses so that this cut is supported OR place a couple 2x4s across them like shown below.
.

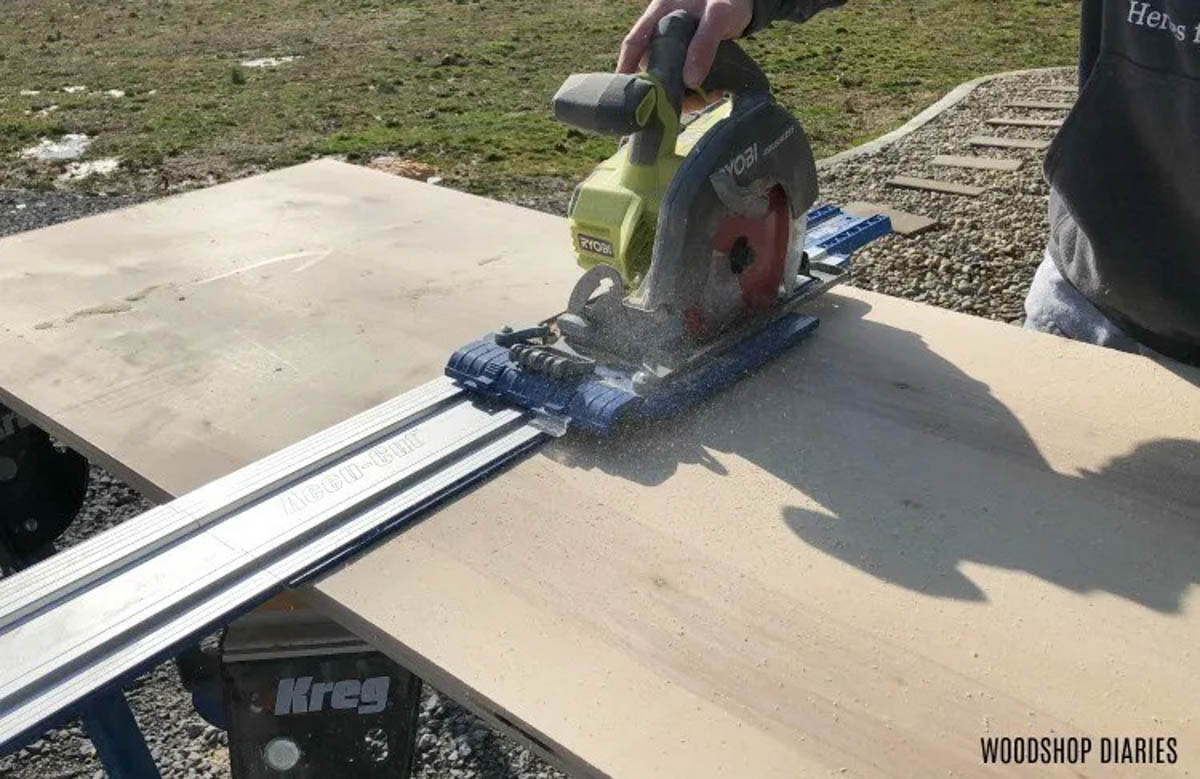
Once everything is properly supported, it’s time to cut. The same sled I used with the Rip Cut fits with the Accu-Cut as well. When the Accu-Cut is properly set up, I simply line up the cut edge with the marks I made with my square earlier.
.
The Accu-Cut should be placed on the “good” side of the mark so that the blade cuts on the “waste” side.
.
.
Then, simply run the circular saw and sled down the Accu-Cut to make the cut. The rubber grips on the bottom of the Accu-Cut guide should hold it in place while you make your cut.
.
If you find it’s slipping, wipe the dust off the grips, and wipe the dust and debris off the plywood surface.
.
.
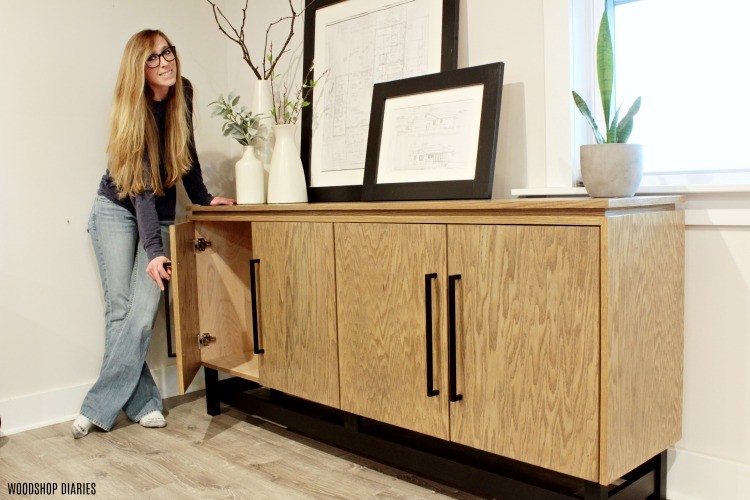
Step 5: Start Building
.
And that’s how I cut down my plywood sheets! It’s really that simple…set the sheet on scrap blocks on sawhorses, rip widths, cut lengths, start building.
.
If you’d like to see some project examples using plywood, here are a few of my favorites:
.

.
I hope this post gets you a little more comfortable and confident working with plywood. Breaking down a full plywood sheet can be overwhelming, but with these simple guides and a circular saw, you can have it cut down in minutes so you can move on to building.

If you’d like to check out some other helpful guides and beginner’s tips, head over to the Getting Started page for more.
Be sure to pin this for later and until next time, happy building!